We are currently updating our site; thank you for your patience.
CRM Activities
Calendar
Your calendar will display all scheduled activities.
You can change your calendar display to view: Day, Work Week, Week, Month, Timeline and Agenda
| Ribbon Access: Webpage > http://[servername]:[portno]/BPOCRM/User.aspx |
Select the Calendar Tab
- In the Dashboard (Home page) screen,
- Ensure that the Calendar tab is selected to be able to view activities over the last 7 days.
- The calendar will open by default to Work Week view.
- The current day will be highlighted.
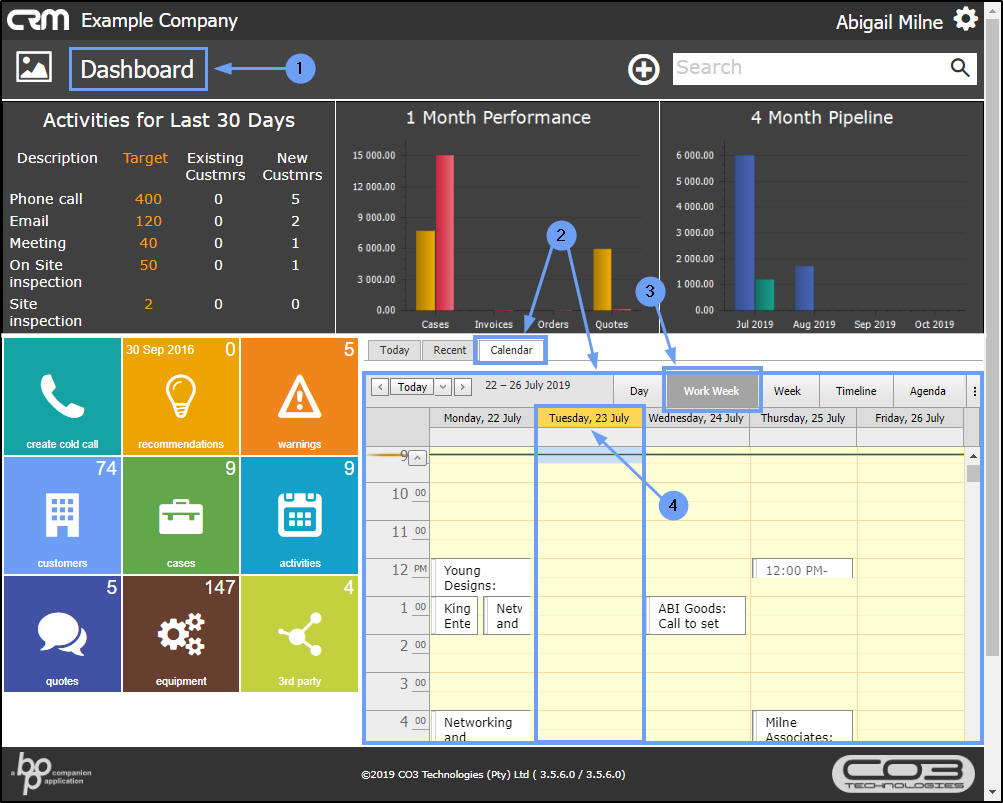
View Previous or Future Weeks
- Use the directional arrows to view previous or future weeks. The date frame will display which week you are currently viewing.
- The current day is highlighted.
- The orange bar running across the calendar indicates the current time of day e.g. in this example it is 9:55 AM.
- Use the scroll bar if necessary, to view all activities on the calendar.
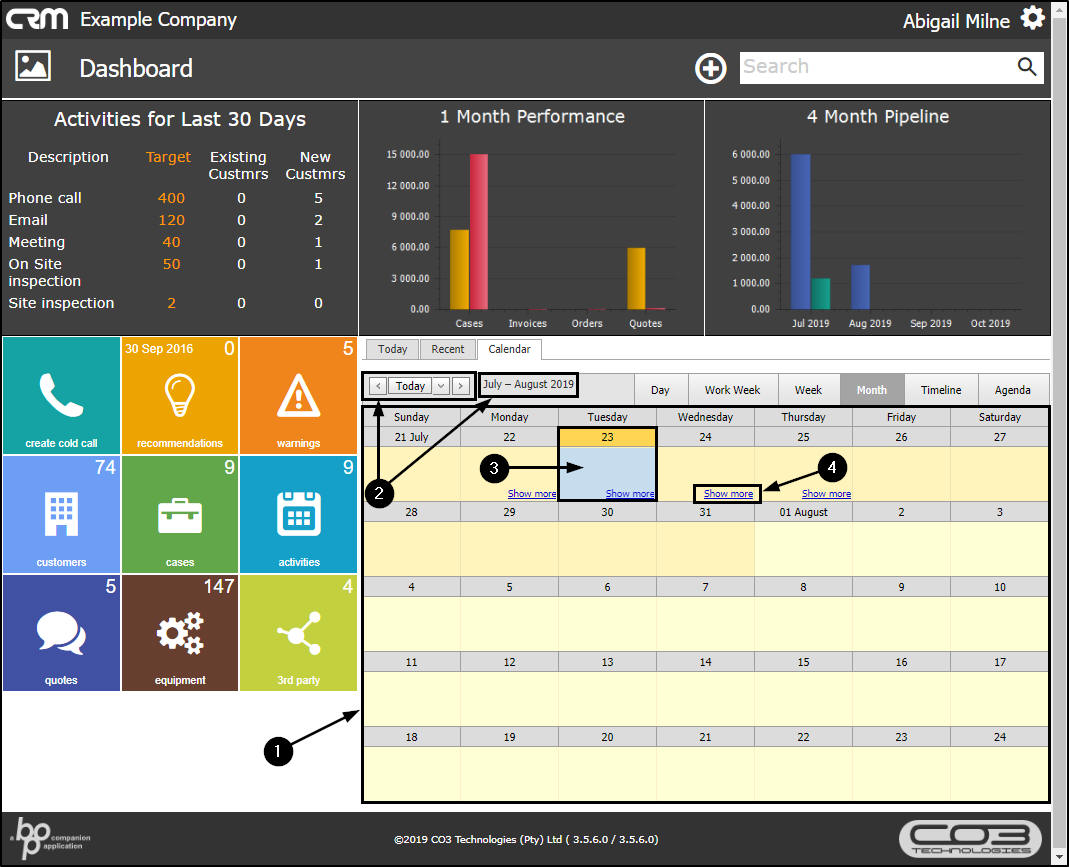
Change Calendar View
- Click on the applicable tab to change the view to:
- Day
- Work Week
- Week
- Month
- Timeline
- Agenda
- In this example, Month is selected.

- The calendar frame will now display the Month view.
- Use the directional arrows to view previous or future months. The date frame will display which month you are currently viewing.
- The current day is highlighted.
Open 'Show More' Links
- You will note the Show more links in certain days of the month. This indicates that activity information is available here. Click on one of these links.
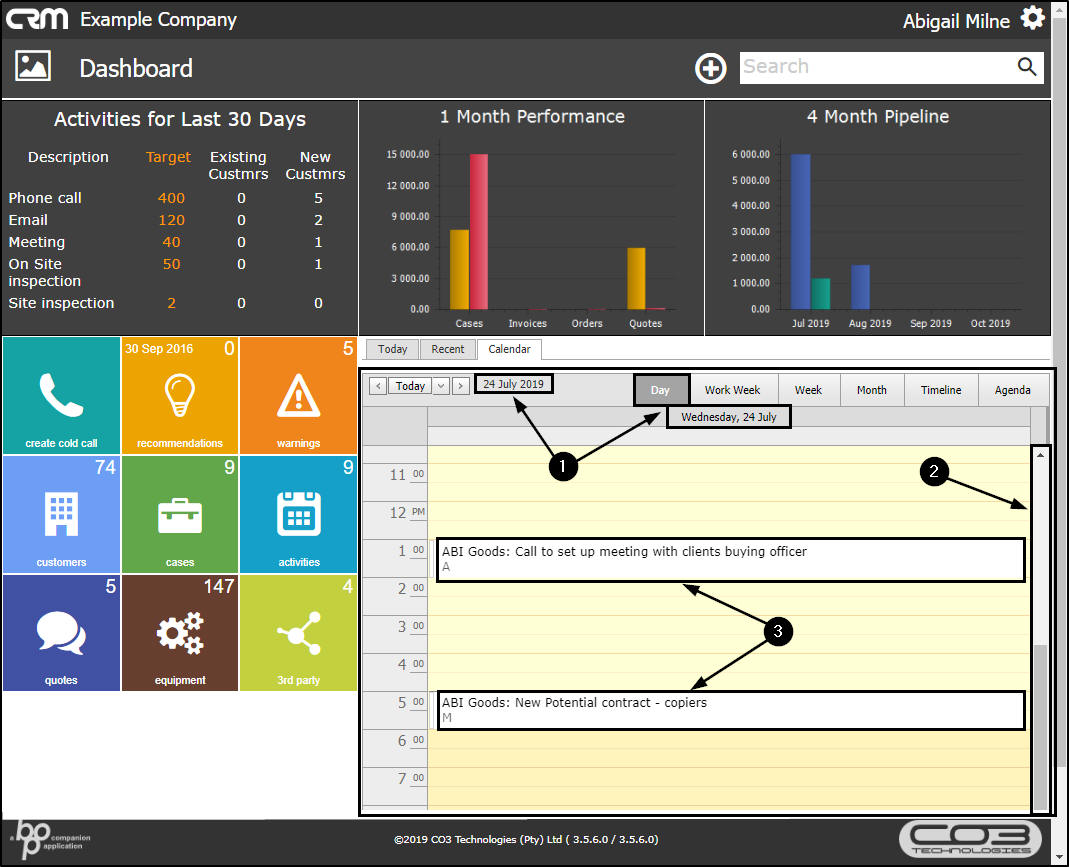
- The calendar frame will now open the Day view.
- Use the scroll bar if necessary, to view all the hours in the day.
- This screen will display more detail regarding the day's activity e.g. the Customer Name and Activity description.
Save Activity Screen
- Click on any one of these activities.
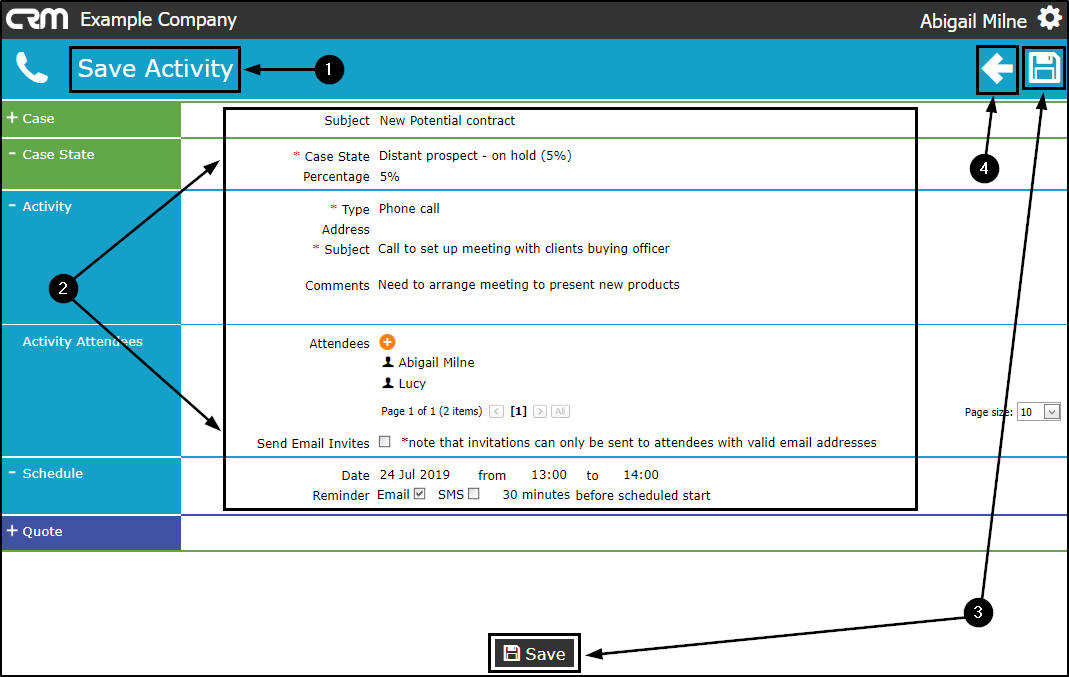
- The Save Activity screen will be displayed.
- Here you can view all the activity details. You can also edit the details here if required, e.g. add another attendee.
- If you have made any changes, click on Save.
- Or click on Back to return to the Dashboard (Home page) screen.
CRM.001.003