We are currently updating our site; thank you for your patience.
CRM Settings
Stage Gate Configuration
- Stage Gates - an automated process for Winning or Losing a Case.
- Case moves to the next stage automatically when all gate questions are answered.
- Pre-defined ‘Steps’ (Gates) need to be completed for the case stage to progress to the next stage.
- Stage Gates can be enabled / disabled per Case Type.
- Specific Stages can be selected per Case Type (not all stages will be relevant to a specific Case Type).
- A stage gate could be a: Yes / No Question, Question / Answer, Question with Drop-Down List Answer.
- Ability to select which Case Types have Stage Gates enabled.
- Ability to Add Case Types, Case Stages and Stage Gates within CRM.
| Ribbon Access: Webpage > http://[servername]:[portno]/BPOCRM/User.aspx |
View Case Types
- Click on the Settings button to the right of your UserName.
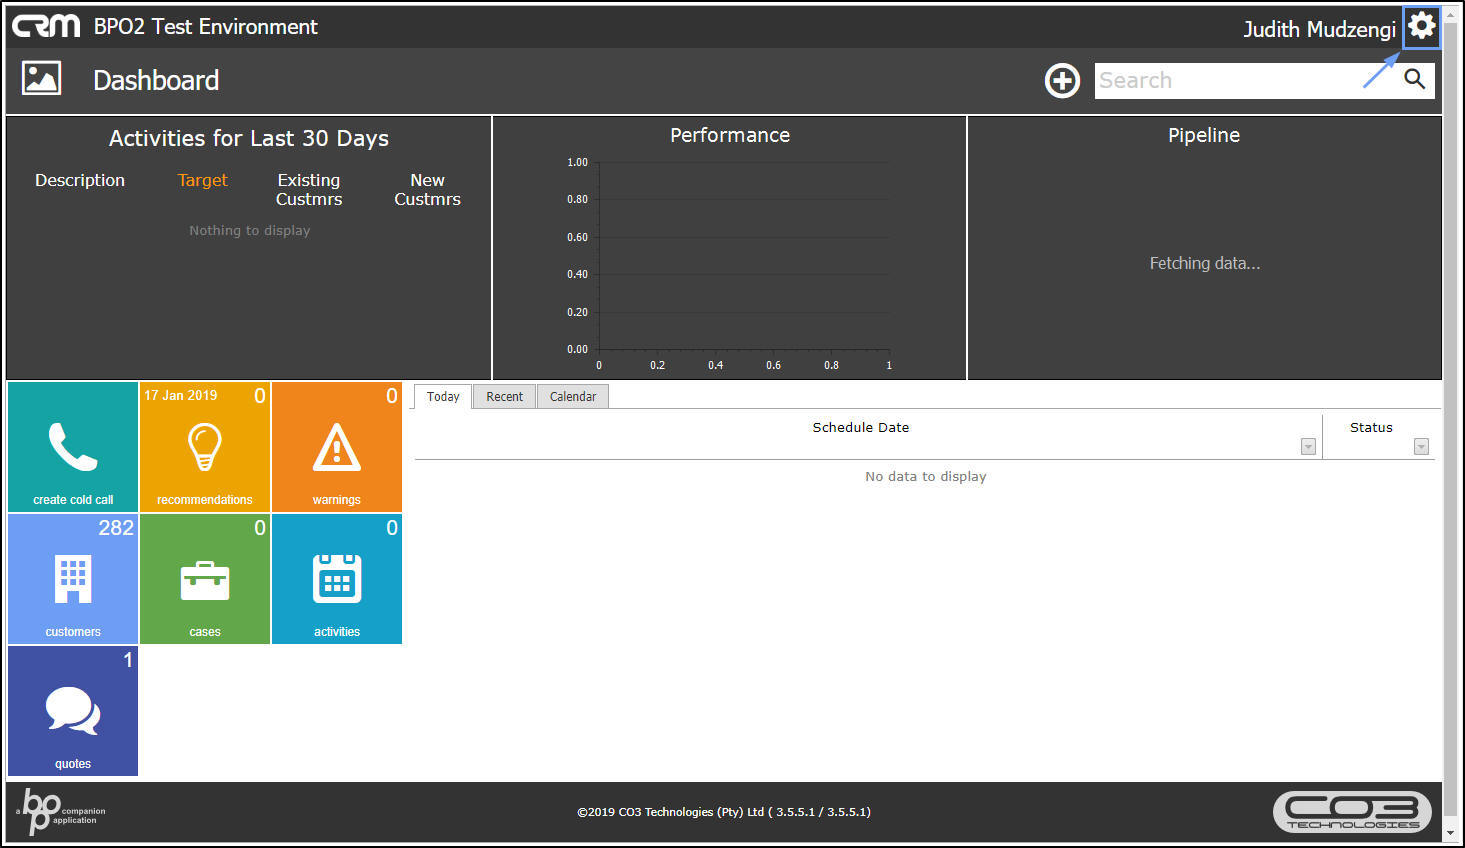
- The session Options page will pop up.
- Click on Case Config.

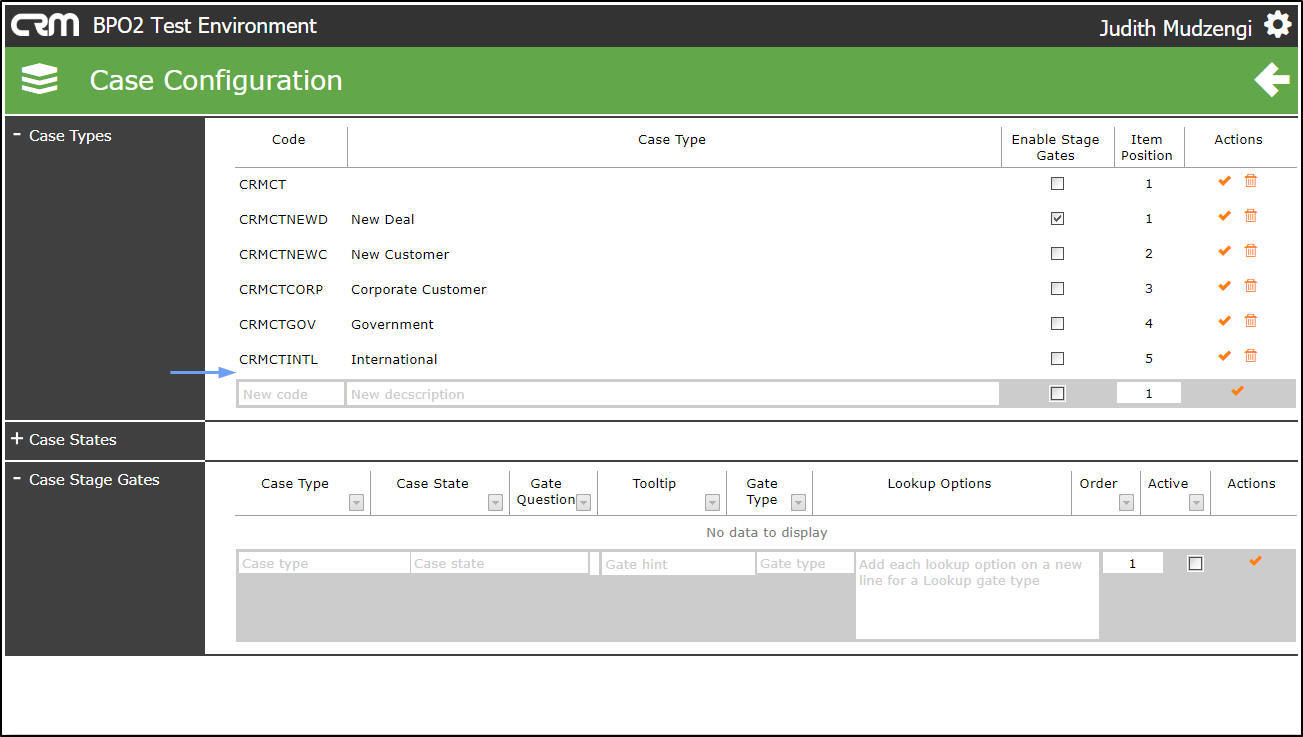
- The Case Configuration screen will be displayed.
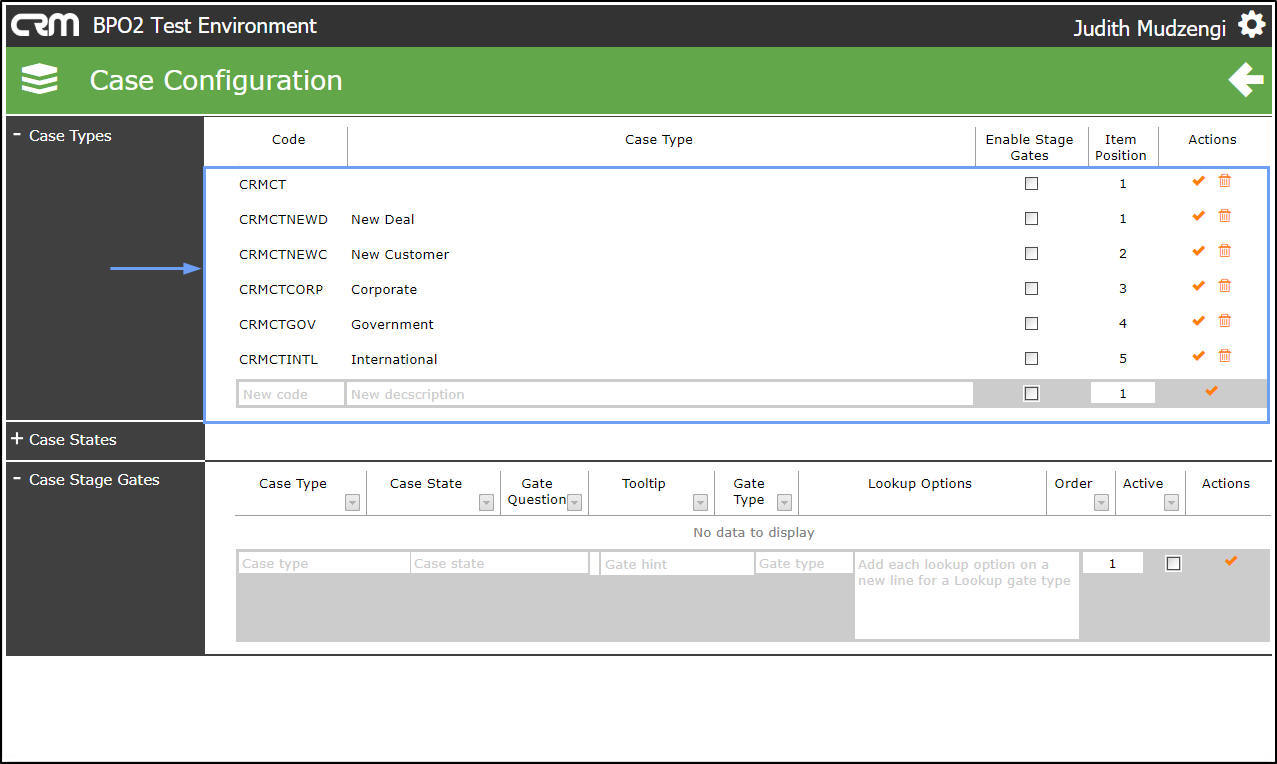
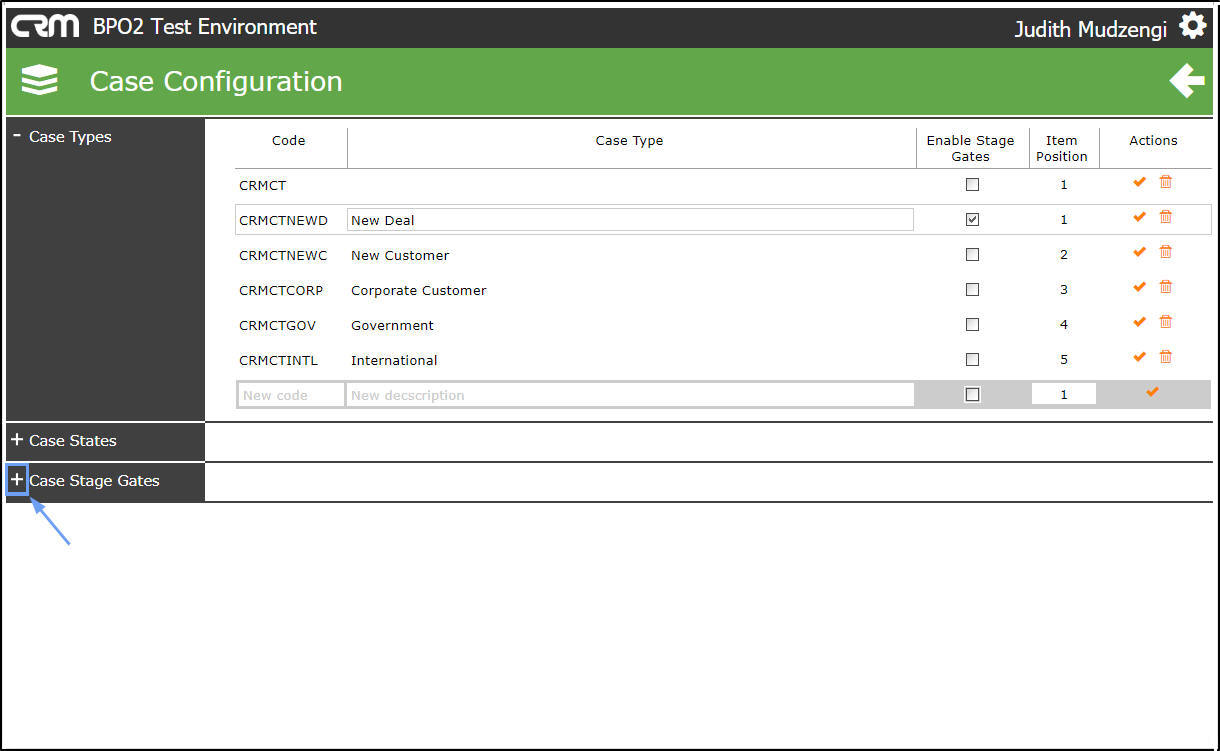
- Click on the '+' sign in the Case Types section to view all current case types.
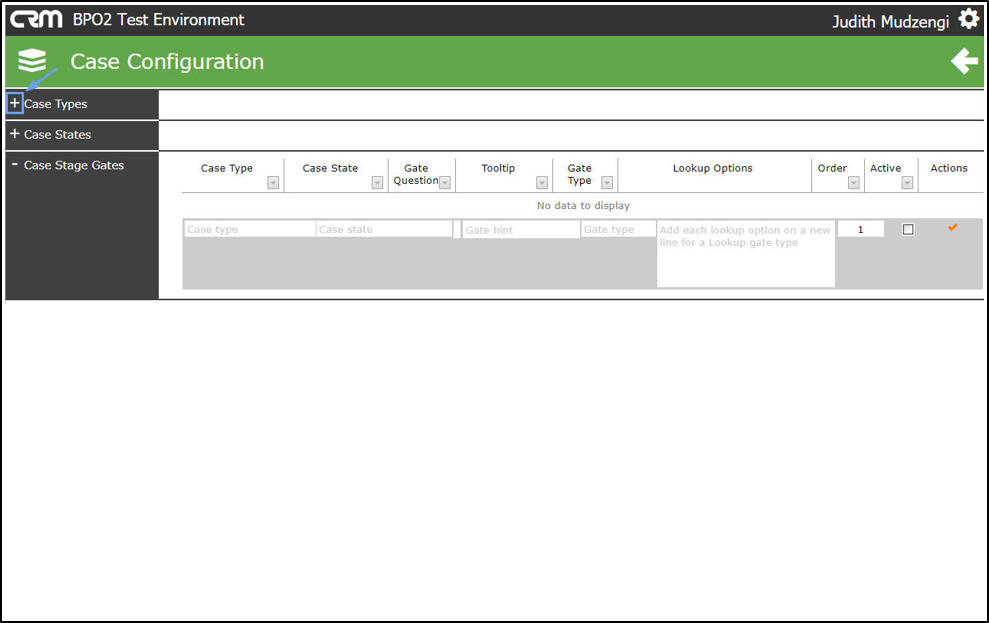
- A list of Case Types will be displayed in the Case Types section.
Add A Case Type
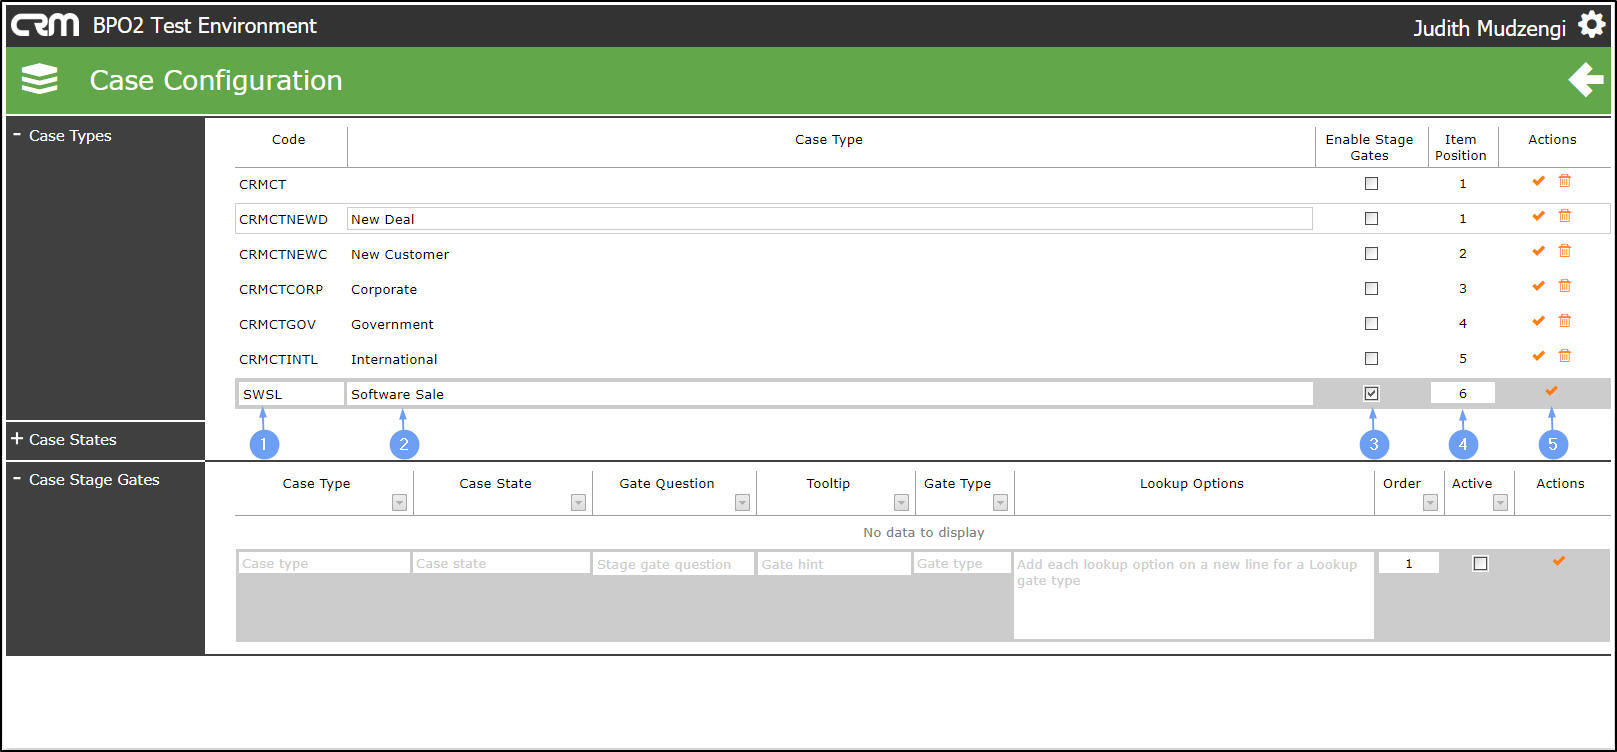
- In the Case Types section, go to the last row.
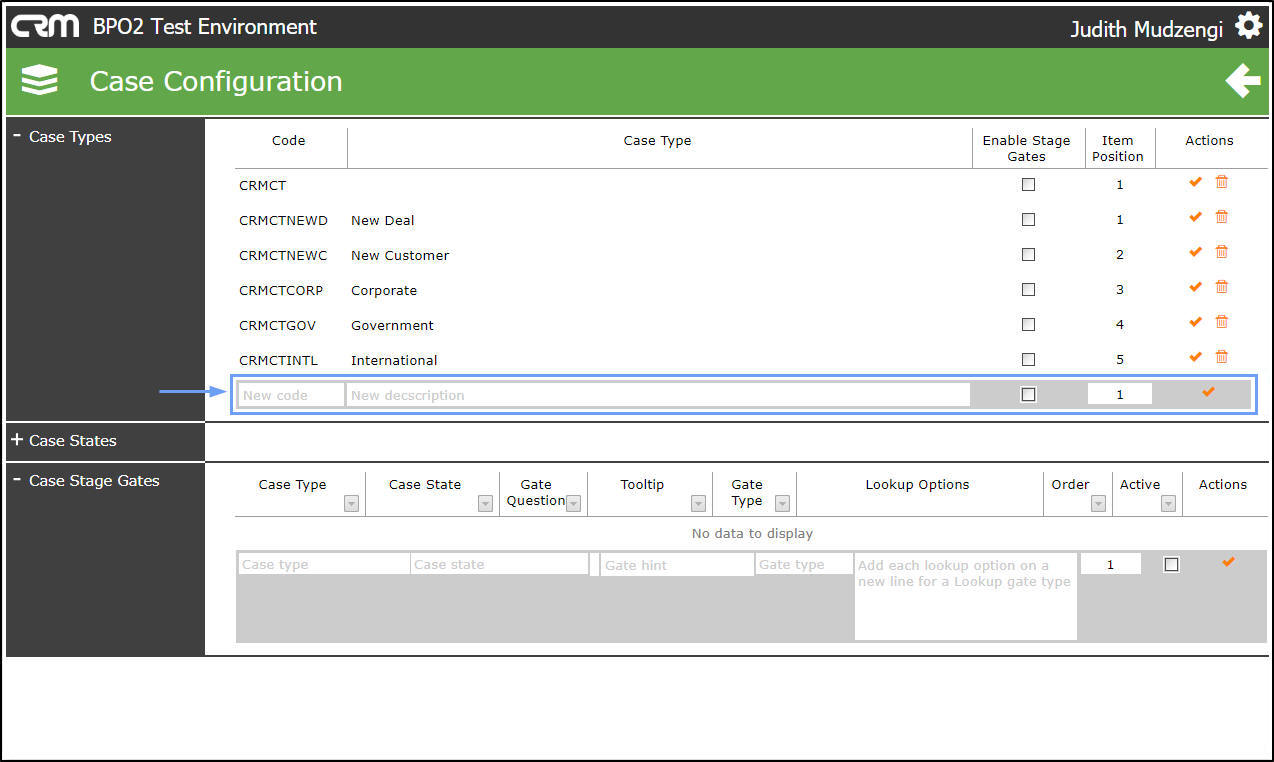
- Type in the code.
- and case type description of the new case type you wish to add.
- Click on the Enable Stage Gates checkbox if you wish to enableStages Gates for this Case Type.
- Type in the sort order number or use the up and down arrows to select the sort order number for the Item Position.
- Click on the 'Check Mark' to save the new Case Type.
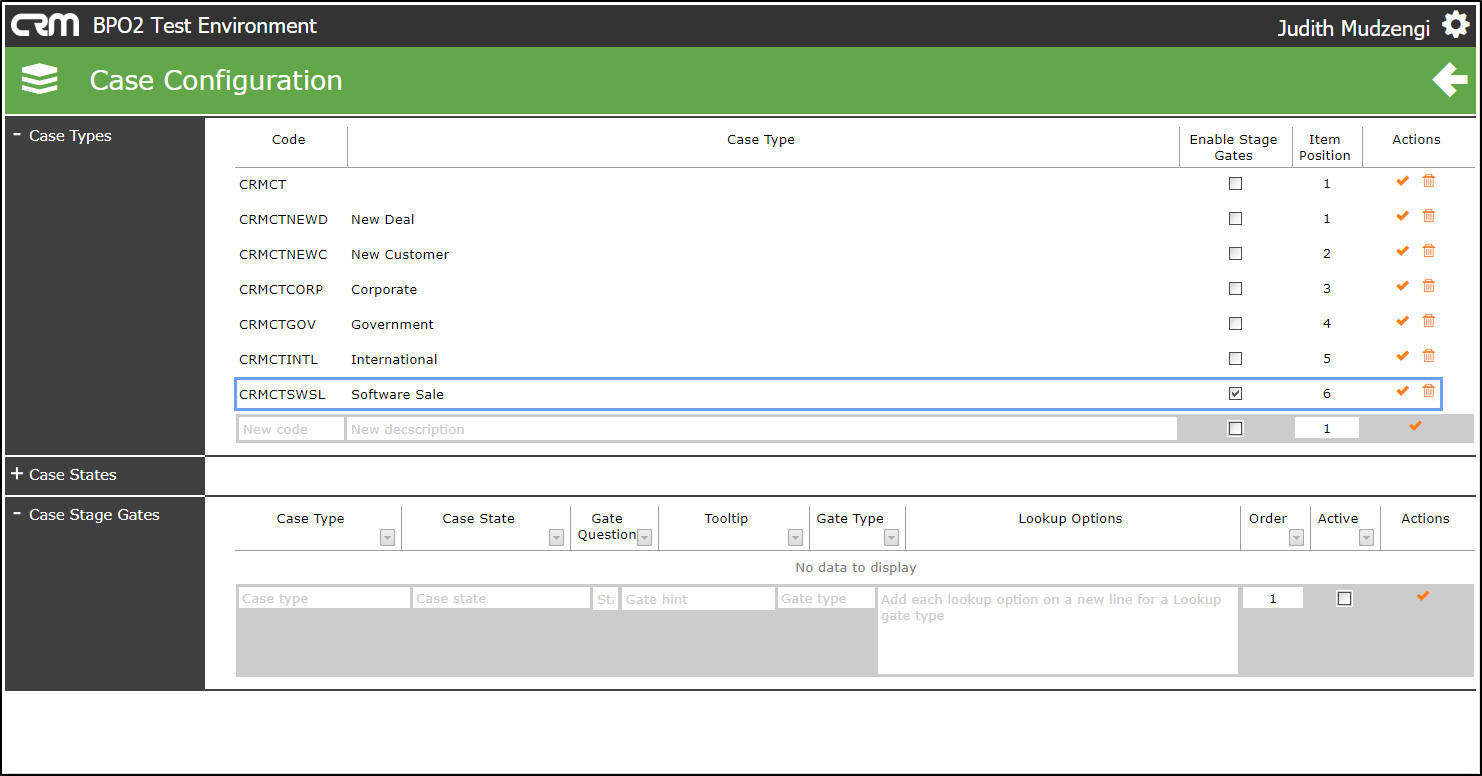
- The newly added Case Type will be displayed in the Case Types section.
- Note: On save, a prefix may be added to the Code. In this image, the prefix added is CRMCT.
Manage Case Types
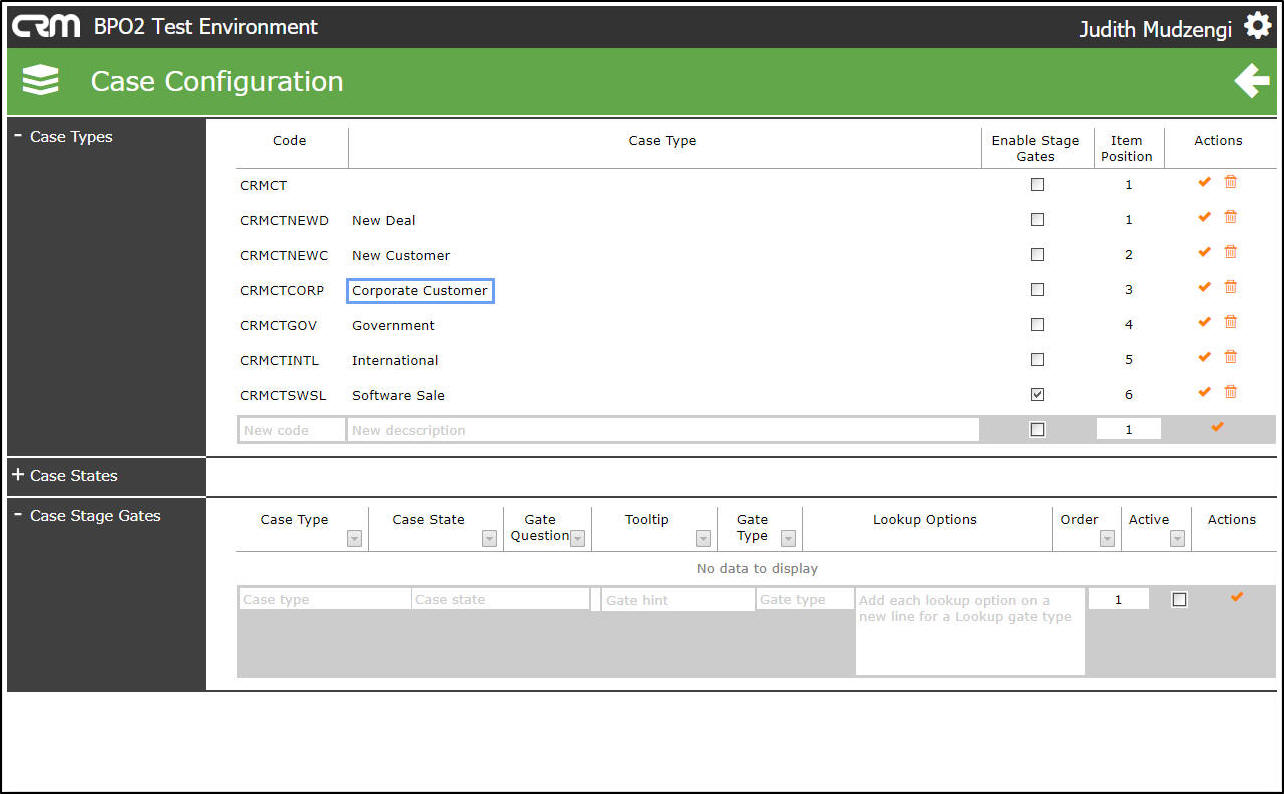
Edit A Case Type
- You can edit the case type description, Item Position and enable / disable stage gates.
- Click on the Case Type Description textbox or item position textbox you wish to edit.
- For the purpose of this manual, case type description will be edited.
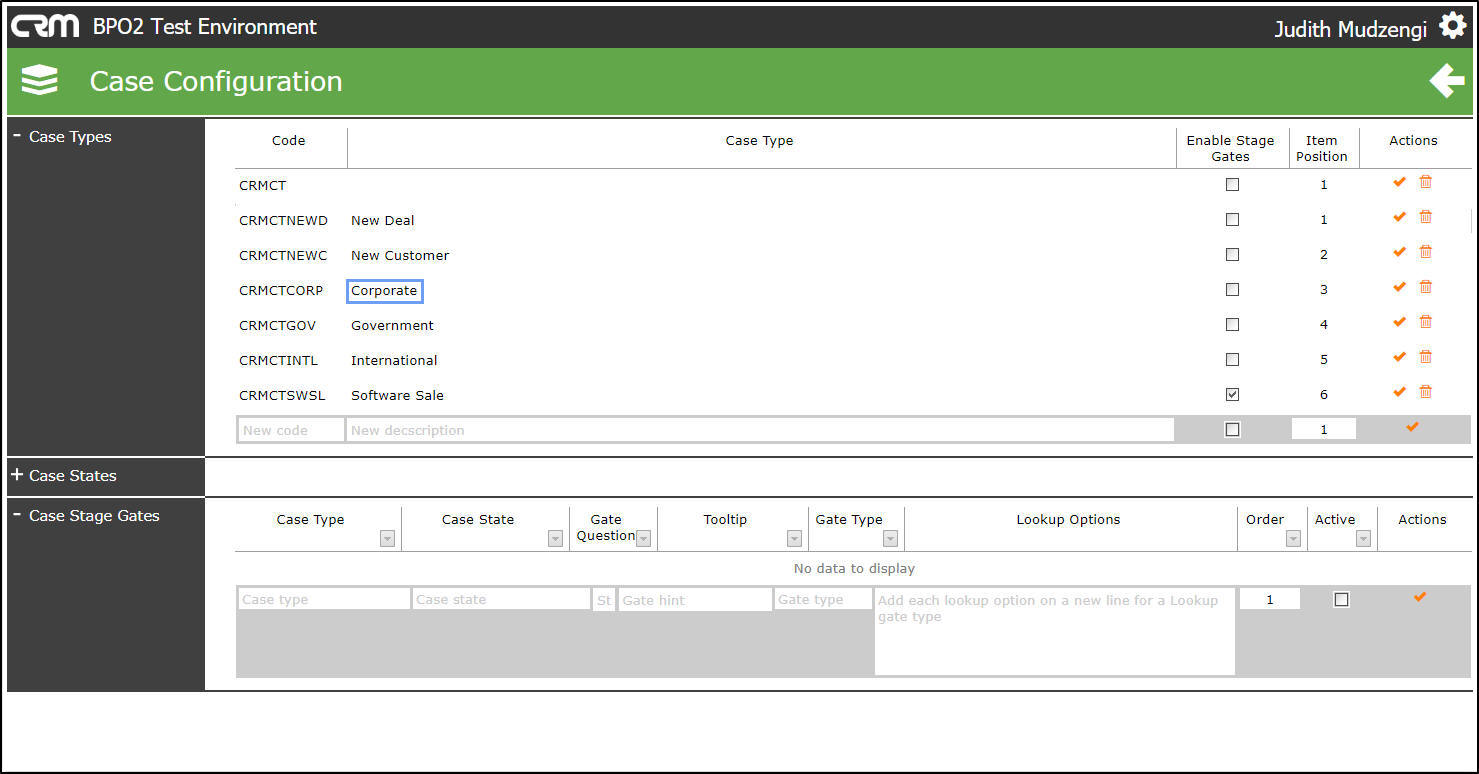
- Edit the case type description as required.
- Click on the 'Check Mark' to save the changes.
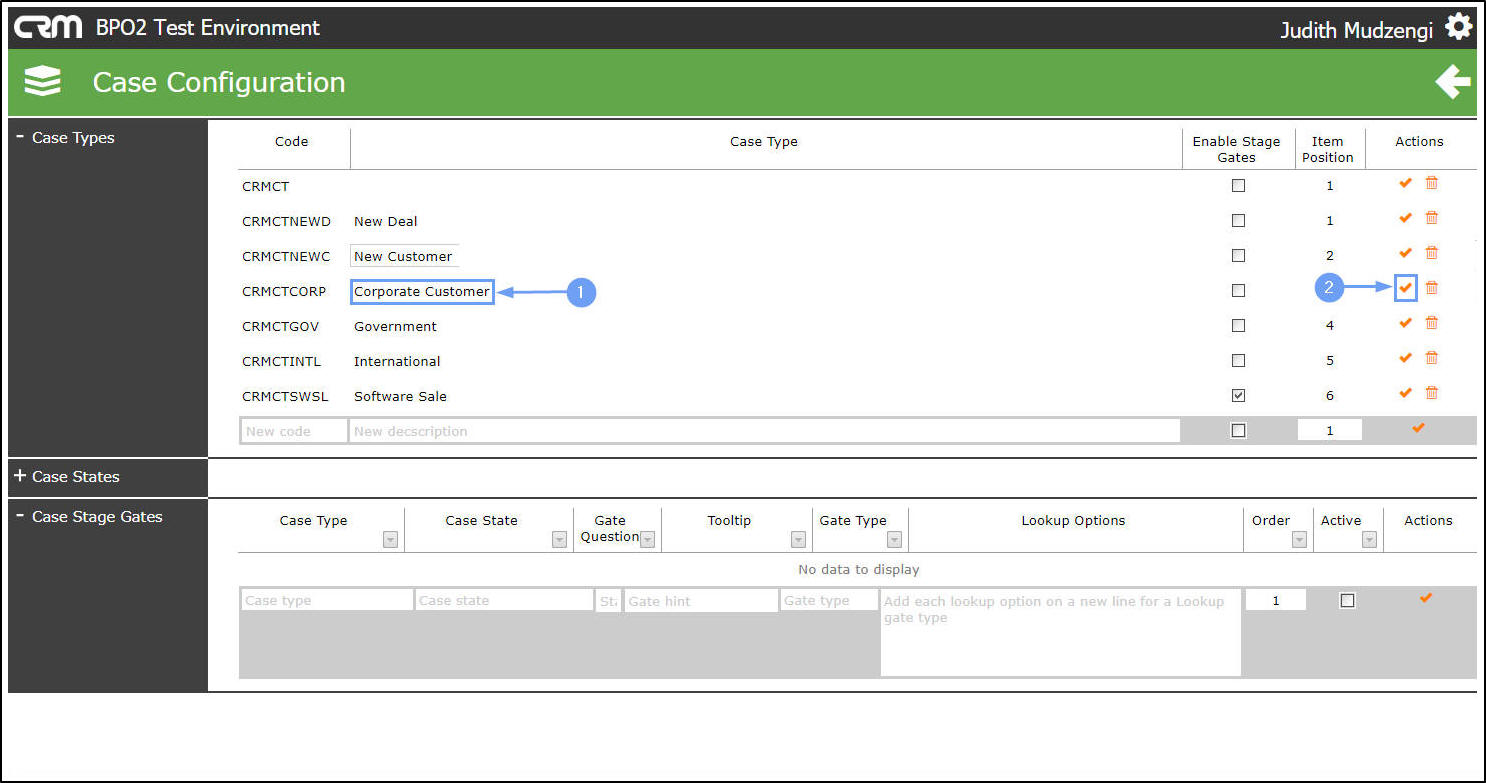
- The edited Case Type will be displayed in the Case Types section.
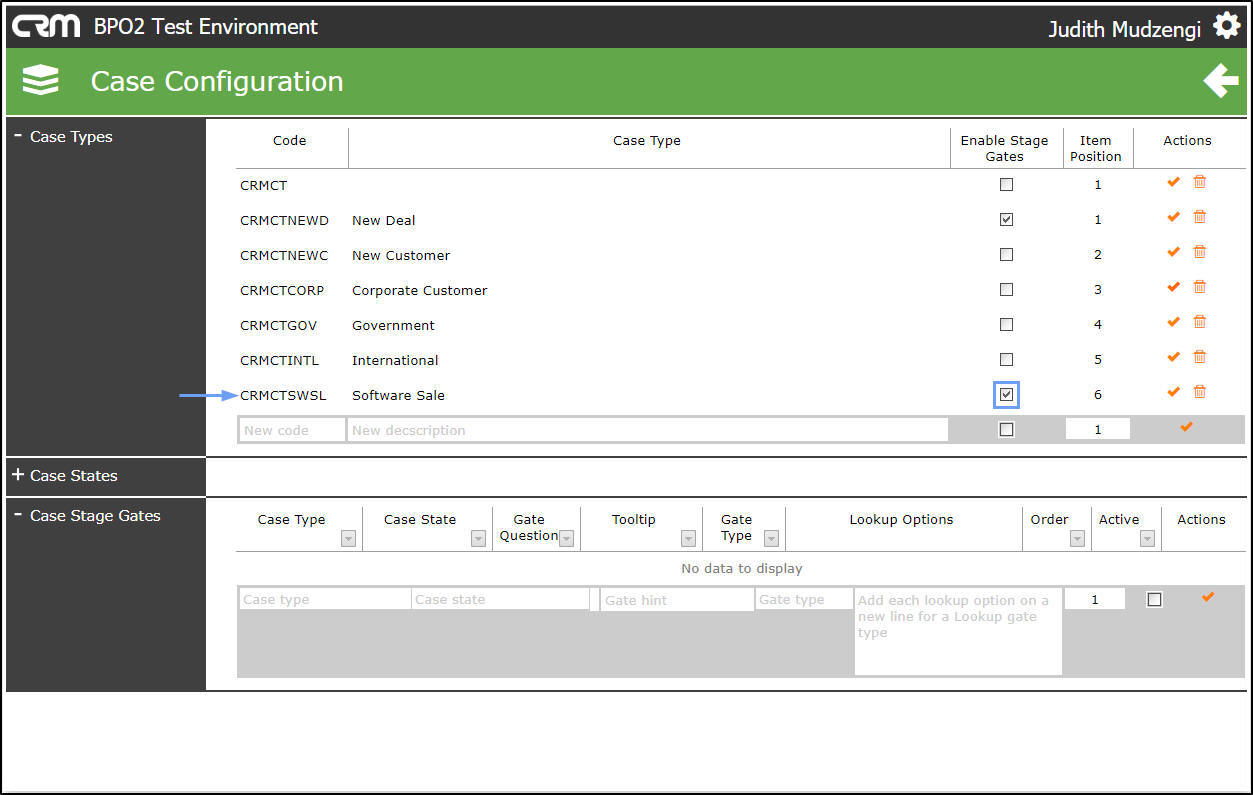
Case Type - Enable / Disable Stage Gates
- On the case type you wish to enable stage gates for,
- click on the unmarkedcheck box.
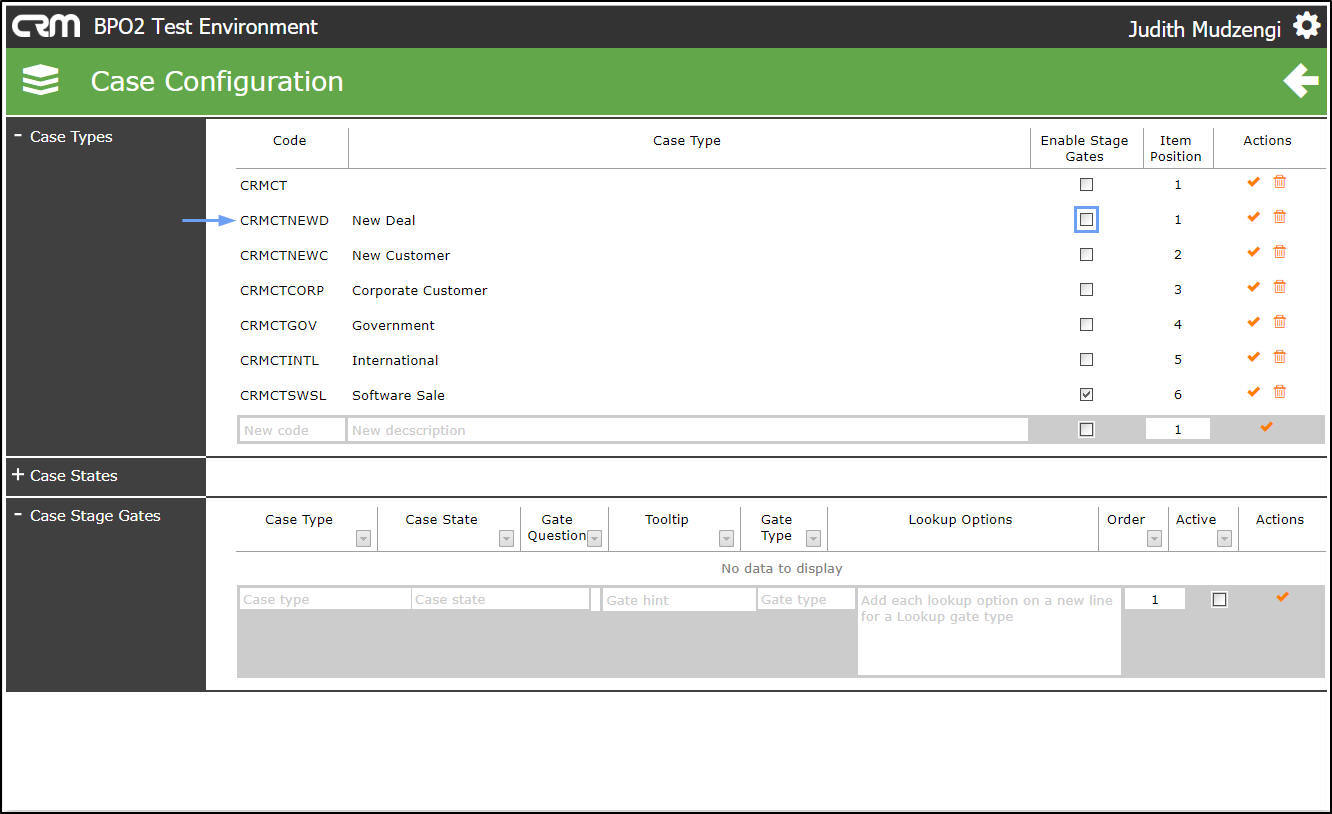
- The checkbox will become marked.
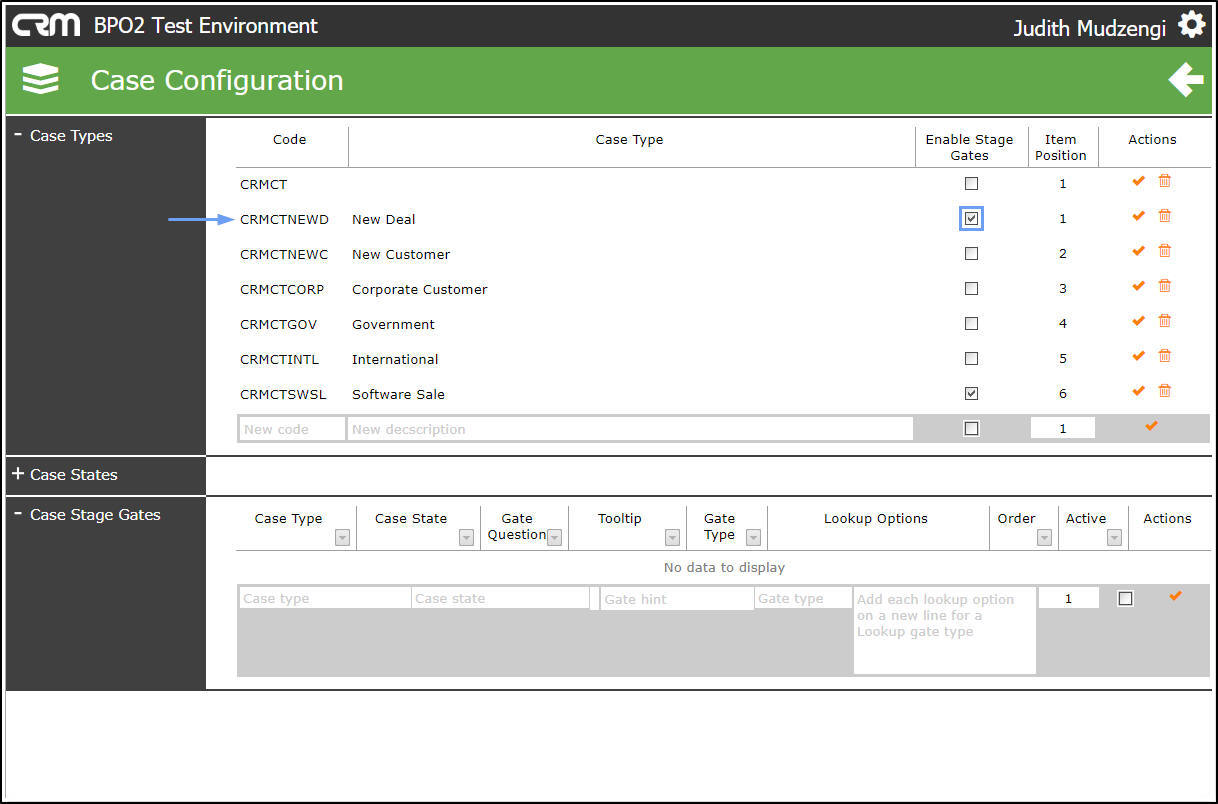
- Click on the 'Check Mark' to save the changes.
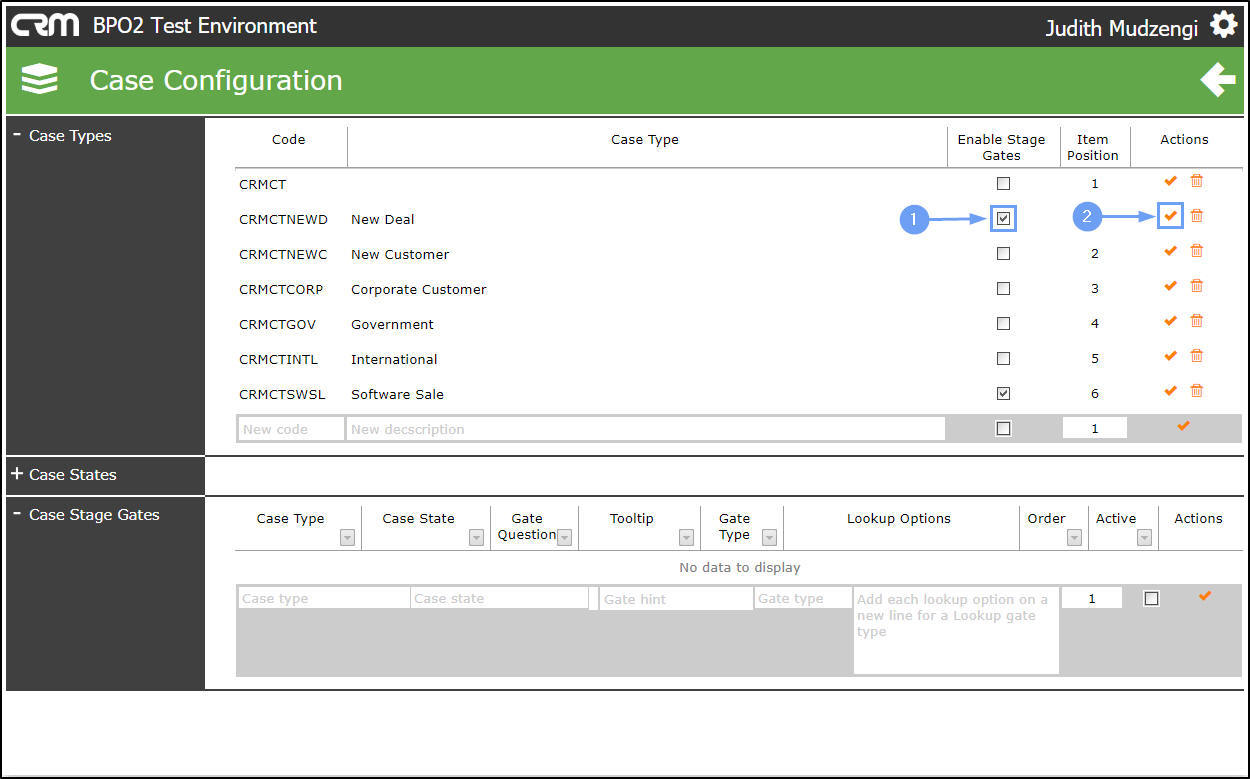
- The Stage Gate will now be enabled on the selected case type.
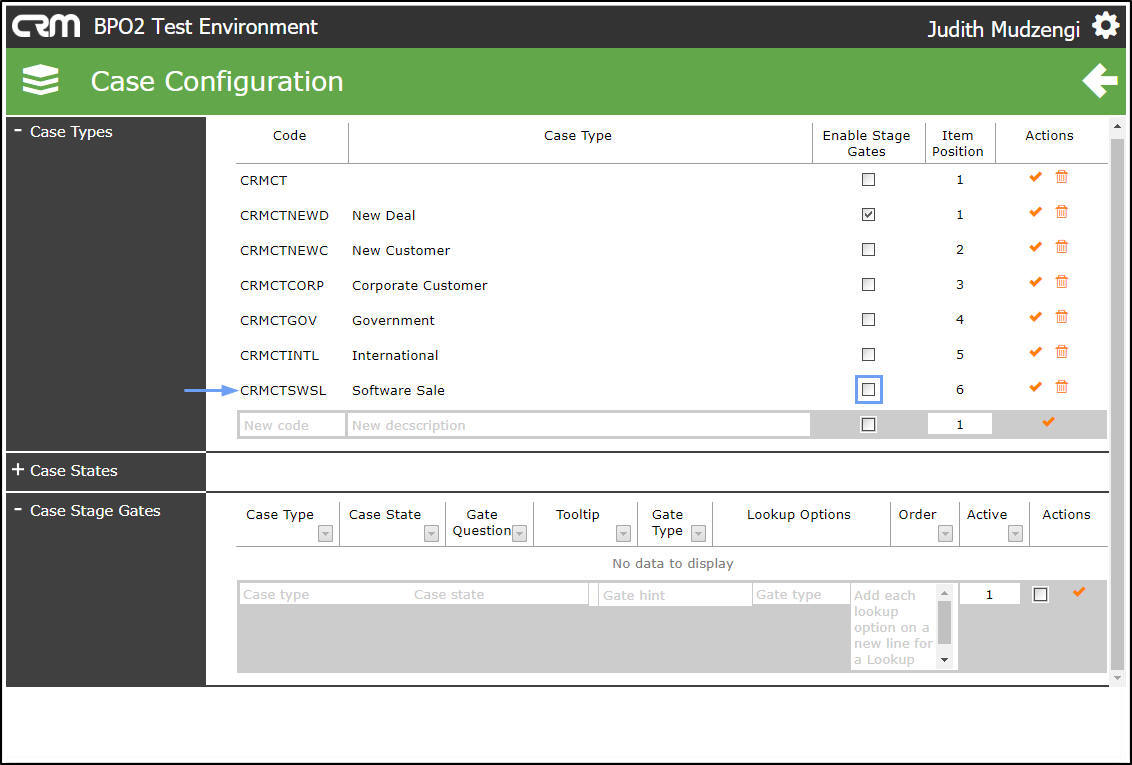
- On the case type you wish to disable stage gates for,
- click on the markedcheck box.
- The check box will become unmarked.
- Click on the 'Check Mark' to save the changes.

- The Stage Gate will now be disabled on the selected case type.
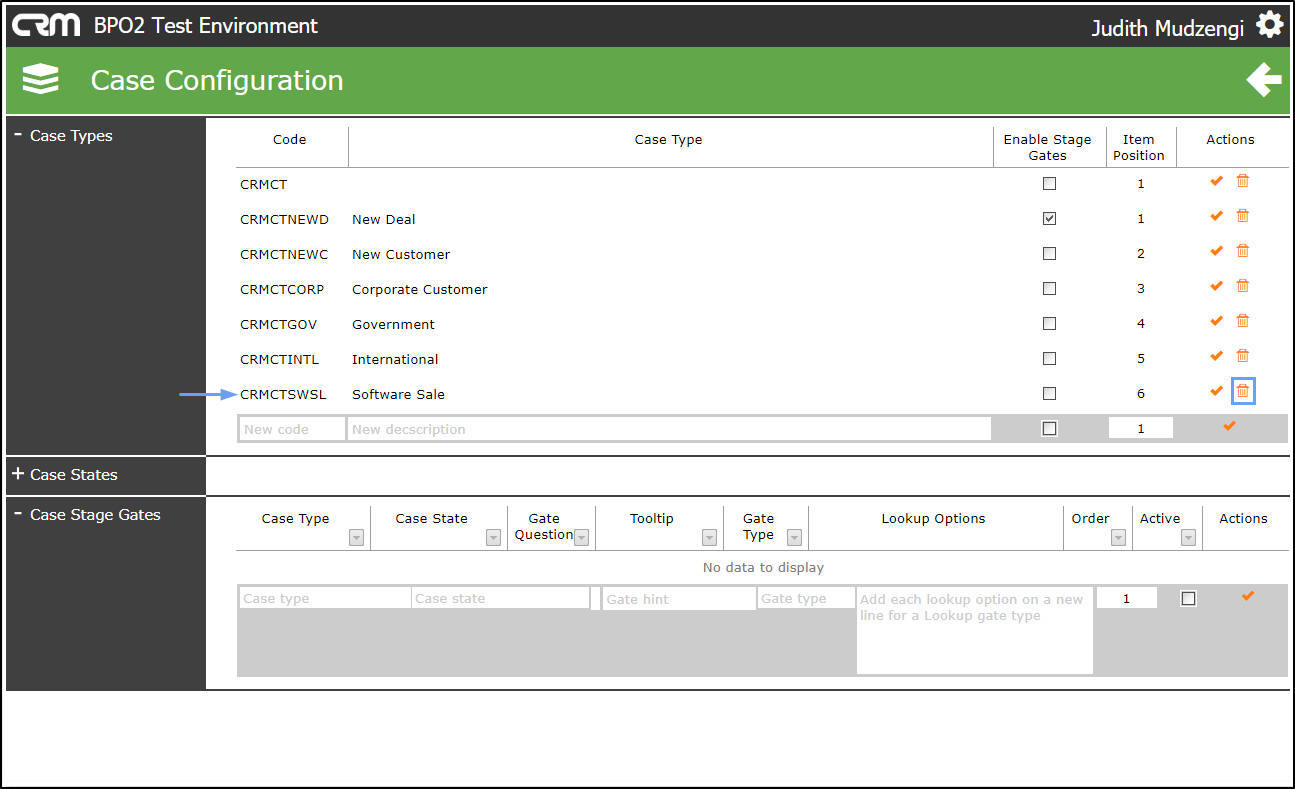
Delete A Case Type
- On the case type you wish to delete,
- click on the Delete icon.
- A message box will pop up asking you;
- Are you sure you want to delete this Case Type?
- Click on Ok.
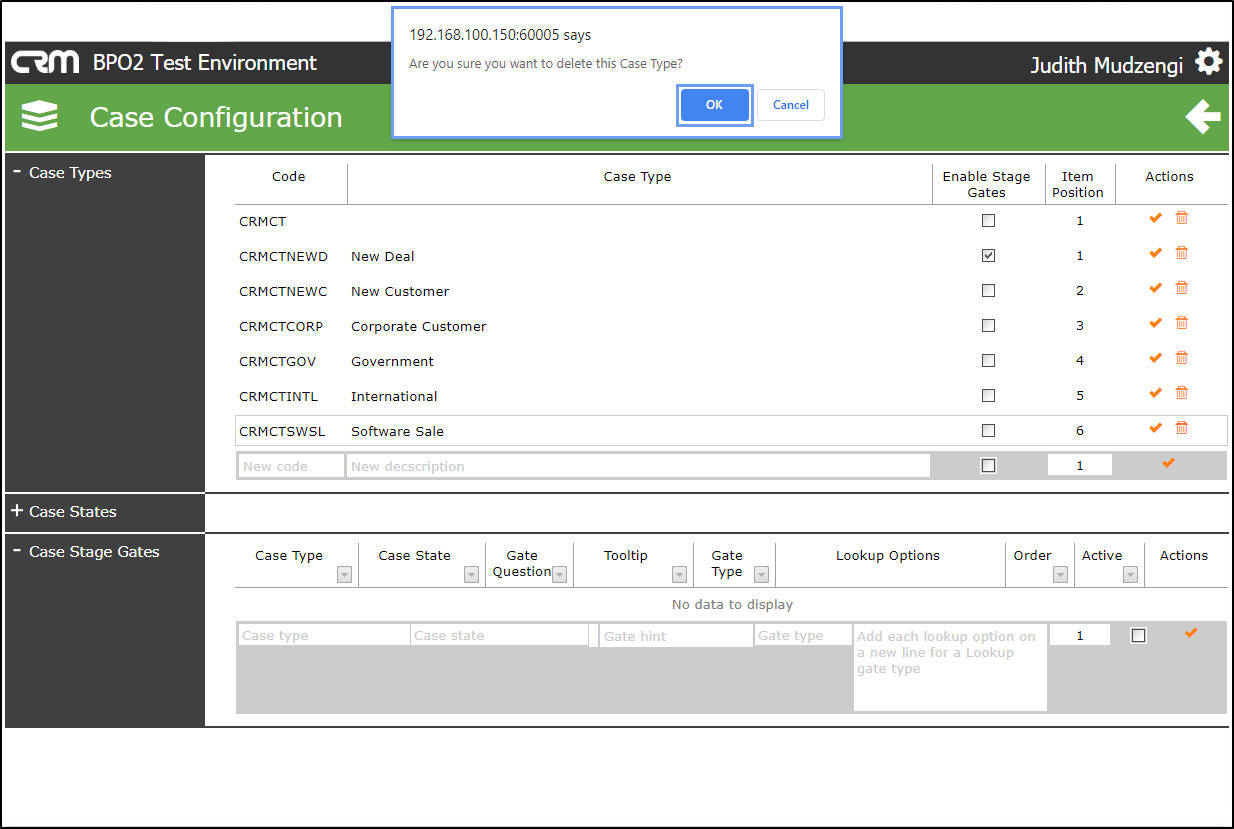
- The Case Type will be removed from the Case Type section.
View Case States
- Click on the '+' sign in the Case States section to view all current Case States.
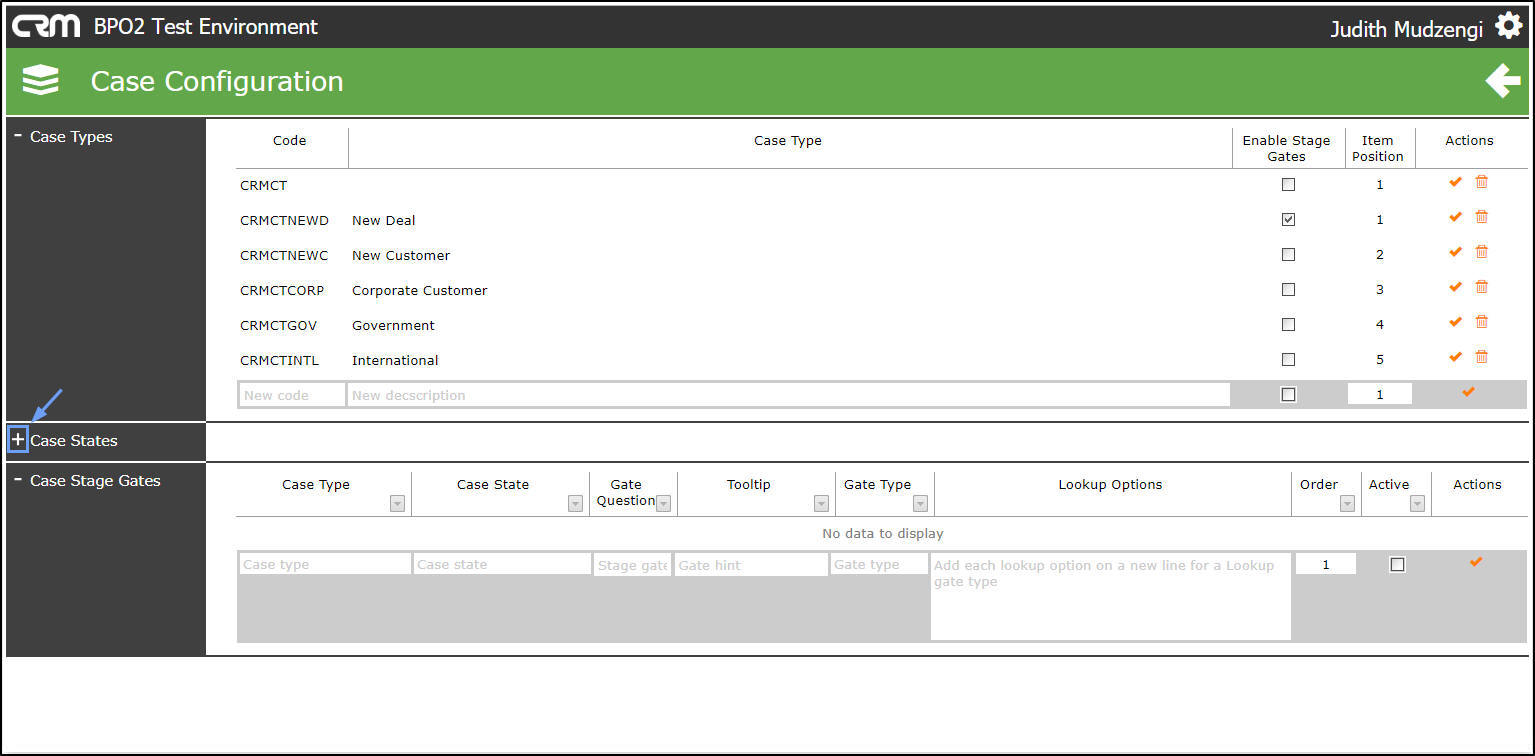
- A list of all Case States will be displayed.
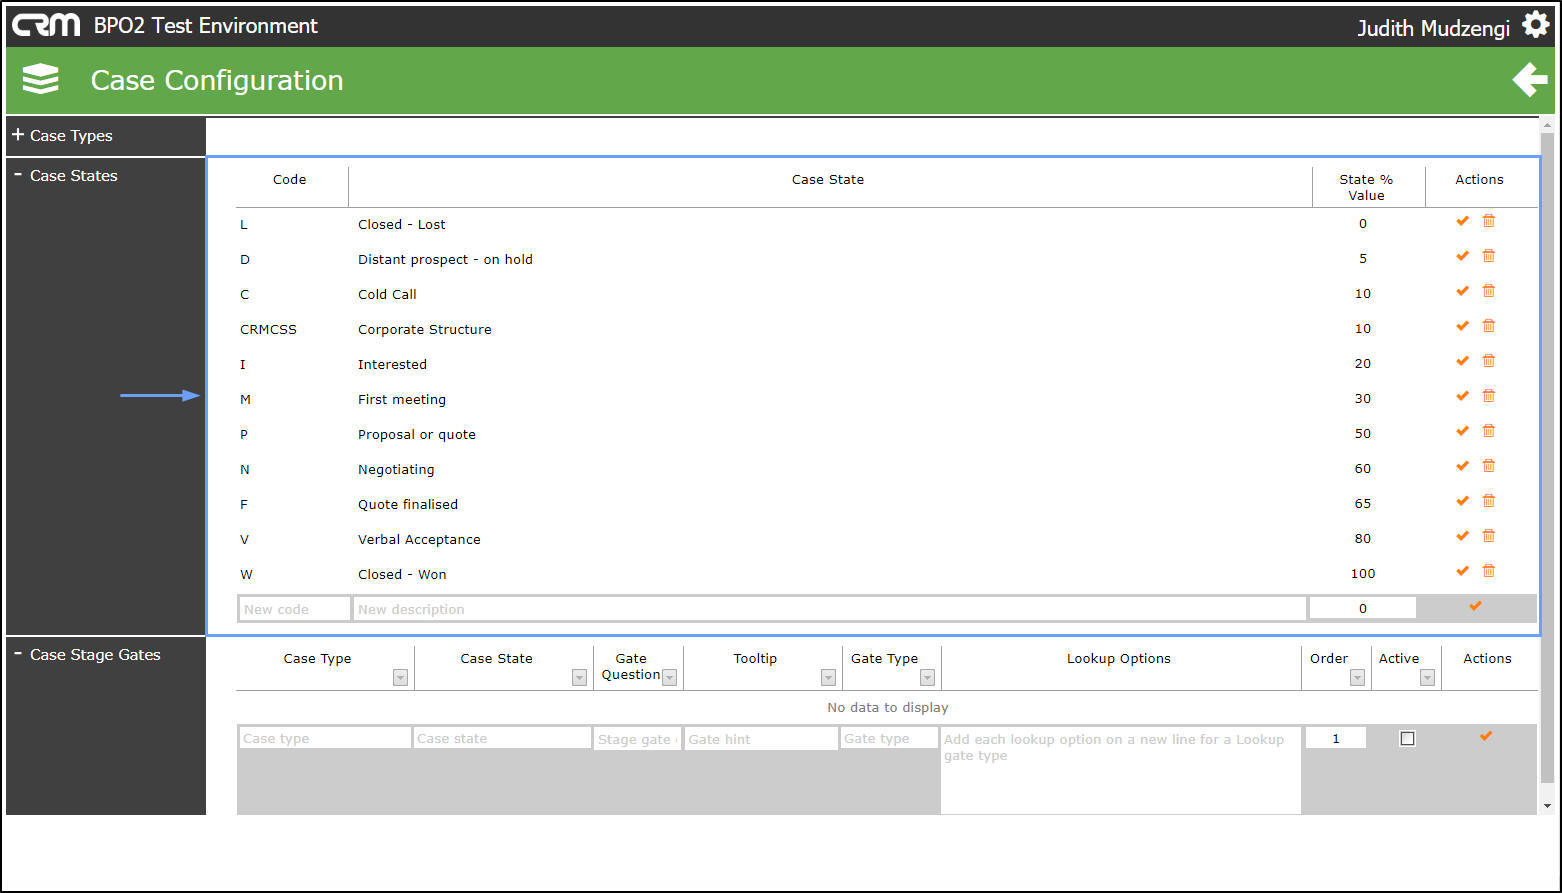
Add A Case State
- In the Case States section, go to the last row.
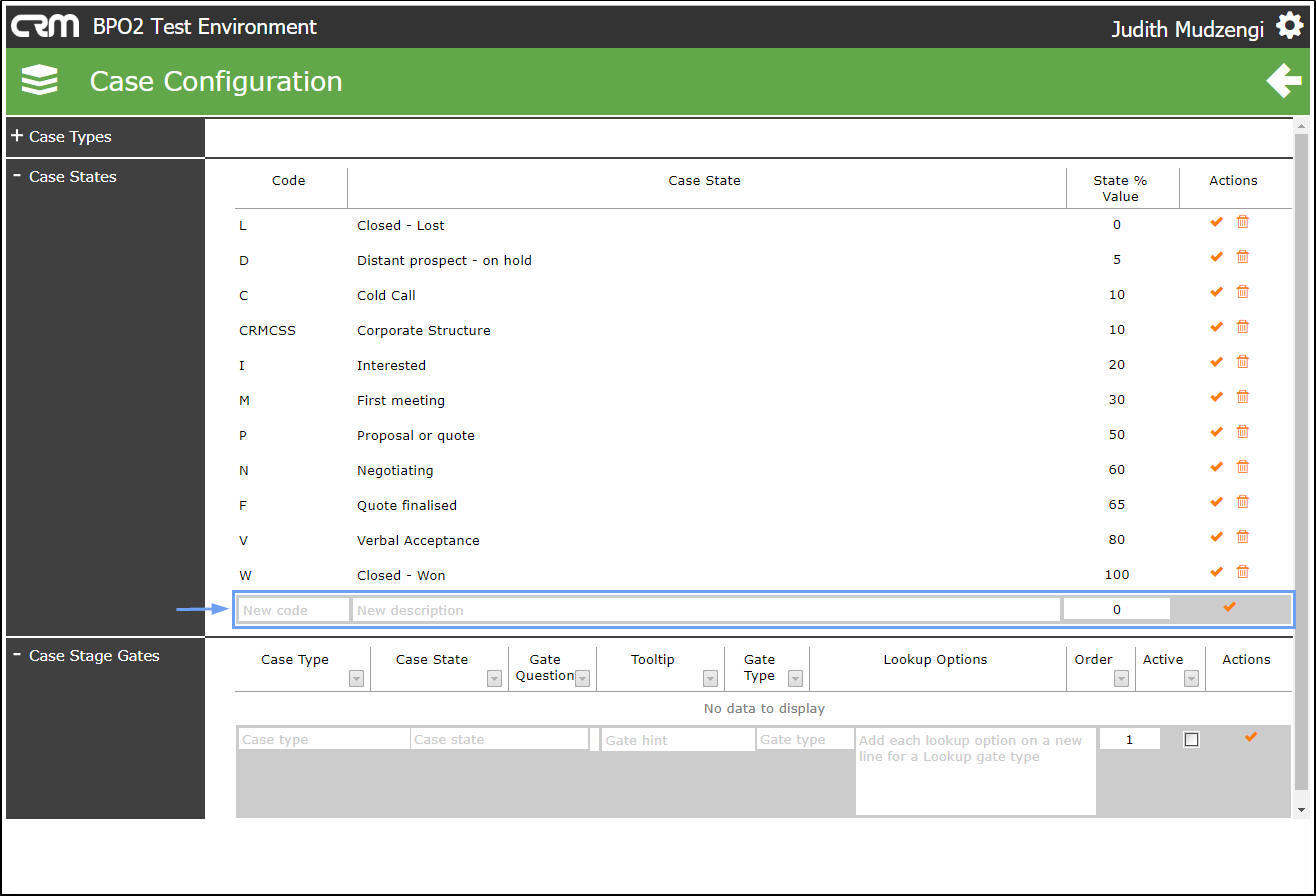
- Code: Type in the code of the new case state you wish to add.
- Case State: Type in the case state description of the new case state you wish to add.
- Case State % Value: Type in the percentage of completion for this case state.
- Click on the 'Check Mark' to save the new case state.

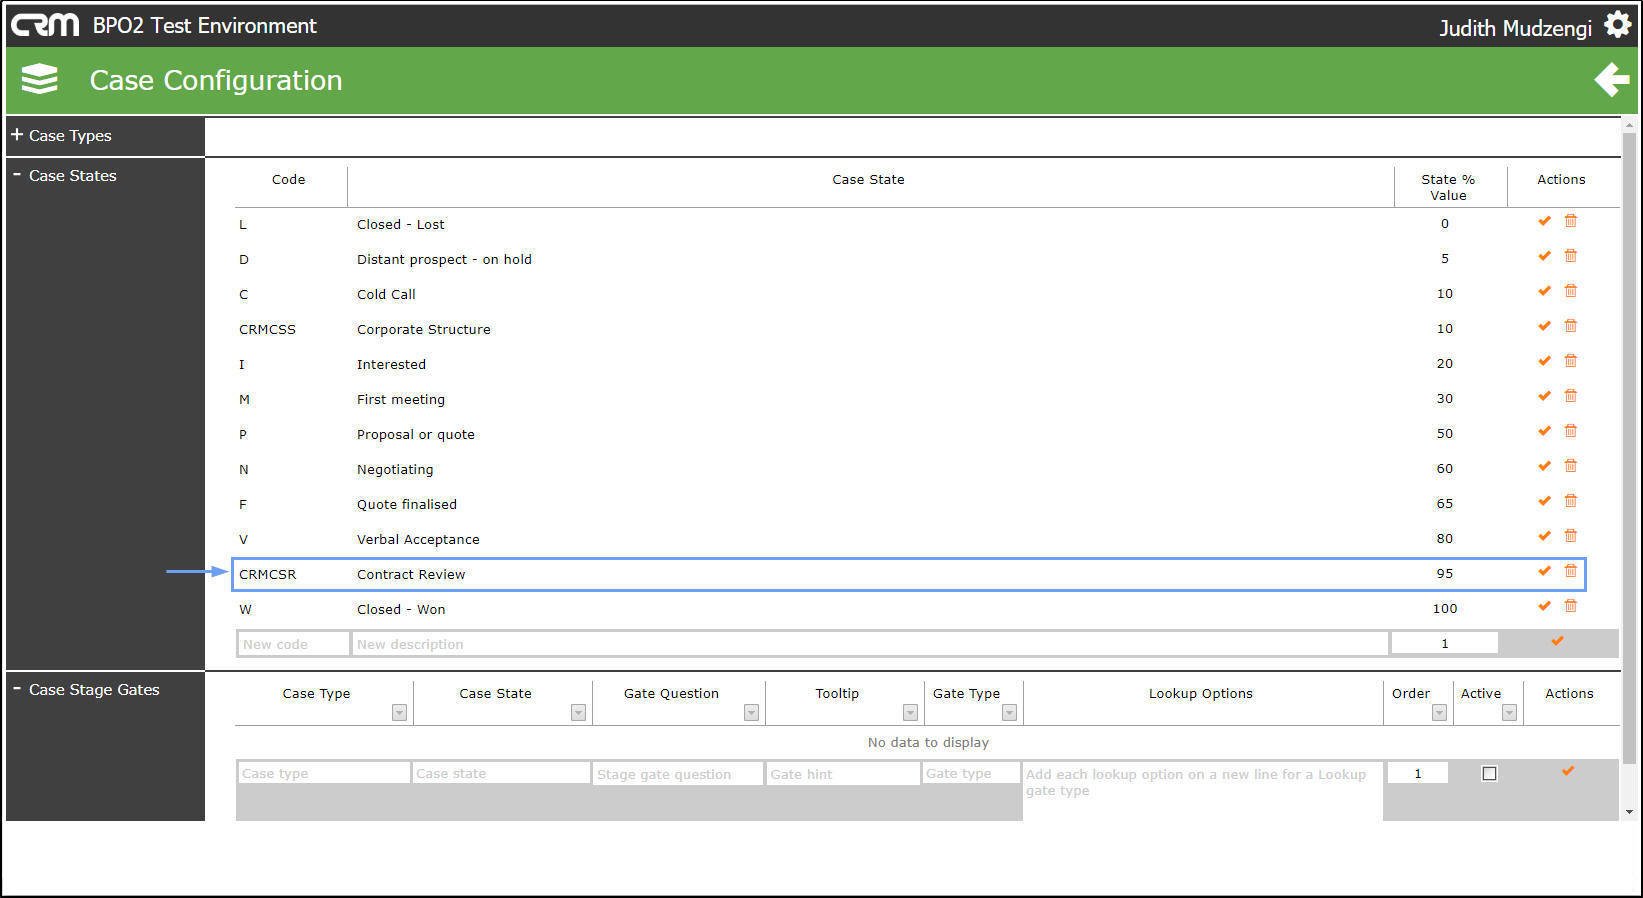
- The newly added Case State will now be displayed in the Case States section.
- Note: On save, a prefix may be added to the Code. In this image, the prefix added is CRMCS.
Manage Case States
Edit A Case State
- You can edit the case state description and the Case State % Value.
- Click on the case state description textbox you wish to edit or the
- Case State % Value textbox you wish to edit.
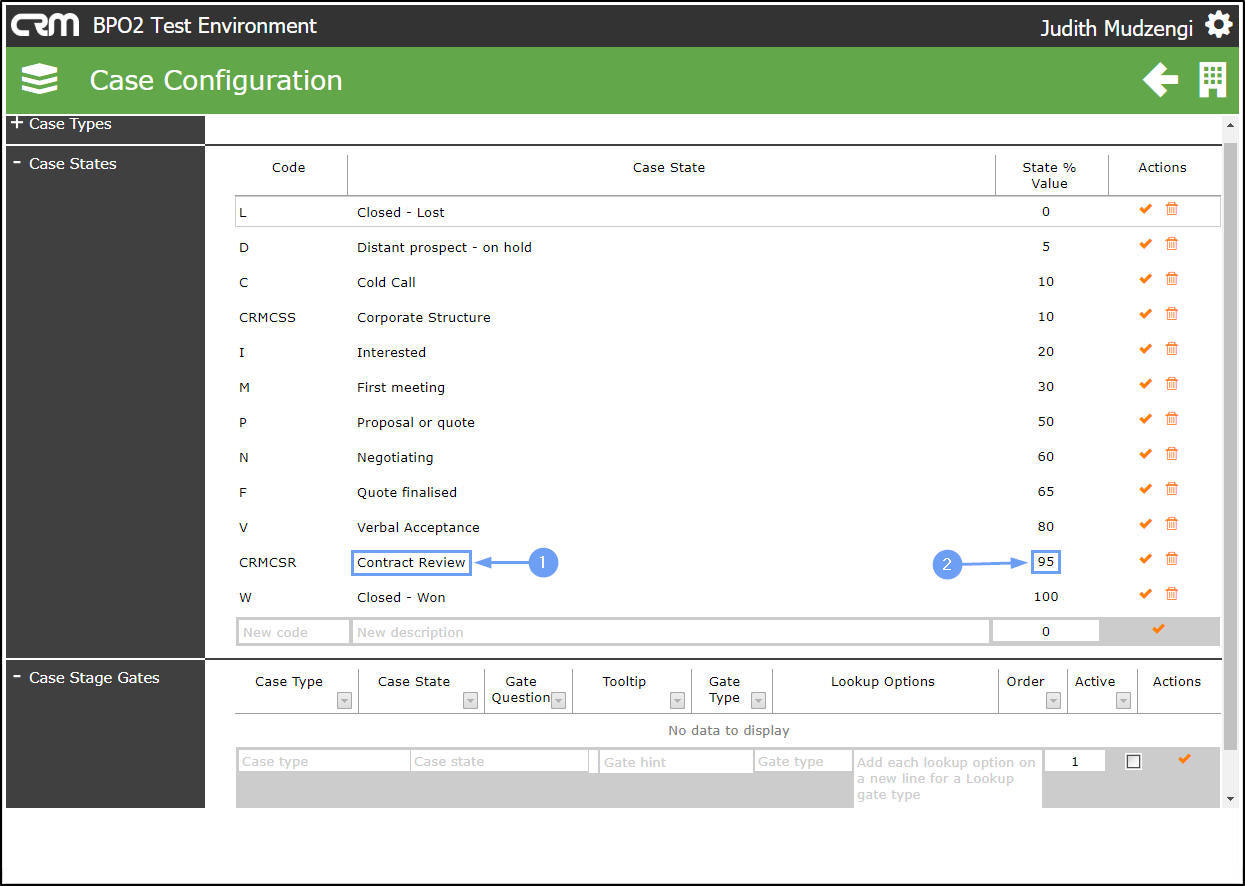
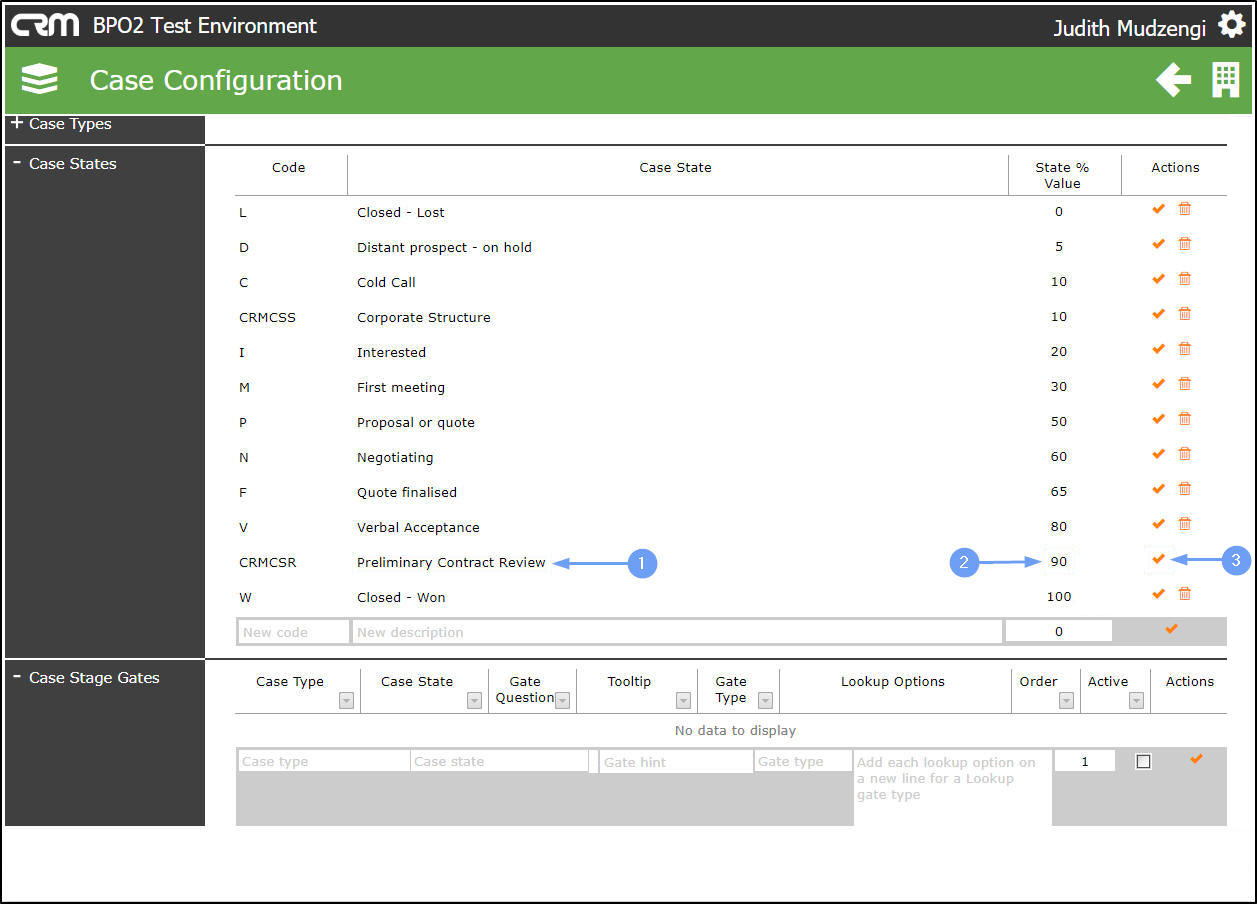
- Edit the case state description and or the
- Case State % Value as required.
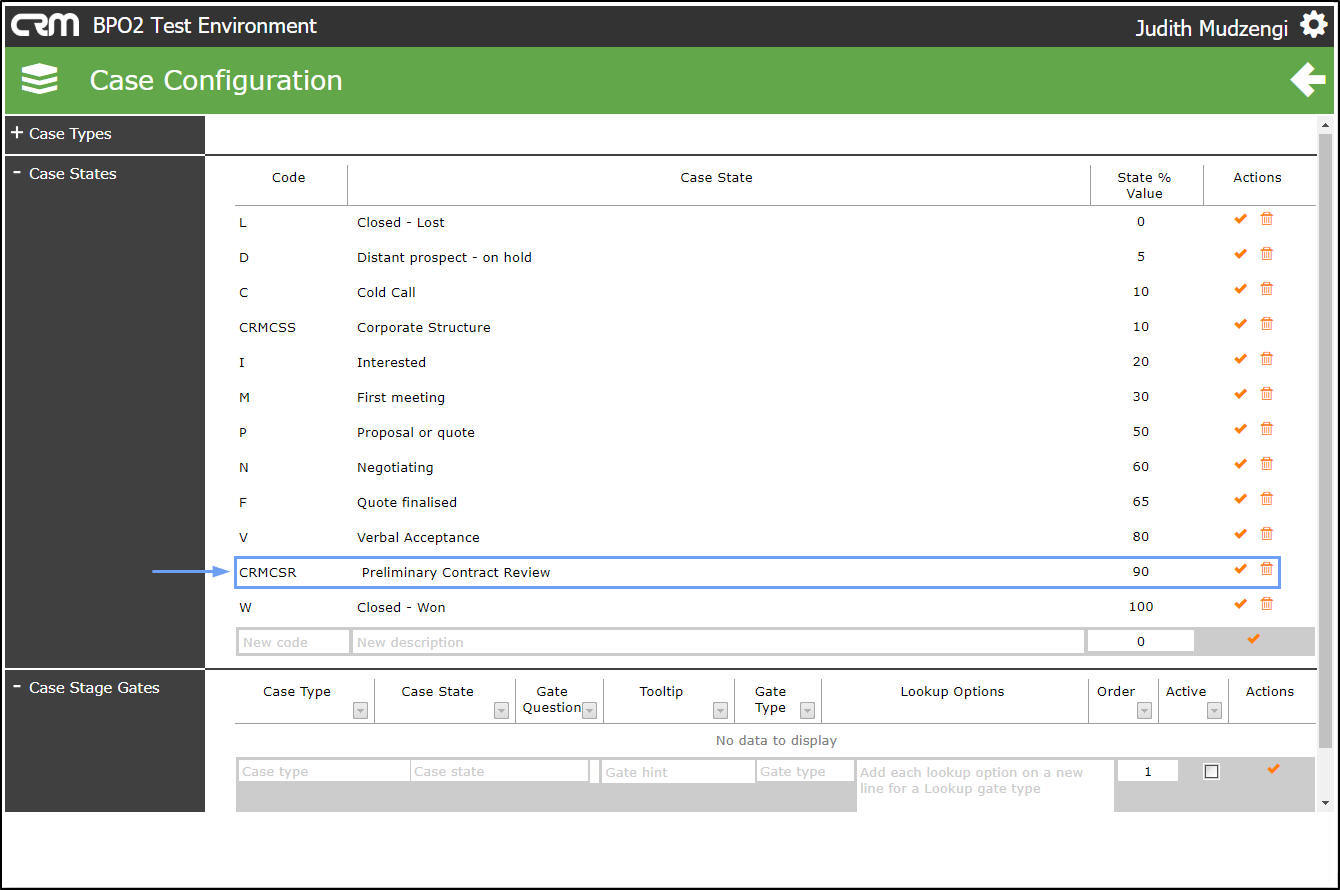
- Click on the Check Mark to save the changes.
- The edited Case State will be displayed in the Case States section.
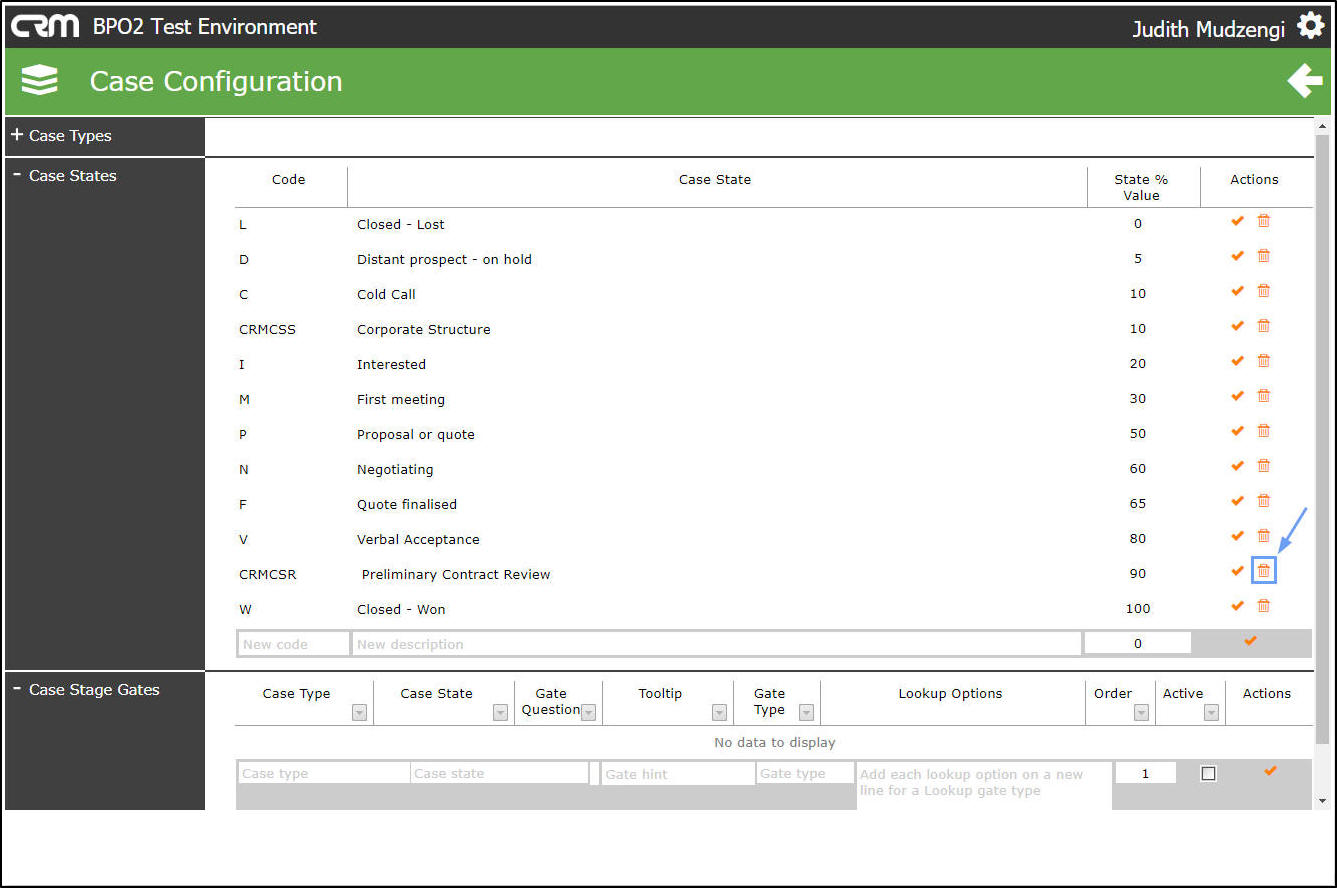
Delete A Case State
- Click on the Delete icon on the case state you wish to delete.
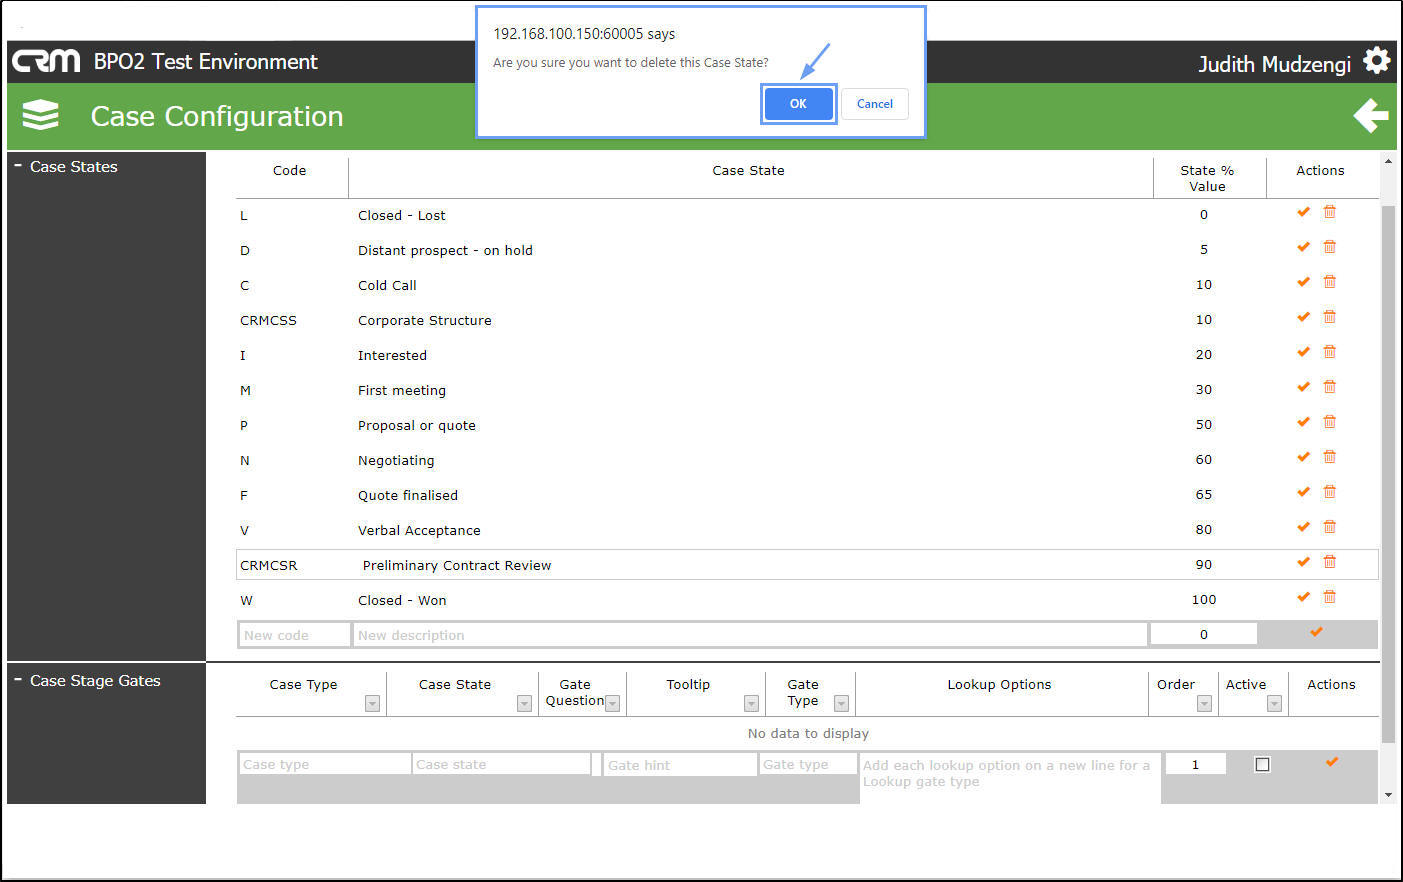
- A message box will pop up asking you;
- Are you sure you want to delete this Case State?
- Click on Ok.
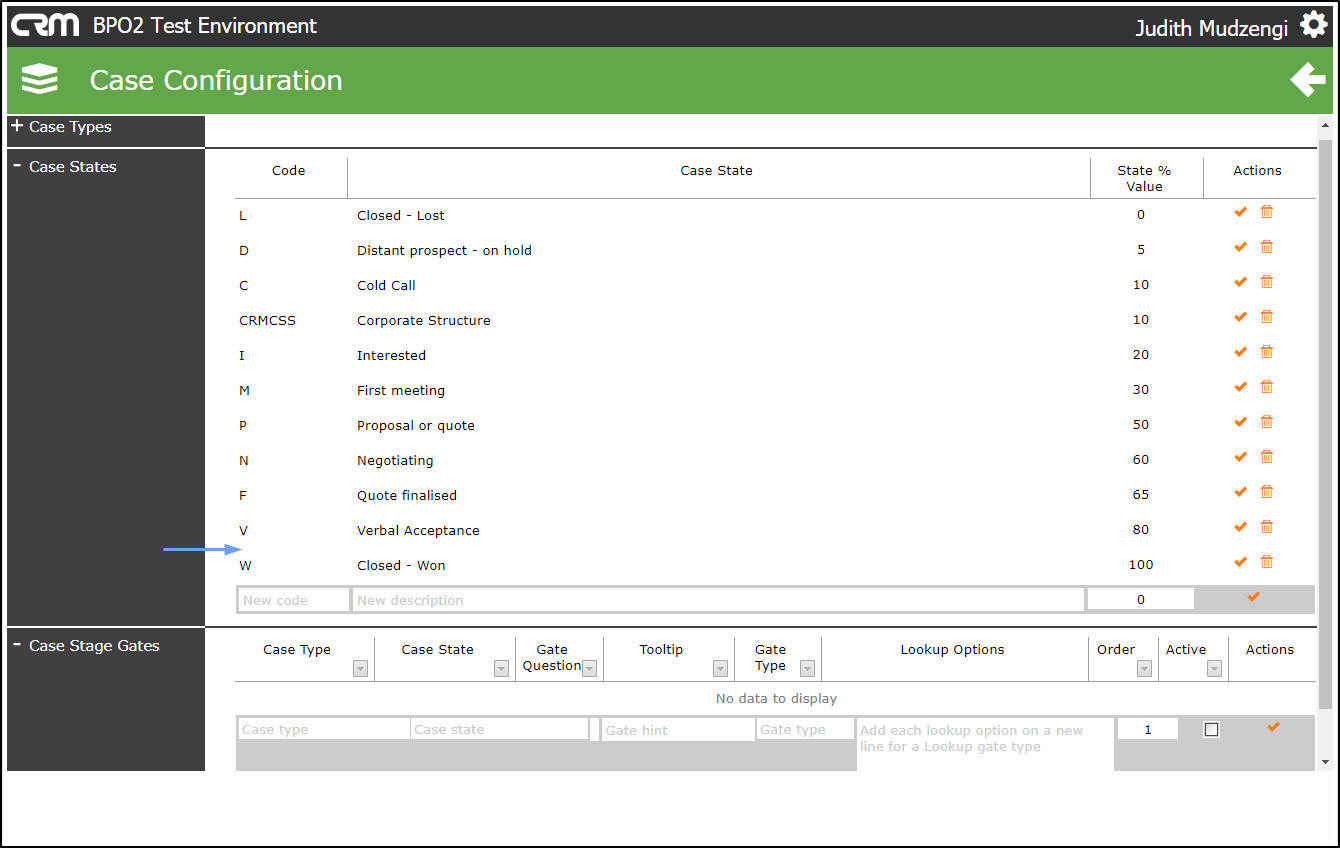
- The Case State will be removed from the Case States section.
View Case Stage Gates
- Click on the '+' sign in the Case Stage Gates section to view all current Case Stage Gates.
- A list of Case Stage Gates will be displayed.
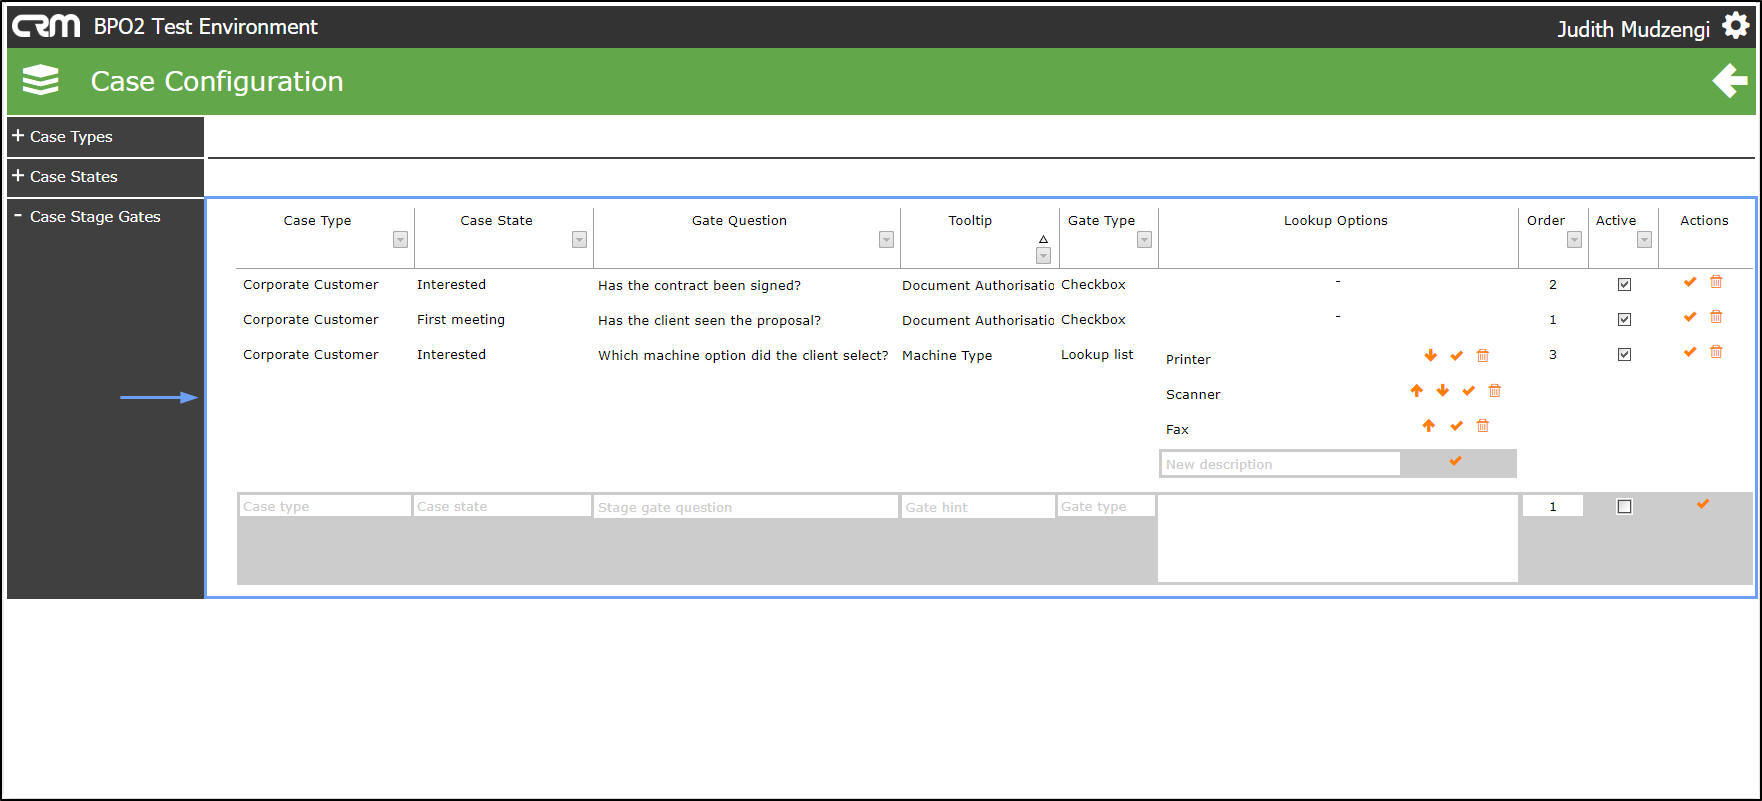
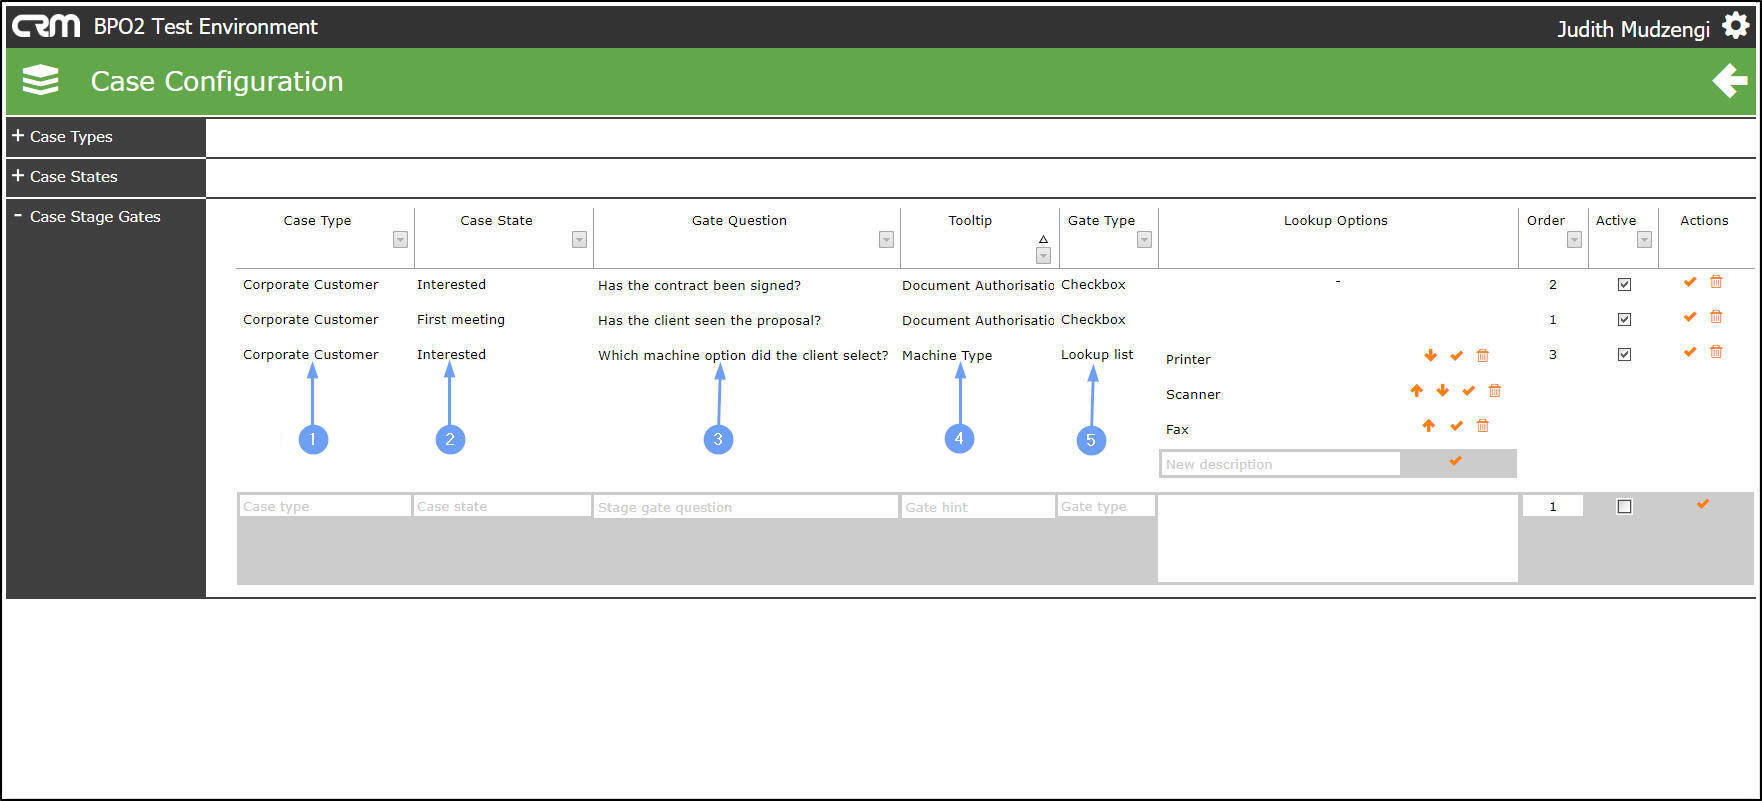
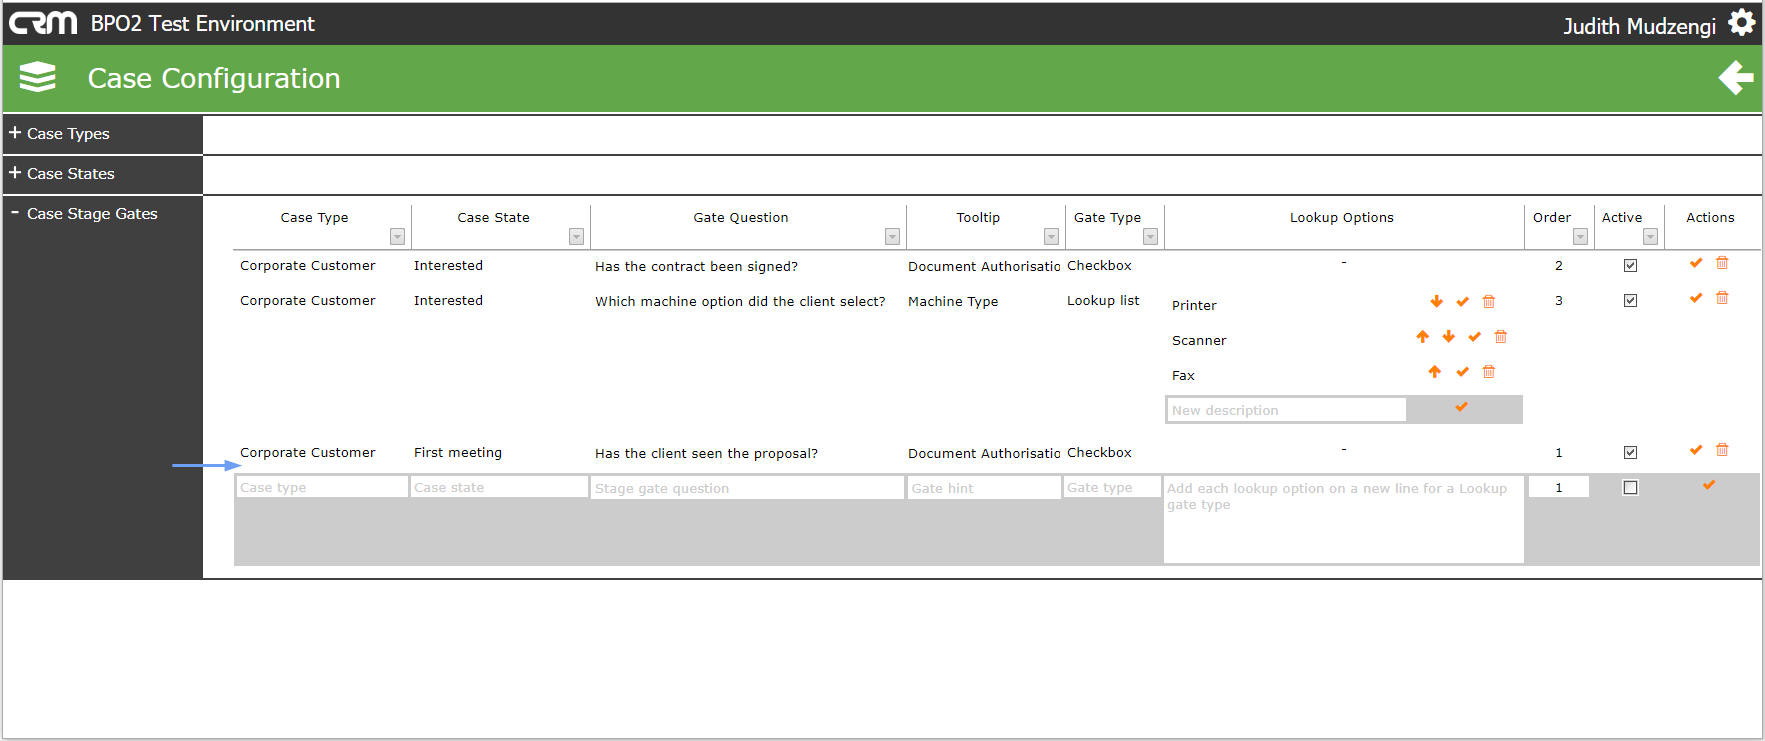
Case Stage Gates Details
- Case Type: This shows the case type of the case stage gate.
- Case State: This shows the case state of the case stage gate
- Gate Question: This shows the gate question.
- Tool tip: This shows the tool tip that will come up when hoving on the stage gate on the case, as a reminder or hint regarding the Stage Gate question.
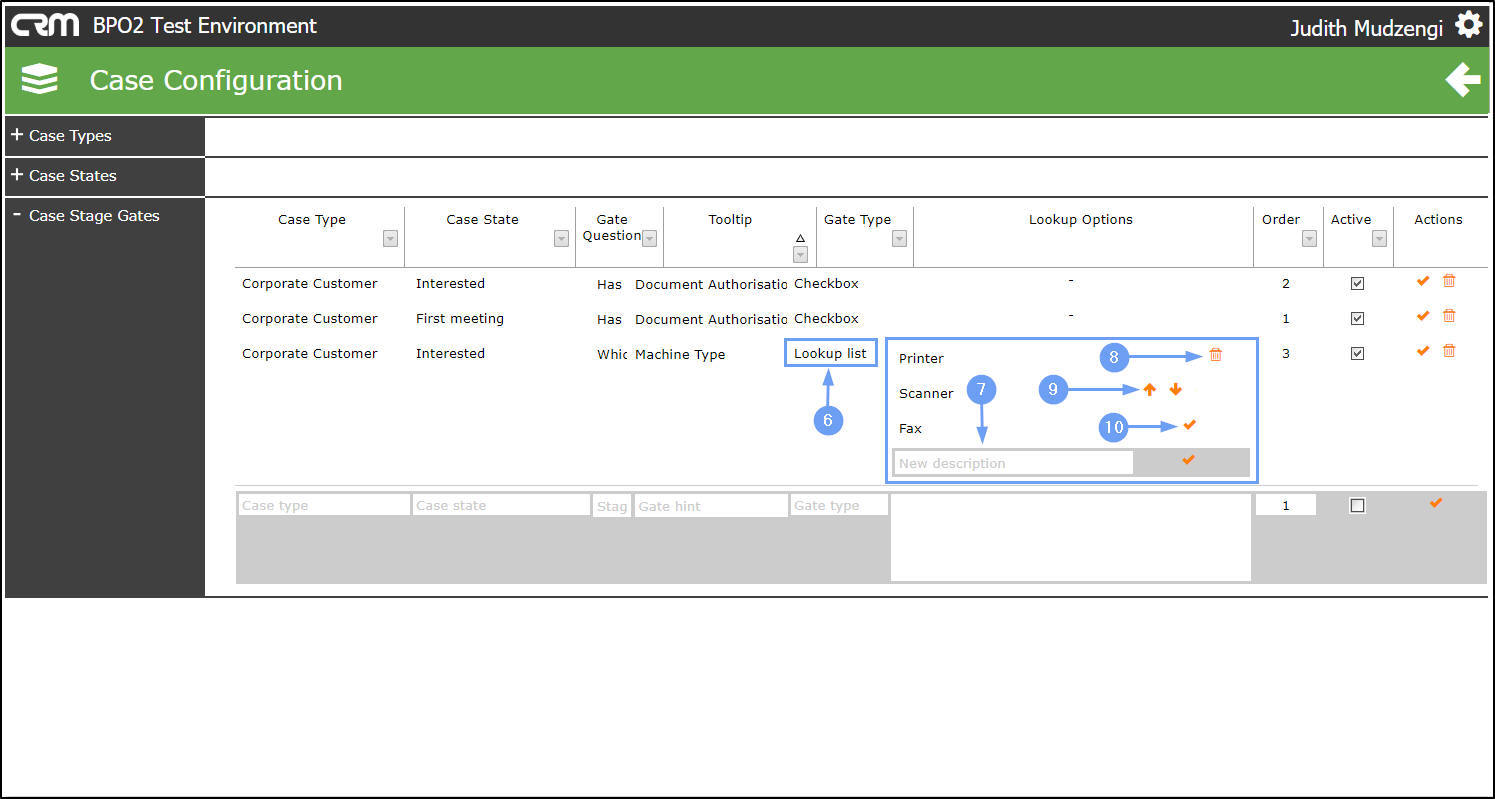
- Gate Type: This shows the gate type.
- For the
- Lookup List Gate Type the:
- Blank row is used to add Lookup Items.
- Up / Down arrows are used to reorder the Lookup Items.
- Check Mark is used to save the changes made.
- Delete icon is used to remove a lookup list item.
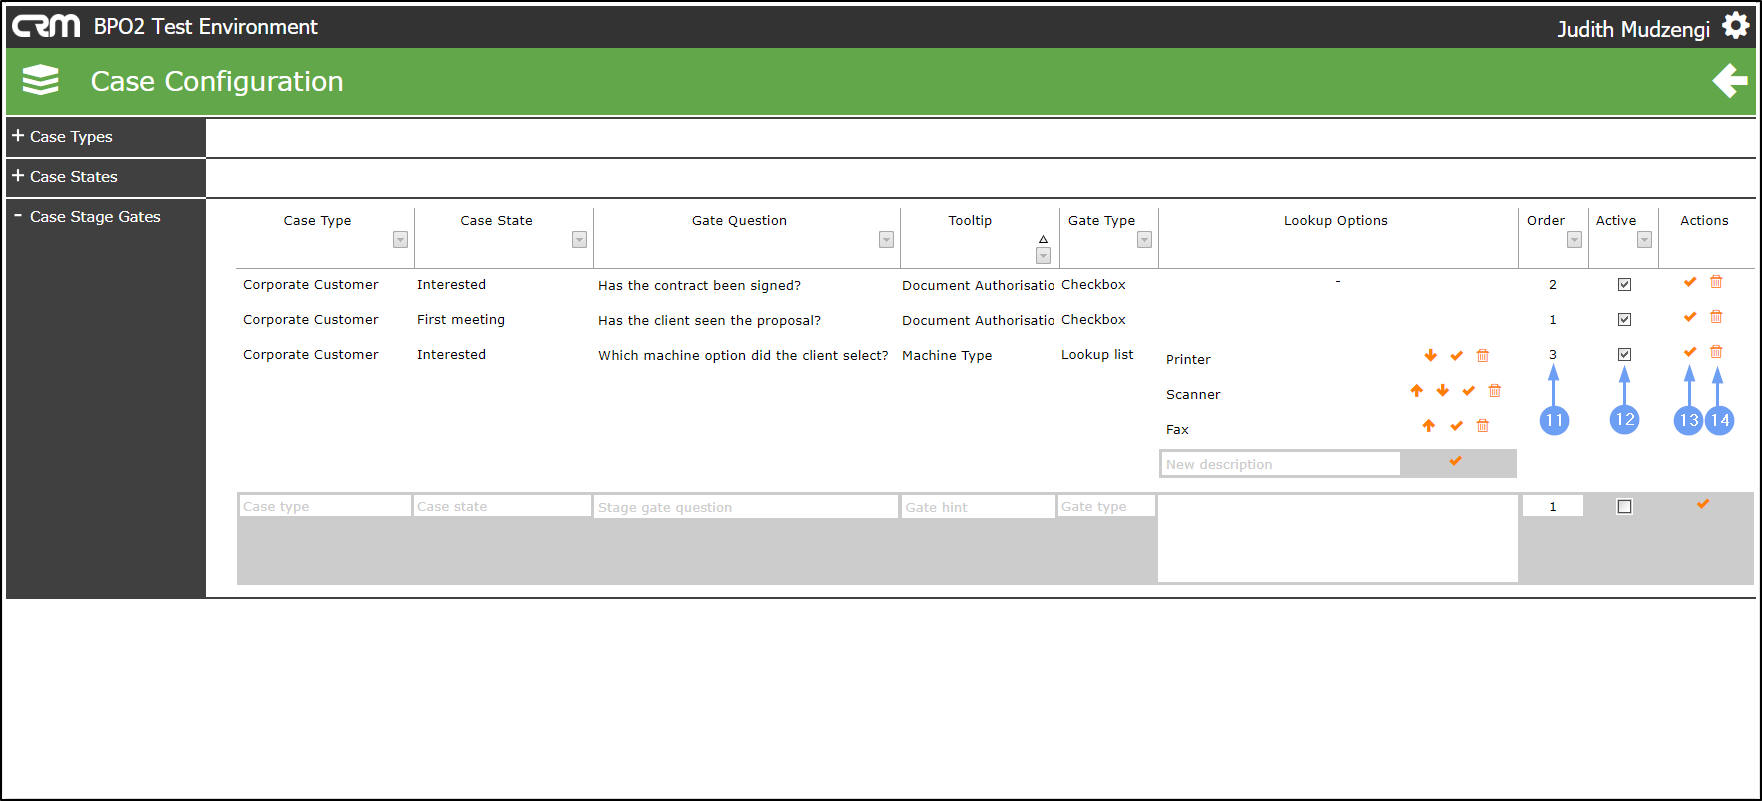
- Order: This shows the sort order number which determines the item position.
- Active: This shows whether the stage gate question is enabled or disabled.
- Actions - Check Mark: This is used to save changes made to the item.
- Actions - Delete Icon: This is used to remove the item from the Case Stage Gate list.
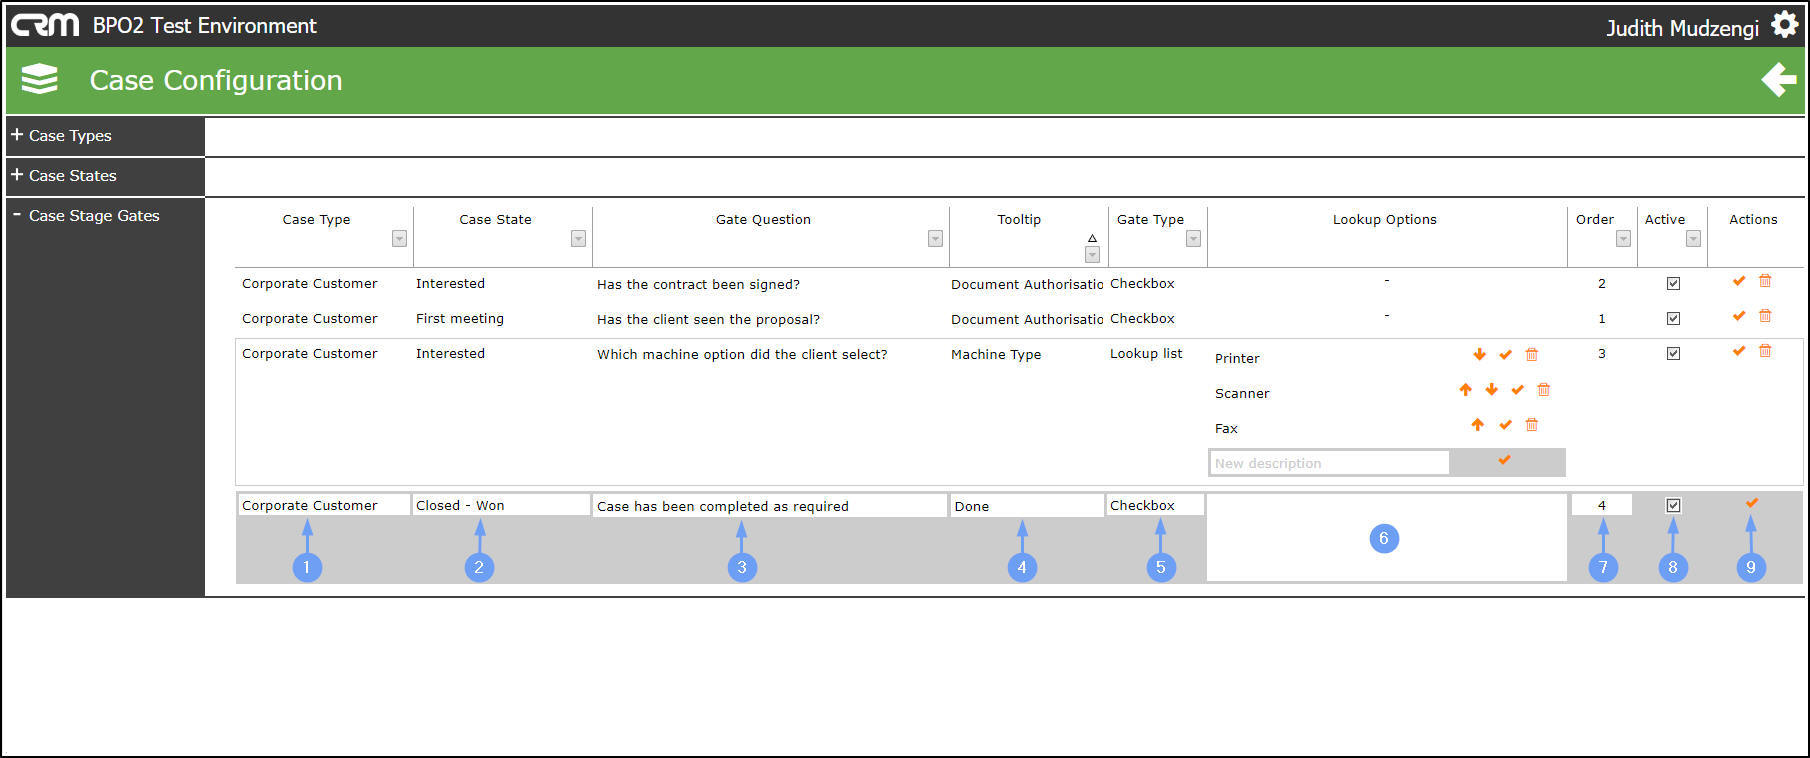
Add A Case Stage Gate
- In the Case Stage Gates section, go to the last row.
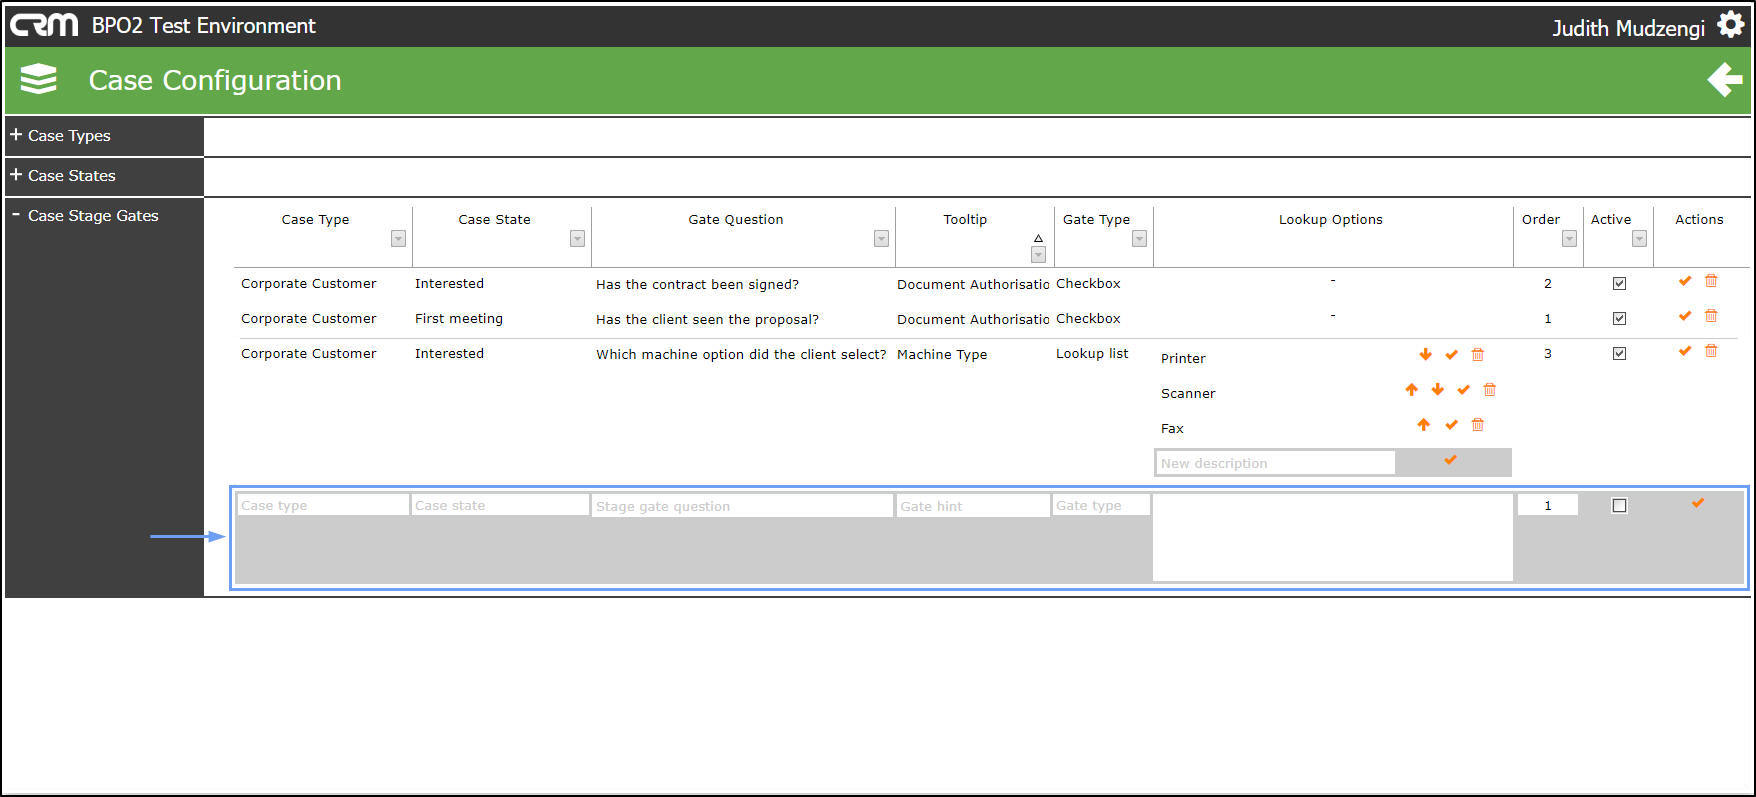
- Case Type: Select the Case Type for this Stage Gate.
- Case State: Select the Case State for this Stage Gate.
- Gate Question: Type in the Stage Gate question.
- Tool tip: The tooltip will come if when hoving on the stage gate on the case, as a reminder or hint regarding the Stage Gate question.
- Gate Type: You
can select:
- Checkbox: This is used for a Yes / No Stage Gate Question.
- Text Input: This is used for a Stage Gate Question that will require you to type in an answer.
- Lookup List: This is used for a Stage Gate Question that will require you to select an answer from the defined lookup list.
- Lookup Options: Type in the list of answers for the Lookup List Gate Type.
- Order: Select the order these gates should display.
- Active: Select whether this gate is Active or not.
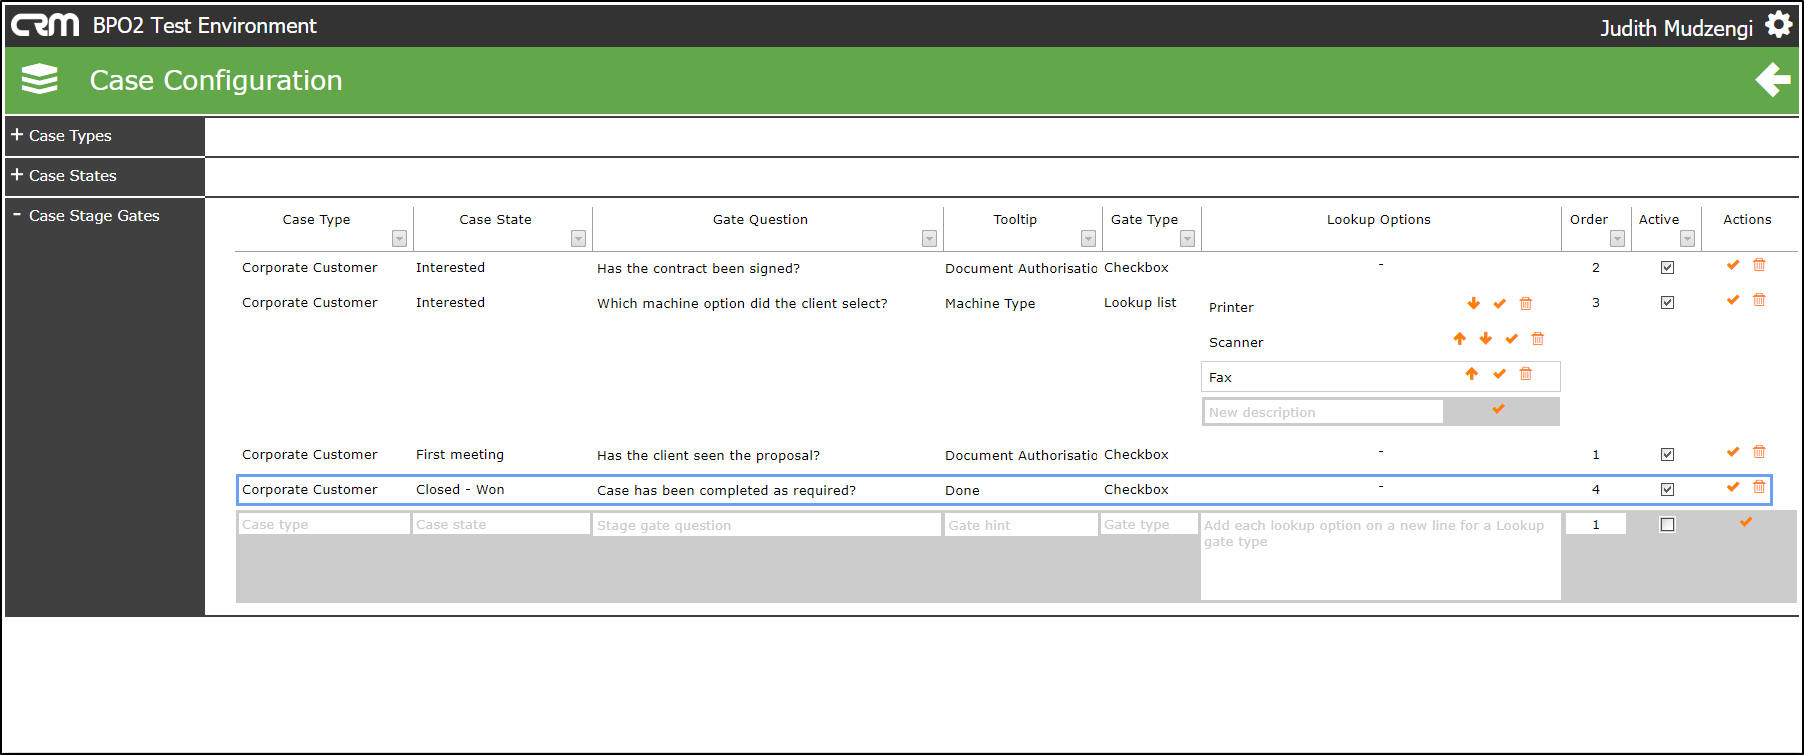
- Actions: Click on the 'Check Mark' to save the changes.
- The newly created Case Stage Gate will now be displayed in the Case Stage Gates section.
Manage Case Stage Gates
Edit A Case Stage Gate
- Click on any of the selection or text boxes you wish to make a change.
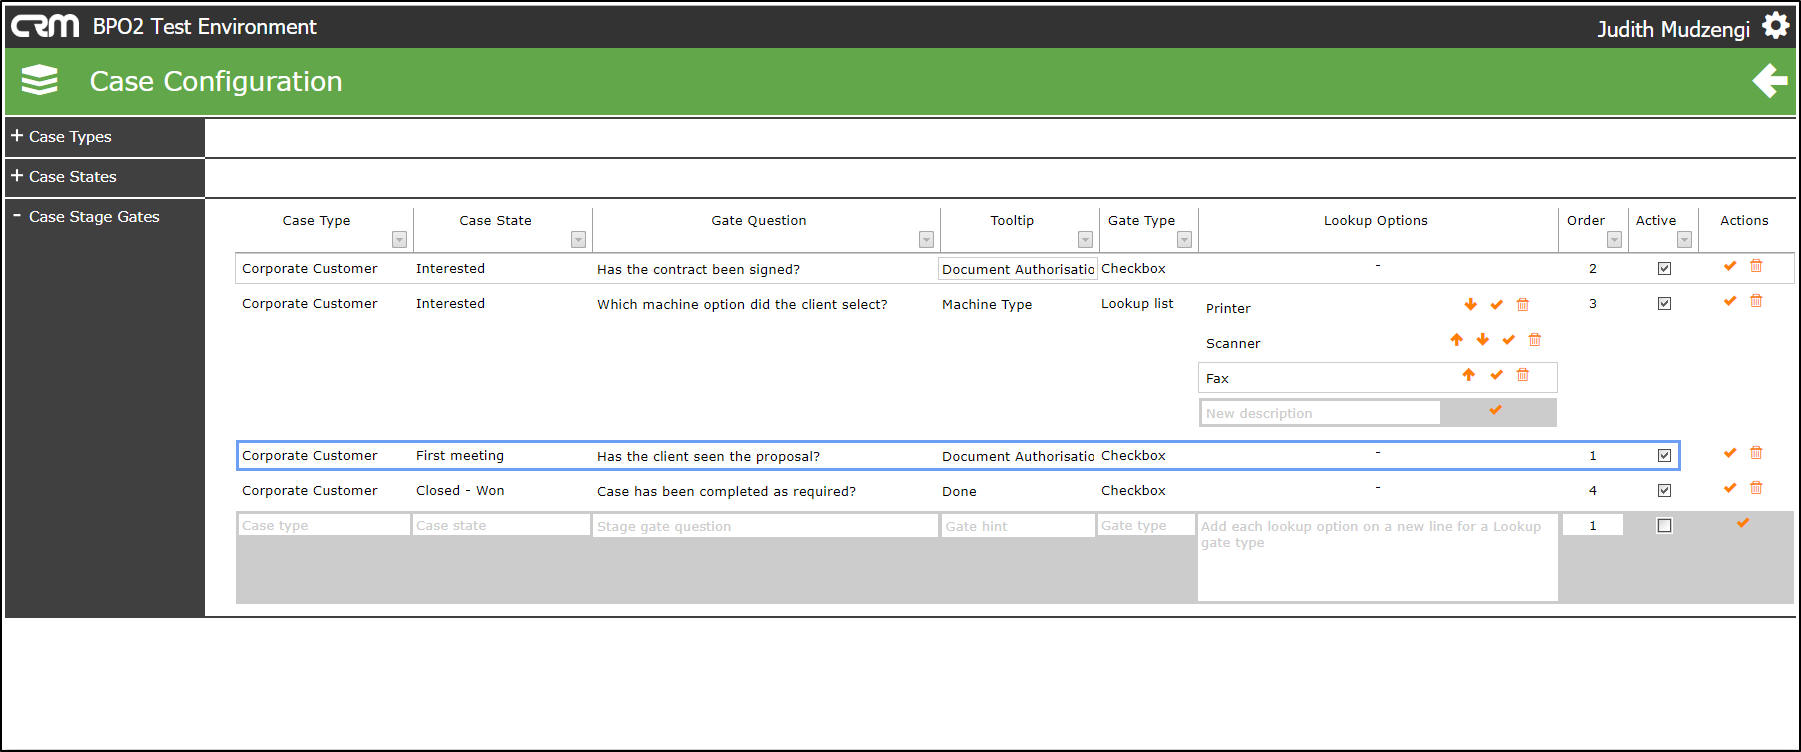
- Make the relevant changes.
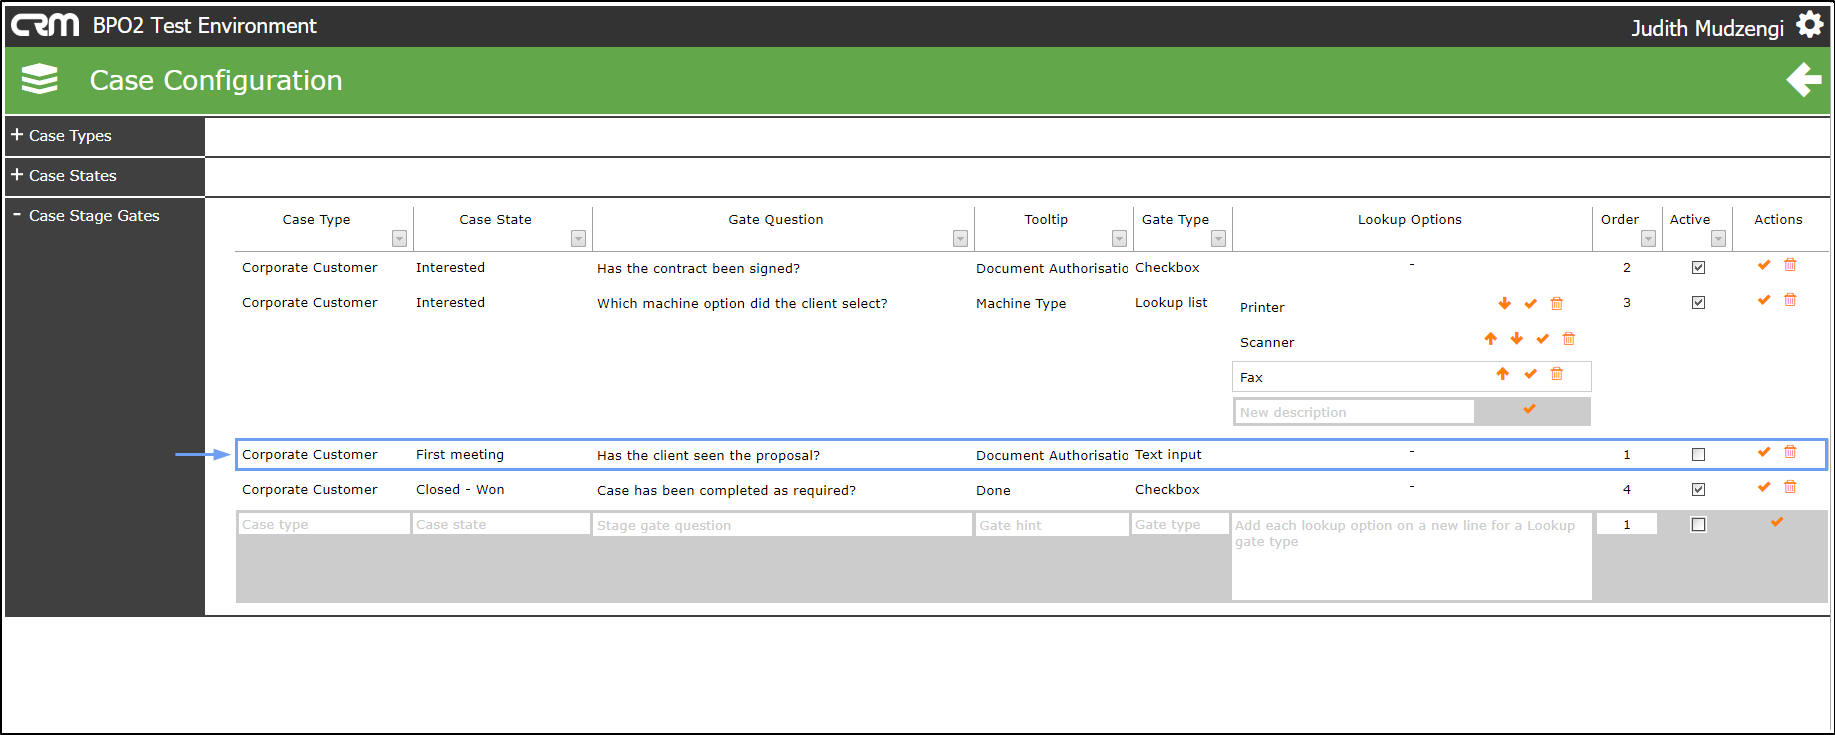
- Click on the 'Check Mark' to save the changes.
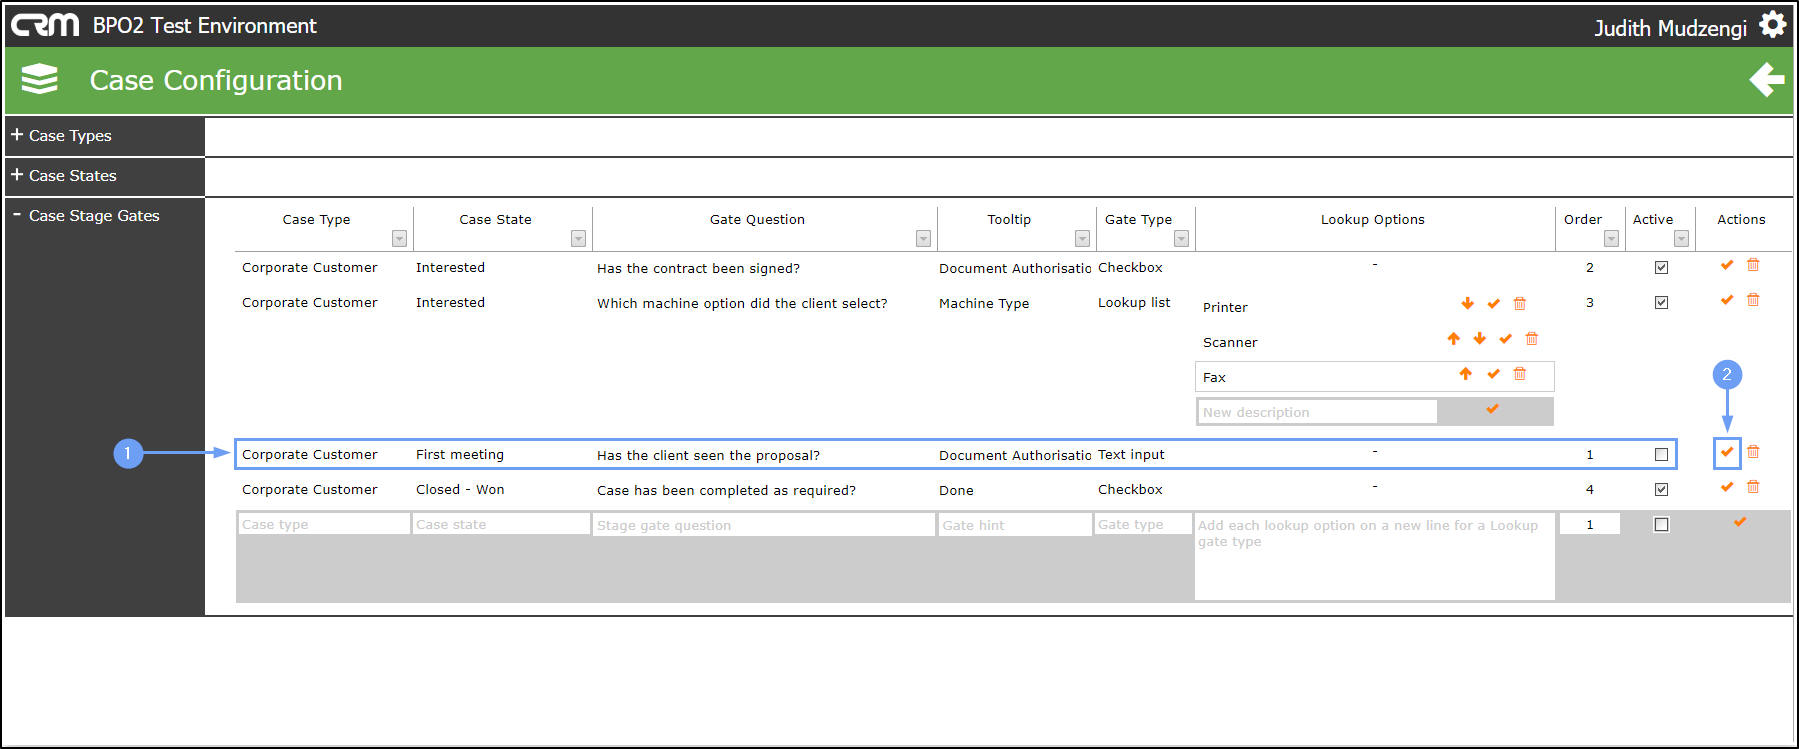
- The edited Case Stage Gate will be displayed in the Case Stage Gates section.
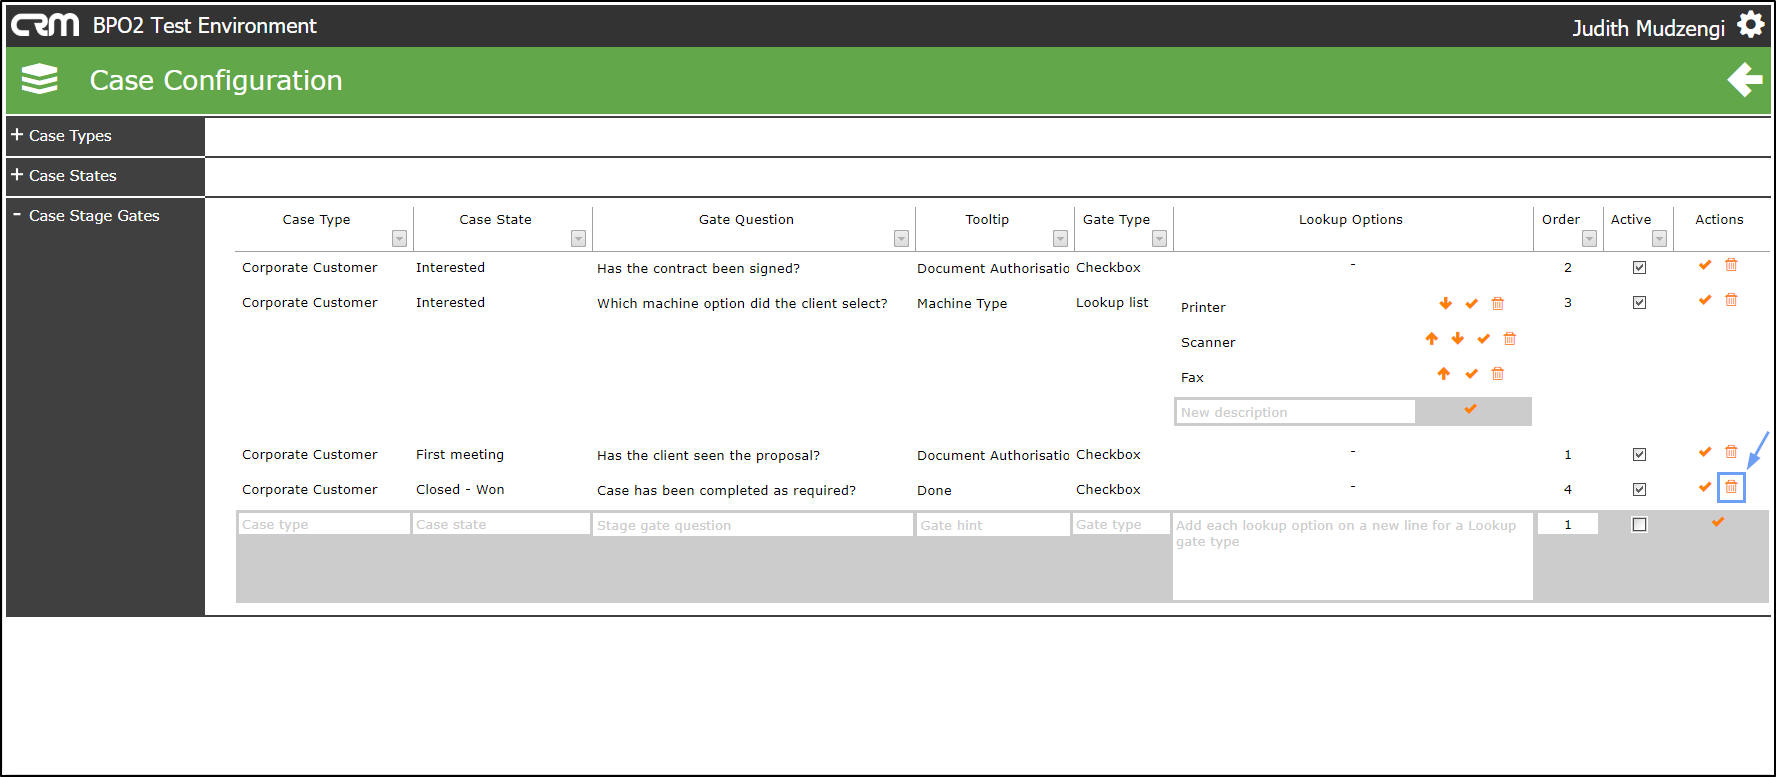
Delete A Case Stage Gate
- Click on the Delete icon on the case stage gate you wish to delete.
- A message box will pop up asking you;
- Are you sure you want to delete this Stage Gate?
- Click on Ok.
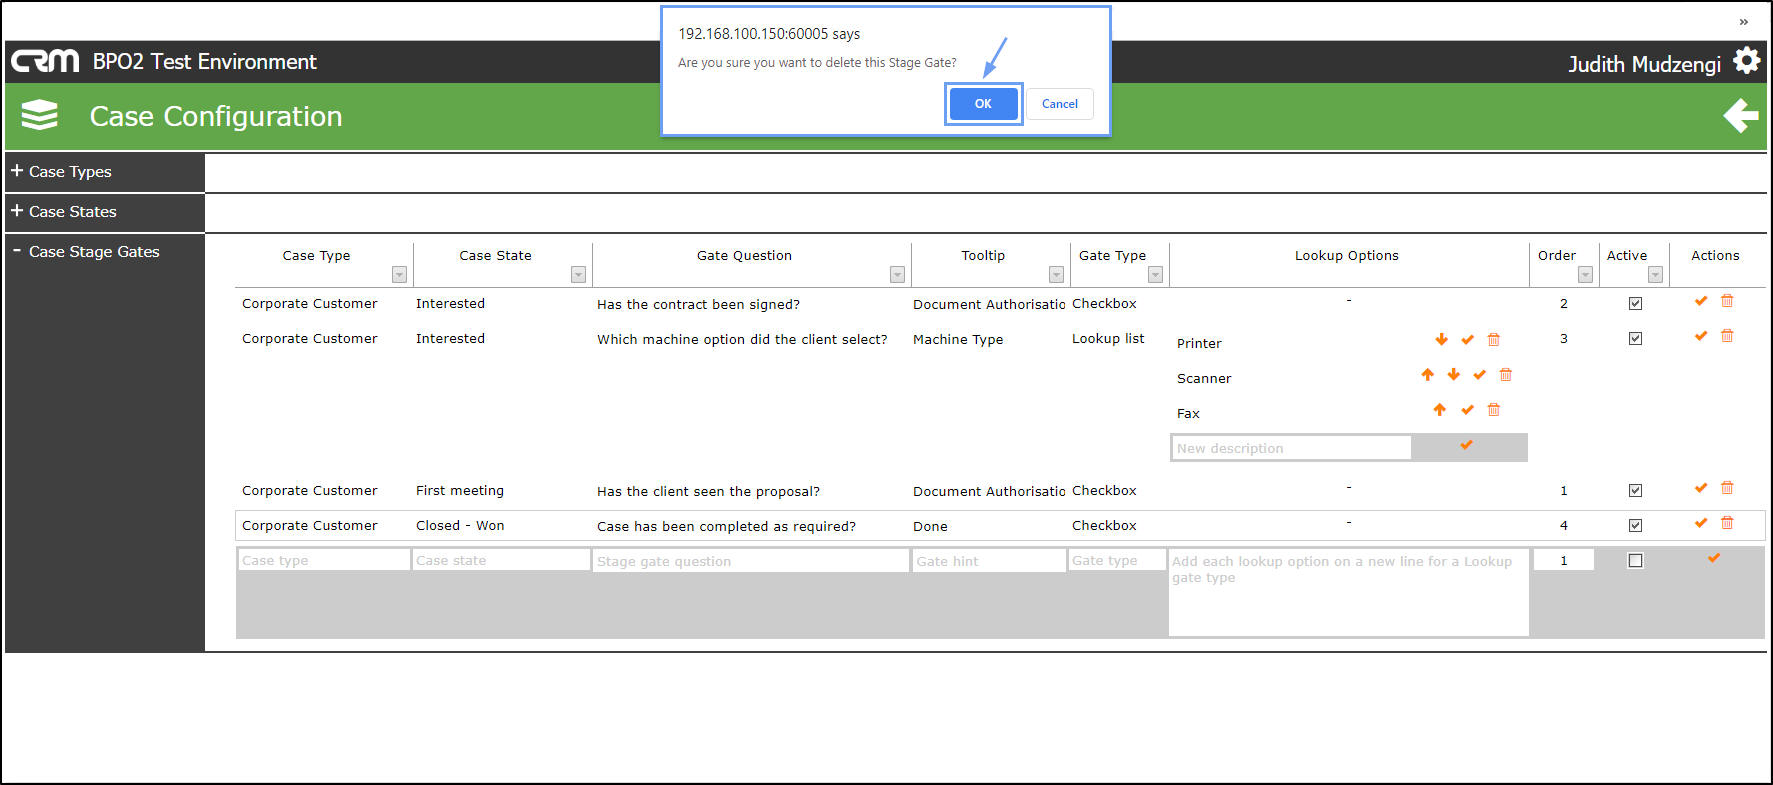
- The Case Stage Gate will be removed from the Case Stage Gates section.
CRM.003.003