We are currently updating our site; thank you for your patience.
Human Resources
Availability Codes
You must set up availability codes, e.g. Unavailable, Available in order to set up a Technician List.
You can schedule call workload, by assigning a technician and then using the Start and End work function on the call screen. This requires the technician to notify the call centre when work has begun and ended. Time taken to complete the work will be automatically calculated.
Alternatively, if you use Tech Connect, when the technician starts his day on his mobile device, his status will move from Unavailable to Available. The following default set up is a must (additional codes can be added to these if you wish to use this functionality manually)
- AVA: Available - Start Day
- UNA: Unavailable - Is Unavailable, Is Default or End Day
Using these function will give you the ability to pull the Activity report on the call screen, in order to see which technicians are available to assign to a new call; and to see who is currently working on assigned calls. Also, for clients who use Tech Connect, the technician's GPS location is stored. You can view their last known location from the Activity screen.
| Ribbon Access: Configurator > Human Resources > Availability Codes |
The Availability Codes listing screen will be displayed.
- Here you can view the availability codes currently on the system.
Add An Availability Code
- Click in the first editable field in the final row to 'activate' it.
Availability Code Details
- Now you can type in the details of the new availability code.
- Availability Code: Type in the availability code.
- Description: Type in the availability description.
- Default: Click in this check box if you wish this to be the default code.
- Note: Only one code should be set as default, and this is normally the Unavailable availability code.
- Is Unavailable: Click in this check box if you wish this to be an Is Unavailable code.
- Start Day: Click in this check box if you wish this to be a Start Day code.
- End Day: Click in this check box if you wish this to be an End Day code.
- Status: This will auto populate with A - Active.
- In this image, a new Unavailability code has been created:
- OL - On Leave
Save Availability Code
- Press Tab or Enter on your keyboard.
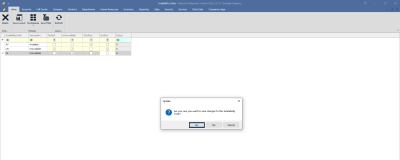
- An Update message box will pop up asking;
- Are you sure you want to save changes to this Availability Code?
- Click on Yes.
- The new availability code will be saved and a new row will be created in the Availability Codes data grid.
BPO.MNU.141


