Service
Work Orders - Warranties Issued
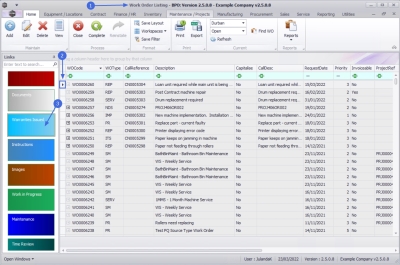
The Warranties Issued tile will direct you to the Issued Warranties![]() A warranty is a written assurance for an item given by the maker or supplier. This guarantee holds themselves responsible to repair or replace the item if it or its parts are defective. for the Work Order that have been linked to the underlying asset.
A warranty is a written assurance for an item given by the maker or supplier. This guarantee holds themselves responsible to repair or replace the item if it or its parts are defective. for the Work Order that have been linked to the underlying asset.
| Ribbon Access: Service > Work Orders |
- The Work Order Listing screen will be displayed.
- Click on the row of the work order you wish to view the warranty details of.
- Click on the Warranties Issued tile.
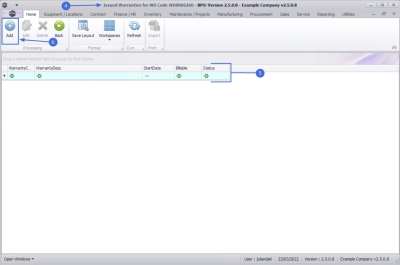
- The Issued Warranties for WO Code [work order code] screen will be displayed.
- Any warranties already linked to this work order, will display in the data grid.
Add Warranty
- Click on Add.
![]() Short cut key: Right click to display the Process menu list. Click on Add.
Short cut key: Right click to display the Process menu list. Click on Add.
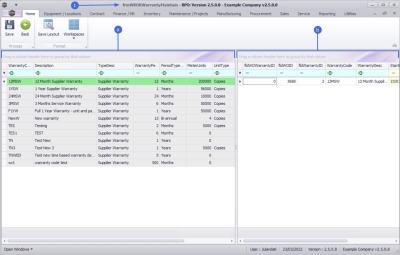
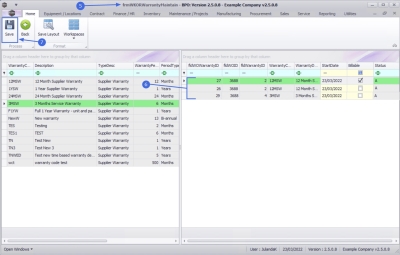
- The Work Order Warranty Maintain Screen will be displayed.
- The screen is divided into two data grid areas.
- A list of all the Warranty Type and Warranty Periods will be displayed on the left.
- All the Warranties that have been linked to the work order will be displayed on the right.
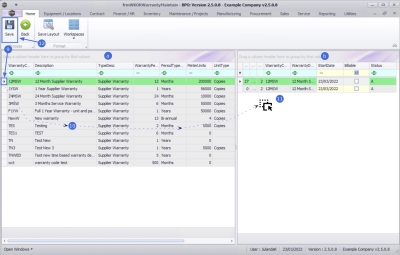
- To link a warranty to the asset on the work order, click on the row, in Grid A, to select the warranty.
- Click and hold down the mouse button on the warranty and drag the item from Grid A and drop it in Grid B.
- As you drop the warranty item, the screen will be updated with the selection.
- Continue adding the warranties to the work order as required.
Remove Warranty
- To remove a Warranty that has incorrectly been added to Grid Area b, click, hold down and drag the warranty back to Grid Area a.
 Note that you will only be able to remove a warranty using drag-and-drop before the screen has been Saved.
- When you have finished updating the screen, click on Save.
- You will return to the Issued Warranties for WO Code [work order code] screen.
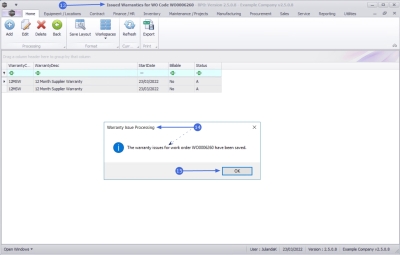
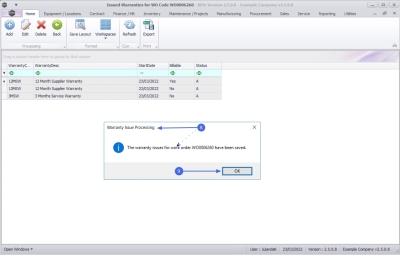
- When the Warranty Issue Processing message displays to confirm;
- The warranty issues for work order [work order code] have been saved.
- Click on OK.
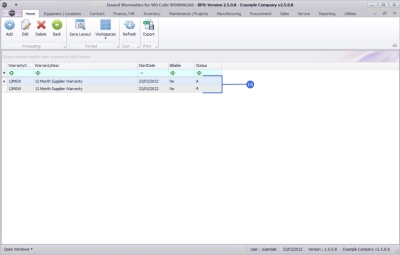
- The warranties you have linked to the work order will be displayed in the data grid.
Edit Warranties Issued
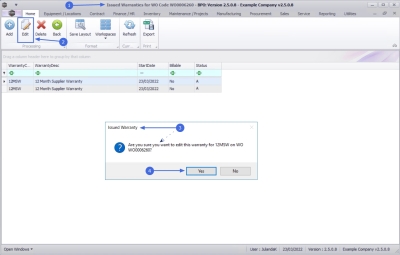
- From the Issued Warranties for WO Code [work order code] screen,
- Click on Edit.
![]() Short cut key: Right click to display the Process menu list. Click on Edit.
Short cut key: Right click to display the Process menu list. Click on Edit.
- When you receive the Issued Warranty message to confirm;
- Are you sure you want to edit this warranty for [warranty code] on WO [work order code]?
- Click on Yes.
- The Work Order Warranty Maintain screen will be displayed.
- You can;
- add an additional warranty to the work order using drag-and-drop,
- set the warranty as Billable by clicking in the Billable check box, or
- remove from Billable, by clicking in the Billable check box to deselect the warranty.
- When all the required changes have been made, click on Save.
- When you receive the Warranty Issue Processing message to confirm;
- The warranty issues for work order [work order code] have been saved.
- Click on OK.
Delete Warranties Issued
- From the Issued Warranties for WO Code [work order code] screen,
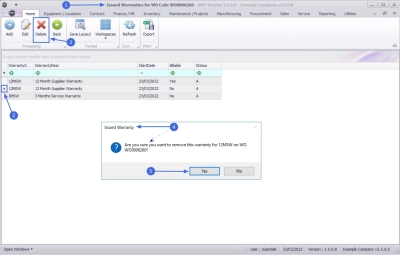
- Click on the row of the warranty you wish to remove from the work order.
- Click on Delete.
- When you receive the Issued Warranty message to confirm;
- Are you sure you want to remove this warranty for [warranty code] on WO [work order code]?
- Click on Yes.
![]() Short cut key: Right click to display the Process menu list. Click on Delete.
Short cut key: Right click to display the Process menu list. Click on Delete.
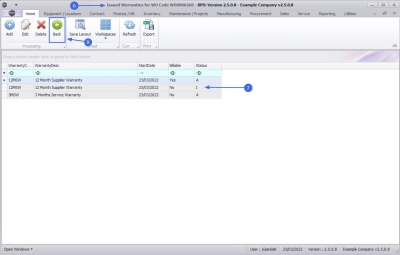
- You will return to the Issued Warranties for WO Code screen,
- Note that the warranty you have selected to be deleted displays and I - Inactive Status.
- Click on Back to return to the Work Orders Listing screen.
MNU.072.023

