Services
Work Orders - Invoices
From the Invoices tile you can Add, Edit, add a Comment and Reference, View and Print an Invoice.
The Issues Functions tab will display stock that is issued to the invoice, where it is an OTC Invoice.
| Ribbon Access: Service > Work Orders |

- The Work Order Listing screen will be displayed.
- Select the Site where the work order was issued.
- The example has Durban selected.
- Select the Status for the work order.
- The example has Active selected.
- Select the row of the work order you wish to invoice.
- Click on the Invoices tile.

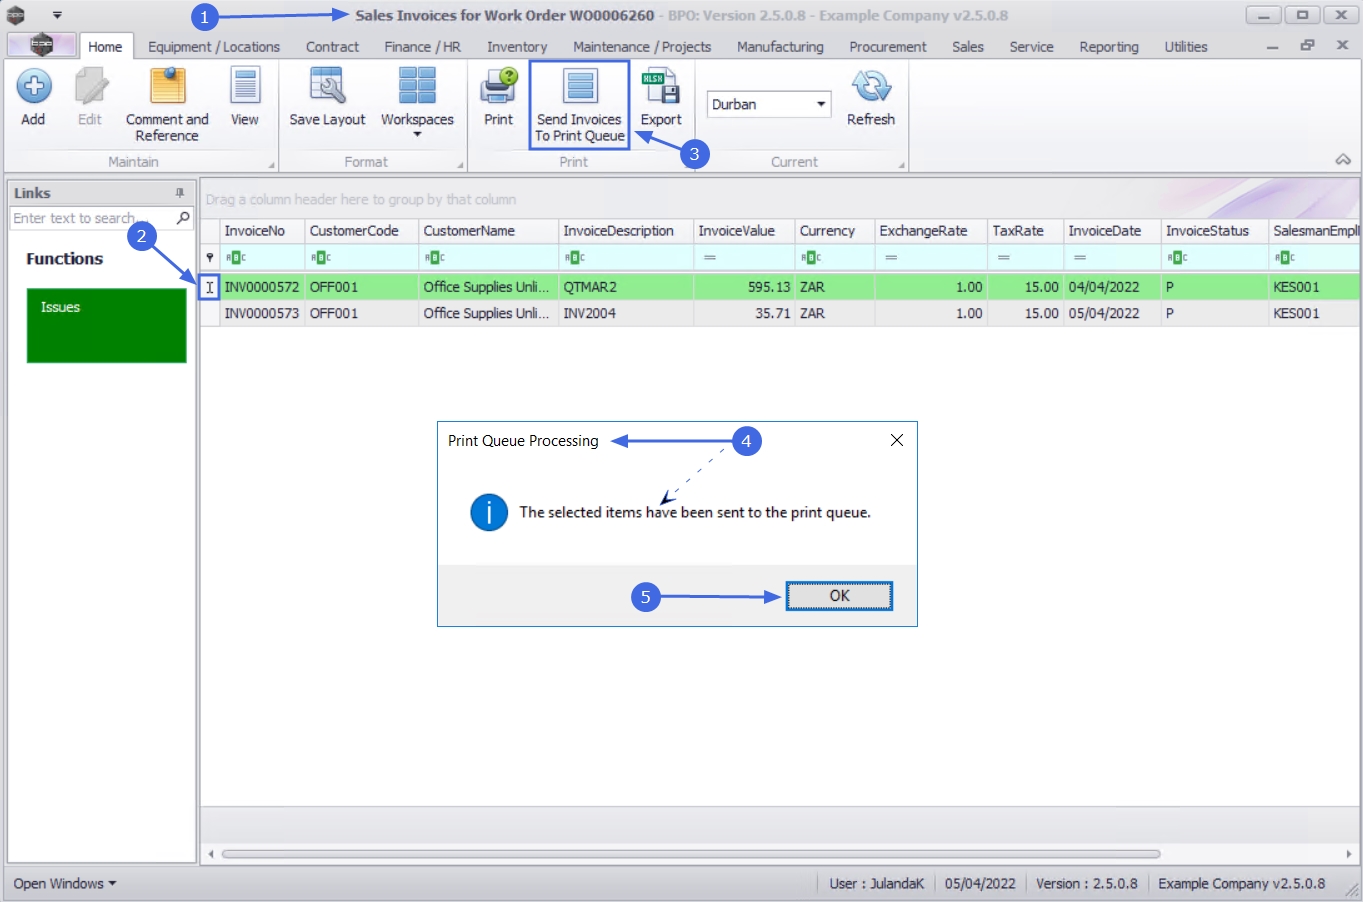
- The Sales Invoices for Work Order [work order number] screen will display.
- The Site from the Work Order Listing screen will not automatically pull through to the Sales Invoices for Work Order screen, click on the down arrow to change the Site filter.
Add Sales Invoice
- Click on Add.
![]() Short cut key: Right click to display the Process menu list. Click on Add.
Short cut key: Right click to display the Process menu list. Click on Add.

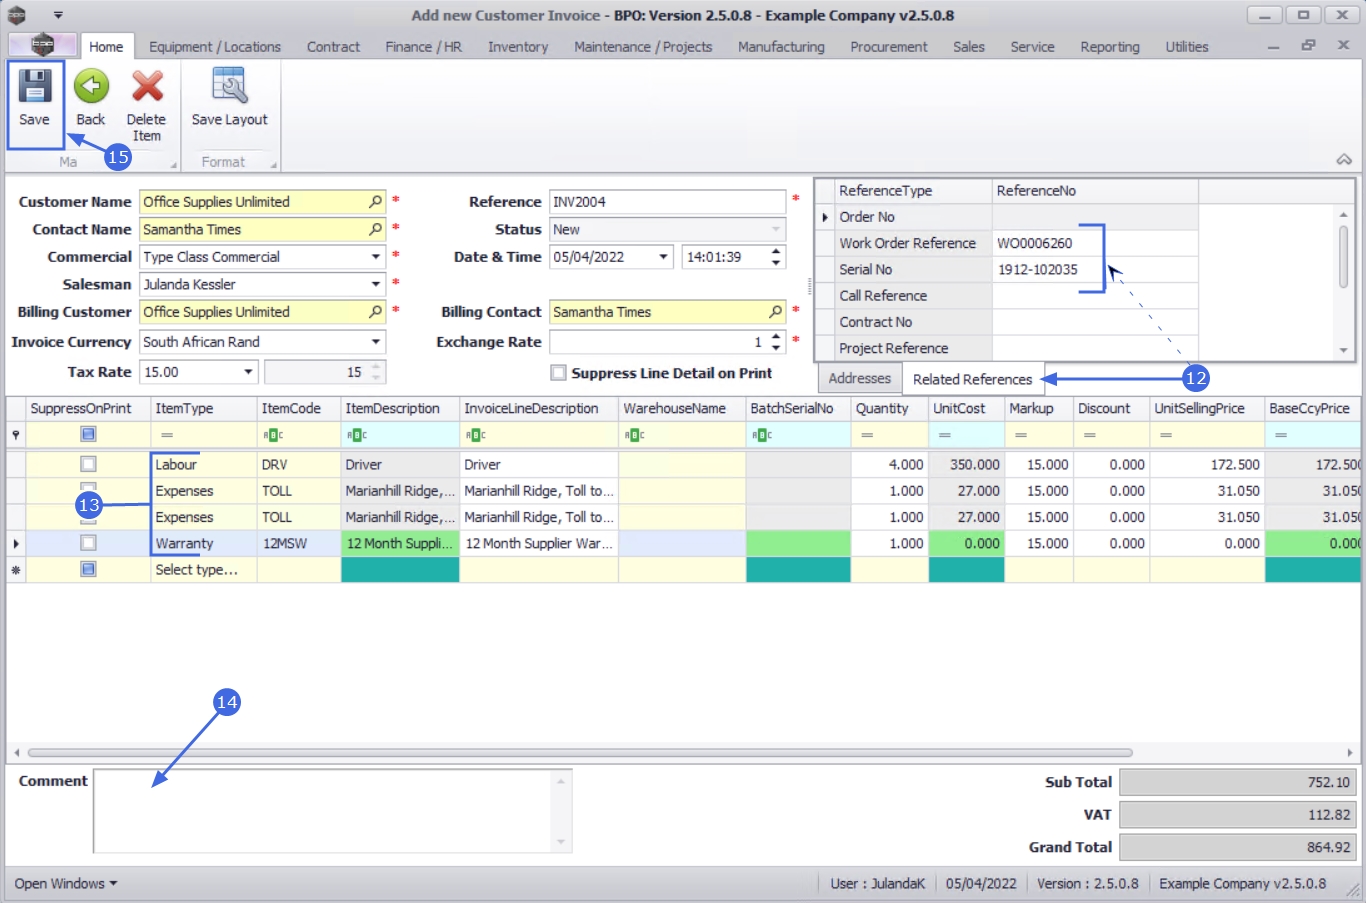
- The Add new Customer Invoice screen will display.
- Complete the Sales Invoice Header and the Financial Header information.
- Confirm the Billing and Shipping Addresses, if these fields were not populated when you entered the Header information.

- Click on the Related References tab to enter the reference information for the Customer Order.
- The Work Order Reference has been auto populated with the selected Work Order number.
- When referencing a work order which has stock issued, but not yet invoiced, will auto populate the frame.
- Edit the Items to be Invoiced as required.
-
-
Drag and drop rows to set the order you wish the items to be displayed on the sales invoice. This order will directly be pulled into the printed invoice when generated.

-
- Click in the Comments text box to type in a comment related to the invoice.
- Click on Save to save the Customer Invoice details.
![]() For a detailed handling of this topic refer to Invoices - Create Sales Invoice (OTC)
For a detailed handling of this topic refer to Invoices - Create Sales Invoice (OTC)
- The Sales Invoices for Customer listing screen will be updated with the new Invoice you have created.

Edit Sales Invoice
- From the Sales Invoices for Customer [customer code] screen,
- Ensure that the correct Site has been selected, by clicking on the arrow to change the Site filter.
- The Sales Invoices for Customer listing screen will be updated with the Customer Invoices for the selected site.
- Select the row of the Invoice you wish to edit.
- Click on Edit.
![]() Short cut key: Right click to display the Process All groups menu list. Click on Edit.
Short cut key: Right click to display the Process All groups menu list. Click on Edit.

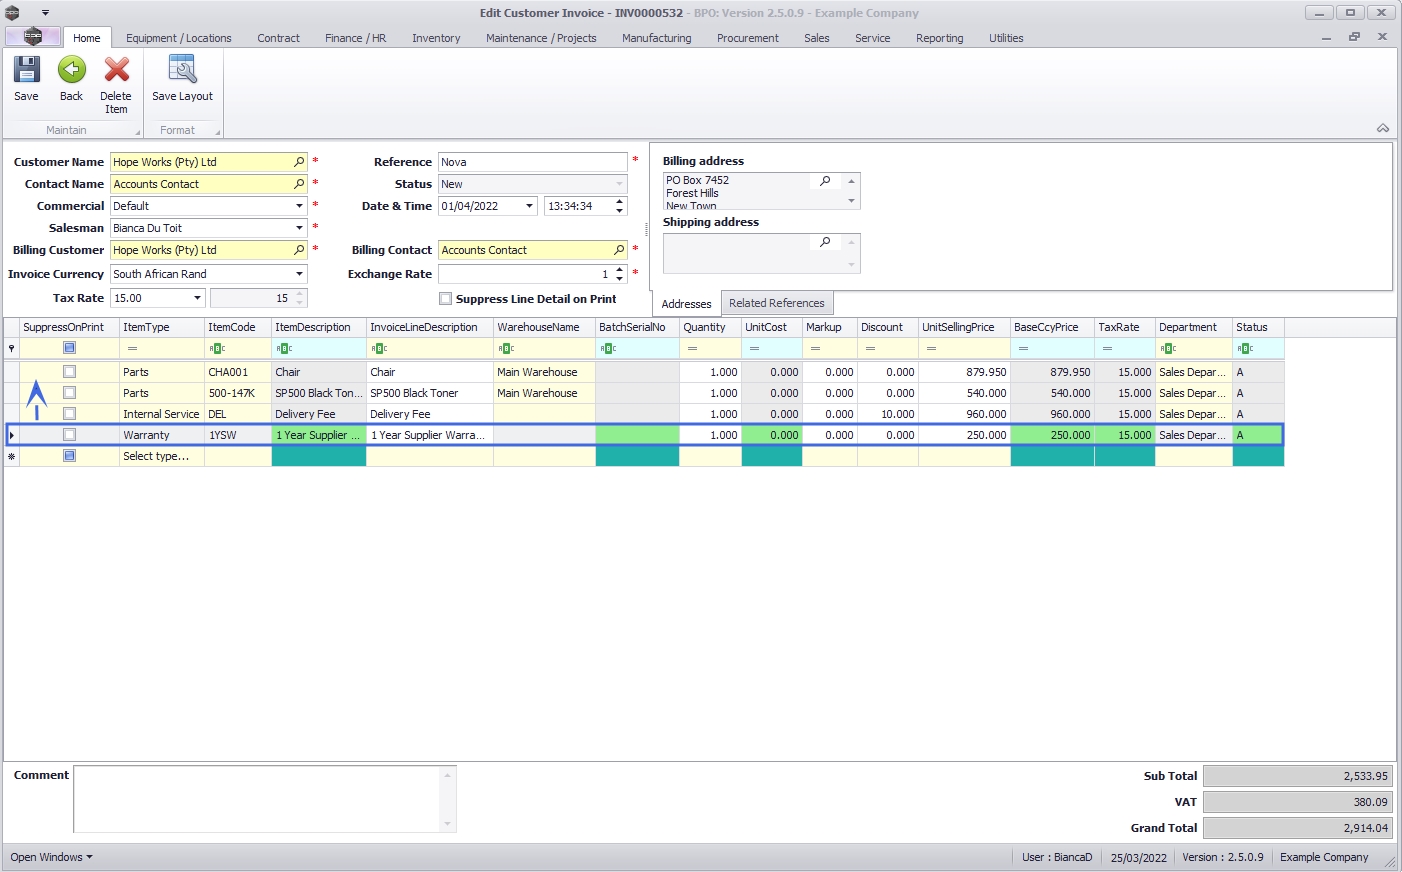
- The Edit Customer Invoice - [invoice number] screen will display.
- Make the required changes to the Heading Information, Addresses or Related References tabs.
- Make the required changes to the Invoice Item frame.
- To Add a new Invoice item, click on the Select type text box of the first available item line.
- To remove an item, click on the row of the item you wish to remove and click on Delete Item.
Drag and drop rows to set the order you wish the items to be displayed on the sales invoice. This order will directly be pulled into the printed invoice when generated.
- Click on Save.
For a detailed handling of this topic refer to Invoices - Edit Sales Invoice

You will return to the updated Sales Invoices for Customer listing screen.
Comment and Reference
You will be able to add or view the Comment and Reference information for the Customer Invoice from the Work Order Listing Screen.
- From the Sales Invoices for Customer [customer code] screen,
- Select the row of the Invoice you wish to add or view the Comment and Reference information for.
- Click on Comment and Reference.
![]() Short cut key: Right click to display the Process menu list. Click on Comment and Reference.
Short cut key: Right click to display the Process menu list. Click on Comment and Reference.

- The Invoice No. [invoice number] comment maintenance screen will display.
- Make the necessary changes to, or add the required information to the Reference or Comment fields.
- Click OK to update the Invoice information and to return to the Sales Invoice for Customer listing screen.
![]() For a detailed handling of this topic refer to Invoices - Comment and References
For a detailed handling of this topic refer to Invoices - Comment and References

View Customer Invoice
![]() You will only be able to view and print the Invoice, no changes can be made in the View screen.
You will only be able to view and print the Invoice, no changes can be made in the View screen.
- From the Sales Invoices for Work Order [work order number] screen,
- Select the row of the Invoice you wish to view.
- Click on View.

- The View Customer Invoice - [invoice number] screen will display.
- Note the Comment and Reference Number fields have been updated with the changes made, using the Comment and Reference button.
- Click on Back to return to the Sales Invoice for Customer listing screen.
![]() For a detailed handling of this topic refer to View Tax Invoice
For a detailed handling of this topic refer to View Tax Invoice

Print Invoice
![]() You will be able to Print, Email or Print and Email the Sales Invoice from the Sales Invoices for Customer listing screen or the View Customer Invoice screen.
You will be able to Print, Email or Print and Email the Sales Invoice from the Sales Invoices for Customer listing screen or the View Customer Invoice screen.
- From the Sales Invoices for Customer [customer code] screen,
- Click on the row of the Invoice you wish to print.
- Click on Print.
- The Select the option as desired message will display.
- Click on the radio button of the option you require.
 When selecting Email Invoice, the invoice will be emailed via the BPO Email Service on the server and not from MS Outlook.
- The example has Print Invoice selected.
- Click on Accept.

- The Tax Invoice will display in the Preview screen.
- From here you can make cosmetic changes to the document, as well as Save, Print, Add a Watermark, Export or Email the Invoice.
- Click on Close to return to the Sales Invoices for Customer screen.
![]() Refer to Proforma Invoice and Printing a Sales Invoice for a detailed handling of the functions.
Refer to Proforma Invoice and Printing a Sales Invoice for a detailed handling of the functions.

Send Invoices To Print Queue
- You can send Invoices to the Print Queue directly from the Sales Invoices for Customer [customer code] listing screen, instead of going to the Print Queue Reprint screen. This means that a batch of invoices can be send to the customer.
- Print Queue is only available where the status is set to Printed.
- From the Sales Invoices for Customer [customer code],
- Select the Invoice(s) you wish to send to the Print Queue.
-
To select a range of invoices: Click on the row of the first Invoice. Hold down the Shift key on your keyboard and click on the row of the last invoice in your list.
-
To select alternate invoices: Hold down the Ctrl (Control) key on your keyboard and click on the row of each Invoice you wish to include in the selection.
- Click on Send Invoices to Print Queue.
- When you receive the Print Queue Processing message to confirm that;
- The selected items have been sent to the print queue.
- Click on OK.
![]() For a detailed handling of this topic refer to Invoices - Send Invoices To Print Queue
For a detailed handling of this topic refer to Invoices - Send Invoices To Print Queue
Issues Tile
- From the Sales Invoices for Customer [customer code] listing screen, you can view the stock issued for a selected Invoice.
- Click on the row of the Invoice you wish to view the linked issued items.
- Click on the Issues tile.

- The Issues for Sales Invoice: [invoice number] listing screen will display.
Print Part Issue Note
- Click on the row of the Part Issue Note you wish to print.
- Click on Print.

- The Part Issue Note for the Sales Invoice will display in the Preview screen.
- From here you can make cosmetic changes to the document, as well as Save, Print, Add a Watermark, Export or Email the Part Issue Note.
- Click Close to return to the Issues for Sales Invoice screen.

MNU.072.029