We are currently updating our site; thank you for your patience.
BPO2
Site Selection
There are many screens in BPO which require Site selection before proceeding with a process. Not selecting a Site in these scenarios will cause an 'error' message either when trying to move on to the next screen or when attempting to save information.
Default Site Configuration
The default Site displayed in the Site filter is dependant on what is configured on the user.
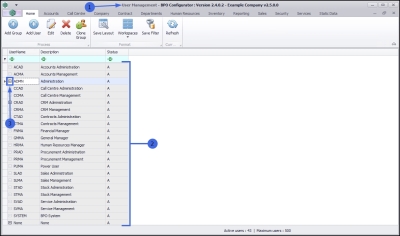
| Ribbon Access: Configurator > Security > User Management |
- The User Management screen will display.
- Expand the User Group that contains the user where you wish to check the set up details.
- In this example, the user is in the Administration group.
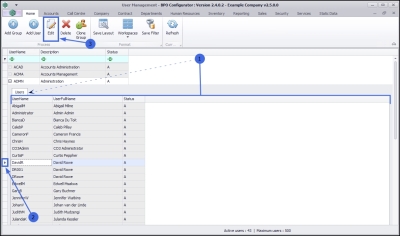
- The Users frame will expand.
- Select the row of the user you wish to view. (This will be the user linked to the system where you are testing the Site filter.)
- Click on Edit.
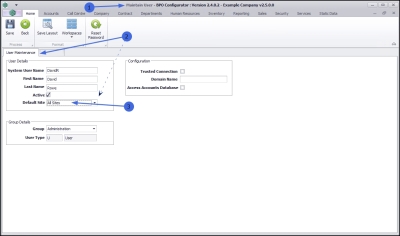
- The Maintain User screen will open.
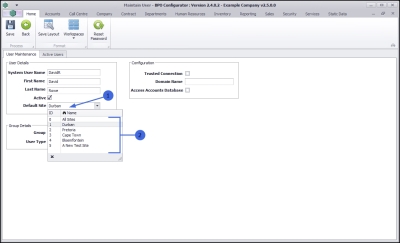
- In the User Maintenance frame, look for the Default Site field.
- Whatever is set in this field will be the default site that displays in the Site filter in BPO.
'All Sites' set as the Default Site
Example 1
- In this example, the Default Site is set to All Sites.
This means that in BPO, the user will need to select the correct Site each time they are actioning a screen that includes a Site filter.
Singular Site set as the Default Site
Example 2
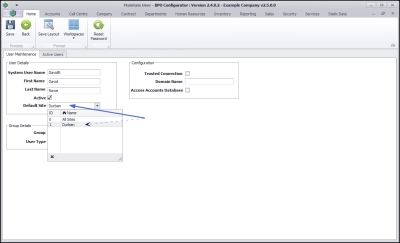
If the company has only one Site (branch) the Default Site field may be set to that singular Site. The user will not need to select a Site when they are working in screens that contain a Site filter.
Multiple Sites, most common Site set as the Default Site
Example 3
- If the company has more than one Site, the Default Site will often be set to the most commonly used Site.
- If the user needs to work in a different Site, this alternative Site will need to be selected from the drop-down list in BPO.
Site Filter Selection in BPO
In BPO, the Site filter would display as shown in the images below. In this process, the Inventory module has been selected as an example.
| Ribbon Access: BPO > Inventory > Part Requests |
'All Sites' set as the Default Site
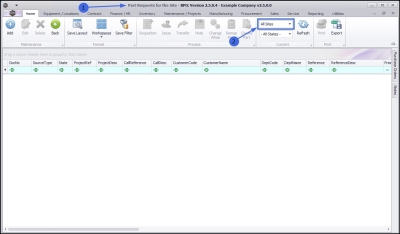
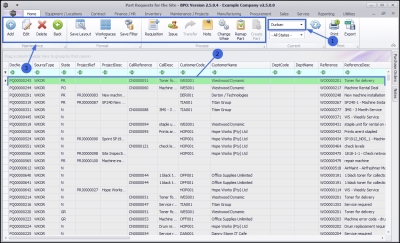
- The Part Requests for the Site listing screen will open.
- Note that the Site filter is set to All Sites (Example 1 above).
The user will need to manually select the Site.
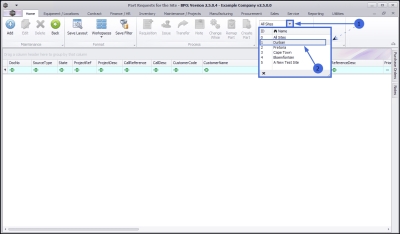
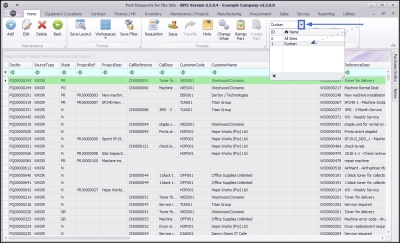
- Click on the drop-down arrow in the Site field and select the relevant Site from the drop-down list.
- In this example, Durban is selected.
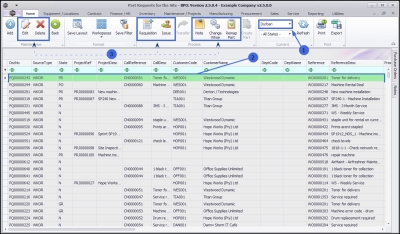
- The selected Site will popular the Site filter field.
- The screen will refresh to display the data relevant to the selected Site.
- Now that there is data in the grid, certain Action buttons will activate according to the auto-selected first row and the State/Type Selection.
Singular Site set as the Default Site
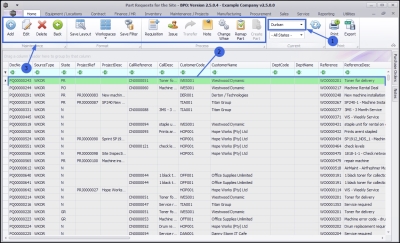
- In the Part Requests for the Site screen, note that the Site filter is set to a named Site (Example 2 above).
- The screen opens with the data grid populated with the data linked to the Site.
- The Actions buttons are activated (dependant on both the Site and State/Type Selection).
There will be no other Site available for selection in the drop-down list.
Multiple Sites, most common Site set as the Default Site
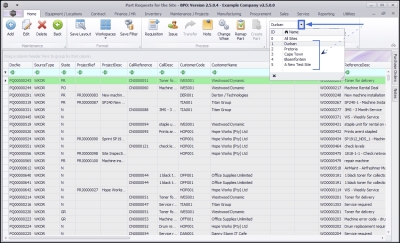
- In the Part Requests for the Site screen, note that the Site filter is set to a named Site (Example 3 above).
- The screen opens with the data grid populated with the data linked to the Site.
- The Actions buttons are activated (dependant on both the Site and State/Type Selection).
There are multiple Sites available for selection in the drop-down list. If the user wishes to work in a Site other than the default one, this must be selected from the list.
ST.000.001

