We are currently updating our site; thank you for your patience.
Contracts
Release / Remove / Approve / Reject Processes
After a credit note has been created, it has to go through an approval process which includes:
- Releasing the Credit Note for Approval or Removing the Credit Note from Approval
- Approving or Rejecting the Credit Note
- Printing the Credit Note (this step will post the transaction to Pastel)
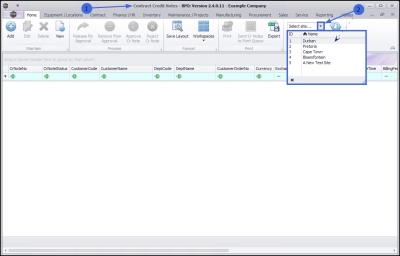
| Ribbon Access: Contract > Contract Credit Notes |
- The Contract Credit Notes screen will be displayed.
Release Contract Credit Note for Approval
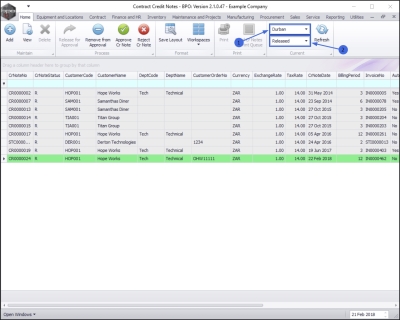
- Click on the drop-down arrow in the Site field and select from the list, the Site in which you wish to work.
- In this example, Durban is selected.
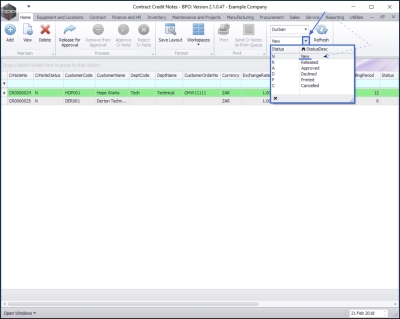
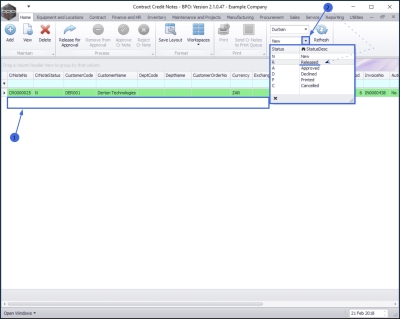
- This screen will open by default with the Status set to New. This does not need to be changed, in order to release a Contract Credit Note.
Select Credit Note
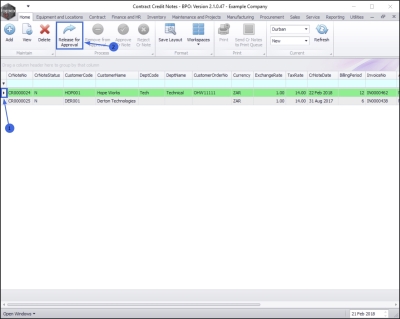
- Select the row of the contract credit note that you wish to release for approval.
Release Credit Note
- Click on Release for Approval.
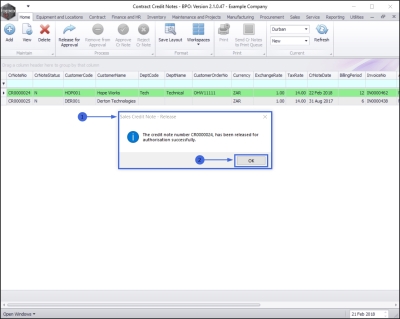
- A Sales Credit Note - Release message box will pop up informing you that;
- The Credit Note number [ ] has been released for authorisation successfully.
- Click on Ok.
- The selected contract credit note will be removed from the Contract Credit Notes listing screen where the status is set to New.
View Credit Note in the Released Status
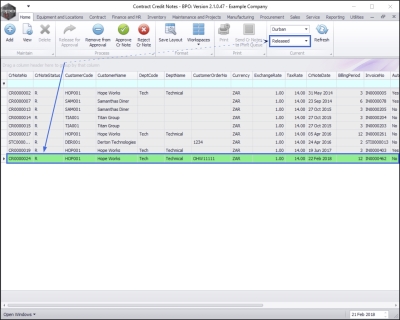
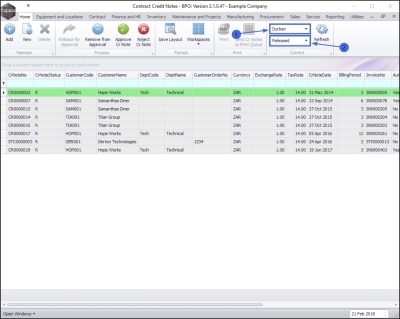
- Select the Released status.
- The selected contract credit note has been moved to the Contract Credit Notes listing screen where the status is set to Released.
Remove Contract Credit Note from Approval
You will need to follow this process is used in order to delete a contract credit note and subsequently raise a new credit note, if required, as you cannot delete the credit note in the Released status.
Select the Site and Status
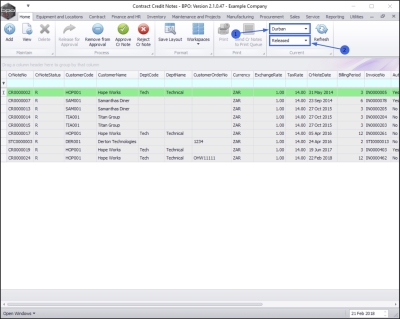
- In the Contract Credit Notes listing screen, select the Site.
- In this image Durban has been selected.
- Select the Status.
- This must be set to Released.
Select Credit Note
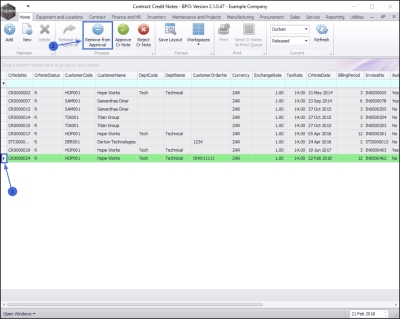
- Select the row of the contract credit note that you wish to remove from approval.
Remove Credit Note
- Click on Remove from Approval.
Credit Note Placed 'On Hold'
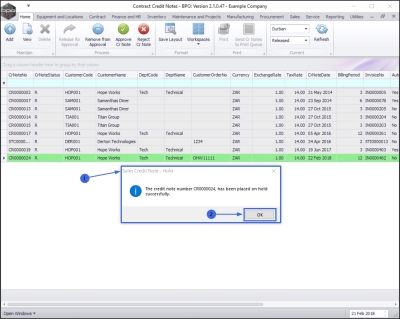
- A Sales Credit Note - Hold message box will pop up informing you that;
- The credit note number [ ], has been placed on hold successfully.
- Click on Ok.
View Removed Credit Note in New Status
- The selected contract credit note will be removed from the Contract Credit Notes listing screen where the status is set to Released.
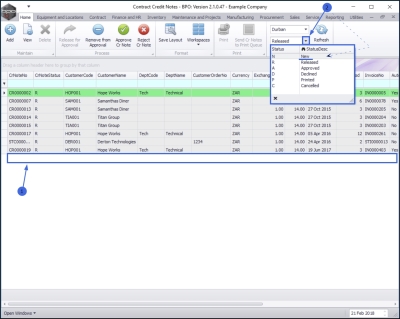
- Select the New status.
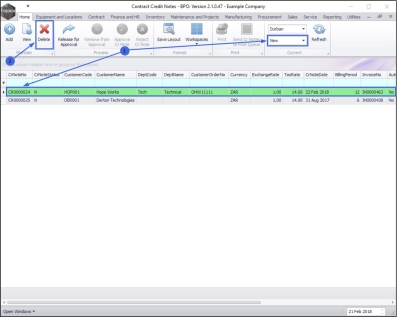
- The credit note has been moved back to the Contract Credit Notes listing screen where the status is set to New.
- You can now Delete the contract credit note (and raise a new one if required).
Approve Contract Credit Note
Select the Site and Status
- In the Contract Credit Notes screen, select the Site.
- In this image Durban has been selected.
- Select the Status.
- This should be set to Released.
Select Credit Note
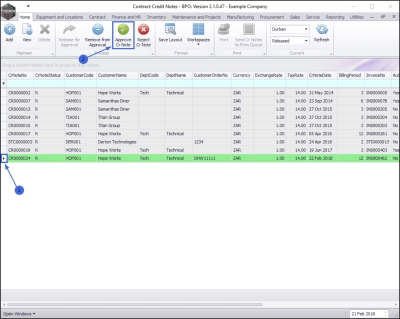
- Select the row of the contract credit note that you wish to approve.
Approve Credit Note
- Click on Approve Cr Note.
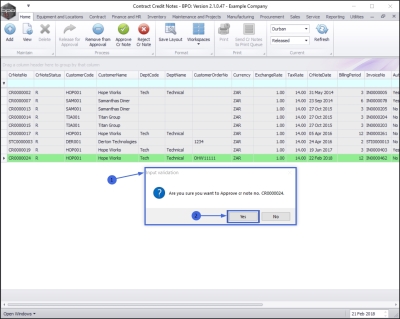
- An Input Validation message box will pop up asking;
- Are you sure you want to Approve cr note no. [ ]?
- Click on Yes.
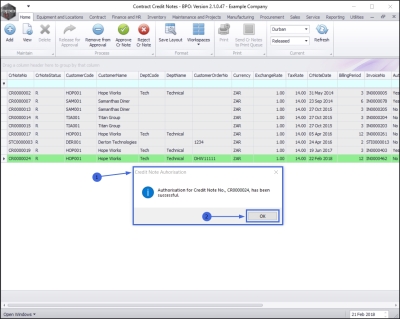
- A Credit Note Authorisation message box will pop up informing you that;
- Authorisation for Credit Note No. [ ], has been successful.
- Click on Ok.
View Credit Note in the Approved Status
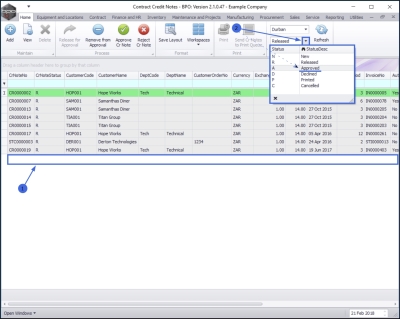
- The selected credit note will be removed from the Contract Credit Notes listing screen where the status is set to Released.
- Select the Approved status.
- The selected credit note has been moved to the Contract Credit Notes listing screen where the status is set to Approved.
Reject Contract Credit Note
Select the Site and Status
- In the Contract Credit Notes screen, select the Site.
- In this image Durban has been selected.
- Select the Status.
- This should be set to Released.
Select Credit Note
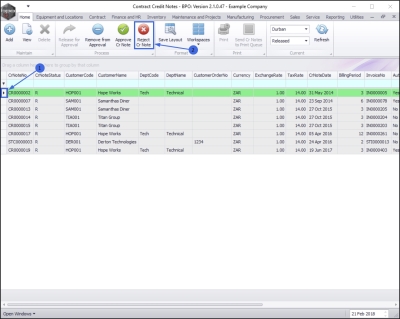
- Select the row of the contract credit note that you wish to reject.
Reject Credit Note
- Click on Reject Cr Note.
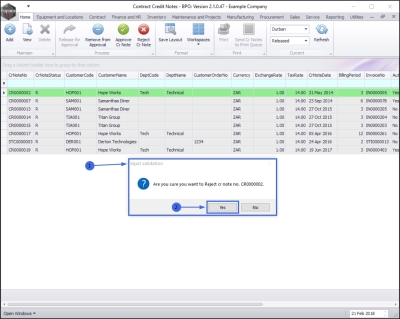
- An Input Validation message box will pop up asking;
- Are you sure you want to Reject cr note no. [ ]?
- Click on Yes.
Add Rejection Comments
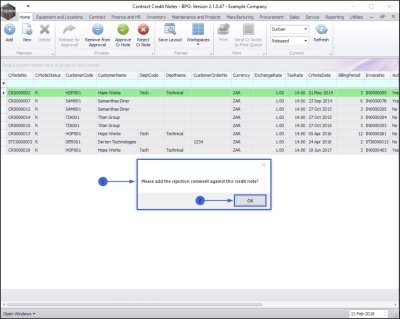
- A second message box will pop up asking;
- Please add the rejection comment against this credit note?
- Click on OK.
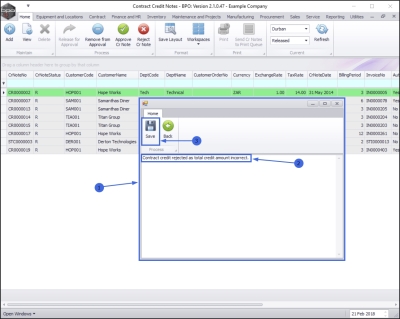
- The Rejection Comment screen will pop up.
- Type a comment relating to the reason for this contract credit note rejection, in the text box.
- Click on Save.
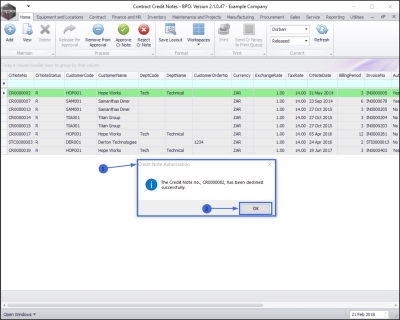
- A Credit Note Authorisation message box will pop up informing you that;
- The Credit Note no., [ ] has been declined successfully.
- Click on Ok.
View Credit Note in Declined Status
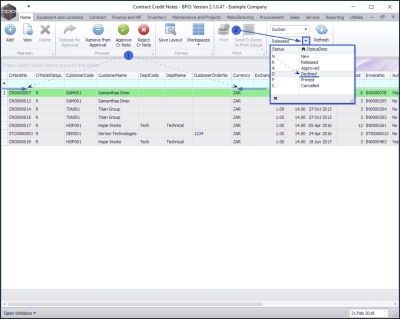
- The selected credit note will be removed from the Contract Credit Notes listing screen where the status is set to Released.
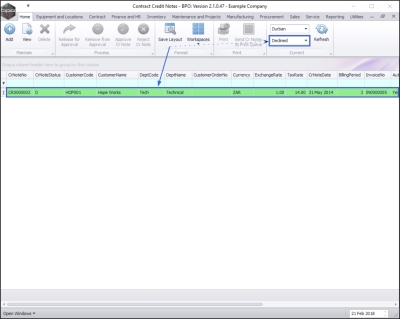
- Select the Declined status.
- The selected credit note has been moved to the Contract Credit Notes listing screen where the status is set to Declined.
Print Credit Note
Select the Site and Status
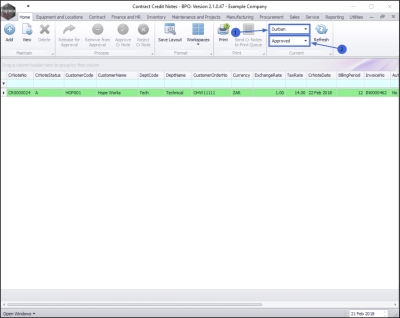
- In the Contract Credit Notes listing screen, select the Site.
- In this image Durban has been selected.
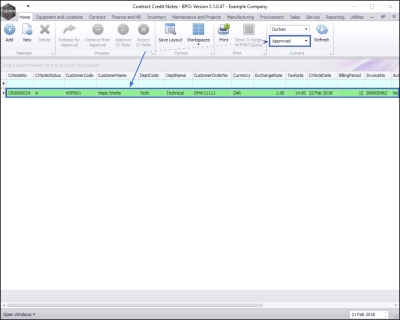
- Select the Status.
- This must be set to Approved.
Select Credit Note
- Select the row of the contract credit note that you wish to print.
Print Credit Note
- Click on Print.
Select Print Option
- A Select the option as desired screen will pop up.
- Select the required radio button print option from the list. In this example, Print Credit Note is selected.
- Click on Accept.
Suppress Discount Column
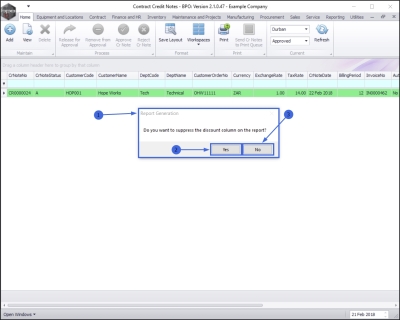
- A Report Generation message box will pop up asking;
- Do you want to suppress the discount column on the report?
- Click on Yes if you wish to hide the discount column on the report.
- Click on No if you wish to show the discount column on the report.
View Credit Note Print Preview
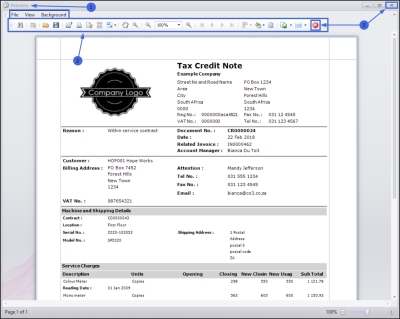
- The Report Preview screen will be displayed.
- From here you can View, Print, Export or Email the contract credit note.
- Close the Report Preview screen when done.
MNU.119.002

