We are currently updating our site; thank you for your patience.
Contract
Short Term Contract - Invoice
A Short Term Contract Invoice is created at the end of the contract. (Multiple invoices can be raised, if for example, the contract is extended).
Important Note: Remember to subtract the deposit amount from the invoice total, if applicable.
| Ribbon Access: Contract > Short Term Contracts |
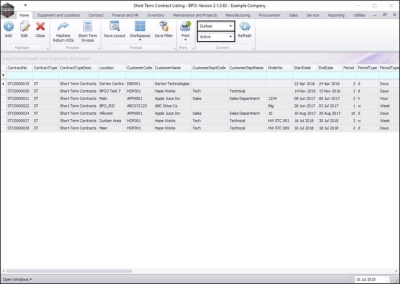
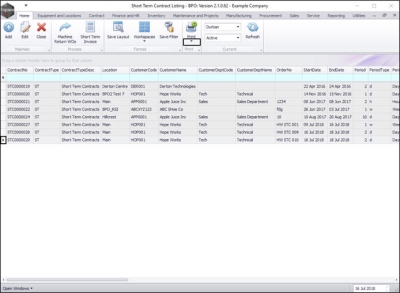
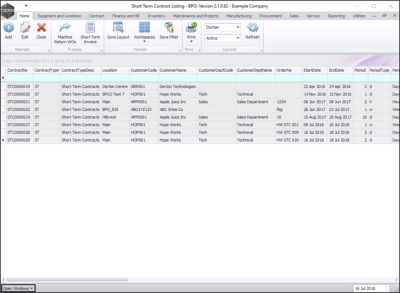
- The Short Term Contract Listing screen will be displayed.
- Ensure that you have selected the correct site and that the status is set to Active.
Select the Contract
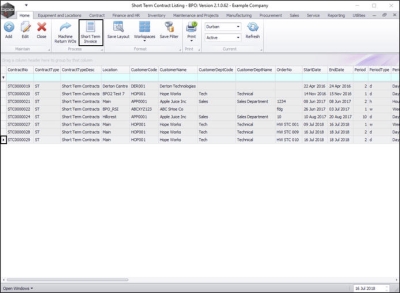
- Select the row of the short term contract where you wish to raise an invoice.
- Click on Short Term Invoice.
Closure Invoice Details
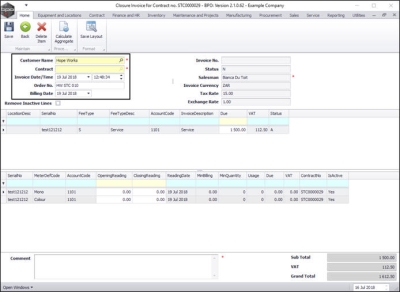
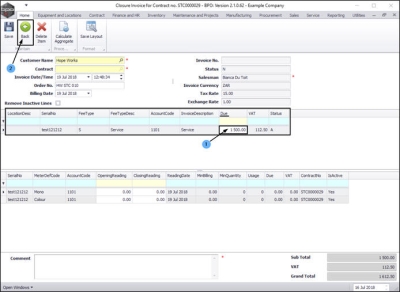
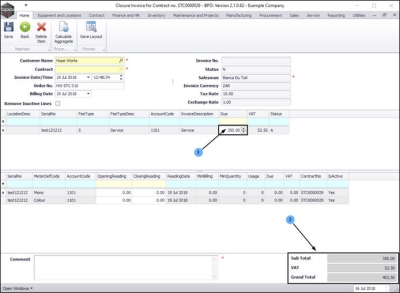
The Closure Invoice for Contract no. [ ] screen will be displayed.
- Customer Name: This will auto populate with the name configured on the contract.
- Contract: This is un-editable in this screen but the contract number will pull across on the printed invoice.
- Invoice Date/Time: This will auto populate with the current date and time.
- Date: You can either type in click on the drop-down arrow and use the calendar function to select an alternative date if required.
- Time: You can either type in or use the arrow indicators to select an alternative time if required.
- Order No: This will auto populate with the reference no. set up on the contract.
- Billing Date: This will auto populate with the billing date set up on the contract. You can click on the drop-down arrow and select an alternative date if required.
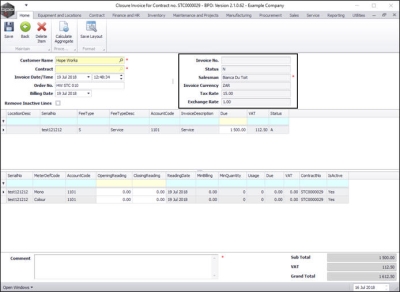
- Invoice No: The system will create an invoice number based on the contract type configuration.
- Status: This will be set to N - New.
- Salesman: This will auto populate with the person originally set up on this contract.
- Currency: This will auto populate with the currency set up on the customer.
- Tax Rate: This will auto populate with the tax rate set up on the customer.
- Exchange Rate: This will auto populate with the exchange rate set up in the system.
The Fees frame
This frame will auto populate with the details of the fees configured on the contract.
- If a deposit was paid for this contract, subtract this deposit amount from the total in the Due column.
Check Deposit Amount to deduct from Invoice
- If you need to check the amount of the deposit, click on Back to return to the Short Term Contract Listing screen.
Print Deposit Invoice
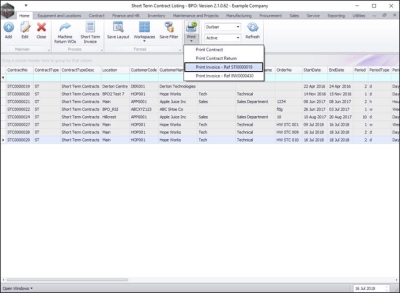
- Click on the row selector in front of the relevant contract.
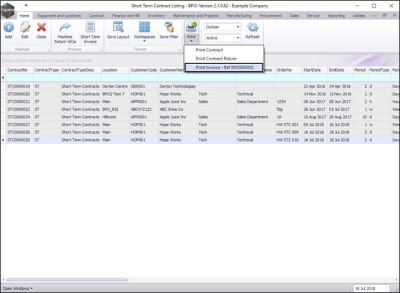
- Click on the drop-down arrow on the Print button.
- Select from the drop-down list, the Print Invoice - Ref [ ] option.
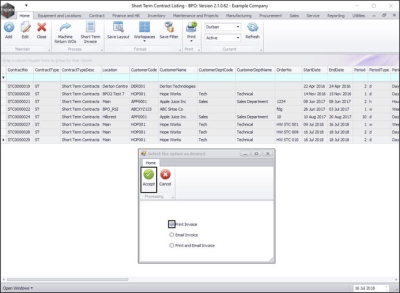
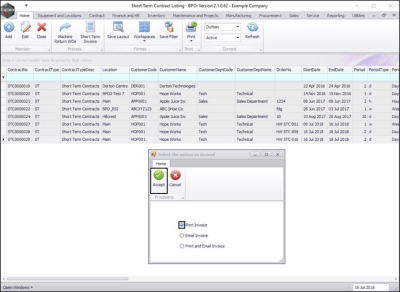
- A Select the option as desired screen will pop up.
- Click on the radio button in front of Print Invoice.
- Click on Accept.
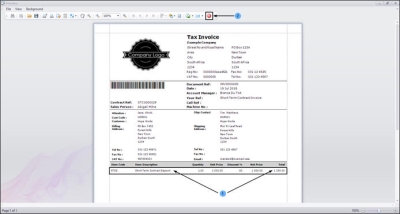
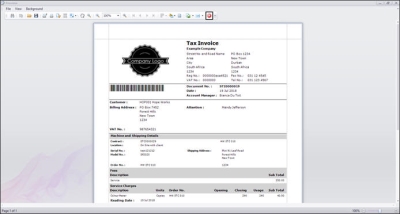
The Report Preview screen will be displayed.
- In this image, you can see that this is the Short Term Contract Deposit Invoice and that the Total deposit amount is R1150.00 .
- Close the report preview screen when you having finished viewing it.
Return to 'Closure Invoice' screen
- You will return to the Short Term Contract Listing screen.
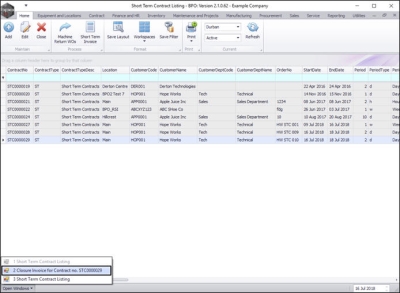
- Click on the Open Windows tab at the foot of this screen.
- A list of all the windows currently open in BPO2 will display.
- Select the Closure Invoice for Contract no. [ ] option to take you back to the Closure Invoice screen that you were working in.
Deduct Deposit Amount
- Now that the deposit amount has been confirmed, it can be deducted from the Fees Due column.
- In this image, the fees due were R1500 minus the deposit of R1150 gives a total of R350 still owing on the fees.
- Change the amount in the Due column accordingly.
- You will note that the Sub Total, VAT and Grand Total amounts will auto calculate to accommodate the new figures.
The Meter Fees frame
Close Readings
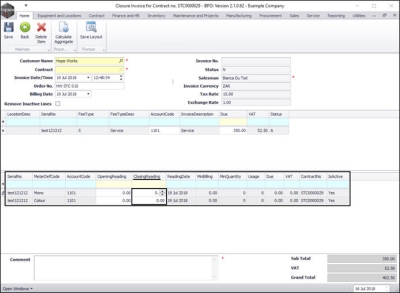
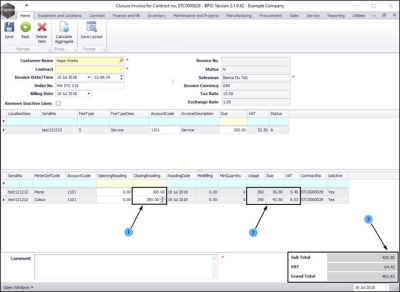
- In this frame, click in each meter Closing Reading field and either type in or use the arrow indicators to select the correct reading.
- As you update the meter readings,
- the Usage, Due and VAT columns will update,
- as will the Sub Total, VAT and Grand Total amounts.
Invoice Comment
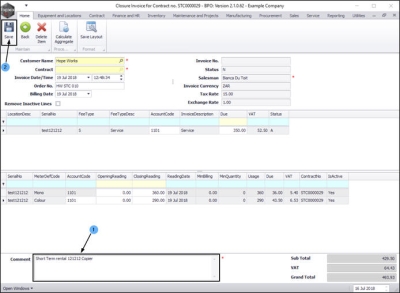
When you have checked that all charge amounts are correct,
- Type in a comment relevant to this Short Term Invoice. (This field is mandatory).
Save Short Term Invoice
- Click on Save.
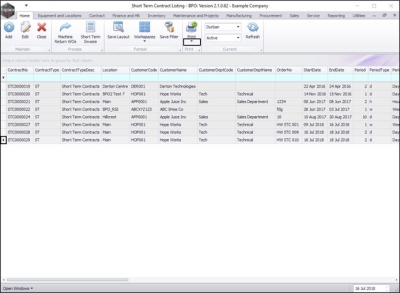
- The Short Term Invoice will be saved and you will return to the Short Term Contract Listing screen.
Print Invoice
- Ensure that the row selector is in front of the contract that you raised the invoice for.
- Click on the drop-down arrow on the Print button.
- Select from the list, the Print Invoice - Ref STI[ ] option.
- Note: You will be able to differentiate from the Deposit Invoice option by the reference number of the invoice.
- The Select the option as desired pop up screen will appear.
- Click on Print Invoice.
- Click on Accept.
- The Report Preview screen will be displayed.
- When you have finished viewing the invoice, close the screen.
MNU.158.003

