We are currently updating our site; thank you for your patience.
Contracts
Short Term Contract - Print Deposit and Final Invoice
| Ribbon Access: Contract > Short Term Contracts |
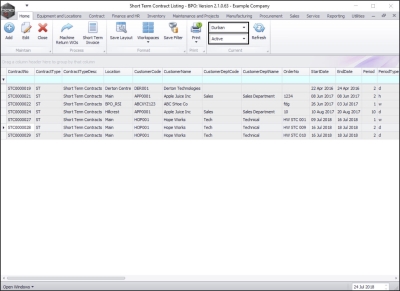
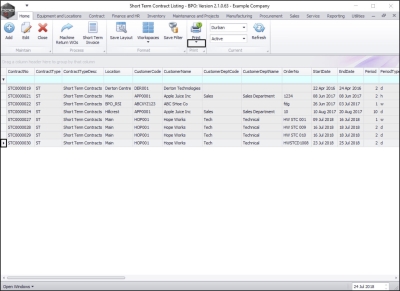
- The Short Term Contract Listing screen will be displayed.
- Ensure that you have selected the correct site and that the status is set to Active.
Print Short Term Contract Deposit Invoice
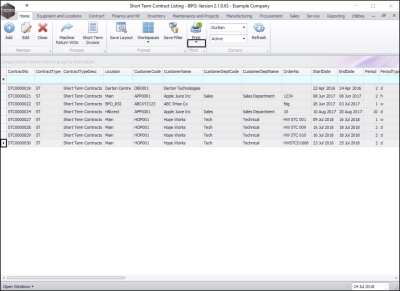
- Select the row of the short term contract where you wish to print the deposit invoice.
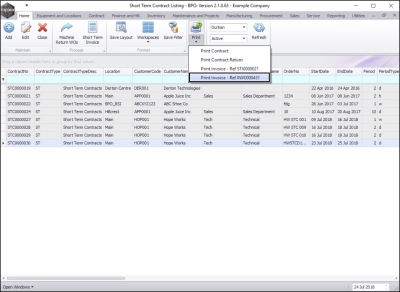
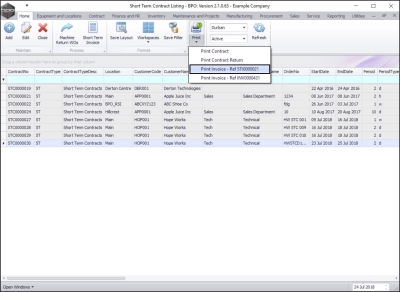
- Click on the drop-down arrow on the Print button.
- Select Print Invoice - Ref [ ] from the drop-down list.
Note: You will be able to distinguish between the Deposit Invoice and the Short Term Invoice by the invoice reference numbers set up in the Configurator.
Select Print Option
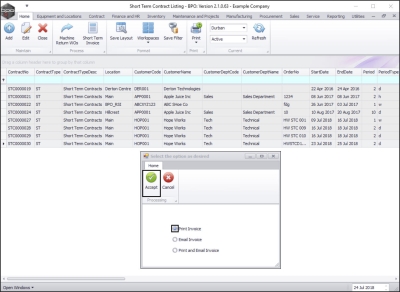
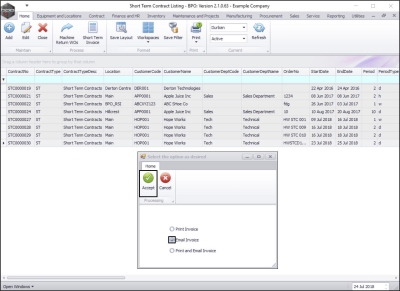
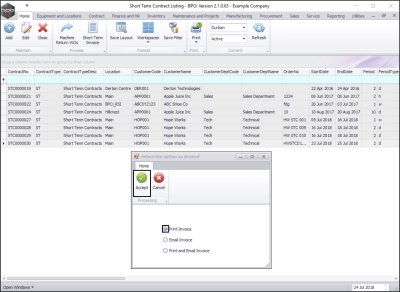
- A Select the option as desired screen will pop up with the following options;
- Print : will open the Deposit Invoice in Report Preview to view, print, export or email.
- Email: can attach documents, add recipients, the system will create a pdf and email the Deposit Invoice.
- Print/Email: both the Report Preview and Email screens will pop up.
- Click on the radio button in front of the option you want.
- Click on Accept.
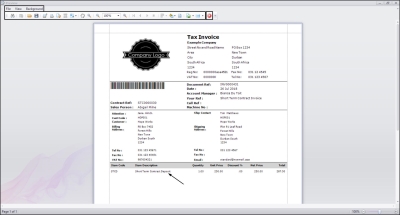
- The Report Preview screen will come up, where Print or Print and Email is selected
- From here you can view, print, export or email the Deposit Invoice.
Note: In this image you can see that Item Code and Description on the invoice reads as STCD - Short Term Contract Deposit.
- Close the preview screen when you are done.
Email Short Term Contract Deposit Invoice
- In the Select the option as desired pop up screen, click on the radio button in front of Email Invoice.
- Click on Accept.
Email Details
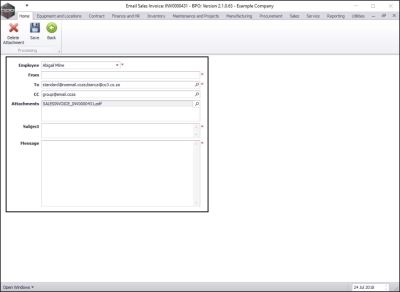
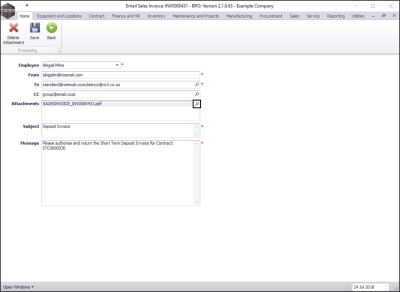
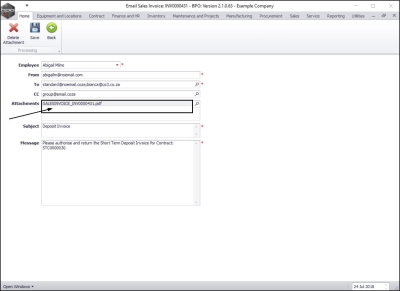
The Email Sales Invoice: [ ] screen will be displayed.
- Employee: This will auto populate with the employee currently logged on to the system. You can click on the drop-down arrow and select an alternative employee if required.
- From: Type in the email address of the employee above.
- To: This will auto populate with the email address of the customer contact selected on the deposit invoice (the accounts person will be always added to this).
- CC: If a group email address has been set up on the order or accounts contact, that will pull through here.
- Attachments: BPO will create a PDF of the deposit invoice and attach it automatically (you can attach additional documentation).
- Subject: Type in the email subject.
- Message: Type in the email message.
Note: If you receive an 'error' message when trying to email the document, ask your administrator to make sure that the correct shared folder location has been configured in BPO and that you have the relevant folder rights to access the shared folder on the server.
Additional Email Addresses
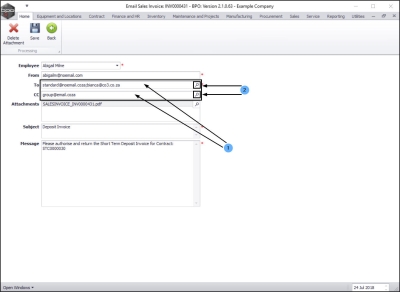
In the To or CC fields, you can either,
- type in additional email address(es) (separated by a semi-colon) or
- click on the search button and select additional customer contacts.
Link Additional Documents
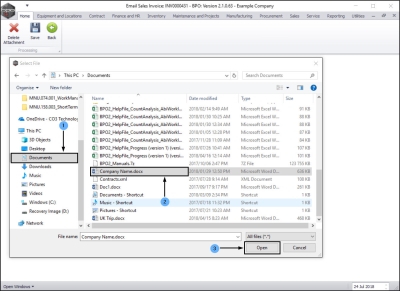
- Click on the search button in the Attachments field.
- The Select File: [ ] screen will pop up.
- Select the file location.
- Click on the file.
- Click on Open.
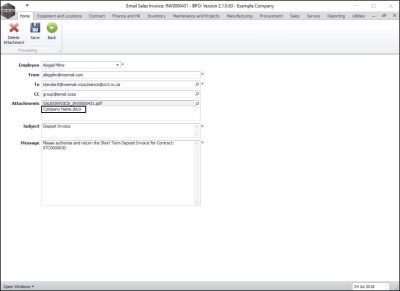
- You will return to the Email Sales Invoice: [ ] screen.
- In the Attachments field, you will see that the new document has been added.
Delete Attachments
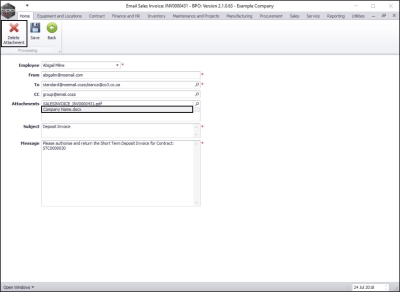
- If you wish to delete a document, click on the document name.
- Click on Delete Attachment.
- The document will be removed from the Attachments field.
Save and Send Email
- When you have finished adding all the details to the Email Sales Invoice: [ ] screen, click on Save.
- The email will be sent via the BPO Email Service on the server and you will return to the Short Term Contract Listing screen.
Print Short Term Contract (Final) Invoice
- Select the row of the contract where you wish to print the (final) Invoice.
- Click on the drop-down arrow on the Print button.
- Select Print Invoice - Ref [ ] from the drop-down list.
Note:Remember, you will be able to distinguish between the Deposit Invoice and the Short Term Invoice by the Invoice Reference numbers as set up in the Configurator.
Select Print Option
A Select the option as desired screen will pop up with the following options;
- Print: - will open the Invoice in Report Preview to view, print, export or email.
- Email: - can attach documents, add recipients, the system will create a PDF and email the Invoice.
- Print/Email: - both the Report Preview and Email screens will pop up.
- Click on the radio button in front of the option you want.
- Click on Accept.
- Now follow the same processes as explained above to;
- Print the Invoice.
- Email the Invoice.
- Link Additional Documents to the Invoice.
- Delete Attachments from the Invoice.
MNU.158.004

