We are currently updating our site; thank you for your patience.
Contract
Add Contract Item Inclusions
You will be following the process below to add each item to be linked to this contract, where Inclusions apply.
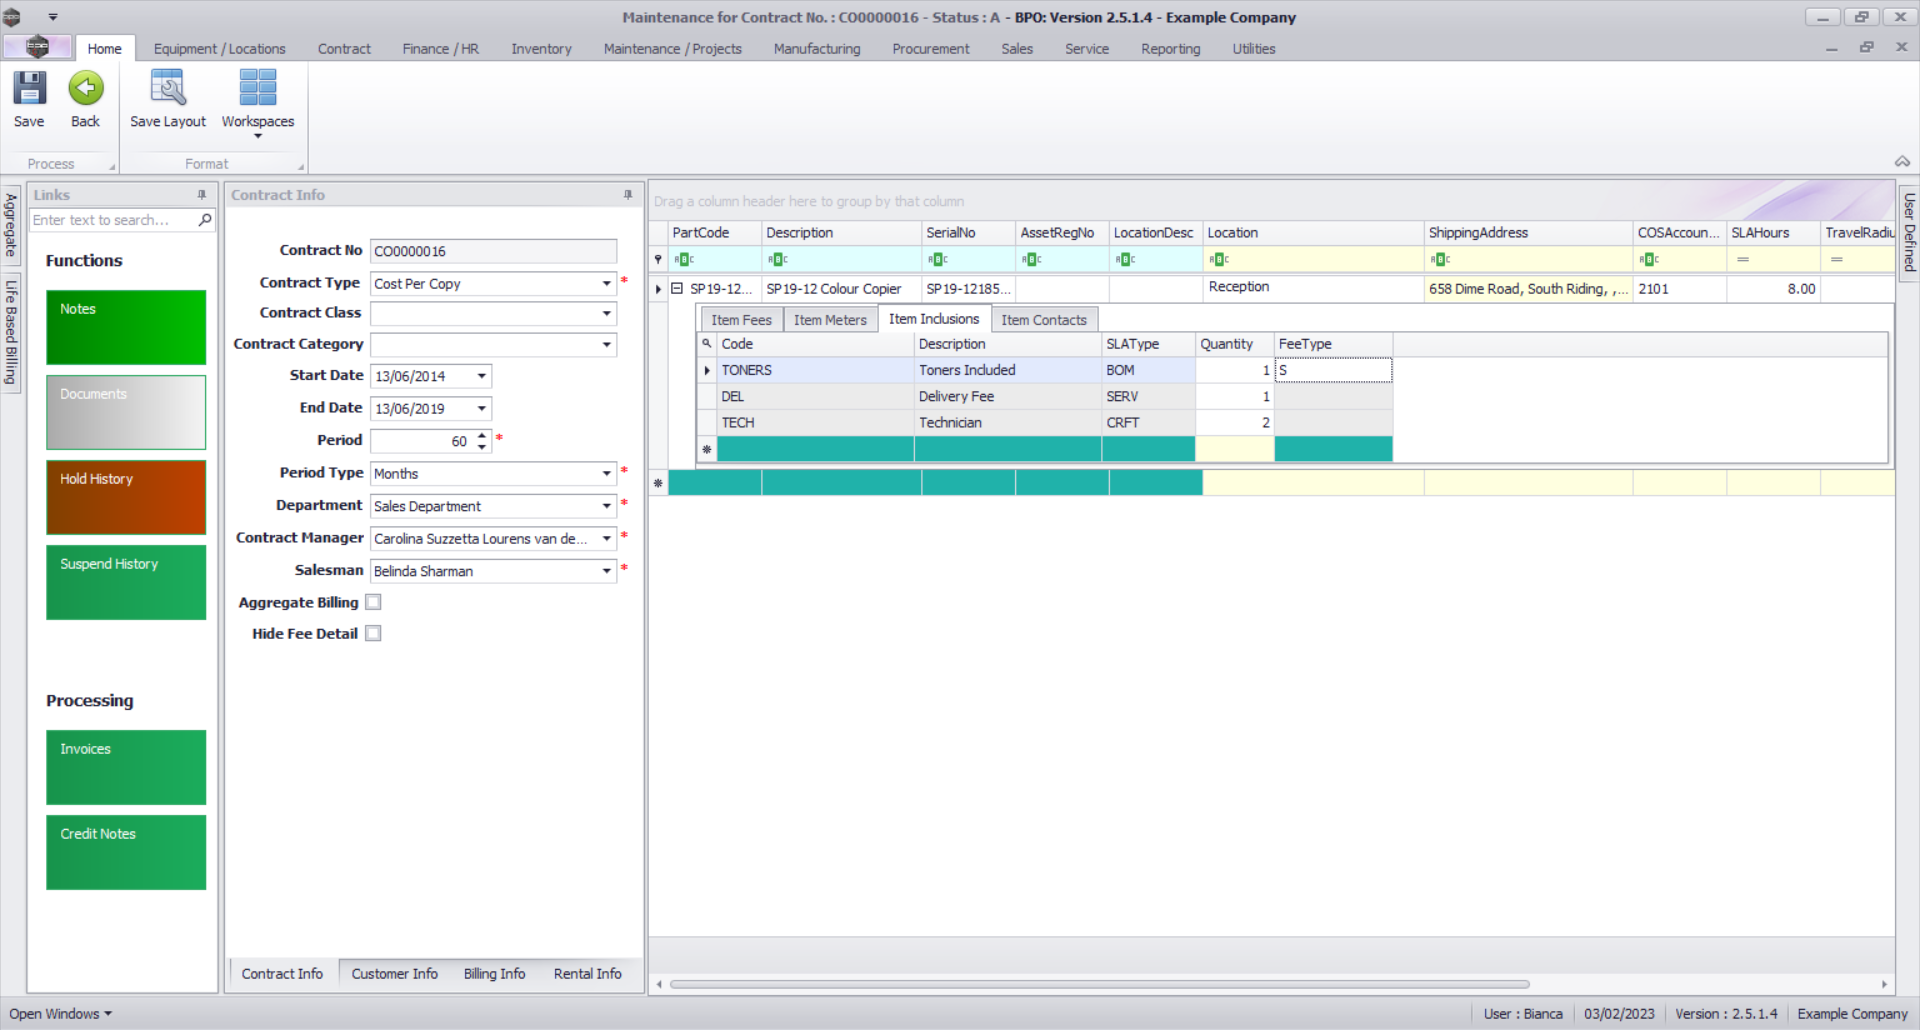
Item Inclusions Frame
- Click on the Item Inclusions tab.
The Item Inclusions frame will be expanded.
- In the Item Inclusions frame, you can add all .png Inclusions (items which are included in the .png and not billed separately).
- These are tasks, items, actions, services, etc. that are specifically “included” in the .png and are covered by a set .png fee agreed between the customer and service provider.
- Although they are included, you can have a breakdown of each individual inclusion. This breakdown is achieved by utilising the Link Fee panel within the Item Inclusion panel. For more information, refer to the Link Fee topic.

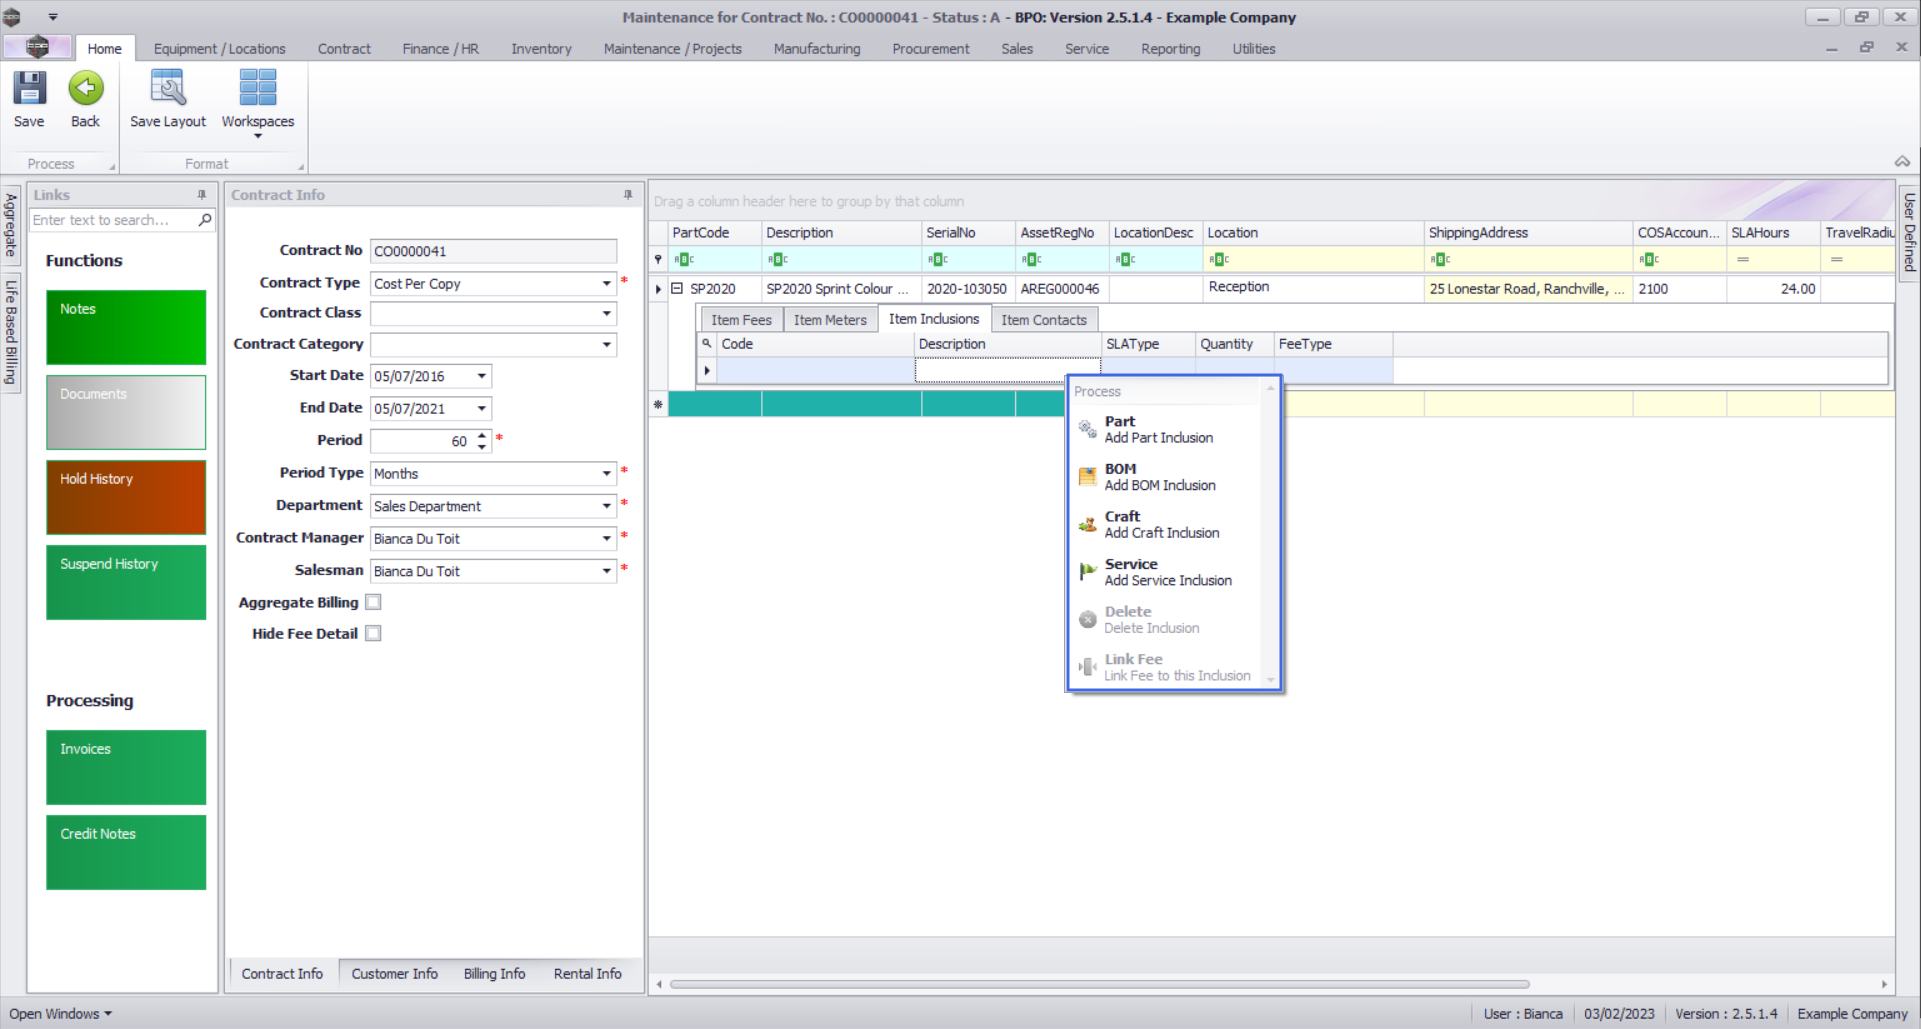
Add Item Inclusions
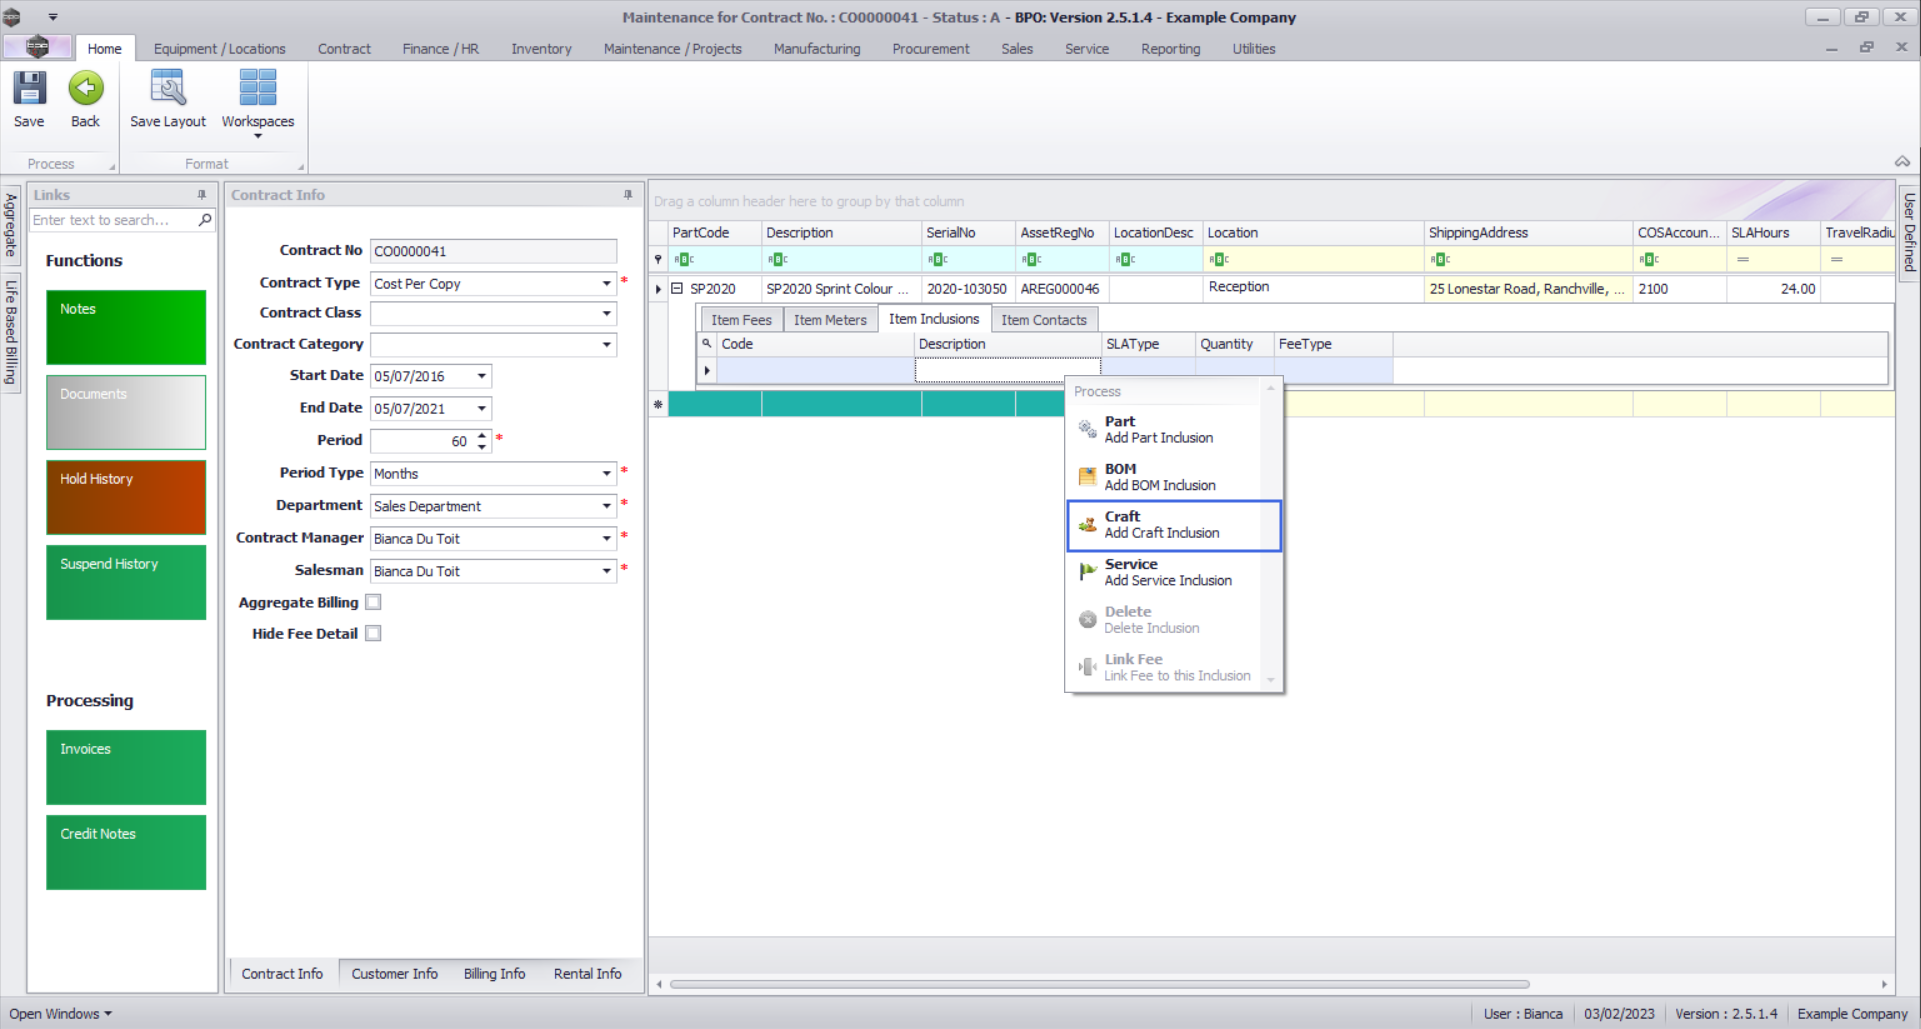
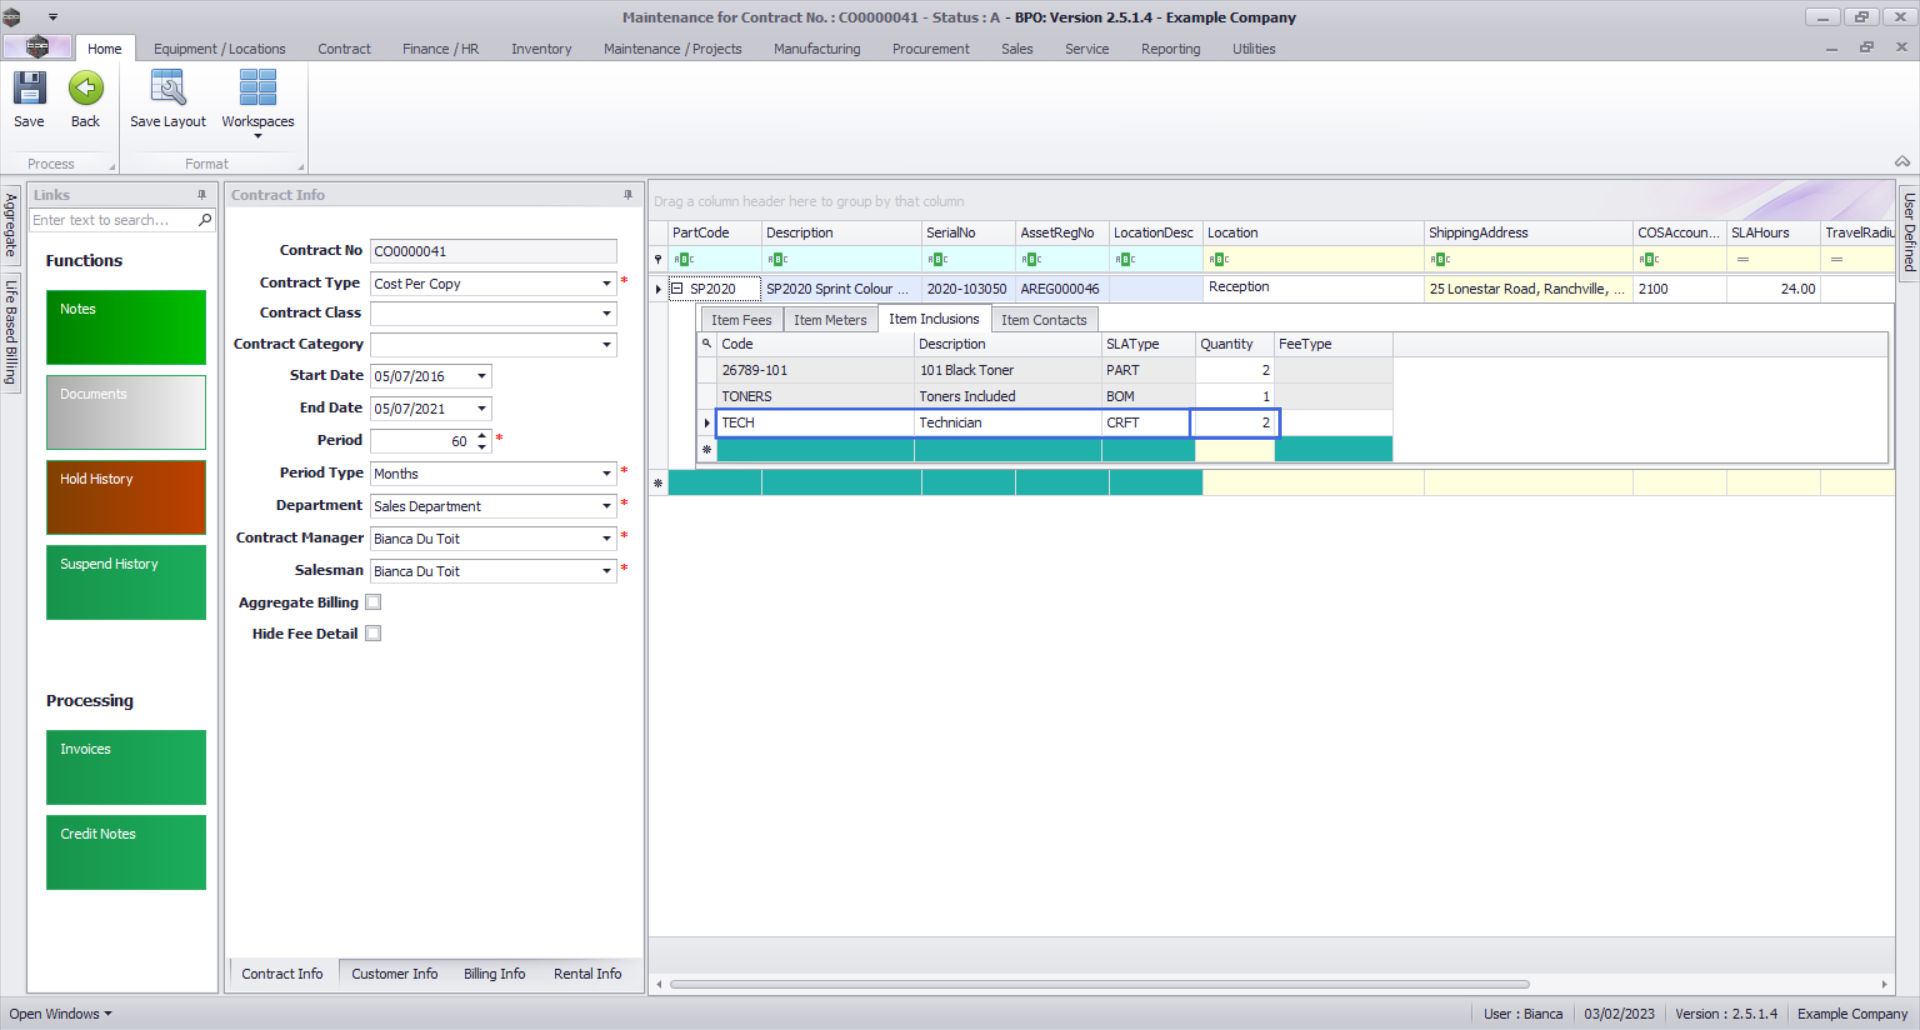
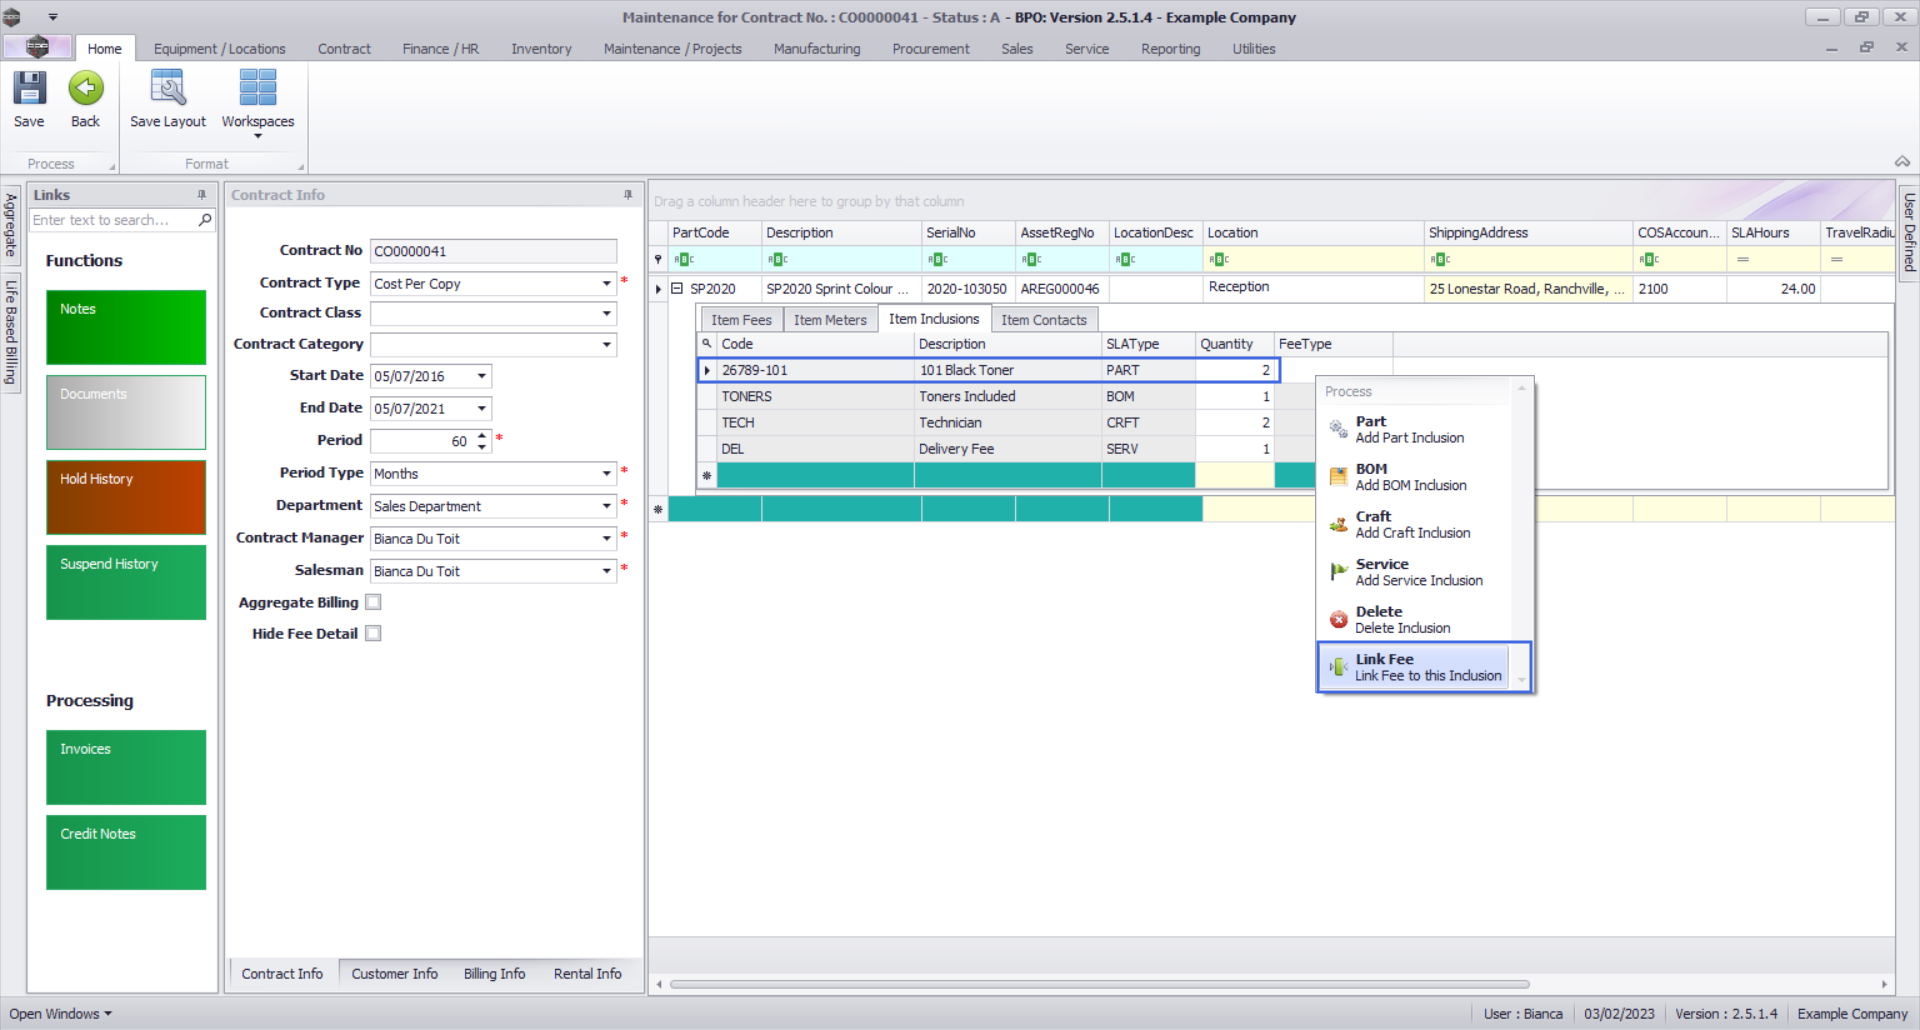
- Right click anywhere in a row of the Item Inclusions frame.
- A Process menu will pop up with the following options:
- Part:Add Part Inclusion
- BOM:Add Bill Of Materials Inclusion
- Craft:Add Craft Inclusion
- Service:Add Service Inclusion
- Link Fee:Link A Fee To An Inclusion
- Delete:Delete Inclusion
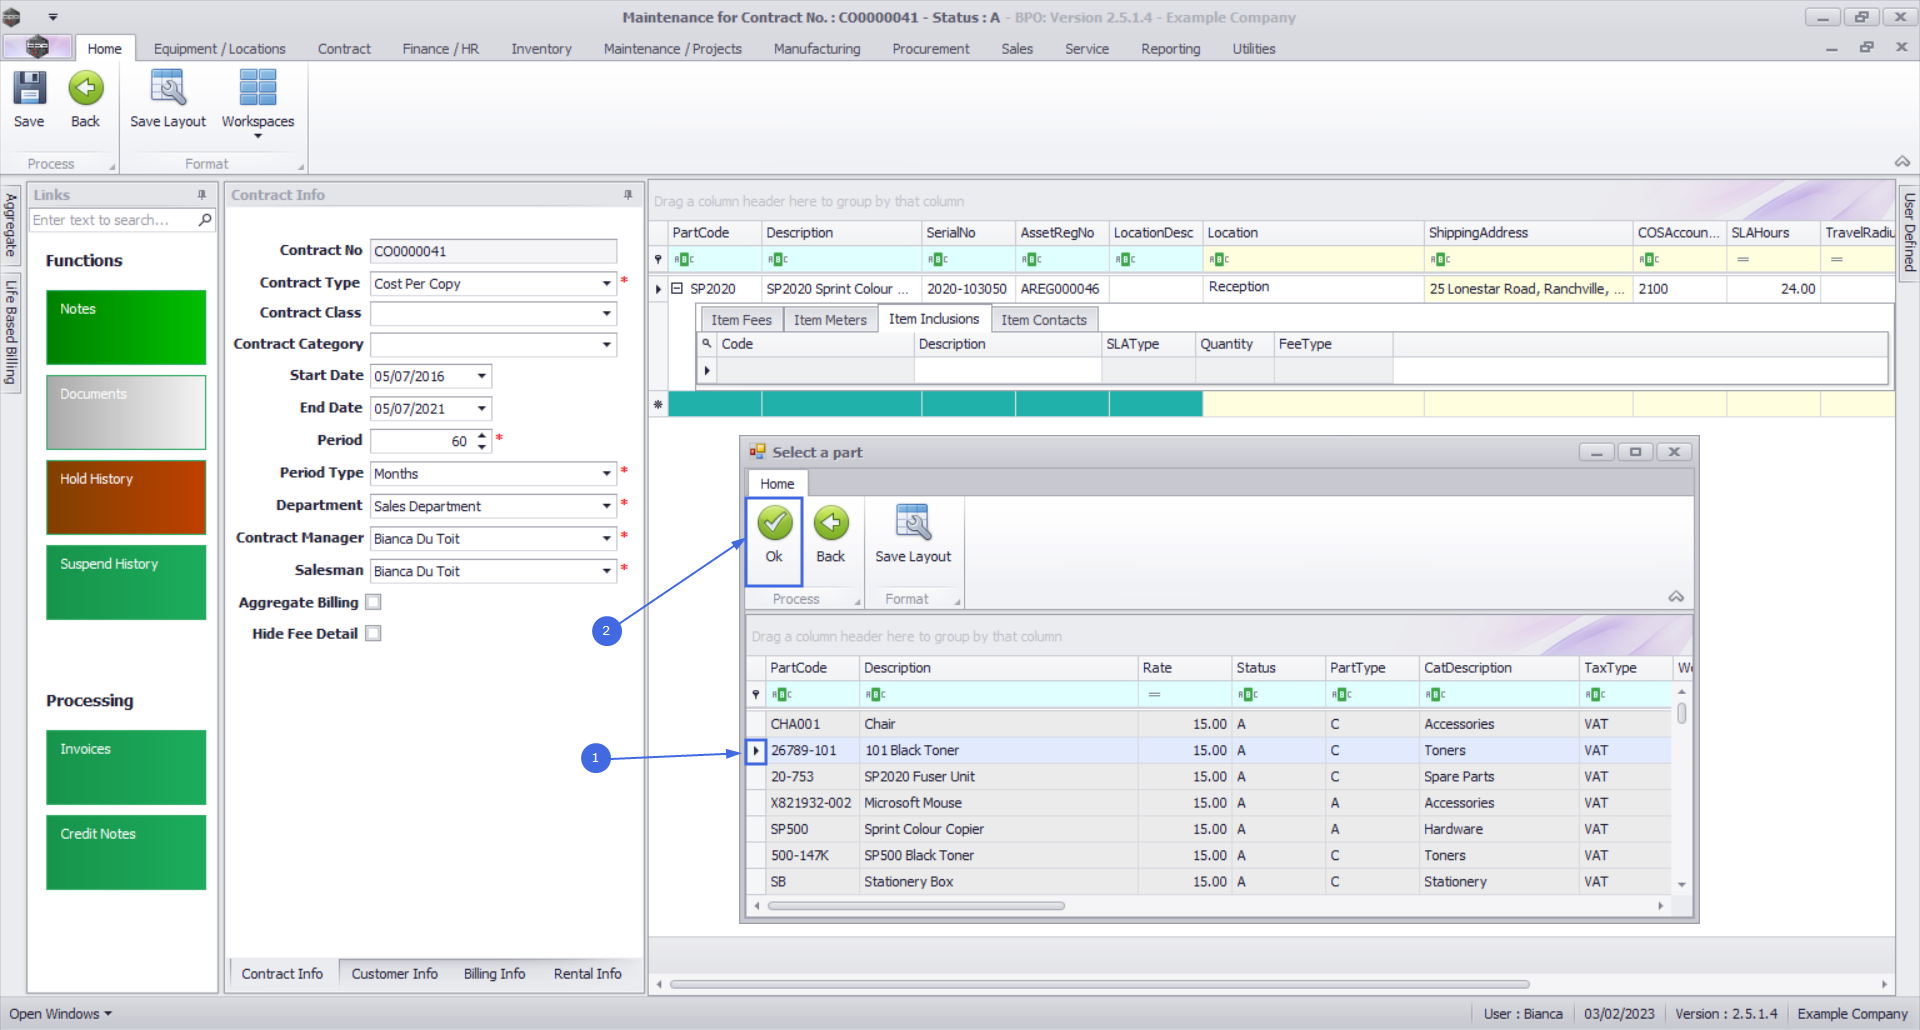
Add Part Inclusion
- Click on Part - Add Part Inclusion.

- An Input Validation message box will pop up asking:
- Are you sure you want to add a part inclusion to this item - [Serial Number or Location Description]?
- Click on Yes.

- A Select a part screen will pop up.
- Click on the row selector in front of the part you wish to add to this .png as an inclusion
- Click on Ok.
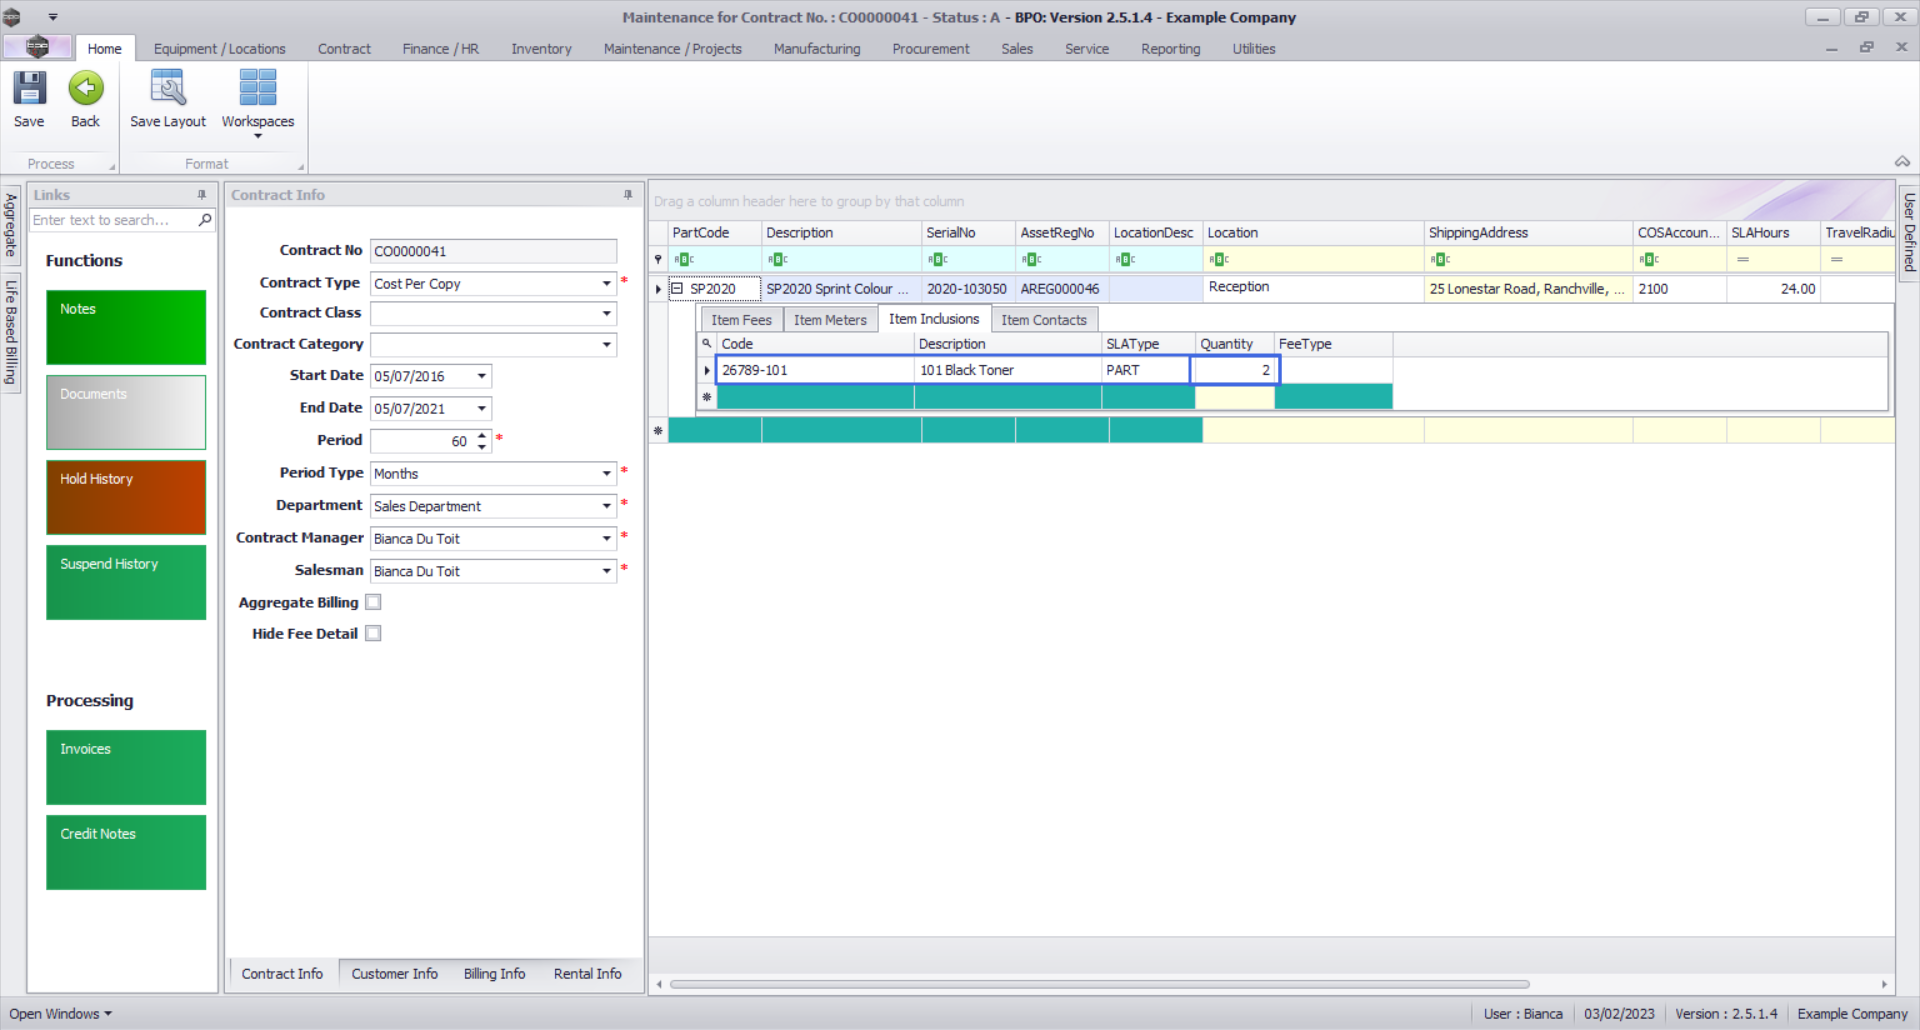
- The selected part will be added to the Item Inclusion frame.
- Code: This field will auto populate with the code of the selected item.
- Description: This field will auto populate with the description of the selected item.
- SLA Type: This field will auto populate with the SLA type of the selected item.
- Quantity: Type in the quantity included for the selected part.
- Fee Type: This field will only be populated if you link a fee to the inclusion.
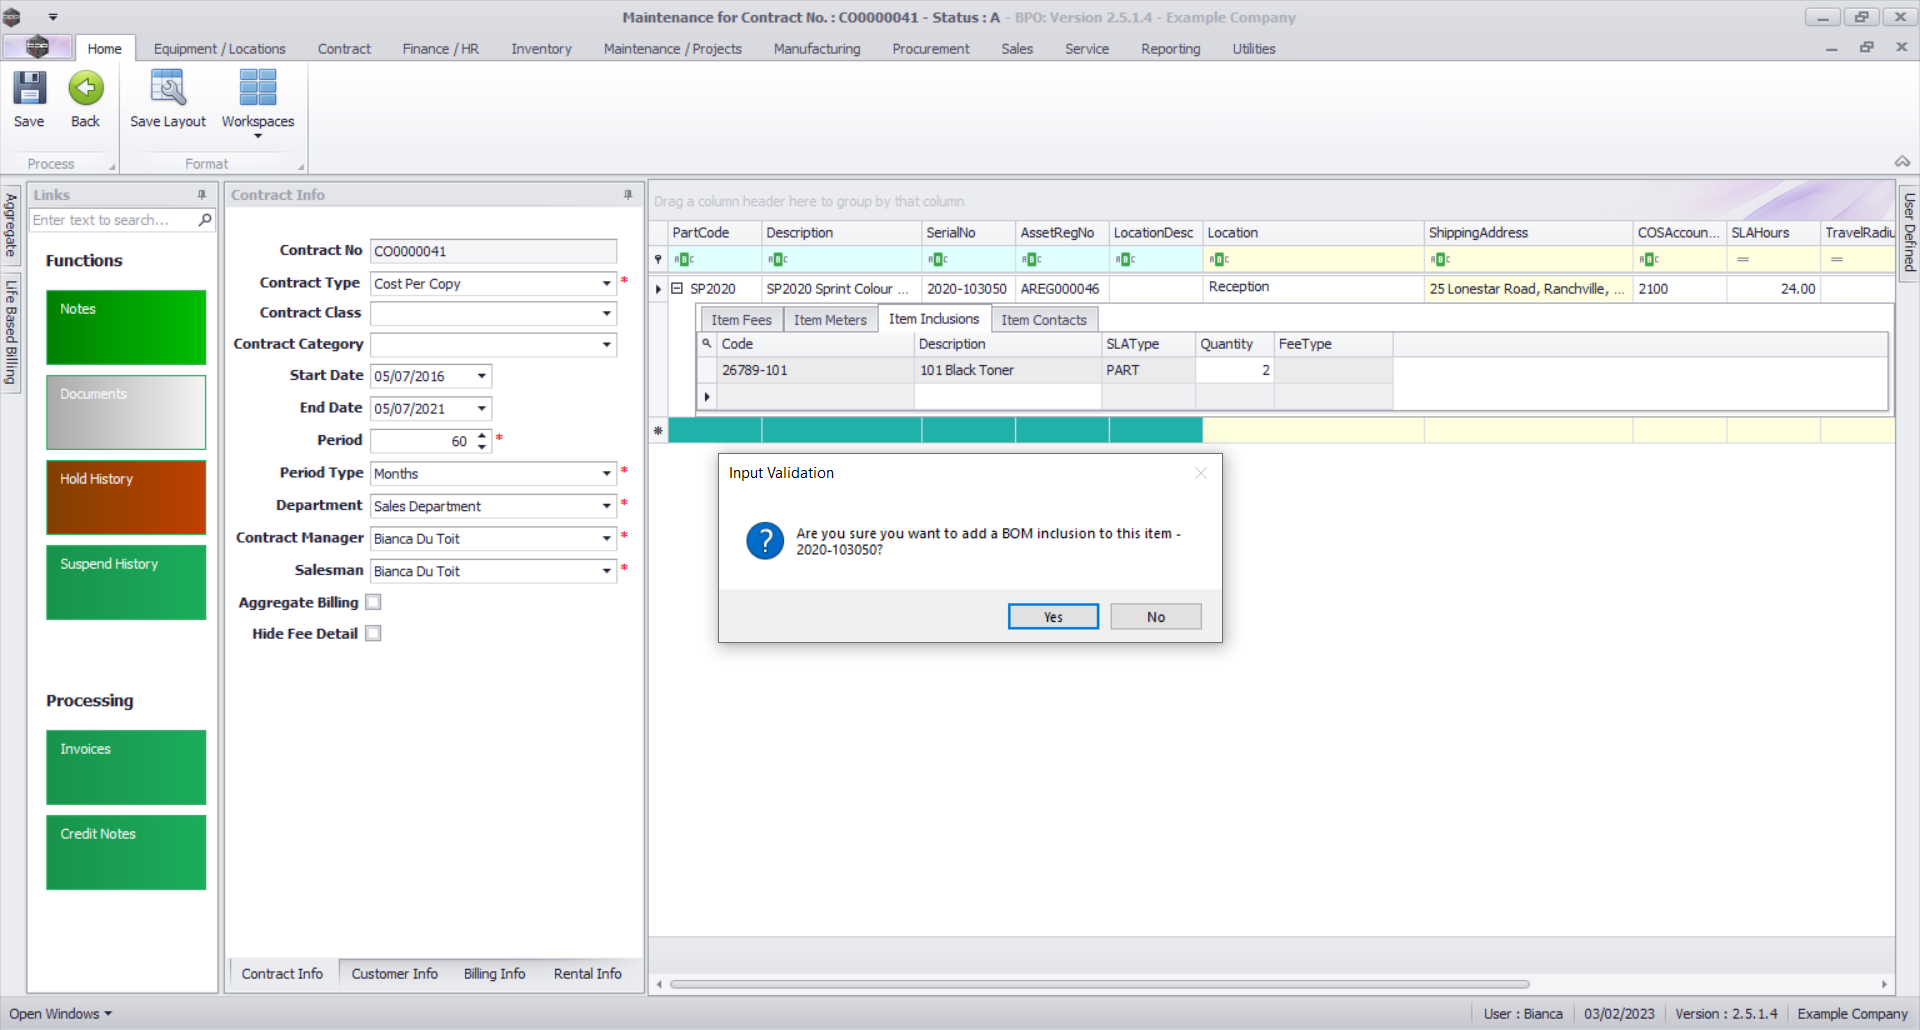
Add Bill of Materials Inclusion
- Right click anywhere in a row of the Item Inclusions frame.
- The Process menu will pop up.
- Click on BOM - Add BOM Inclusion.

- An Input Validation message box will pop up asking:
- Are you sure you want to add a BOM inclusion to this item - [Serial Number or Location Description]??
- Click on Yes.
- A Select a bill of material screen will pop up.
- Click on the row selector in front of the BOM you wish to add to this .png as an inclusion.
- Click on Ok.
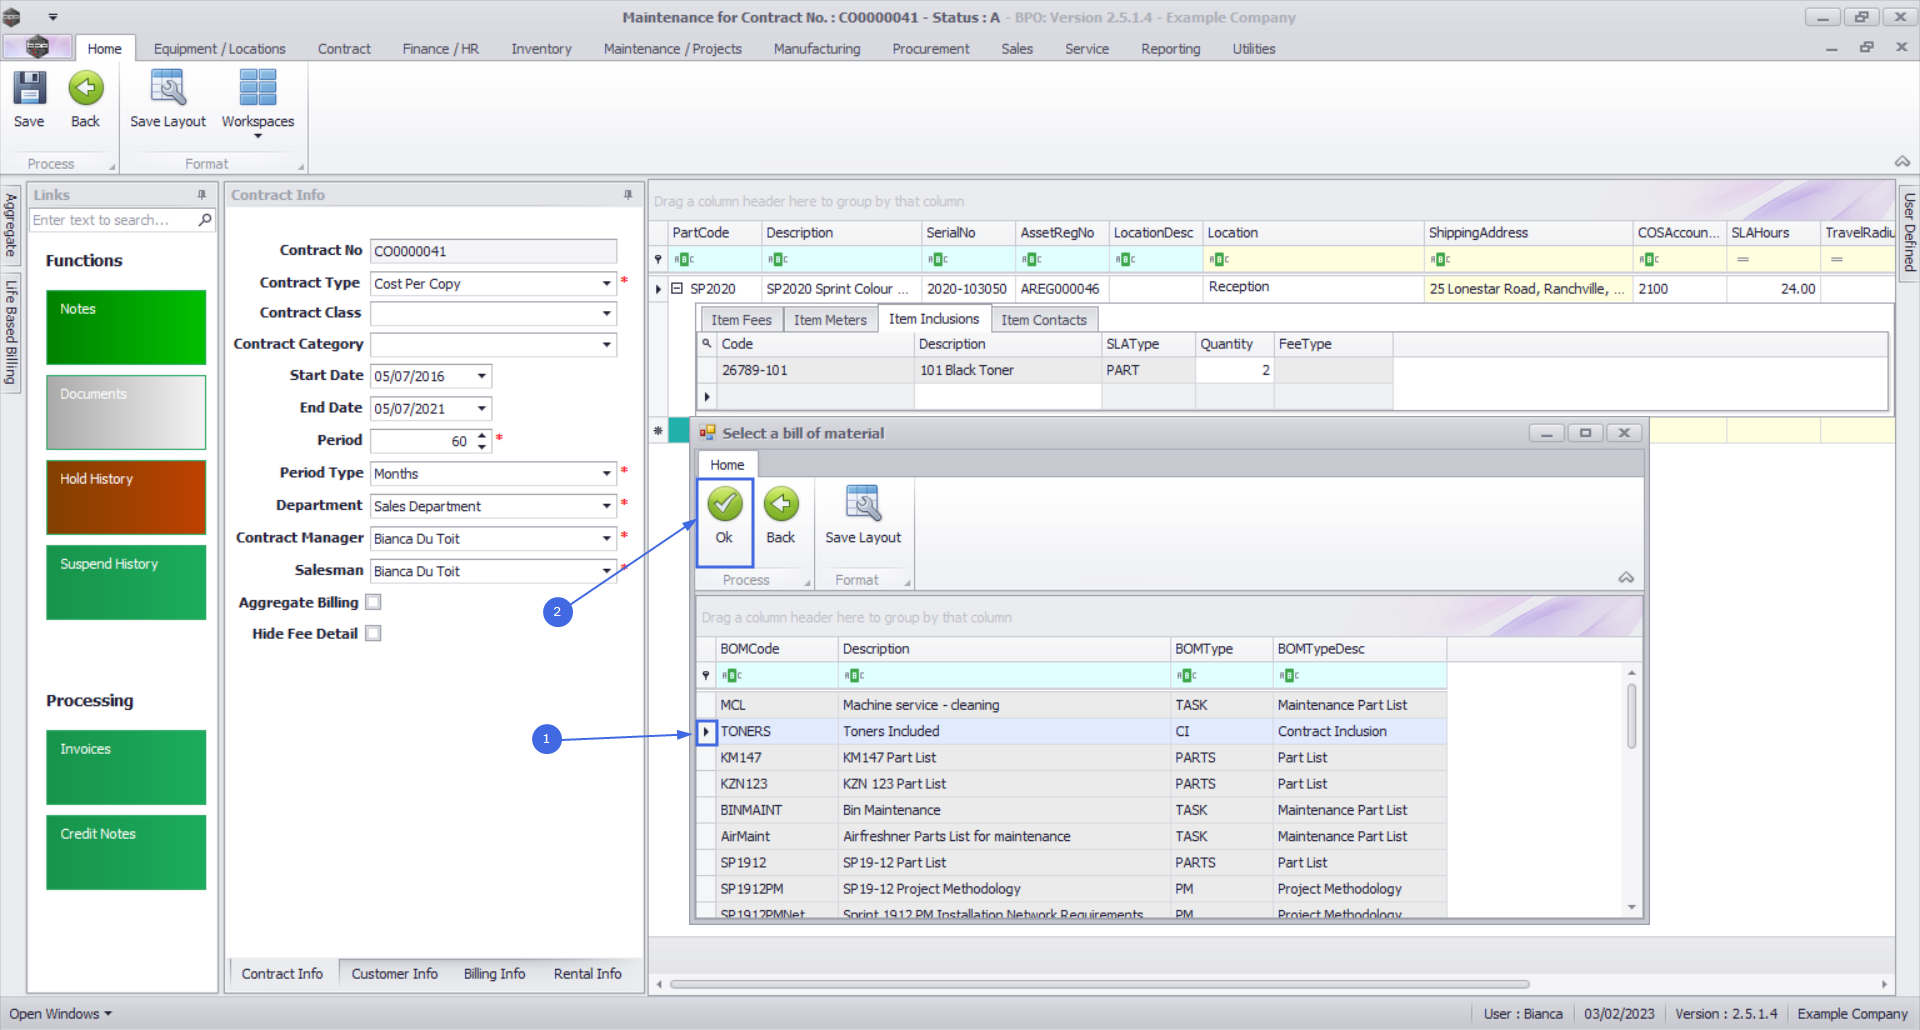
- The selected BOM will be added to the Item Inclusions frame.
- Code: This field will auto populate with the code of the selected item.
- Description: This field will auto populate with the description of the selected item.
- SLA Type: This field will auto populate with the SLA type of the selected item.
- Quantity: Type in the quantity included for the selected BOM.
- Fee Type: This field will only be populated if you link a fee to the inclusion.

Add Craft Inclusion
- Right click anywhere in a row of the Item Inclusions frame.
- The Process menu will pop up.
- Click on Craft - Add Craft Inclusion.
- An Input Validation message box will pop up asking:
- Are you sure you want to add a Craft inclusion to this item - [Serial Number or Location Description]?
- Click on Yes.
- A Select a craft screen will pop up.
- Click on the row selector in front of the craft you wish to add to this .png as an inclusion.
- Click on Ok.
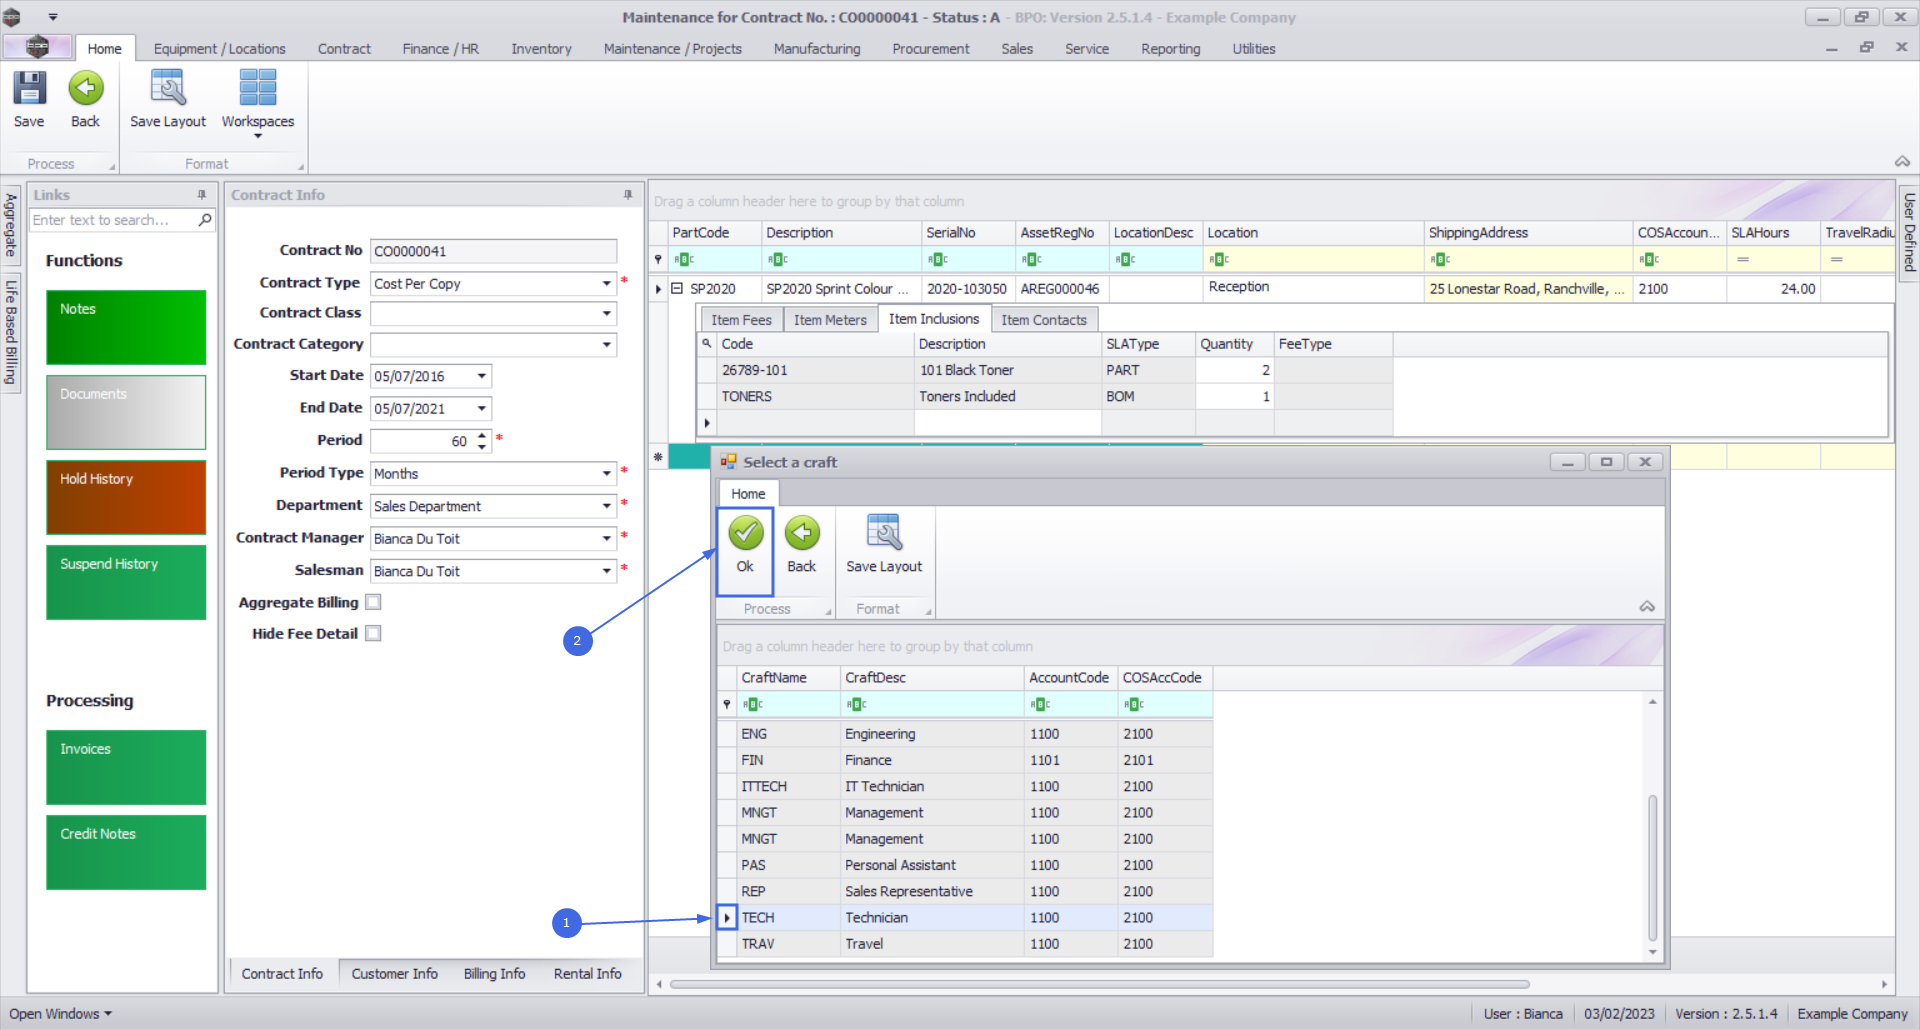
- The selected Craft will be added to the Item Inclusions frame.
- Code: This field will auto populate with the code of the selected item.
- Description: This field will auto populate with the description of the selected item.
- SLA Type: This field will auto populate with the SLA type of the selected item.
- Quantity: Type in the number of hours included for the selected Craft.
- Fee Type: This field will only be populated if you link a fee to the inclusion.
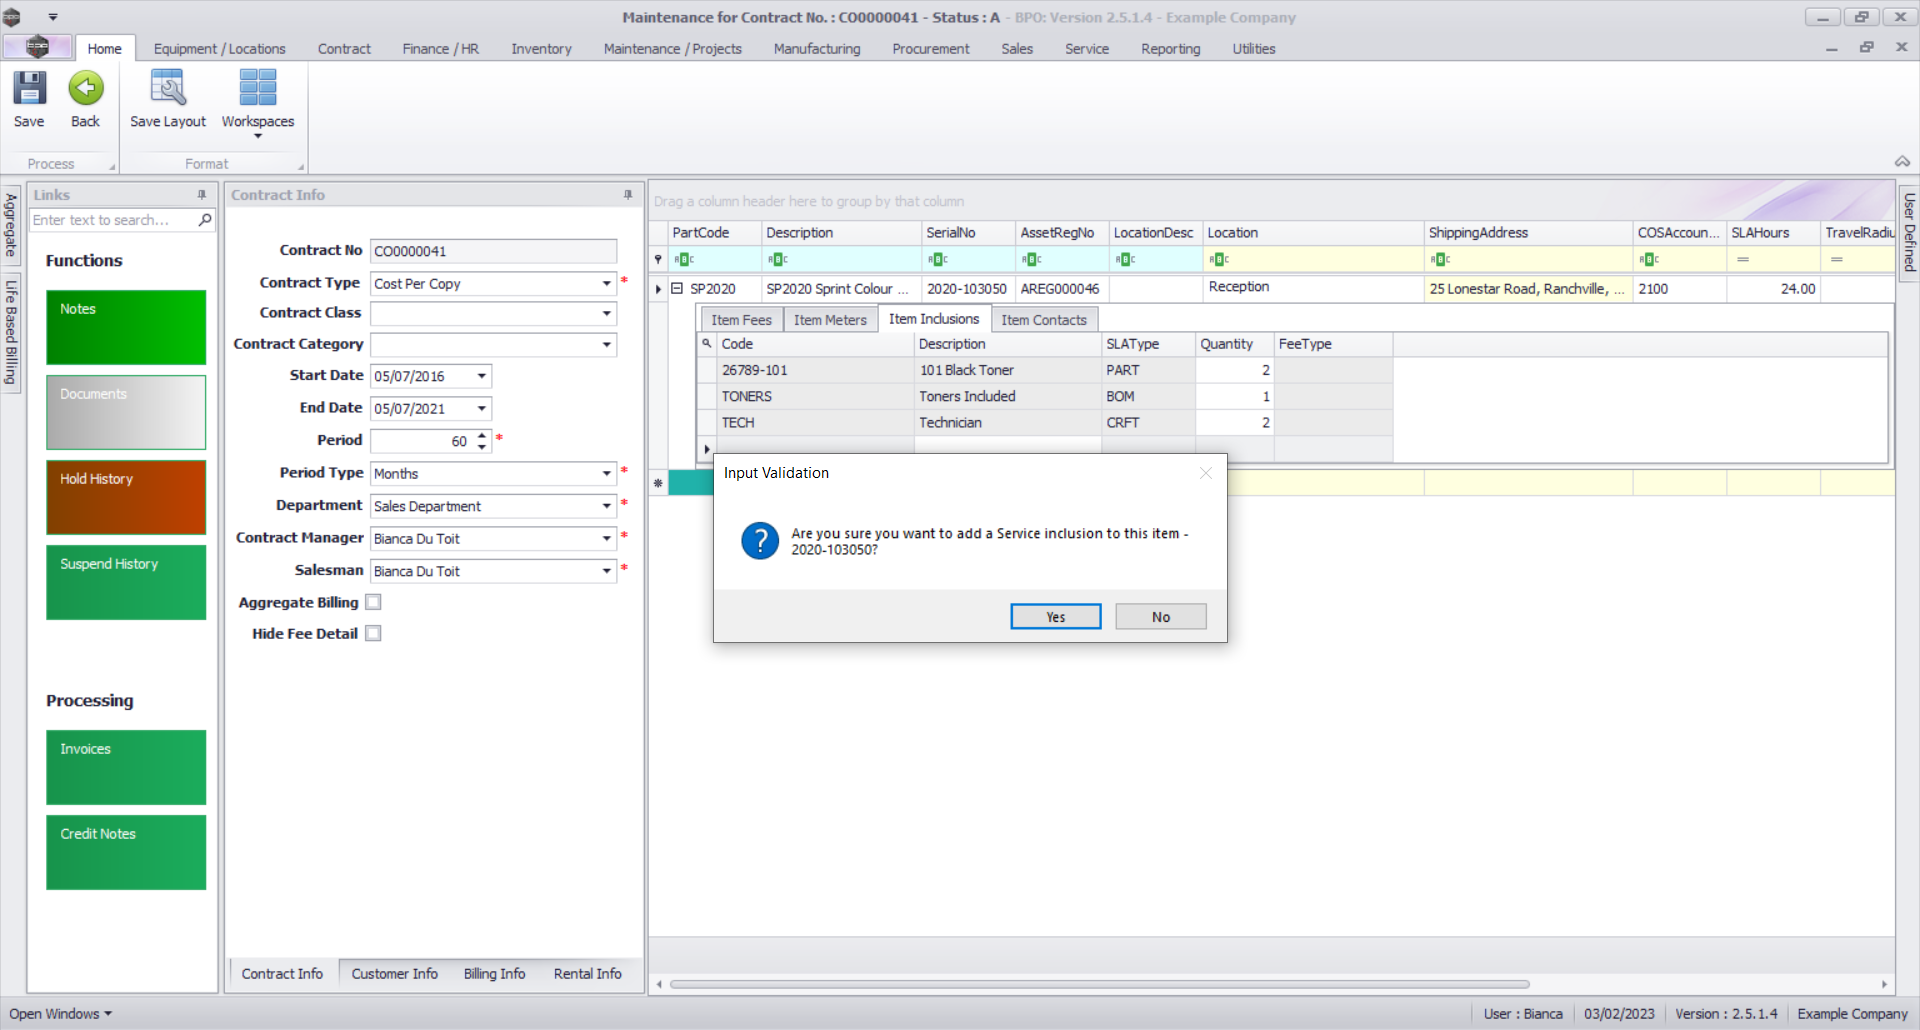
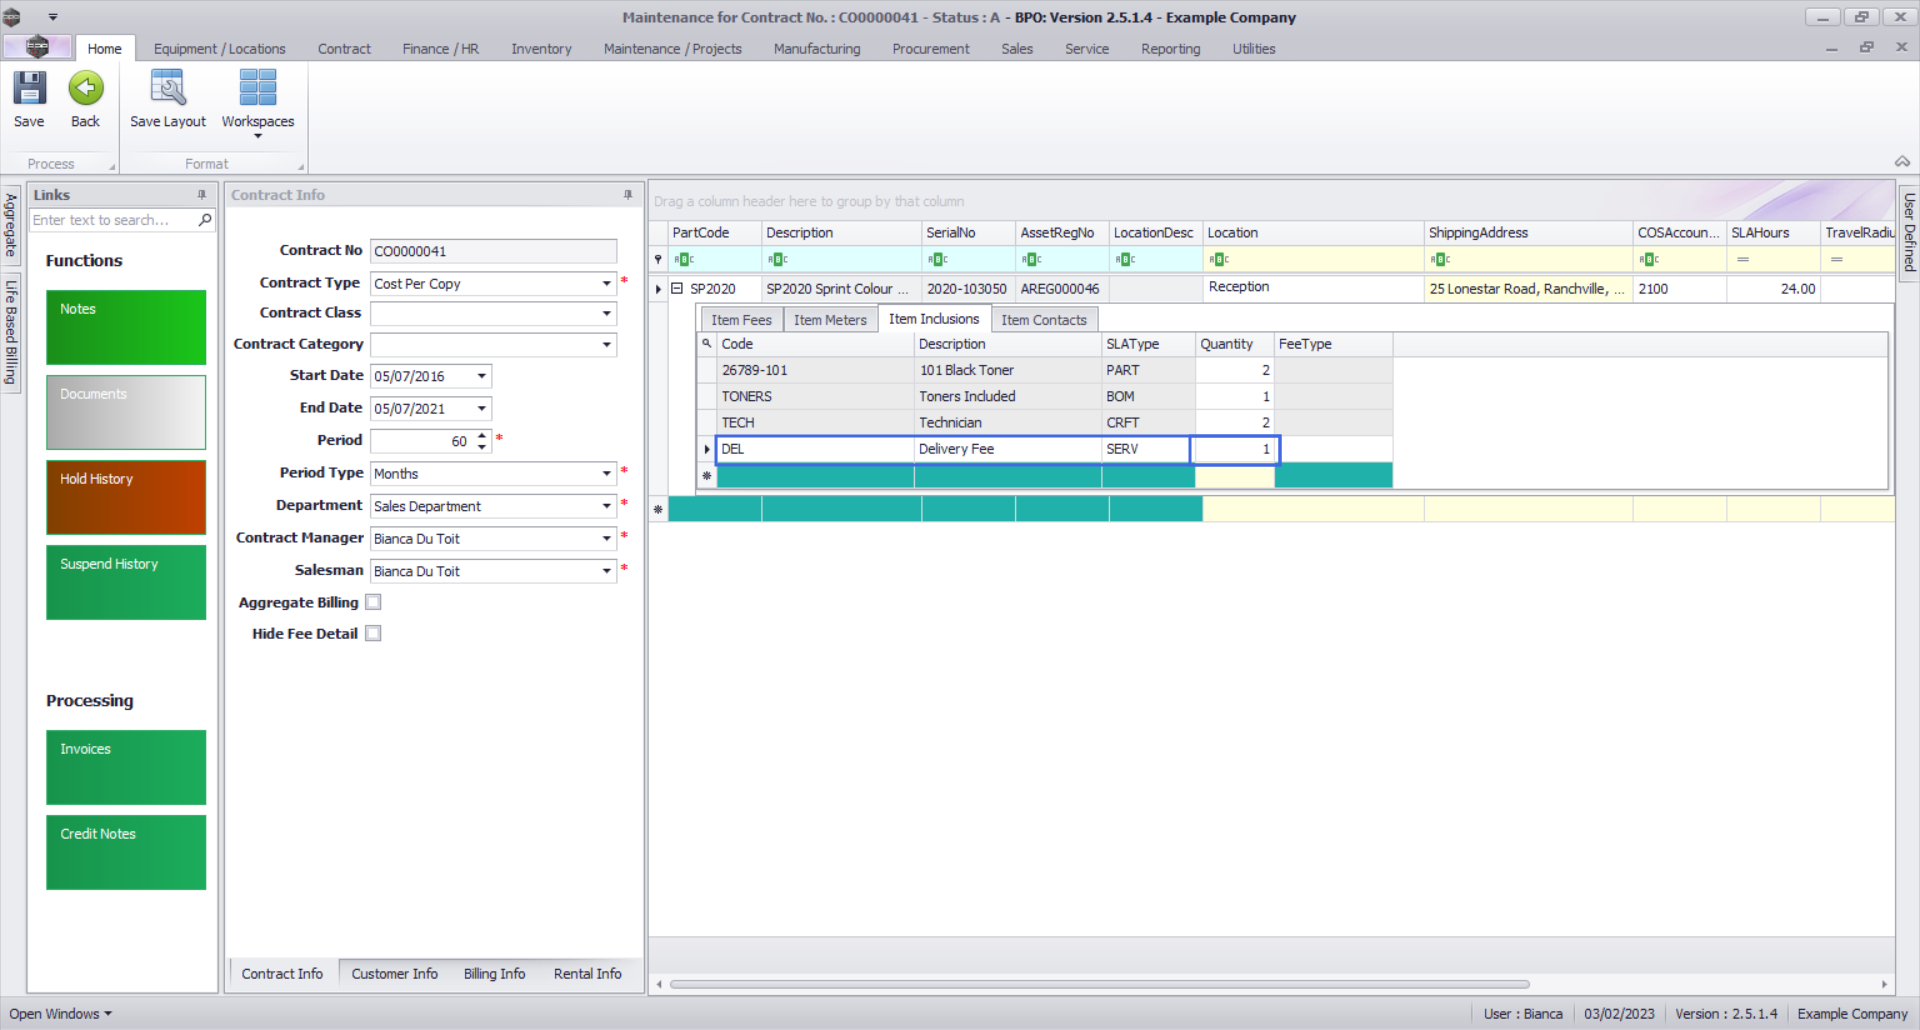
Add Service Inclusion
- Right click anywhere in a row of the Item Inclusions frame.
- The Process menu will pop up.
- Click on Service - Add Service Inclusion.

- An Input Validation message box will pop up asking:
- Are you sure you want to add a Service inclusion to this item - [Serial Number or Location Description]?
- Click on Yes.
- A Select a service screen will pop up.
- Click on the row selector in front of the service you wish to add to this .png as an inclusion.
- Click on Ok.

- The selected Service will be added to the Item Inclusions frame.
- Code: This field will auto populate with the code of the selected item.
- Description: This field will auto populate with the description of the selected item.
- SLA Type: This field will auto populate with the SLA type of the selected item.
- Quantity: Type in the quantity included for the selected Service.
- Fee Type: This field will only be populated if you link a fee to the inclusion.
- Note: You can add more than one of each type of item inclusion to the .png.
Link a Fee to an Inclusion
- Right click in the row of the item inclusion that you wish to link a fee to.
- In this image IT Technician has been selected.
- The Process menu will pop up.
- Click on Link Fee - Link Fee to this Inclusion.
- A The Fee Lookup List screen will pop up.
- Click on the row selector in front of the fee you wish to add to this inclusion.
- Click on Ok.
- Note:Only the fees that you selected in the Item Fees Frame will be displayed in this screen, and the fee can only be linked to one inclusion.
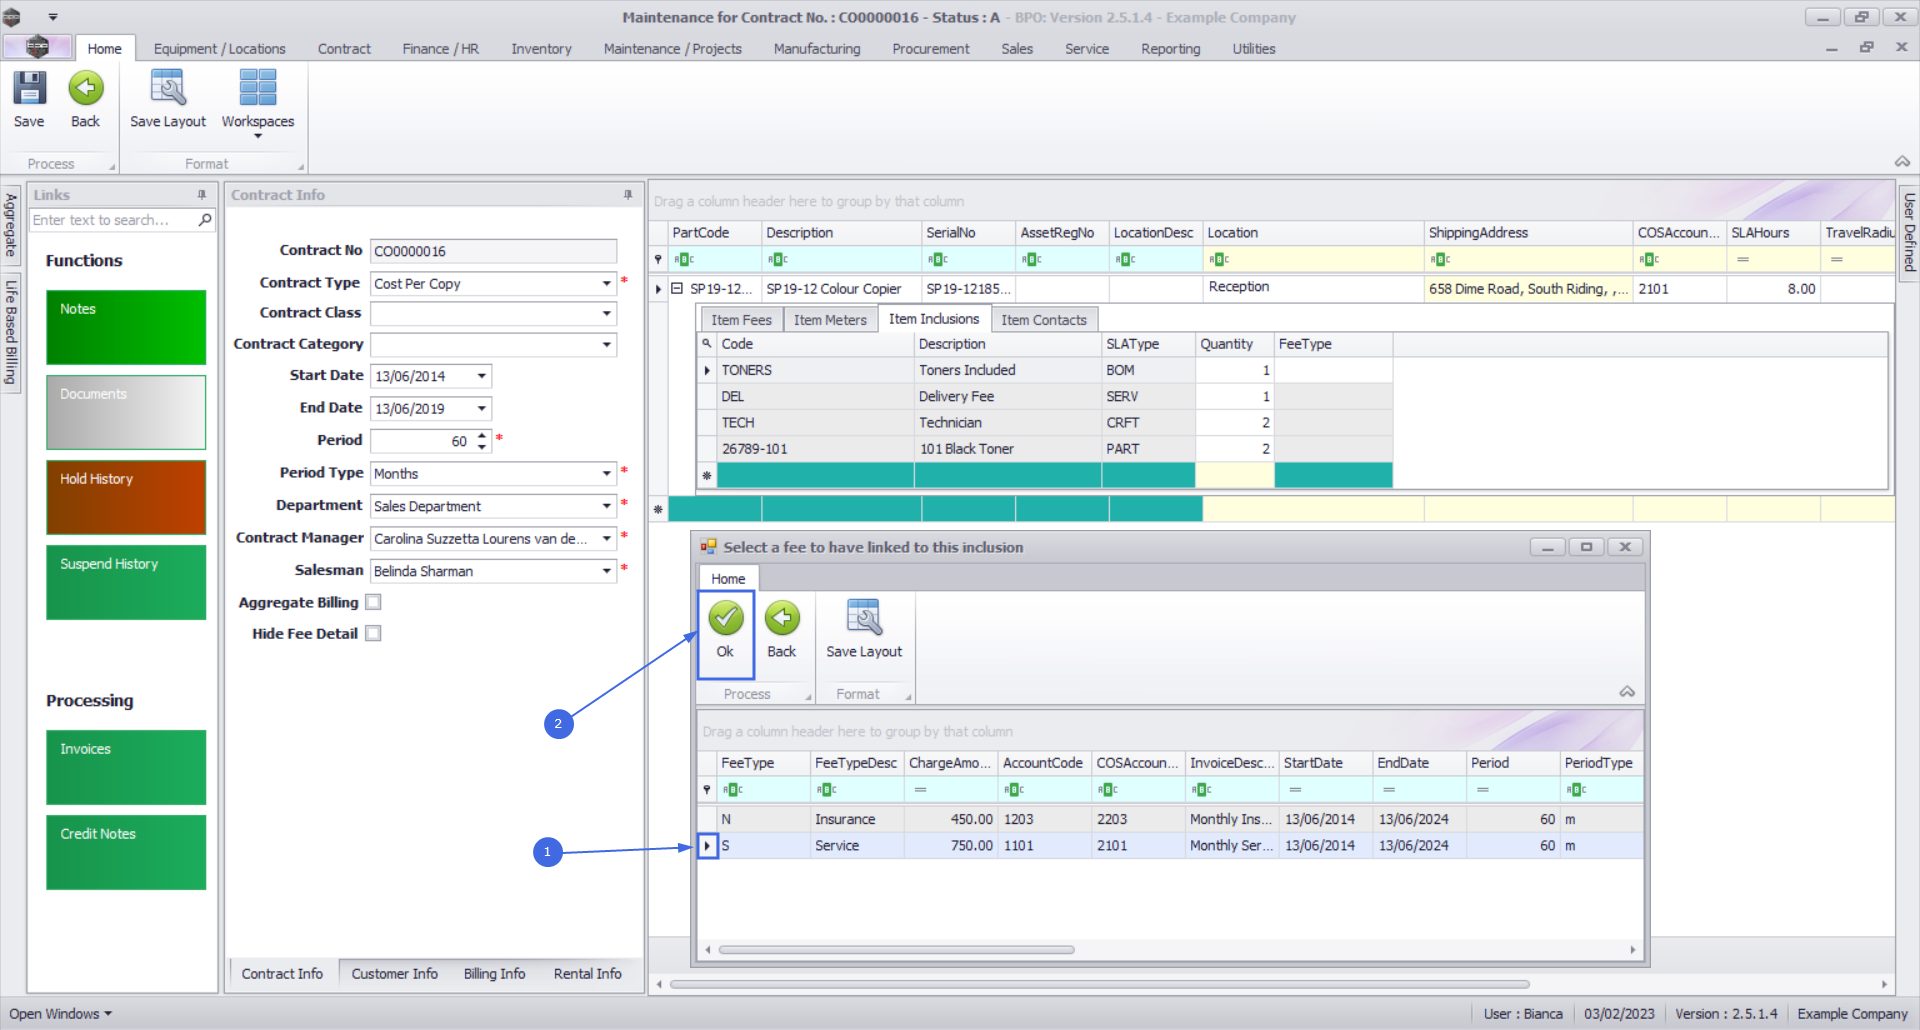
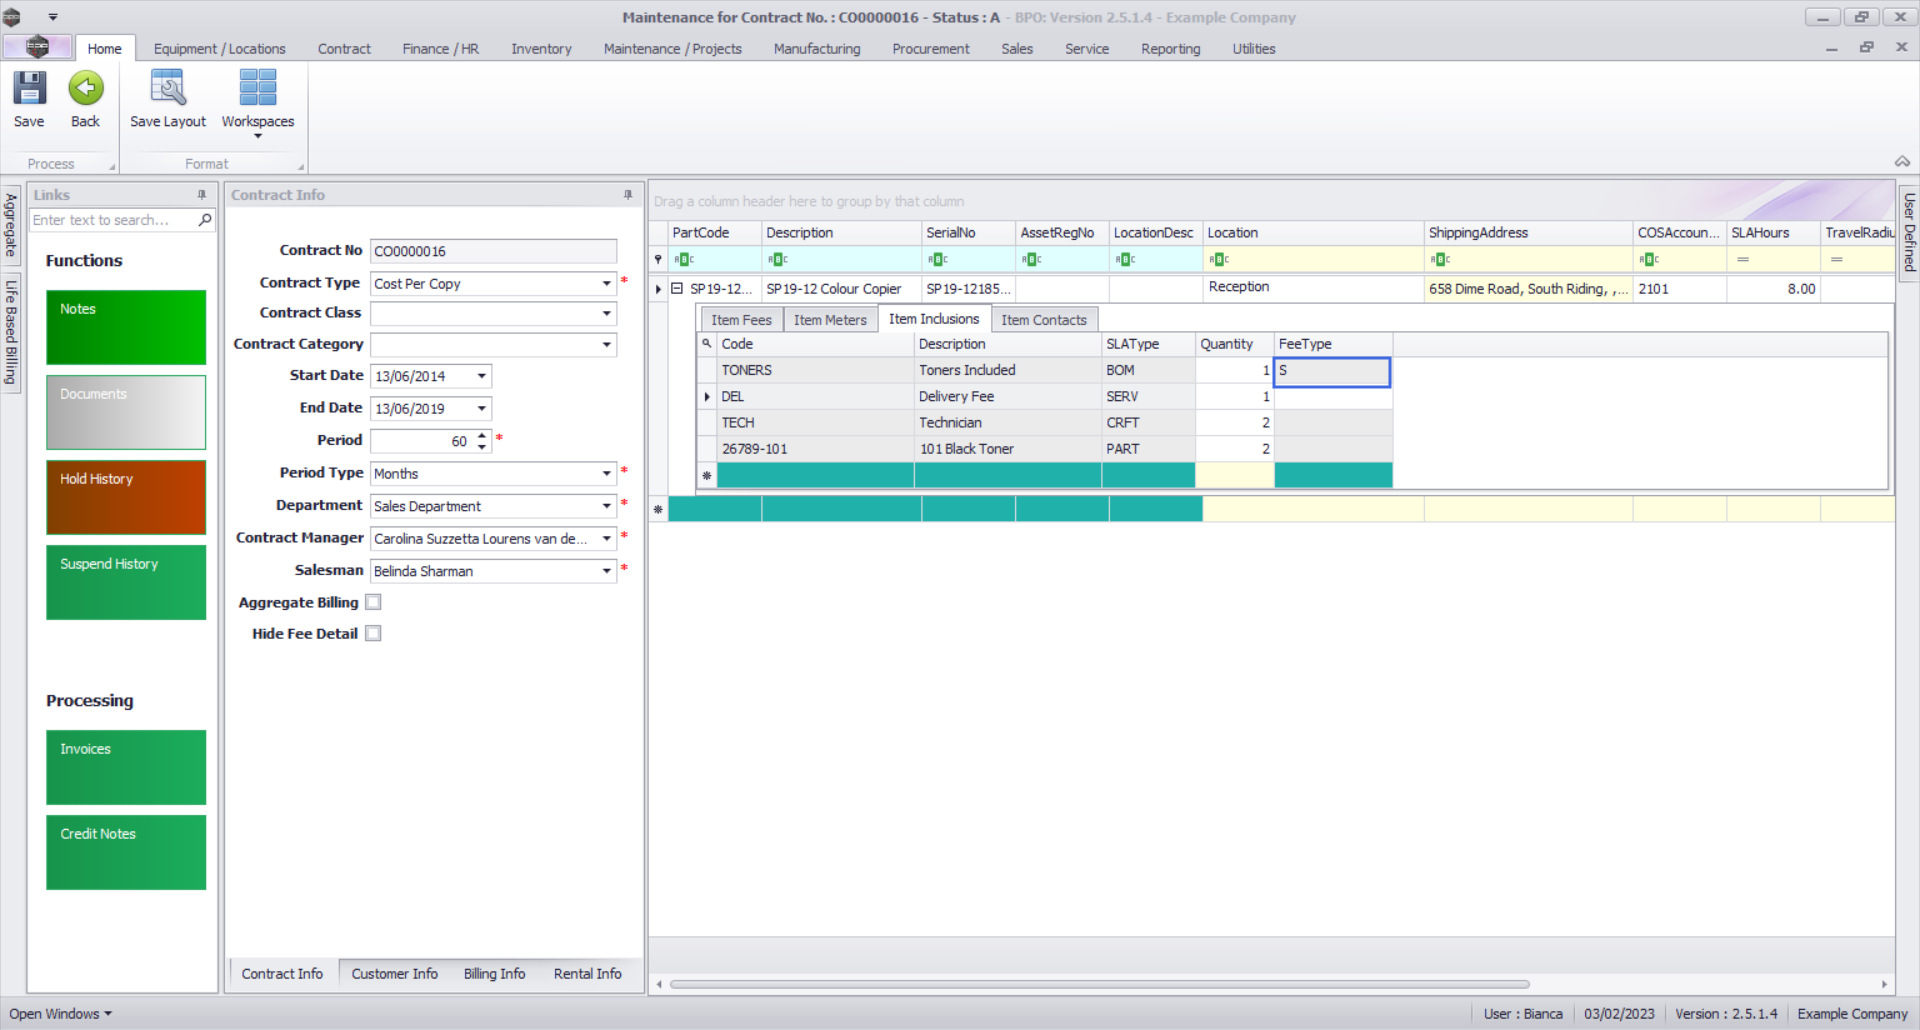
- The The Fee Type field will be populated with the selected fee type.
- In this image, S - Service was selected, since the selected inclusion is covered by the Service Fee, in this example.
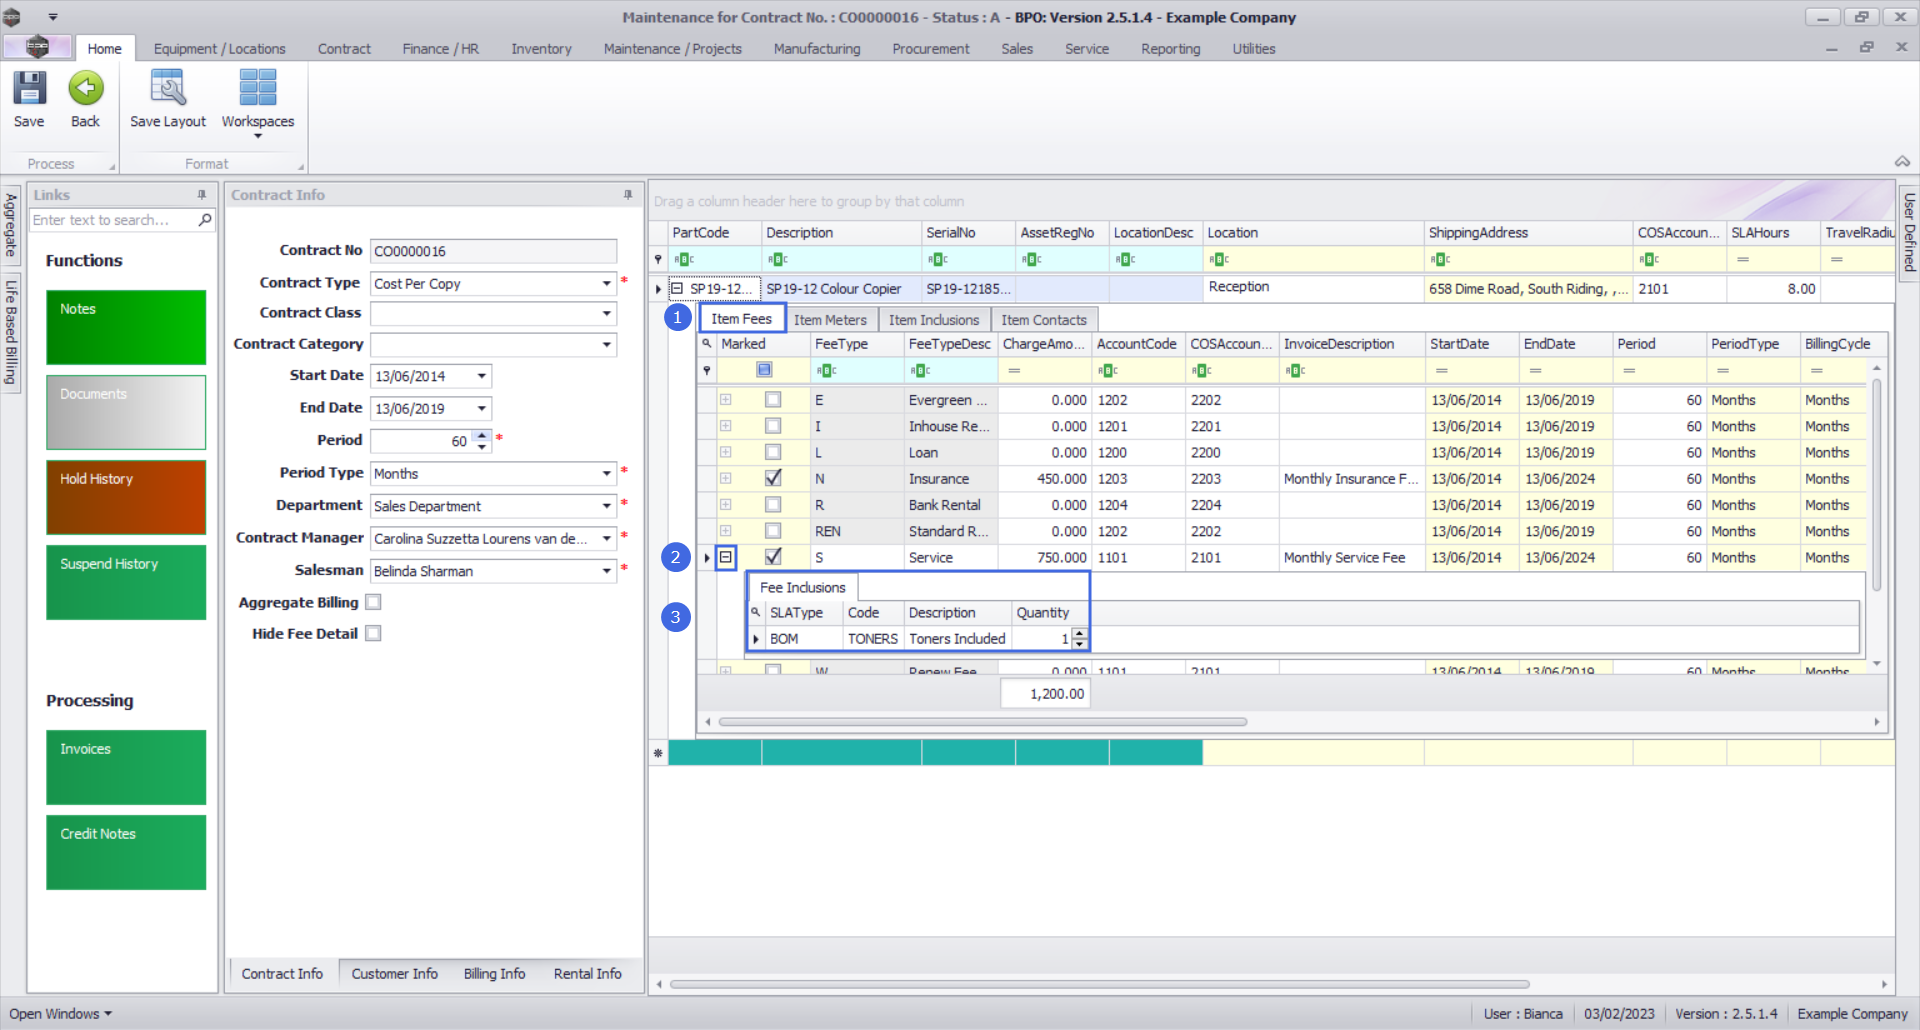
View the linked Inclusion on the Fee Detail
Note: that for this step you will need to save the .png first and then come back to view the Fee's linked Inclusion.
- Click on the Item Fees frame.
- Click on the Expand button on the fee you linked to an inclusion.
- The Fee Inclusions frame will be displayed.
- You can now view the details of the inclusion.
- You can change the Quantity of the inclusion in this frame if required.
Delete Inclusion
- Another option in the Item Inclusions Process menu is Delete Inclusion.
- Right click in the row of the item inclusion that you wish to delete from the .png.
- In this image INST - Installation Fee has been selected.
- The Process menu will pop up.
- Click on Delete - Delete Inclusion.
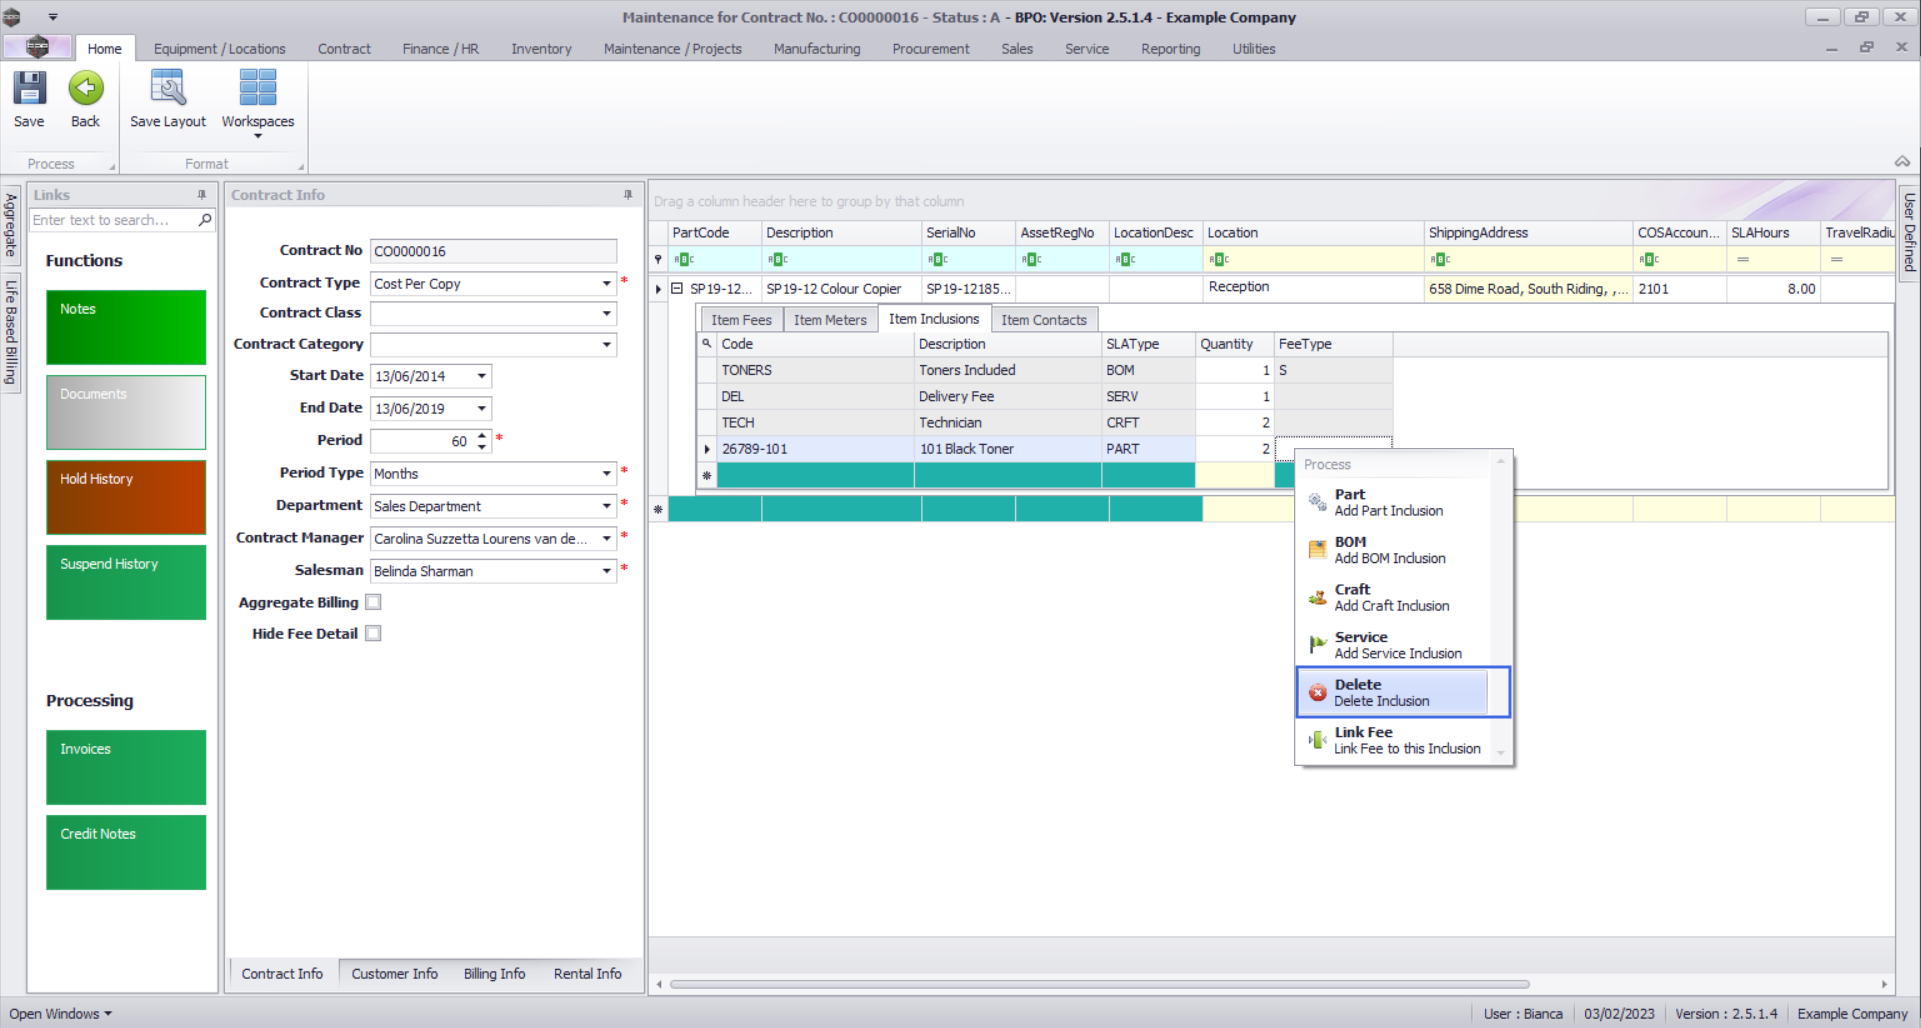
- An Input Validation message box will pop up asking:
- Are you sure you want to delete this item inclusion - [Serial Number or Location Description]?
- Click on Yes.
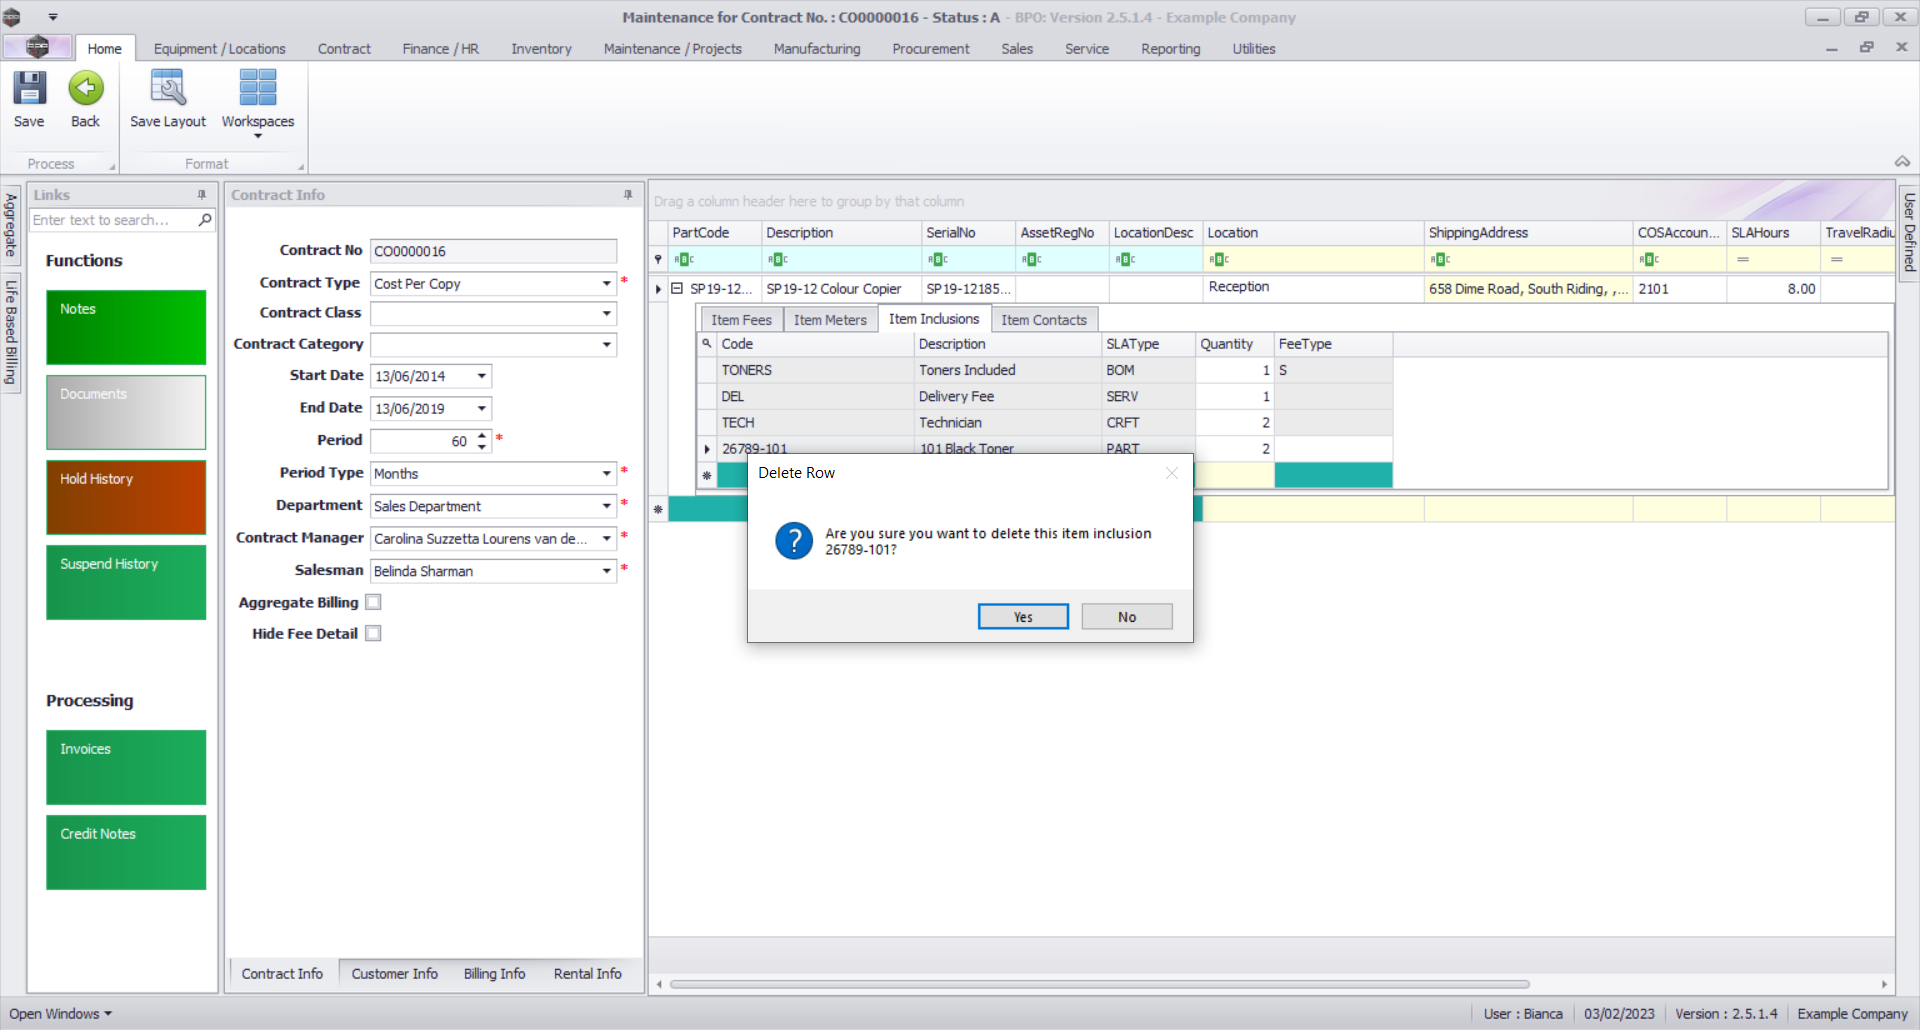
- The selected item will now be removed from the Item Inclusions frame.
Next: Link Contract Item Contacts
NUCL.CTRT.004.008