We are currently updating our site; thank you for your patience.
Interface and Environment
Using Nucleus Service - Ribbon Configuration
You can customize the Nucleus Service Ribbon to arrange Tabs and Commands in the order you want them, hide or unhide your Ribbon, and hide those Tabs and Commands that you use less often.
| Ribbon Select: > Quick Access Toolbar Icon |
Ribbon Customization
- Click on the Quick Access Toolbar icon.

- A pop-up menu will appear with an option to Customize the Ribbon.
- Click on this option.

- The Ribbon Customization screen will be displayed.
Choose Commands From...
- The left-hand side of this screen is the Choose commands from: menu which contains a list of all the Tabs and Commands available in Nucleus Service.
- This list is static and reflects the way your Ribbon has automatically been configured on installation of Nucleus Service.
All Tabs
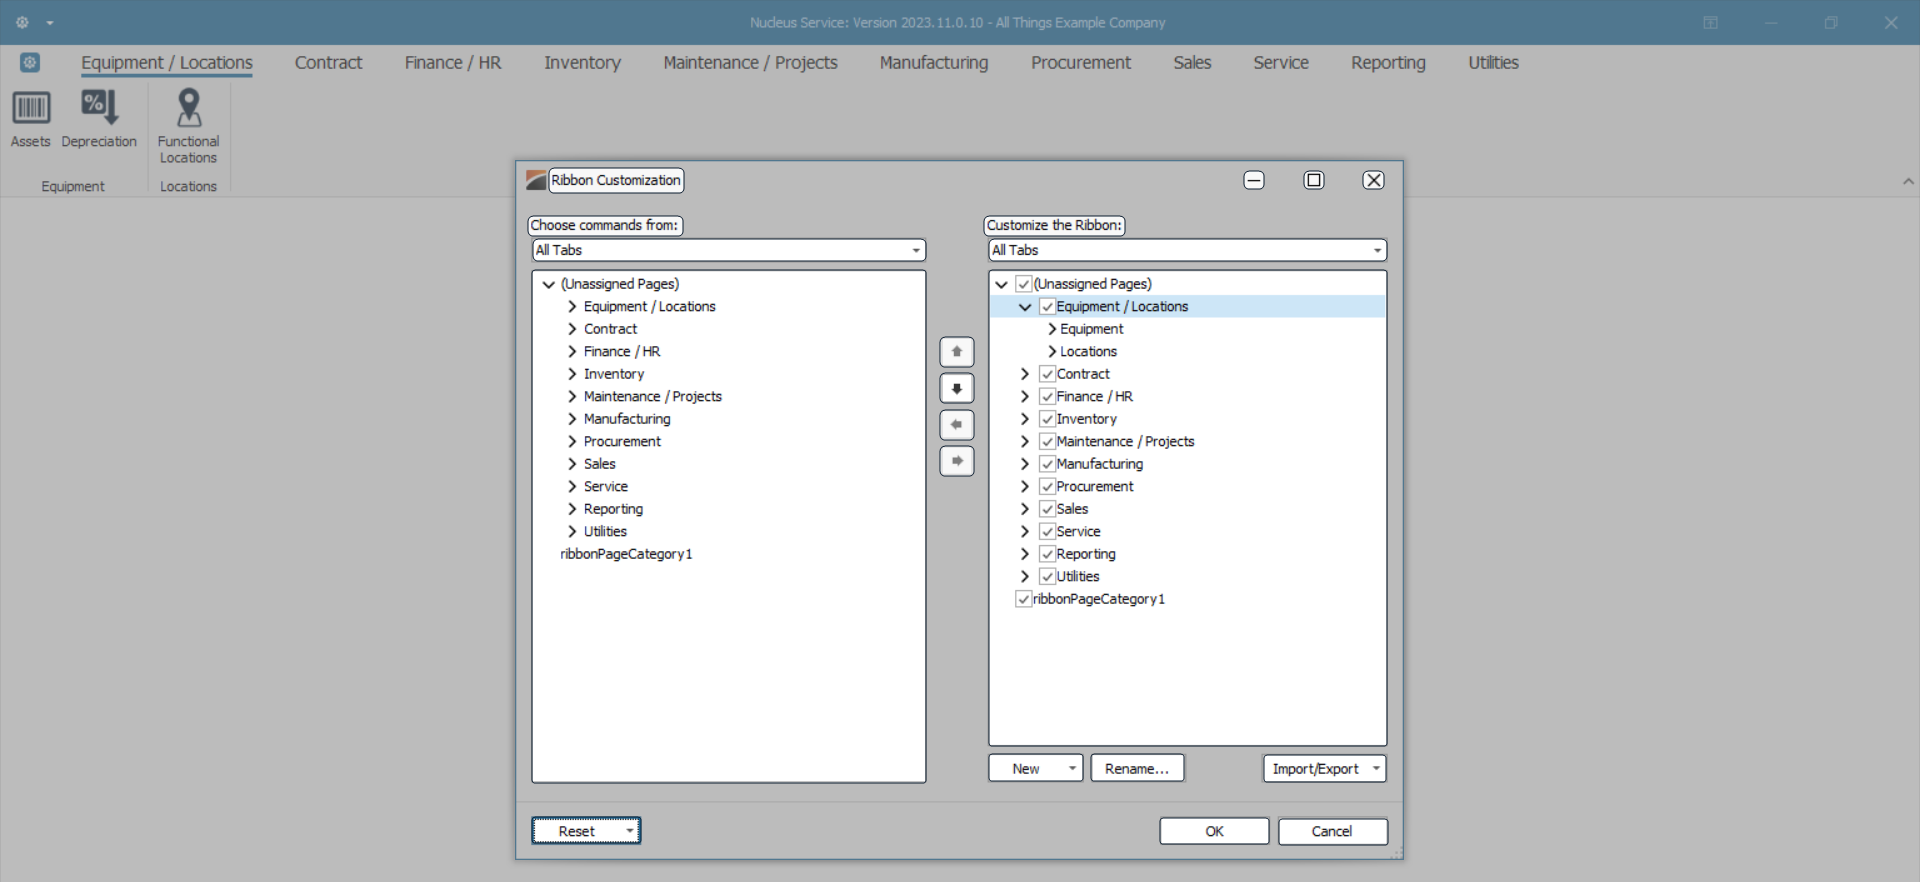
- In this Choose commands from menu you can view all the Tabs in the All Tabs list.
- This list can be expanded using the drop-down arrows next to the Tab titles to reveal the Commands contained in each Tab.
- In this image the Equipment and Locations Tab has been expanded to reveal the commands that are within that Tab.
- You will see that this is a list reflection of your Equipment and Locations Ribbon Tab and its Commands as currently displayed in the Ribbon.

- The entire All Tabs list can be expanded to examine the contents.
- Use the scroll bar to peruse the Tabs and Commands that you may want to select for your customized Ribbon.
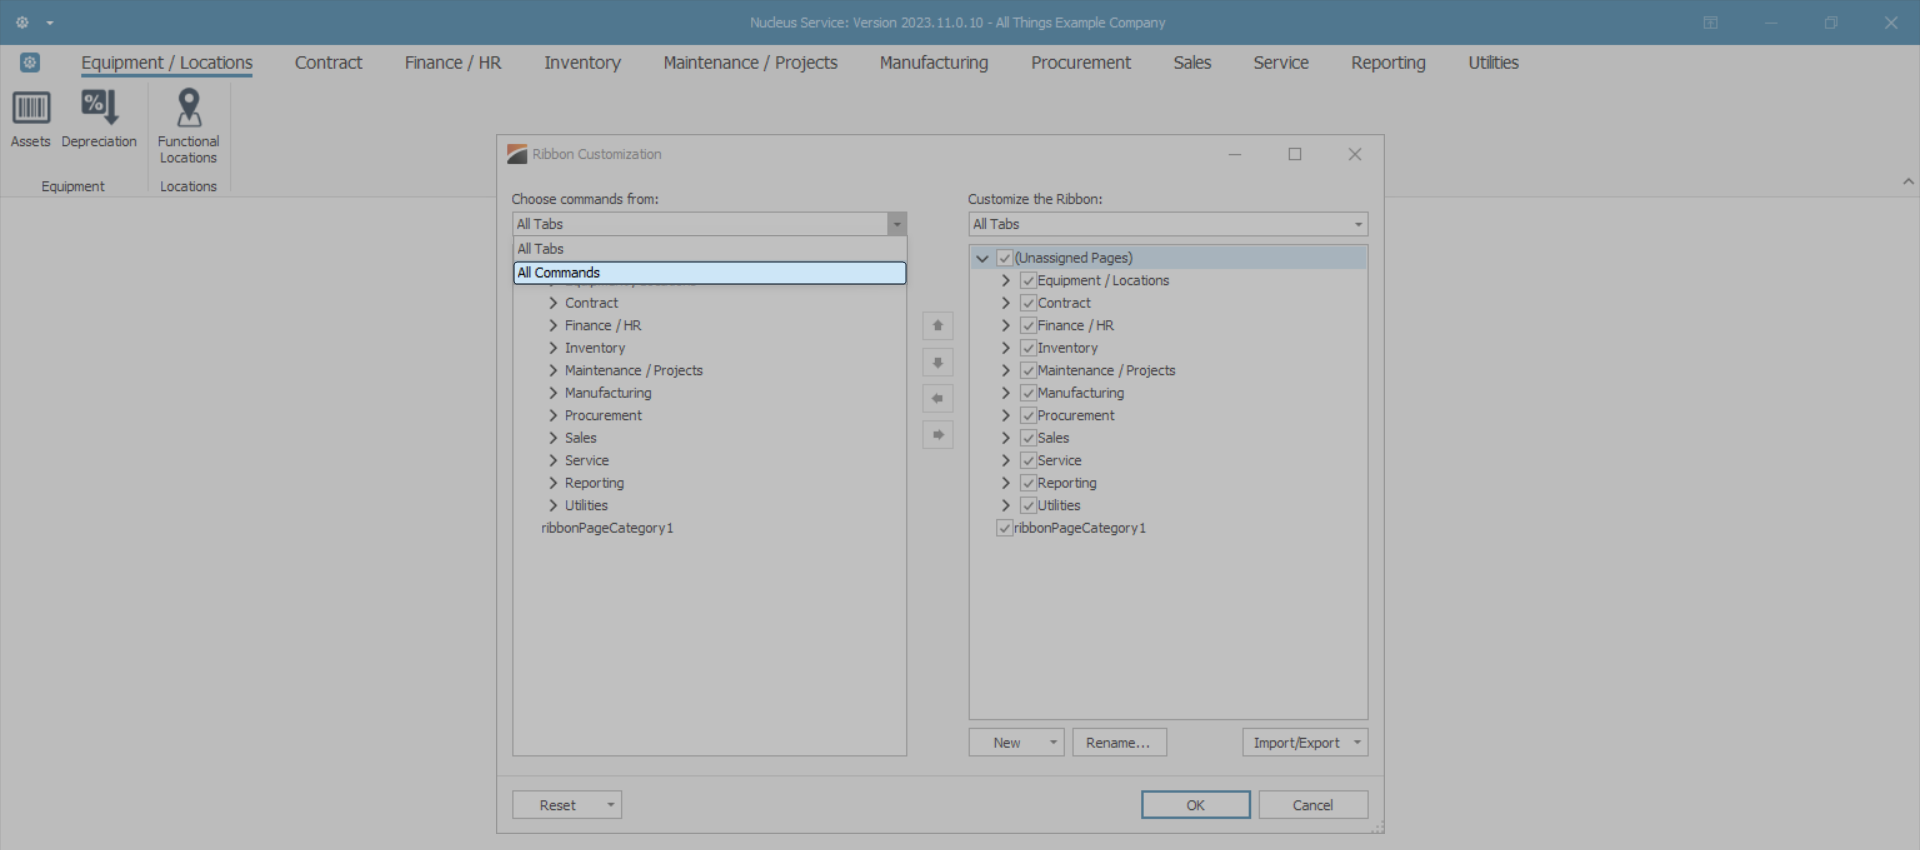
- Click on the drop-down arrow in the All Tabs row.
- A menu list will be displayed that gives two options - All Tabs and All Commands.
All Commands
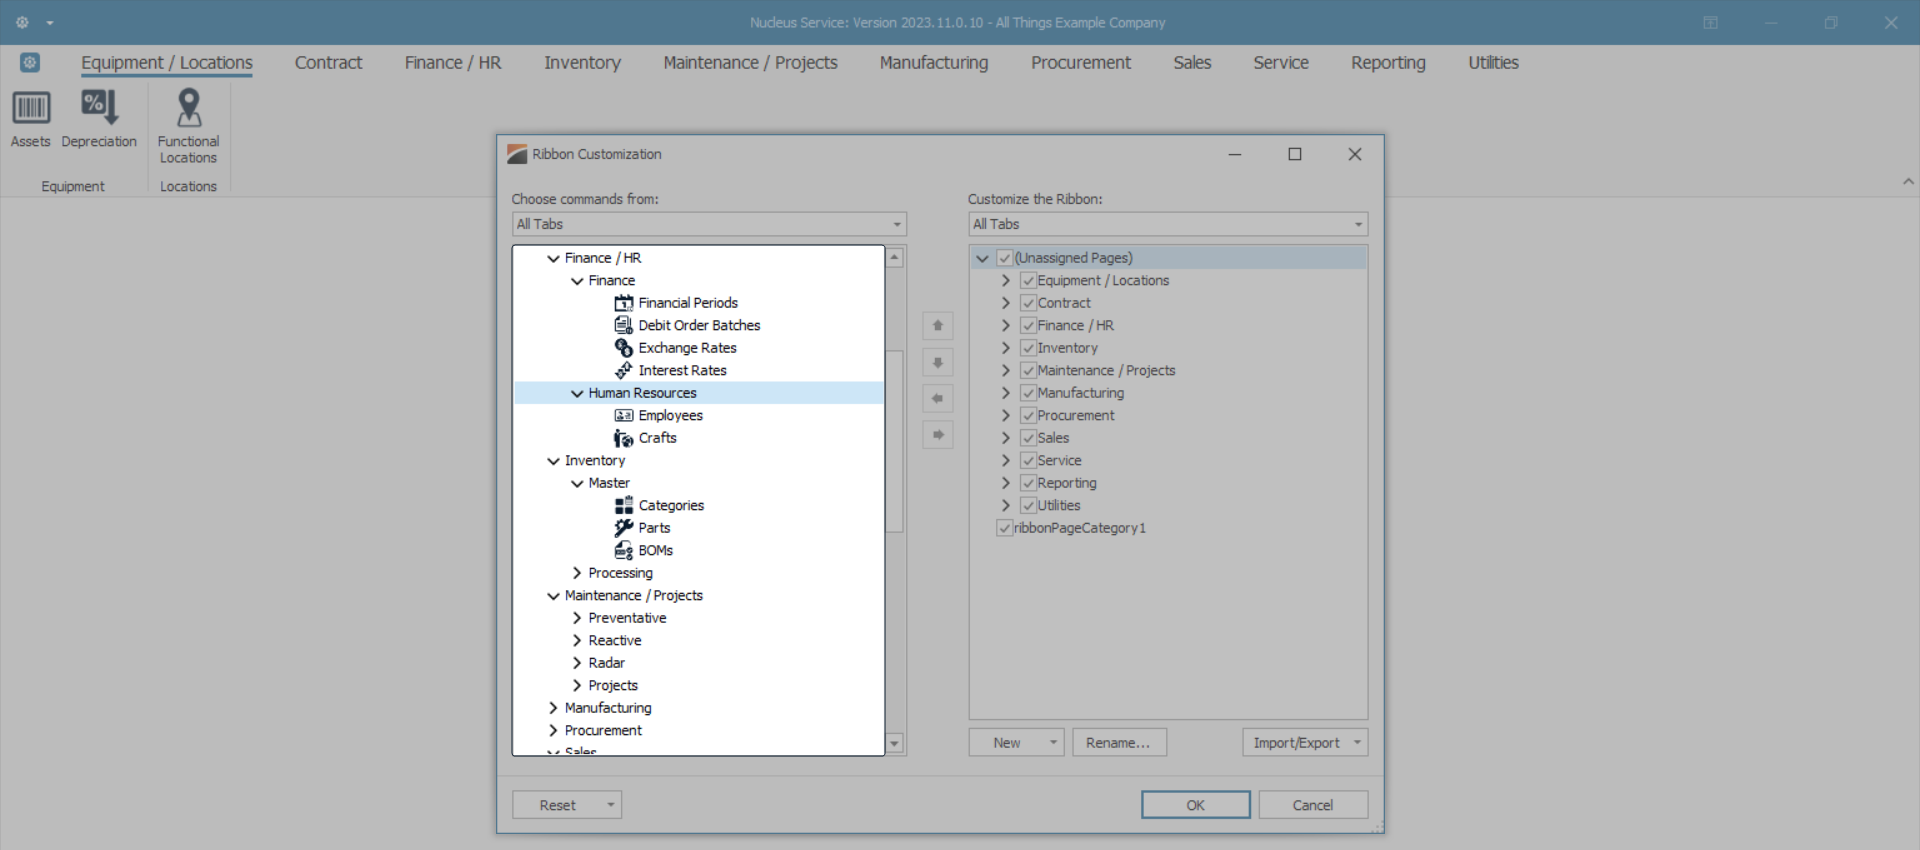
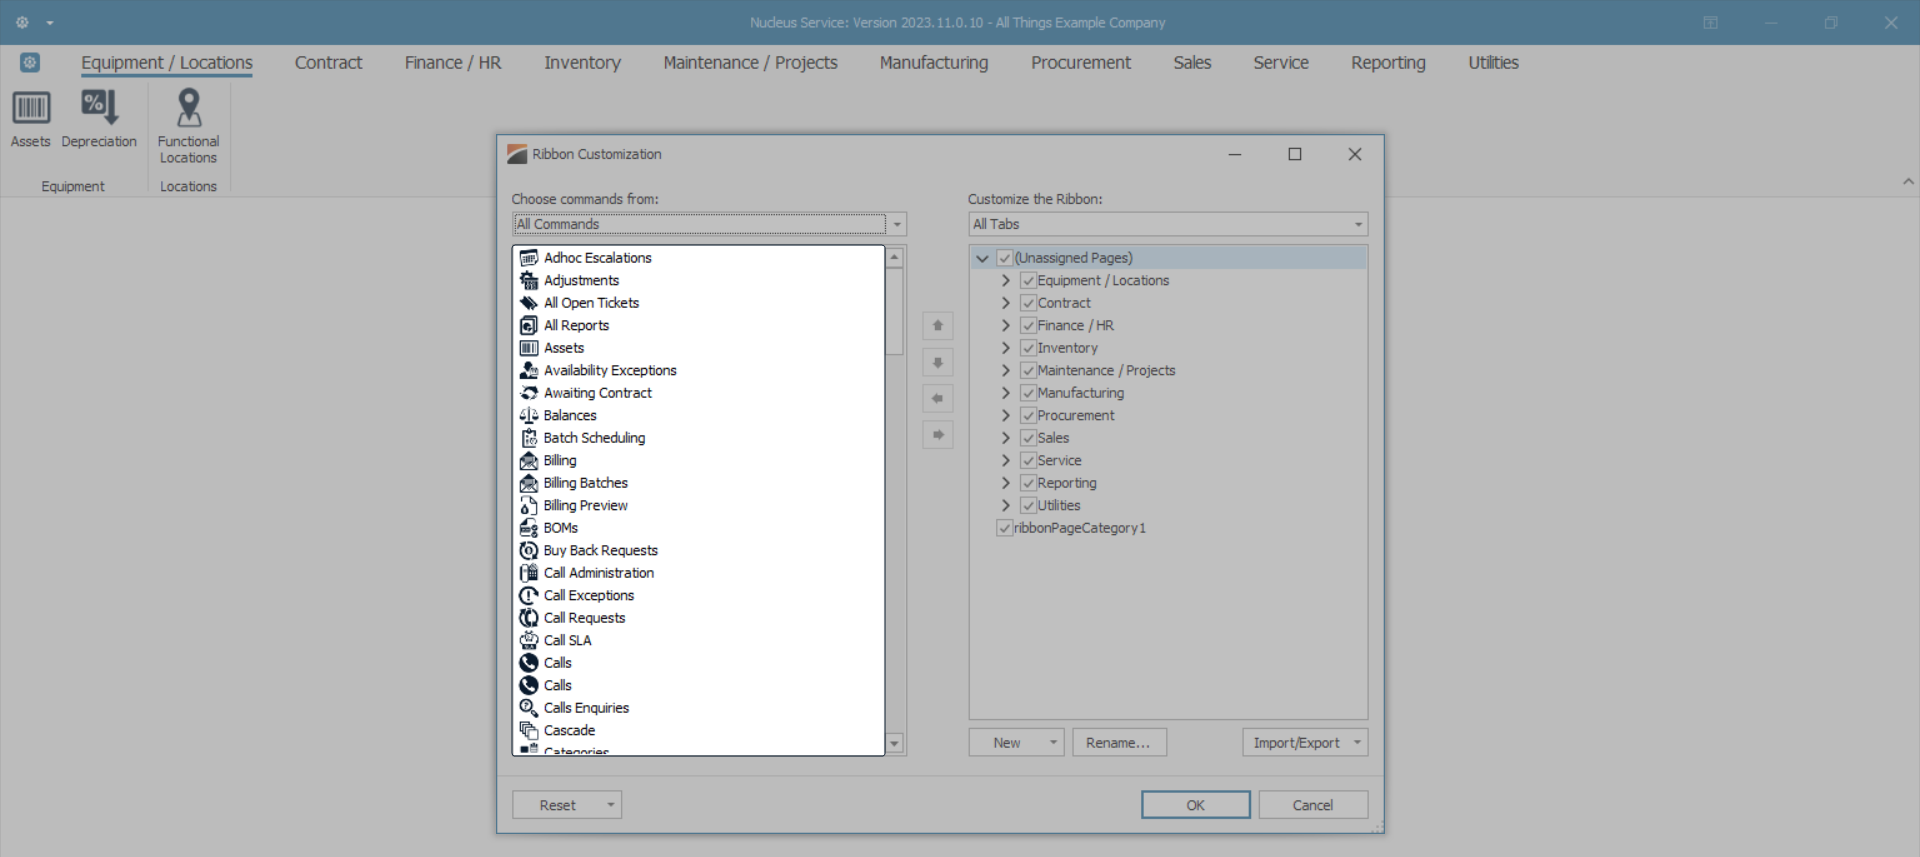
- Click on the All Commands option.
- Now an alphabetical list of all the Commands in Nucleus Service will be displayed.
- These Commands are all available to be added to any of the Tabs in your customized Ribbon.
Customise the Ribbon...
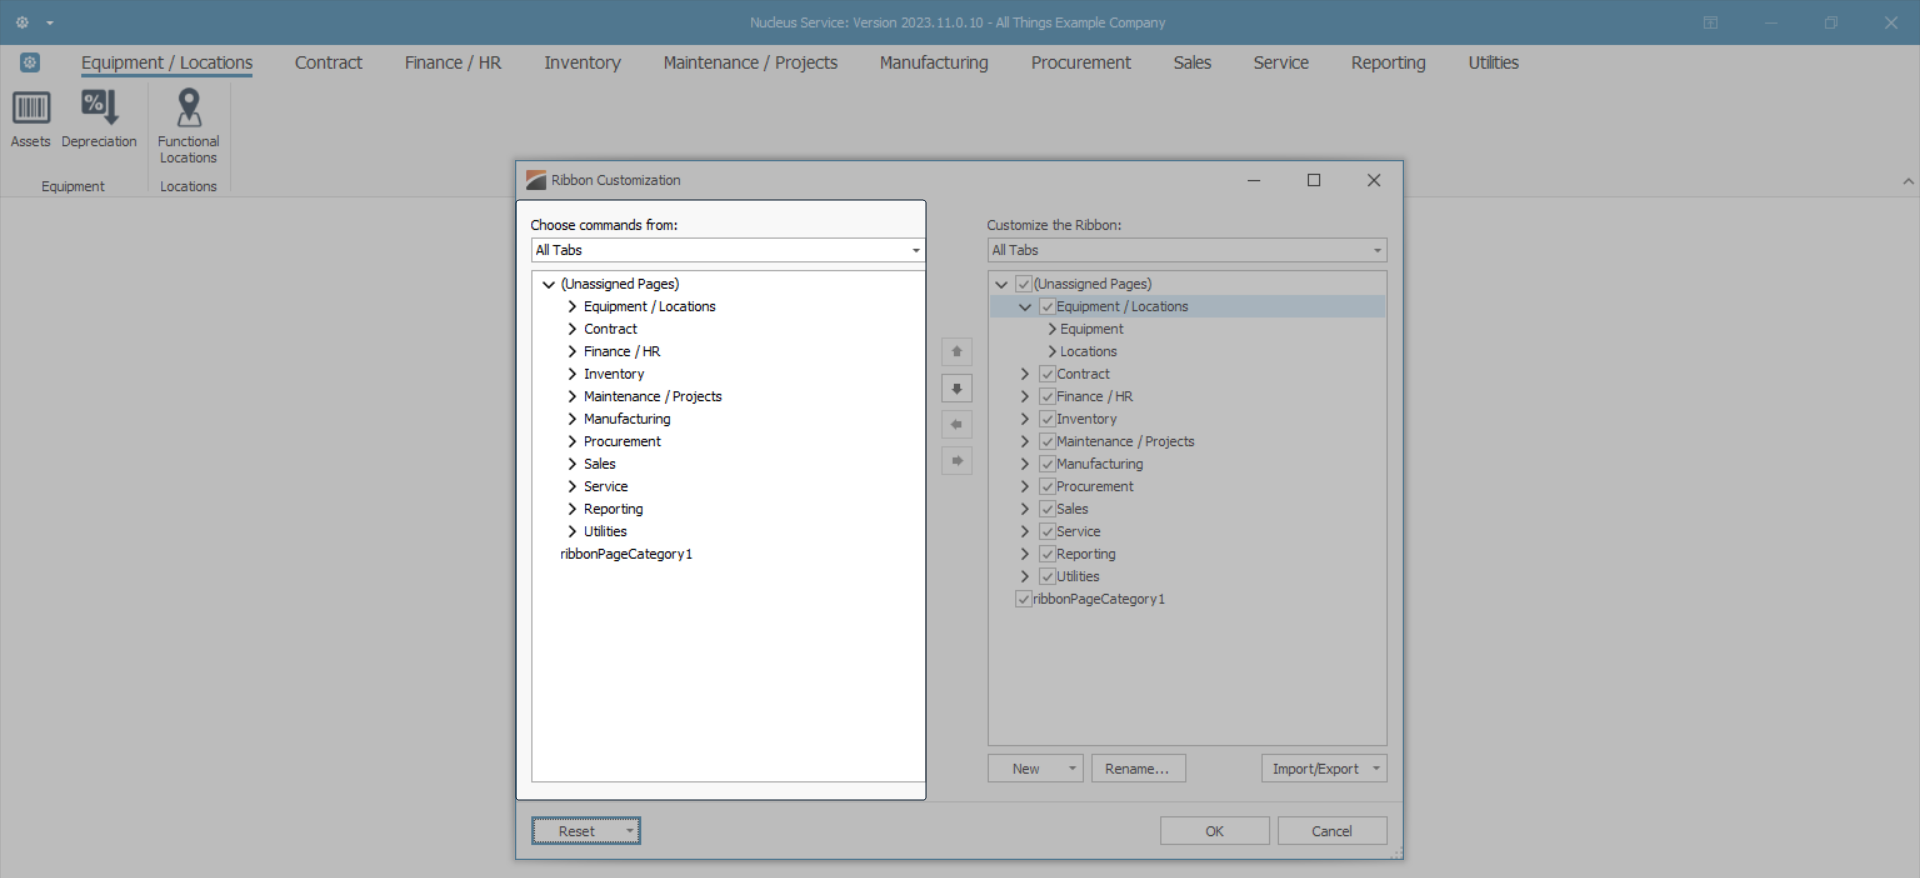
- The right-hand side of the screen is the Customize the Ribbon frame, where you will be adding your personally selected Ribbon Tabs and their relevant Commands.
- It is auto-populated when you first open the screen, with all the check boxes selected.
Change Ribbon Order
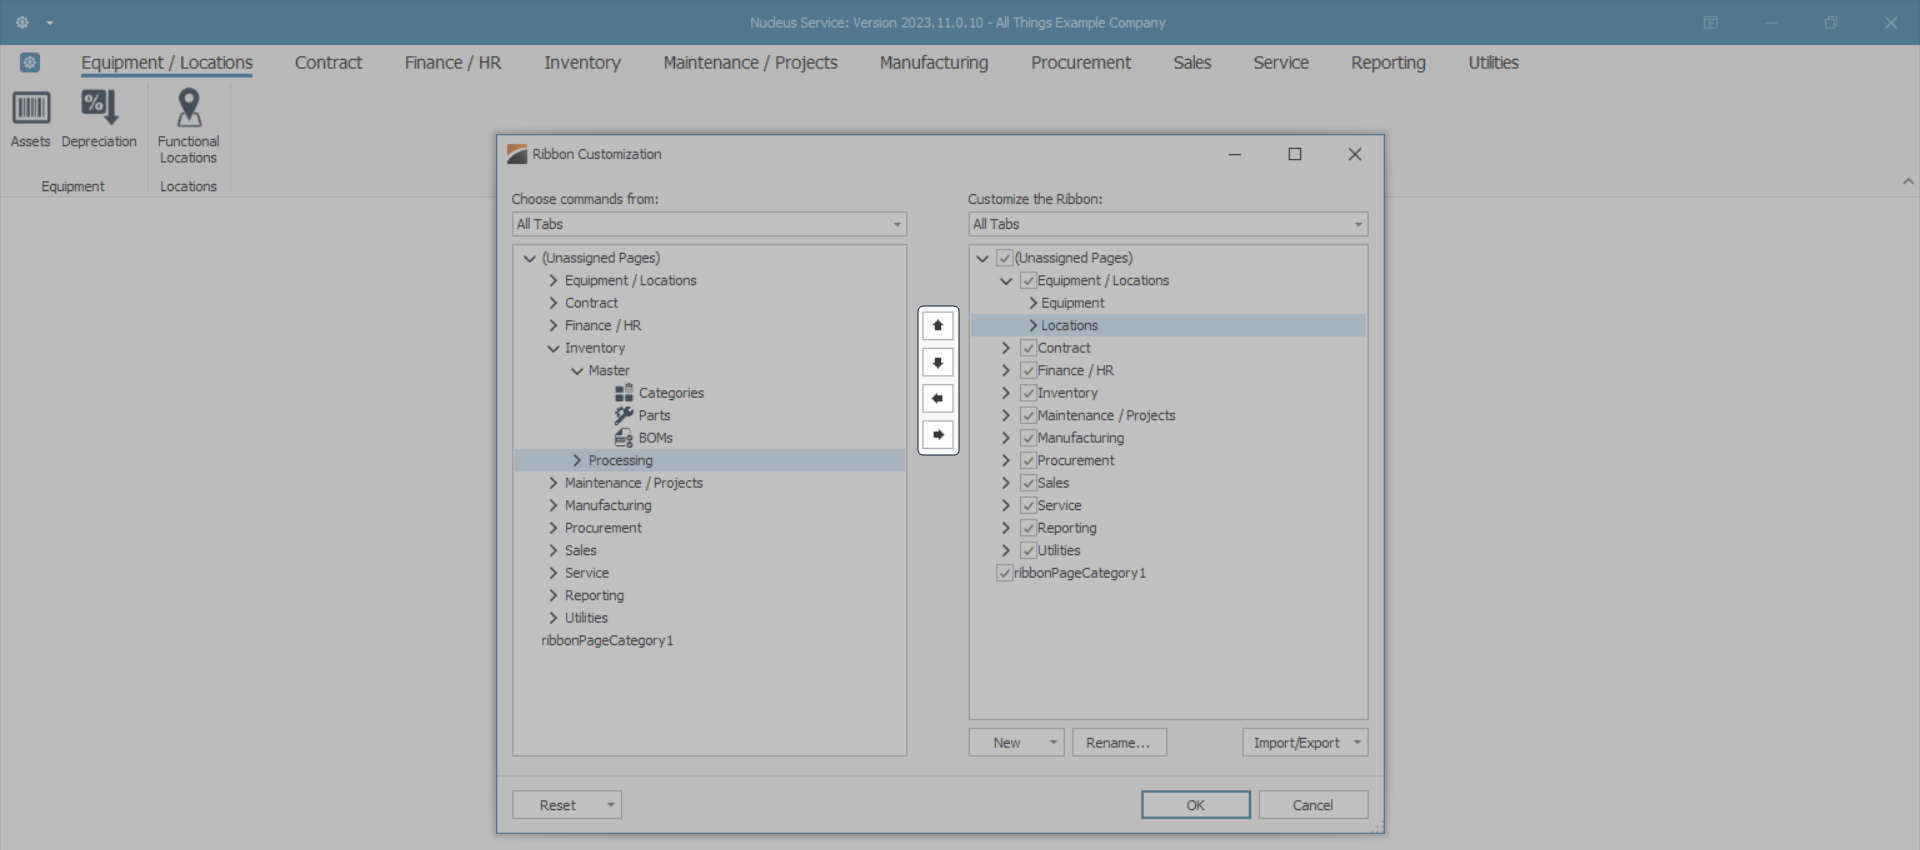
- You can change the order of the Ribbon Tabs in your customized list by using the arrows in the centre of the screen.
- For Example :
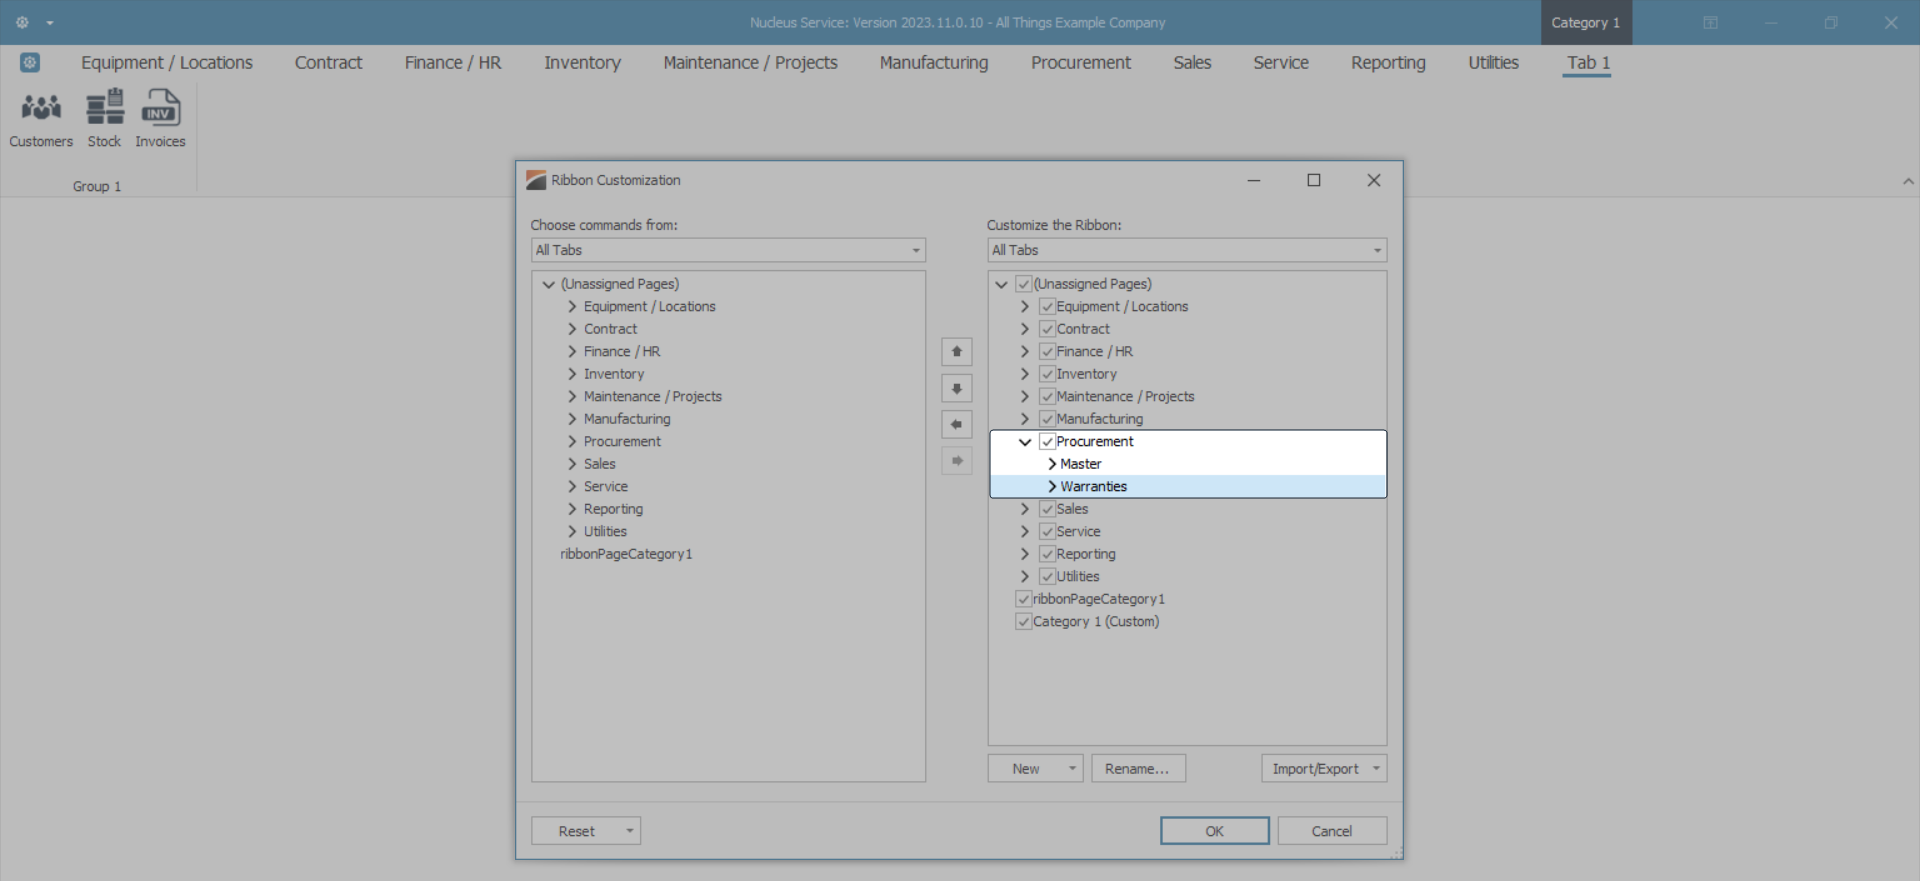
- In this image, Procurement has been selected.
- It is currently 7th position in the list.
- Click twice on the up arrow.

- Procurement has now moved up in the list to 5th position.
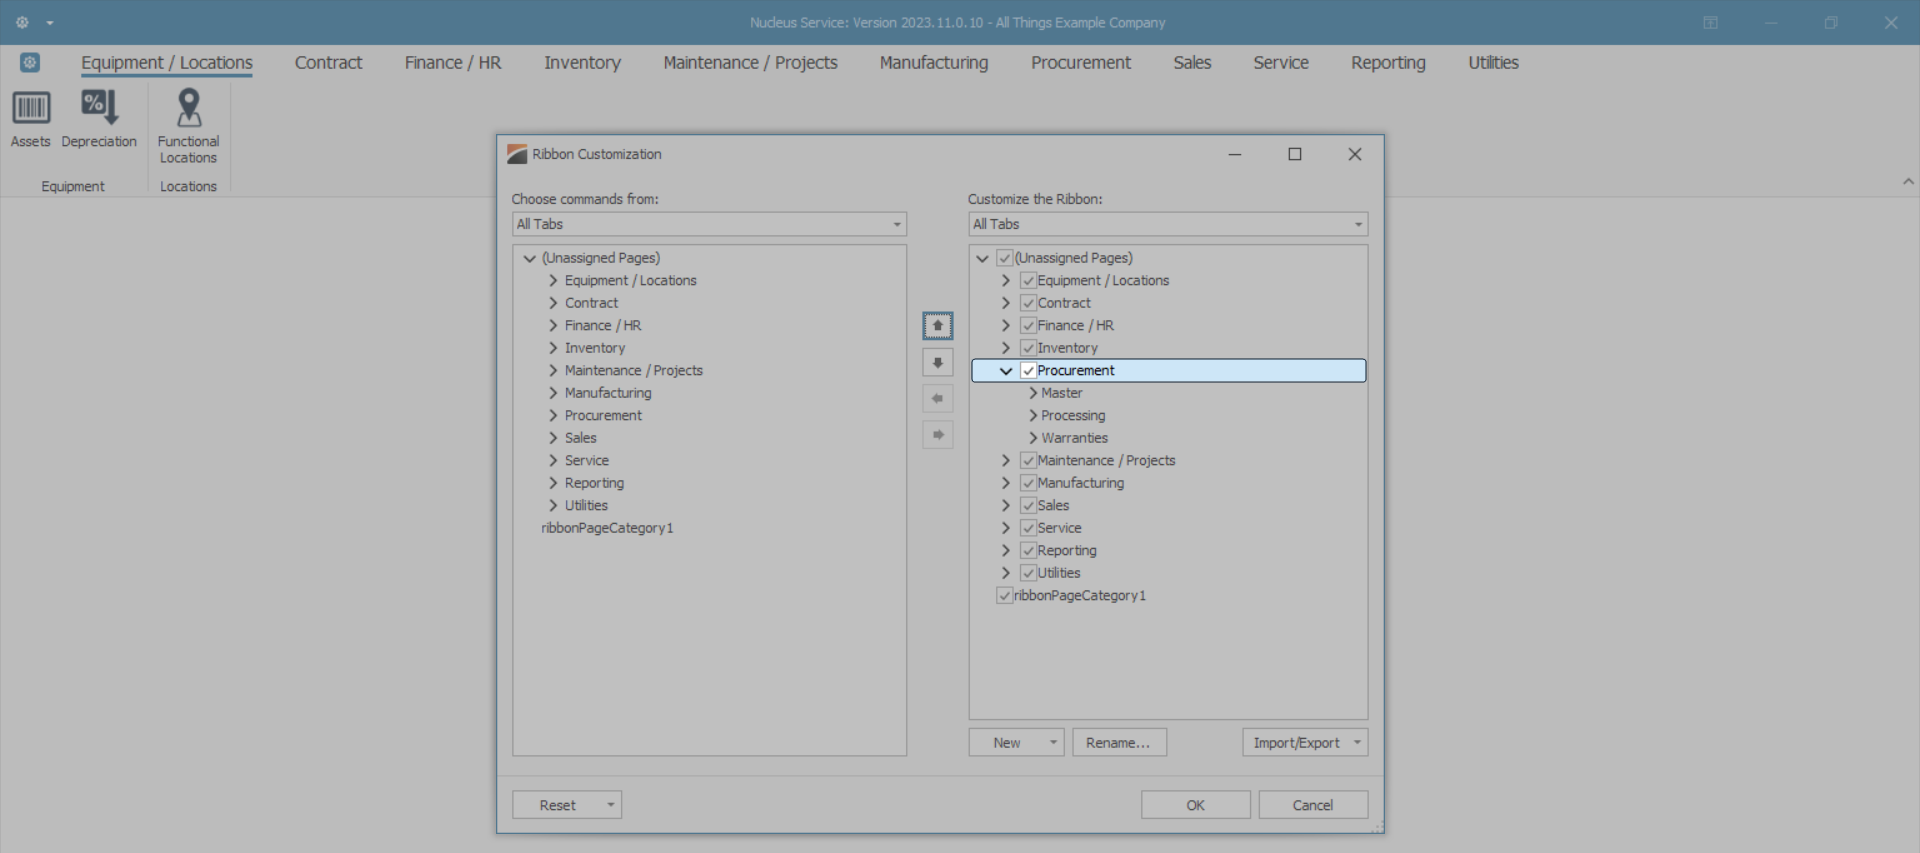
- When you have clicked OK, the changes will be saved and Procurement will now display 5th instead of 7th in the Ribbon.

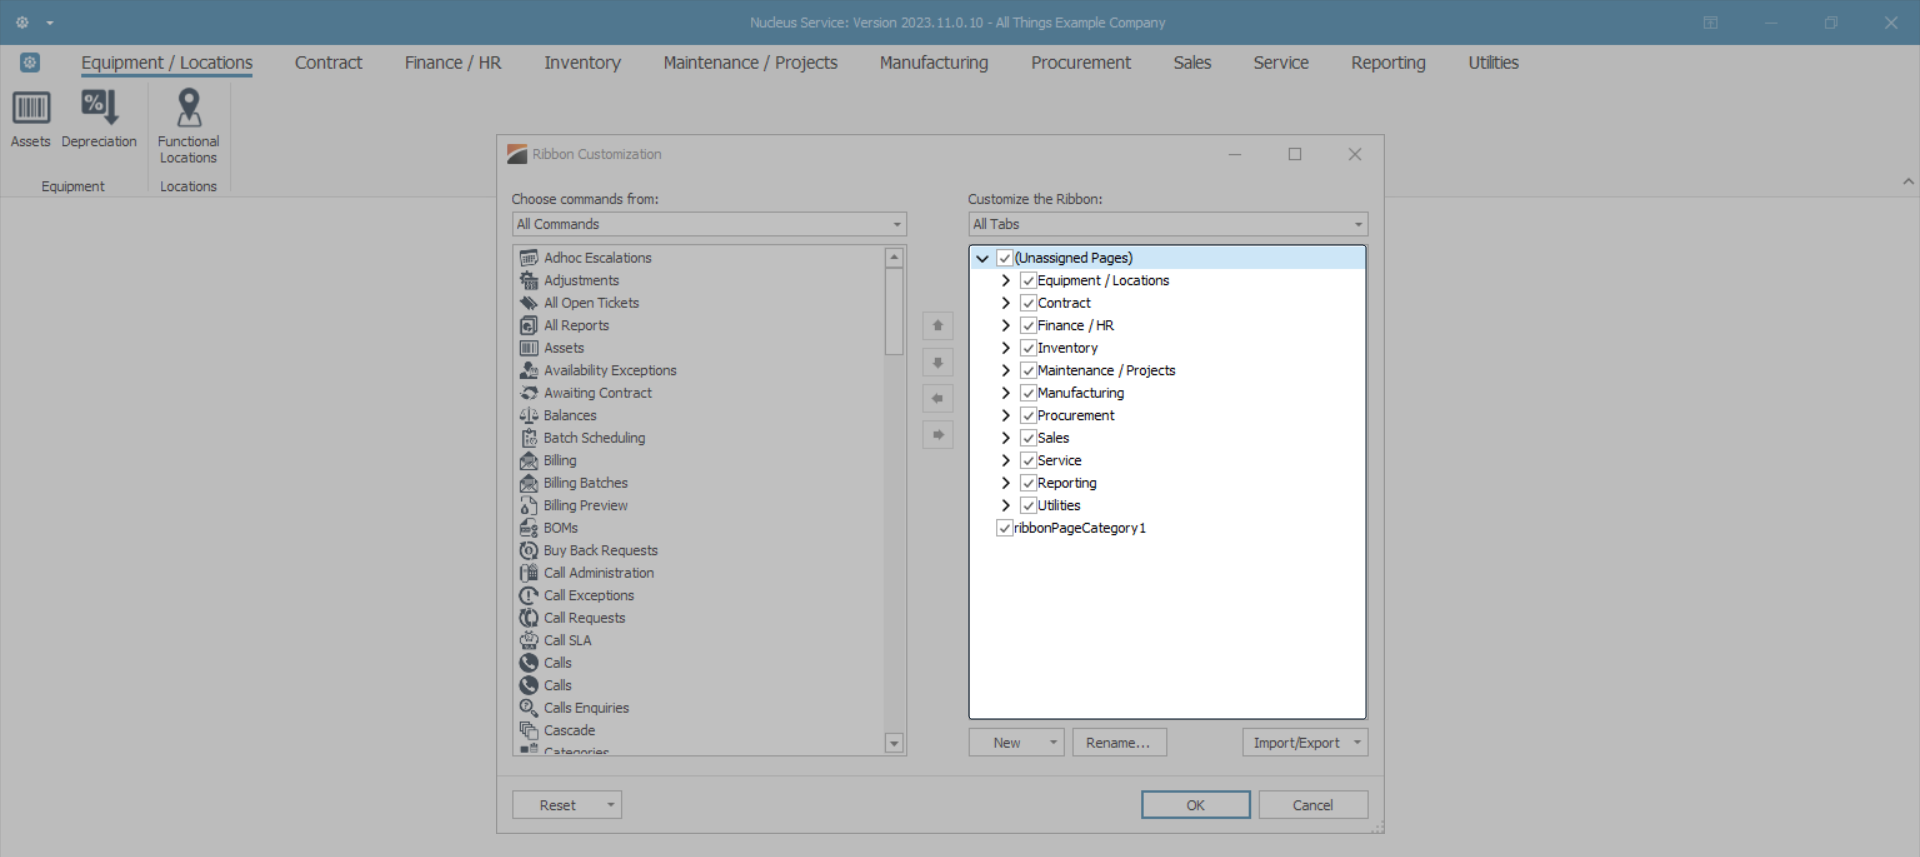
Clear All Customizations
- Use the arrows to move any of the Ribbon Tabs into the order of your choice.
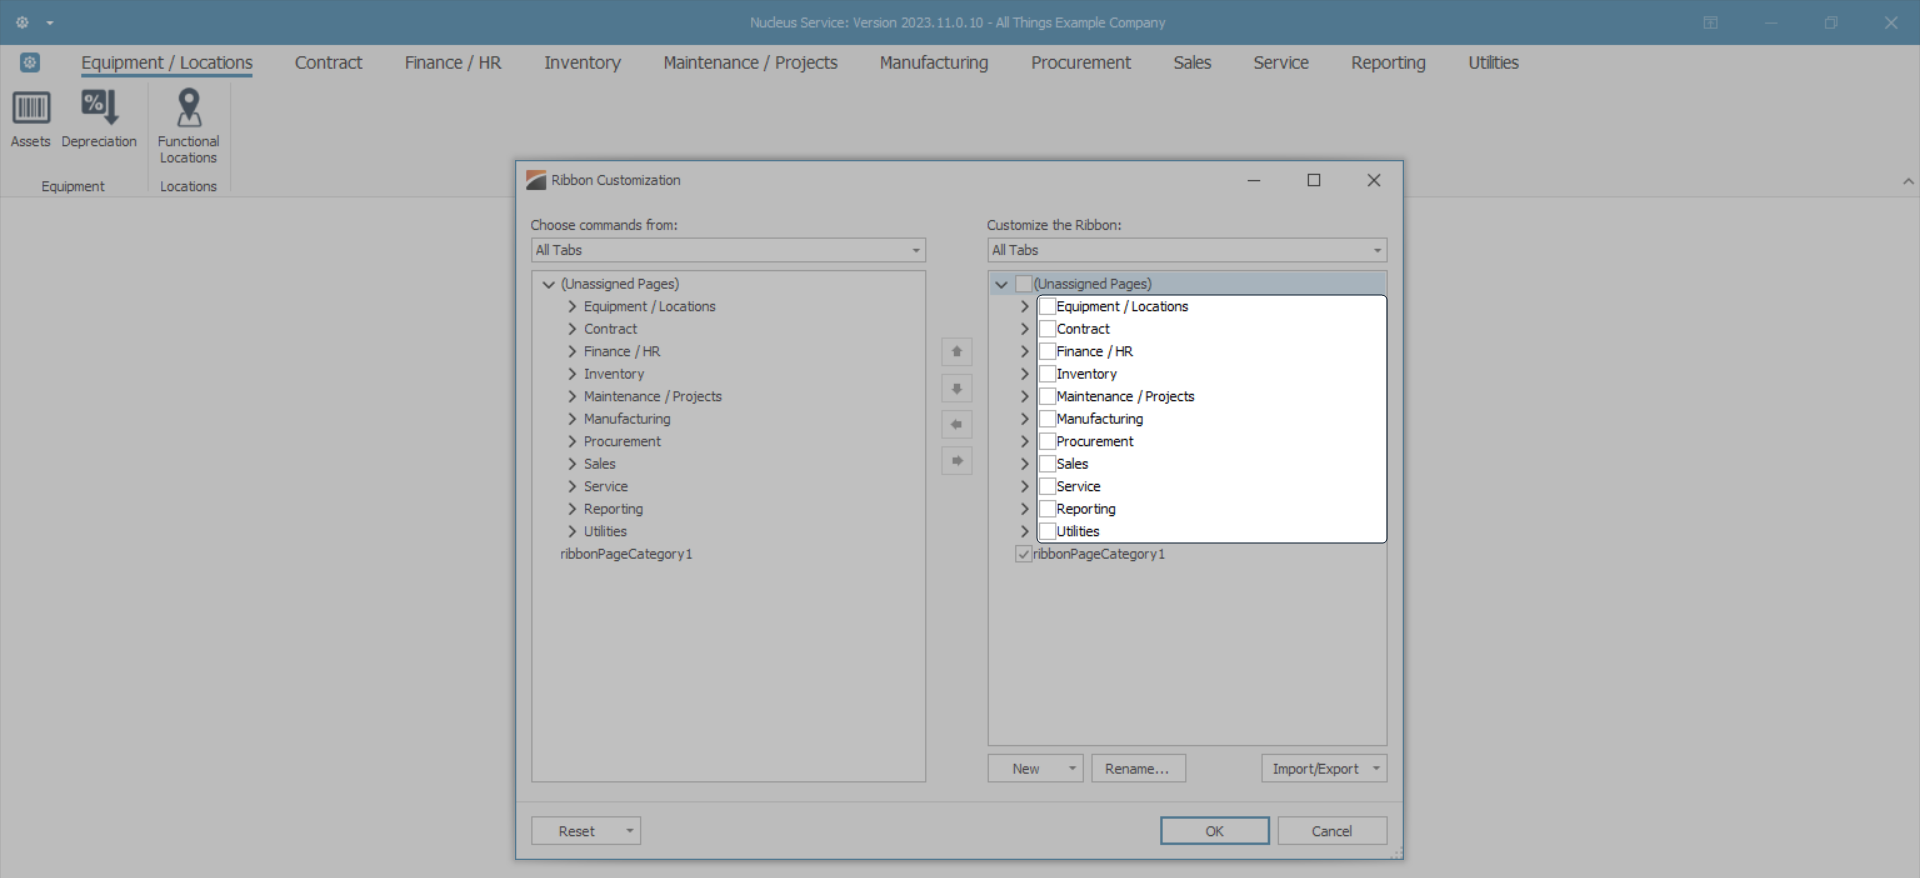
- To clear all the populated fields, untick the check box next to Unassigned Pages.
- This will clear all customizations for you to be able to start with a clear slate.
- Every one of the Ribbon Tab check boxes has been deselected.
Select Specific Customizations
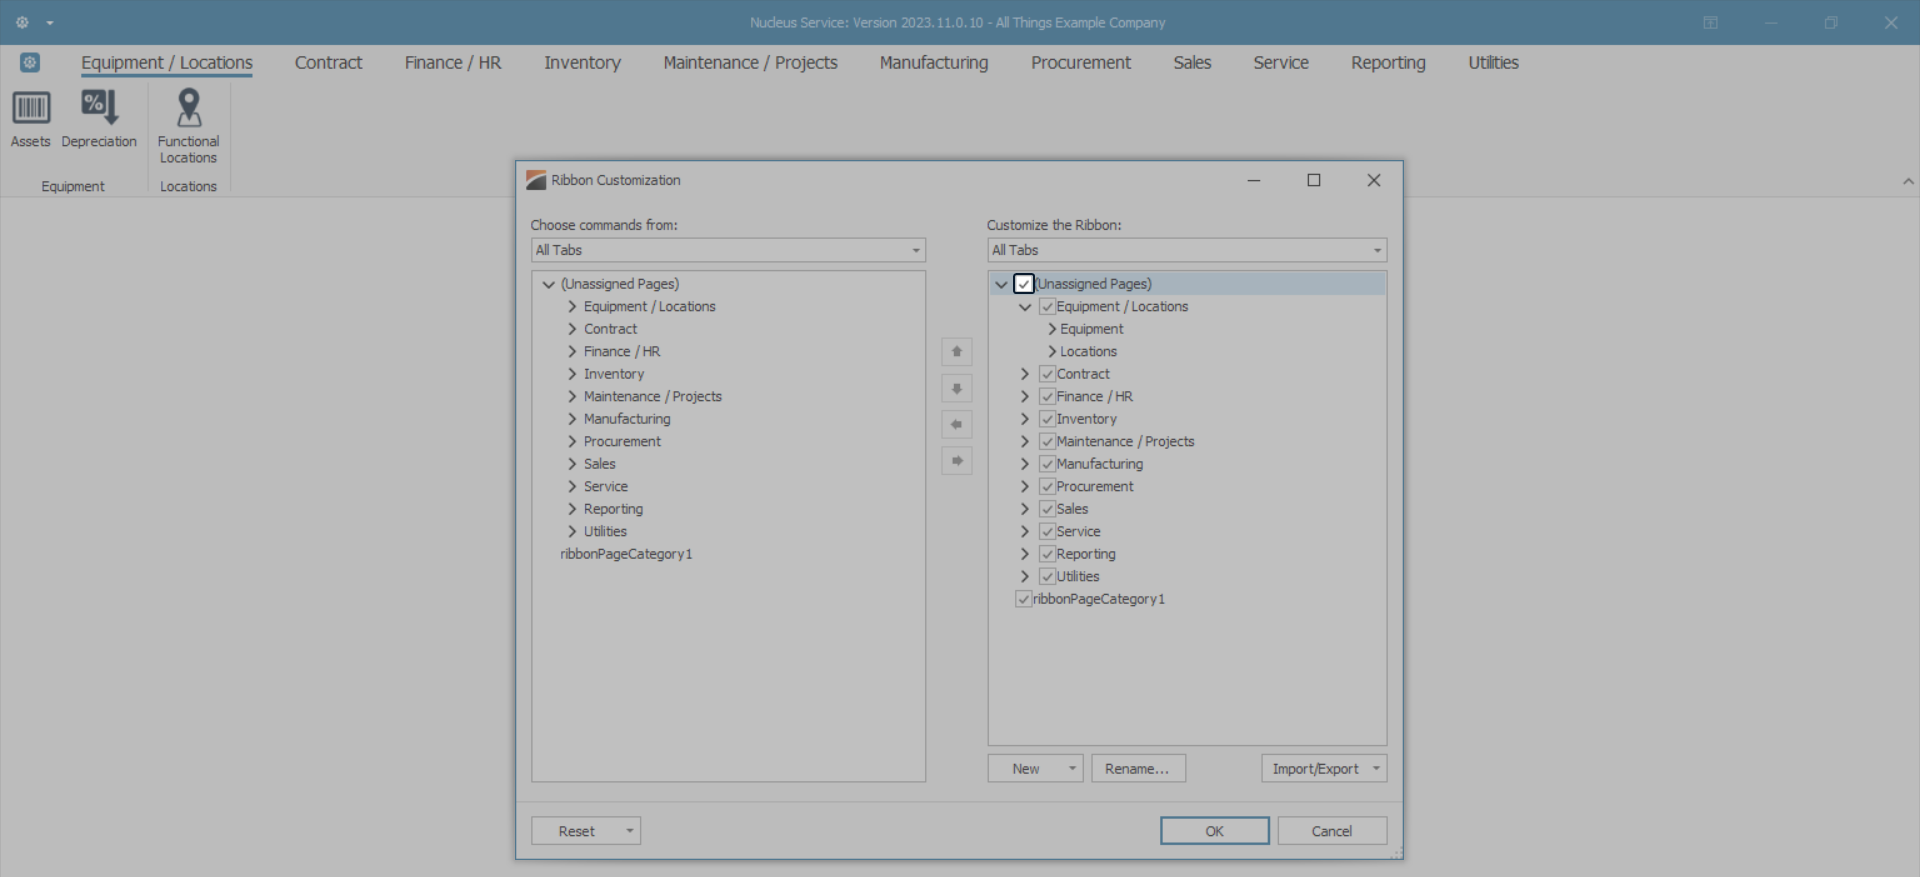
- Alternatively, you can repopulate all the Ribbon Tabs by clicking again on the Unassigned Pages check box.
- Then select by unticking the check boxes next to the specific Tabs that you do not want in your customized Ribbon.
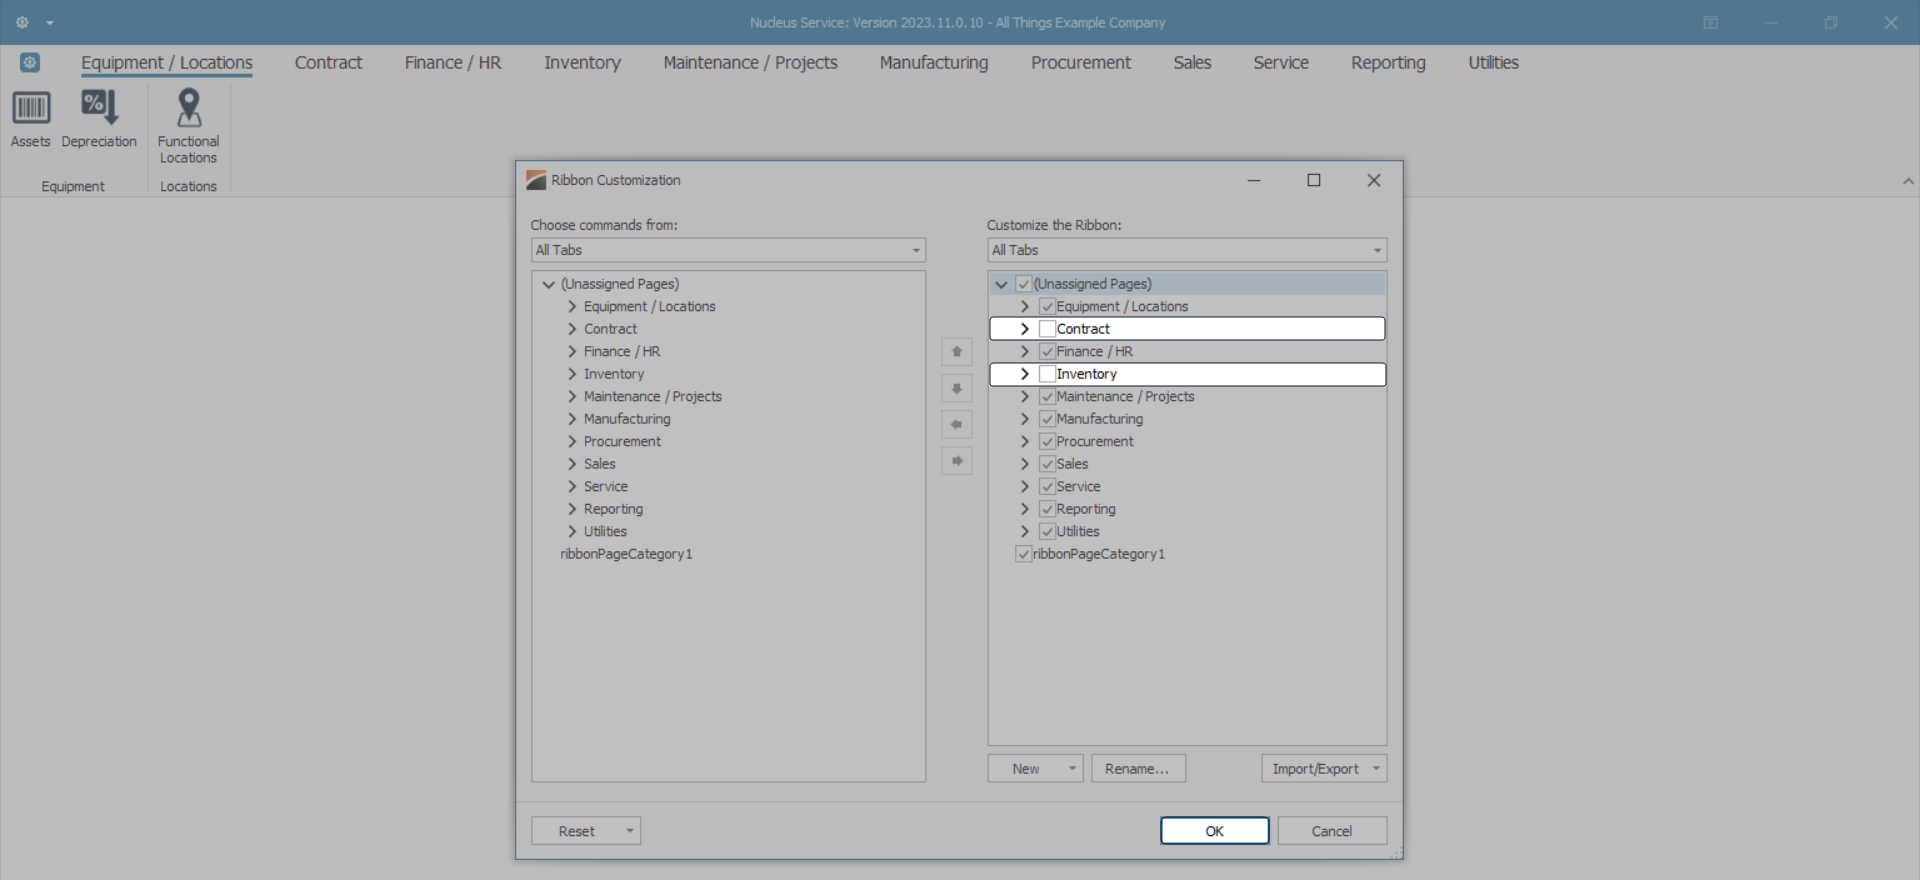
- In this image, the Contract and Inventory Tabs have been deselected.
- Click on OK to save your Ribbon customization.
- Your Ribbon will now display the customizations that you have made.
- In this image, the Contract and Inventory Tabs are no longer displayed in the Ribbon.

Add New Categories, Tabs and Groups
- You can add New Categories, New Tabs and New Groups to your Ribbon.
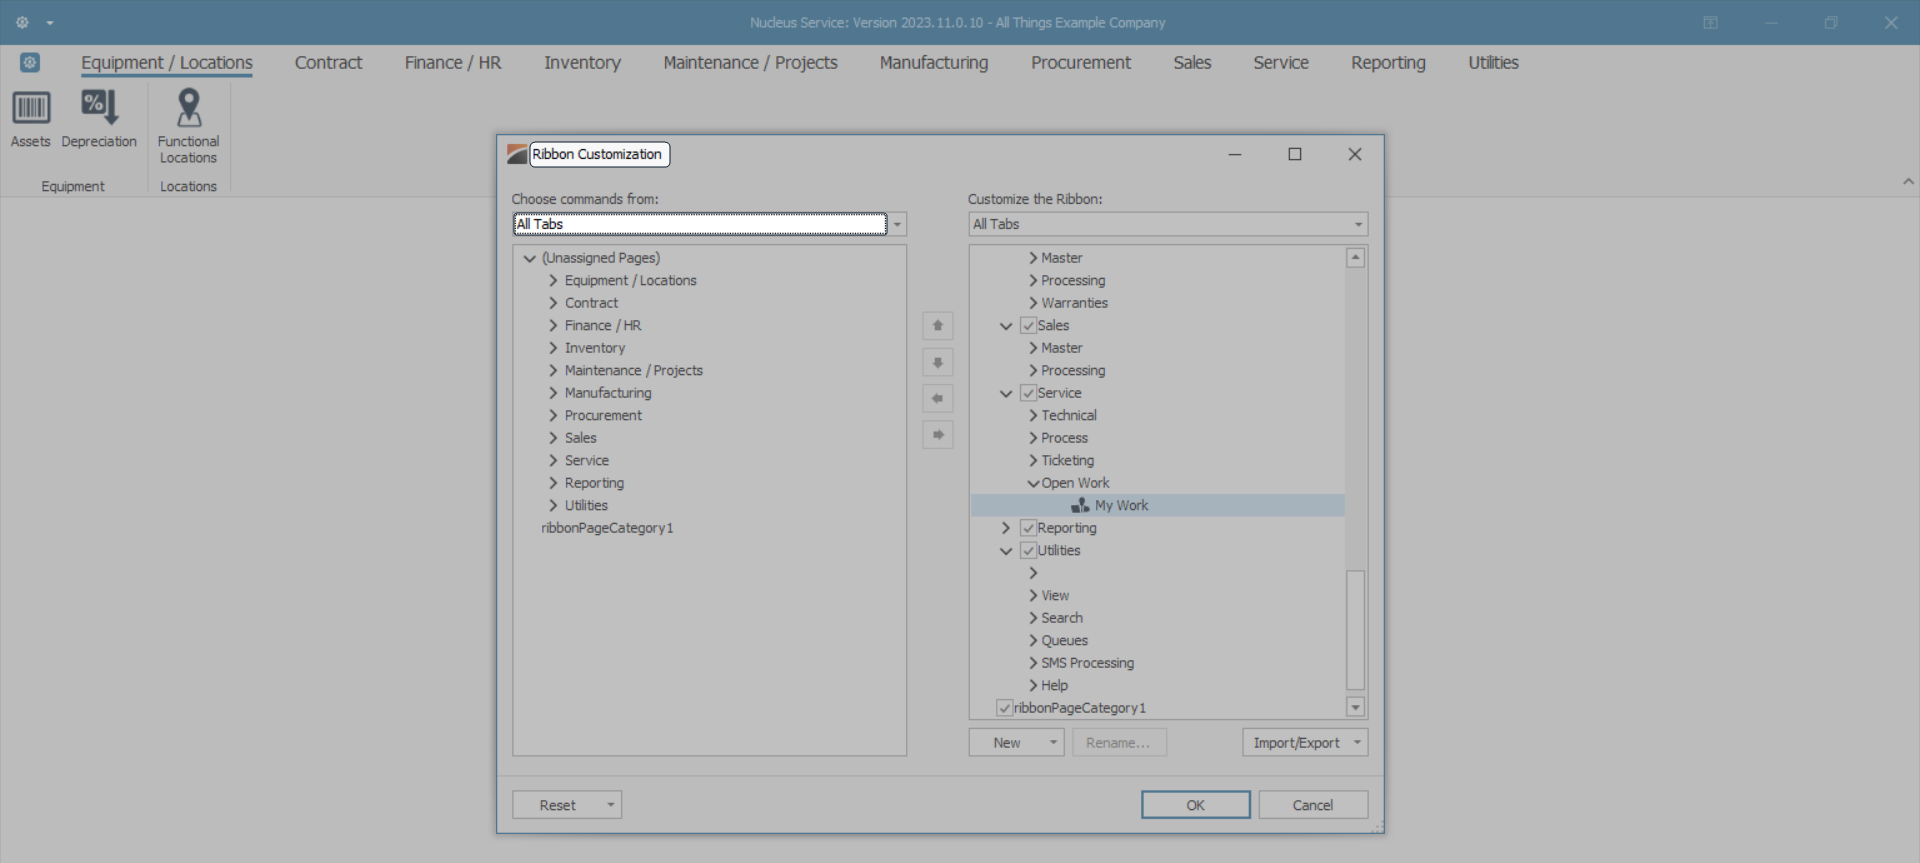
- Right click on any Tab in the list.
- In this image, the Utilities Tab has been selected.
- The pop-up menu will be displayed.
- Click on New Category.
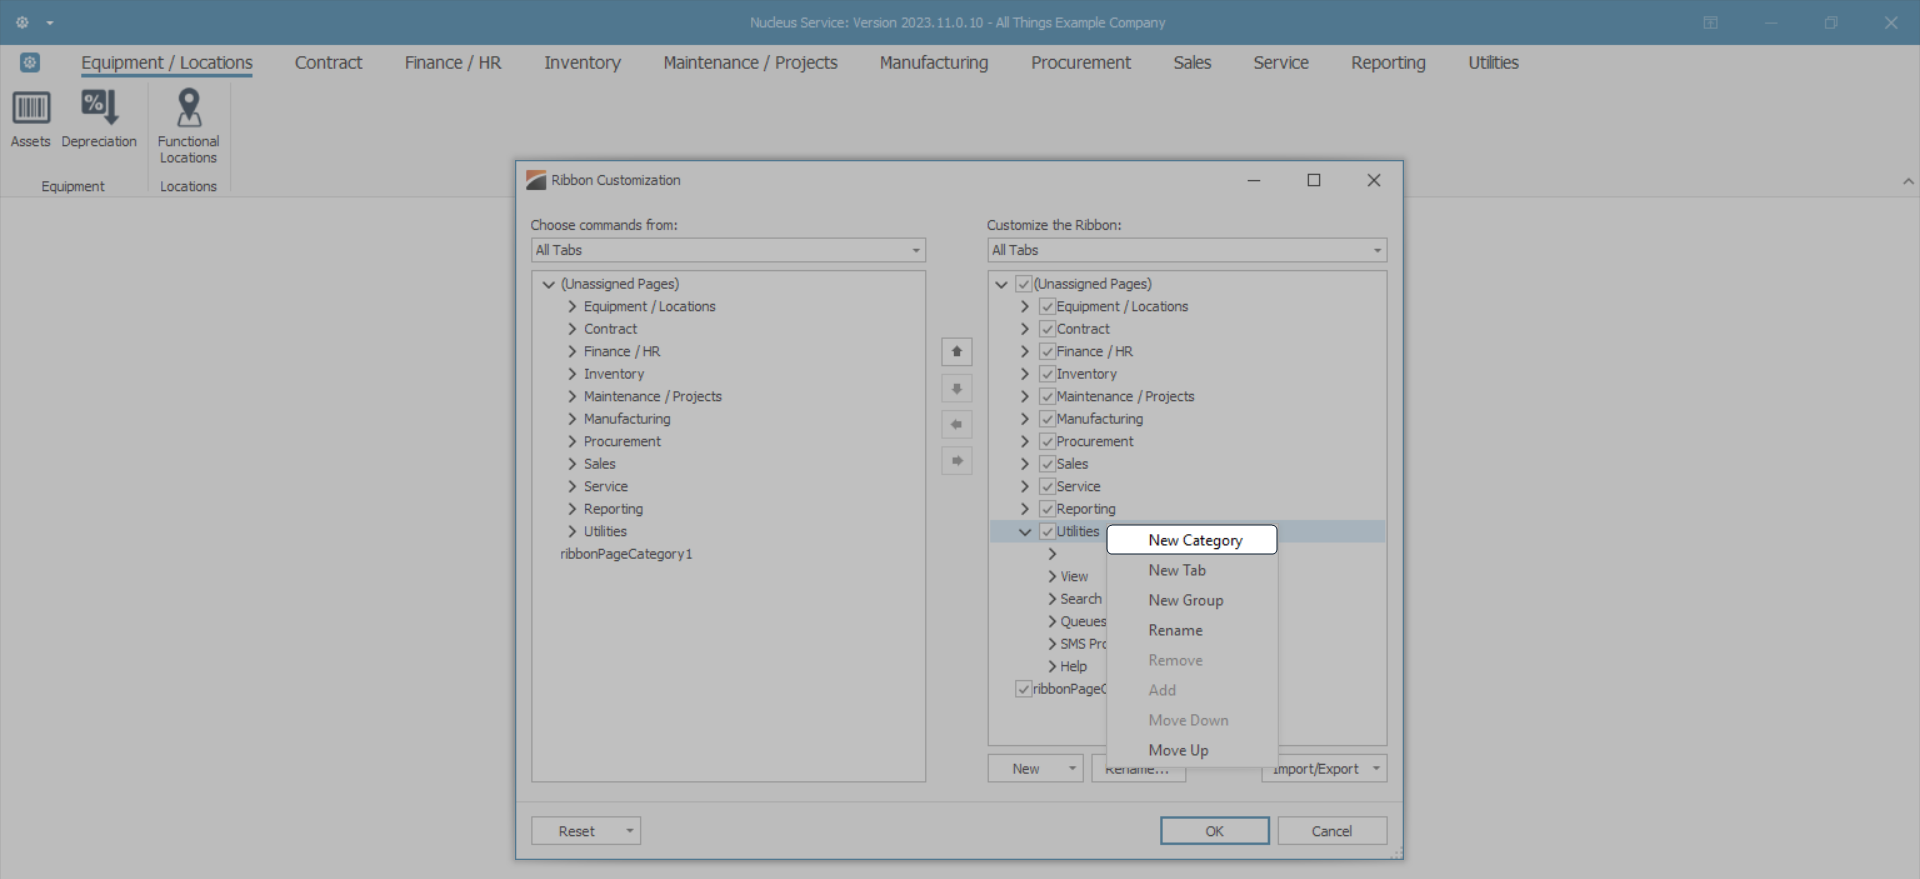
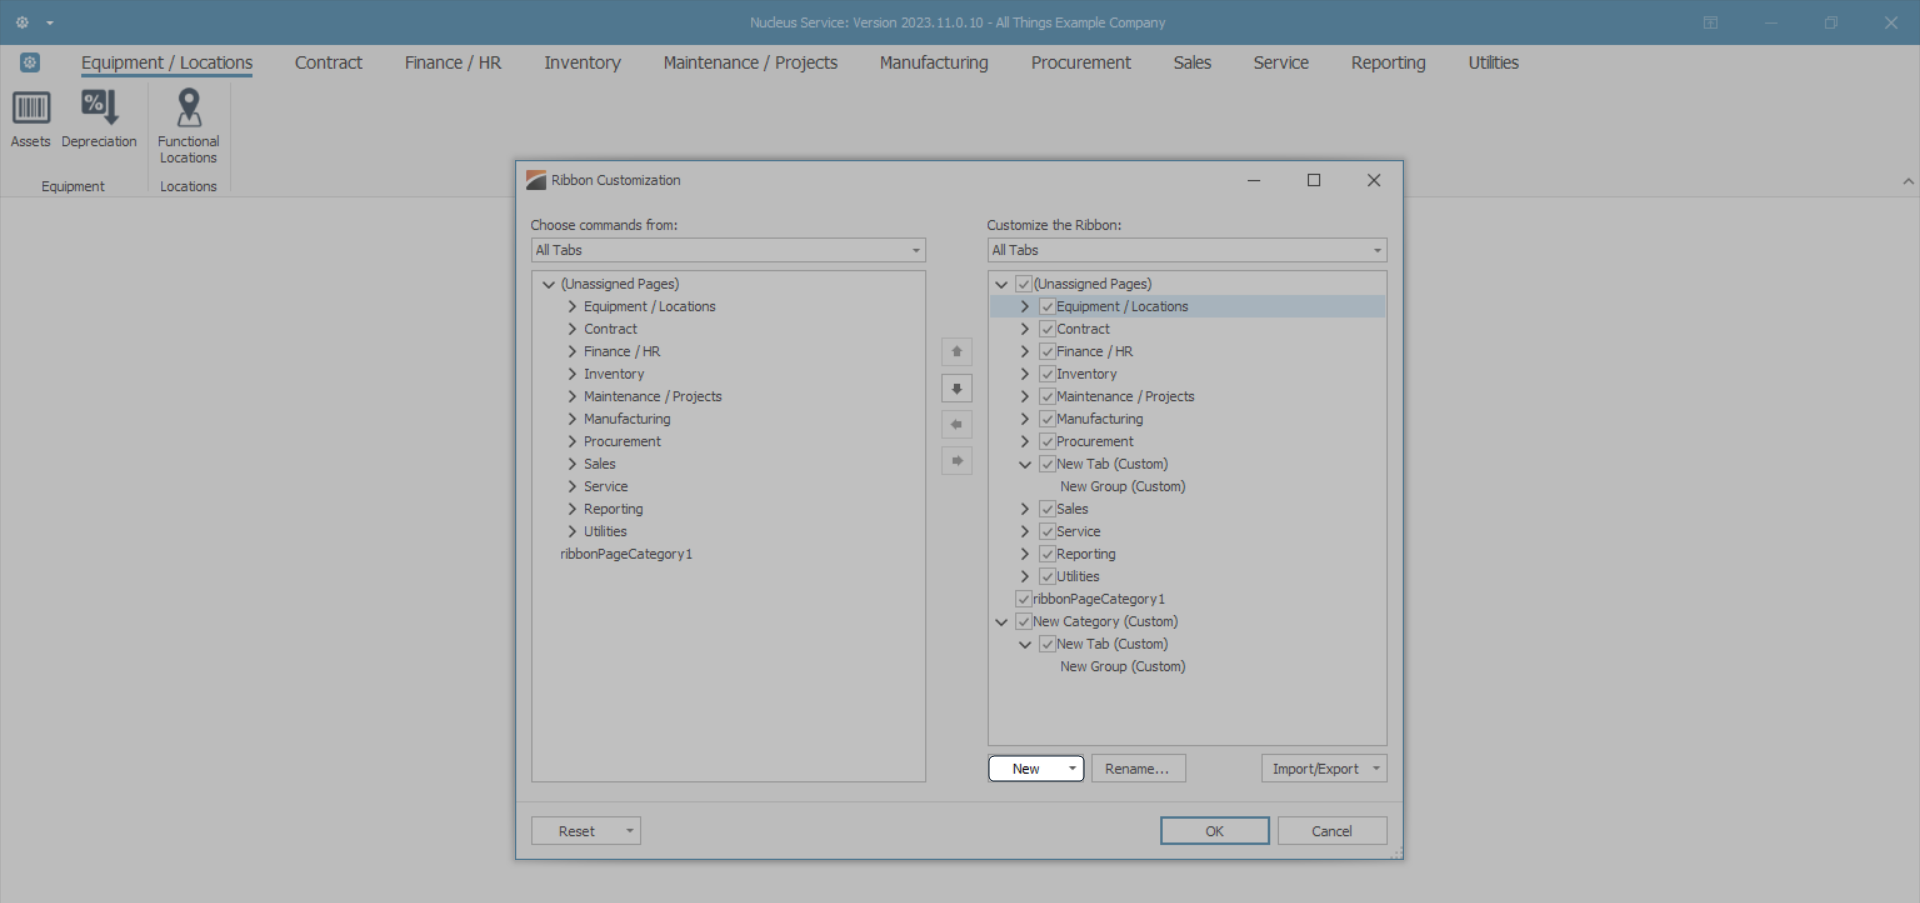
- A New Category has been added to the list.
- The system automatically adds a New Tab and a New Group within a new Category.
- The New Category, New Tab and New Group have (Custom) after their titles to let you know that they are your customized additions to the list.

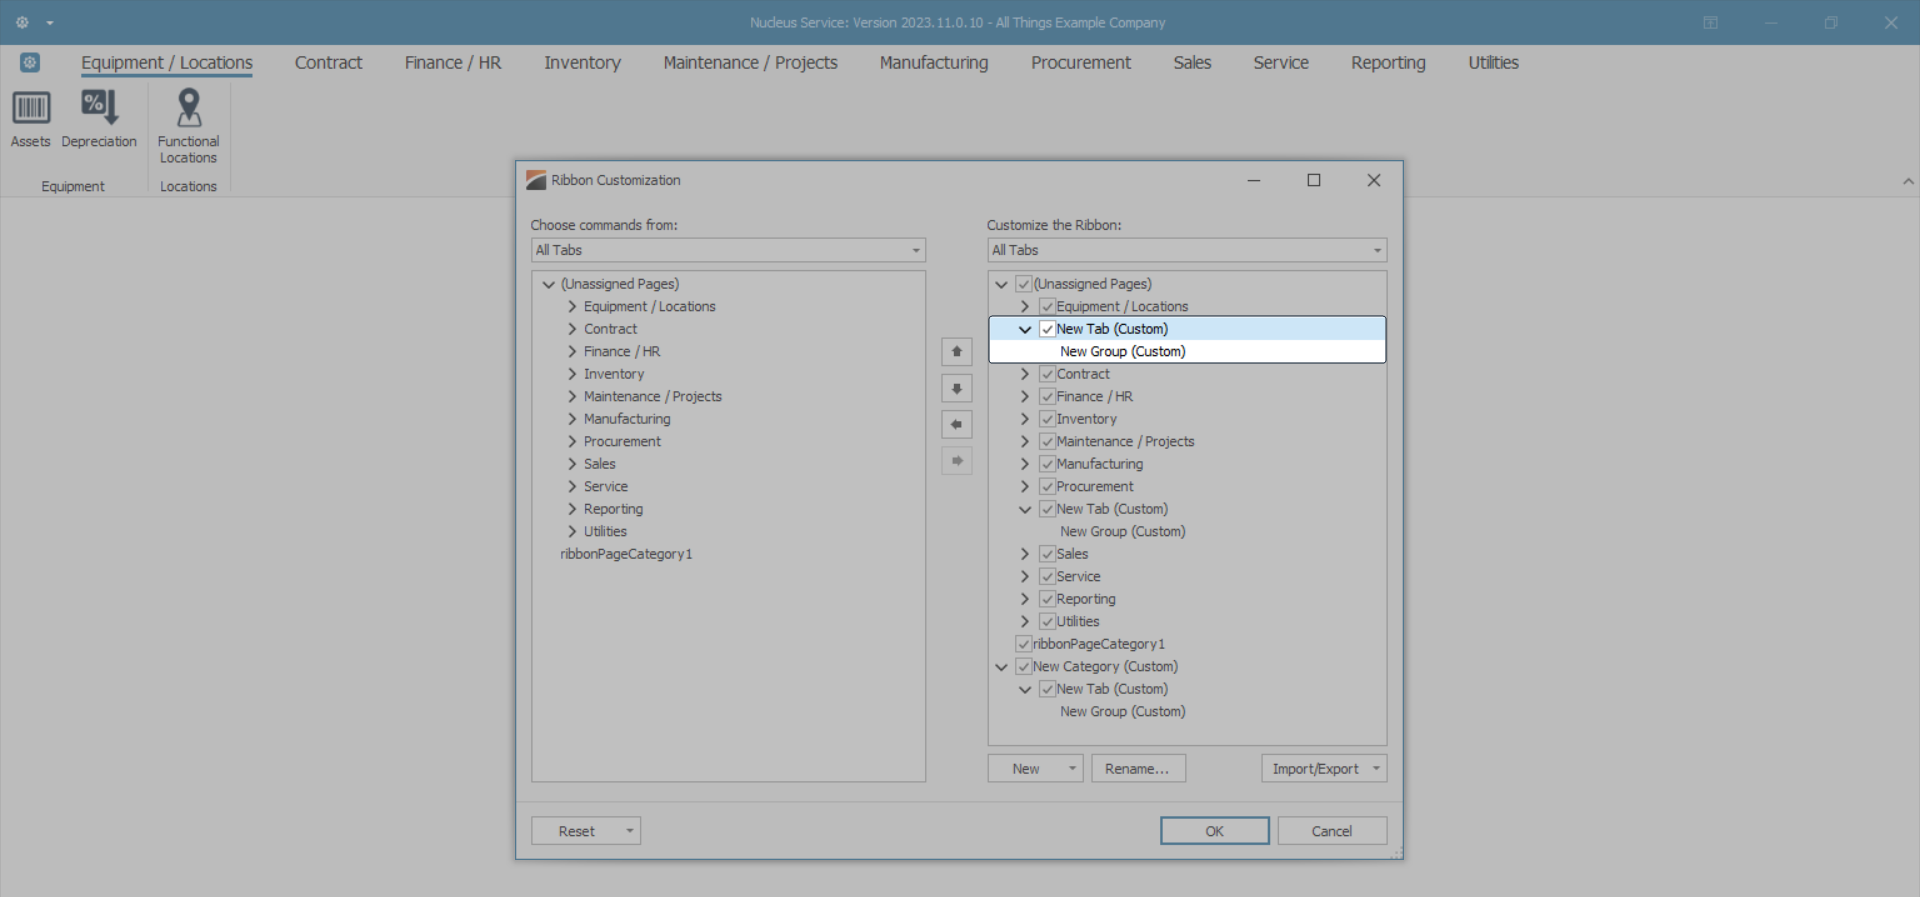
- You can also add a New Tab without creating a New Category.
- Right click on any Tab in the list.
- In this image the Sales Tab has been selected.
- The pop-up menu will be displayed.
- Click on New Tab.
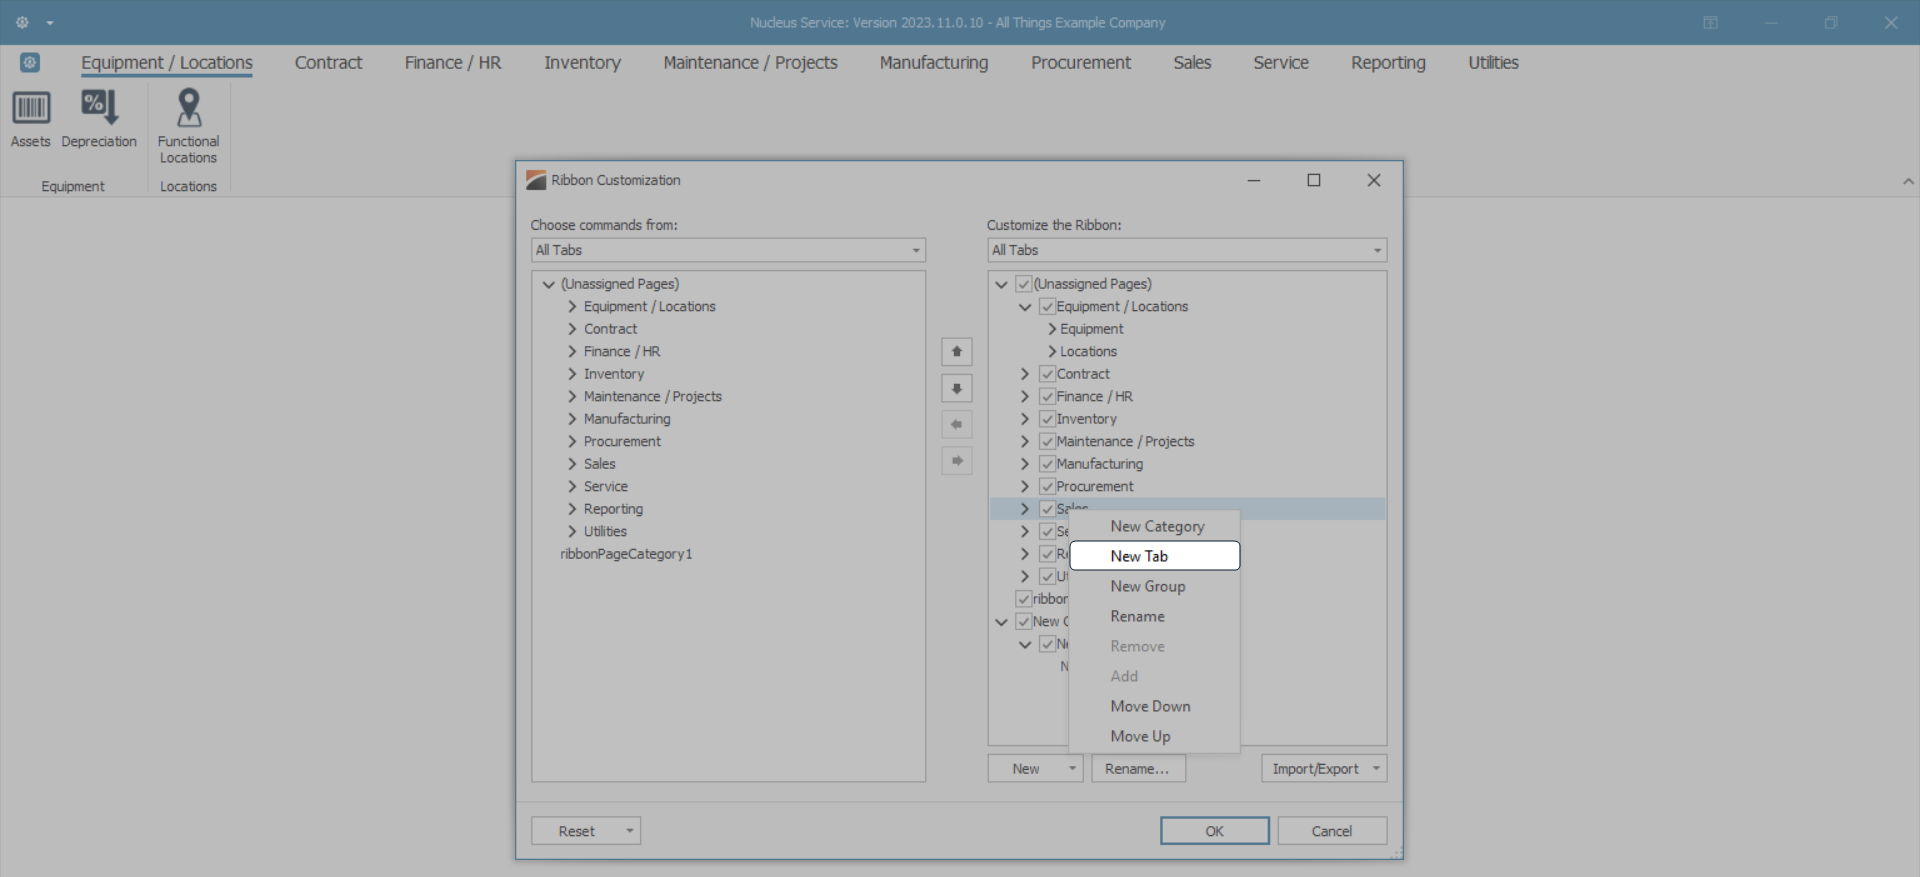
- A New Tab (and automatically a New Group) has been added to the Customized list.
- The New Tab has been positioned above the Tab you selected but this position can be altered, as explained, by using the arrows in the centre of the screen, or by selecting the Move Up or Move Down option in the pop-up menu.

- New Categories, Tabs and Commands can also be added by using the New button at the foot of the Customize the Ribbon frame.
- Click on New and select from the drop-down menu.
- In this image, New Tab has been selected.
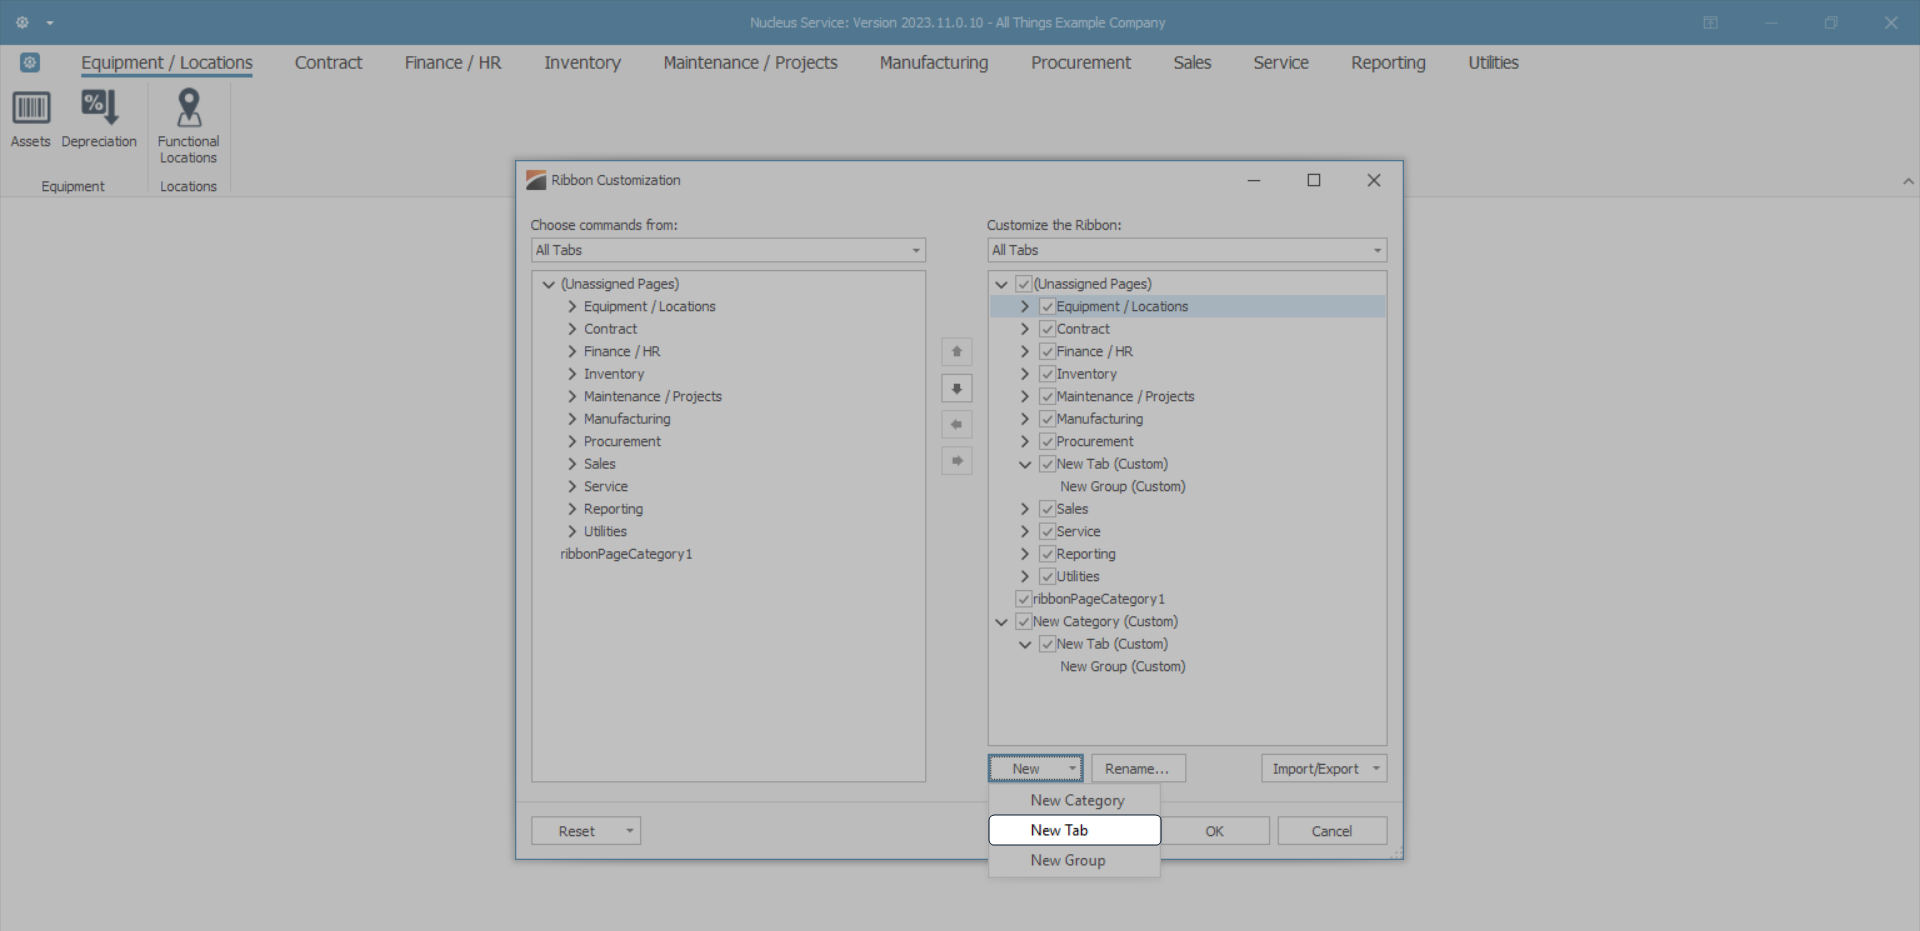
- A New Tab (and automatically a New Group) has been added to the Customized list.
- When you add using the New button then your additions are placed below the Tab that you had highlighted before you clicked on New.
- In this image, the New Tab (and New Group) were added below the highlighted Equipment and Location Tab.
Add Commands to a Group
- All Categories and All Tabs can be renamed but New Groups can be renamed and have any Commands added to them.
- Select a Group to add a Command to.
- In this example, Group 1 has been selected.
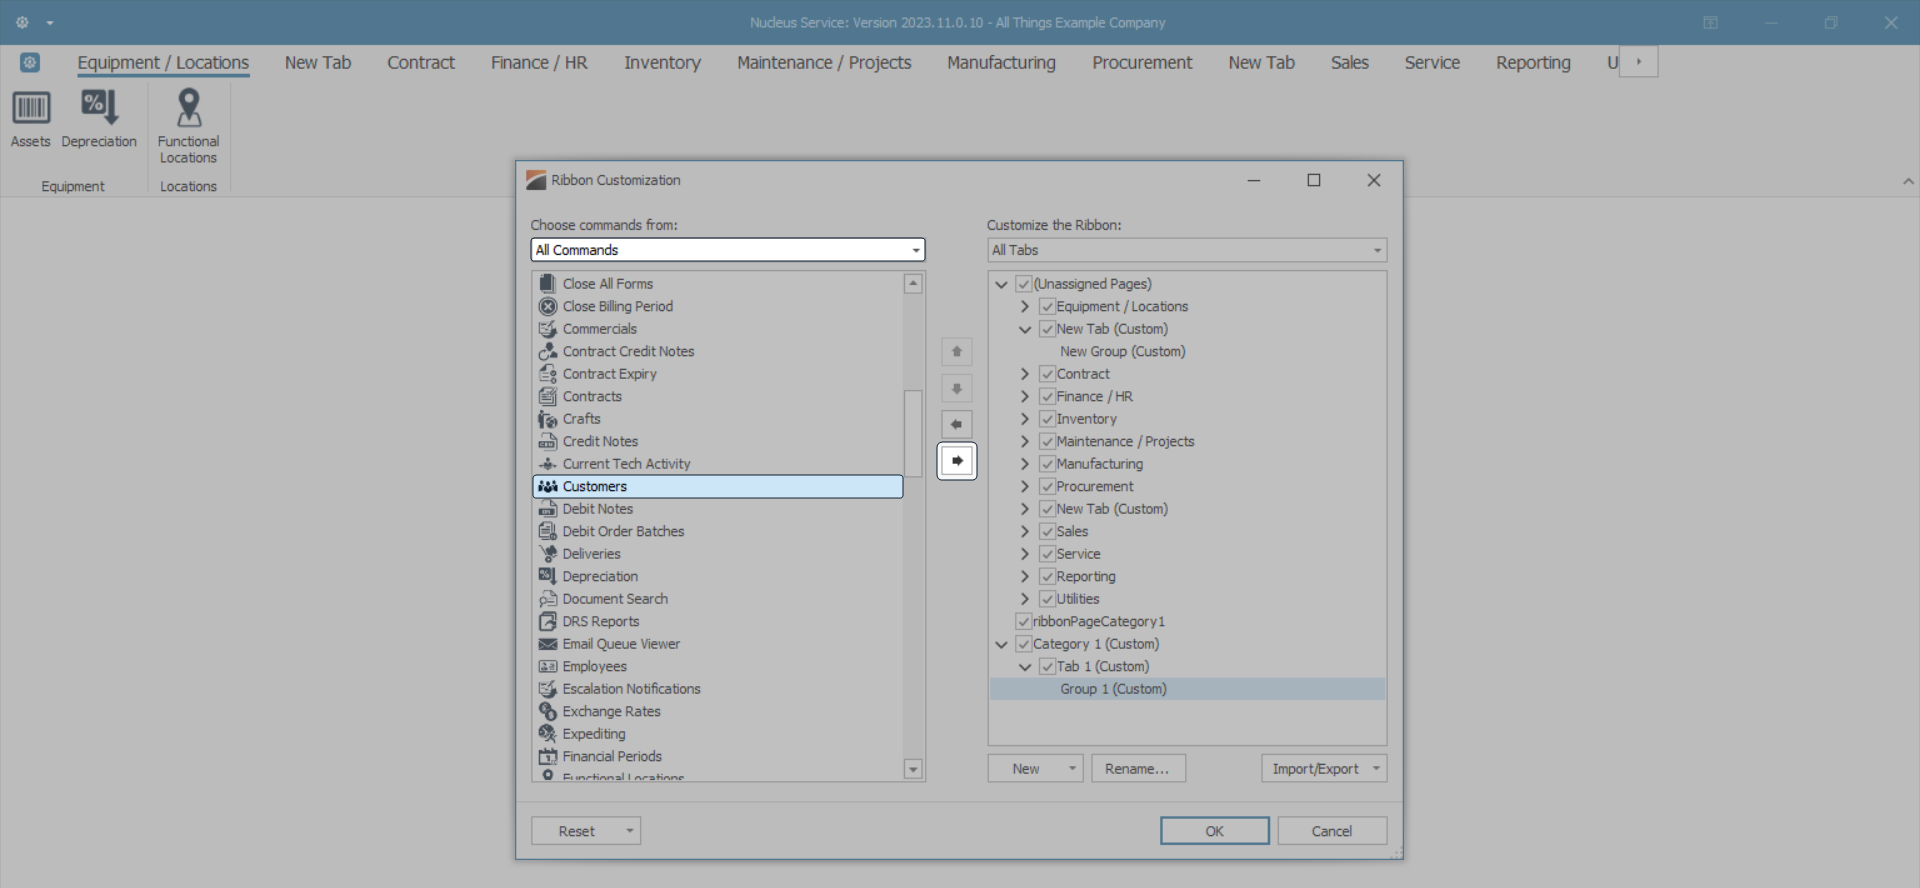
- Open the All Commands list on the left side of the screen.
- Use the scroll bar to search through the list.
- Click on the Command that you want to add to the selected Group.
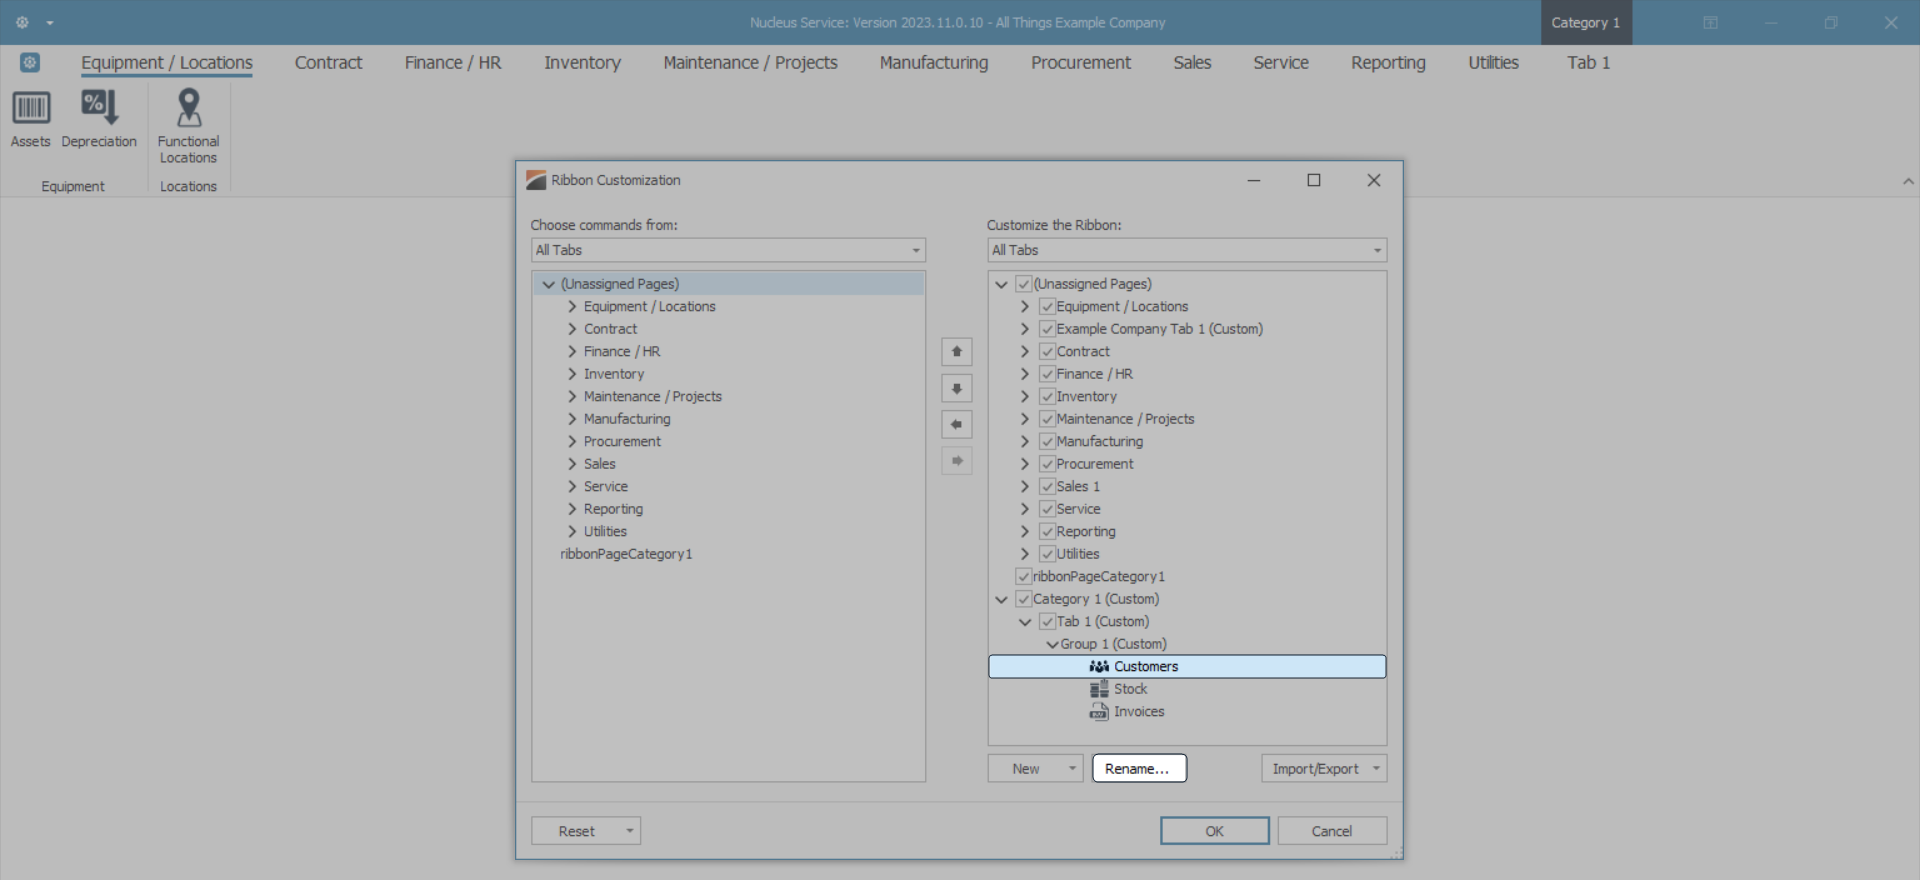
- In this image Customers has been selected from the All Commands list.
- The right directional arrow has now been activated in the arrow list in the middle of the screen.
- Click on this arrow to copy the selected Command to the selected Group.
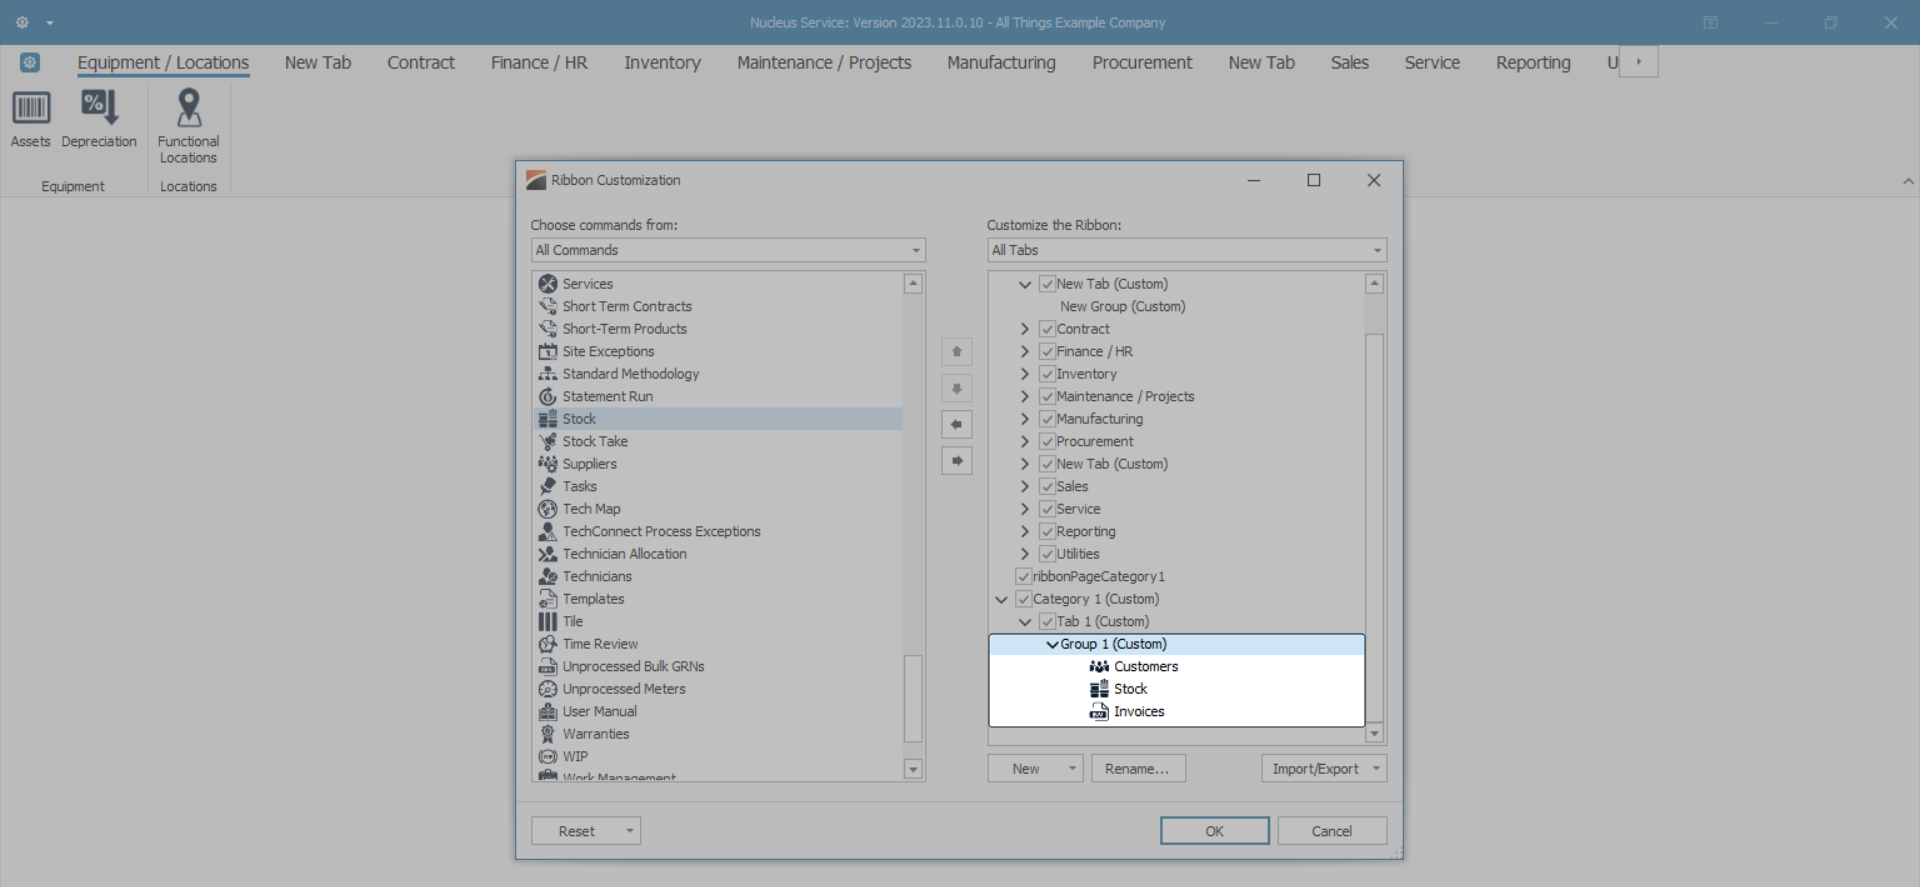
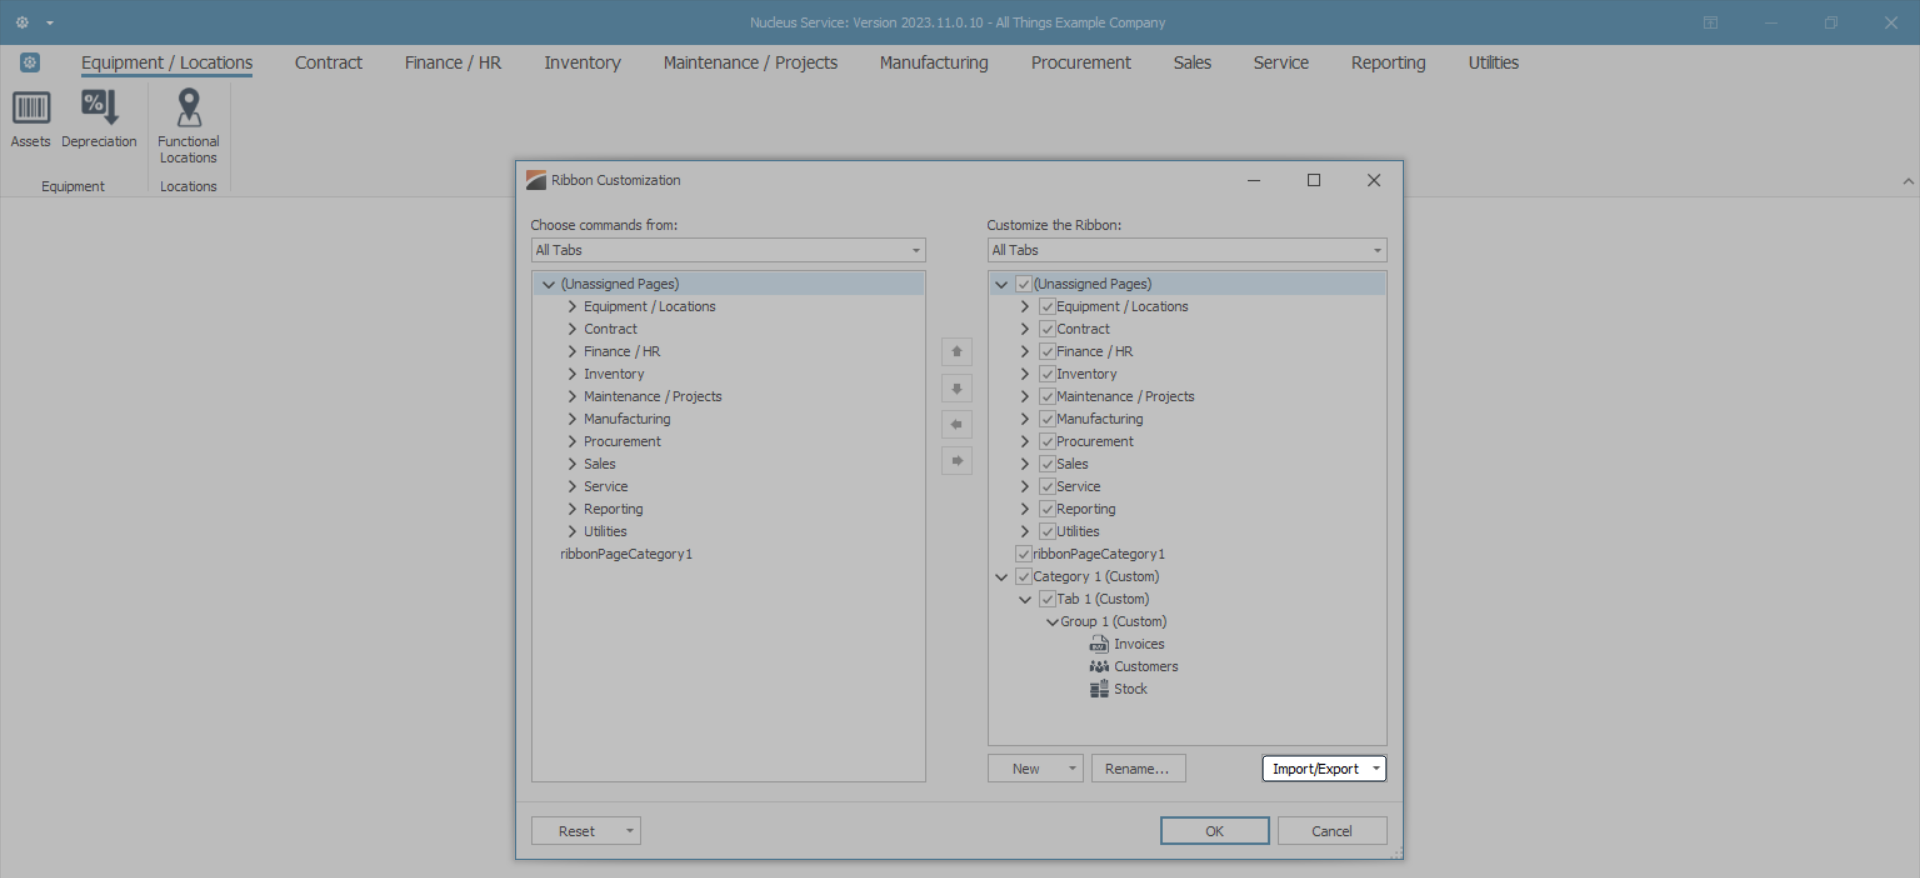
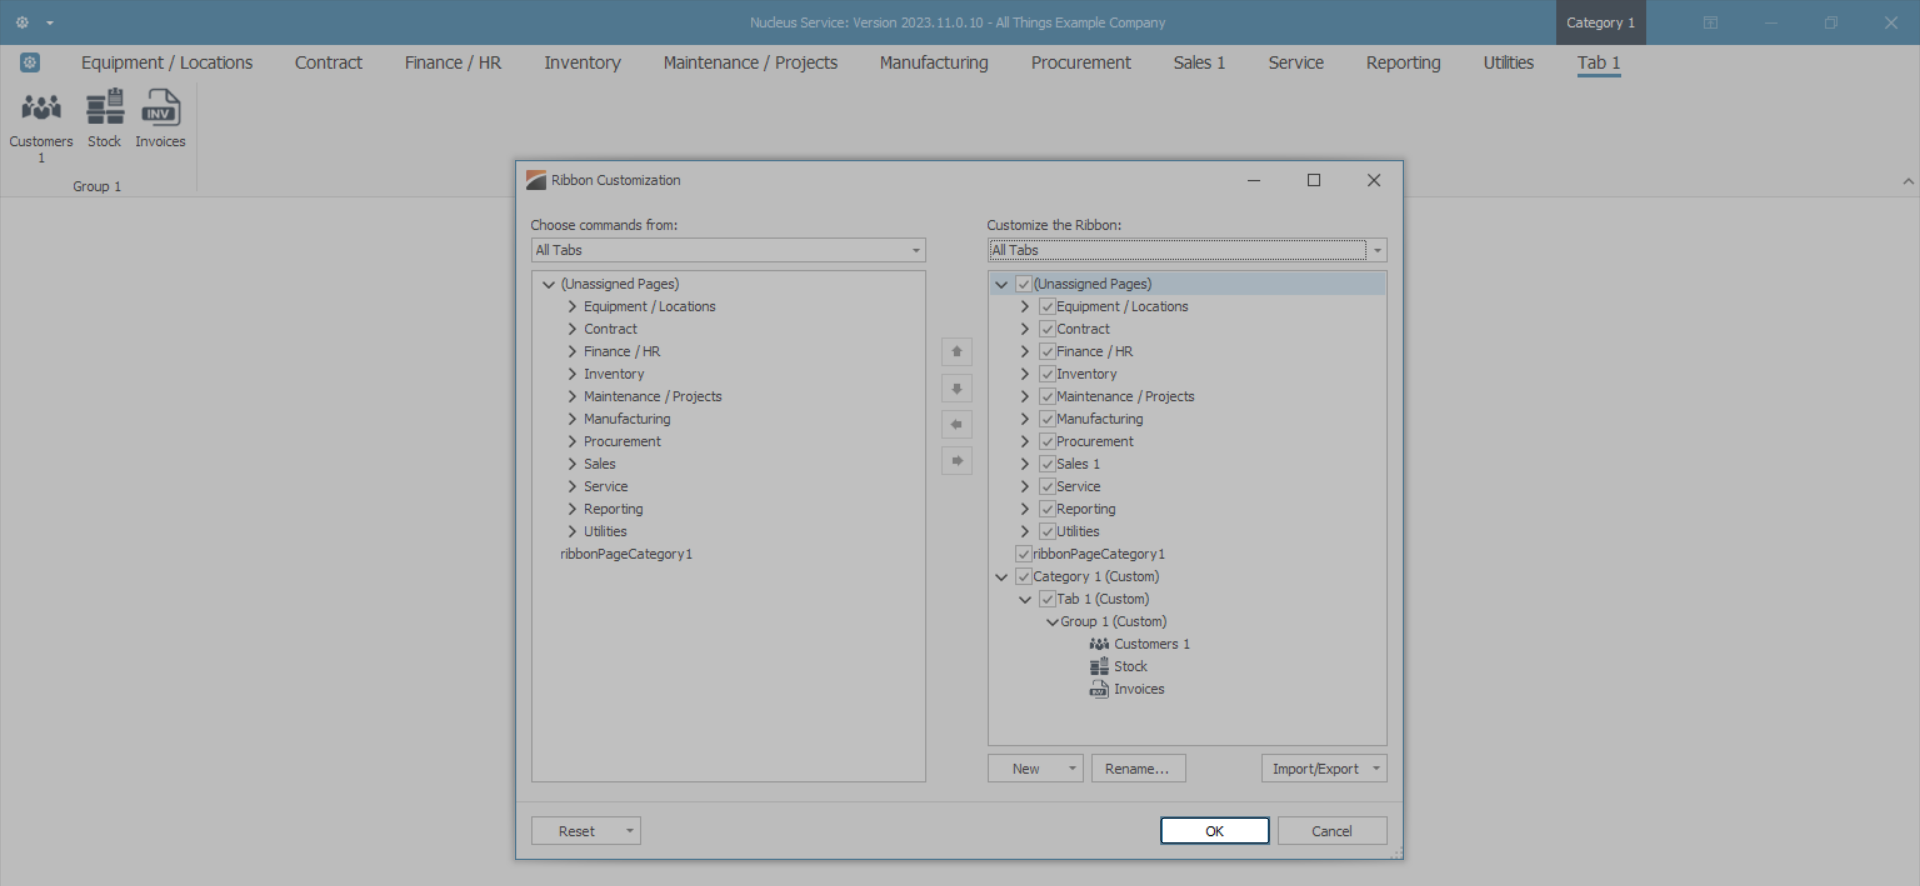
- In this image, the Customers Command has now been added to Group 1.
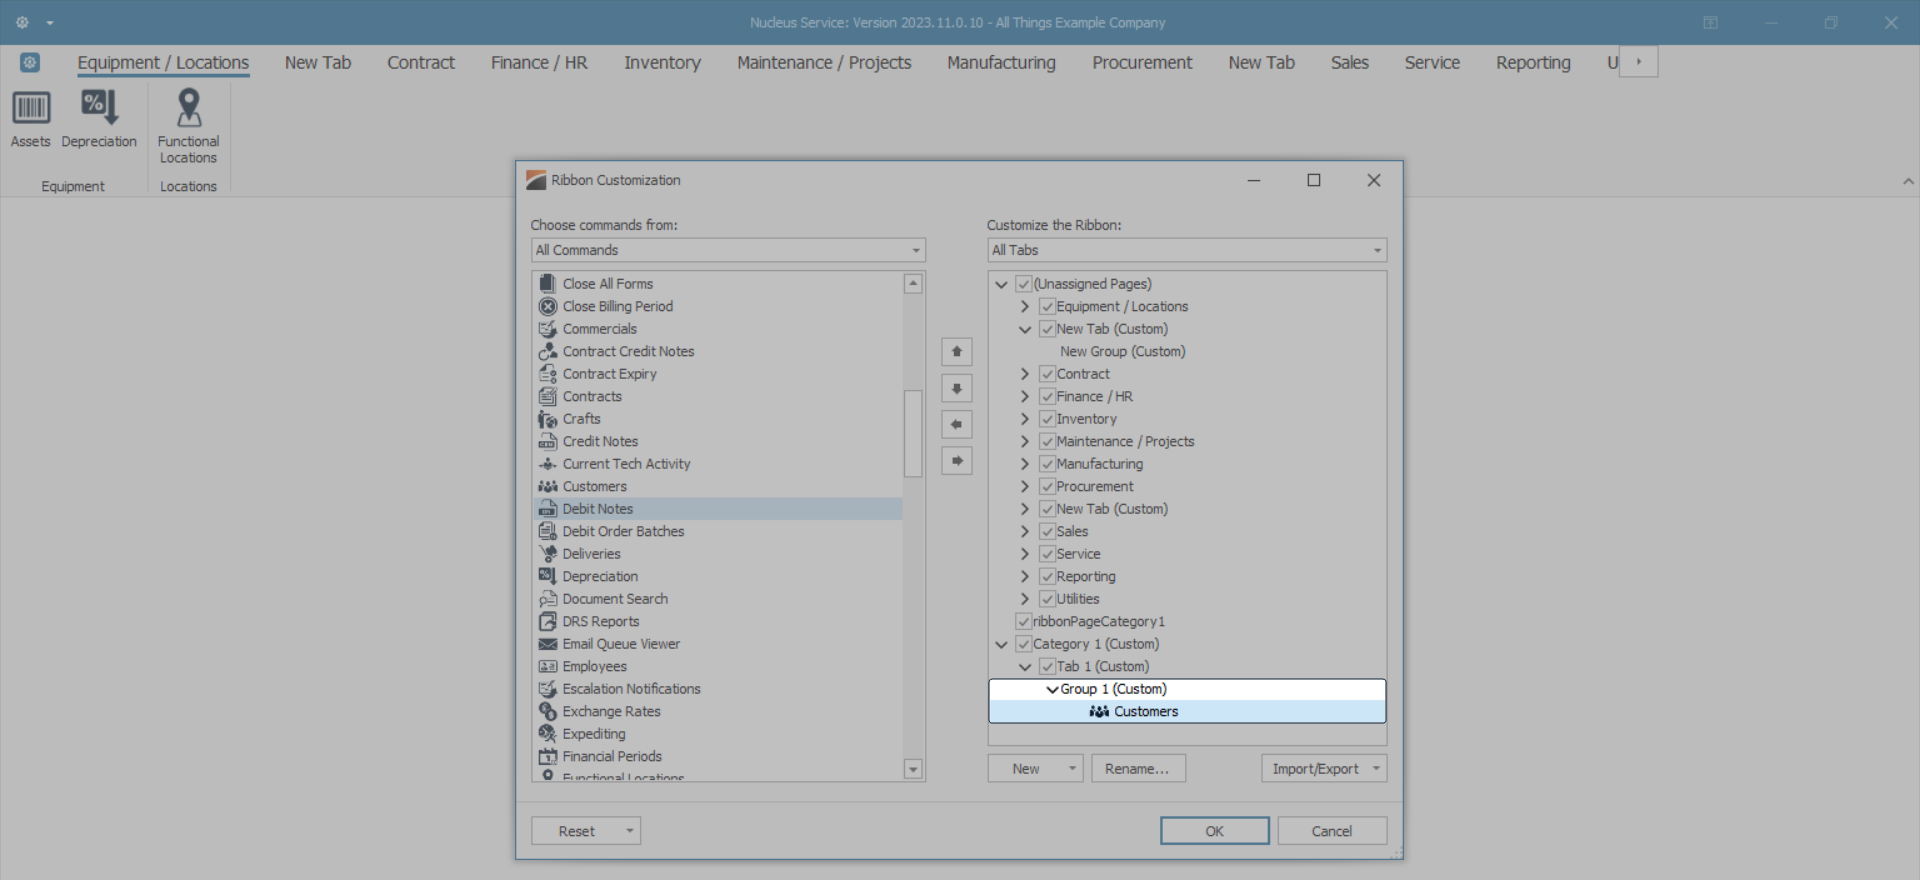
- You can add as many Commands as you want to any New Group that you have created, and even add a Command more than once.
- In this image, the Stock and Invoices Commands have also been added to Group 1.
- This list of Commands can be re-ordered within a Group according to your preference using the arrows in the centre of the screen.
Change the Order of Commands
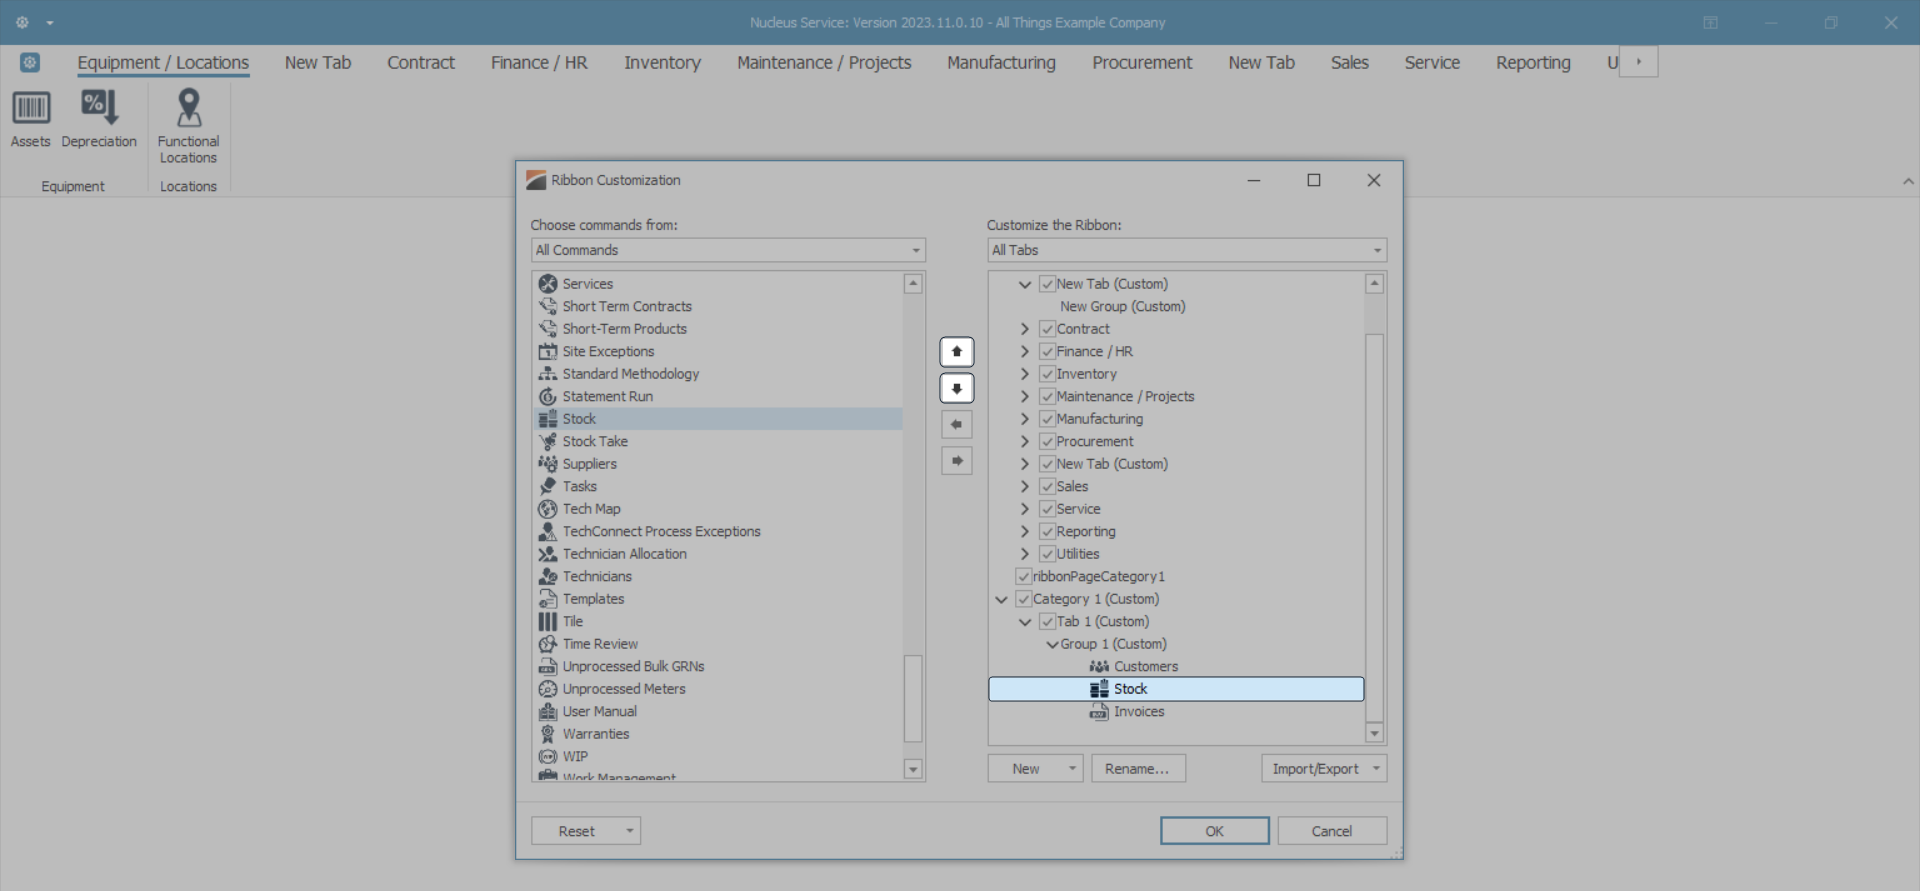
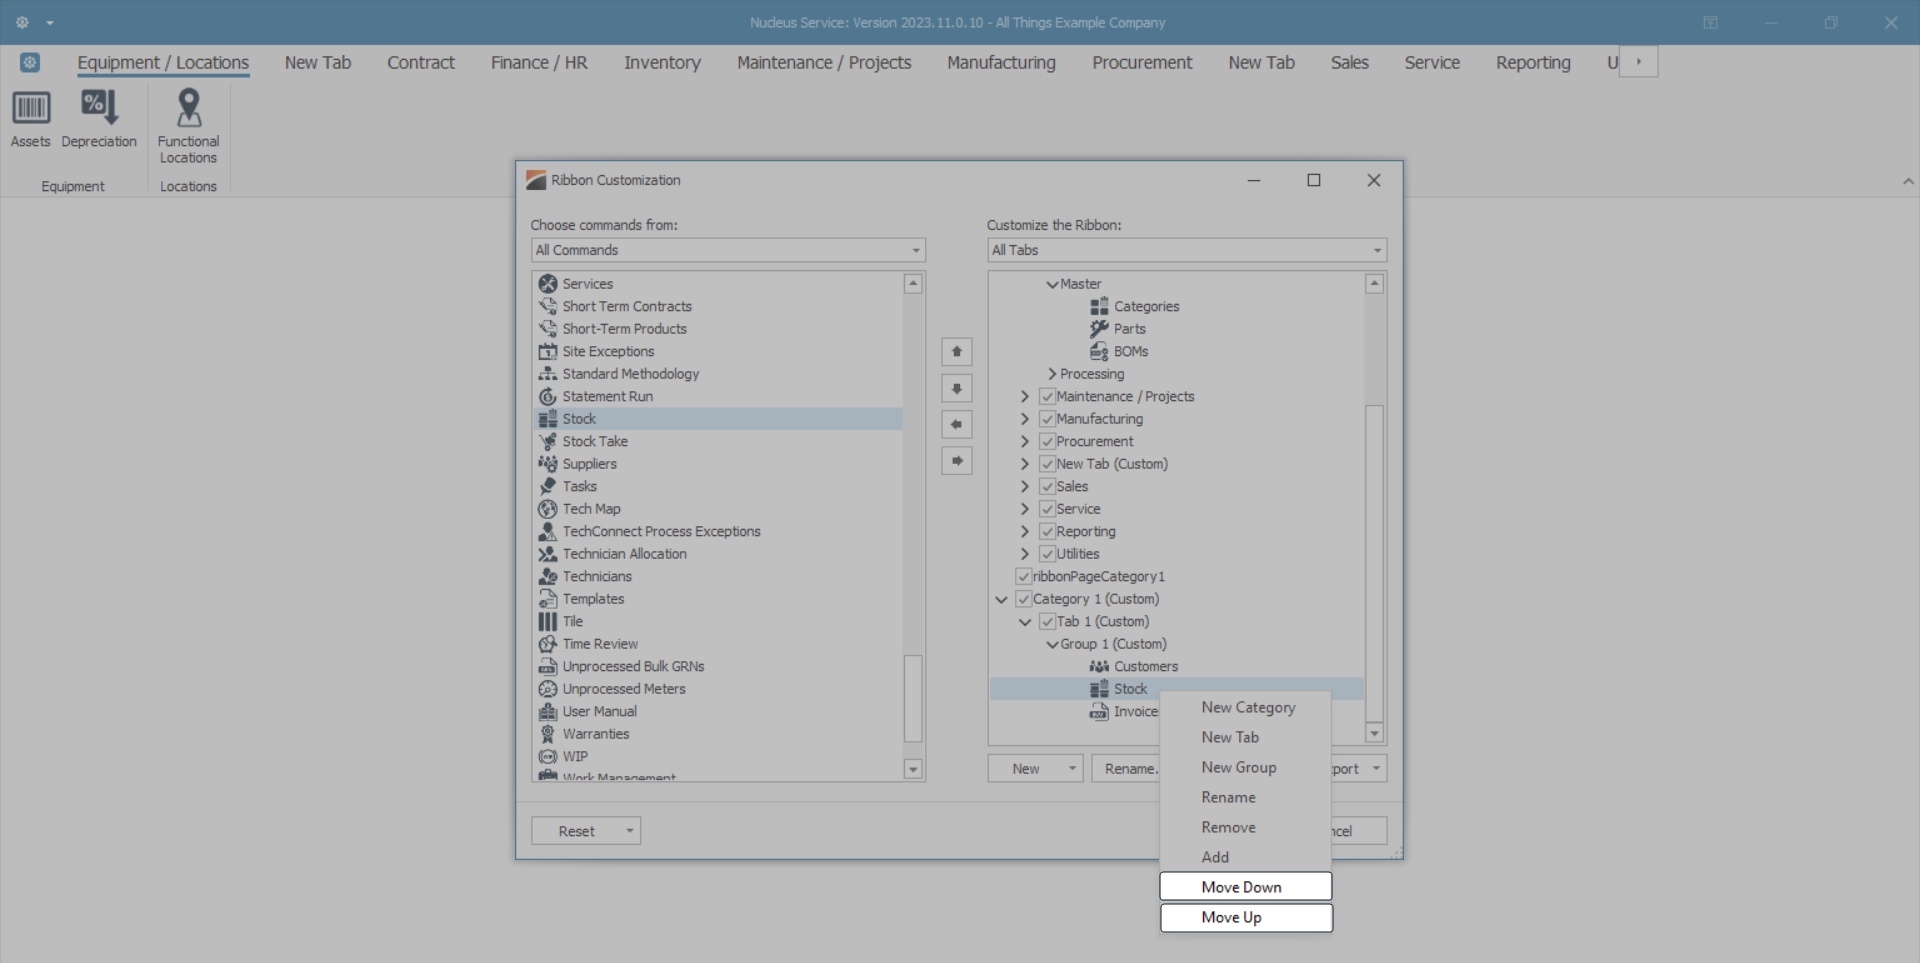
- You can also change the order of a Command within a Group by clicking on that Command to highlight it.
- Now right click to display the pop-up menu.
- In this image, we have highlighted the Stock Command.
- Select the Move Up or Move Down option to change the order of the selected Command.
Remove Categories, Tabs, Groups and Commands
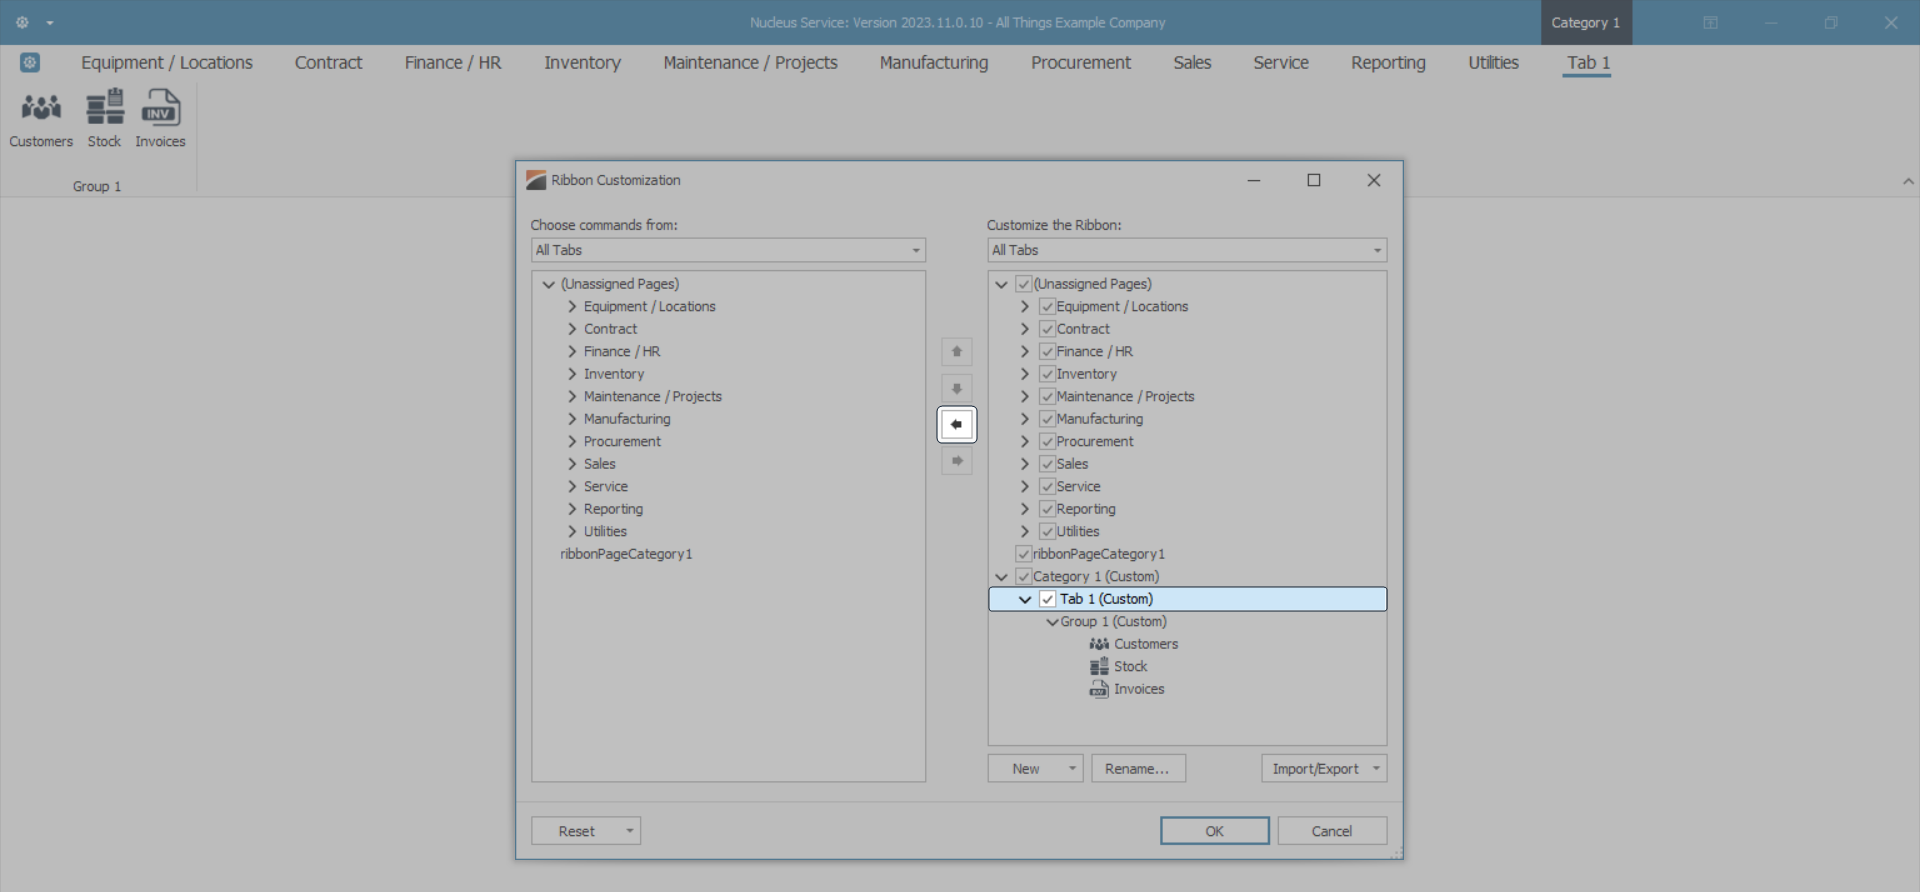
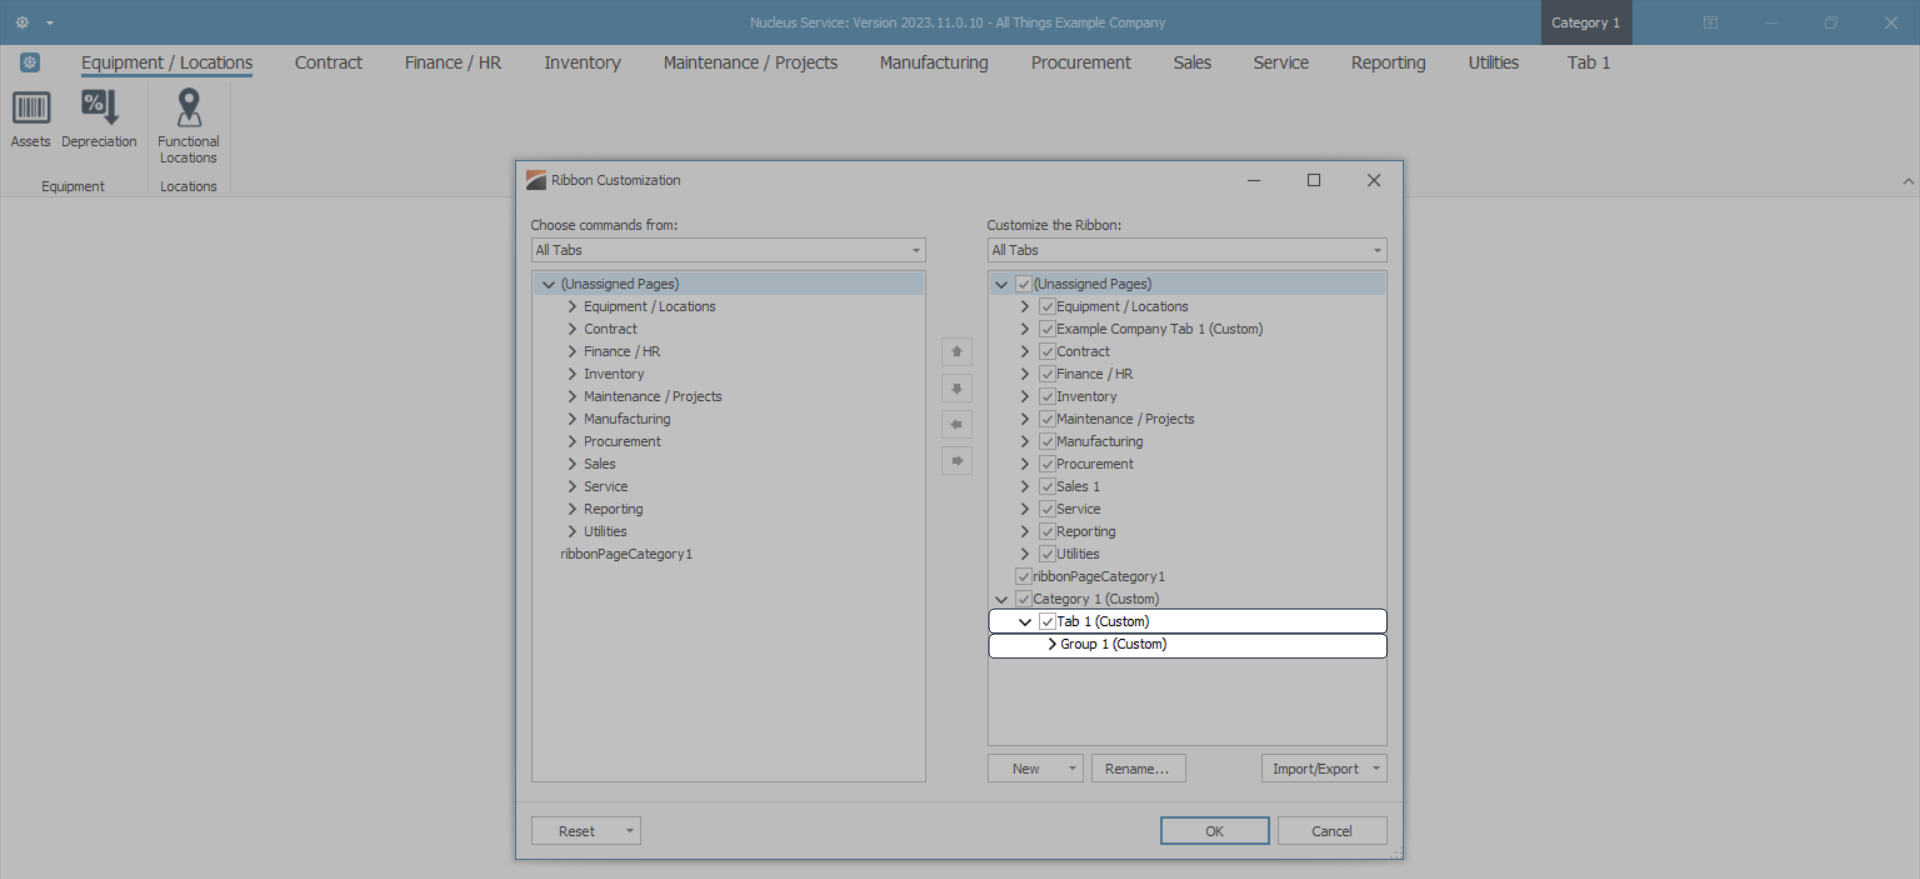
- Click on the Category, Tab, Group or Command you wish to remove from the Ribbon Tab Customization list.
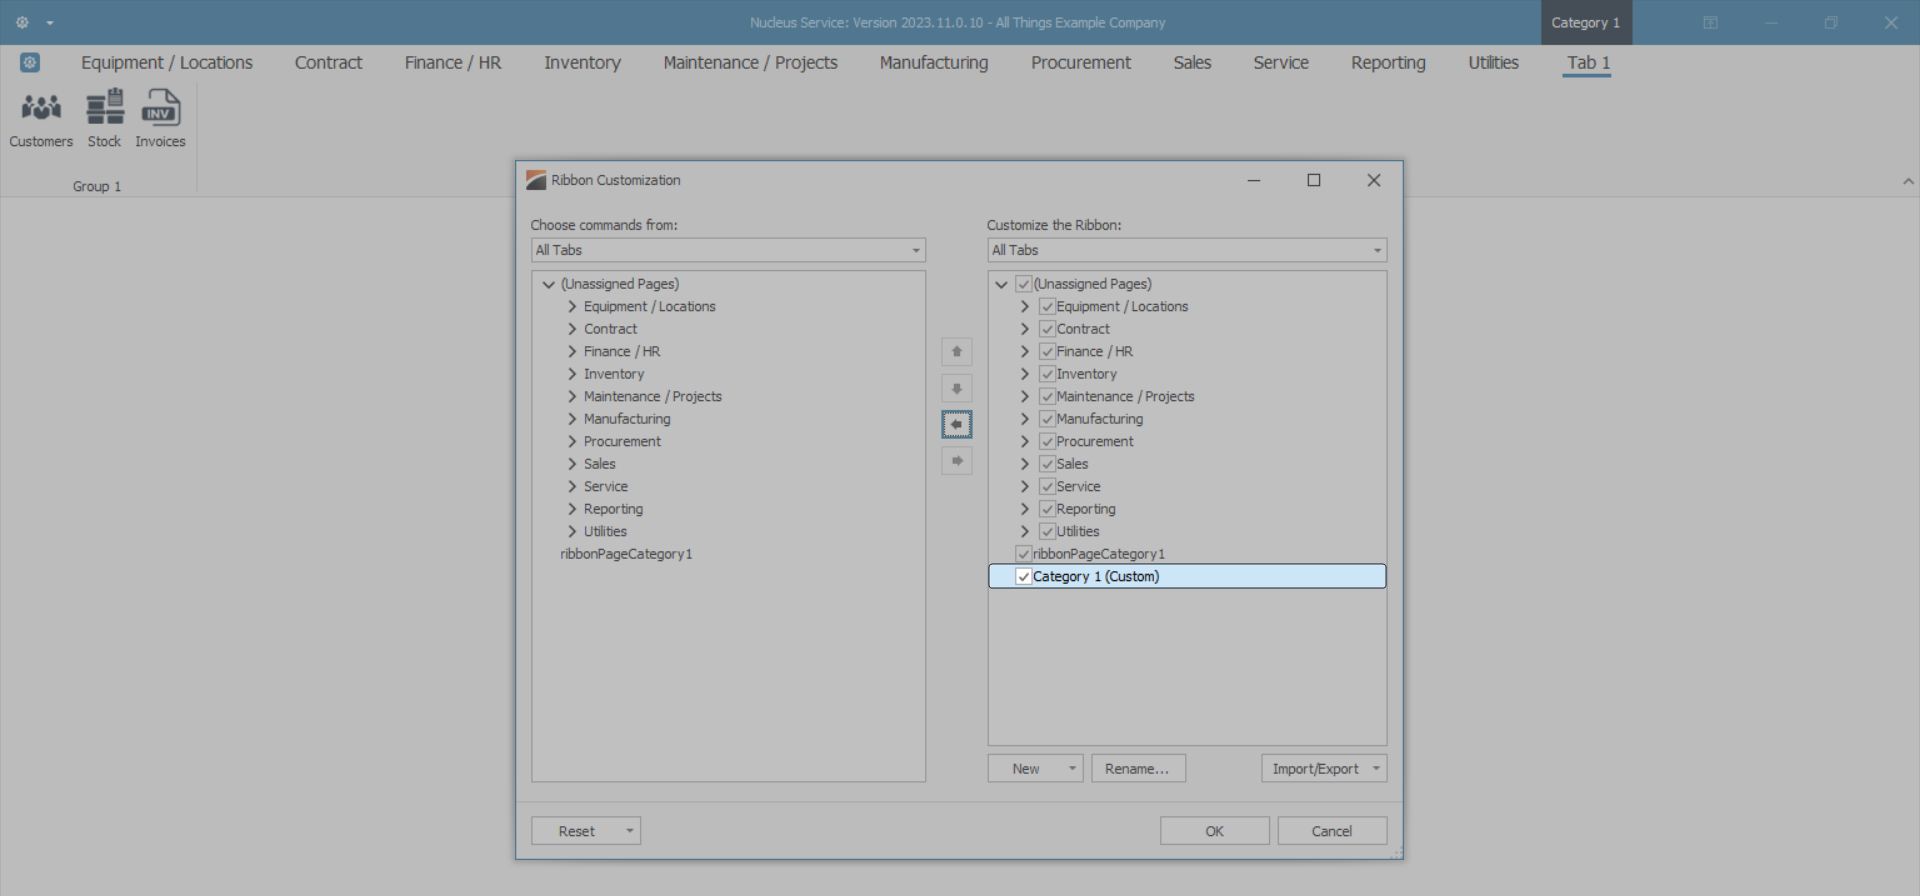
- In this image, we have highlighted Tab 1.
- The left directional arrow in the middle of the screen will now be activated.
- Click on this arrow to remove the highlighted selection.
- Tab 1 Ribbon Tab has now been removed from the Customization list.
- Or you can right click on the Category, Tab, Group or CommandCommand (or a Tab) you wish to remove from the Ribbon Tab Customization list.
- In this image, we have right clicked on the Processing Ribbon Tab.
- On the pop-up menu, click on Remove.
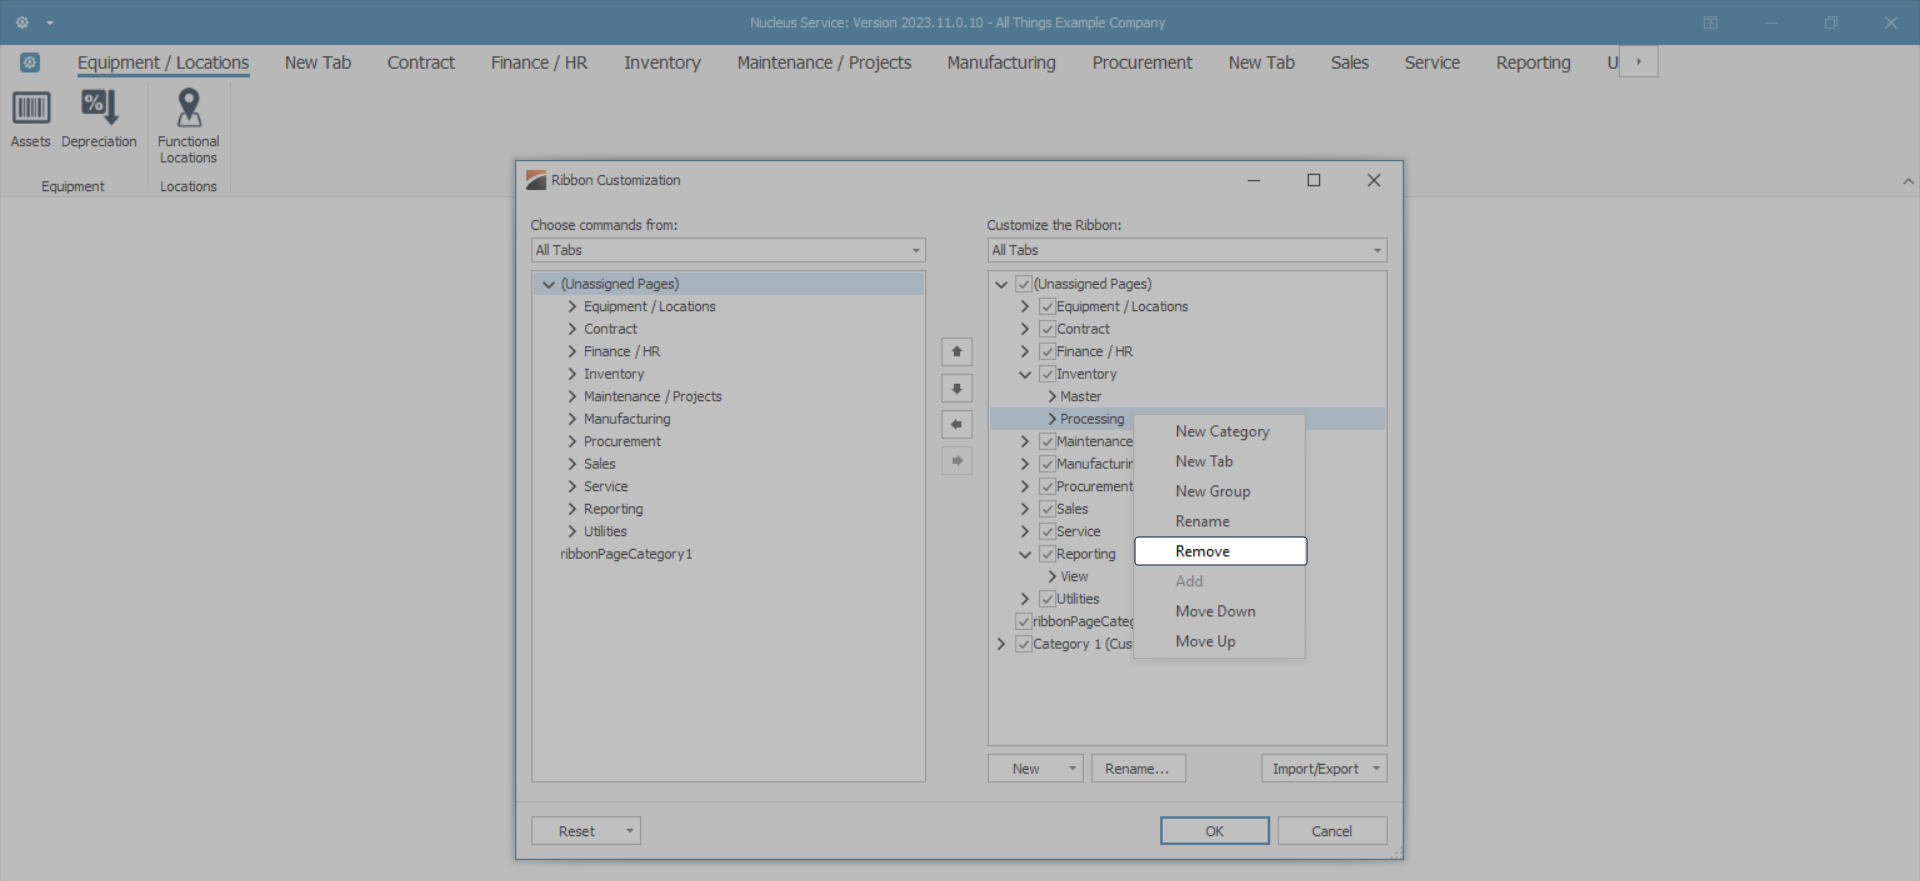
- In this image, the Processing Ribbon Tab has now been removed from the Customization list.
Renaming
- You have two options to rename each of these new customizations and existing Ribbon Tabs.
- If Rename is feint, it indicates that the Title cannot be renamed.
Method 1
- Select the Title you wish to Rename.
- Click on the Rename button at the foot of the Customize the Ribbon frame.
- In this image, a new Command, 'Customers', has been selected (highlighted).
- Click on Rename.
- A Rename pop-up screen will appear.
- The Display name: cell auto populates with the original name.
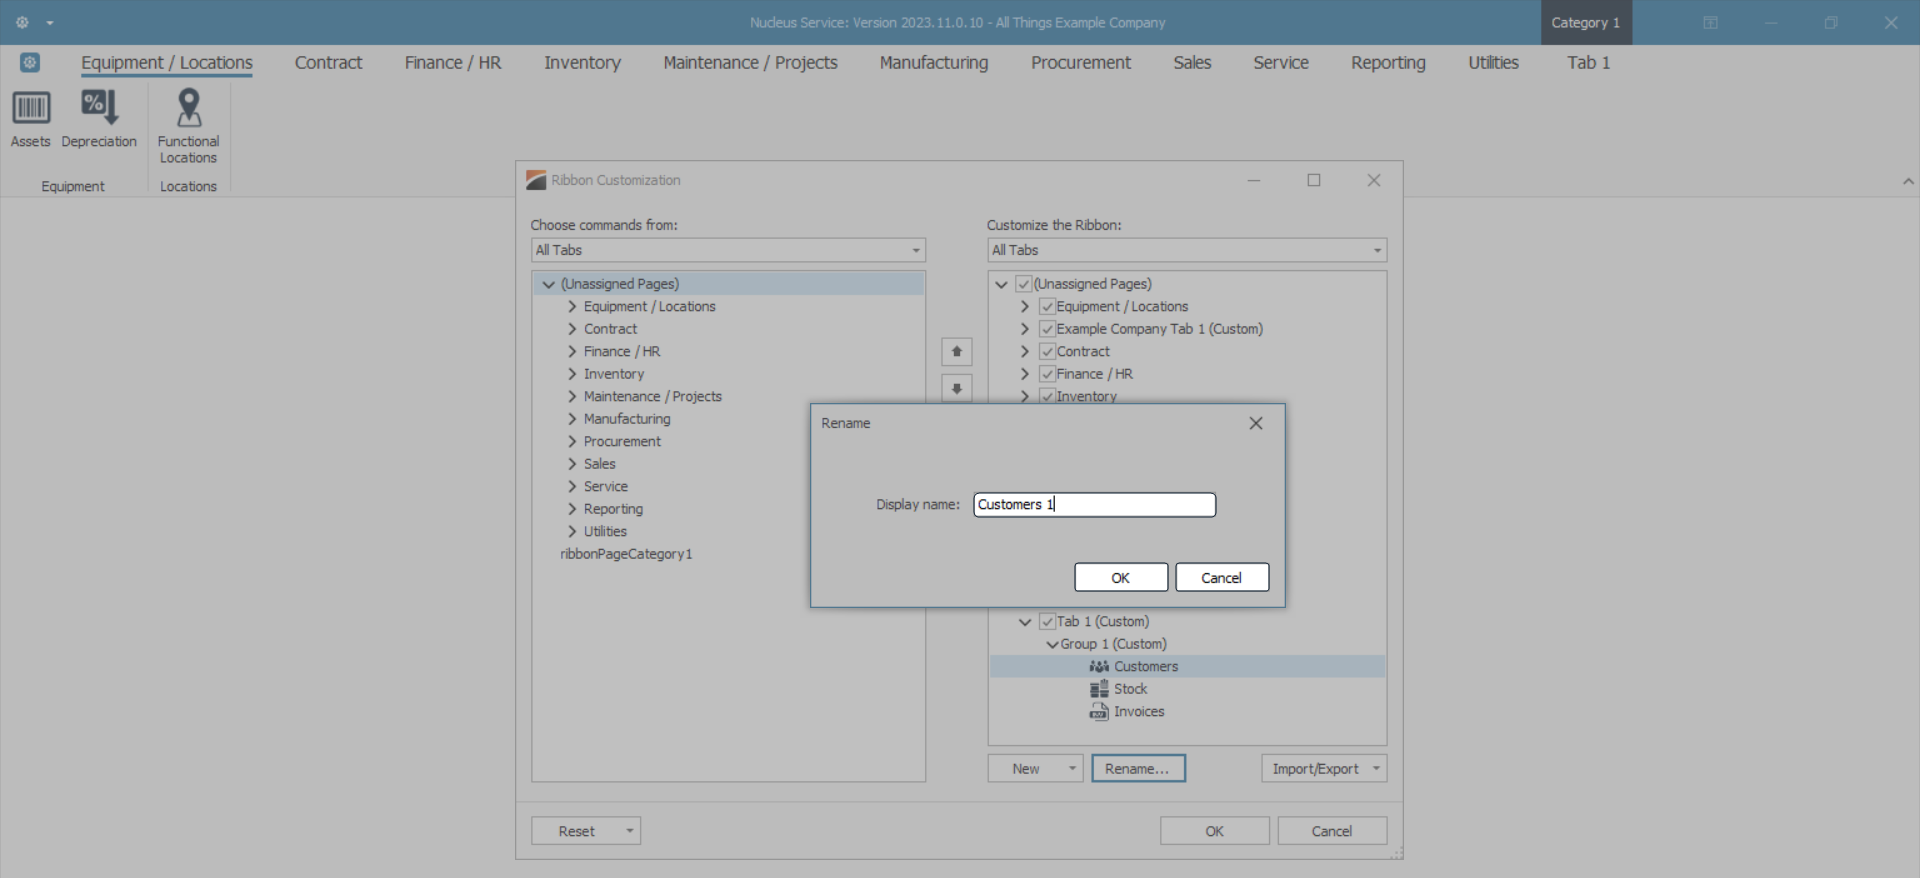
- Type your name of choice over the highlighted wording in this cell.
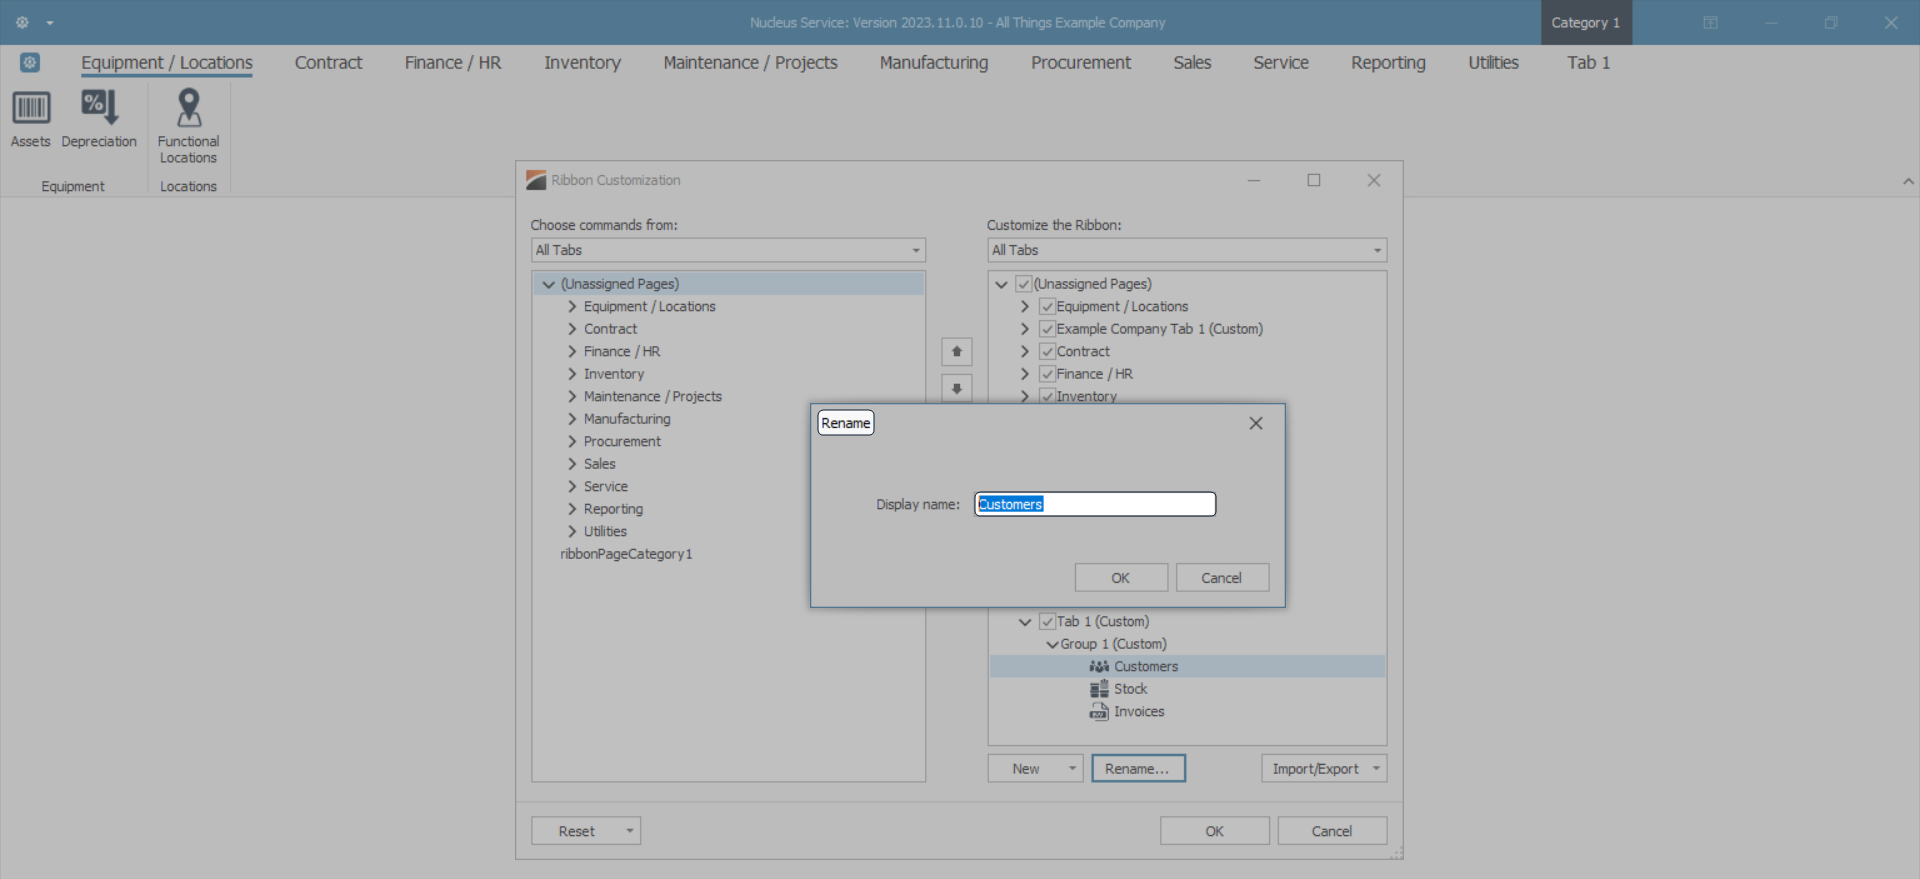
- In this image, the title Customers 1 has been typed.
- Click on Ok to save your name change.
- Or Cancel if you do not want to save the new name.
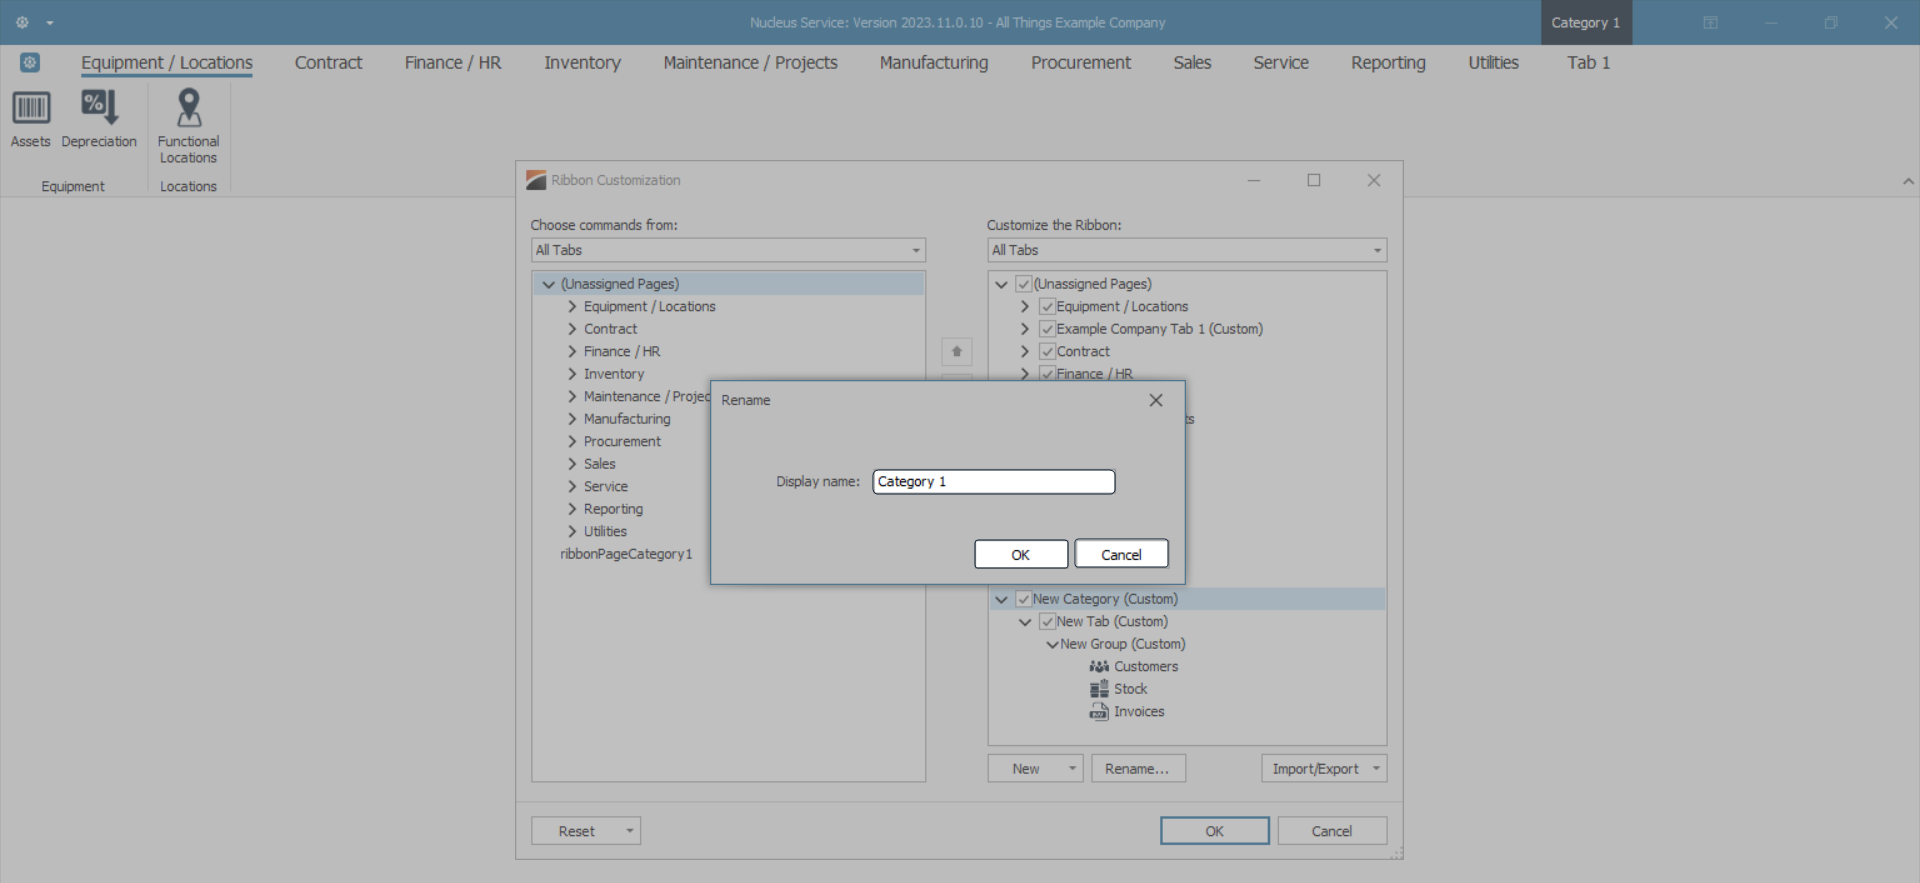
Method 2
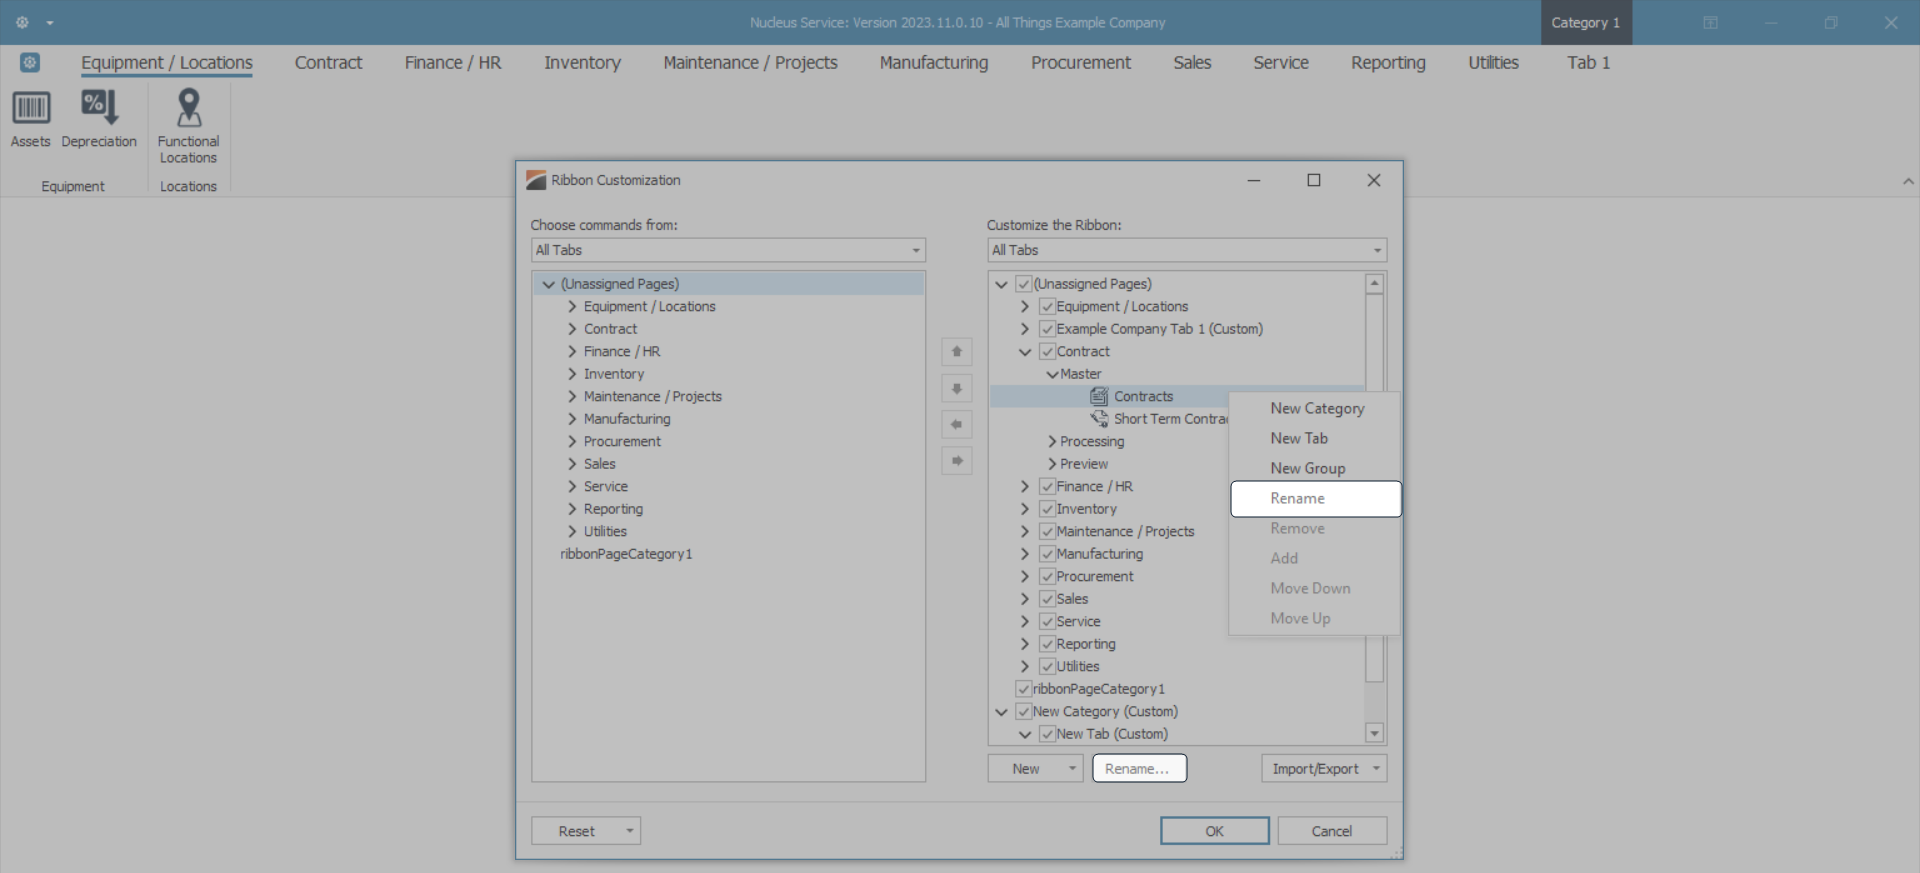
- Select and right click on the Title you wish to rename.
- In this image, New Category has been selected (highlighted).
- Click on Rename in the pop-up menu.

- A Rename pop-up screen will appear.
- The Display name: cell auto populates with the original name.
- Type your name of choice over the highlighted wording in this cell.
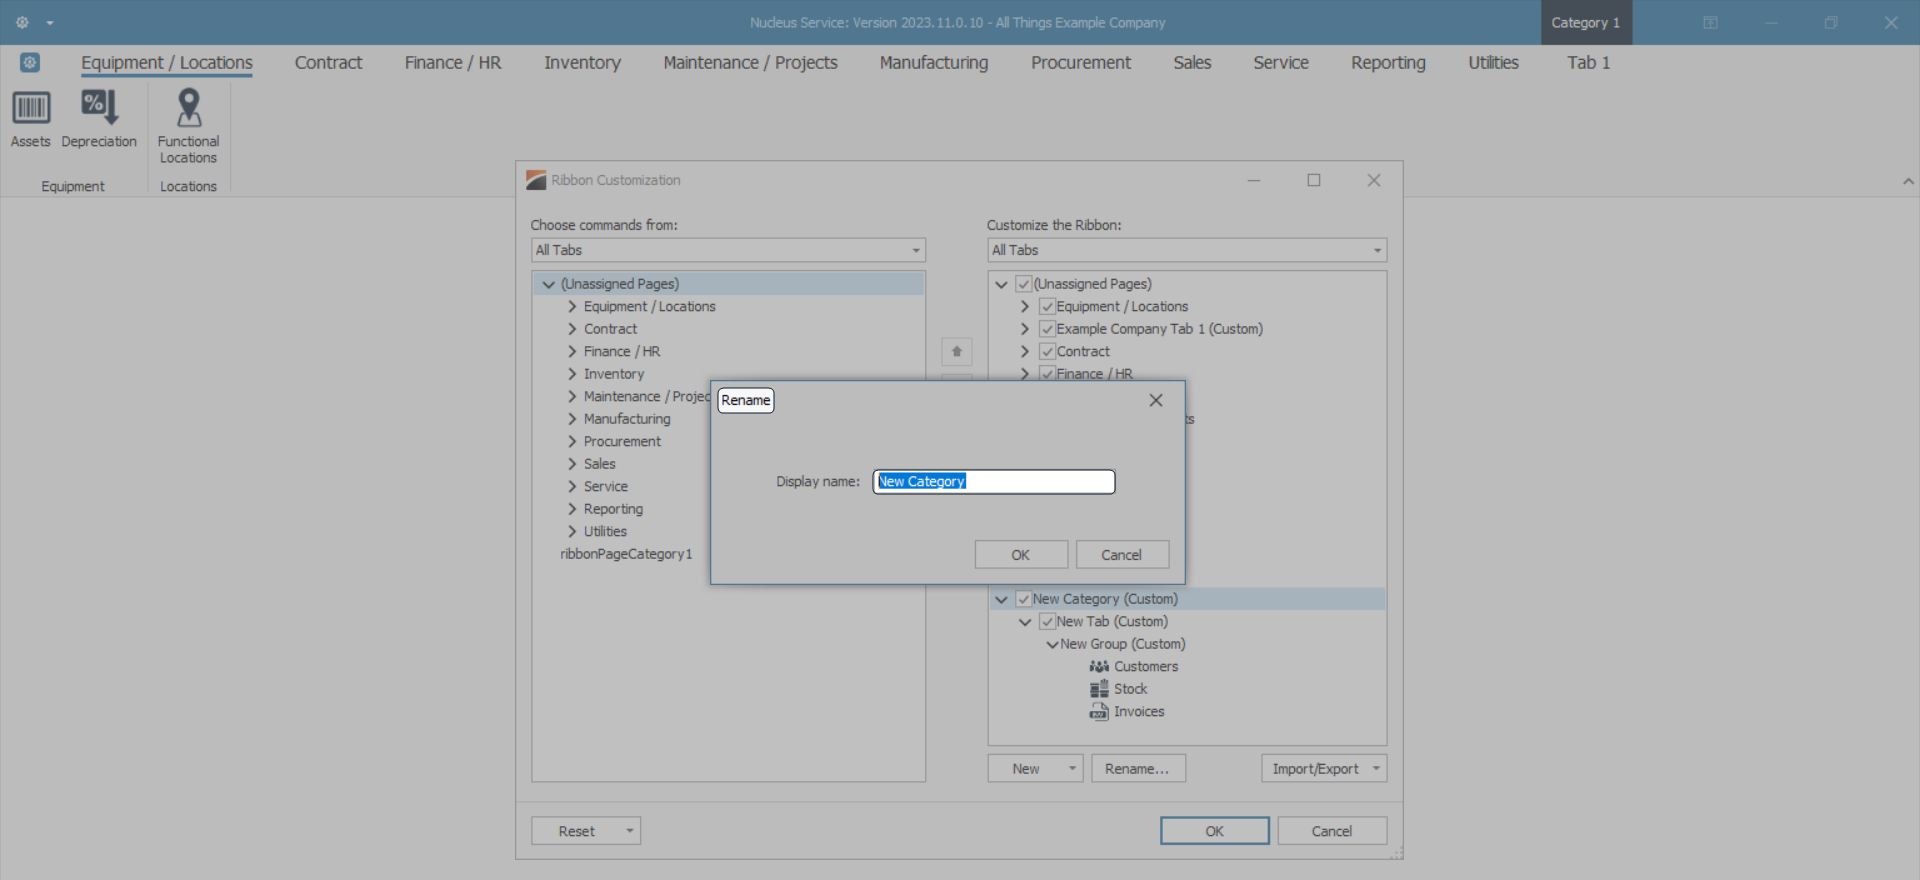
- In this image, the Title Category 1 has been typed.
- Click on Ok to save your name change.
- Or Cancel if you do not want to save the new name.
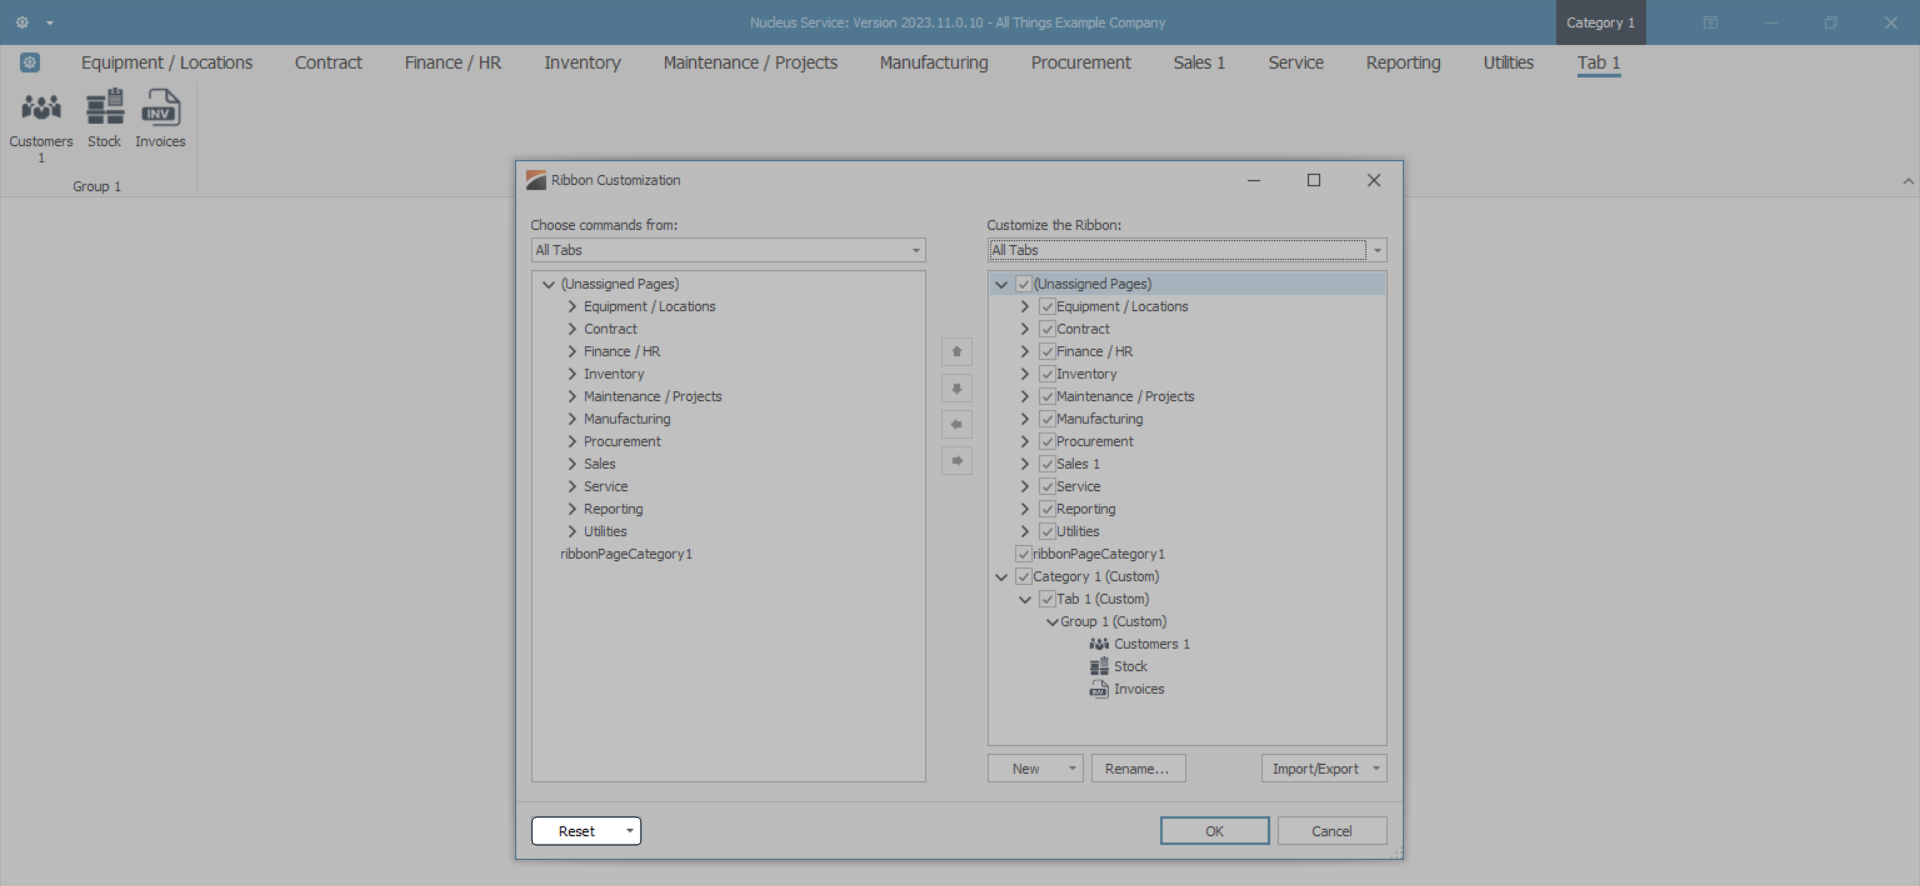
- If you have clicked Ok, your Title will be renamed and saved.
- In this image, the new Titles are displayed in the Customize the Ribbon list.

- Follow the same procedure to rename the New Tab and New Group Categories.
- In this image they have been renamed Tab 1 and Group 1 respectively.
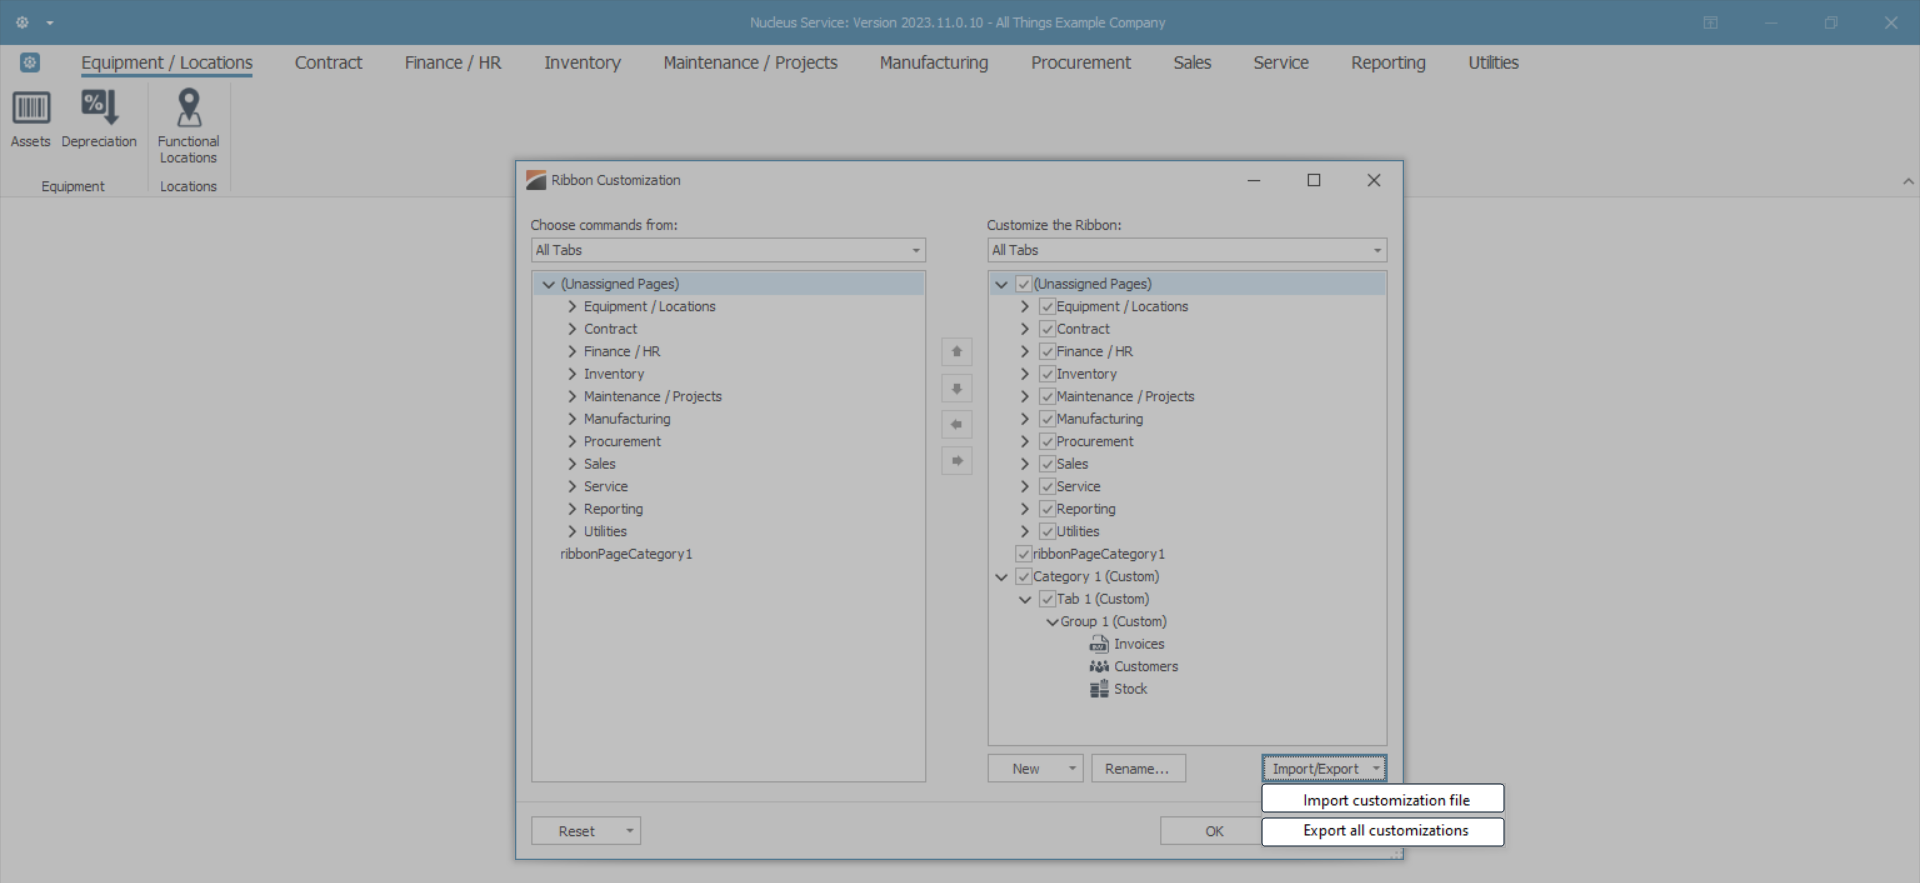
Import / Export Customizations
- You have the option to Import a customization file or Export all your customizations.
- Click on Import/Export at the foot of the Customize the Ribbon frame.
- A drop-down menu will display to select Import customization file or Export all customizations.
Reset Customizations
- If you do not want to save your customizations, you can click on Reset to return to the original Ribbon configuration.
Save Customizations
- If you want to save your customizations, you can click on OK to save your changes.
- Your customizations will now be displayed in your Ribbon.

MNU.000.002