We are currently updating our site; thank you for your patience.
Inventory
Parts - Stock Control - Min/Max Reorder Method
Stock control determines how you will replenish your stock. For example, which reorder method will be used to trigger the process to bring stock into the warehouse ready for sale.
In Nucleus Service you have the ability to set a reorder point method and to set a minimum and maximum level reorder method.
The Min-Max process set out below is considered the simplest method of inventory control.
The minimum level of inventory for a part is generally defined as the quantity of that part which is required to be kept available in stock at all times. This figure is based on factors including lead time![]() The lead time is the amount of time between when an order is placed with a supplier and the time that order is delivered and received by the company. and expected sales of the part in a particular time period, for example, over a week or month.
The lead time is the amount of time between when an order is placed with a supplier and the time that order is delivered and received by the company. and expected sales of the part in a particular time period, for example, over a week or month.
It is important to make sure there is enough stock on hand to ensure that business operations are not impacted and that customer demand can be met.
The maximum level of inventory for a part is defined as the quantity of that part which must not be exceeded in stock. This figure is based on factors such the as cost of storage and insurance, inventory turnover and the nature of the part, e.g., is rapid obsolescence![]() This is the process of becoming obsolete or outdated and no longer used. a consideration?
This is the process of becoming obsolete or outdated and no longer used. a consideration?
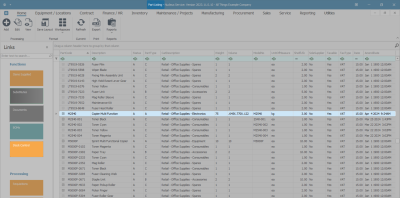
Ribbon Select Inventory > Parts
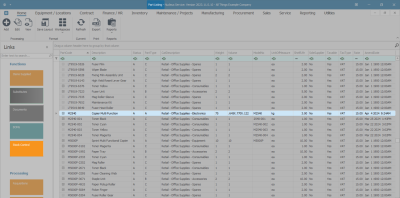
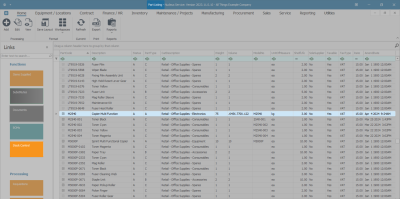
- The Part Listing screen will be displayed.
Add a Min/Max Reorder Method
Select the Part Definition
- Select the row of the part definitionwhere you wish to add a reorder Min / Max level.
- Click on the Stock Control tile.
- The Stock Control for Part: [ ] screen will open.
- Click on Add.
Add Min/Max Details
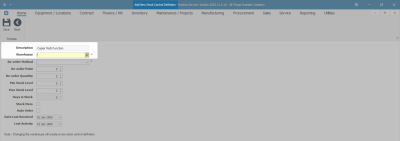
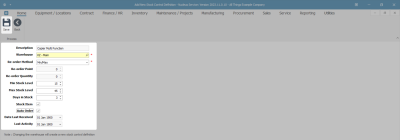
- The Add New Stock Control Definition screen will be displayed.
- Description: This will auto populate with the description of the part definition selected in the previous step.
- Warehouse: Click on the search button in this field.
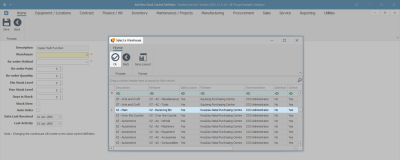
- The Select a Warehouse screen will pop up.
- Select the row of the warehouse where you wish to add a reorder Min / Max method.
- Click on Ok.
- The selected warehouse will populate the field.
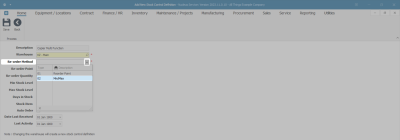
- Re-order Method: Click on the drop-down arrow and select Min/Max from the list.
- Continue adding the stock control definition details, as required:
- Re-order Point: This field will be uneditable as it is only applicable if you are setting a Re-order Point method.
- Re-order Quantity: This field will be uneditable as it is only applicable if you are setting a Re-order Point method.
- Min Stock Level: Type in the minimum quantity to be kept in stock.
- Max Stock Level: Type in the maximum quantity to be kept in stock.
- Days in Stock: Type in the average number of days that this part is stored in the warehouse before being sold.
- Stock Item: Select this check box if the part is kept in stock.
- Auto Order: Select this check box if you want the system to auto order according to the stock control set up.
- Date Last Received: This field is uneditable for the re-order method.
- Last Activity: This field is uneditable for the re-order method.
- When you have finished adding your reorder point stock control definition, click on Save.
- You will return to the Stock Control for Part: [ ] screen.
- The added Min/Max method details will be listed in the data grid.
- Click on Back or Close the screen to return to the Part Listing screen.
Edit a Min/Max Reorder Method
Select the Part Definition
- In the Part Listing screen -
- Select the row of the part definition where you wish to edit the reorder Min/Max method.
- Click on the Stock Control tile.
- The Stock Control for Part: [ ] screen will open.
- If there is more than one stock control method in the data grid, ensure you select the row that contains the reorder Min/Max method where you wish to make changes.
- Click on Edit.
Edit the Min/Max Details
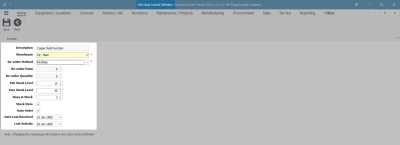
- The Edit Stock Control Definition screen will open.
- The following fields can be edited:
- Warehouse: Click on the search button and choose from the Select a Warehouse pop up screen, the warehouse you wish to link to this reorder point method. (See Add a Reorder Min/Max Method above, for a more in-depth explanation.)
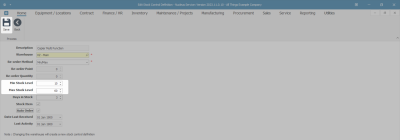
- Min Stock Level: Edit the minimum quantity to be kept in stock.
- Max Stock Level: Edit the maximum quantity to be kept in stock.
- Days in Stock: Edit the average number of days that this part is stored in the warehouse before being sold.
- Stock Item: Edit this check box as required. Select it if the part is to be kept in stock, otherwise leave blank.
- Auto Order: Edit this check box as required. Select it if you wish the system to auto order this part according to the stock control set up, otherwise leave blank.
- In this example, the Min Stock Level has been changed to 10 and the Max Stock Level has been changed to 60.
- When you have finished editing the details in this screen, click on Save.
- You will return to the Stock Control for Part: [ ] screen.
- The edited details can be viewed in the data grid.
- In this example, the Min Stock Level and Max Stock Level were edited to 10 and 60.
- Click on Back or Close the screen to return to the Part Listing screen.
Delete a Min/Max Reorder Method
Select the Part Definition
- In the Part Listing screen -
- Select the row of the part where you wish to delete the reorder Min/Max method.
- Click on the Stock Control tile.
- The Stock Control for Part: [ ] screen will open.
- If there is more than one stock control method in the data grid, ensure you select the row that contains the reorder Min/Max method that you wish to unlink from the part definition.
- Click on Delete.
- A Delete Stock Control Definition message box will pop up with the following prompt:
- Are You sure you want to remove this stock control definition?
- Click on Yes.
- The reorder Min/Max reorder method will be removed from the data grid.
- Click on Back or Close the screen to return to the Part Listing screen.
MNU.026.002

