Inventory
In-Transit Inter-Warehouse Transfer
This process is similar to the Inter-Bin Stock Transfer process with the differences as noted below.
- You will need to ensure that the Company Configuration Enforce In-transit flag is set to 'Yes' to be able to complete this process.
- Once stock is transferred to the 'In-Transit' warehouse, the stock must then be Received from the In-Transit warehouse into the destination warehouse.
- The stock transfer process differs slightly for an A or B-Class item compared to a C-Class item. This manual gives the example of both class types to help explain the differences.
Ribbon Select Inventory > Stock
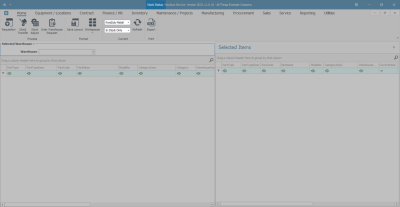
- The Stock Status screen will be displayed.
Transfer A, B or C-class Items
Select Source Site
- Select the source location or Site (where the stock is currently).
- In this image KwaZulu-Natal has been selected.
- This screen will open in the In Stock Only status.
- This can remain unchanged.
Select Source Warehouse
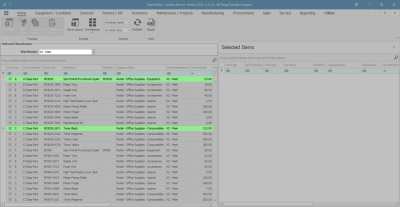
- Click on the drop-down arrow in the Warehouse field and select from the list the source warehouse (where the stock is currently).
- In this image KZ-Main Warehouse has been selected.
- The Selected Warehouse frame will populate with all the items currently in stock in that warehouse.
Select Items to Transfer
- Click on the item lines of the A or B-Class item and the C-Class item that you wish to transfer.
- Note: You can select multiple items in 2 ways:
- Either
- Click in the row of the first item line, press and hold the Shift button on your keyboard, use the arrows on your keyboard to select the items in order. (The items should all be highlighted as they are selected).
- Or
- Click on the first item, then hold the Ctrl button on your keyboard, whilst using your mouse to click on the other item lines that you wish to add. Use this method for items that are not in order. (The items should all be highlighted as they are selected).
- Once you have selected multiple items using either of the above methods -
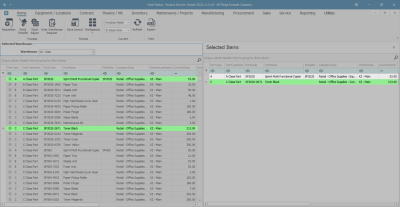
- Press and hold the Shift button on your keyboard, click in the row selector column of the final row of the selection and drag and drop to the Selected Items frame.
- All the selected lines will be copied across to this frame.
Transfer Items to In-Transit Warehouse
- You can see in this image that all the item lines have been copied to the Selected Items frame.
- Click on Stock Transfer.
Transfer Header Details
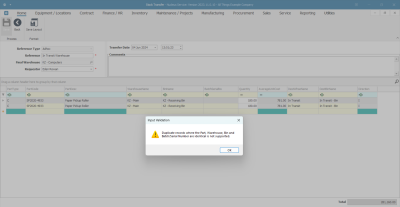
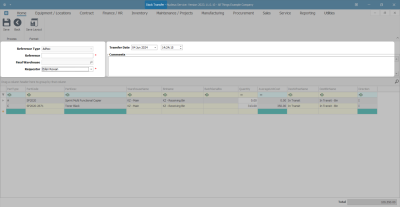
- The Stock Transfer screen will be displayed.
- In this image, you can see that all the selected item lines have been brought across to this screen.
- You will note that the system has auto populated the Destination Warehouse Name and Destination Bin Name fields with the name of the In-Transit Warehouse and bin as set up in Warehouse Configuration.
- Fill in the details in the Header frame:
- Reference Type: This will auto populate with Adhoc.
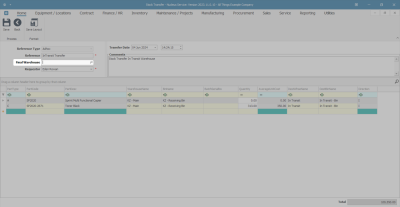
- Reference: Type in your reference for this stock transfer.
- Final Warehouse: (This will be covered in the next image.)
- Requestor: This will auto populate with the person currently logged on to the system. You can click on the drop-down arrow and select an alternative person if required.
- Transfer Date and Time: This will auto populate with the current date and time.
- Date: You can either type in or click on the drop-down arrow and use the calendar function to select an alternative date if required.
- Time: You can either type in or use the directional arrows to select an alternative time if required.
- Comments: Type in a comment relating to the reason for the stock transfer.
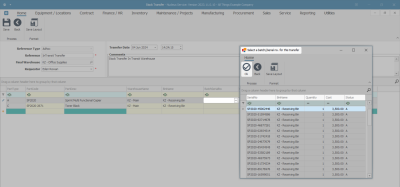
Select Final Destination Warehouse
- Final Warehouse: Click on the search button in this field.
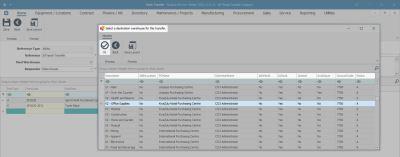
- The Select a destination warehouse for this transfer screen will pop up.
- Click on the row selector in front of the warehouse that you wish to be the final destination warehouse. This is the warehouse that will receive the items from the In-Transit Warehouse.
- Click on Ok.
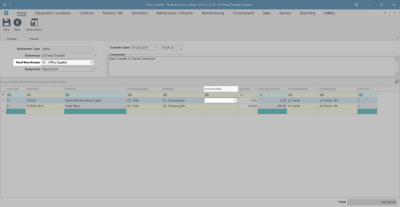
- The Final Destination field will populate with the selected warehouse.
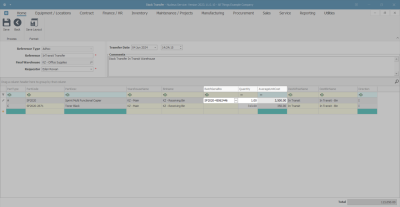
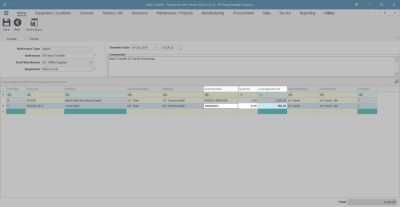
Select Serial No, Quantity and Unit Cost for A or B-Class Item
- Click in the Batch Serial Number field of the A-Class Item.
- An ellipsis button will be revealed. Click on this button to bring up the Select a batch//serial number for this transfer screen.
- As this is an A-Class item, the system will display a list of Serial numbers.
- Click in the row selector in front of the Serial No of the item that you wish to transfer.
- Click on Ok.
- As the selected serial number populates the Batch Serial No text box:
- The Quantity field will populate with 1 (only one A or B-Class item can be selected per item row).
- The Average Unit Cost field will populate with the cost of the selected serialised item.
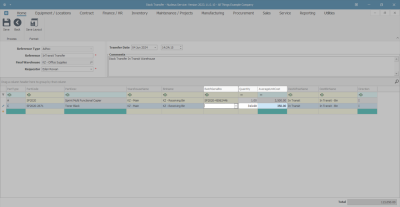
Select Serial No, Quantity and Unit Cost for C-Class Item.
- You will note that the Quantity field will initially auto populate with the total quantity of items available in all the batches in the selected source warehouse bin.
- The Average Unit Cost fields will be populated with the average cost of all of these items in the selected bin.
- If there is only one batch of the selected item available in the selected bin then the Batch Serial No field will populate with that batch number. However, if there is more than one batch then the system will leave this field blank for you to select the batch number.
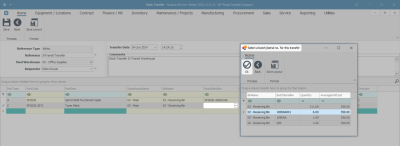
- Click in the Batch Serial No field of the C-Class item.
- An ellipsis button will be revealed. Click on this button to display the Select a batch//serial no. for this transfer pop up screen.
- As this is a C-Class item, you will see that this screen lists the Batch Serial Nos.
- Click on the row selector in front of the Batch Serial No that you wish to select an item from, for the stock transfer.
- Click on Ok.
- Make note of the quantity available in the selected batch. (We will refer to this in the next image).
- The Batch Serial No field will now be populated with the batch number selected in the previous step.
- The Quantity field will now be populated with the quantity of the specific batch selected in the previous step.
- This can be changed as explained in the next step.
- The amount in the Average Unit Cost field will remain the same as it is calculated across all batches.
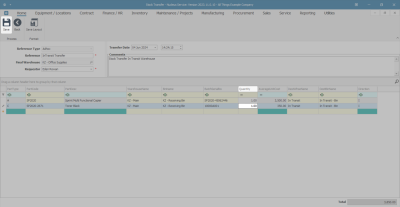
- Click in the Quantity field and either type in or use the directional arrows to select the quantity of the C-Class item that you wish to transfer.
- Remember the system will not let you exceed the quantity in the selected batch.
- In this image 1 item is to be transferred.
Save Transfer
- Click on Save.
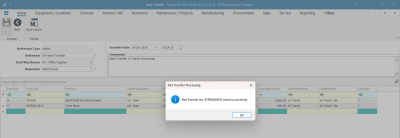
- A Part Transfer Processing message box will pop up informing you that -
- Part Transfer No. [ ] saved successfully.
- Click on OK.
Print Transfer Note
- A Report Generation message box will pop up asking;
- Do you wish to print the transfer [ ]?
- Click on Yes.
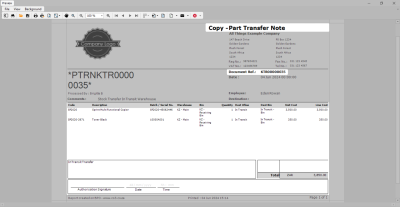
The Report Preview screen for the Part Transfer Note will be displayed.
- Here you can view the item batch and serial numbers that were selected.
- You can view the source warehouse and source bin.
- You can view the destination warehouse is the In-transit warehouse and destination bin is the In-transit bin.
- From here you can View, Print, Export or Email the Part Transfer Note.
- Close the Report Preview screen when done.
- You will return to the Stock Status screen.
View Transferred Items in InTransit Warehouse
Ribbon Select Inventory > InTransit
- The Parts InTransit screen will be displayed.
- Here you can view a list of the A and C-Class items transferred from the source warehouse.
- You may need to select the Site if the system has opened the screen in a different Site.
- In this screen you can receive the items.
MNU.037.012

