We are currently updating our site; thank you for your patience.
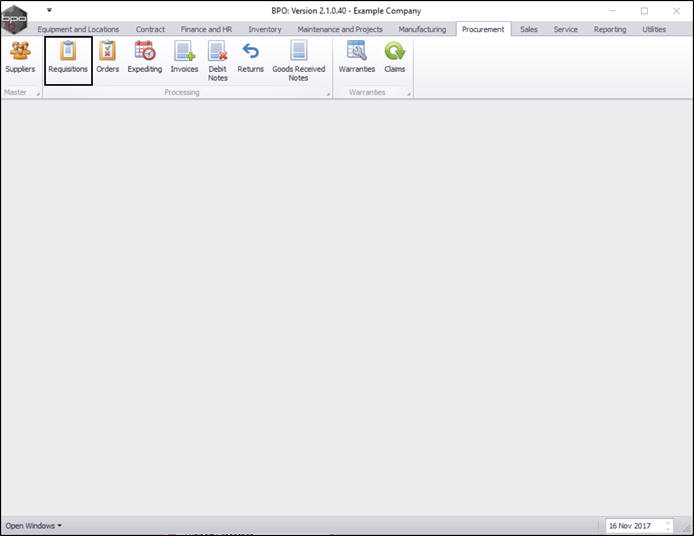
Procurement
Requisitions - Add, Edit, Delete Item Supplier
Once you have created a purchase requisition, you may be required to add, edit or remove a supplier, or make changes to the items supplied, e.g. change the price.
Linking a supplier to the purchase requisition, will pull through the supplier's details to the procurement documentation. It will also give you the ability to add the unit cost and lead time specific to the selected supplier.
If the supplier has not previously been linked to the part, then a supplier will need to be added to the purchase requisition.
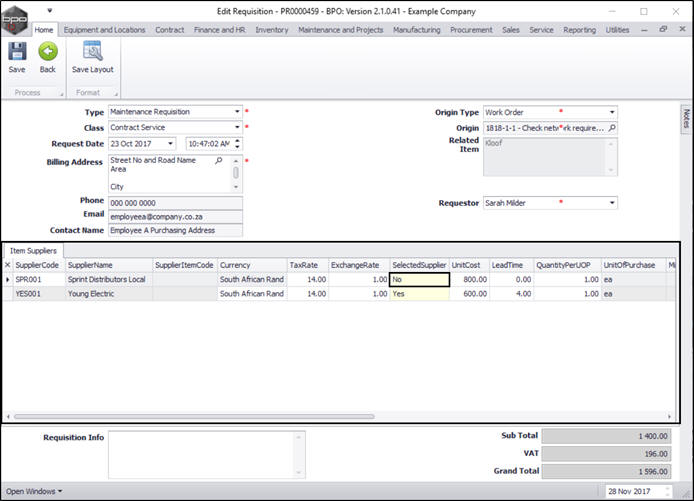
At least one supplier needs to be linked to each requisition item.
You can link more than one supplier to a part, with the main supplier as the default. Ensure that Selected Supplier is set to 'Yes' for the supplier you wish to set up as your default supplier.
Before purchasing from a supplier with a currency outside South Africa, ensure that you check the Exchange Rates have been set up correctly.
| Ribbon Access: Procurement > Requisitions |
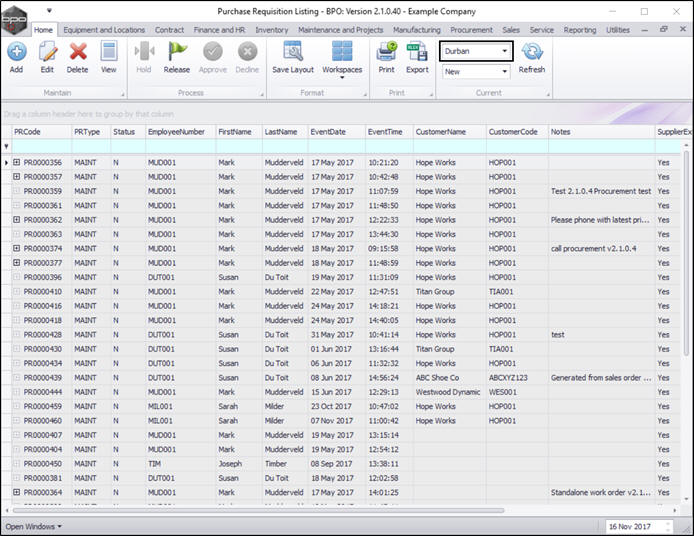
The Purchase Requisition Listing screen will be displayed.
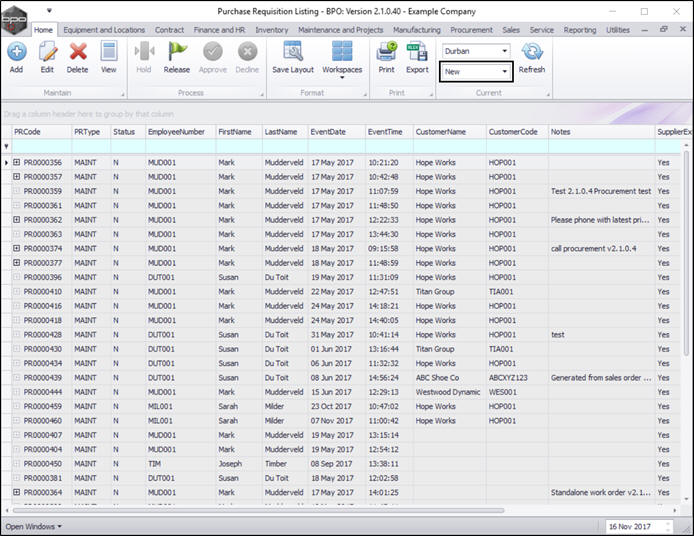
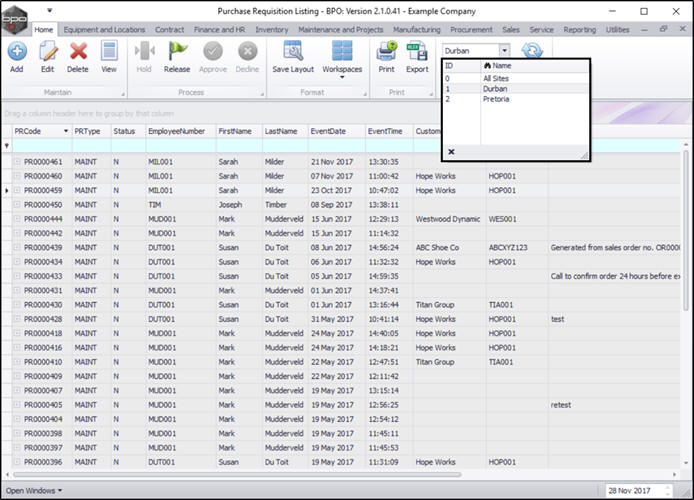
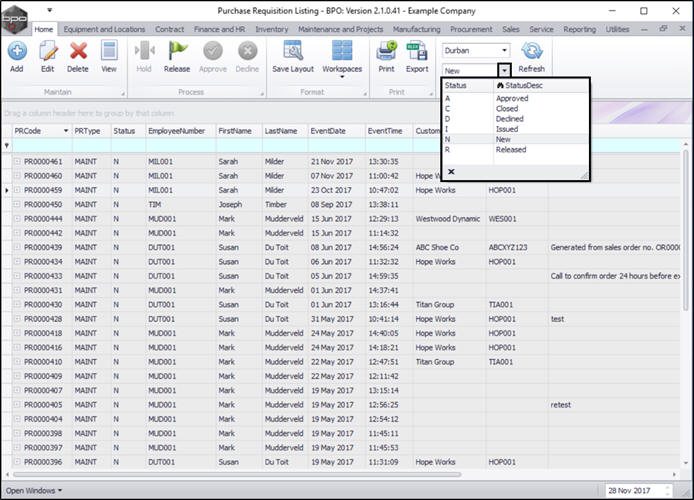
Select the Site and Status
- Select the site.
- In this image Durban has been selected.
- Select the status.
- This should be set to New.
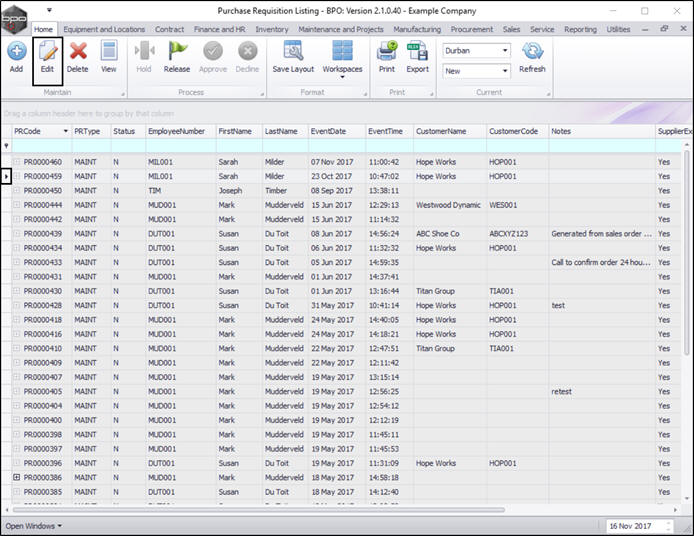
Select Requisition
- Select the row of the purchase requisition where you wish to add an item supplier.
- Click on Edit.
Add Item Supplier
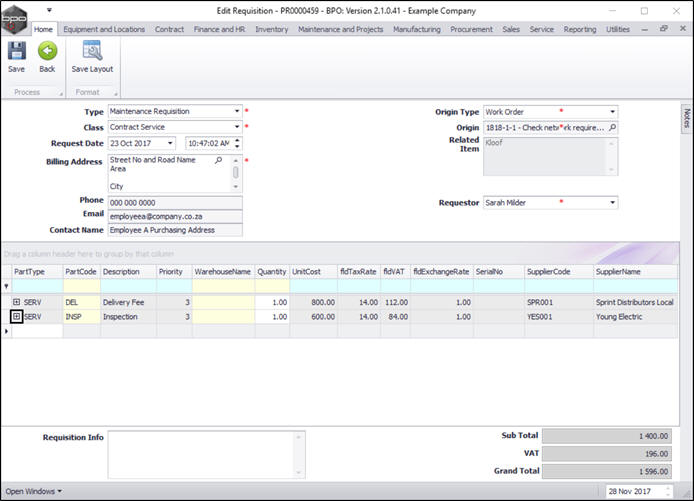
- The Edit Requisition screen will be displayed.
- In the Items data grid, click on the expand [+] button next to the Item (Part Type) you wish to add an item supplier to.
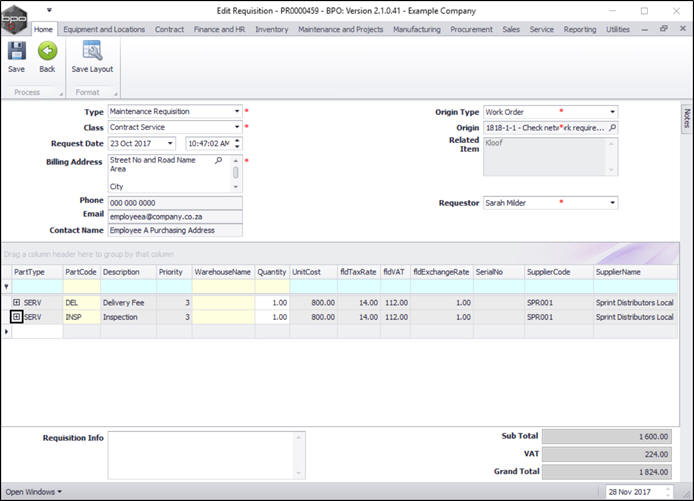
- The Item Suppliers data grid will be expanded.
- Click on the Search icon to prioritise this data grid in the screen and make it easier to work in.
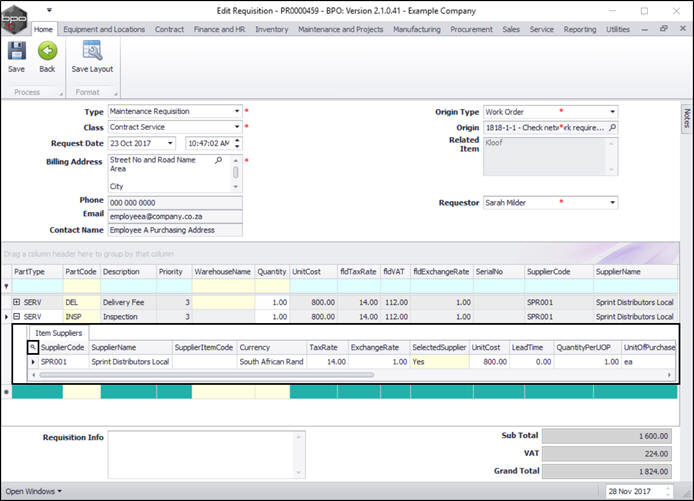
- The Item Suppliers data grid will now be the only data grid displayed in this screen.
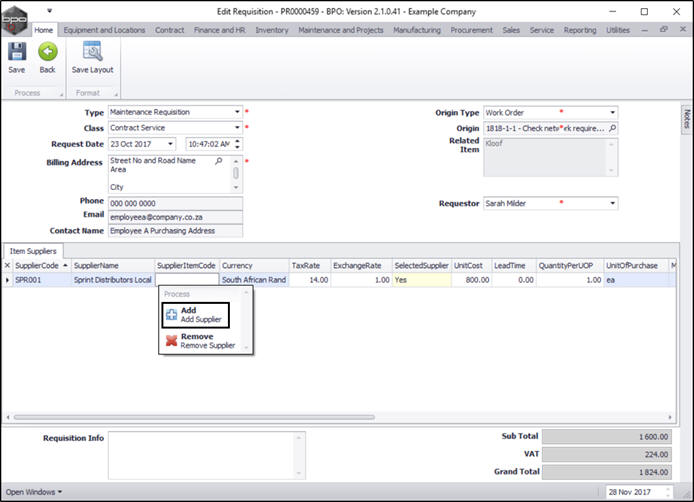
- Right click anywhere in a row of this data grid to bring up a Process selection box.
- Click on Add Supplier.
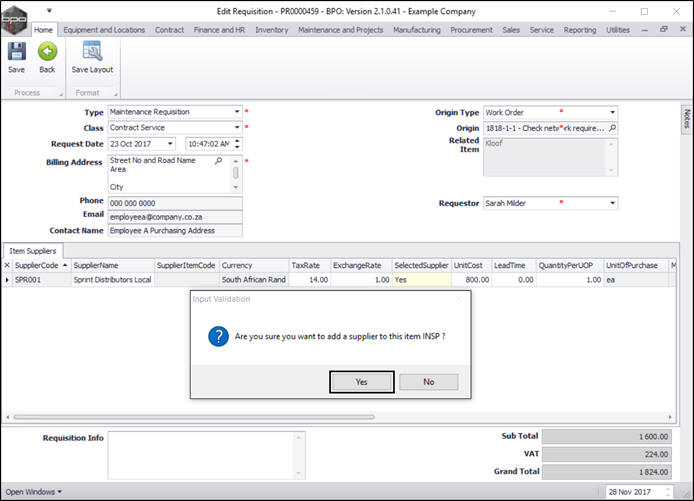
- An Input Validation message box will pop up asking;
- Are you sure you want to add a supplier to this item [ ]?
- Click on Yes.
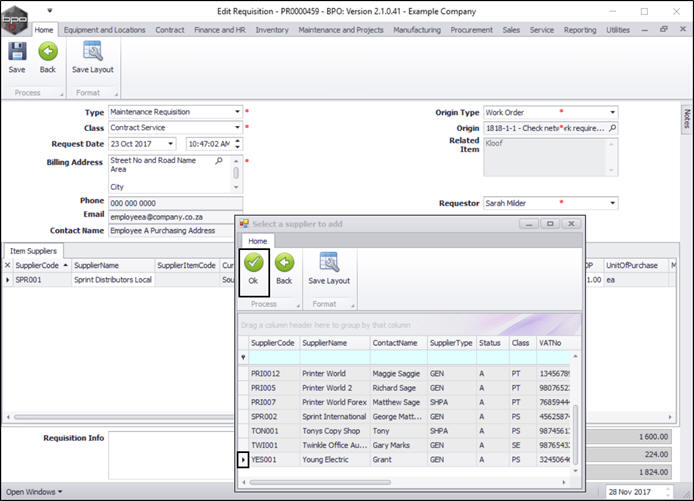
- The Select a supplier to add screen will pop up.
- Select the row of the supplier you wish to add to this purchase requisition.
- Click on Ok.
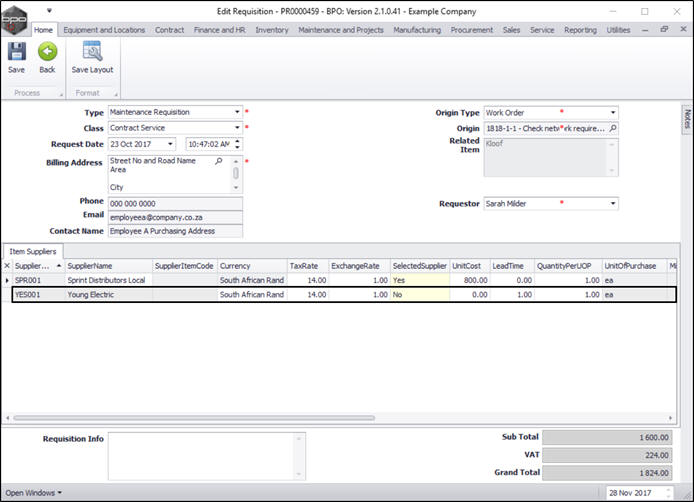
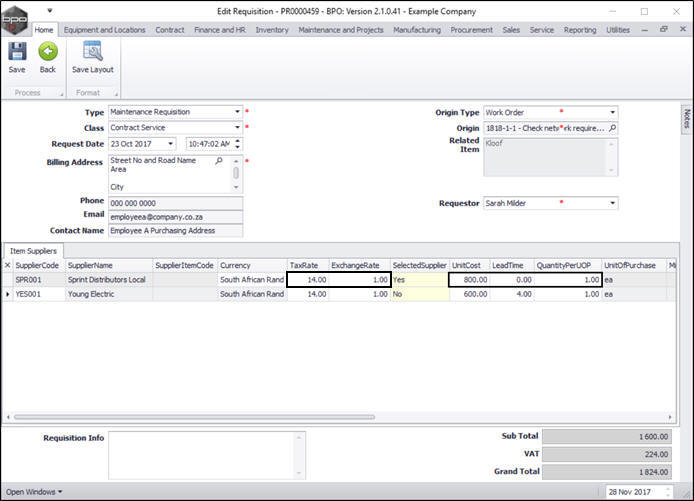
View Added Supplier
- The new supplier will be added to the Item Suppliers data grid.
Add or Edit Supplier Details
Most of the details in the new supplier row will be auto populated according to the details set up when the supplier was initially added to BPO. However, listed below are all the fields in the data grid, including notes on the ones which may need adjusting:
- Supplier Code: This will auto populate.
- Supplier Name: This will auto populate.
- Supplier Item Code: Type in the part number used by the supplier if required. You can update this if the supplier changes their part number - as this will filter through to the Purchase Order
- Currency: This will be populated based on the currency set up on the supplier but you can click on the field and select an alternative currency from the menu if required.
- Tax Rate: This will be populated based on the tax rate set up on the supplier but you can type in an alternative tax rate or click on the field and use the arrow indicators to adjust the tax rate as required.
- Exchange Rate: This will be populated based on the current exchange rate but you can type in an alternative tax rate or click on the field and use the arrow indicators to adjust the tax rate as required.
- Selected Supplier: Click in the field, then on the arrow that is revealed, and select Yes if this is the primary supplier or No if not. Each item can only have one primary supplier.
- Unit Cost: Type in the cost per unit.
- Lead Time: Type in the lead time in days.
- Qty per UOP: Type in the quantity per unit of purchase. This ties up with unit of purchase - you can set up the part to procure 1 each or 10 in a box, etc. Usually the default of 1 is used.
- Unit of Purchase: Type in the unit that ties up with the Qty per UOP, e.g. each or box. Usually the default of 'ea' is used.

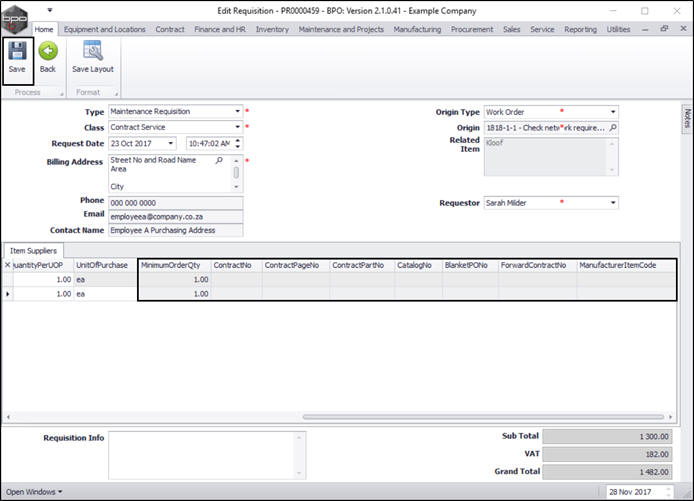
Scroll right if necessary, to display the remaining fields in the data grid;
- Minimum Order Qty: This is the minimum the Supplier will supply per order. Usually the default of 1 is used.
- Contract No: If you have a contract with the Supplier, type in the contract number. Leave blank if not applicable.
- Contract Page No: Type in the contract page number that relates to this part. Leave blank if not applicable.
- Contract Part No: Type in the part number agree to on this contract. Leave blank if not applicable.
- Catalog No: Type in the part number as per the supplier's catalogue.
- Blanket PO No: This is the Purchase Order number relating to the contract if a SLA agreement has been signed with the supplier to procure only from them for a specified period. Leave blank if not applicable
- Forward Contract No: Type in the forward contract number if required.
- Manufacturer Item Code: Type in the part number used by the manufacturer, if required.
Save Supplier Details
- When you have finished adding the new item supplier details, click on Save.
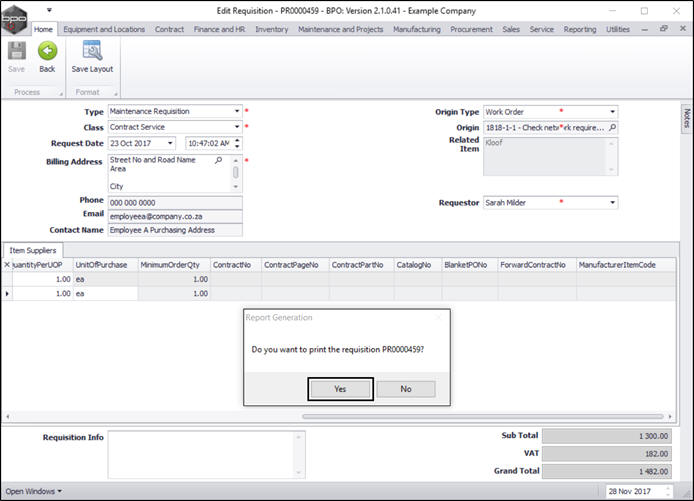
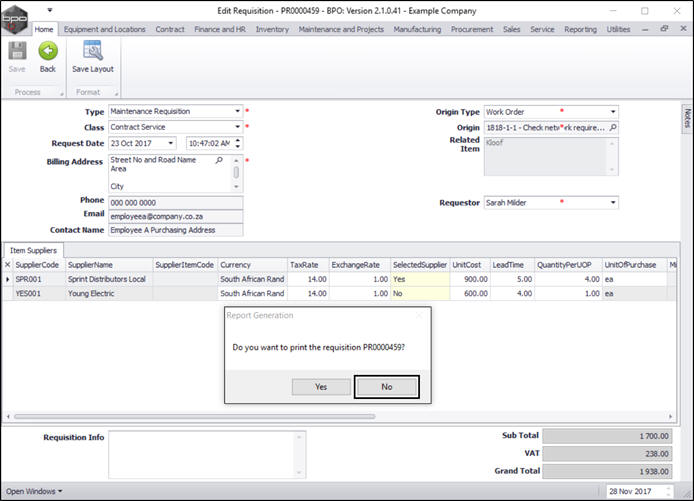
Print Requisition - No
- A Report Generation message box will pop up asking;
- Do you want to print the requisition []?
- If you click on No...
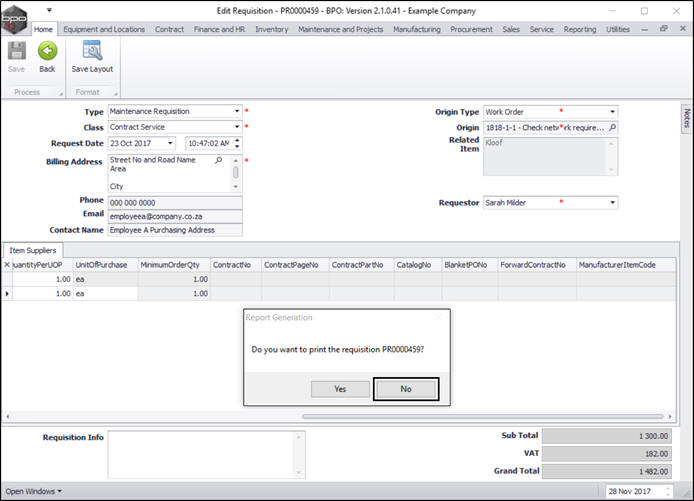
- You will return to the Purchase Requisition Listing screen.
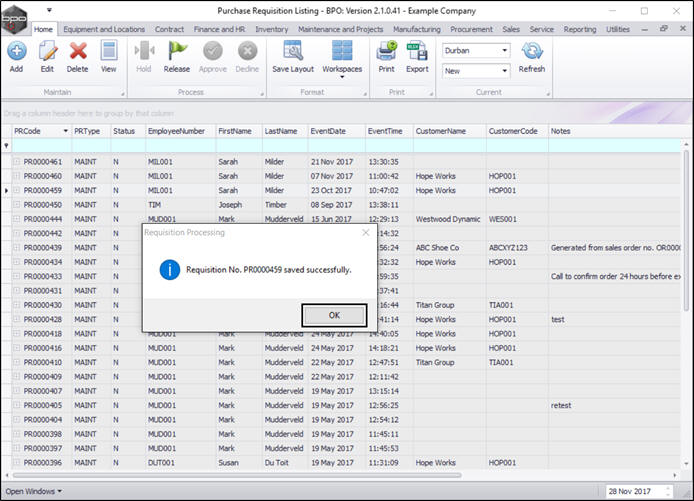
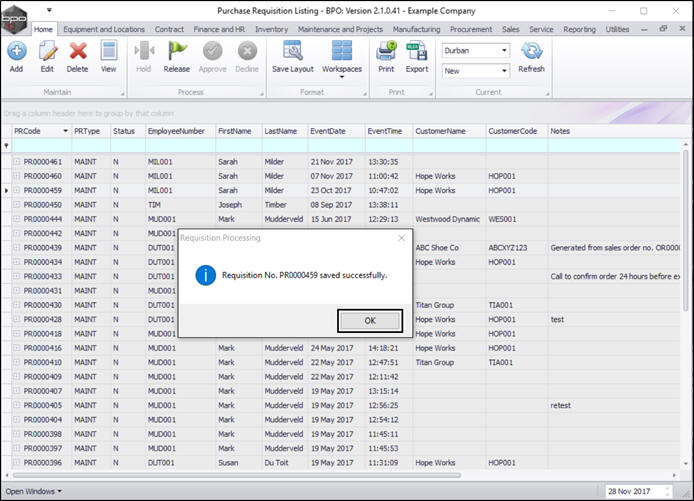
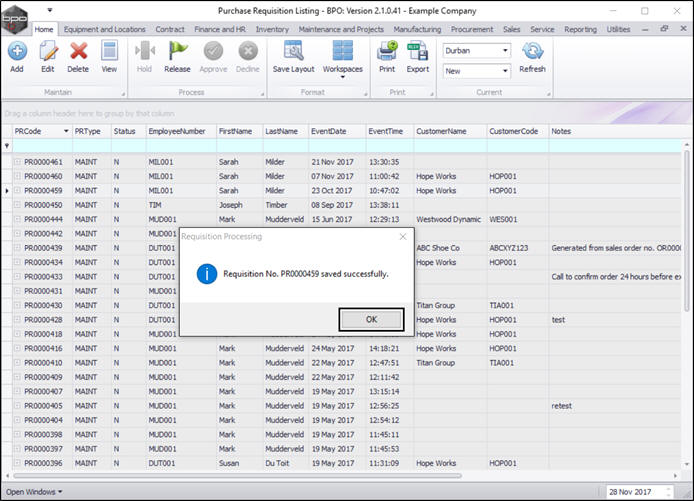
- A Requisition Processing message box will pop up informing you that;
- Requisition No. [ ] saved successfully.
- Click on OK.
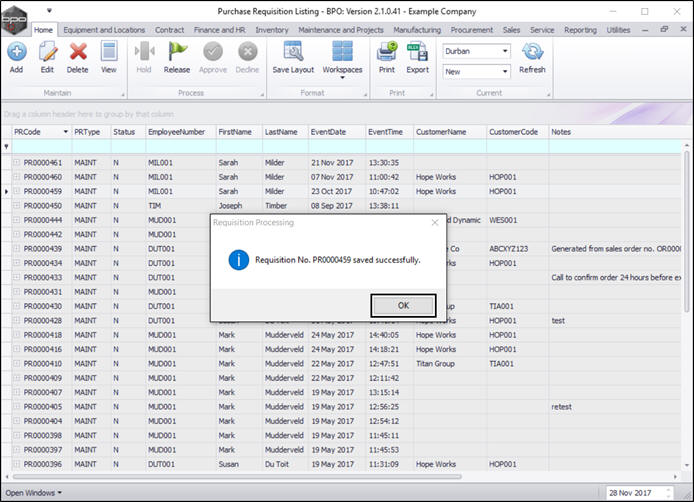
Print Requisition - Yes
- If, when the Report Generation message box pops up asking;
- Do you want to print the requisition []?
- And you click on Yes...
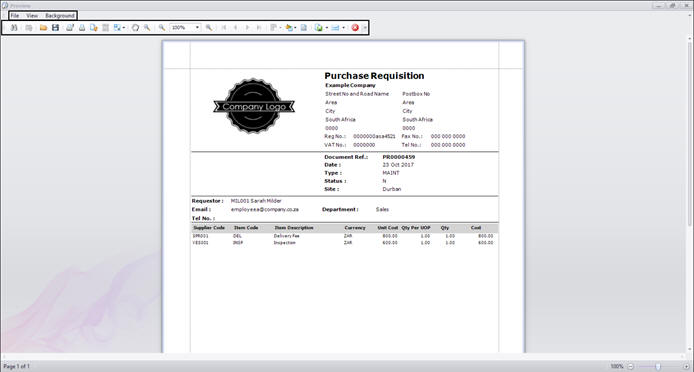
Report Preview
- The Report Preview screen will be displayed.
- From here you can View, Print, Export or Email the requisition.
- Close the Report Preview screen when done.
- You will return to the Purchase Requisition Listing screen.
- A Requisition Processing message box will pop up informing you that;
- Requisition No. [ ] saved successfully.
- Click on OK.
Edit Item Supplier
Select the Site and Status
- In the Purchase Requisition Listing screen,
- Select the site.
- In this image Durban has been selected.
- Select the status.
- This must be set to New.
Select Requisition
- Select the row of the purchase requisition you wish to edit the item supplier for.
- Click on Edit.

The Edit Requisition screen will be displayed.
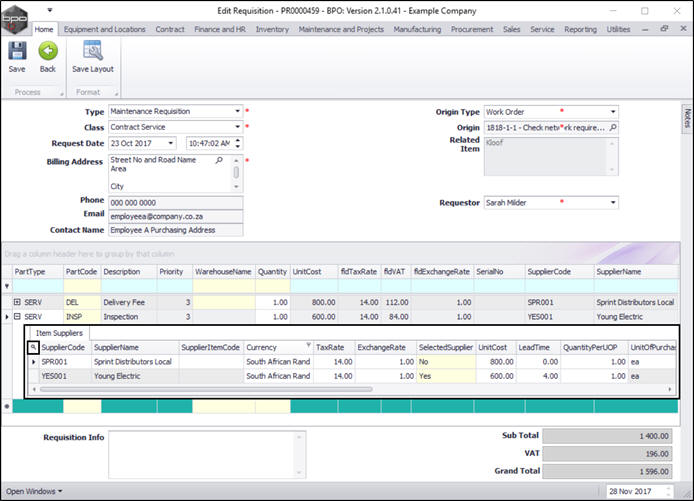
Expand the Items Data Grid
- In the Items data grid;
- Click on the expand [+] button next to the Item (Part Type) where you wish to edit an item supplier.
- The Item Suppliers data grid will be expanded.
- Click on the Search icon to prioritise this data grid in the screen and make it easier to work in.
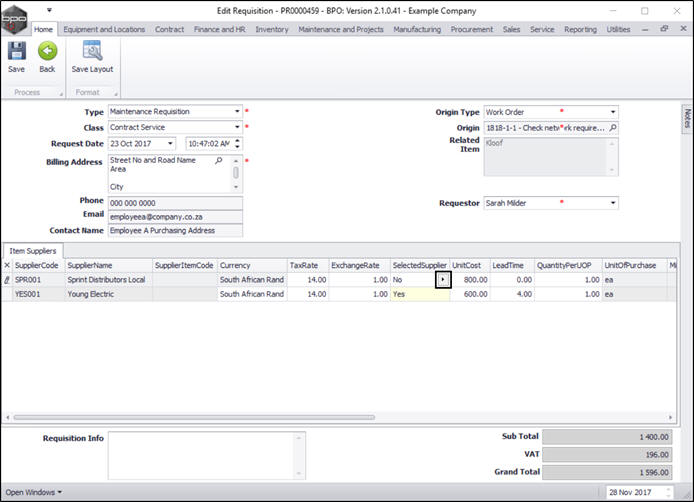
Edit Selected Supplier
- The Item Suppliers data grid will now be the only data grid displayed in this screen.
- In the row of the Item Supplier that you wish to edit the detail of, click in the field below the column header.
- In this example, the Selected Supplier field has been selected to be edited.
- Click on the arrow that is revealed.
- A Change Supplier message box will pop up asking;
- Do you want to change the selected supplier from [ ] for this item?
- Click on Yes.
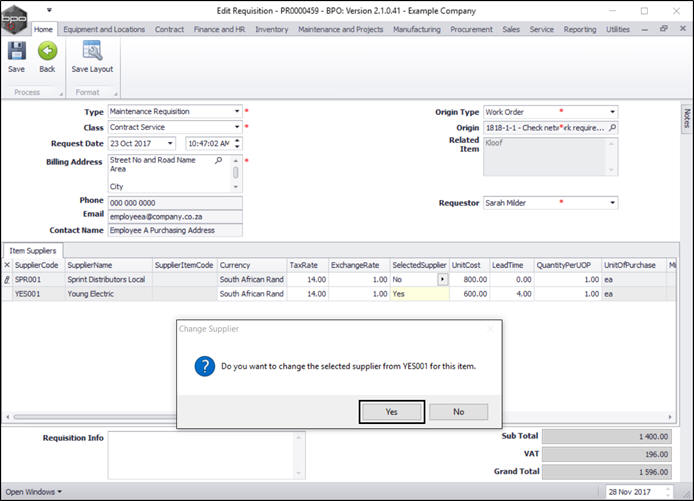
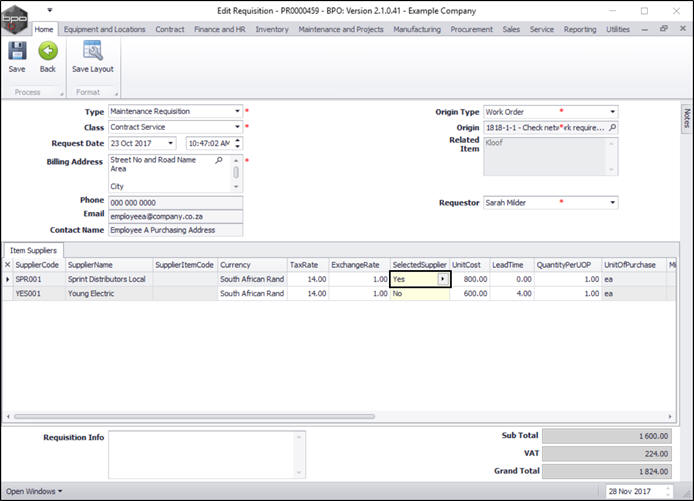
- Yes will now be recorded in the Selected Supplier field for that particular item supplier.
Note: As there can only be one selected supplier, if another supplier was previously the 'selected one', the Selected Supplier field in their row will auto change and populate with 'No'.
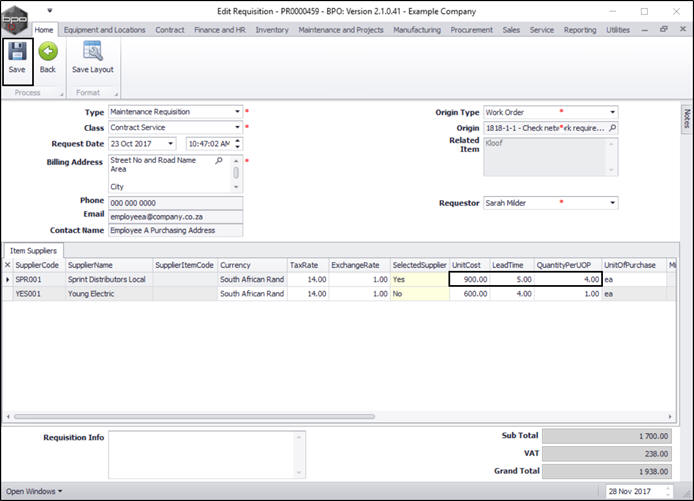
Edit Supplier Details
In the row of the item supplier you wish to edit,
- Click in the Tax Rate text box and either type in, or use the directional arrows to change the Tax Rate as required.
- Click in the Exchange Rate text box and either type in, or use the directional arrows to change the Exchange Rate as required. (This will only apply if the supplier does not work with the same currency as your company).
- Click in the Unit Cost text box and either type in, or use the directional arrows to change the Unit Cost as required.
- Click in the Lead Time text box and either type in, or use the directional arrows to change the Lead Time as required.
- Click in the Quantity Per UOP text box and either type in, or use the directional arrows to change the Quantity Per Unit of Purchase as required.
Save Changes
- When you have finished editing the item supplier details, click on Save.
Print Edited Requisition
- A Report Generation message box will pop up asking;
- Do you want to print the requisition [ ]?
- Follow the directions as above if you wish to print the requisition.
- In this example, No has been selected.
- You will return to the Purchase Requisition Listing screen.
- A Requisition Processing message box will pop up informing you that;
- Requisition No. [ ] saved successfully.
- Click on OK.
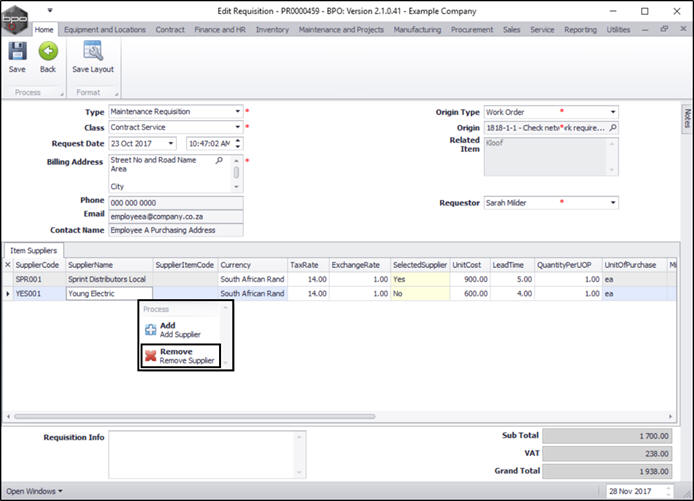
Delete an Item Supplier
- In the Item Suppliers data grid, click anywhere in the row of the item supplier you wish to delete.
- A Process selection box will pop up.
- Click on Remove Supplier.
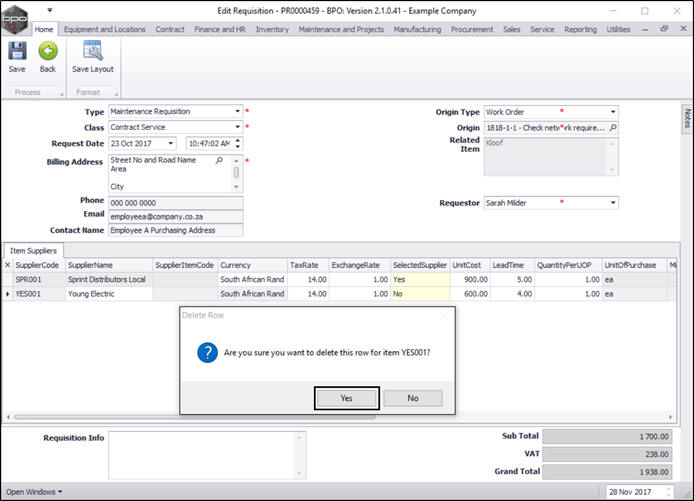
Confirm Deletion
- A Delete Row message box will pop up asking,
- Are you sure you want to delete this row for item [ ]?
- Click on Yes.
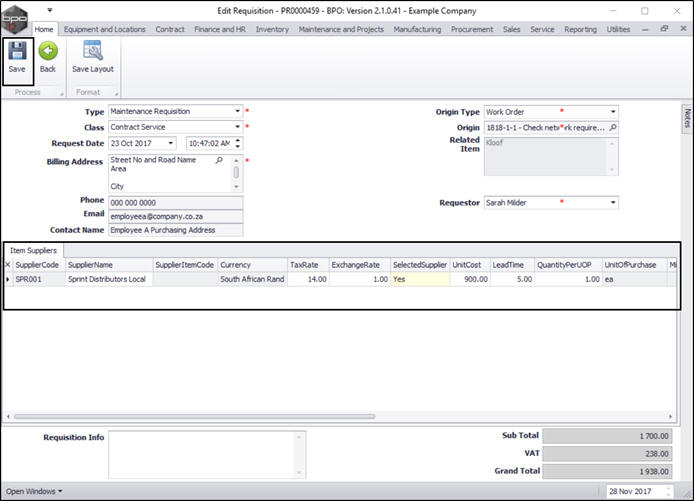
Note:If you have deleted the Selected Supplier, you will need to make another supplier the Selected Supplier for this item.
Save Deletion
- The item supplier will now be removed from the item suppliers data grid.
- Click on Save.
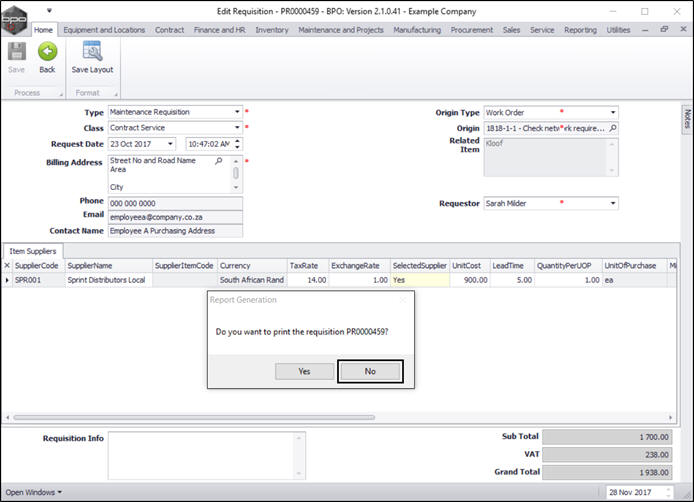
Print Requisition
- A Report Generation message box will pop up asking;
- Do you want to print the requisition [ ]?
- Follow the directions as above if you wish to click on Yes to print the requisition.
- In this image, No has been selected.
- You will return to the Purchase Requisition Listing screen.
- A Requisition Processing message box will pop up informing you that;
- Requisition No. [ ] saved successfully.
- Click on OK.
MNU.053.001