We are currently updating our site; thank you for your patience.
Projects
Projects - Labour Time
This process is used to log labour time per technician.
| Ribbon Access: Maintenance / Projects > Projects |

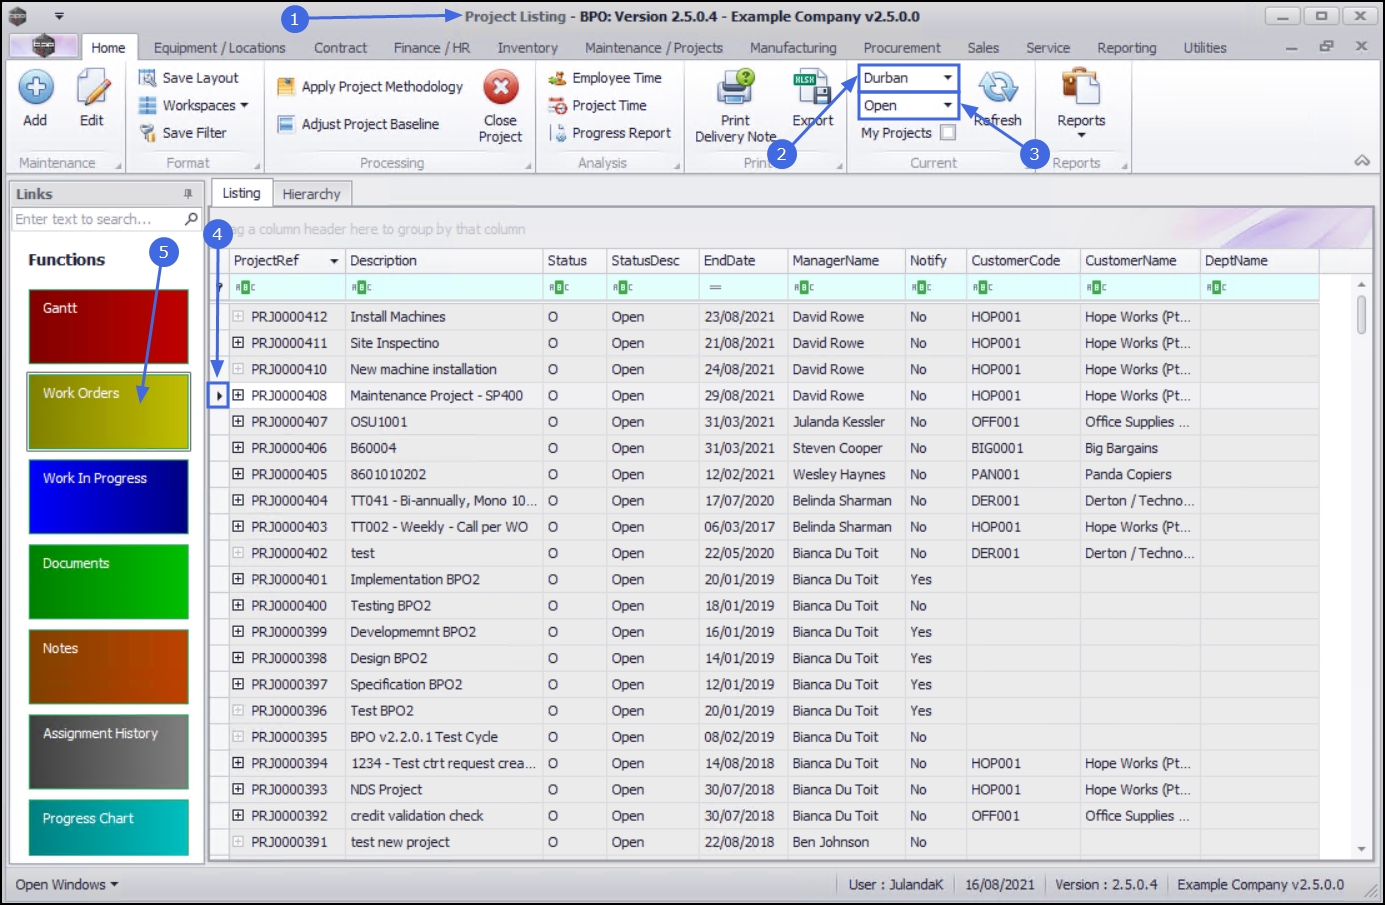
- The Project Listing screen will be displayed.
- Select the Site where the project can be located.
- The example has Durban selected.
- Ensure that the Status has been set to Open.
 Note that you can only log time on a project that is open.
 - Click on the row of the project that you wish to log labour time to.
- Click on the Work Orders tile.
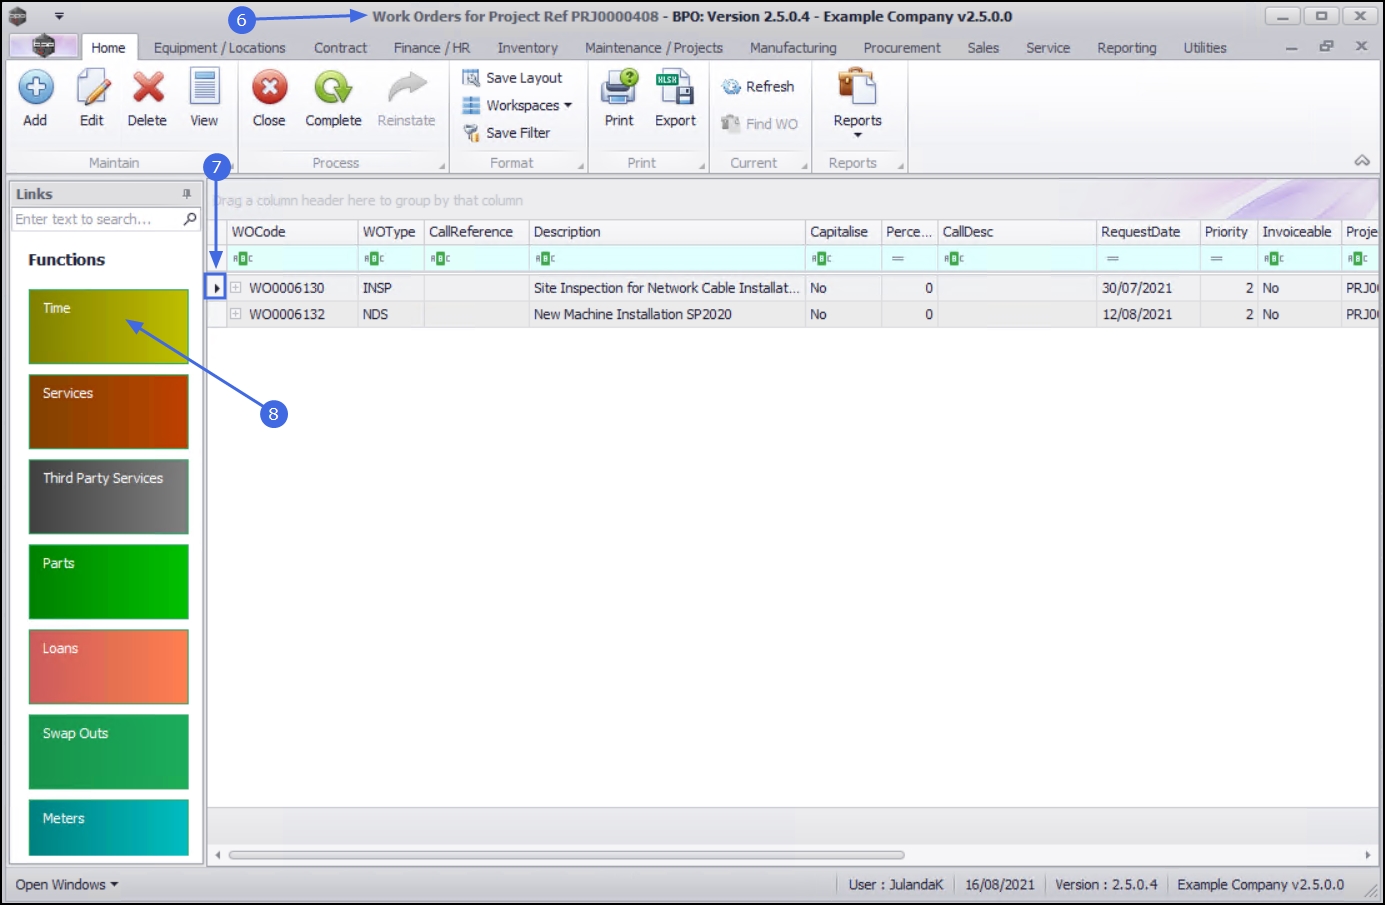
- The Work Orders for Project Ref [project ref number] screen will be displayed.
- Click on the row of the Work Order you wish to log labour time for.
- Click on the Time tile.
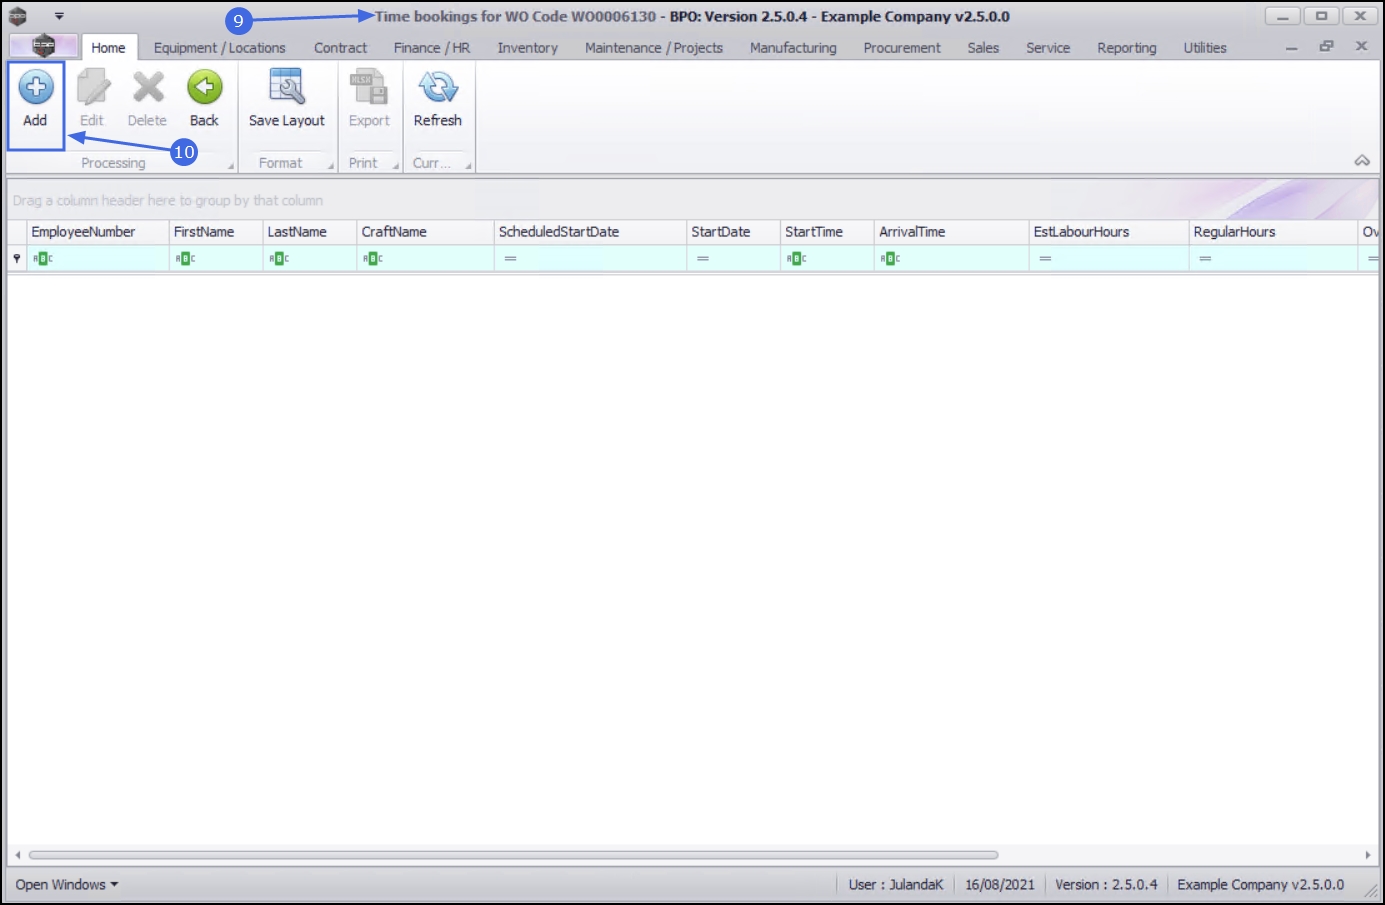
- The Time bookings for WO Code [work order number] screen will be displayed.
Add Labour Time
- Click on Add.
![]() Short cut key: Right click to display the Process menu list. Click on Add.
Short cut key: Right click to display the Process menu list. Click on Add.
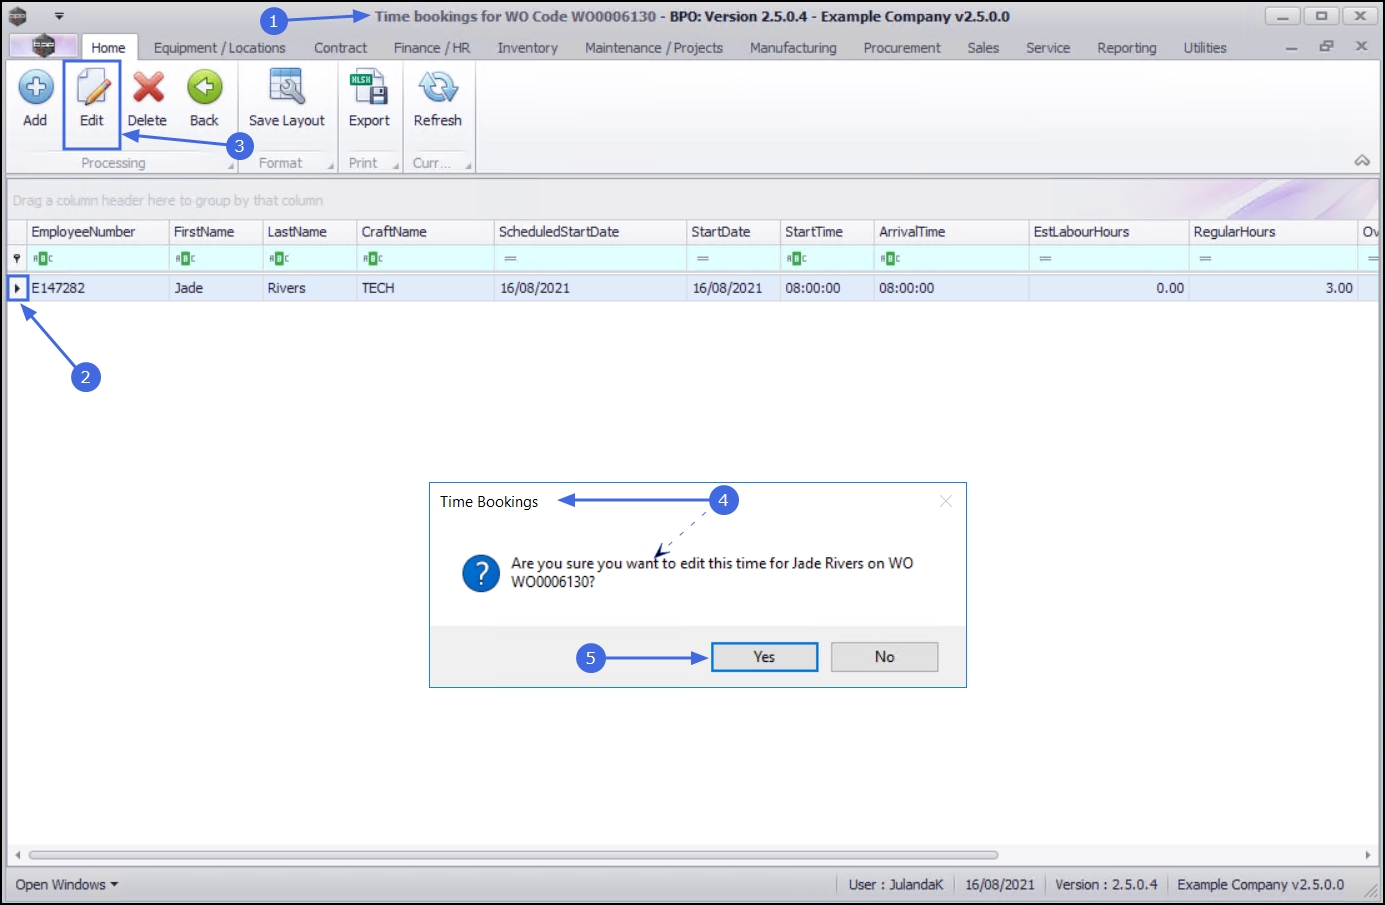
Edit Labour Time
- From the Time Bookings for WO Code [work order number] screen,
- Click on the row of the work order you wish to edit time for.
- Click on Edit.
![]() Short cut key: Right click to display the Process menu list. Click on Edit.
Short cut key: Right click to display the Process menu list. Click on Edit.
- You receive the Time Bookings message to confirm;
- Are you sure you want to edit this time for [employee name] on WO [work order number]?
- Click on Yes.
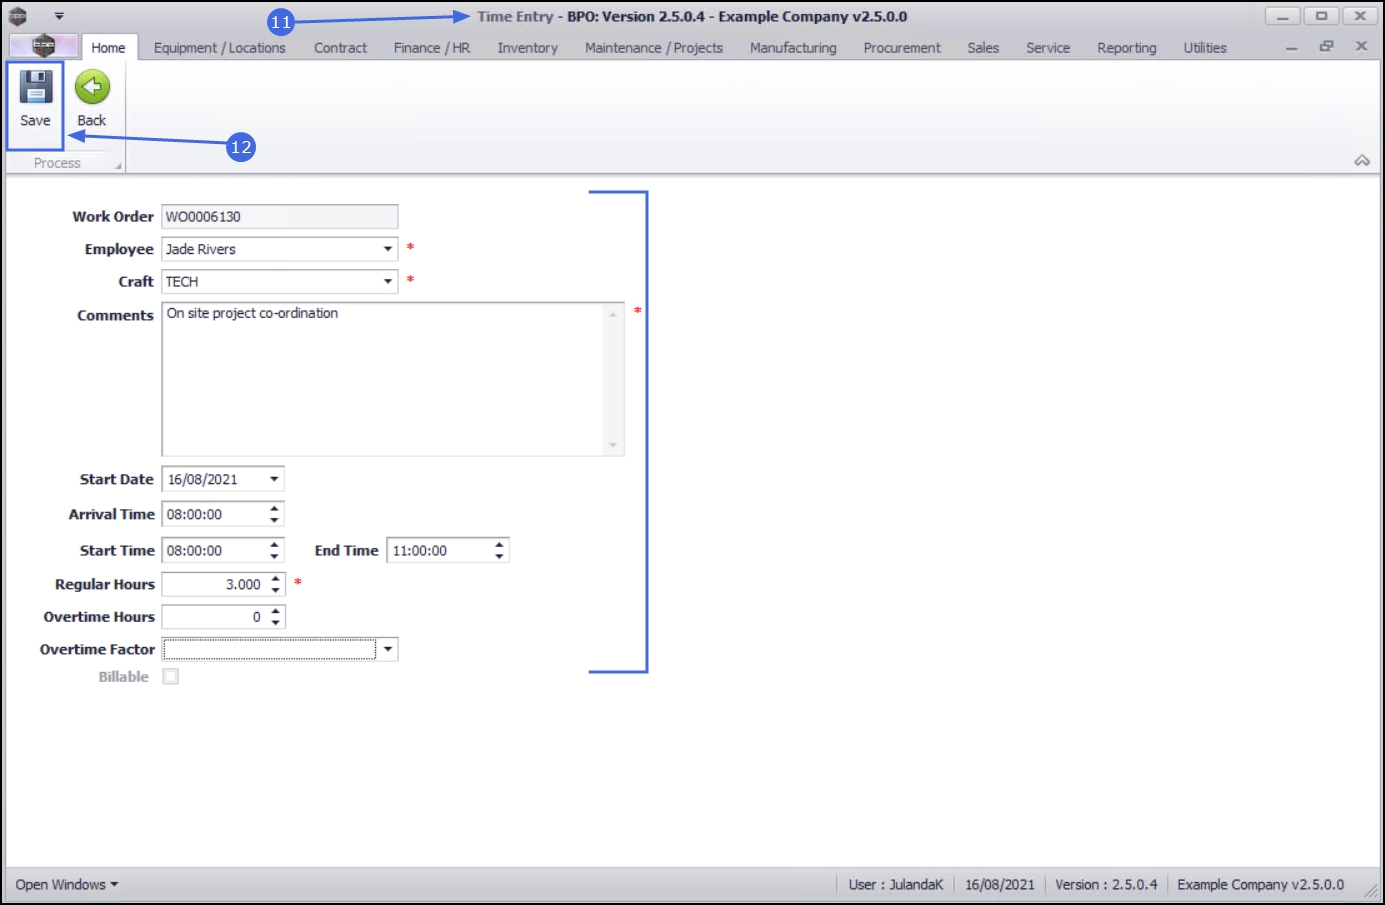
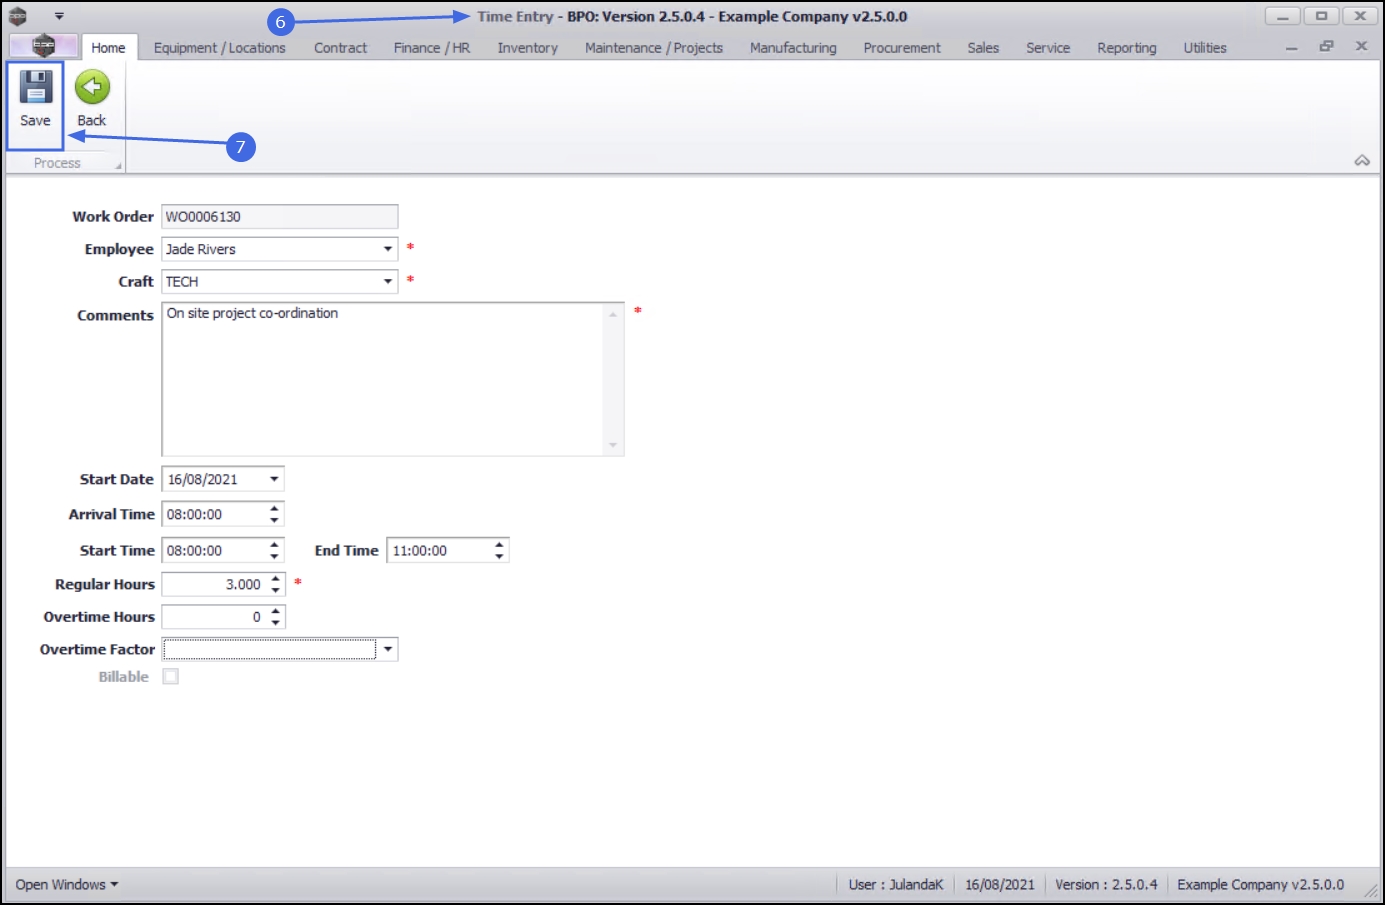
- The Time Entry screen will be displayed.
- Make the required adjustments to the time entry and click on Save.
MNU.058.007