We are currently updating our site; thank you for your patience.
Projects
Projects - Assignment History
In BPO2 v2.5.0.8 (or higher) the first assignee is no longer required to accept the assignment before subsequent assignments on the same project with different work orders can be made.
| Ribbon Access: Maintenance / Projects > Projects |

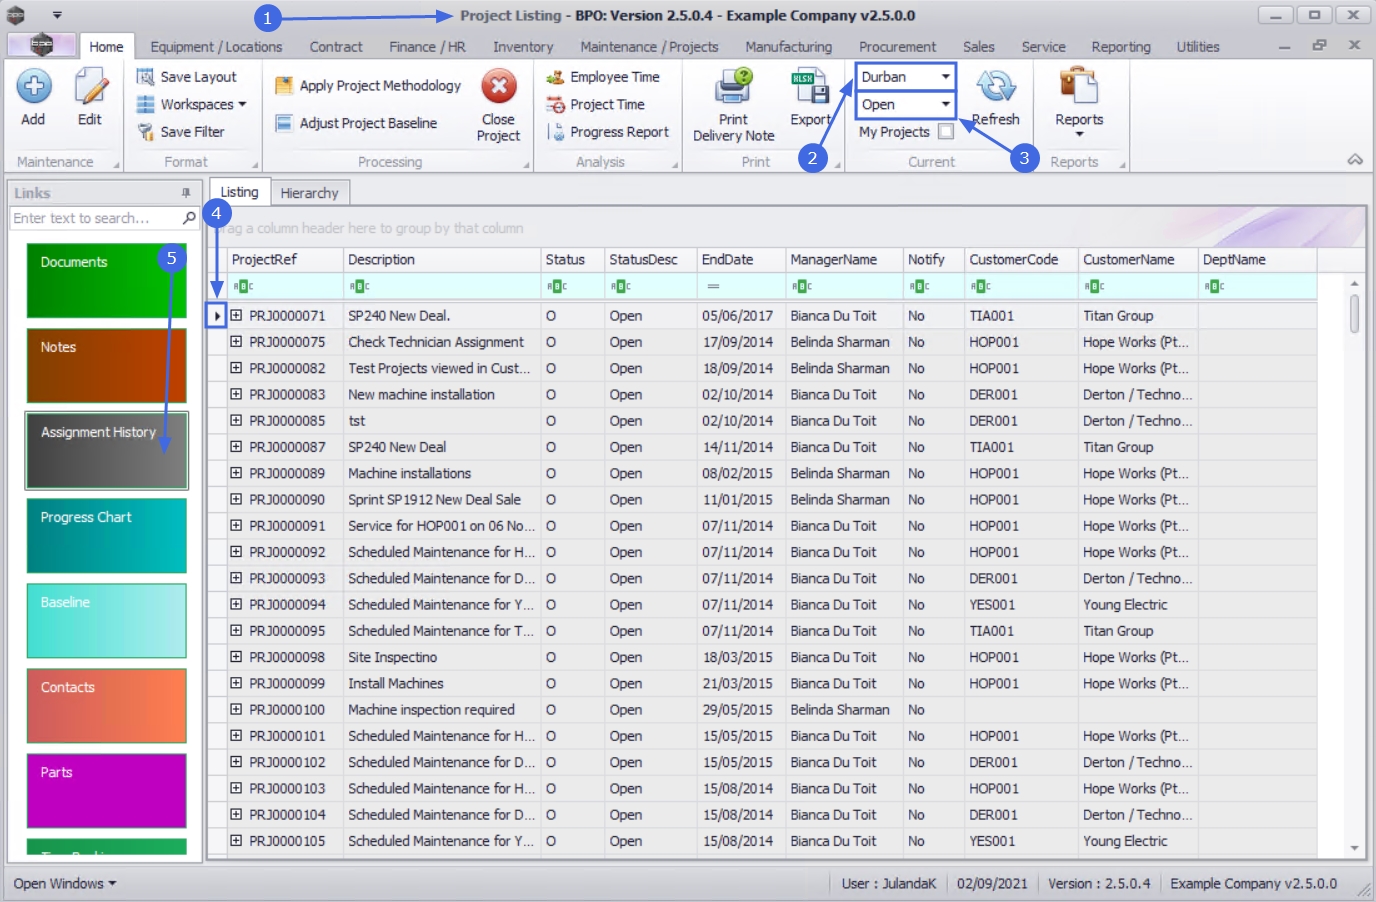
- The Project Listing screen will be displayed.
- Select the Site where the project can be located.
- The example has Durban selected.
- Ensure that the Status has been set to Open.
 Note that you cannot assign resources to a Closed project.
 - Click on the row of the project you wish to assign a technician to.
- Click on the Assignment History tile.
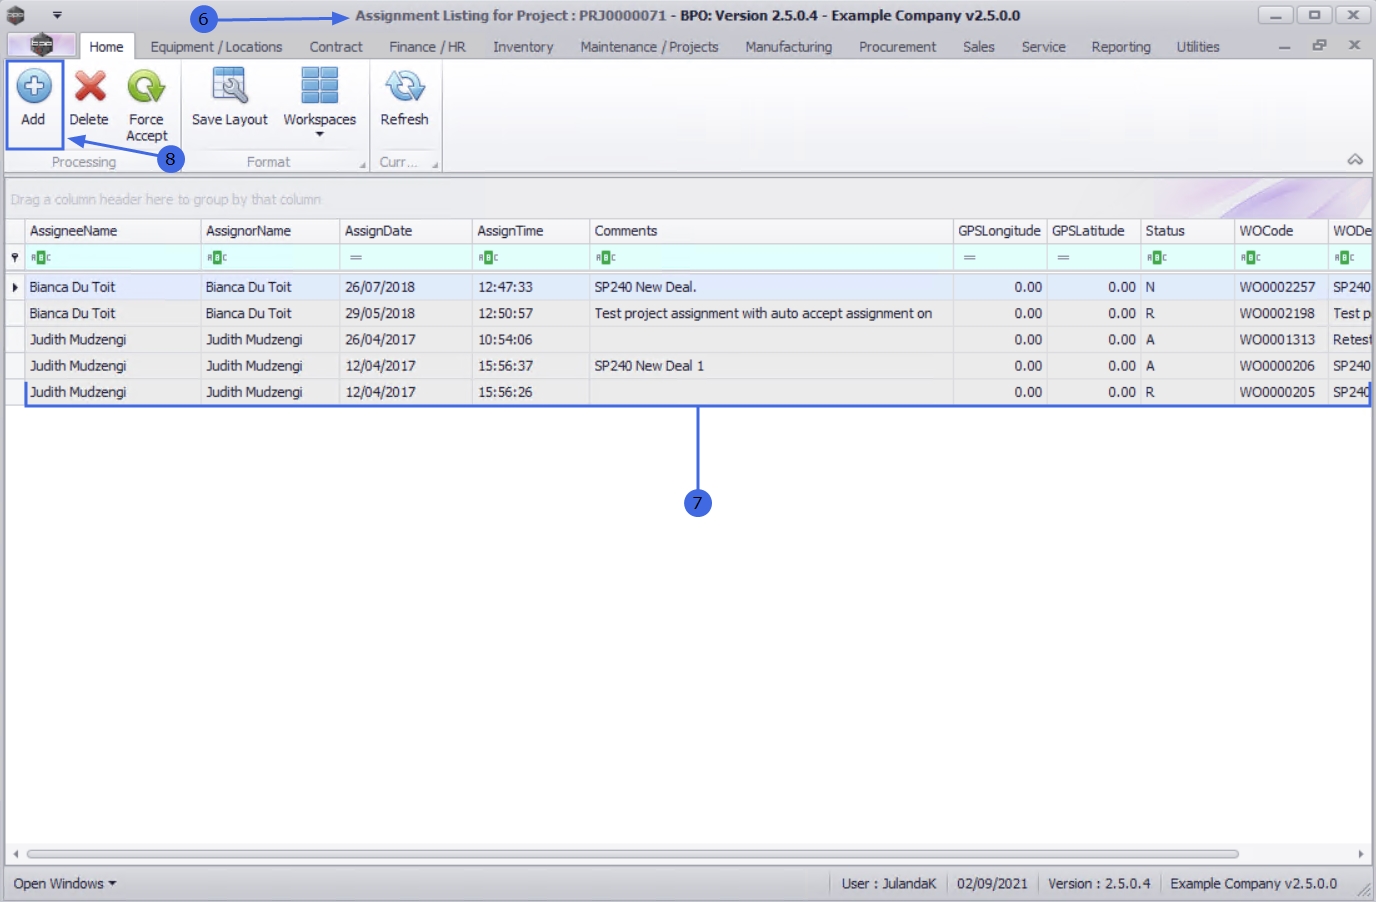
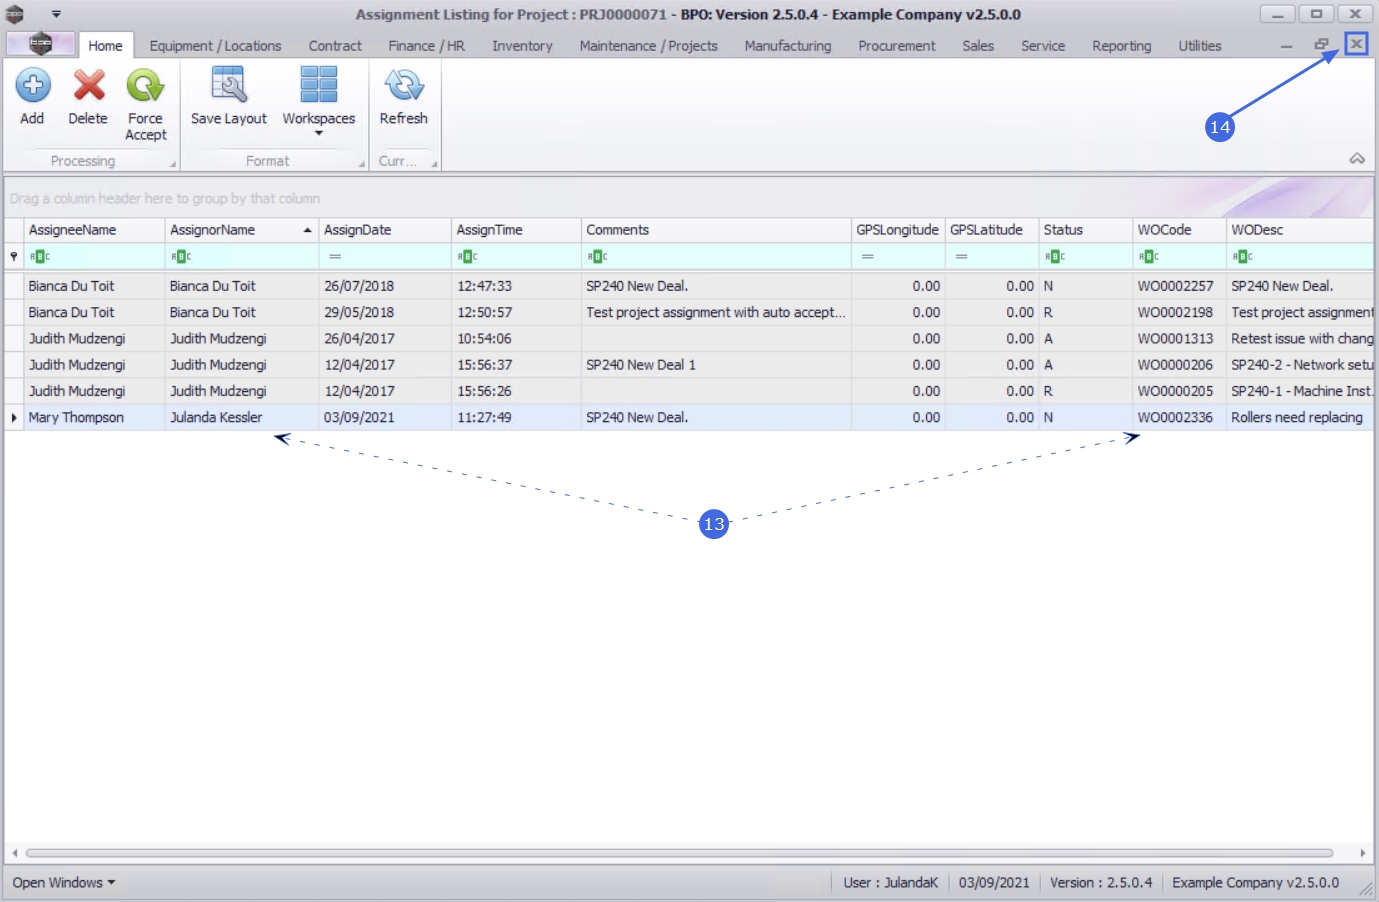
- The Assignment Listing for Project: [project ref number] screen will be displayed.
- A list of the assignment details for the Technician(s) that have been assigned to this Project with their Work Order Codes can be viewed from this screen.
Assign Technician
- Click on Add.
![]() Short cut key: Right click to display the Process menu list. Click on Add.
Short cut key: Right click to display the Process menu list. Click on Add.
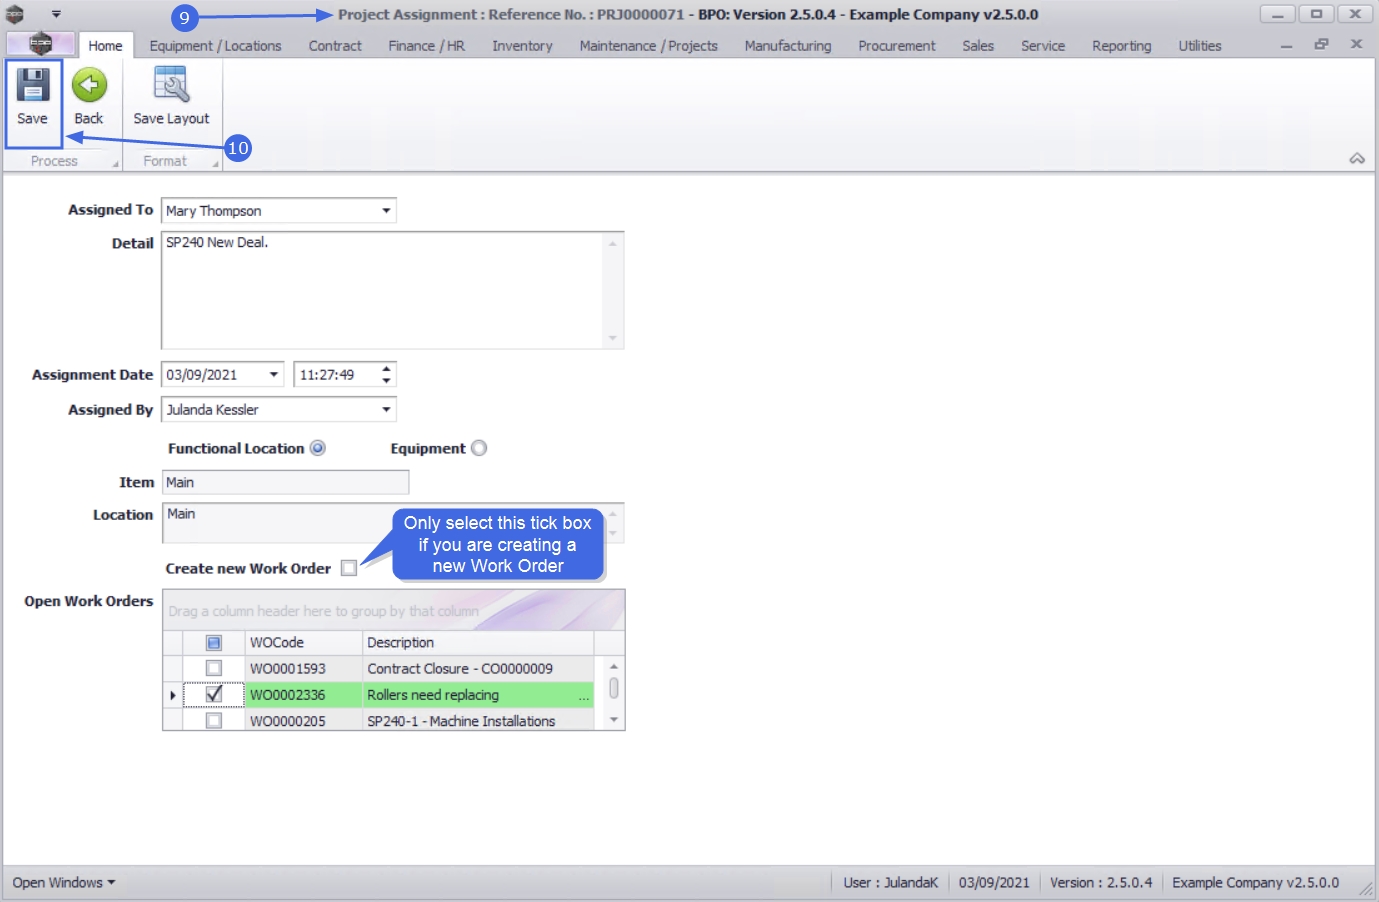
- The Project Assignment: Reference No.: [project ref number] screen will be displayed
- Assigned To: Click on the down arrow to select the Technician you would like to assign.
- Detail: This field will auto populate with the description of the project as recorded in the project listing screen. You can type in extra details, if required.
- Assignment Date:
The date and time will be auto populated with the current date and time.
- Type in or click on the down arrow in the date field to use the calendar function to select an alternative date, if required.
- Type in or use the arrow indicators to select an alternative time, if required.
- Assigned By: This field will default to the user creating the assignment. Click on the down arrow to select an alternative person, for example the name of the Project Manager, if required.
- Functional Location or Equipment: This shows whether the project assignment is linked to a Location or a Machine.
- Item: This field will auto populate with the Location or Machine linked to the project.
- Location: This field will auto populate based on the description of the item linked to the project.
- Create new Work Order:
Click on the check box to create a new work order. If the technician needs to follow up on the same project, but for a different task, then make sure you also change the assignment detail accordingly.
- Open Work Orders: From here you can view the list of all the Open Work Orders linked to this project. Select to link the technician to one of the open work orders.
- When you have finished adding the technician assignment details, click on Save.
- When you receive the Project Processing message to confirm that;
- Project No: [project ref number] has been assigned.
- Click on OK.
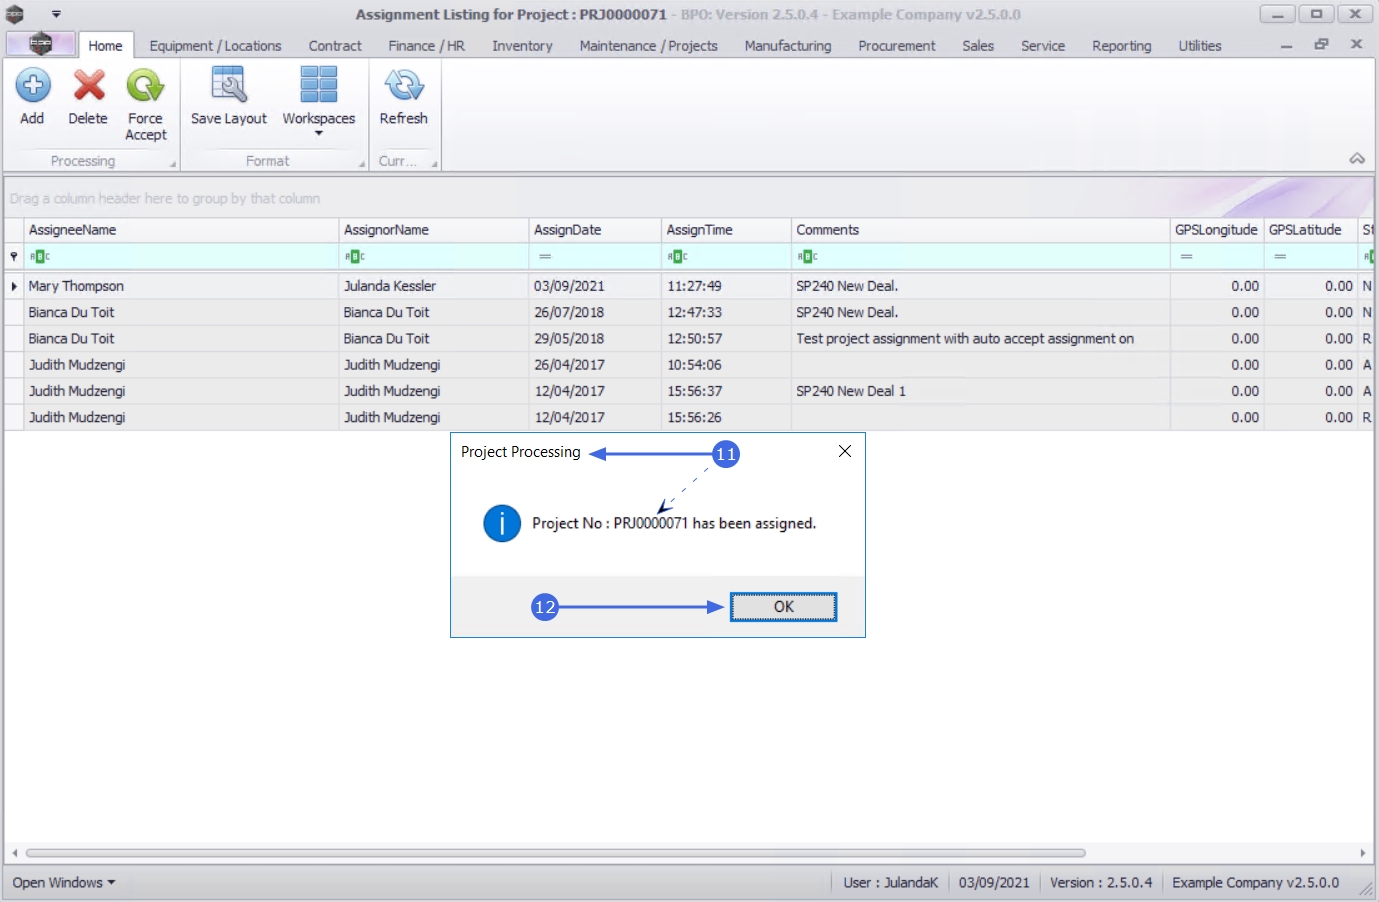
- You will return to the Assignment Listing for Project screen where you can view the details of the technician(s) assigned to this project.
- Click on Close to return to the Project Listing Screen.
Unassign Technician
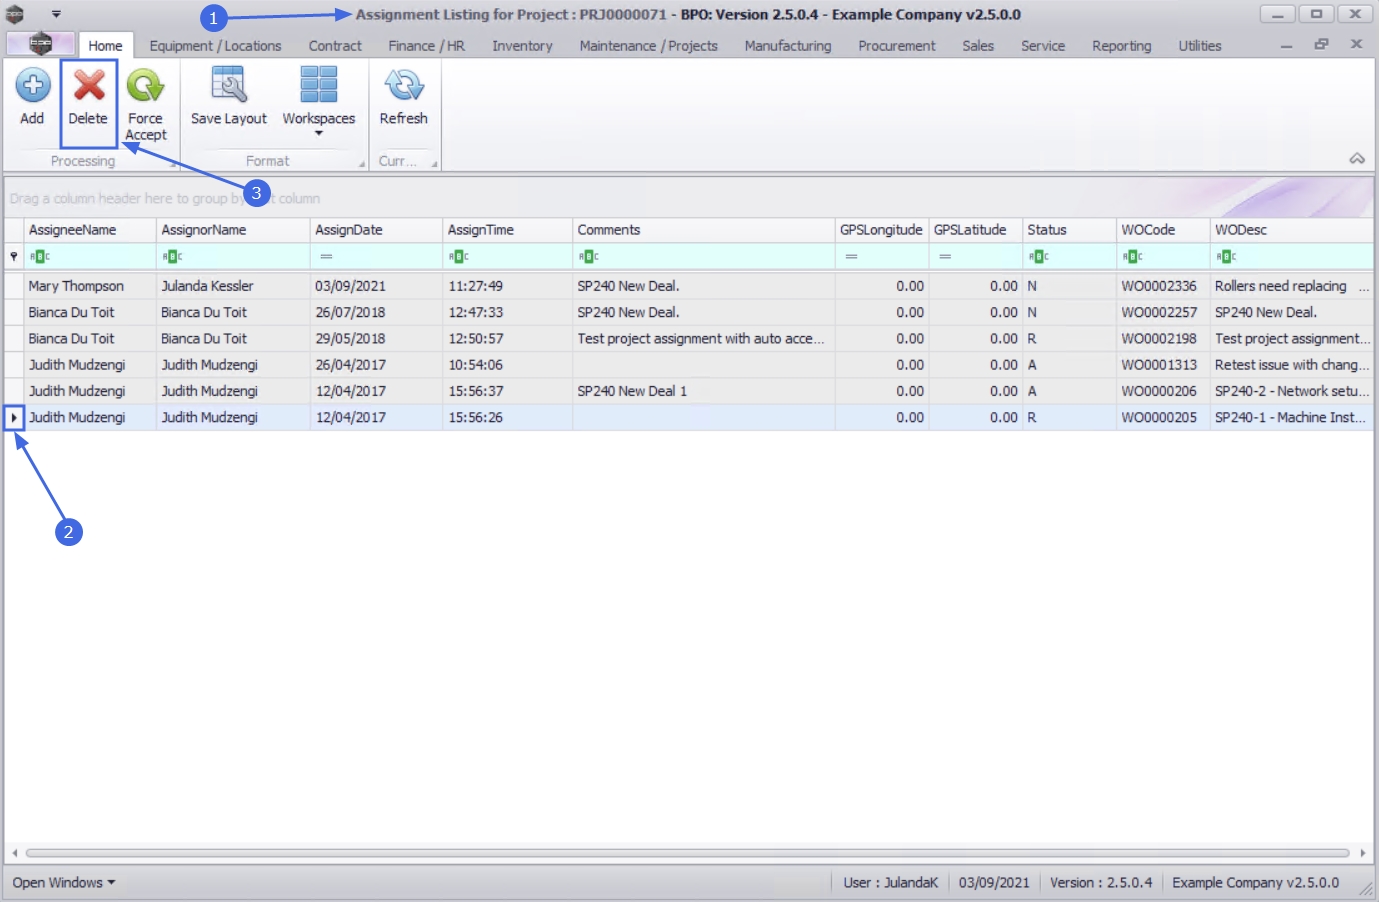
- From the Assignment Listing for Project: [project ref number] screen,
- Click on the row of the technician and the correct Work Order the technician is linked to.
- Click on Delete.
![]() Short cut key: Right click to display the Process menu list. Click on Delete.
Short cut key: Right click to display the Process menu list. Click on Delete.
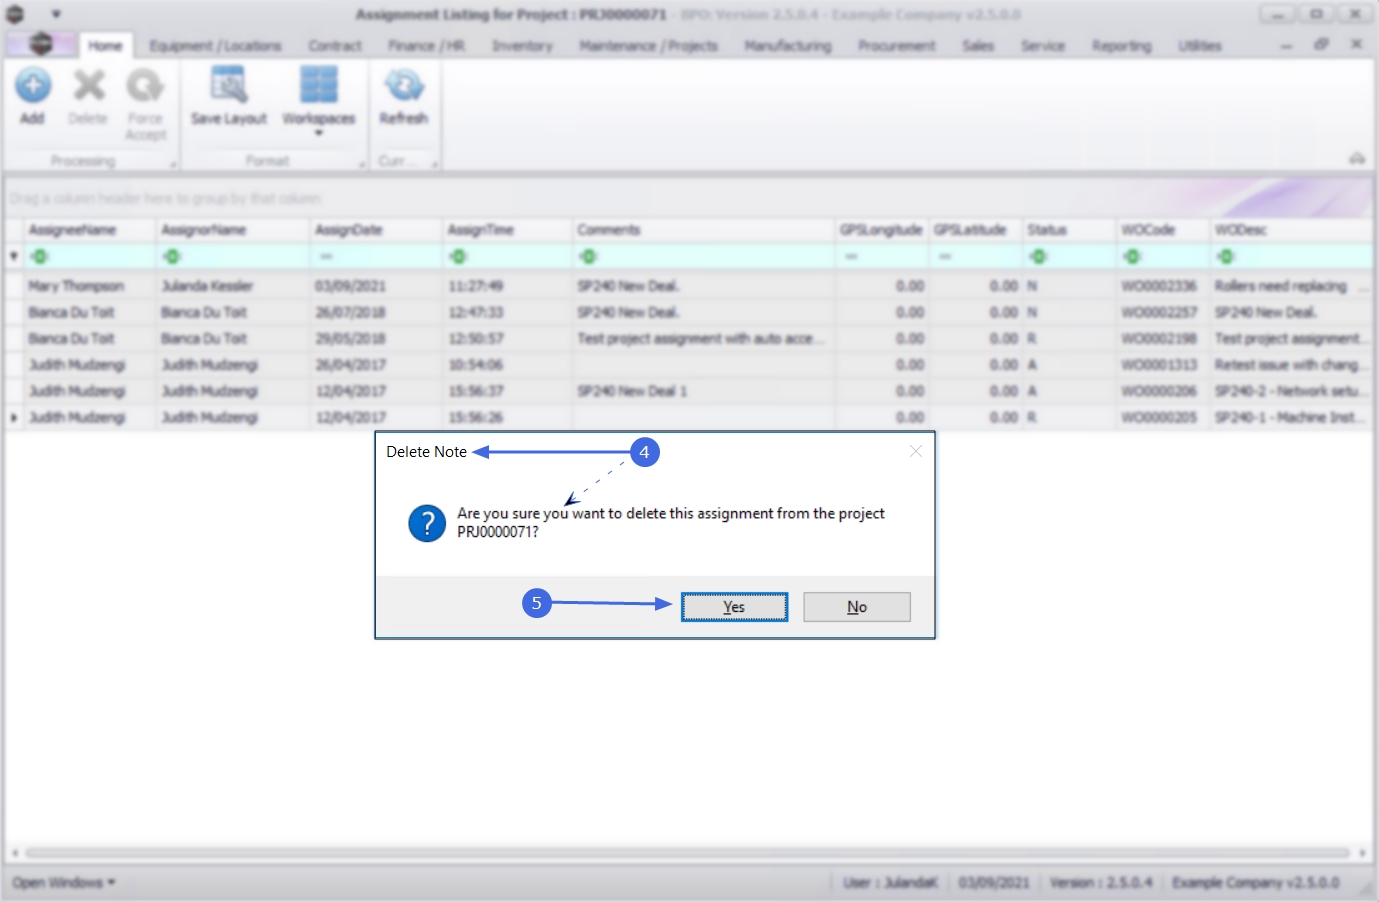
- When you receive the Delete Note message to confirm;
- Are you sure you want to delete this assignment from the project [project ref number]?
- Click on Yes.
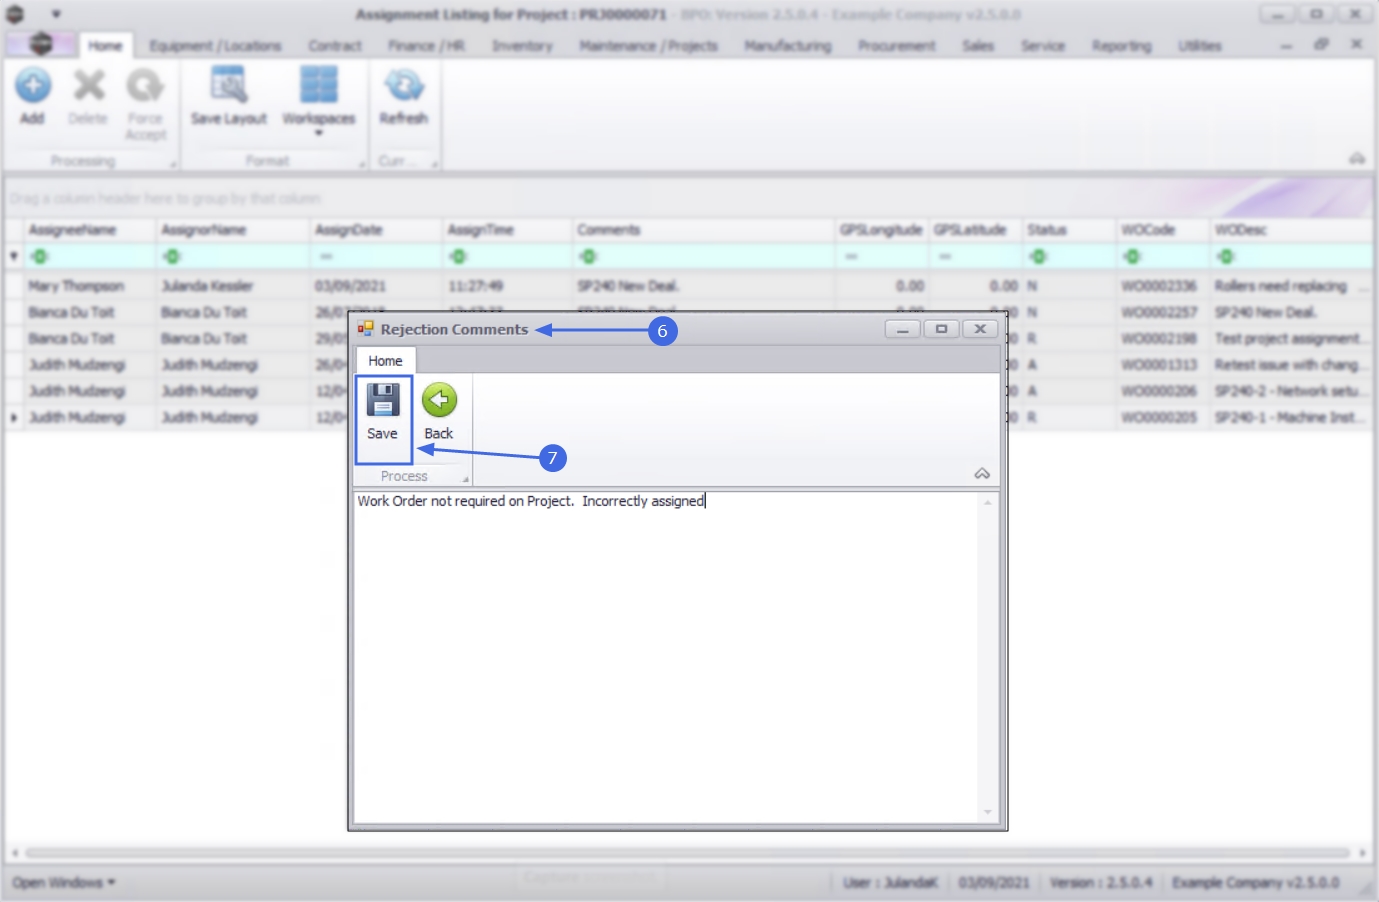
- The Rejection Comments text box will display.
- Type in the rejection comments for the assignment removal and click on Save.
- The Assignment Listing for Project screen has been updated with the assignment comments.
- Click on Close to return to the Project Listing screen.
- You can now Assign Technician to this Work Order, if required.

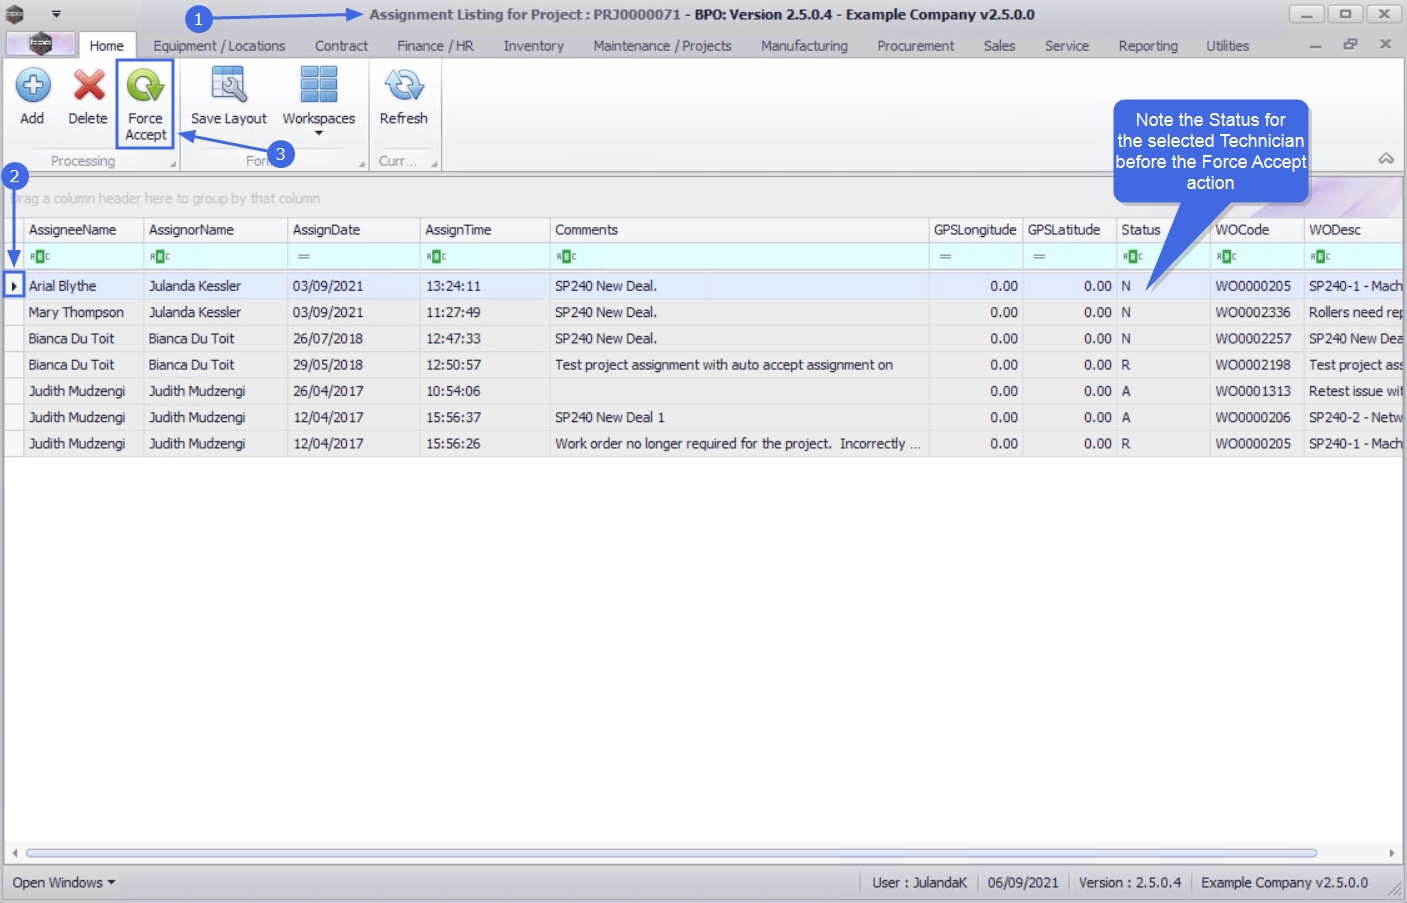
Force Accept
- From the Assignment Listing for Project: [project ref number] screen,
- Click on the row of the technician you wish to Accept the Work Order assignment for. Note that the Status for the Technician selected in the Status Column is N - New.
- Click on Force Accept.
![]() Short cut key: Right click to display the Process menu list. Click on Force Accept.
Short cut key: Right click to display the Process menu list. Click on Force Accept.
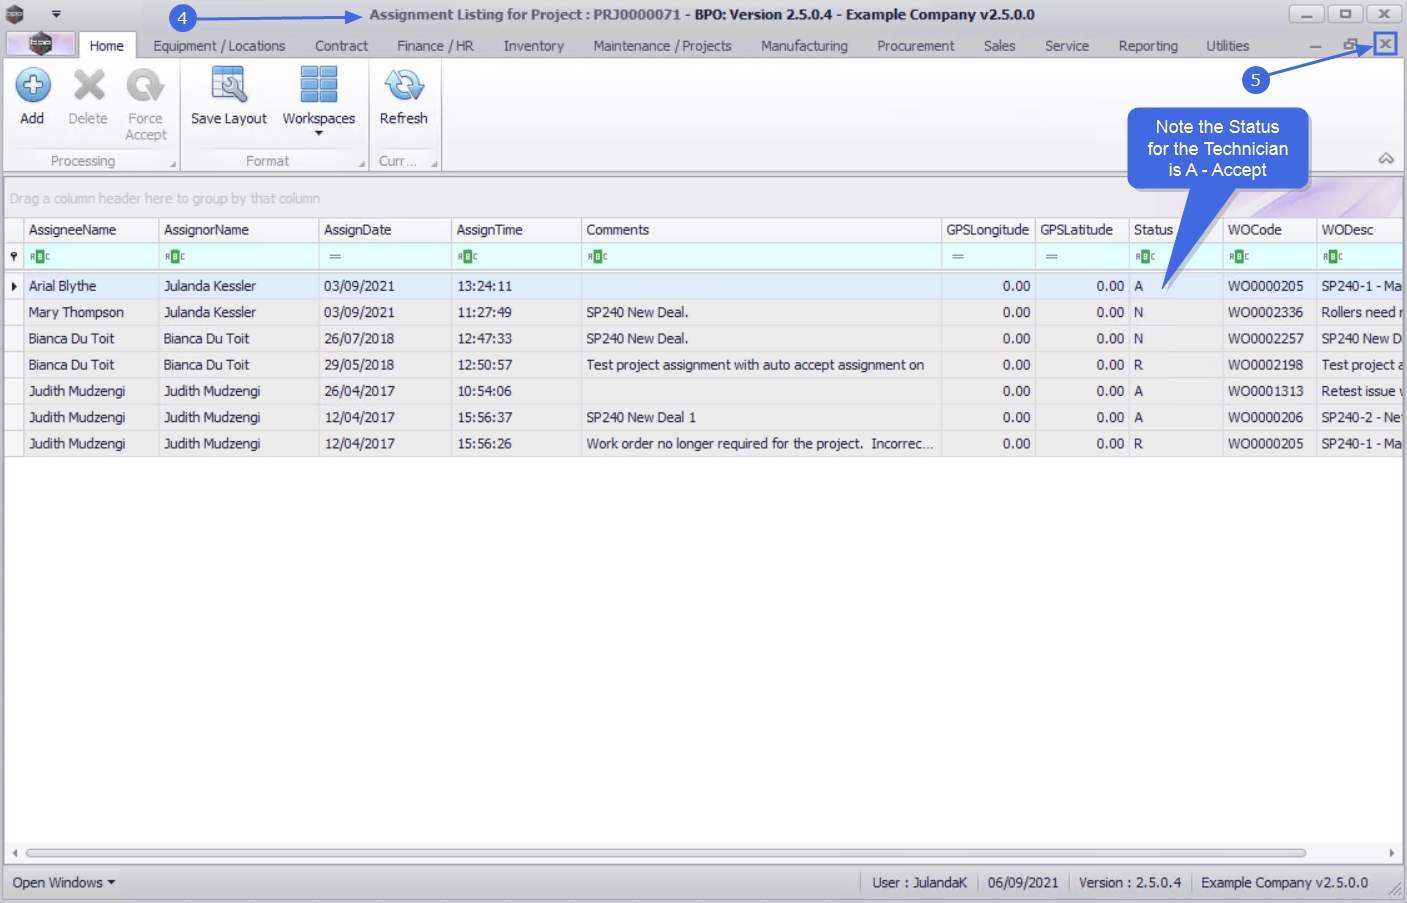
- The Assignment Listing for Project screen has been updated. Note that the Status for the Technician that was selected in the Status Column has changed to A - Accept.
- Close the screen to return to the Project Listing screen.
MNU.058.020