We are currently updating our site; thank you for your patience.
TechConnect
Overview and Log In / Out
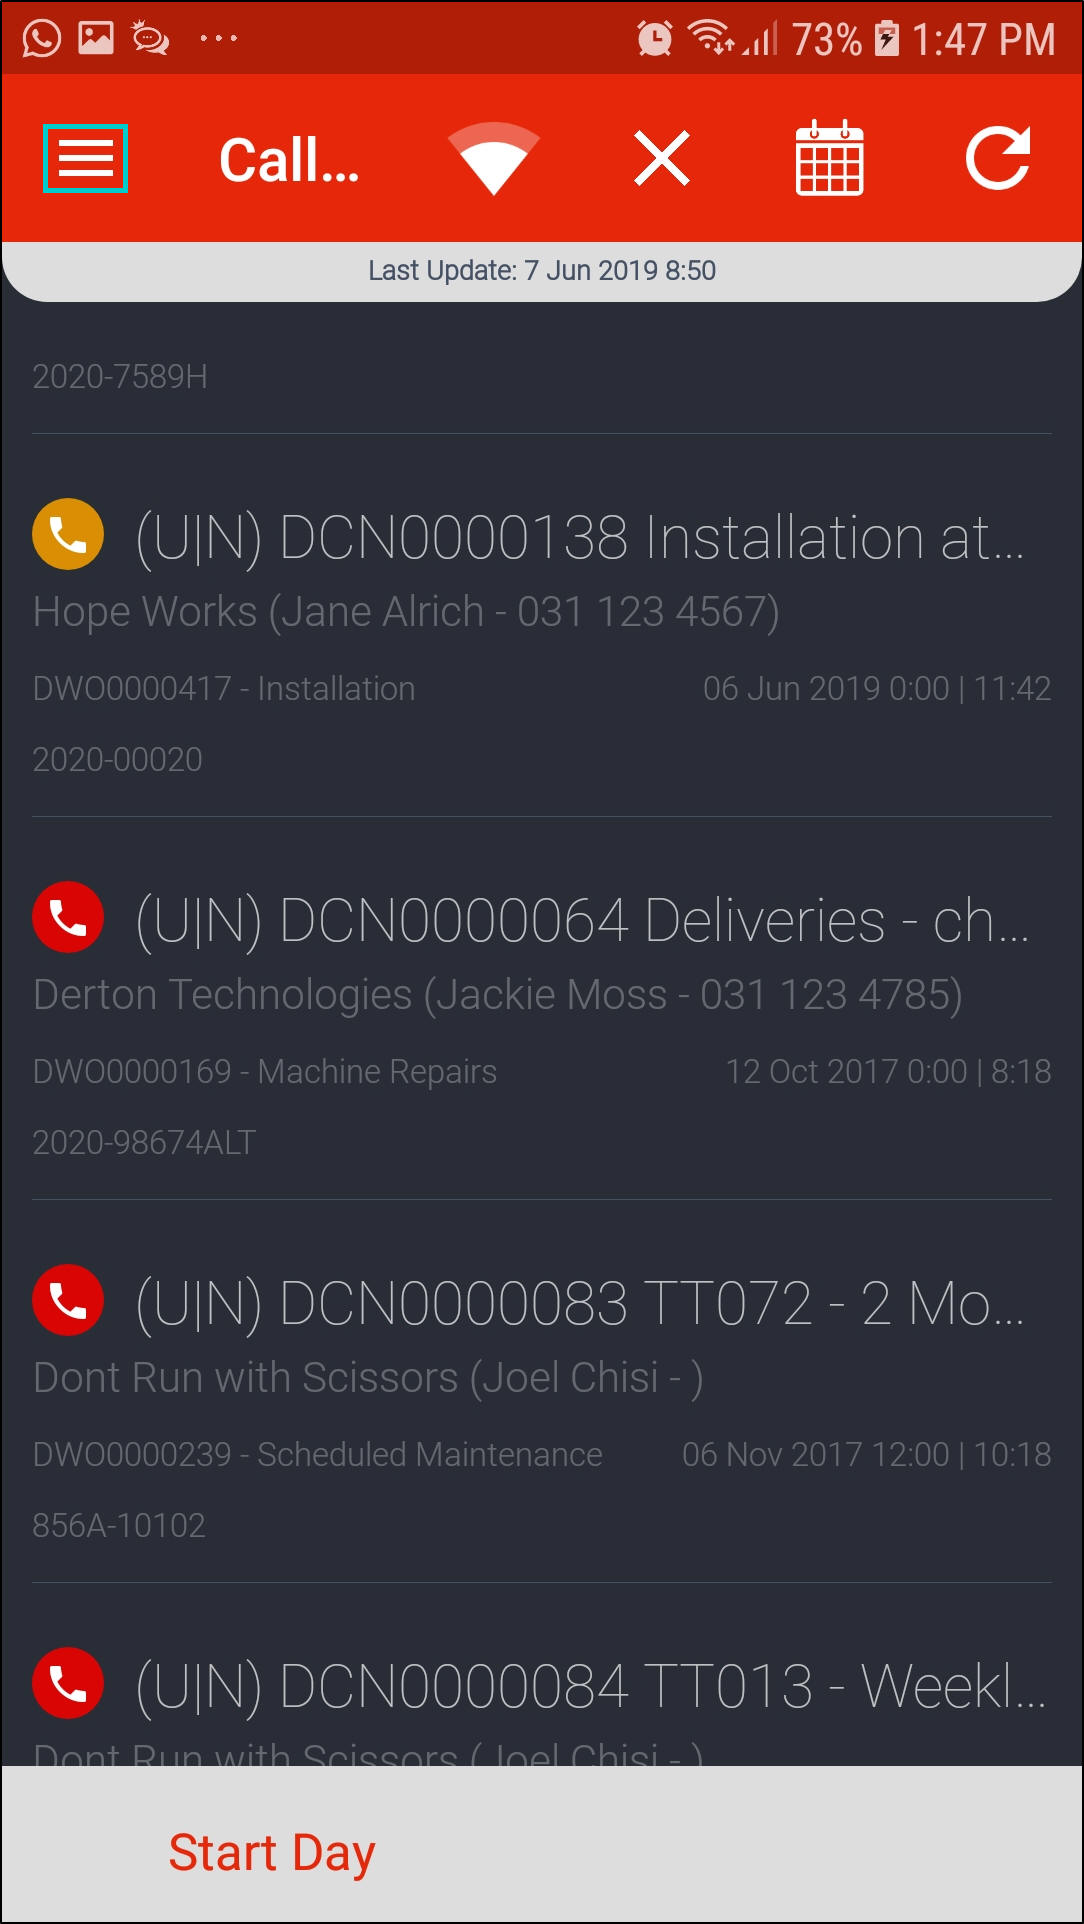
Open App
- If you do not have the app yet, download Tech Connect from the Google Play Store (search for CO3 TechConnect).
- After installation, click on the Tech Connect icon on your device.
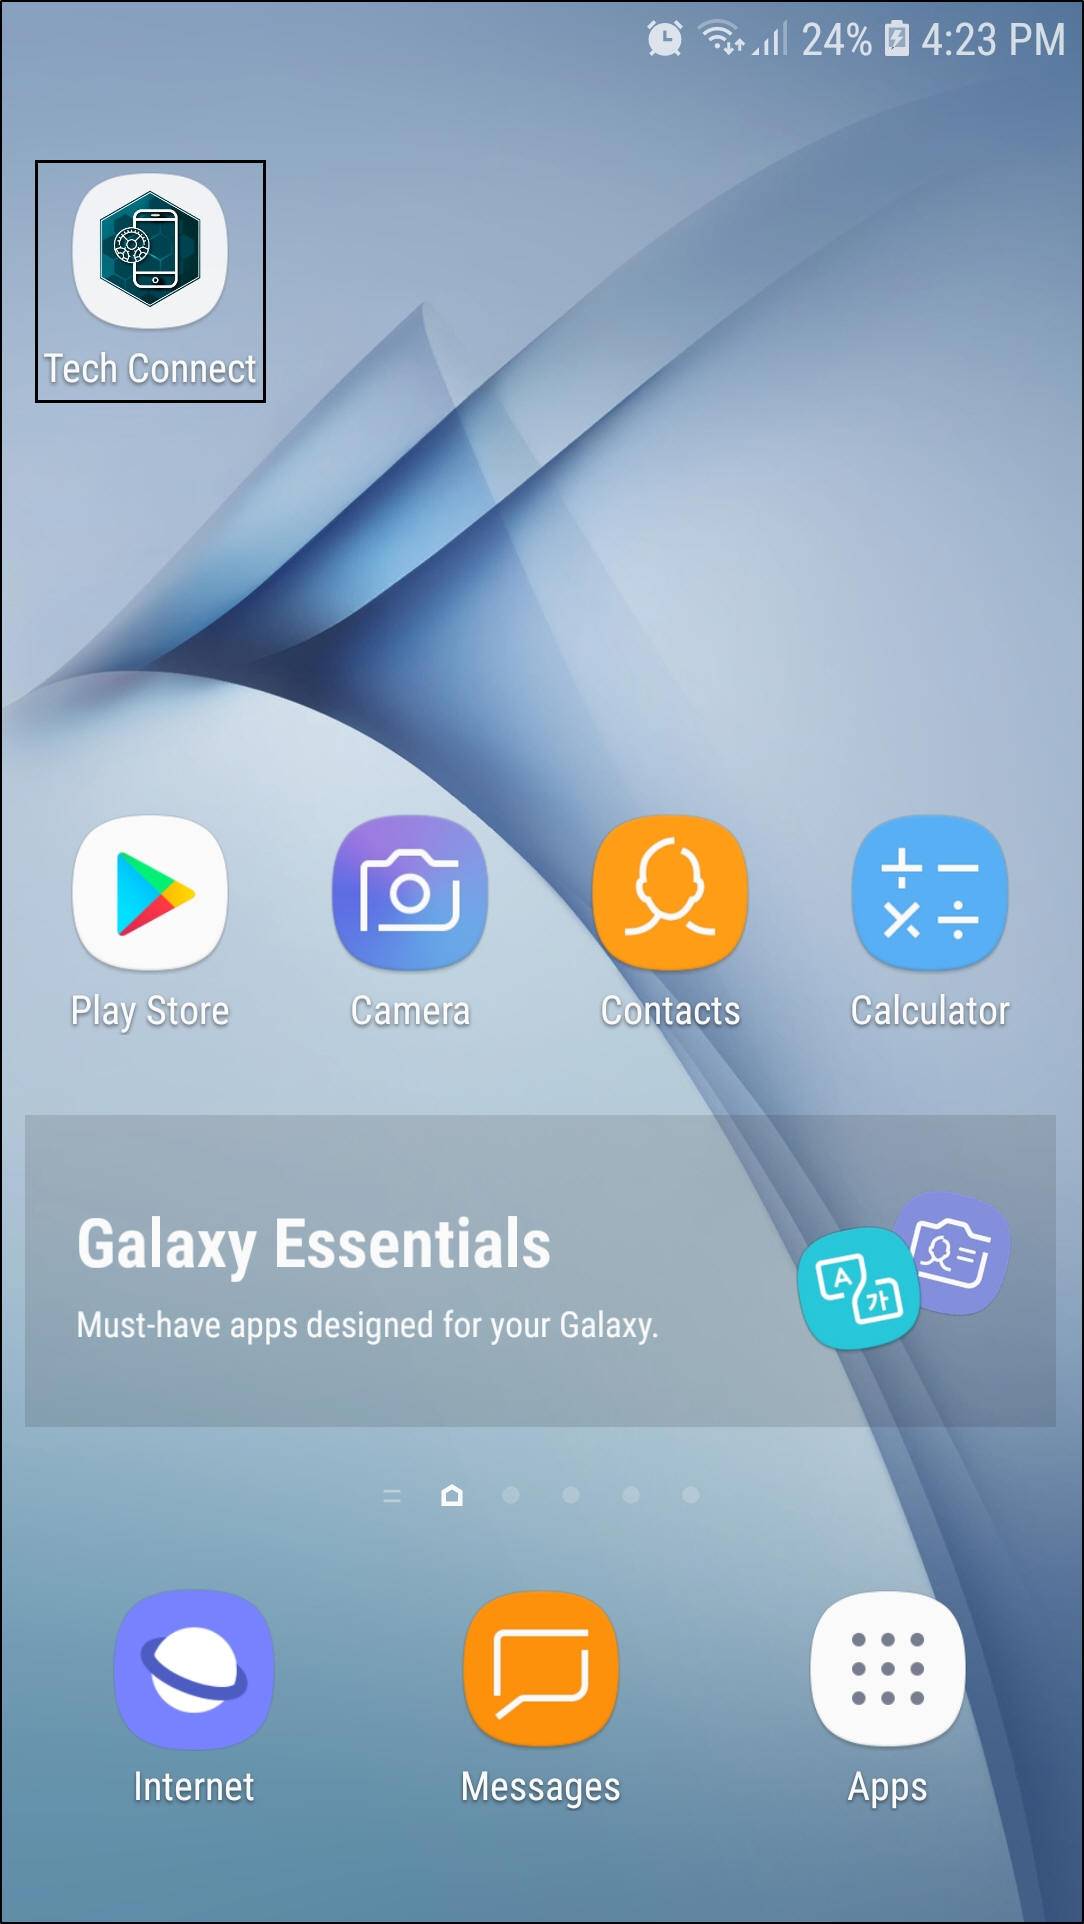
- The Tech Connect start up screen will come up.

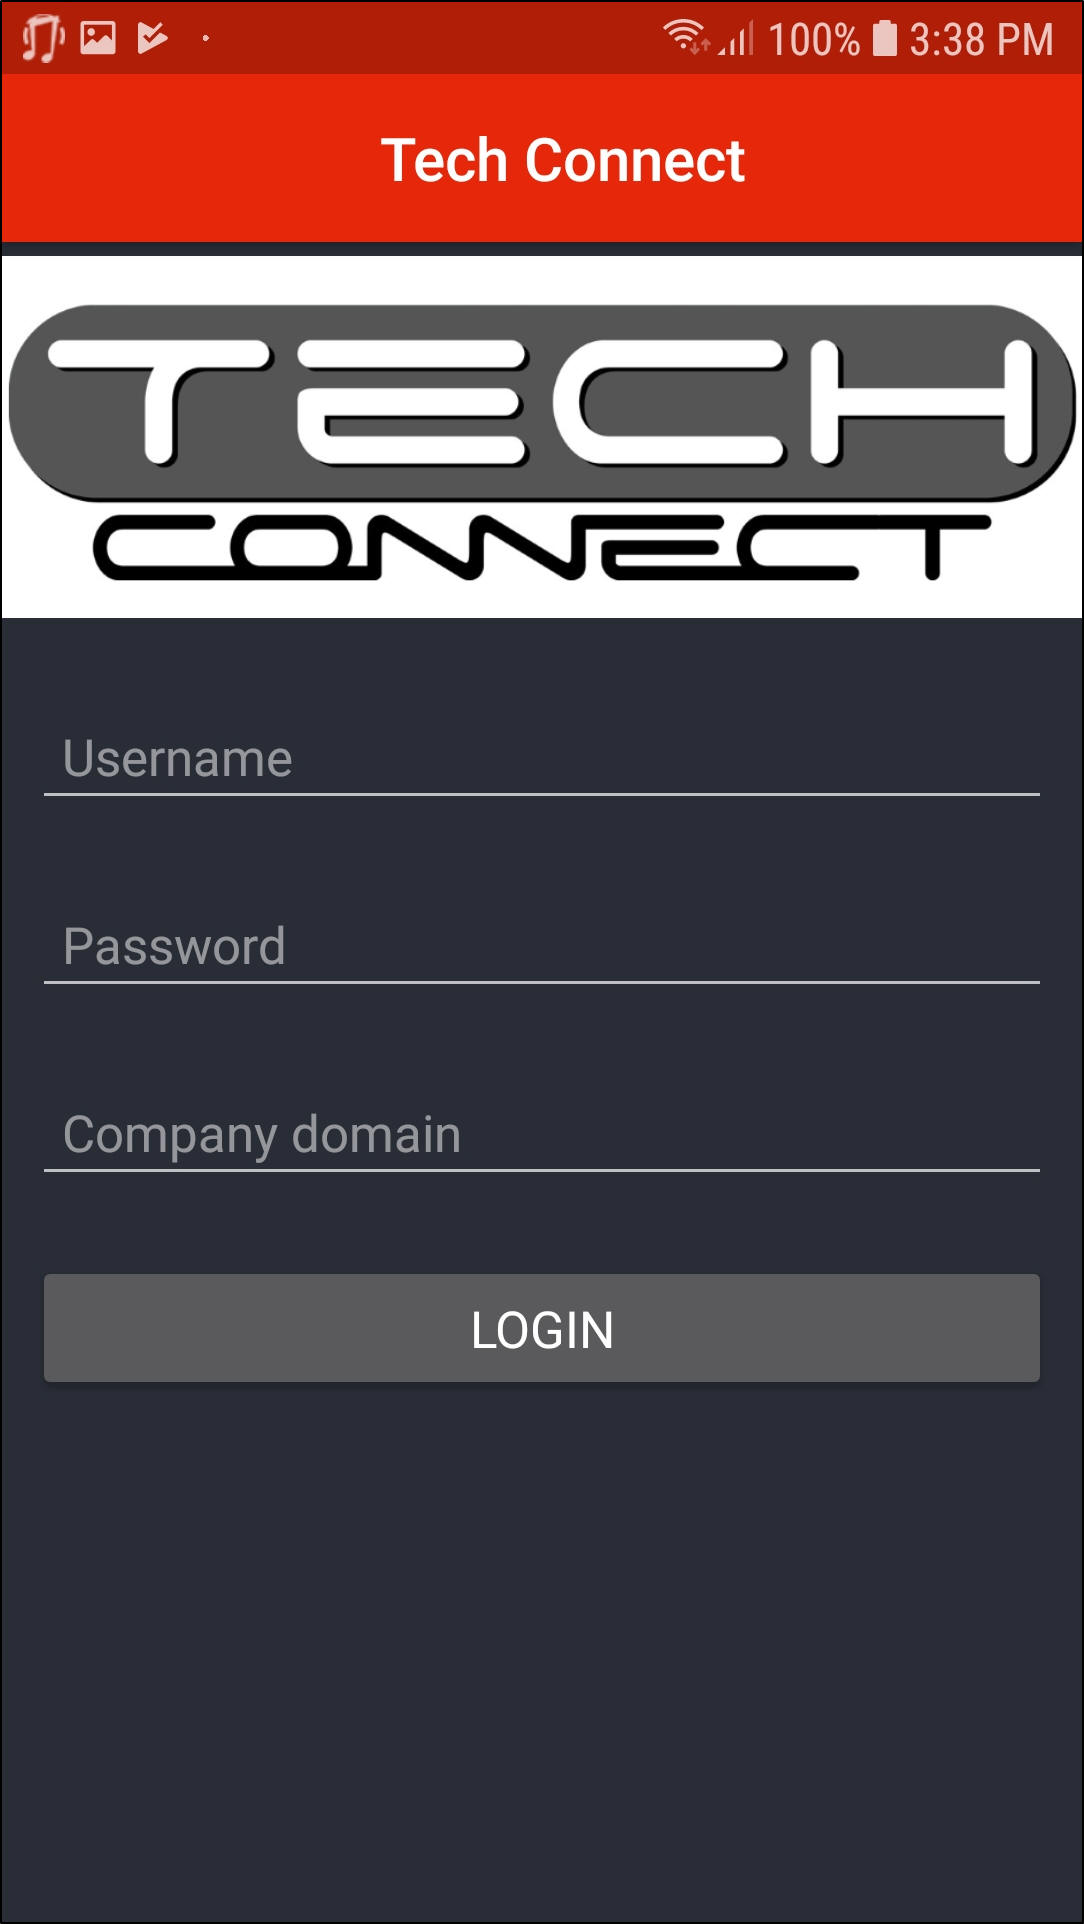
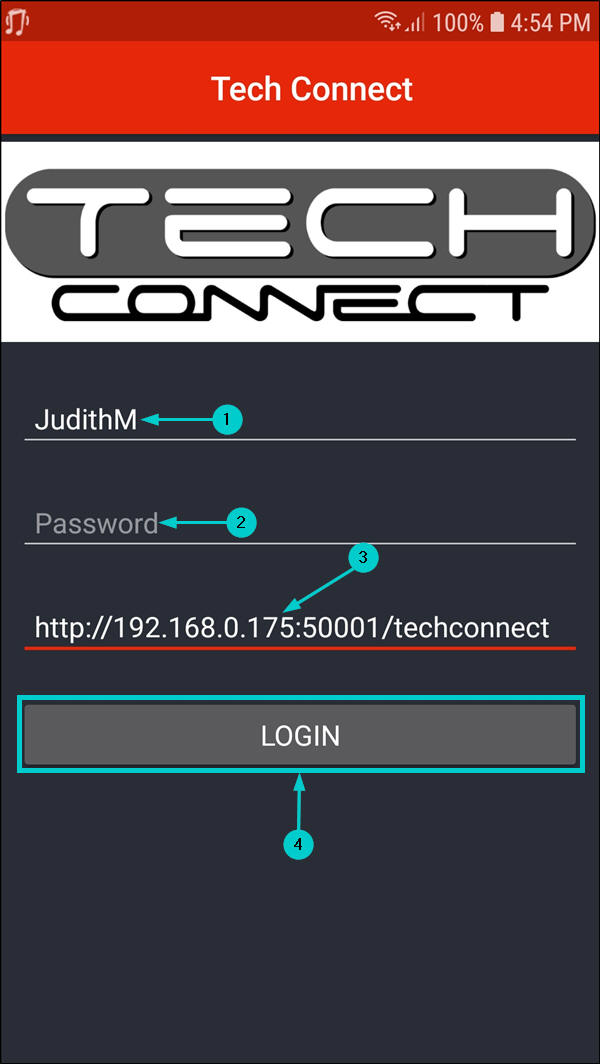
Initial Log In
- Speak to your system administrator with regards to initial Tech Connect setup.
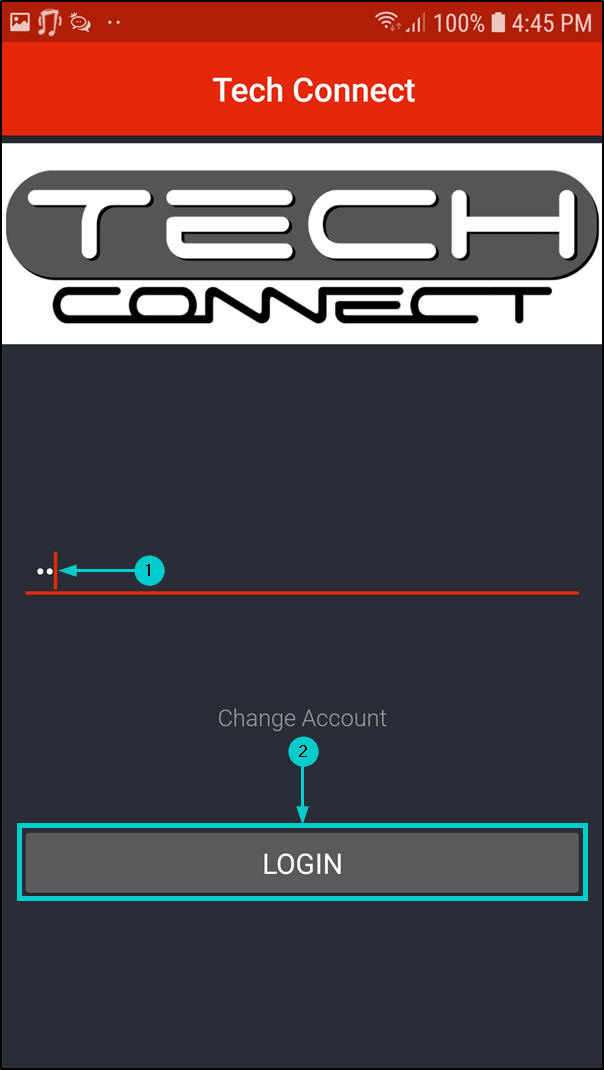
Subsequent Log In
- After your initial log in, Tech Connect will keep your login details, you just need to type in your password.
- Click on Login.
- Note: If you need to log in as another user, refer to Change Account.
Change Account
- If you need to log in as another user, click on Change Account.
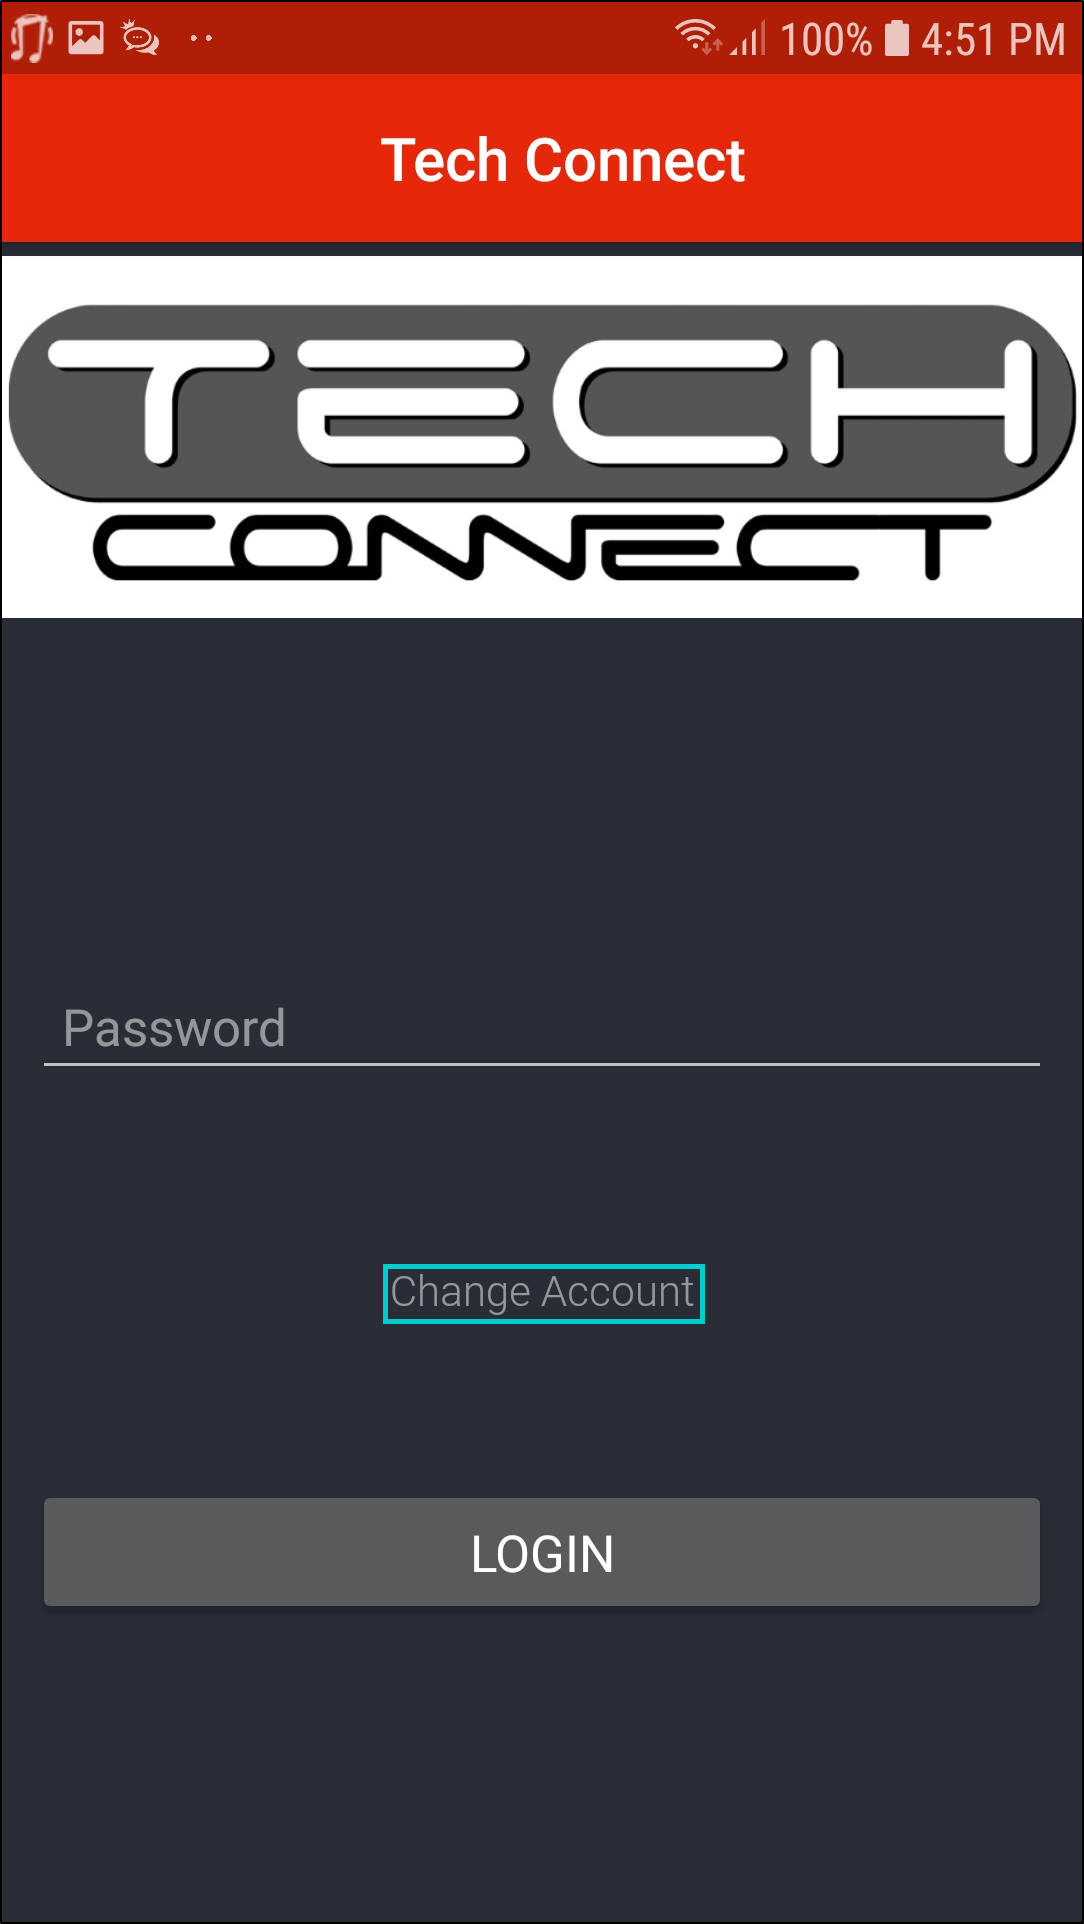
- An initial log in screen will be displayed. The previous user's details will auto populate except the password.
- Username: Delete and type in your username.
- Password: Type in your password.
- Company Domain: Delete and type in the company domain if it's different from what the previous user was using.
- Click on Login.
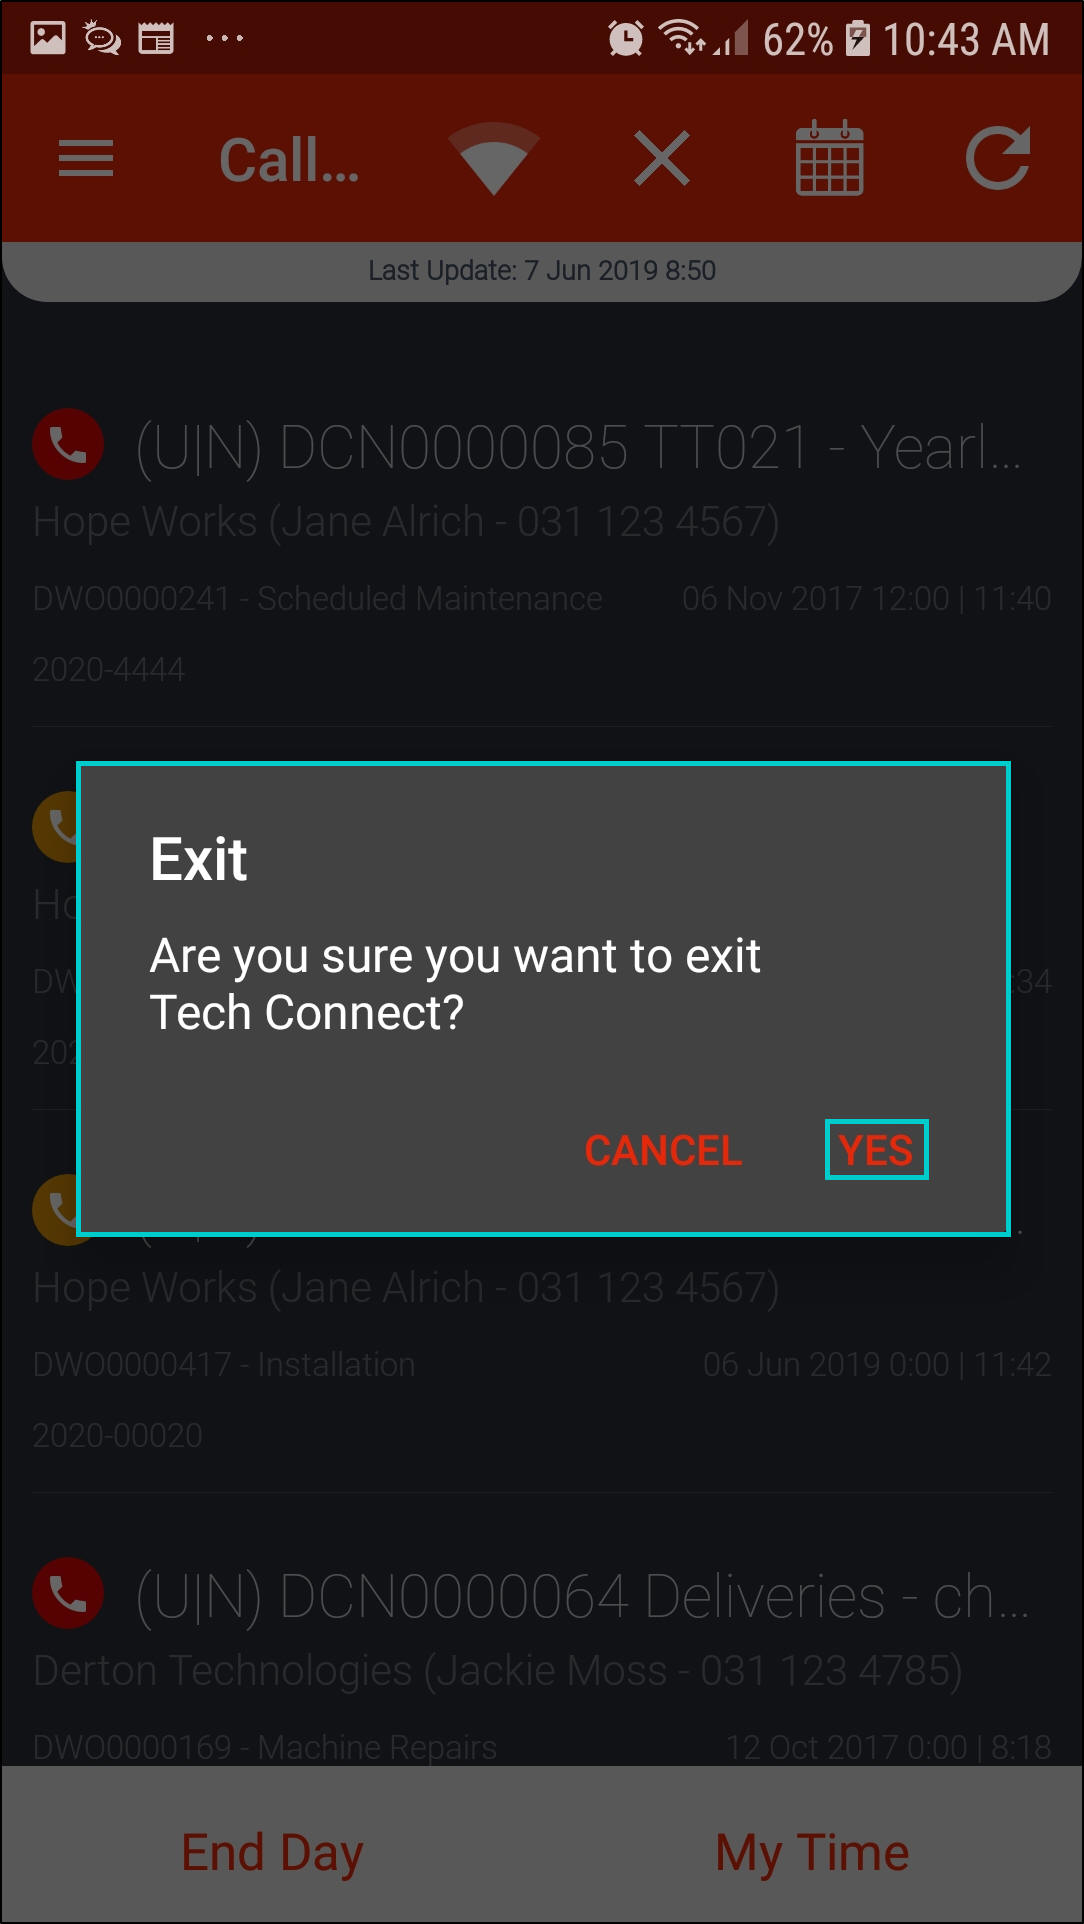
Exit
- To exit the application, click on Back on your device until an Exit message box pops up asking you;
- Are you sure you want to exit this app?
- Click on Yes.
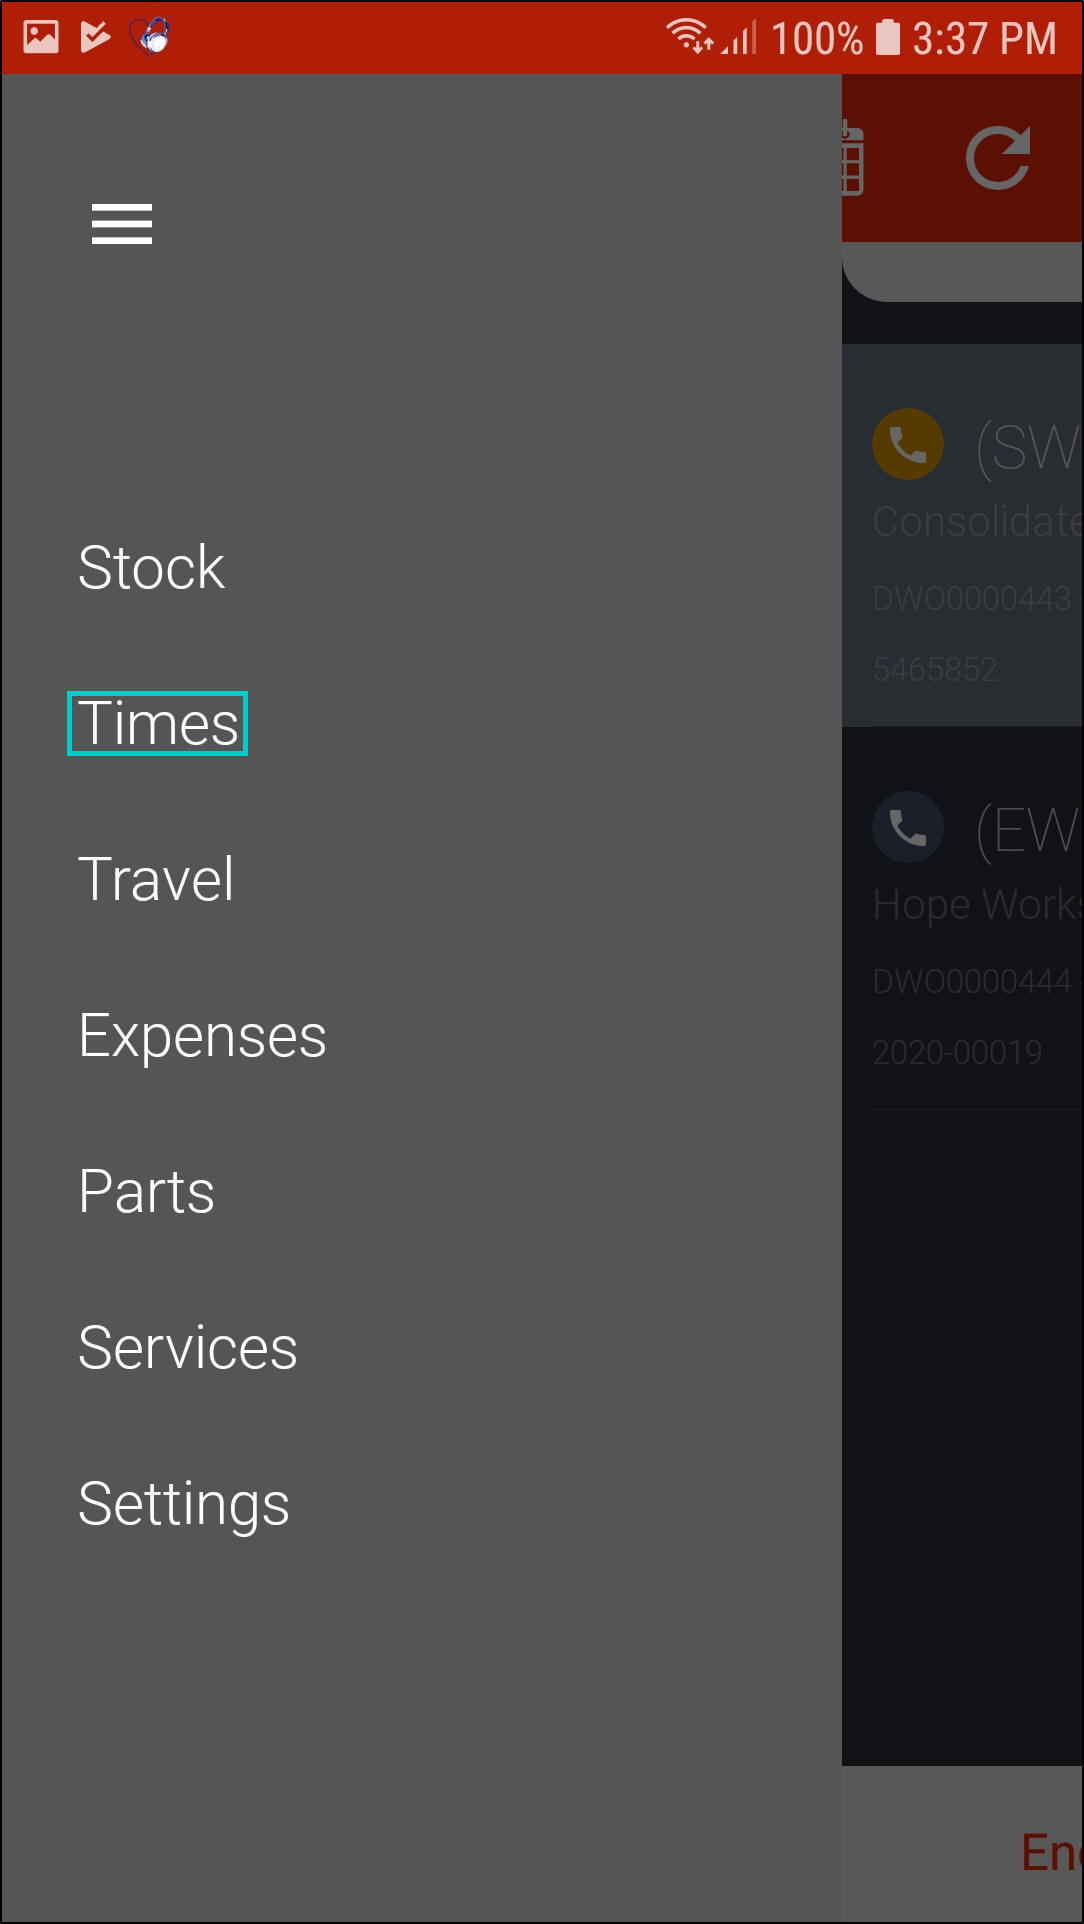
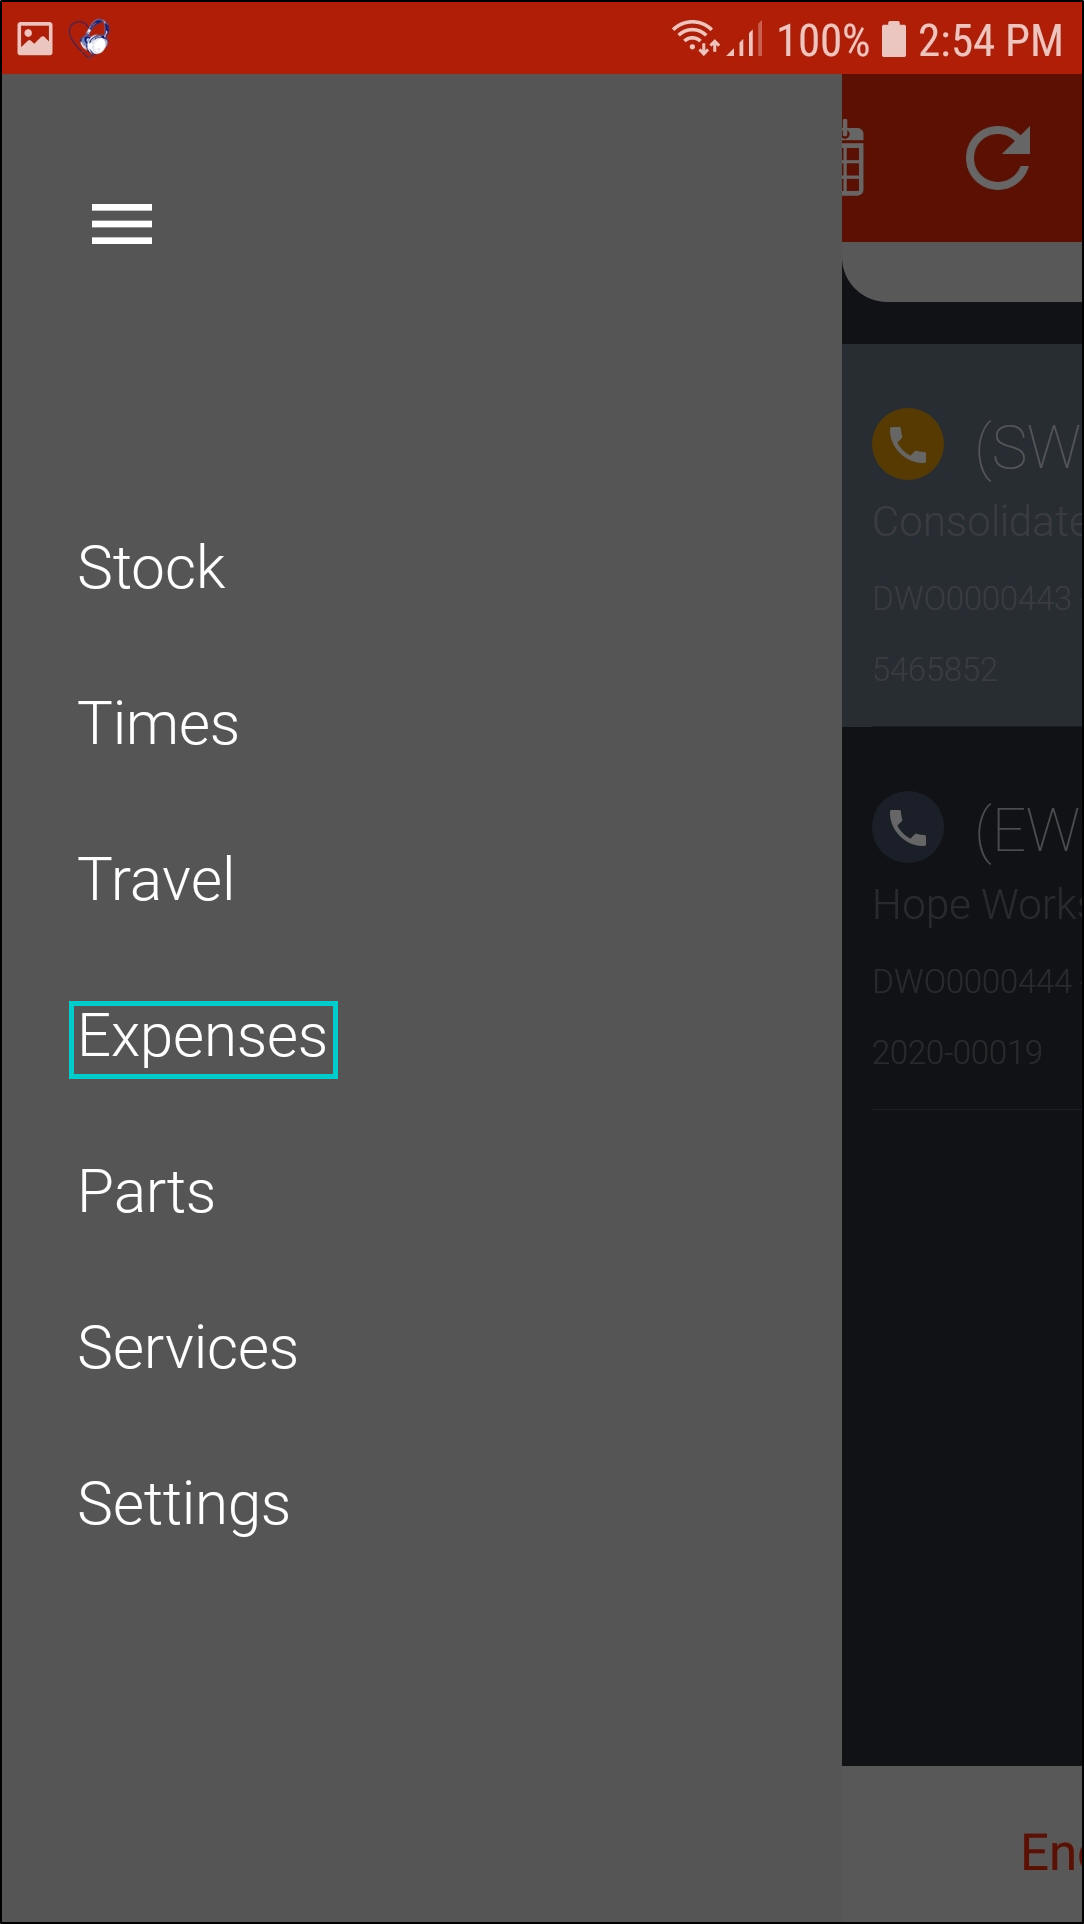
Configuration
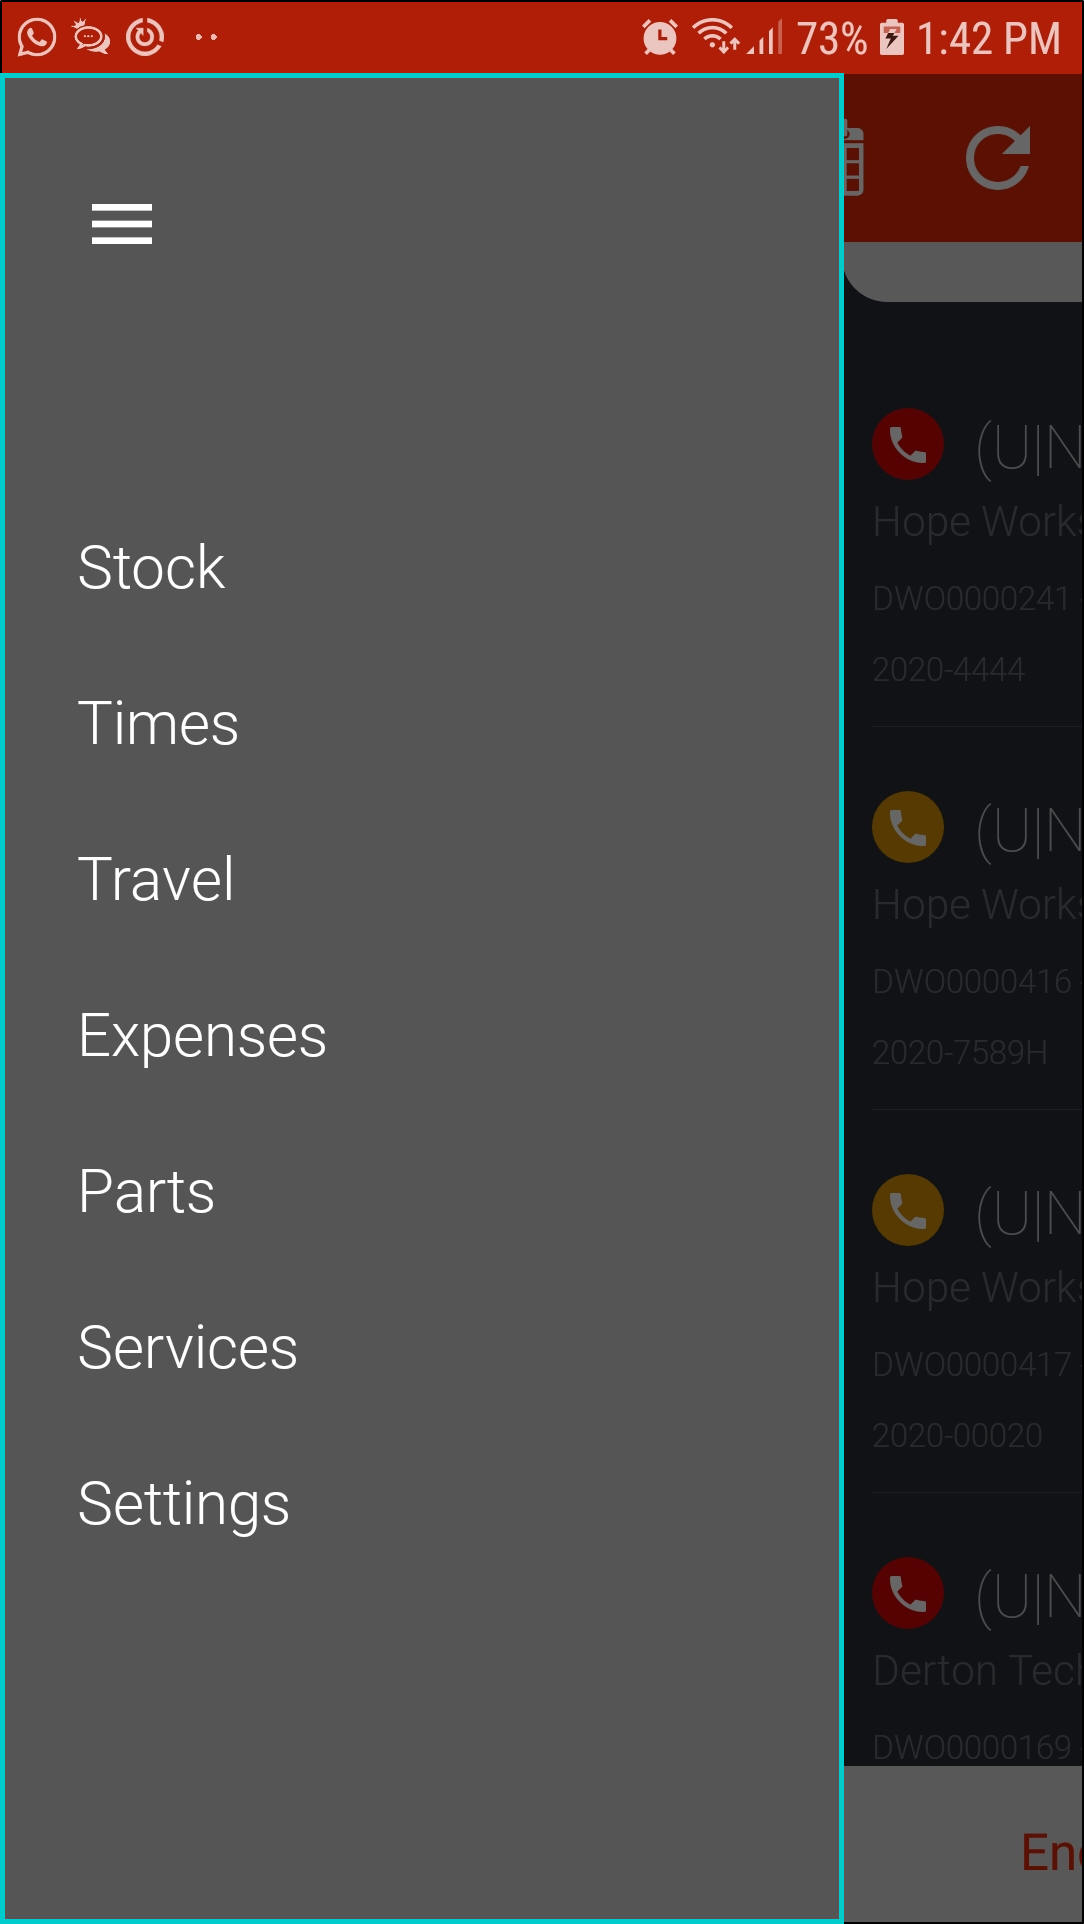
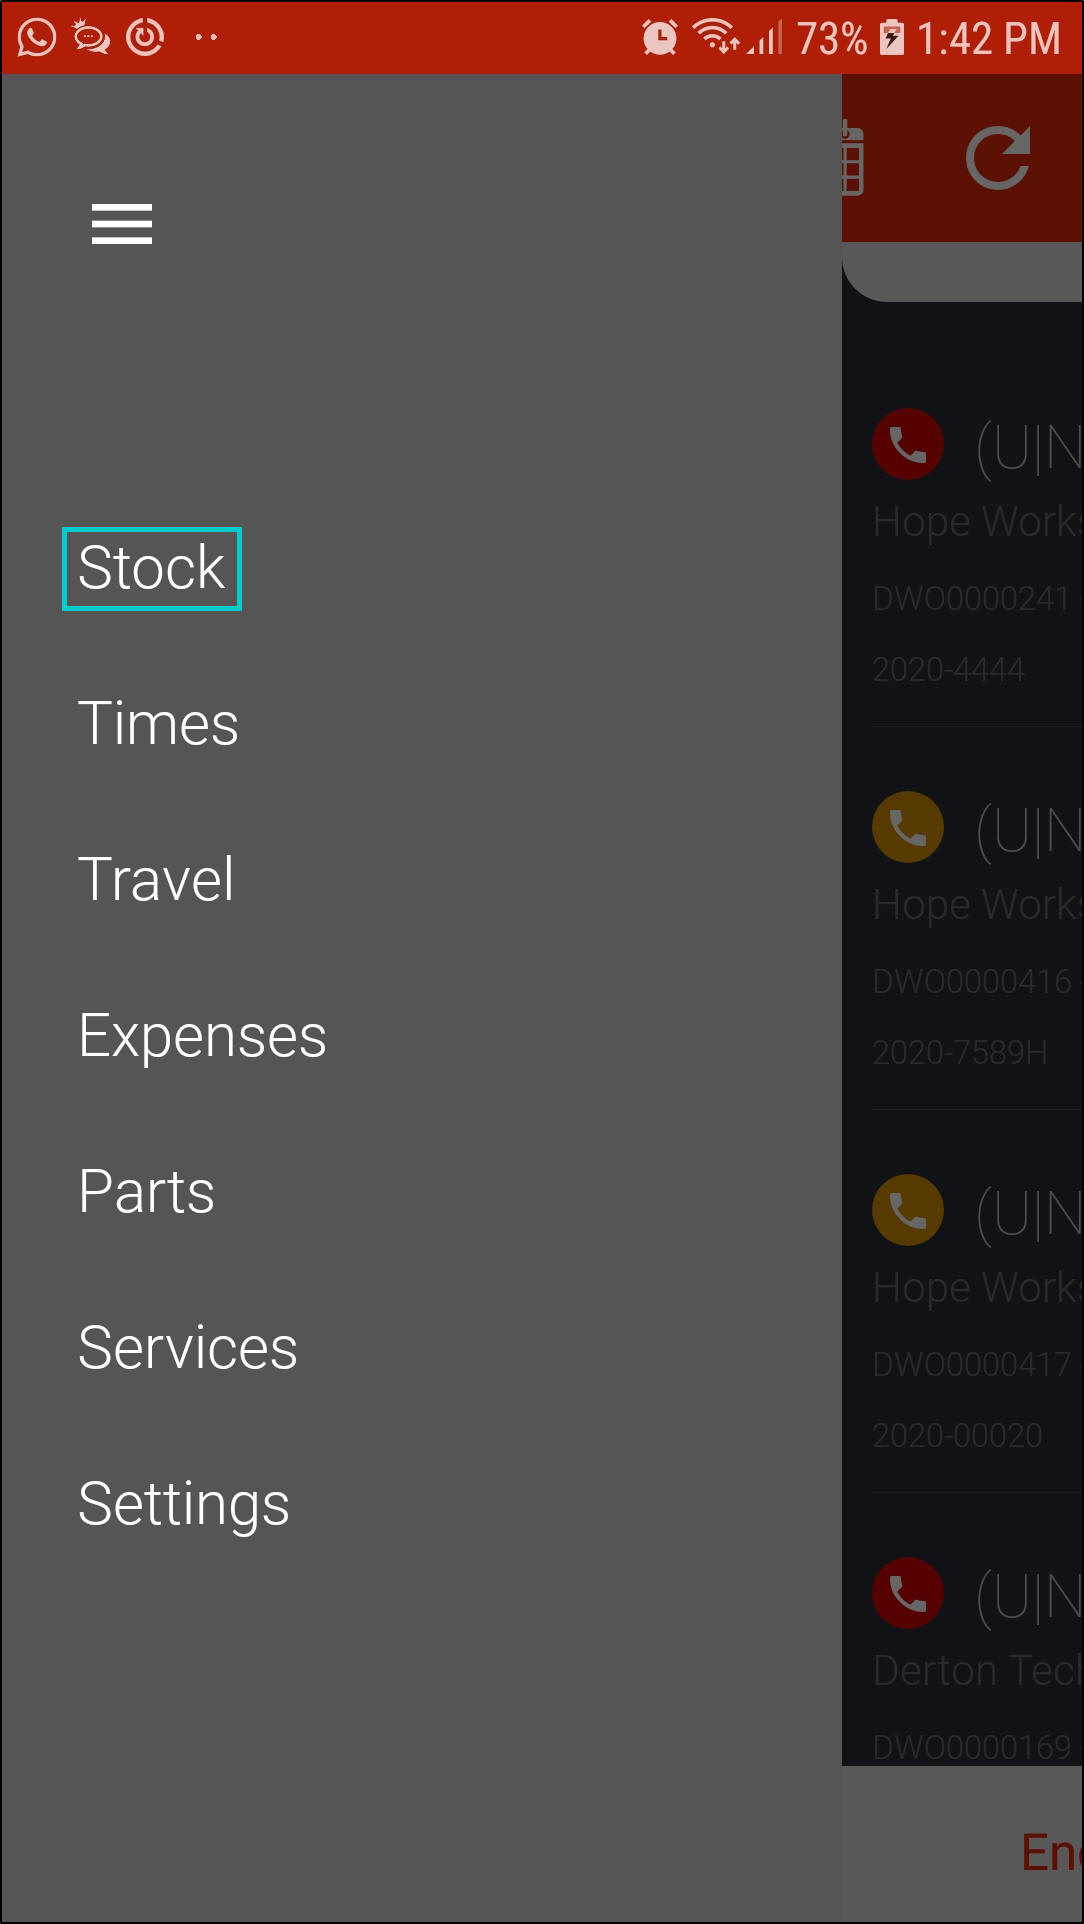
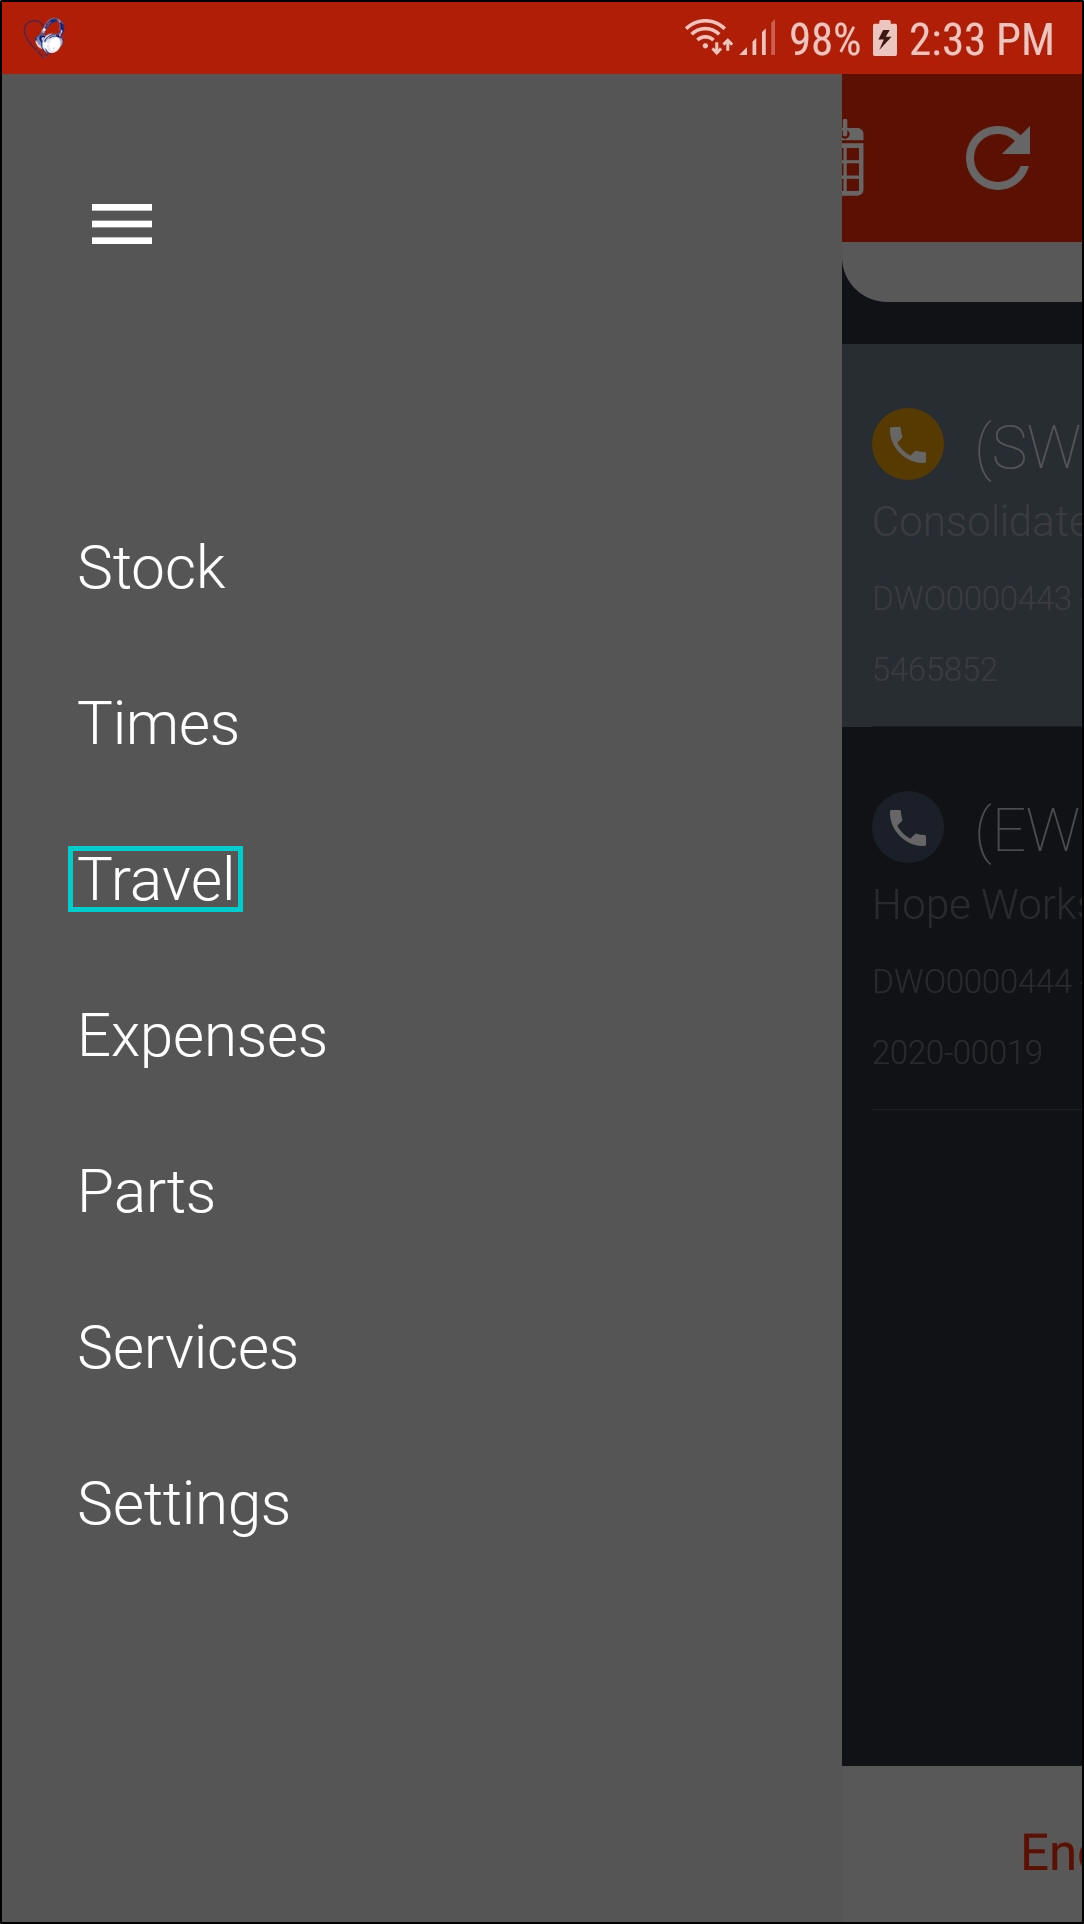
- Click on the Side Menu button.
- The Side Menu will be displayed.
Configuration - Boot Stock Database
- To update the boot stock information from BPO initially or if there has been stock movement in BPO and or you were unable to connect to the internet for some time,
- click on Stock.
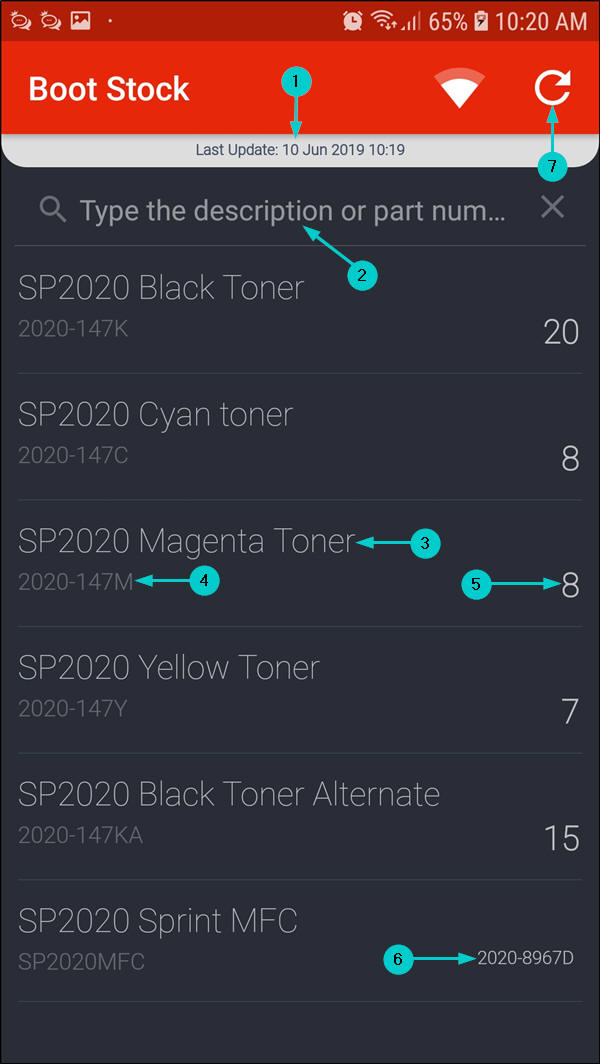
- The Boot Stock screen will be displayed.
- A list of items in your boot stock will be displayed.
- The Last Update: [ ] will show the date and time the boot stock was last updated.
- The Search field is used to search for a part by either typing in the part description or part number.
- This shows the part description.
- This shows the part code.
- This shows the quantity in stock, this is specific to C class items.
- For A / B class items - a serial number is displayed instead of the quantity.
- In this image, part code 2020-147M has a total quantity of 8 before the boot stock information is updated.
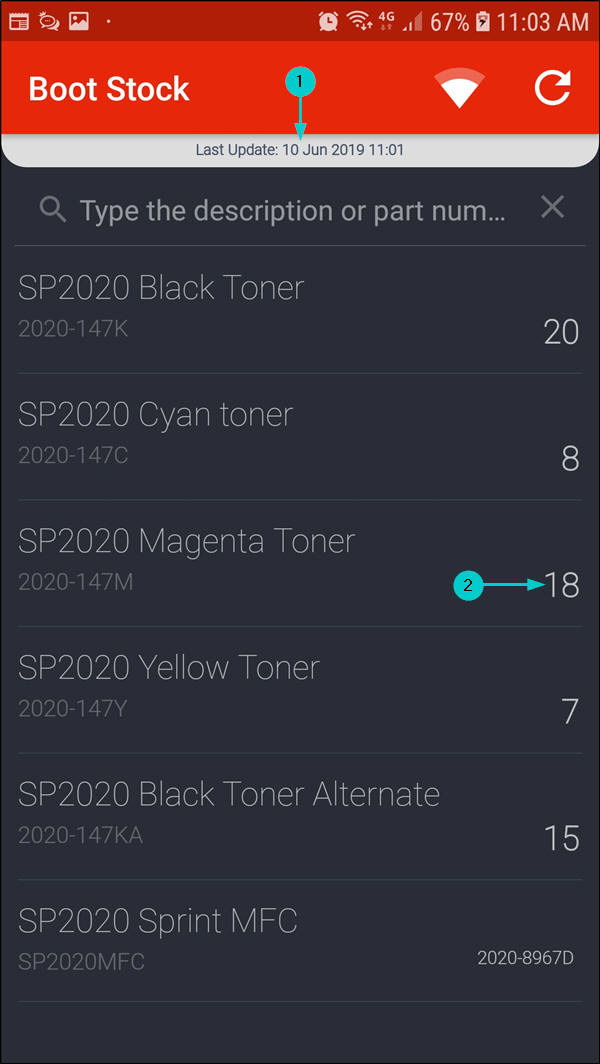
- Click on the Refresh button to update the boot stock information.
- An updated list of items in your boot stock will be displayed.
- The Last Update: [ ] will change to the time the boot stock information was updated.
- In this image, part code 2020-147M now has a total quantity of 18 after the boot stock information was updated.
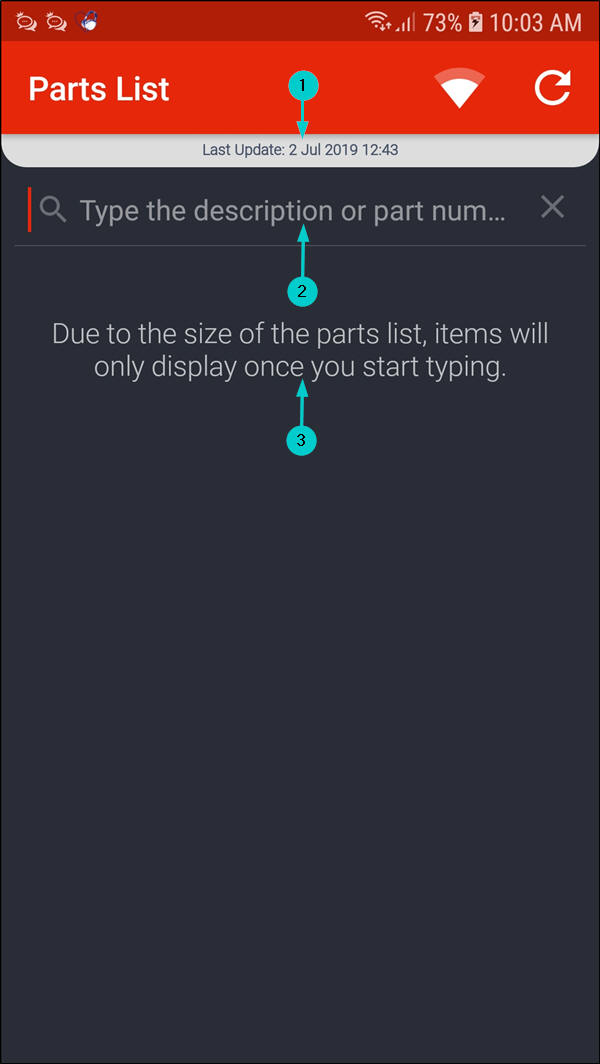
Configuration - Parts Database
- To refresh the part list from BPO initially or refresh if required e.g. new parts added to BPO,
- click on Parts.
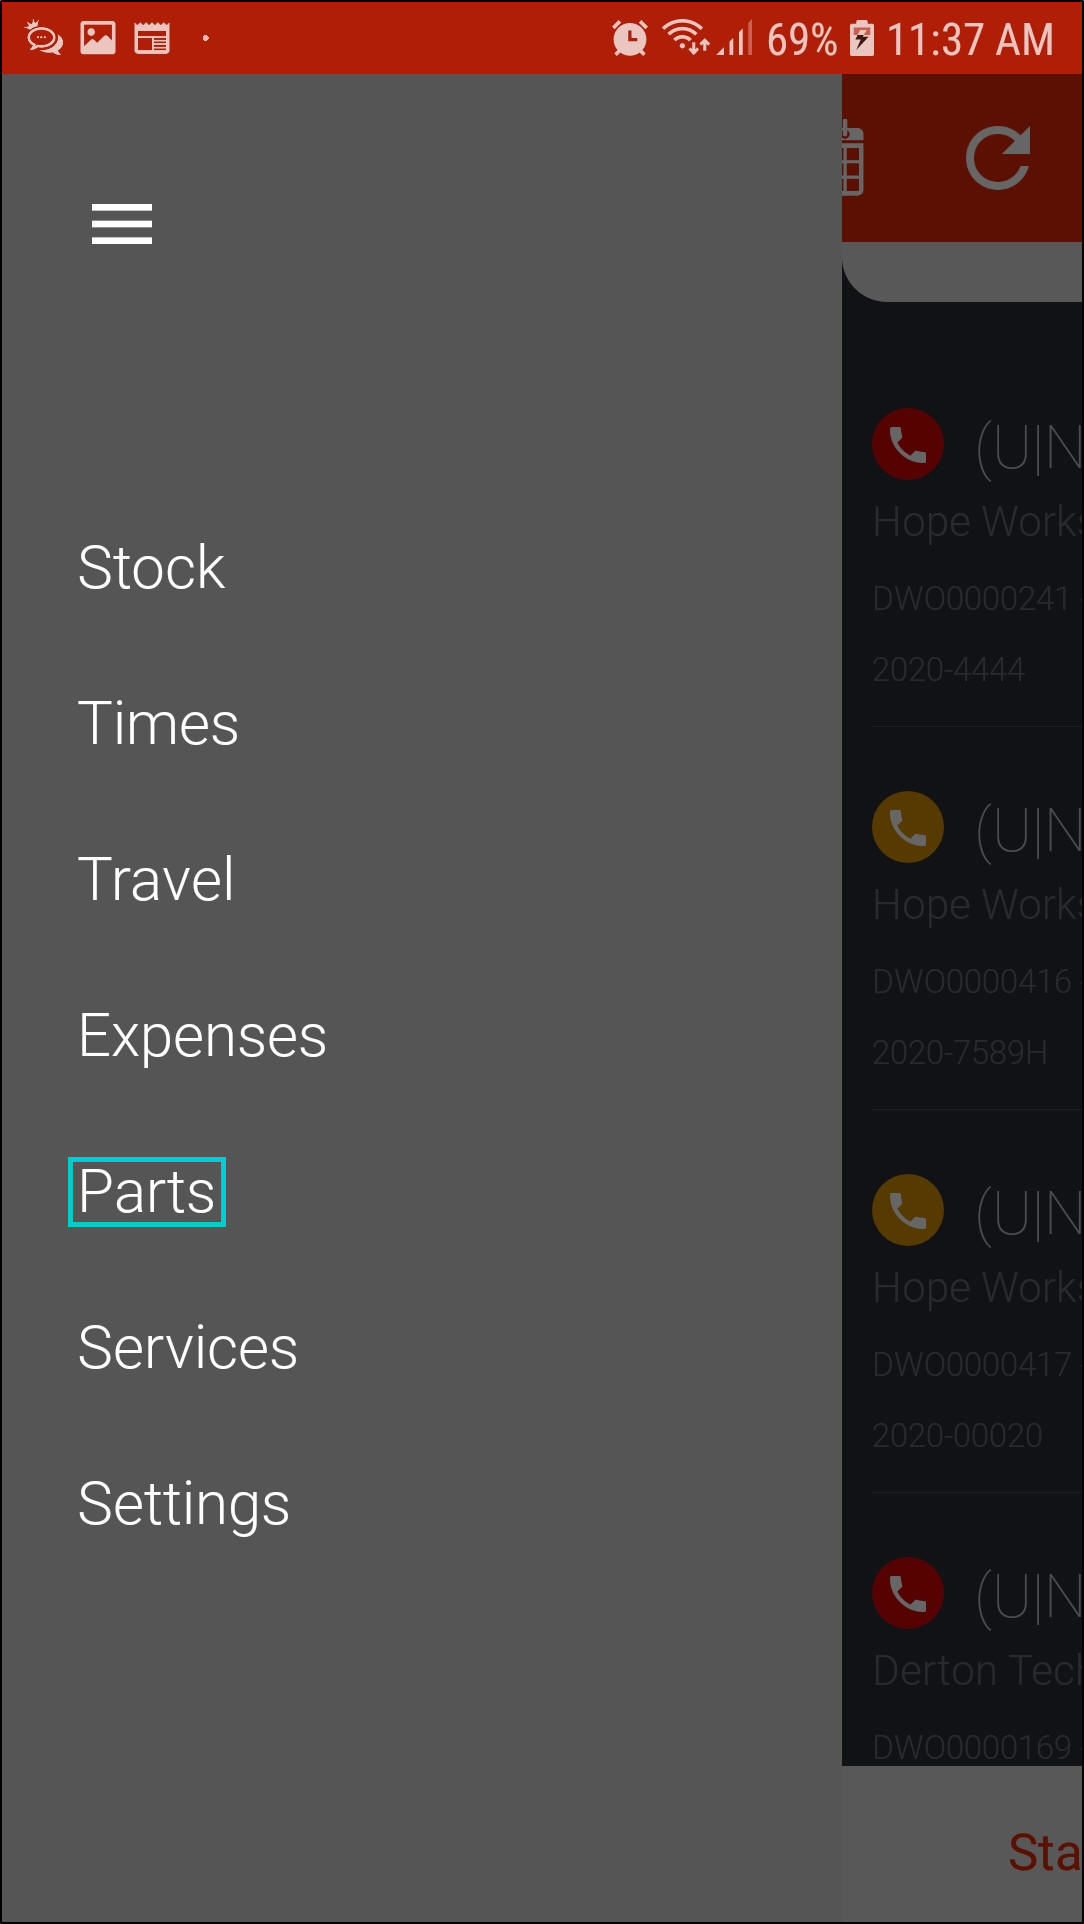
- The Parts List screen will be displayed.
- The Last Update: [ ] will show the date and time the parts list was last updated.
- The Search field is used to search for a part by either typing in the part description or part number.
- A message will be displayed telling you;
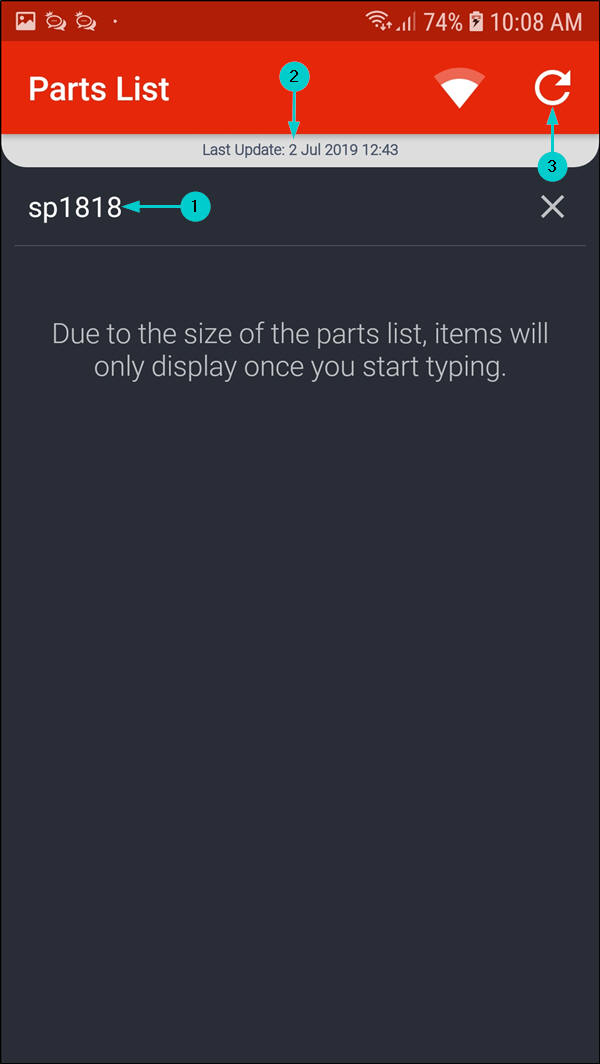
- Due to the size of the parts list, items will only display once you start typing.
- In this image, searching for part SP1818 which was added after the
- Last Update: 2 Jul 2019 12:43
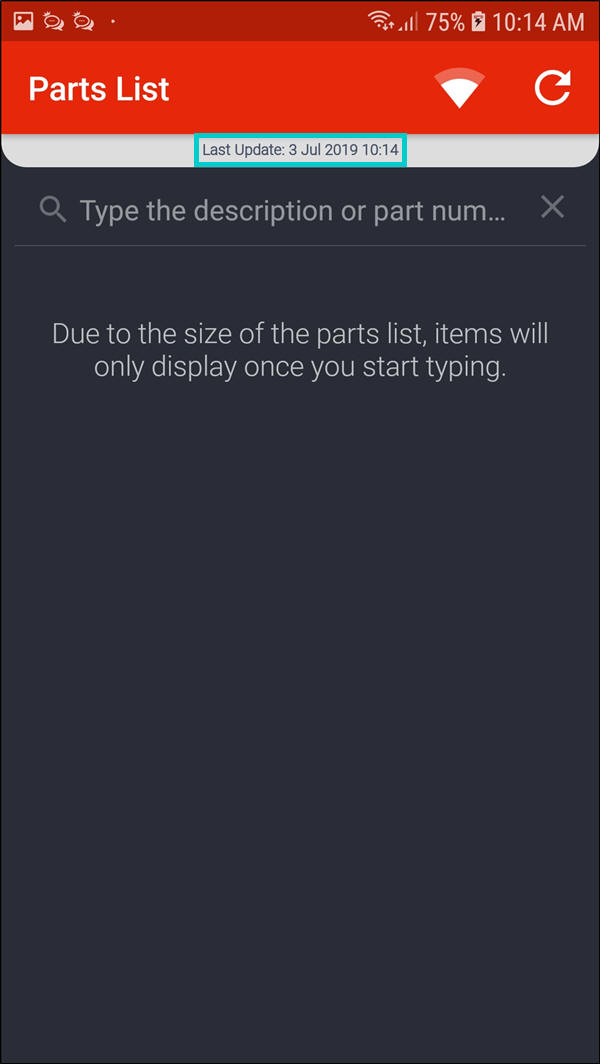
- Click on Refresh to update the parts list information.
returns no results.
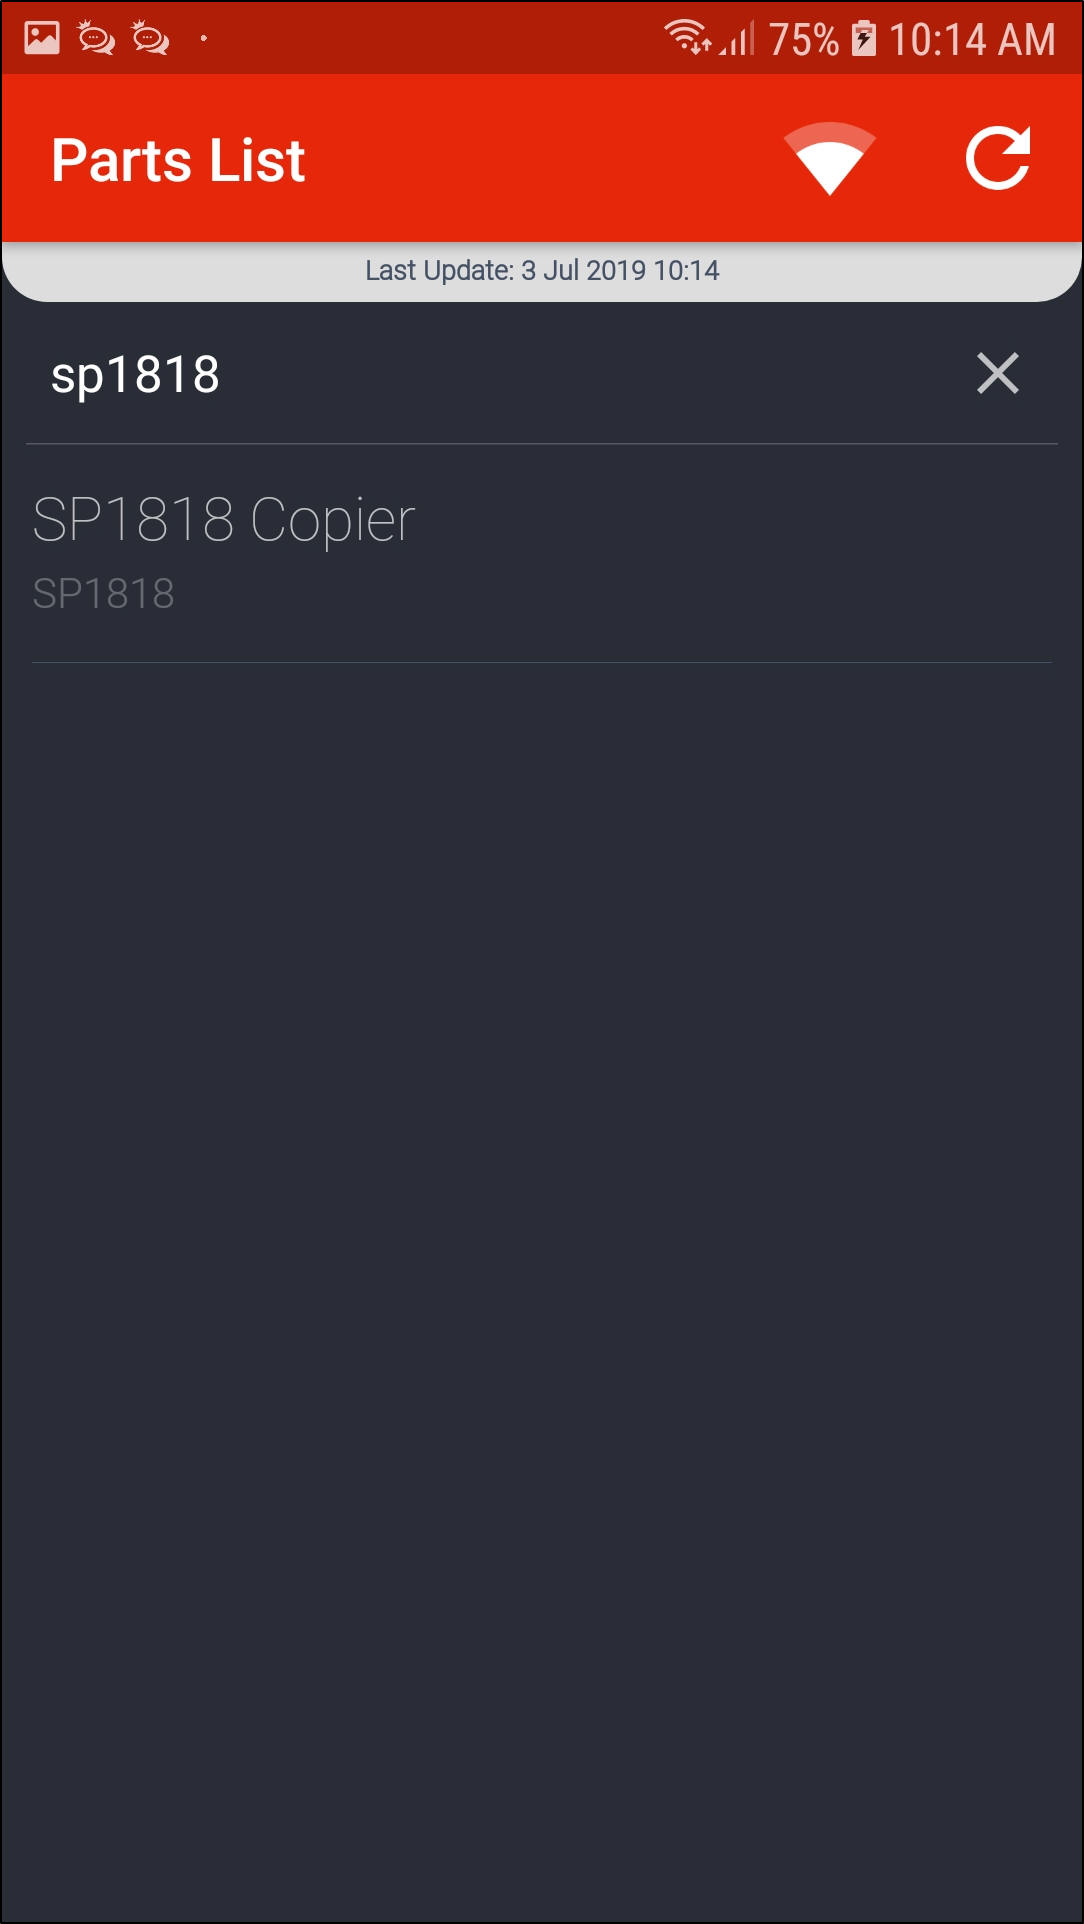
- The Last Update: [ ] will change to the date and time the parts list information was updated.
- In this image, searching for SP1818 now returns results.
Configuration - Services Database
- To refresh the non stock service list from BPO initially or to refresh if required, e.g. new services added to BPO or a service fee has been changed in BPO,
- click on Services.
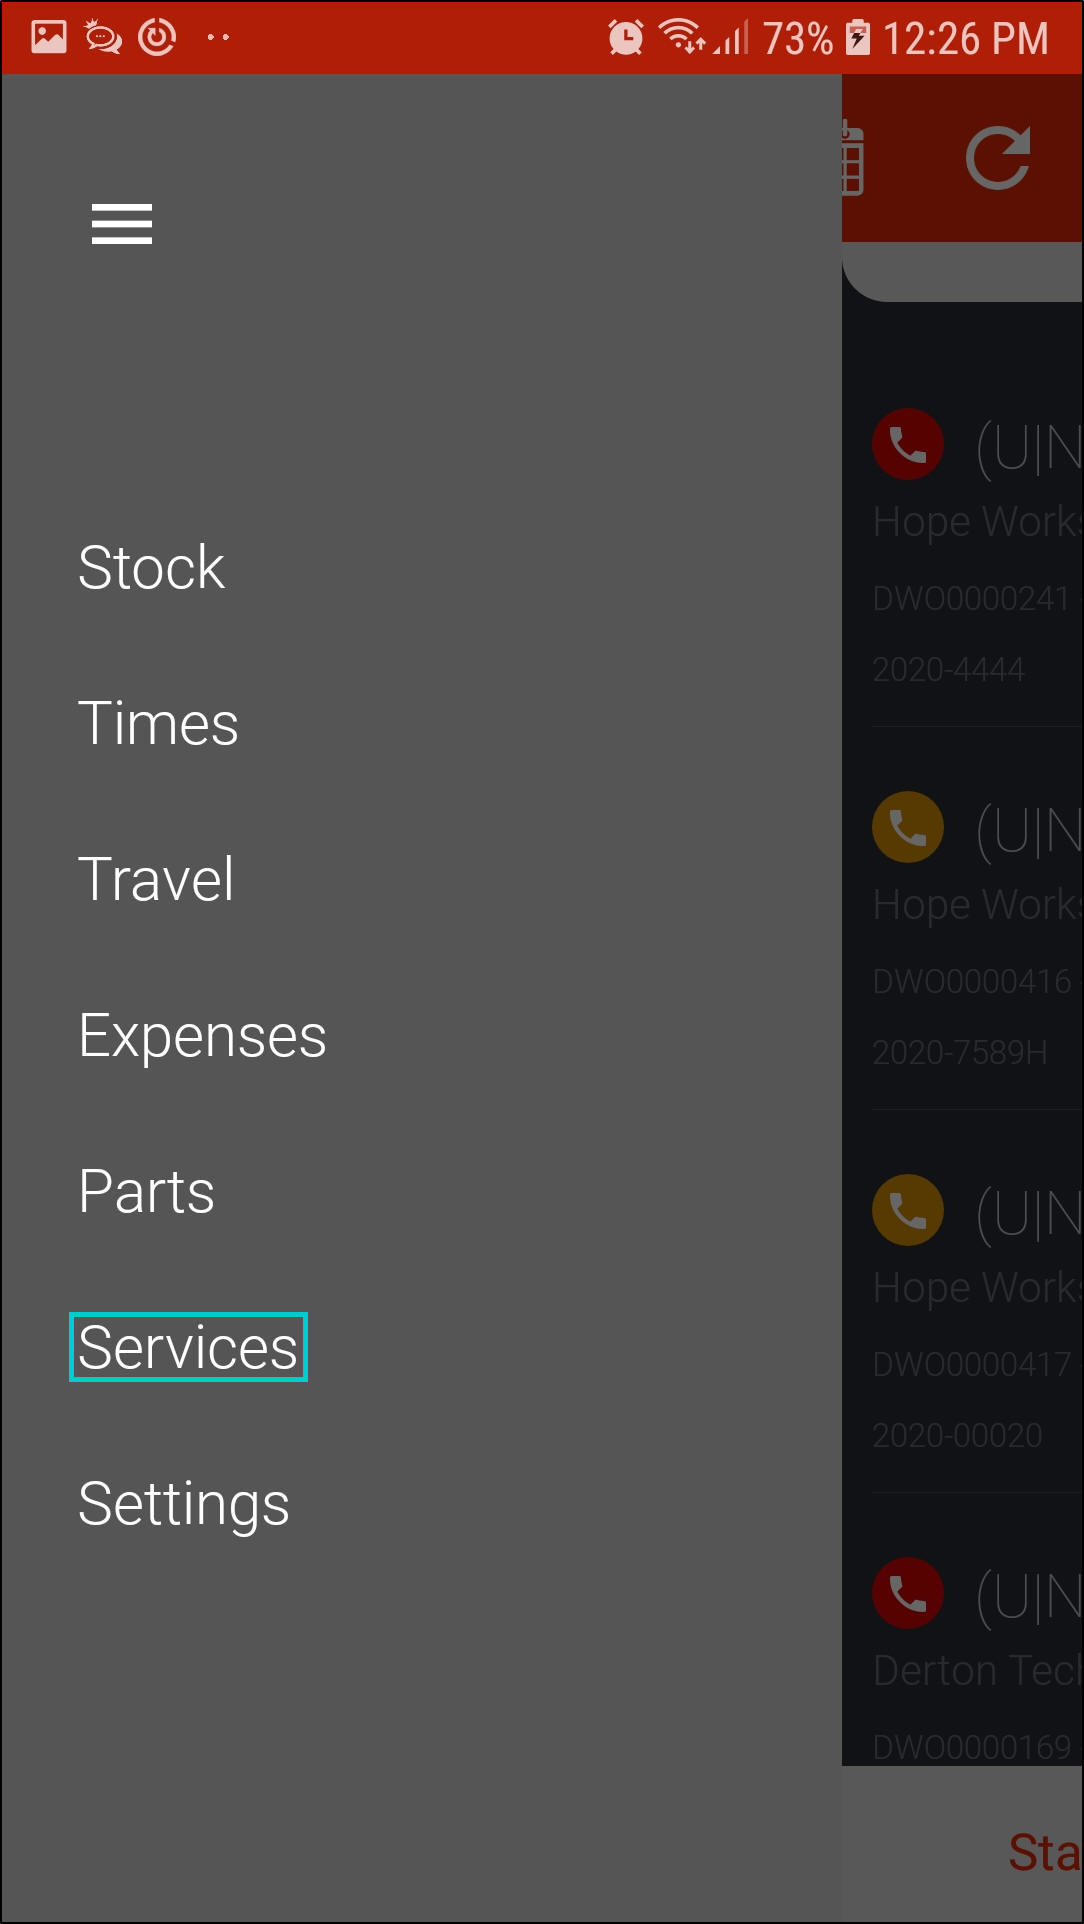
- The Services List screen will be displayed.
- The Search field is used to search for a service by either typing in the service description or service number.
- This shows the service description.
- This shows the service fee.
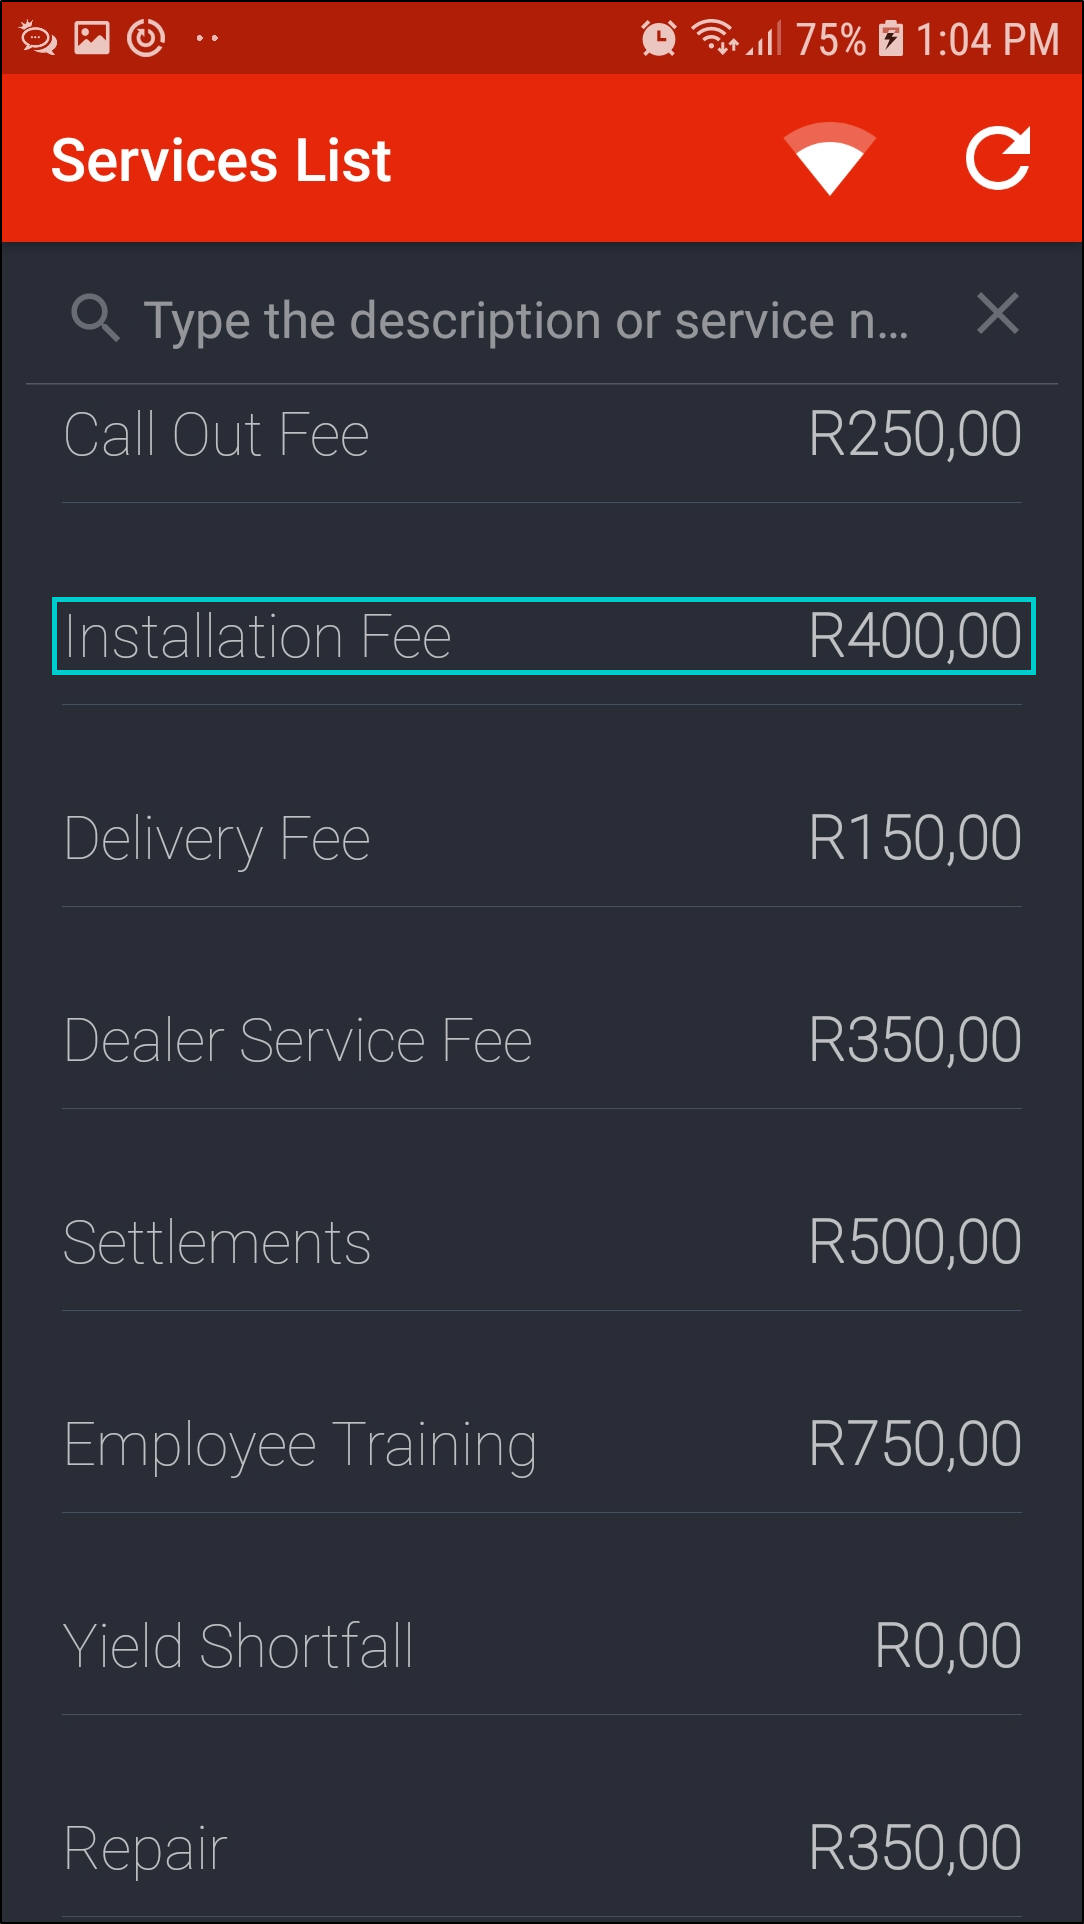
- In this image, the Installation Fee is R350 before the services list information is updated.
- Click on the Refresh button to update the service list information.
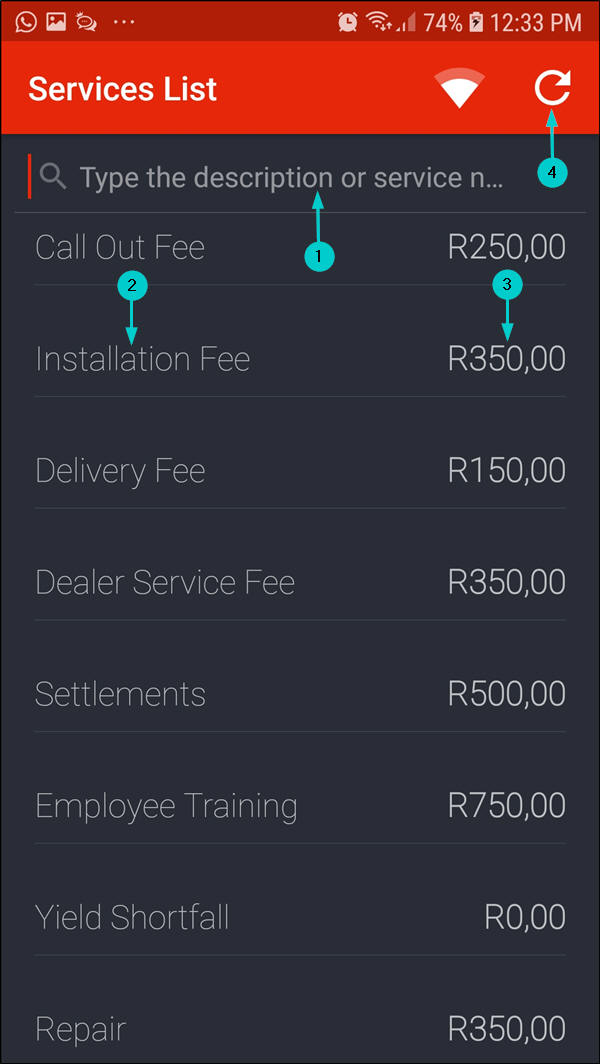
- An updated list of services will be displayed.
- In this image, the Installation Fee is now R400 after the services list information was updated.
Times
- Click on Times.
- The Times screen will be displayed.
- All your time records will be displayed in this screen showing the;
- work order number the time was booked for,
- the time duration of the task and
- the date the time was logged.
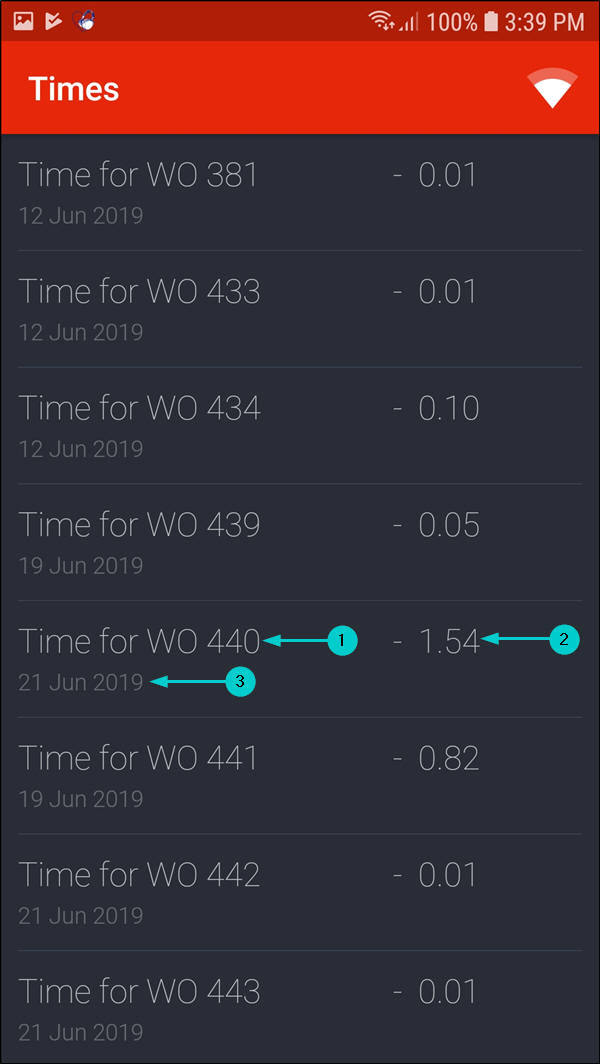
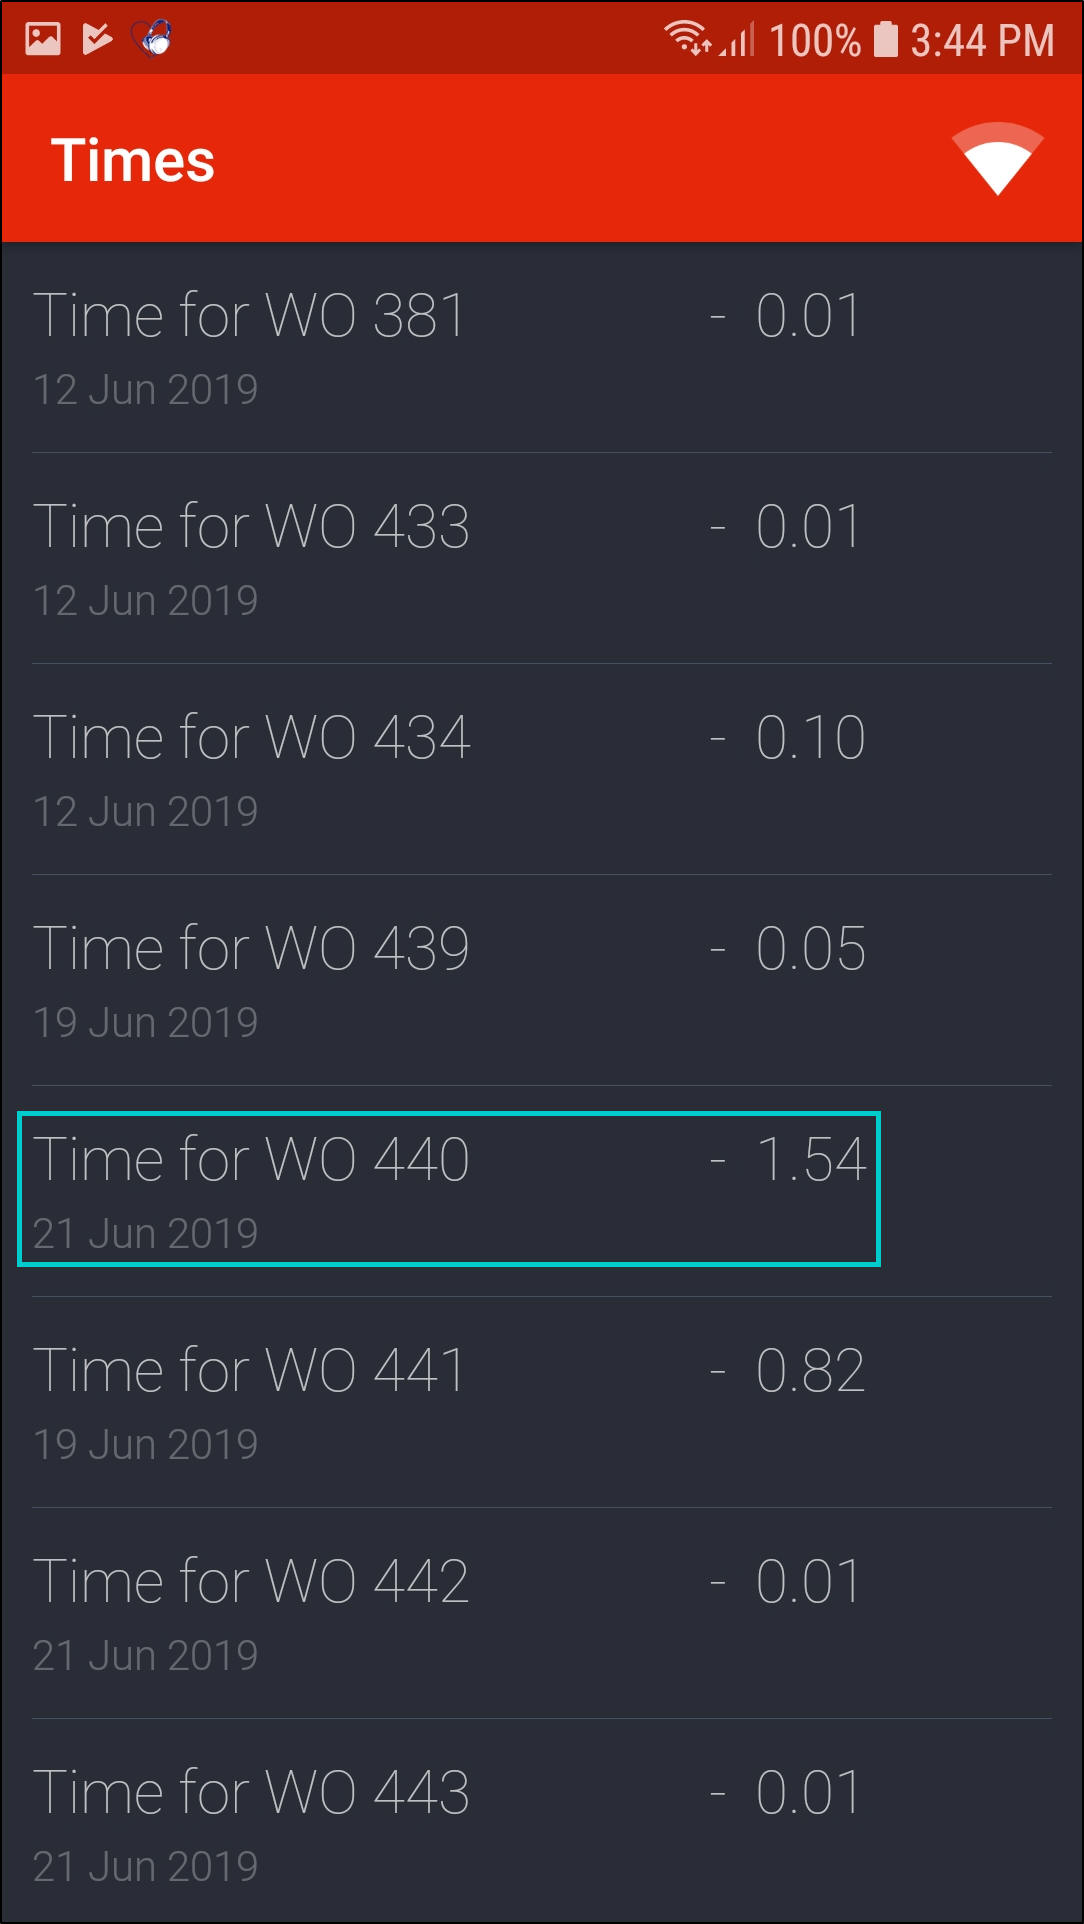
- You can view more details by clicking on the time record you wish to view more details for.
- The Time screen will be displayed.
- From this screen, you can view the time duration and comments related to the selected time record.

Update Time Comments
- Click on the time record you wish to amend.

- The Time screen will be displayed.
- Update the comments accordingly.
- Click on Update.
- Note: The system does not allow you to update the time duration from this screen.

- You will return to the Times Screen.
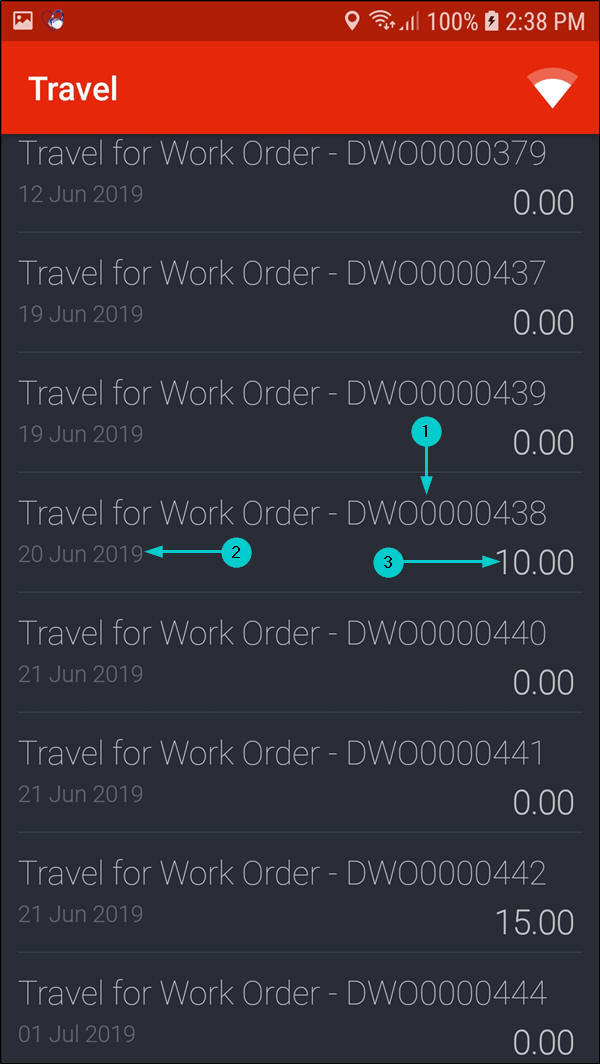
Travel
- You can view or edit travel done on all your work orders.
- Click on Travel.
- The Travel screen will be displayed.
- A list of travel records for all your work orders will be displayed in this screen showing the;
- work order number,
- date the travel was logged and the
- distance travelled in km(s).
Travel Entry
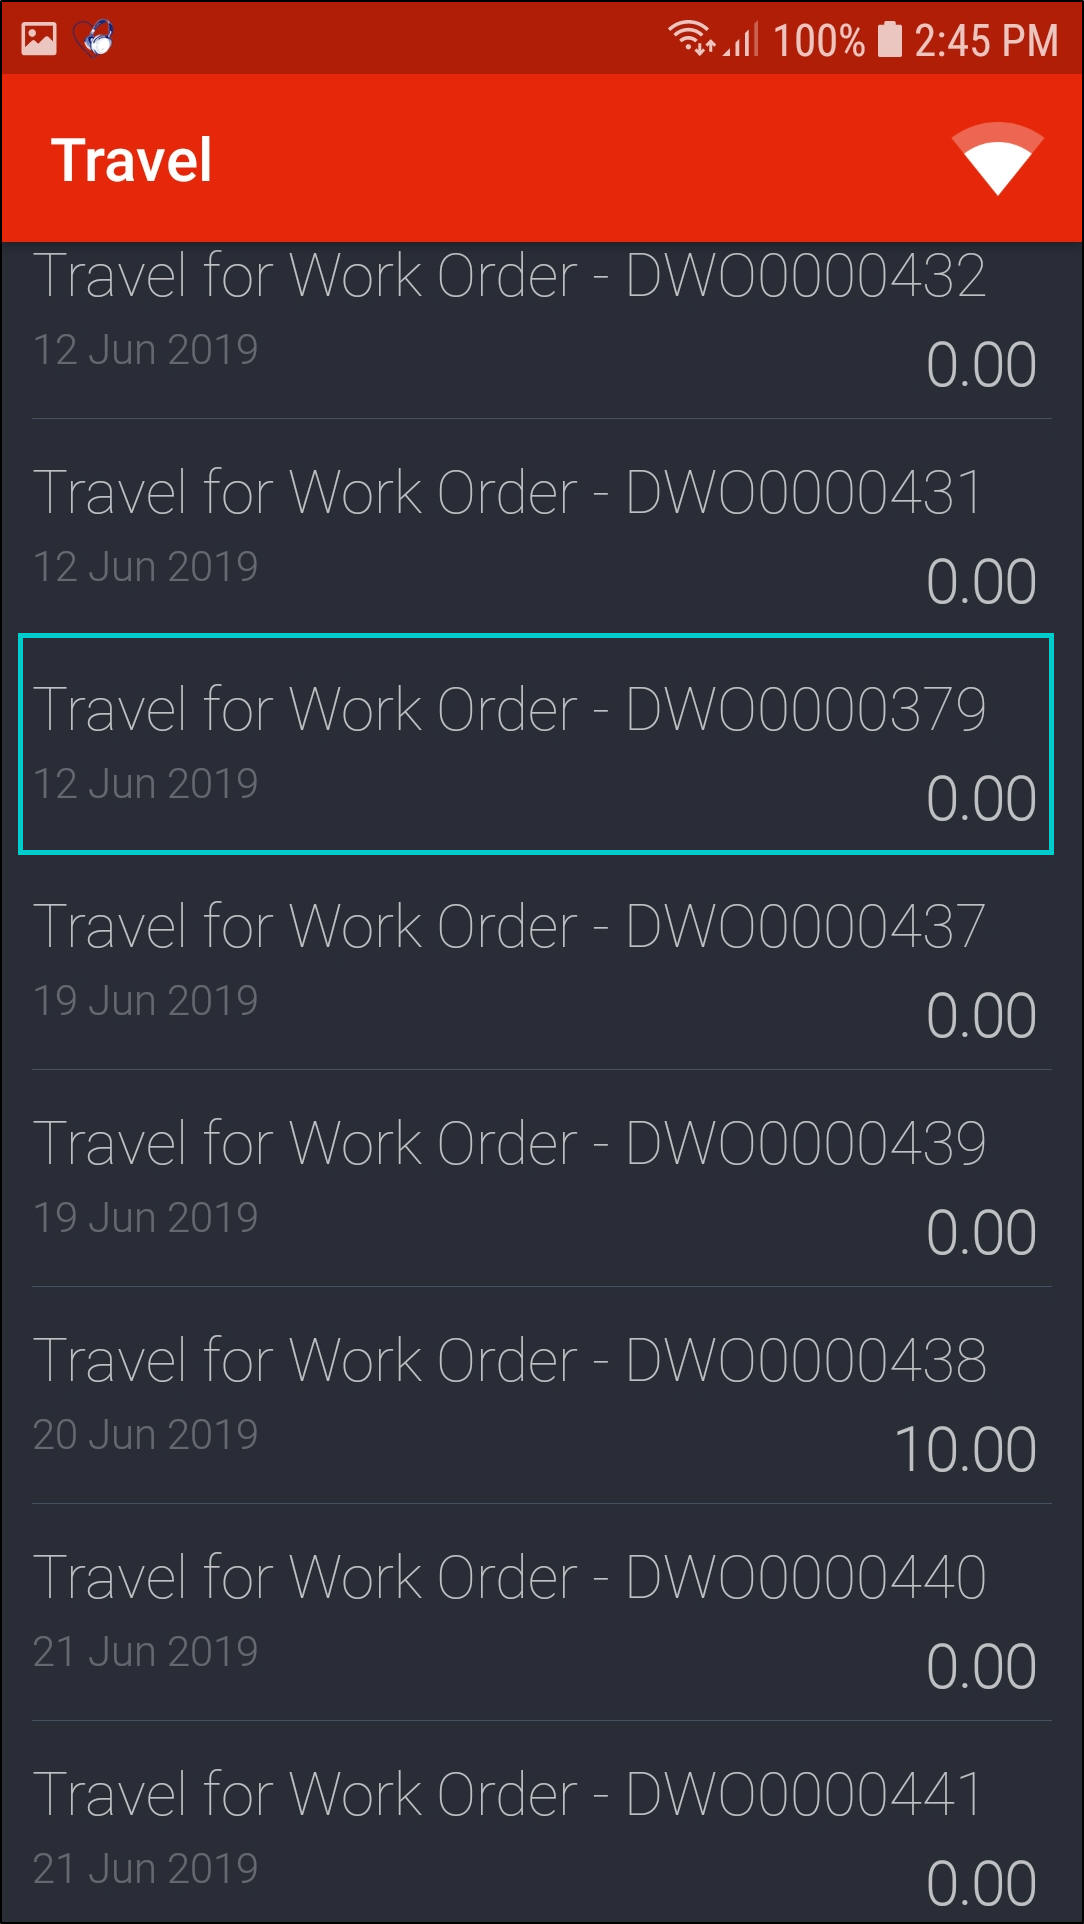
- To edit a travel record, click on the travel record you wish to edit.
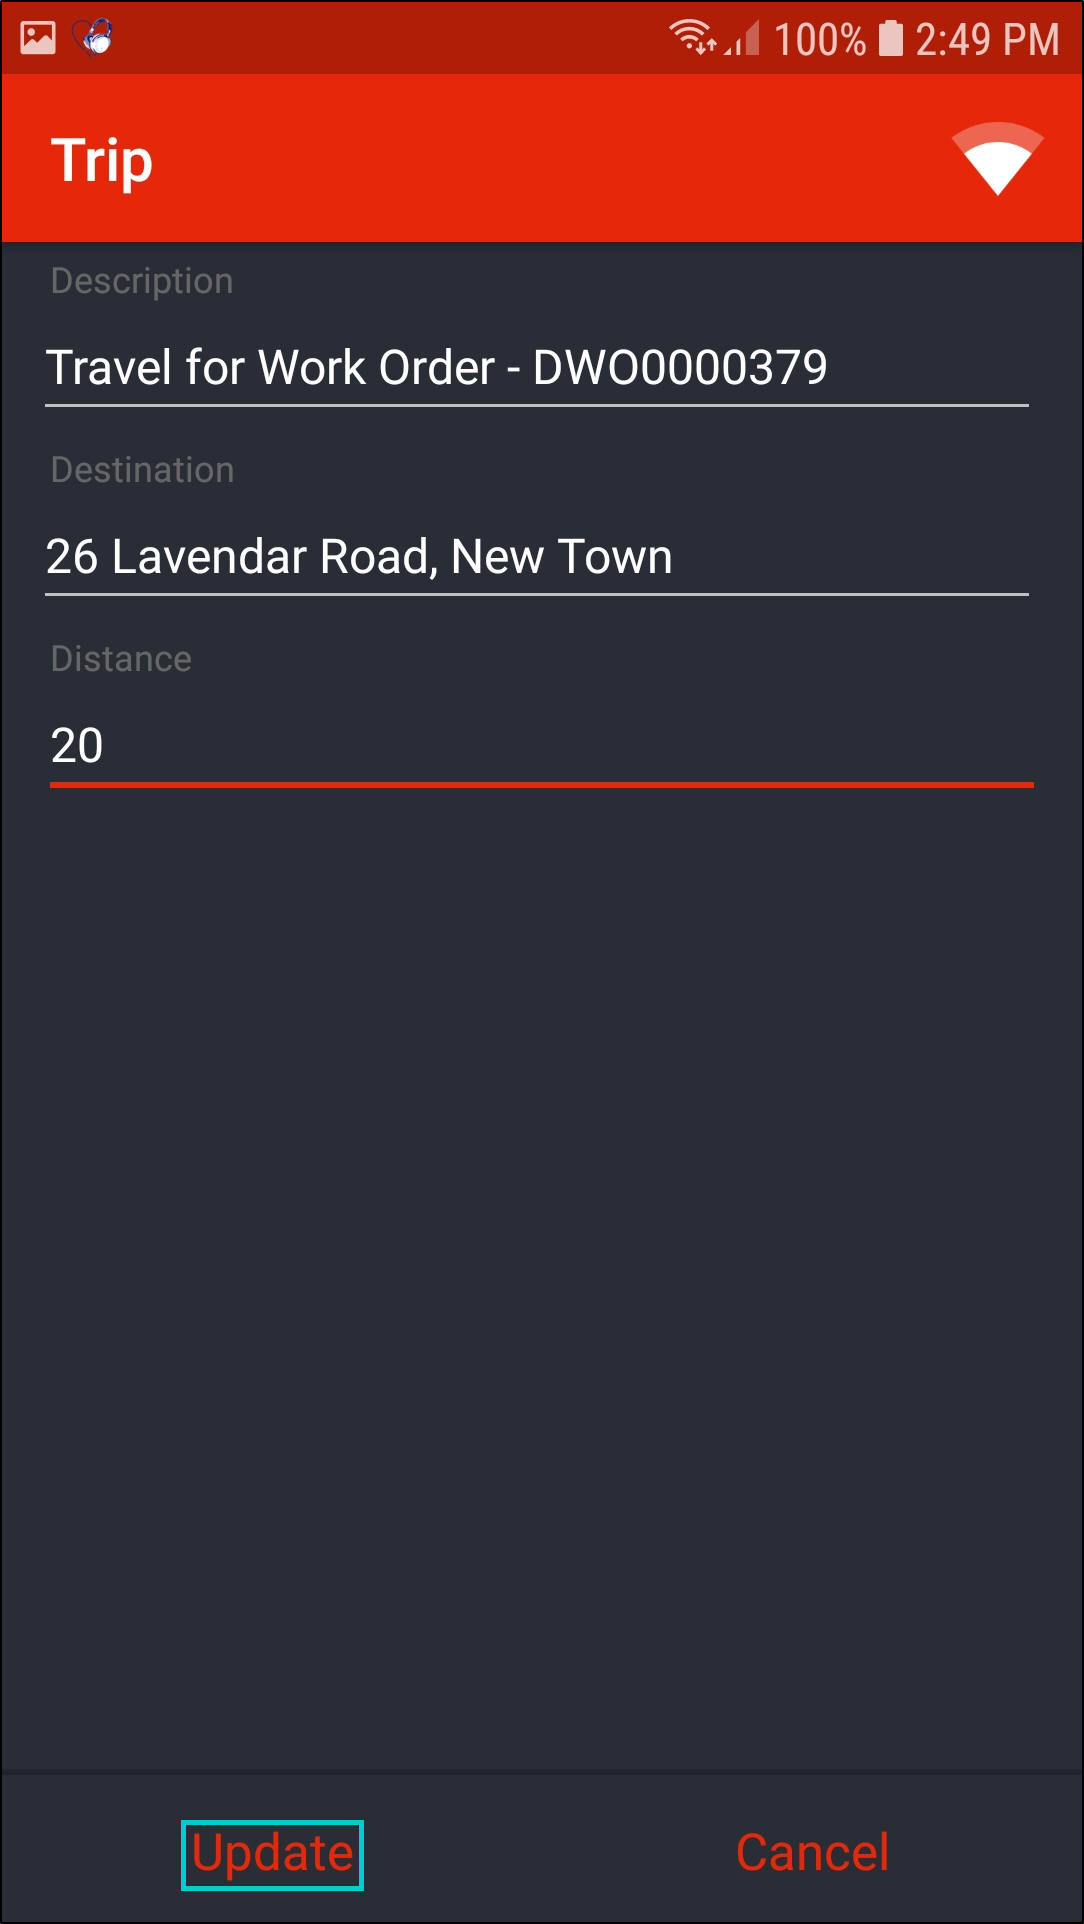
- The Trip screen will be displayed.
- Edit the relevant details.
-
Click on Update.
- In this image, Distance field was updated.
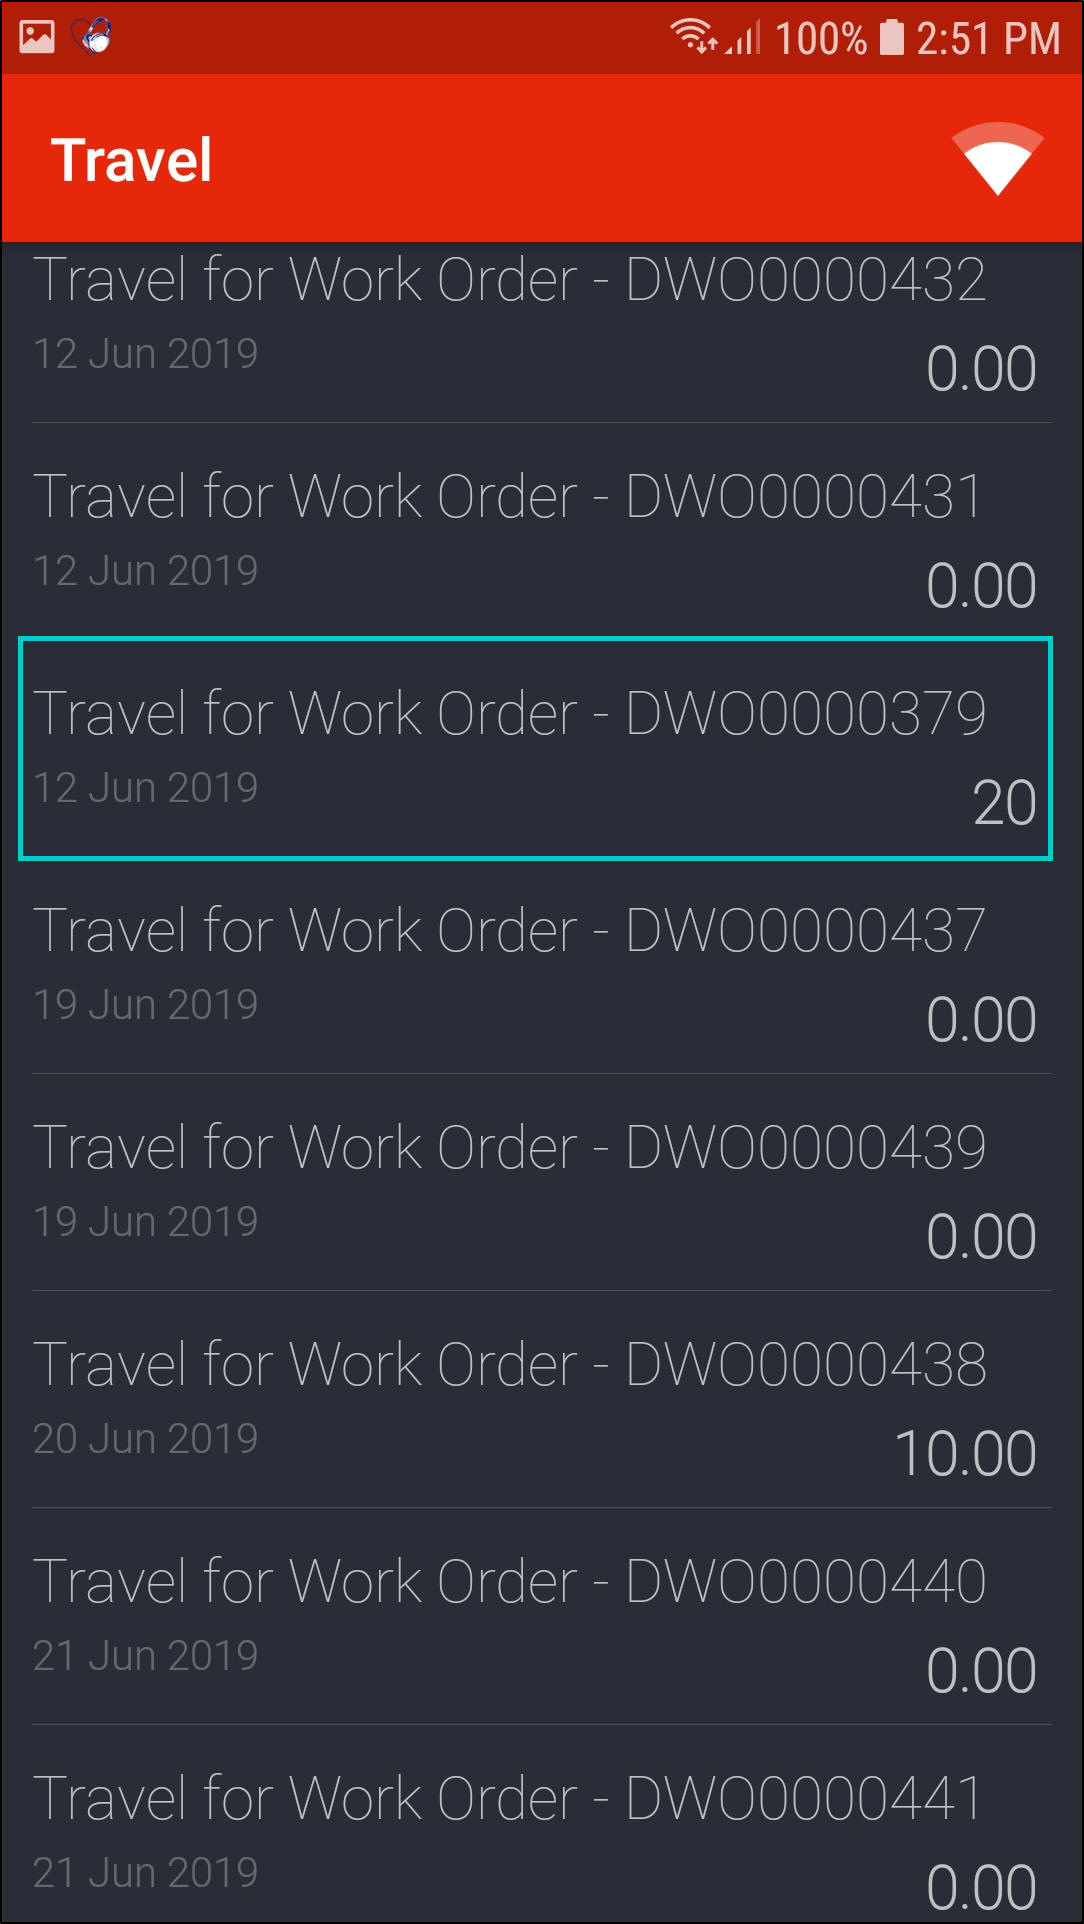
- The updated travel record will now be displayed in the Travel screen.
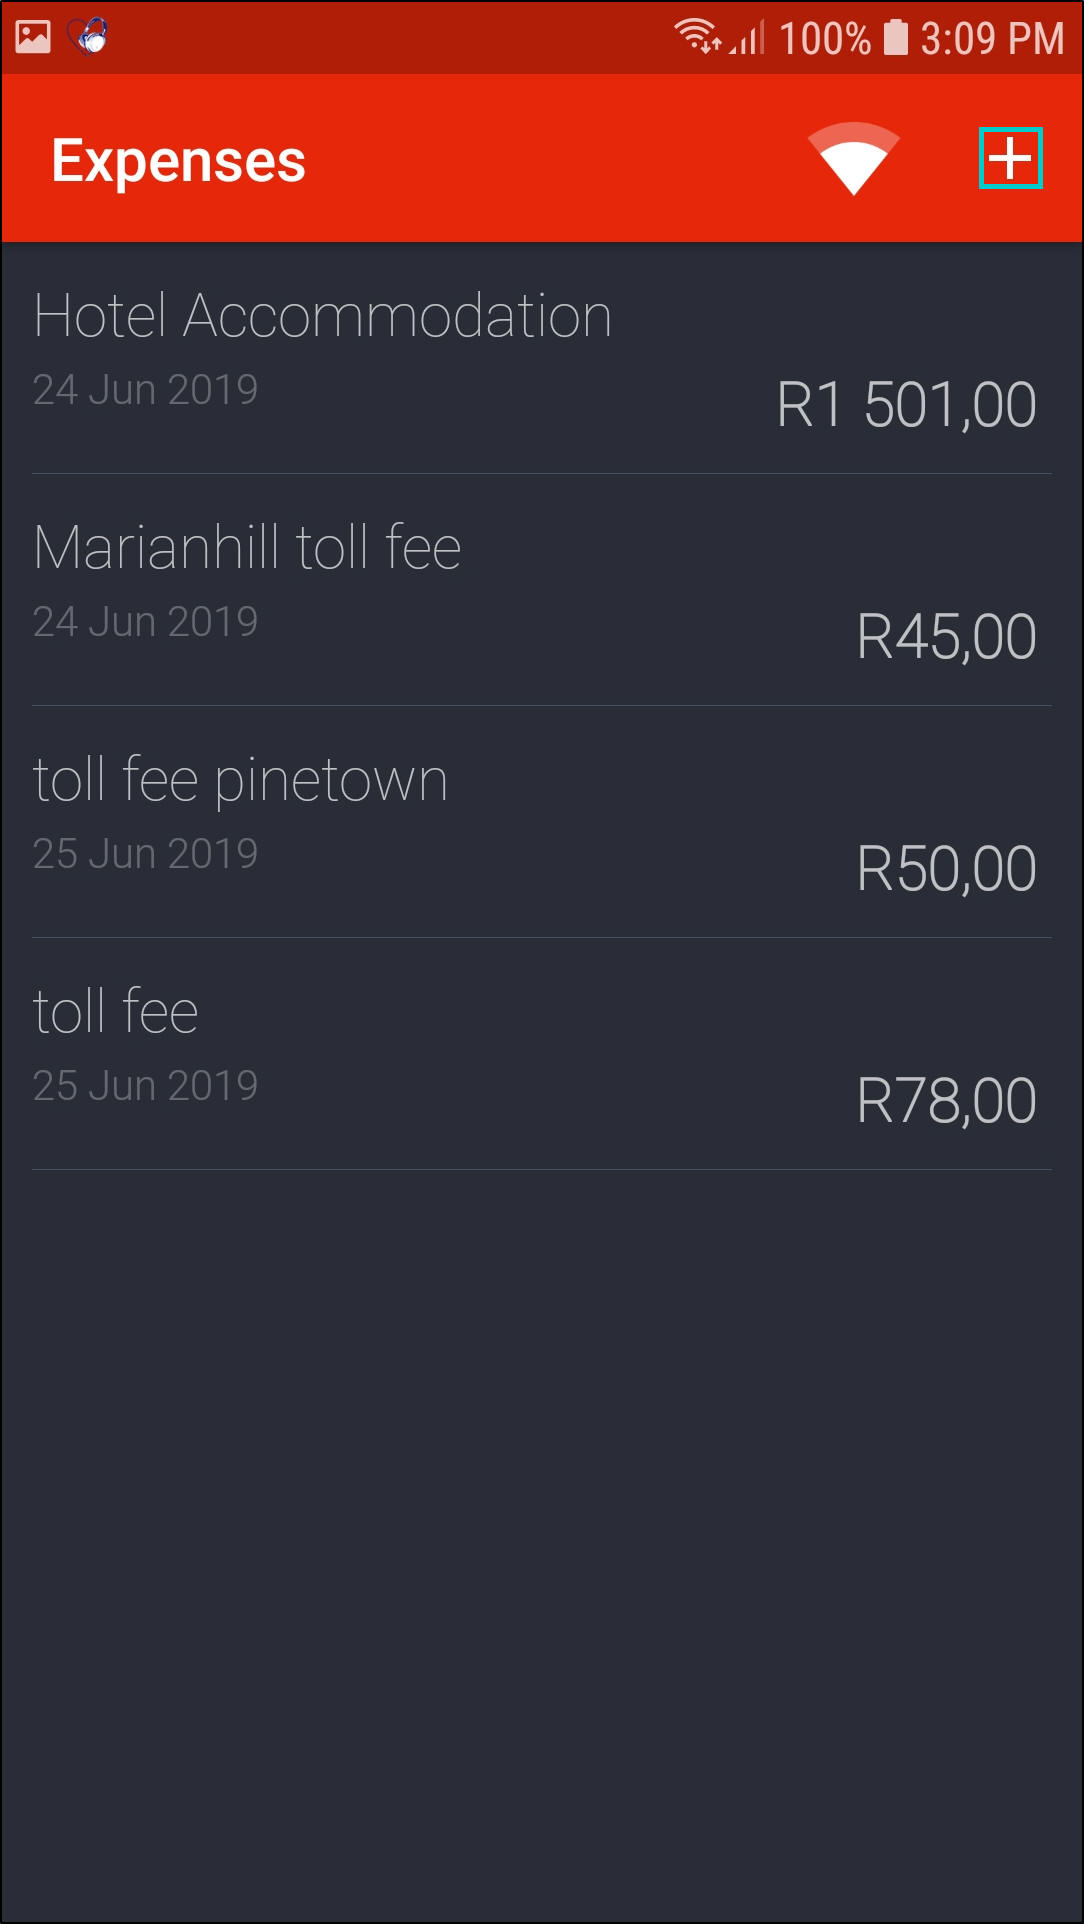
Expenses
- You can view or add expenses on all your work orders.
- Click on Expenses.
- The Expenses screen will be displayed.
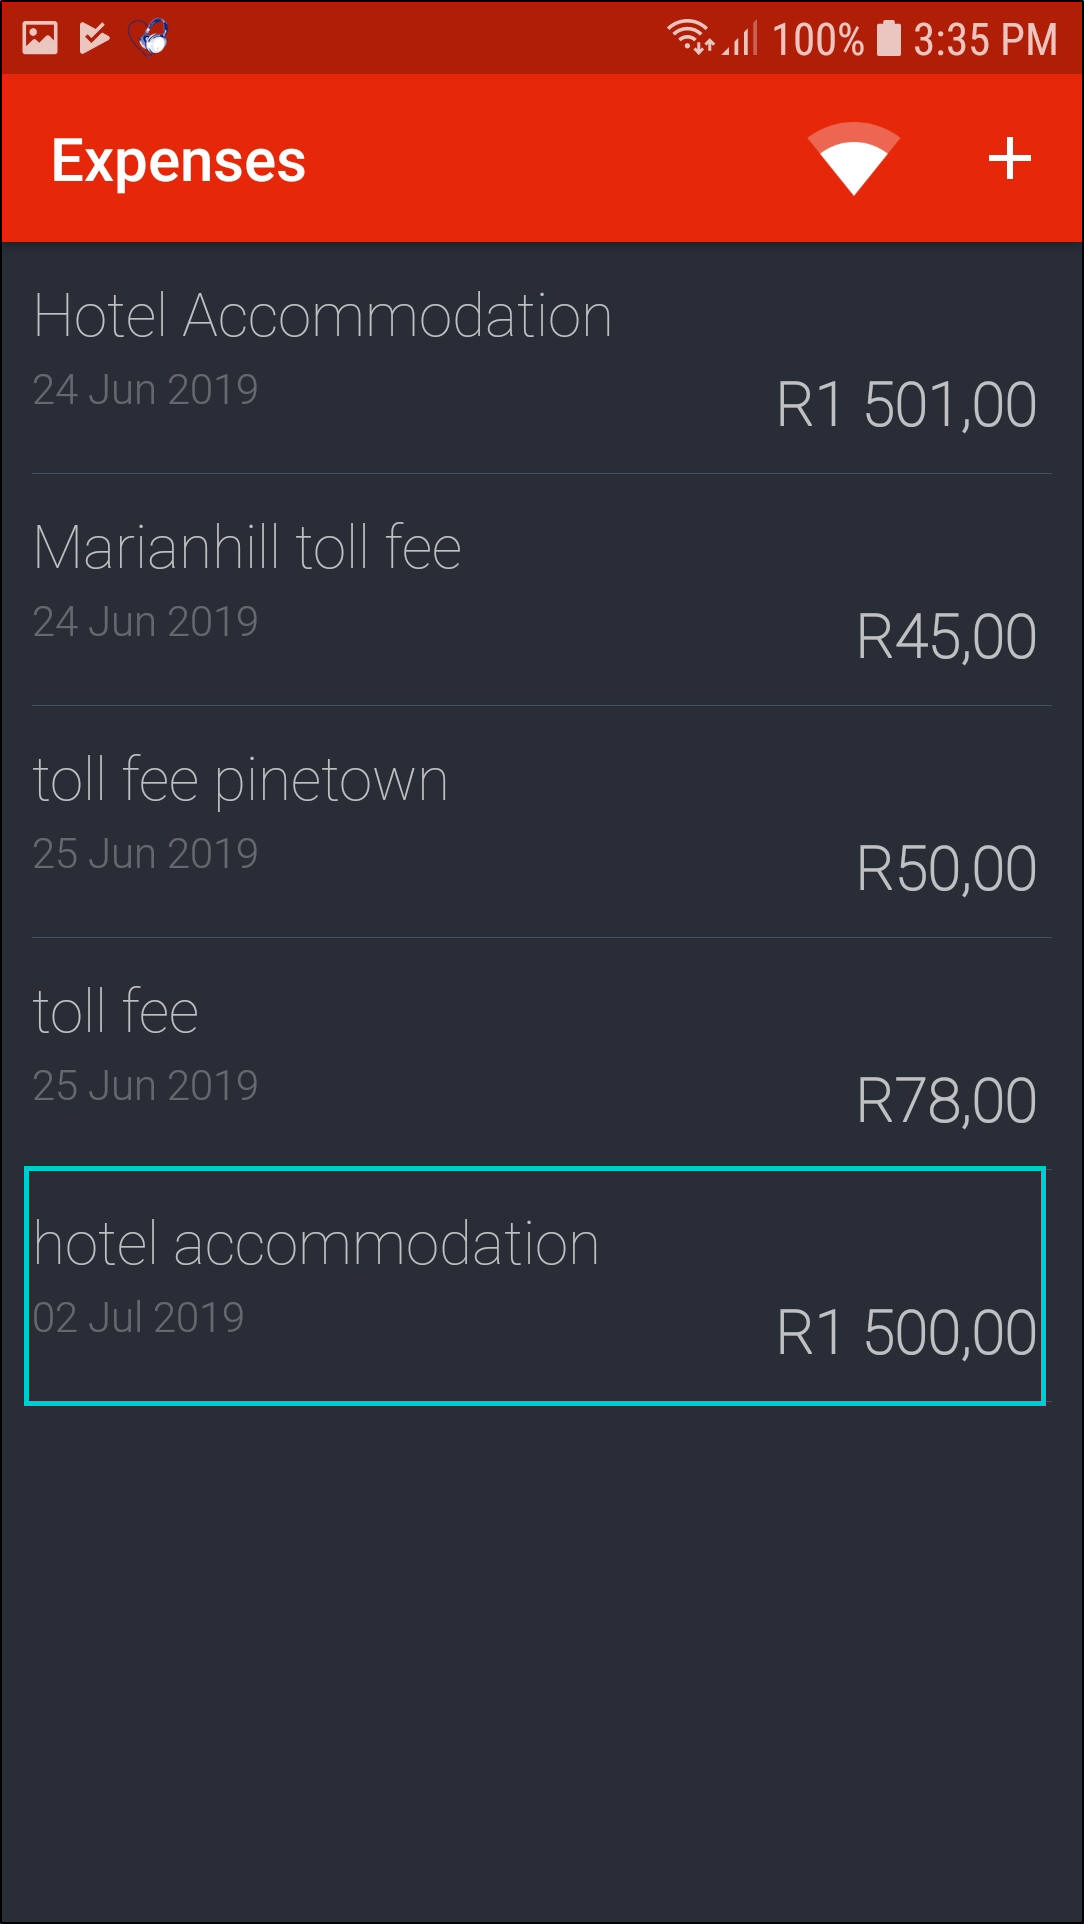
- A list of all logged expenses will be displayed in this screen showing the
- expense description,
- date when the expense was logged and
- expense cost.
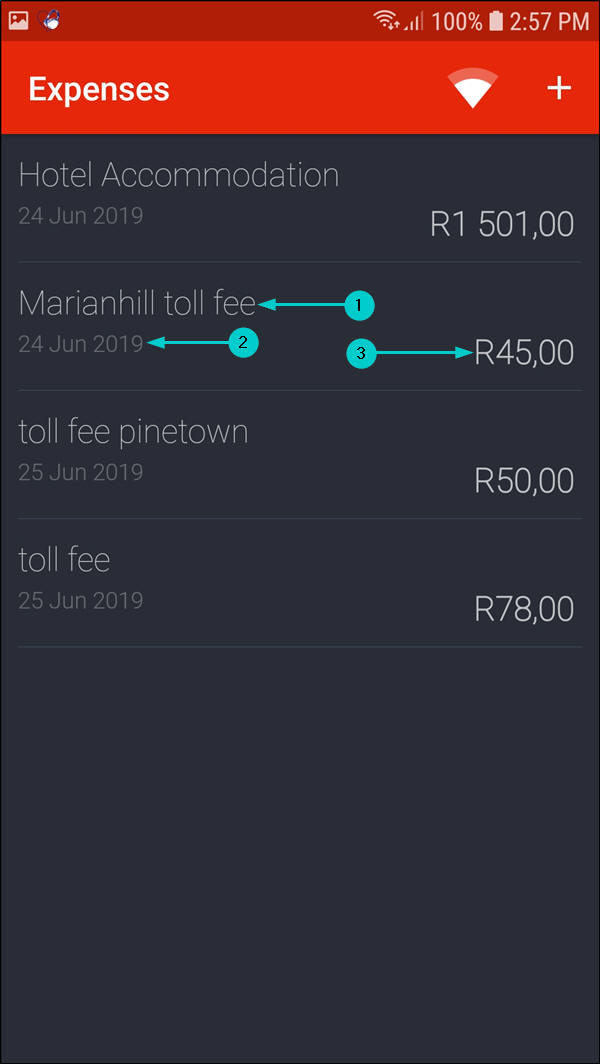
- To view more details, click on the expense you wish to view more details for.
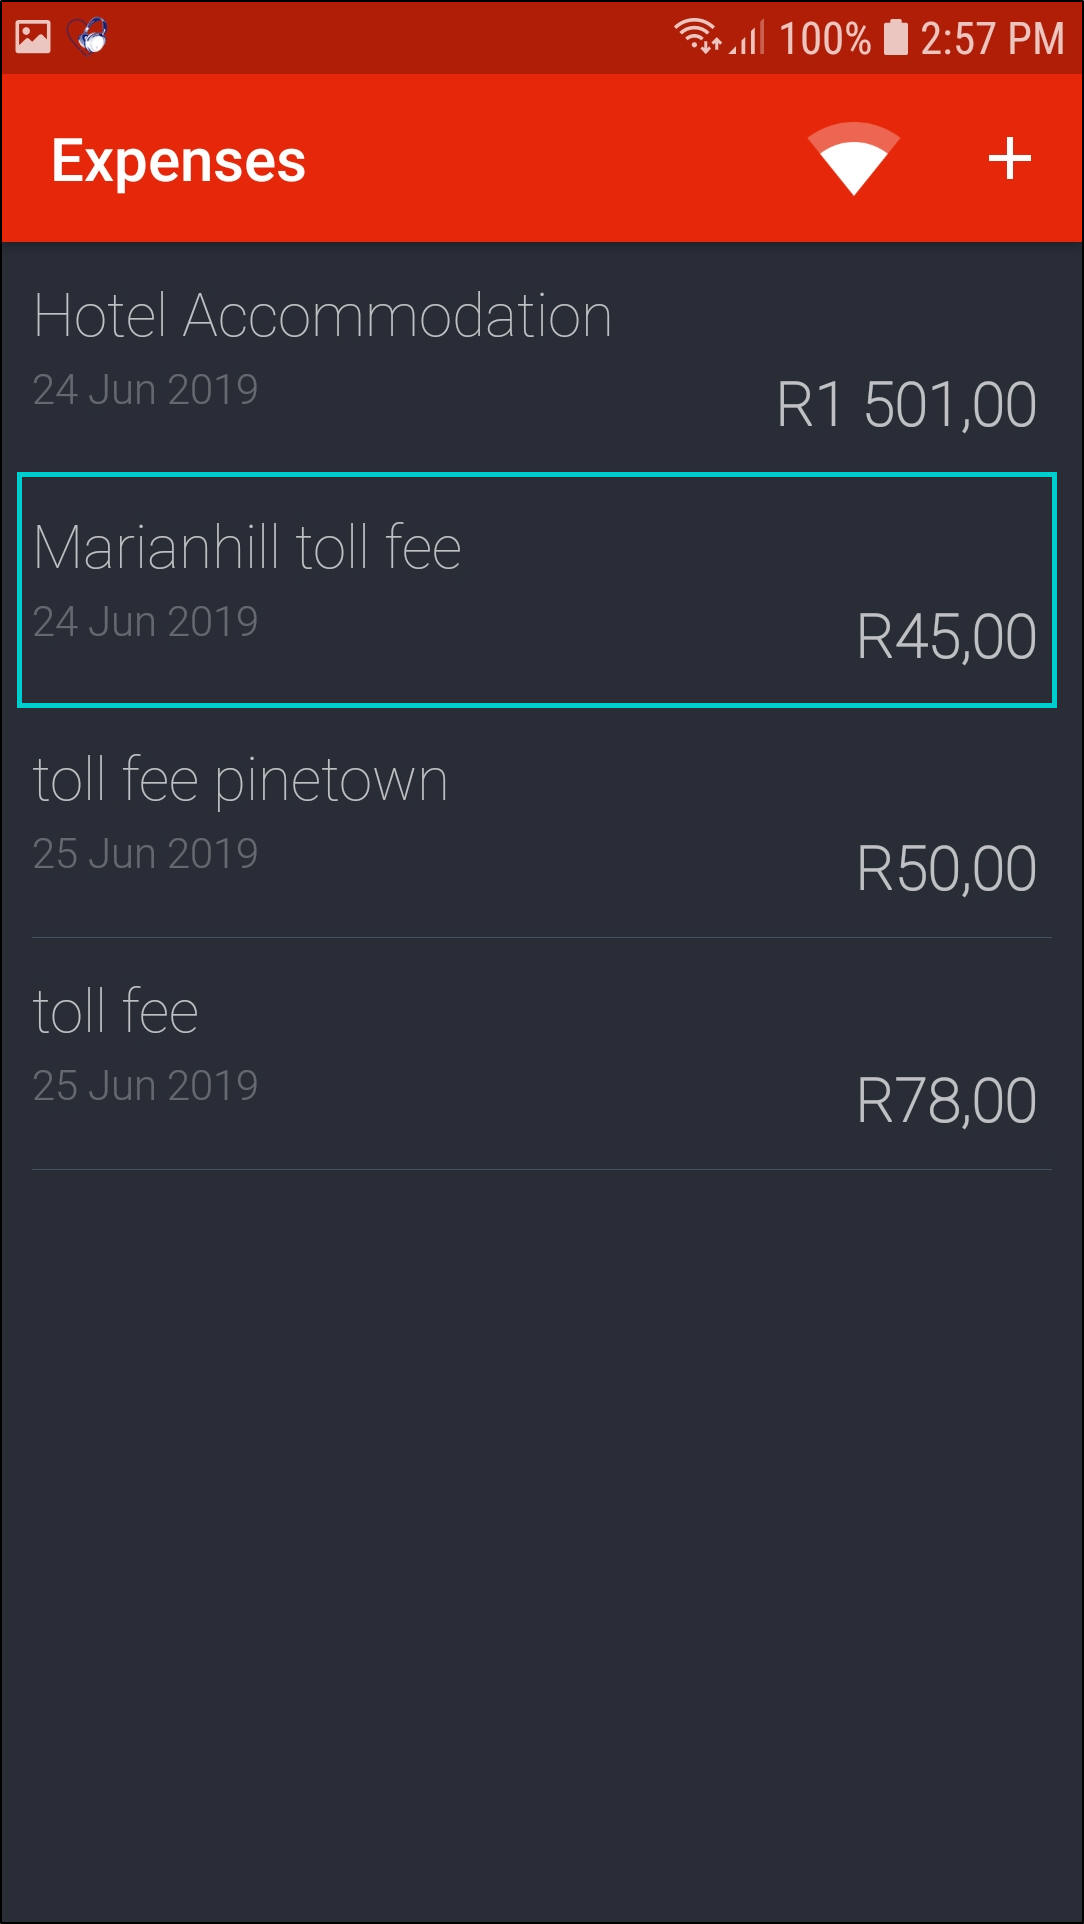
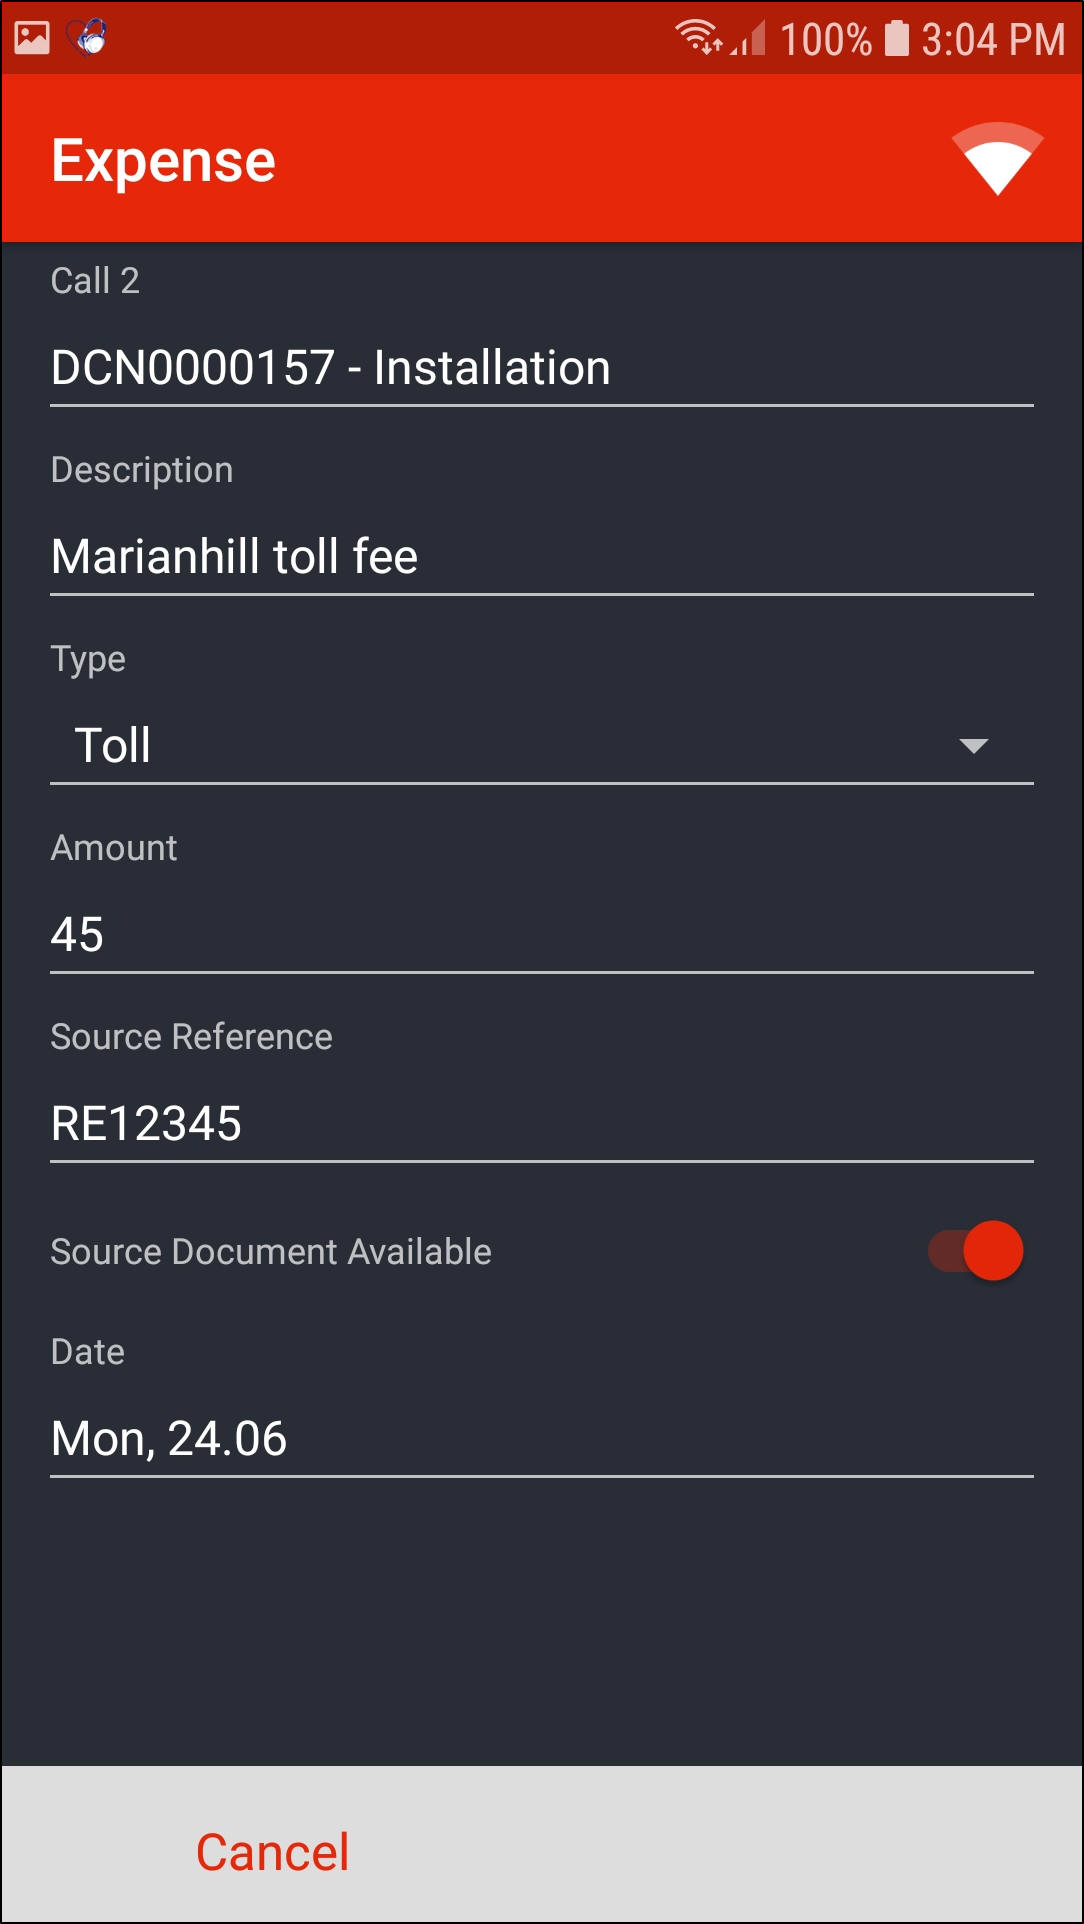
- The Expense screen will be displayed.
- Call [ ]: This will auto populate with the call number of the expense you are currently viewing.
- Description: This shows the call / project description.
- Type: This shows the expense type.
- Amount: This shows the expense amount.
- Source Reference: This shows the receipt number if applicable.
- Source Document Available: This shows whether the source document is available or not.
- Note 1: When the Toggle button is to your left and grey in colour it means the source document is not available.
- Note 2: When the Toggle button is to your right and red in colour it means the source document is available.
- Date: This shows the date the expense was logged.
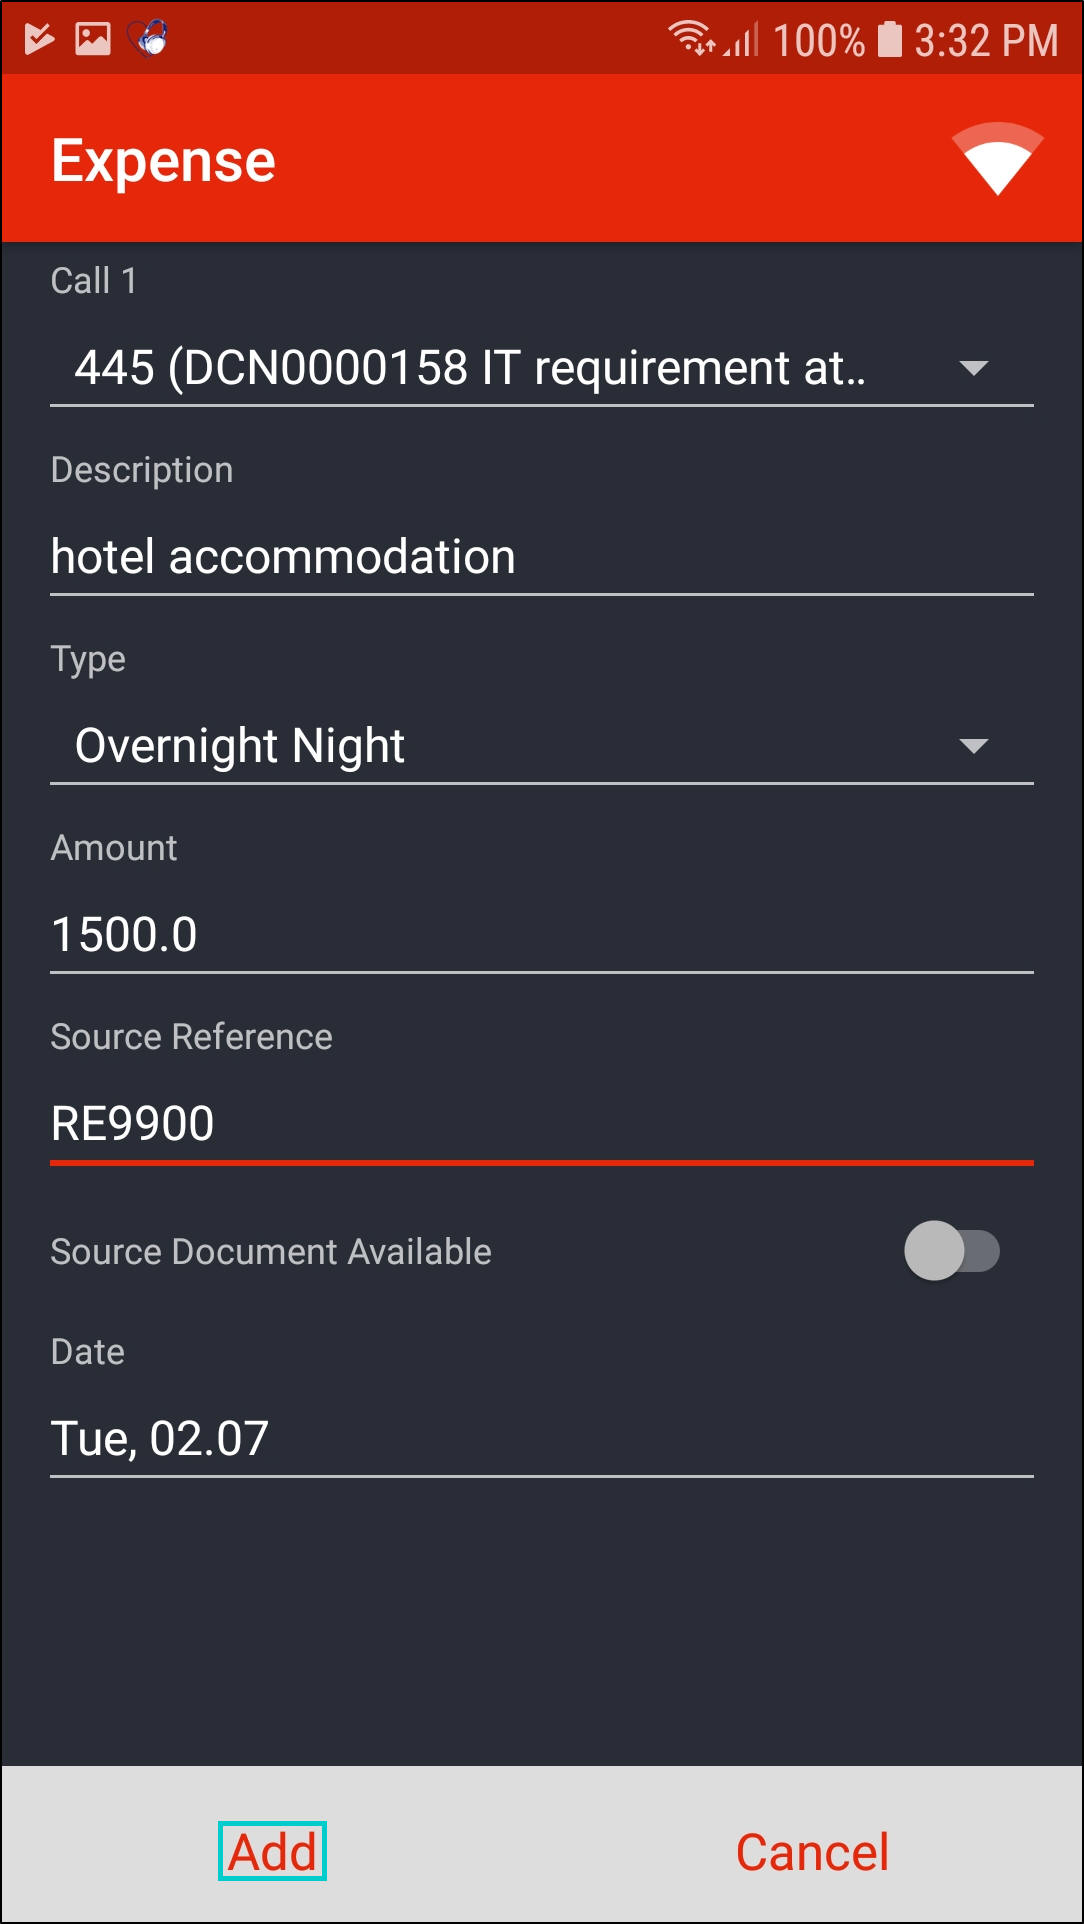
Add an Expense
- Click on the '+' icon in the Expenses screen.
- The Expense screen will be displayed.
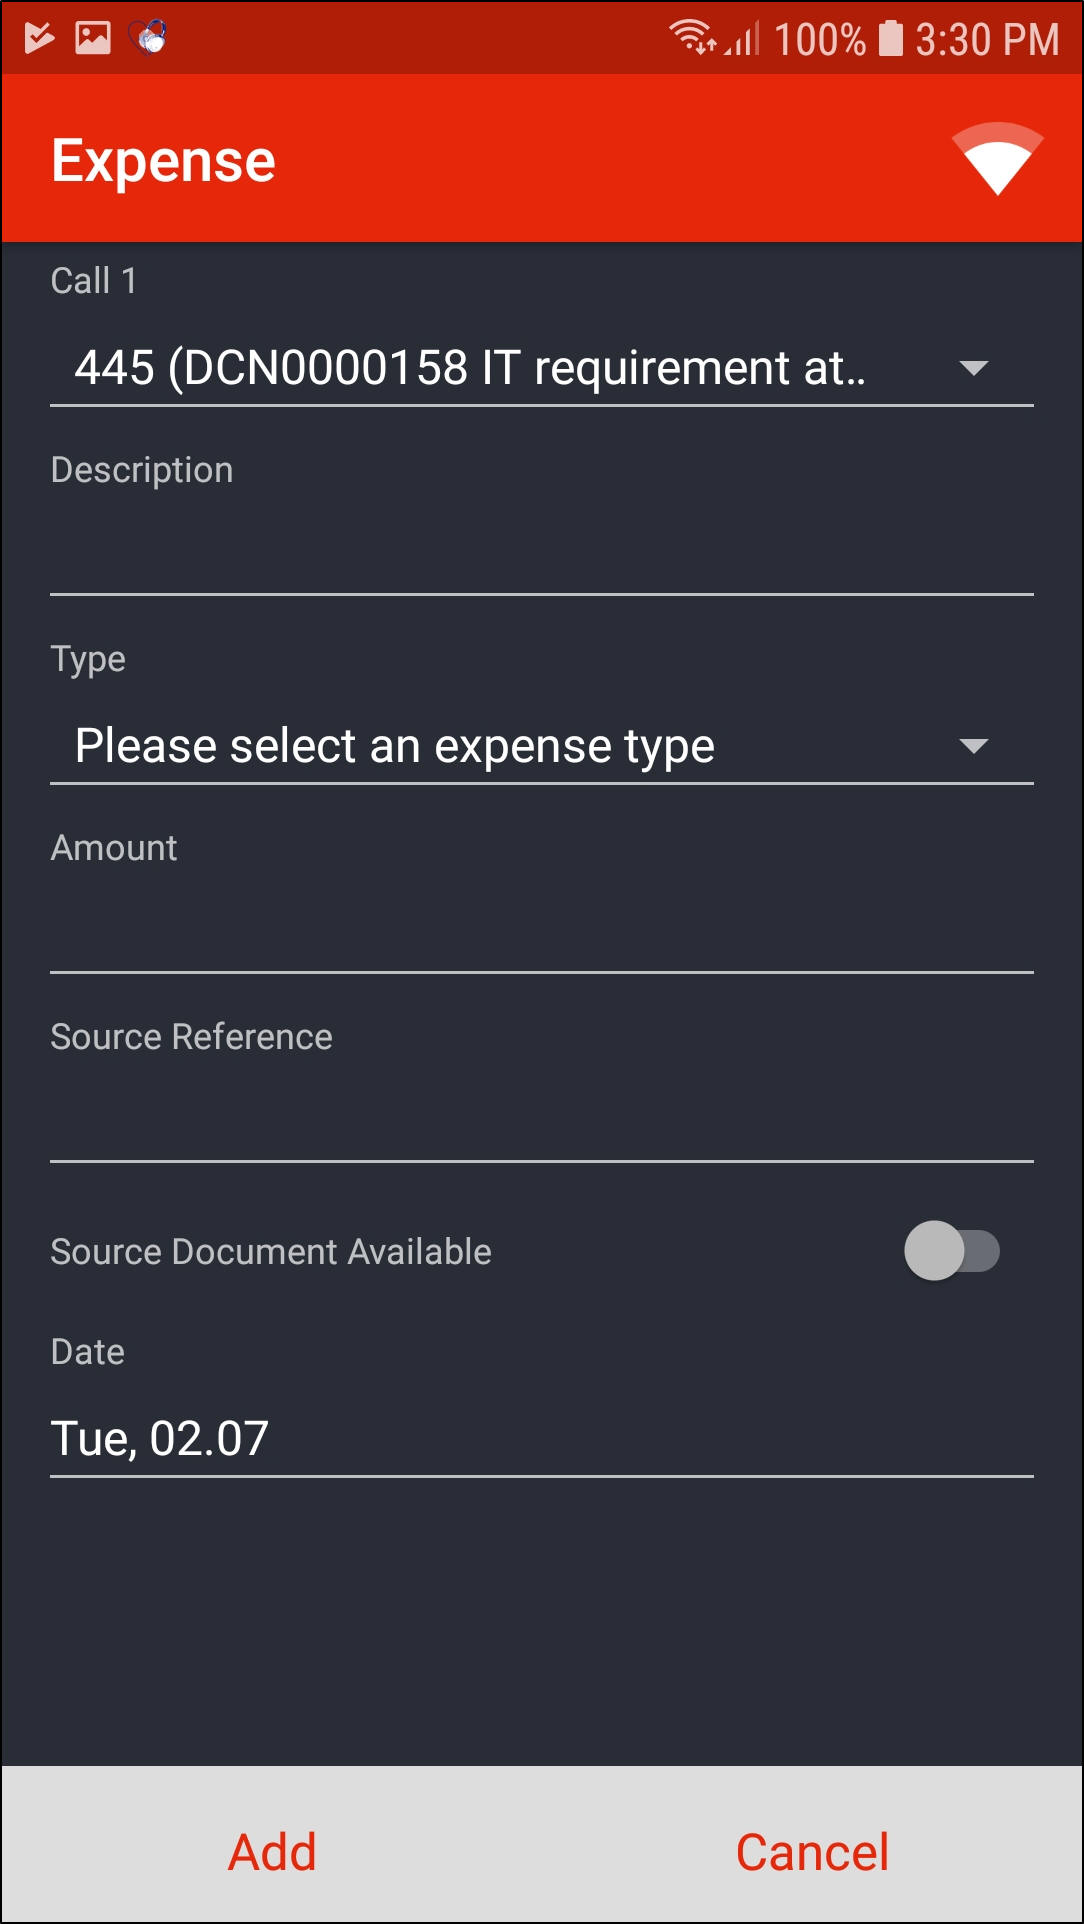
- Call [ ]: This will auto populate with the call number you are currently working on but you can change this by clicking on the down arrow and selecting a different call.
- Description: Type in the relevant description.
- Type: Click on the down arrow and select the relevant expense type.
- Amount: Type in the Expense Amount.
- Source Reference: Type in the Receipt Number if applicable.
- Source Document Available: This is set to Yes by default on save. Only change this if you do not have the Receipt / relating document.
- Date: The current date will auto populate but you can change this by clicking on the date and selecting a different date.
- Click on Add.
- The expense record will now be displayed in the Expenses screen.
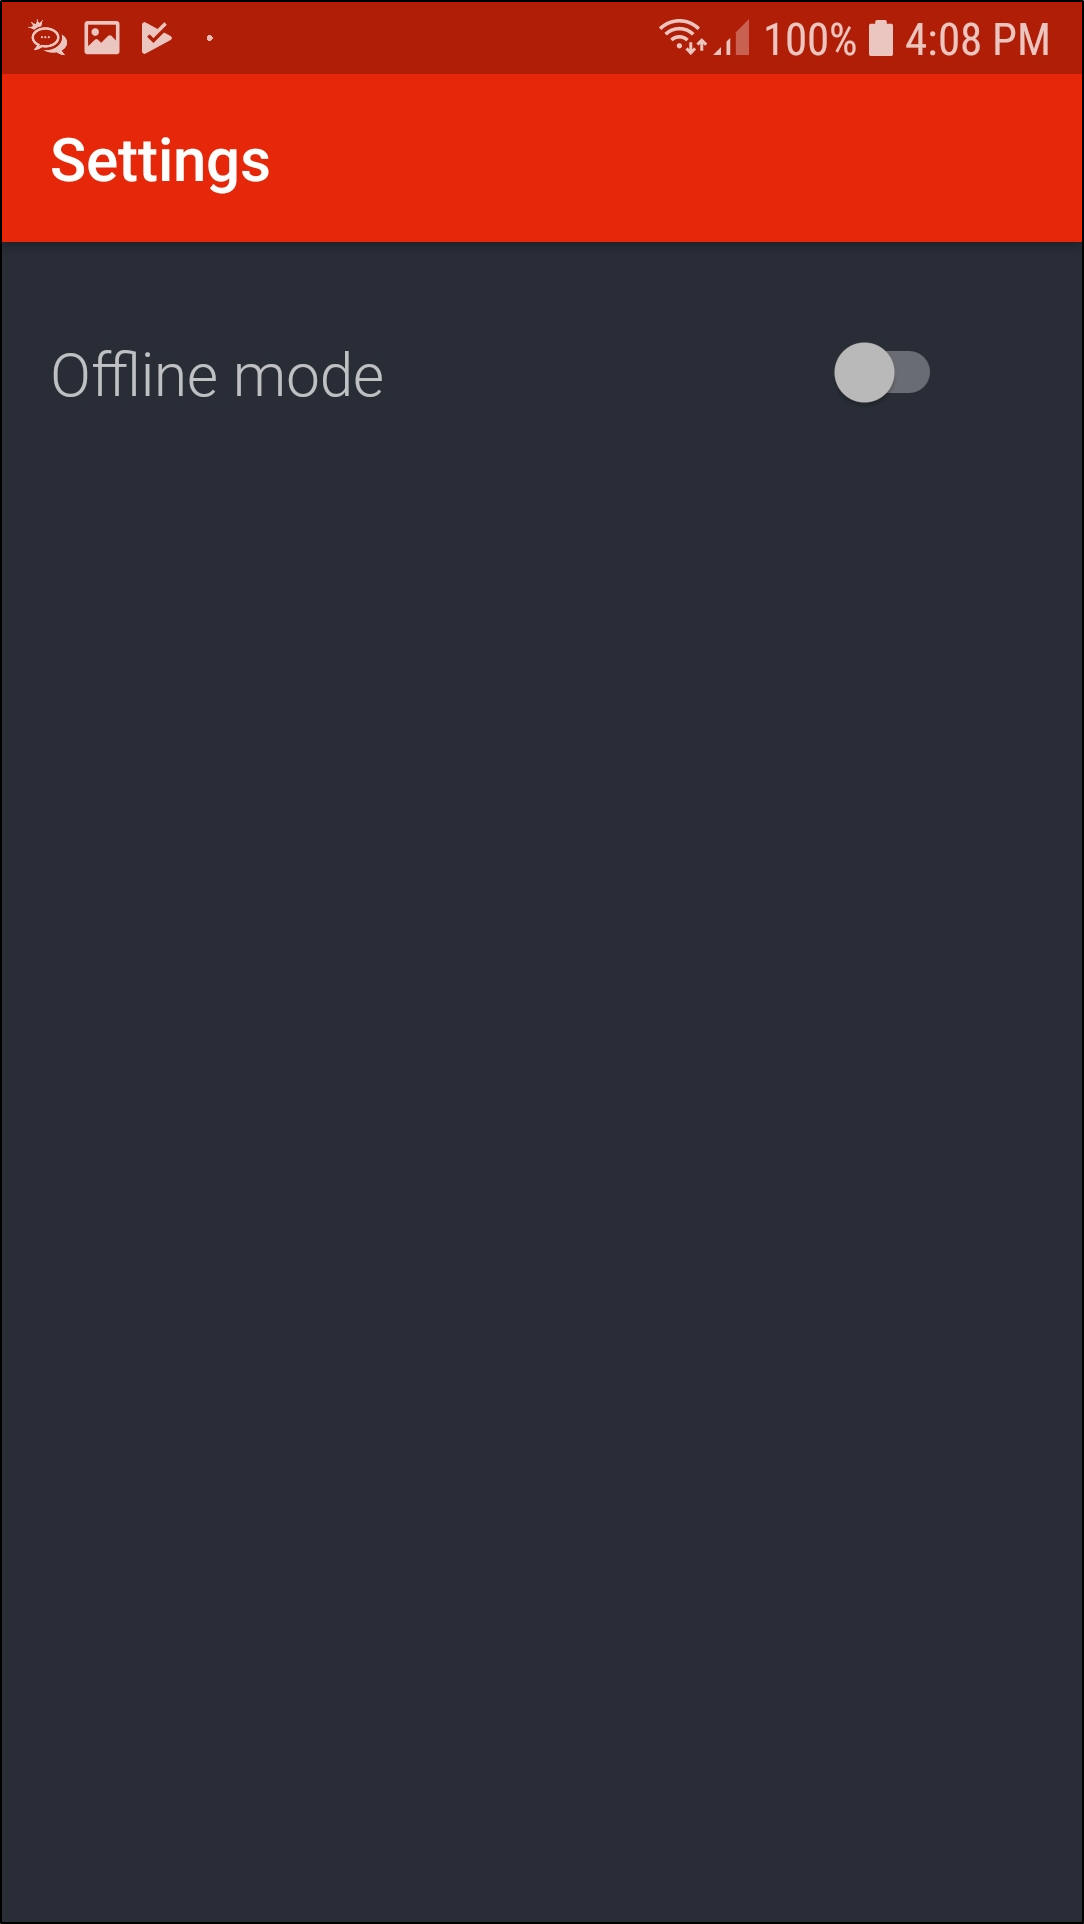
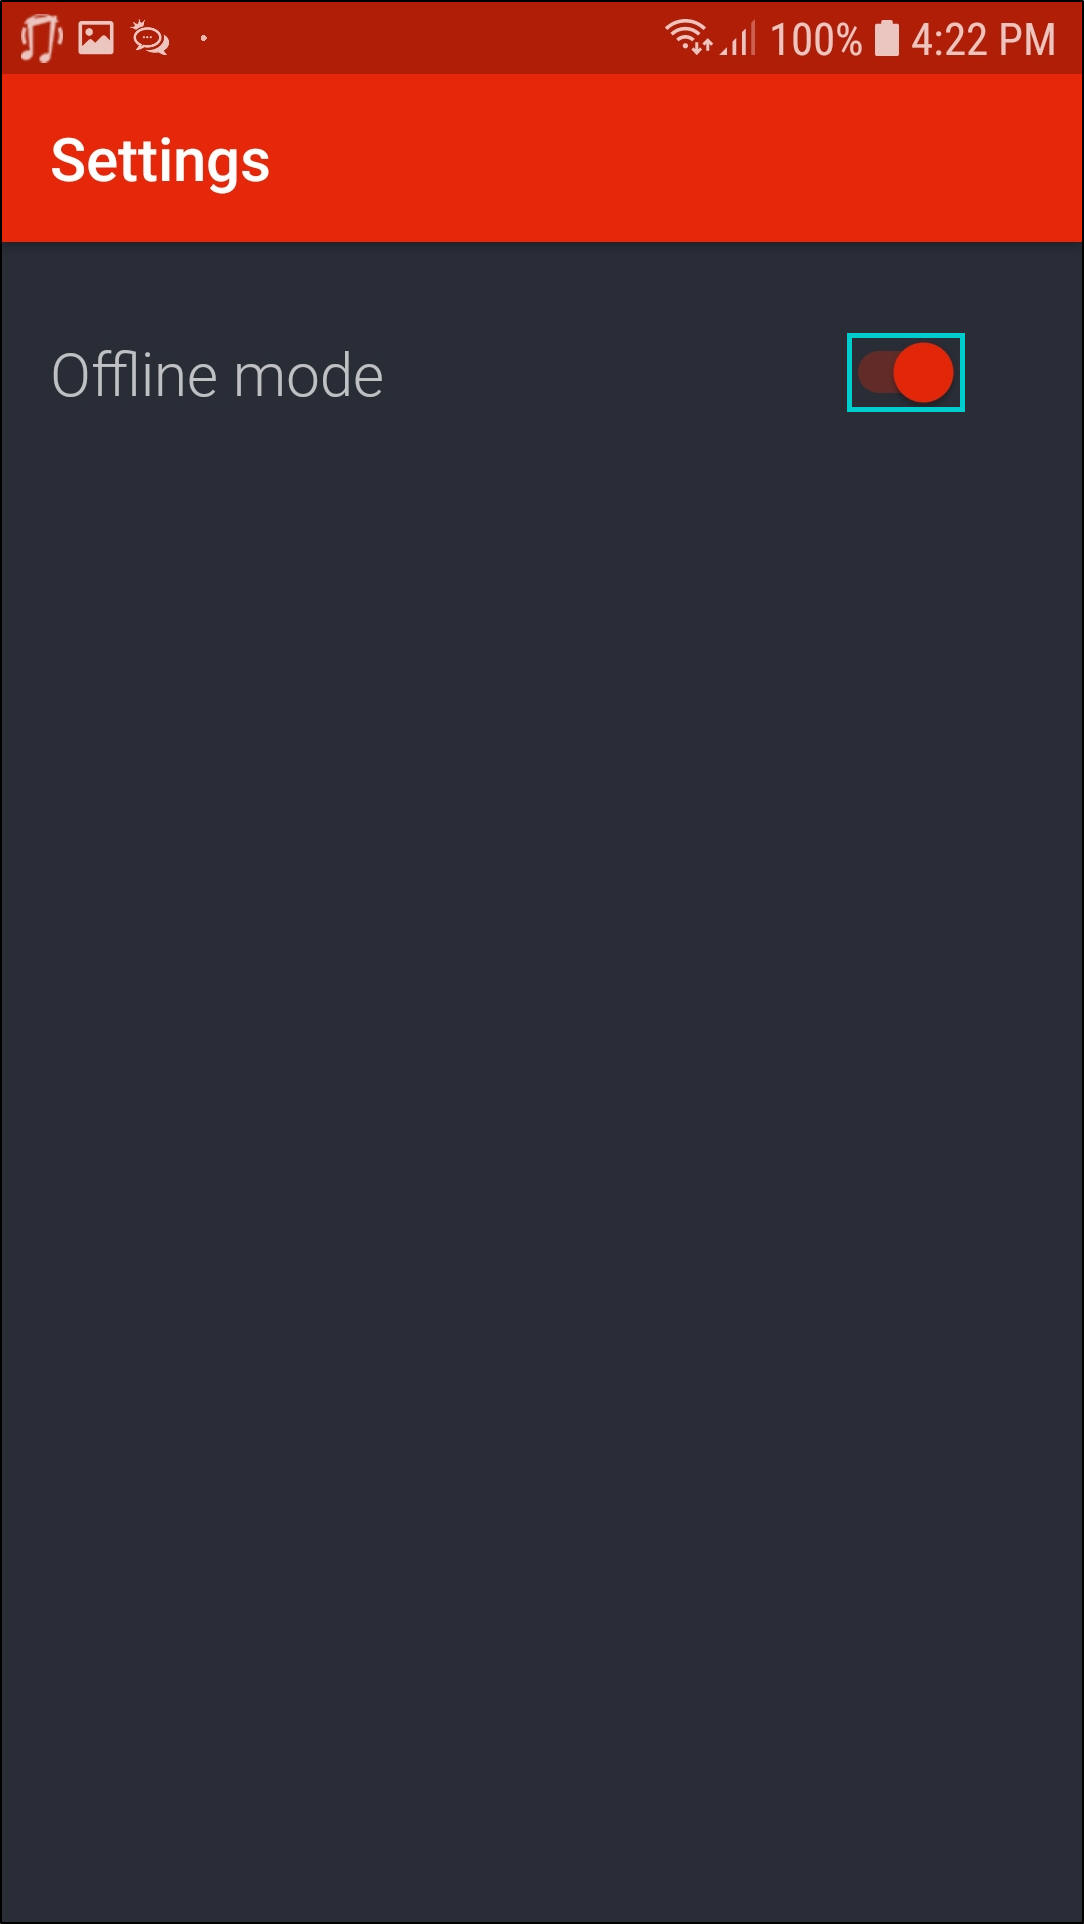
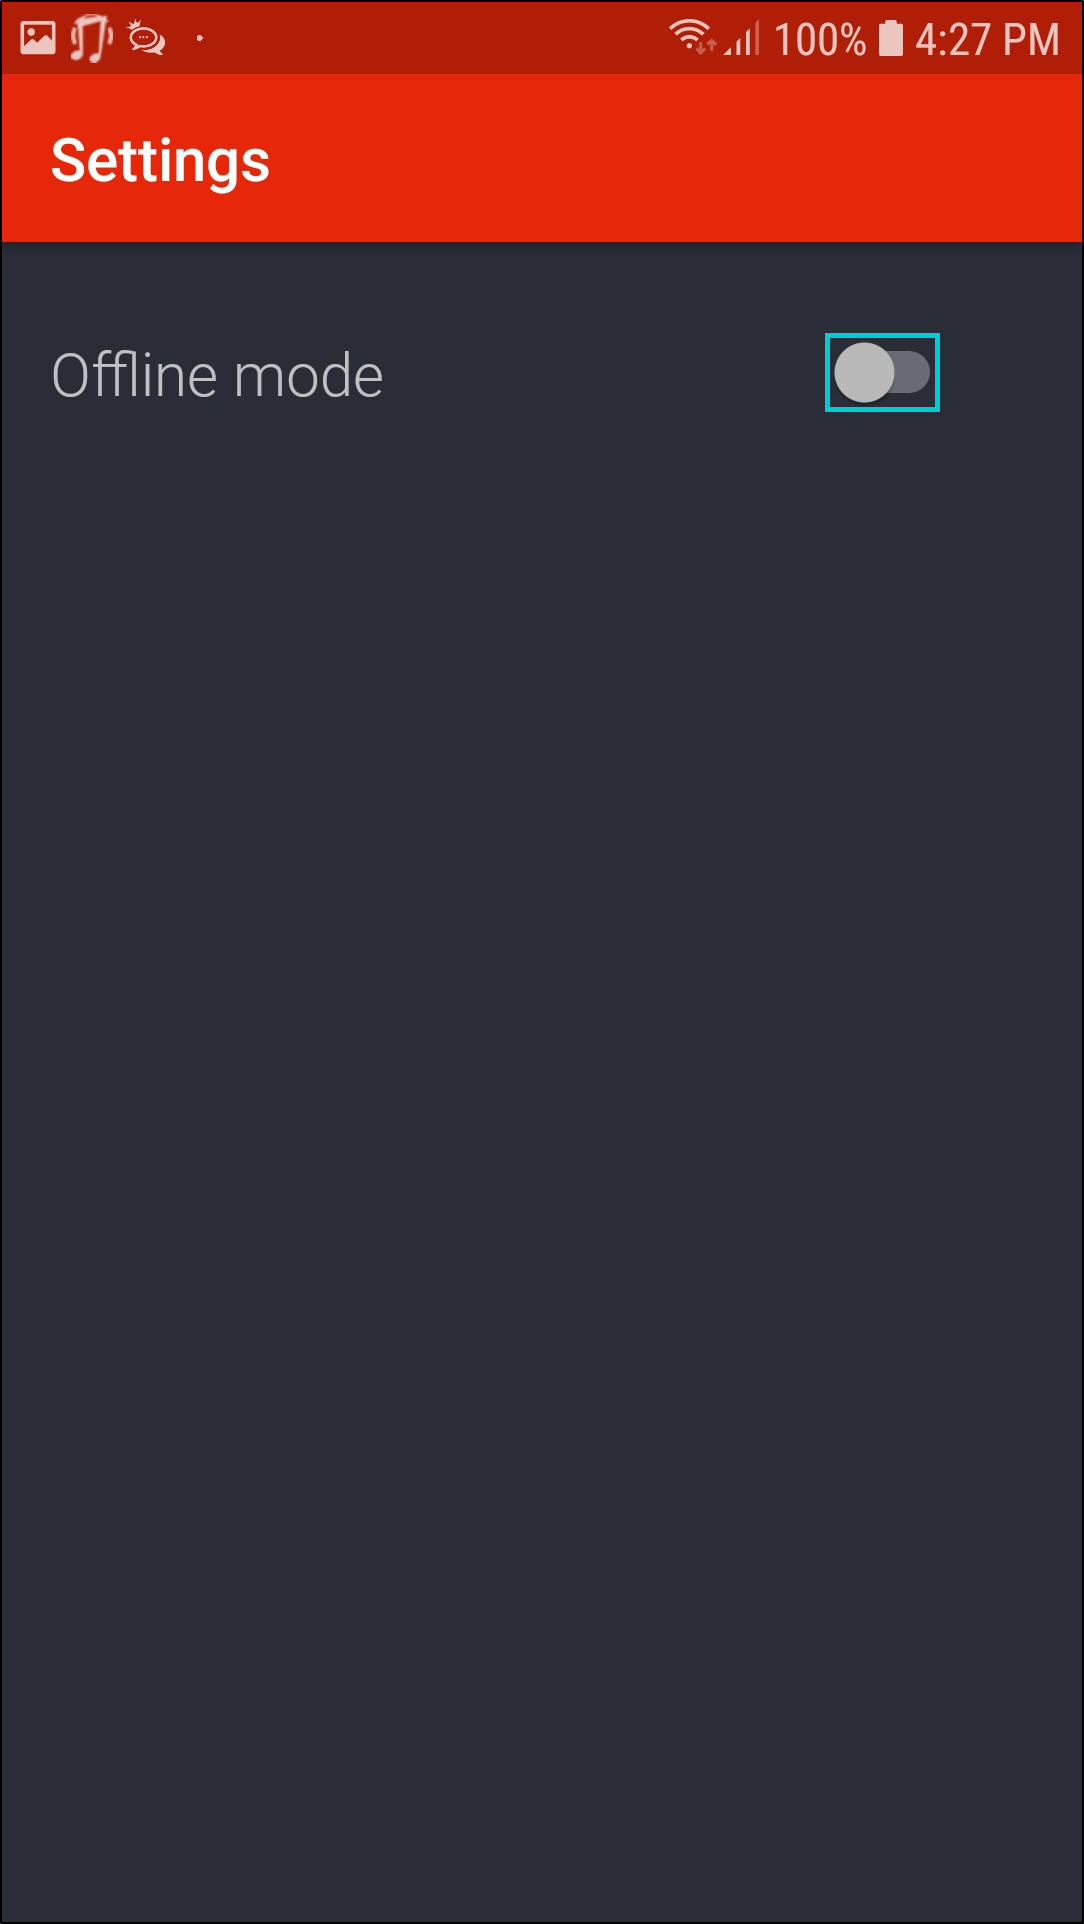
Settings
- This allows you to switch to Online or Offline mode.
- Click on Settings.

- The Settings screen will be displayed.
- By default, Tech Connect will be Online.
- The Toggle button will be to your left and grey in colour.
- To switch to Offline mode, move the Toggle button to your right.
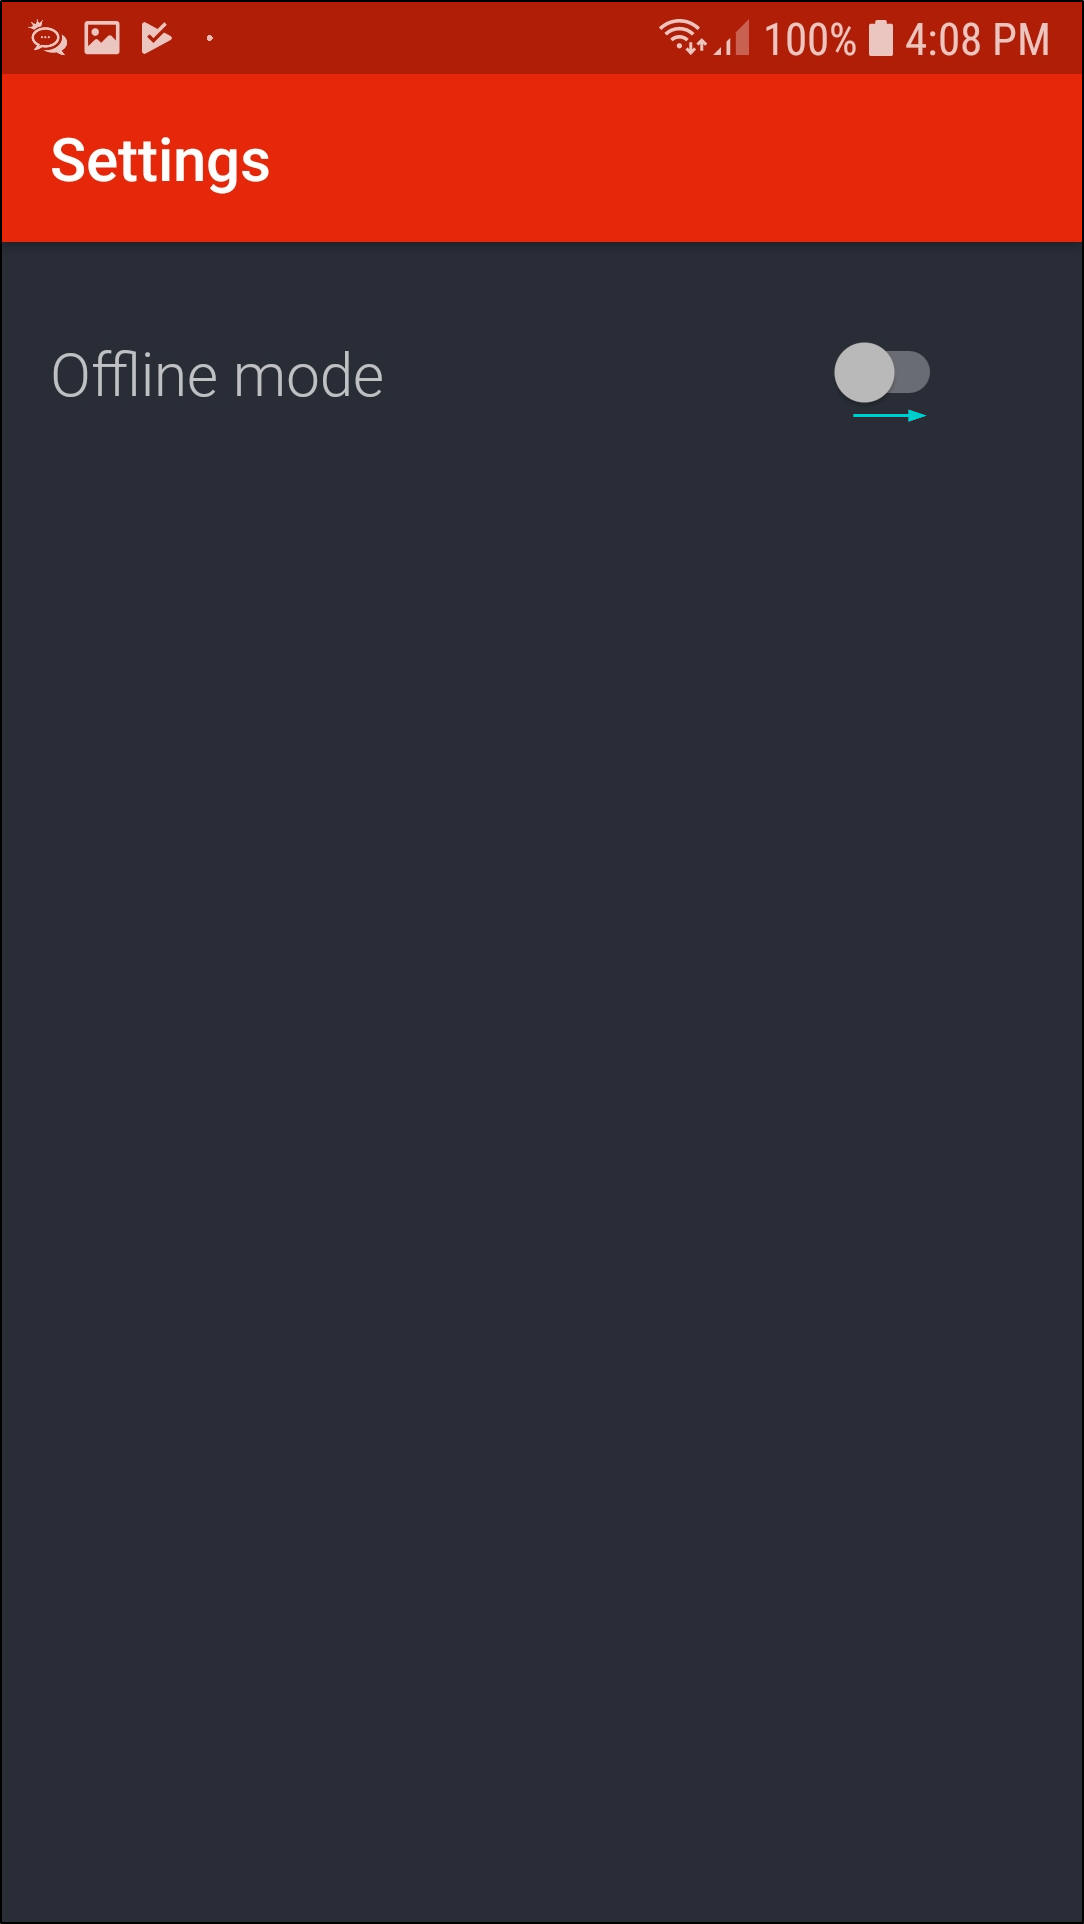
- The Toggle button colour will now be to your right and red in colour.
- To switch to back to Online mode, move the Toggle button to your left.
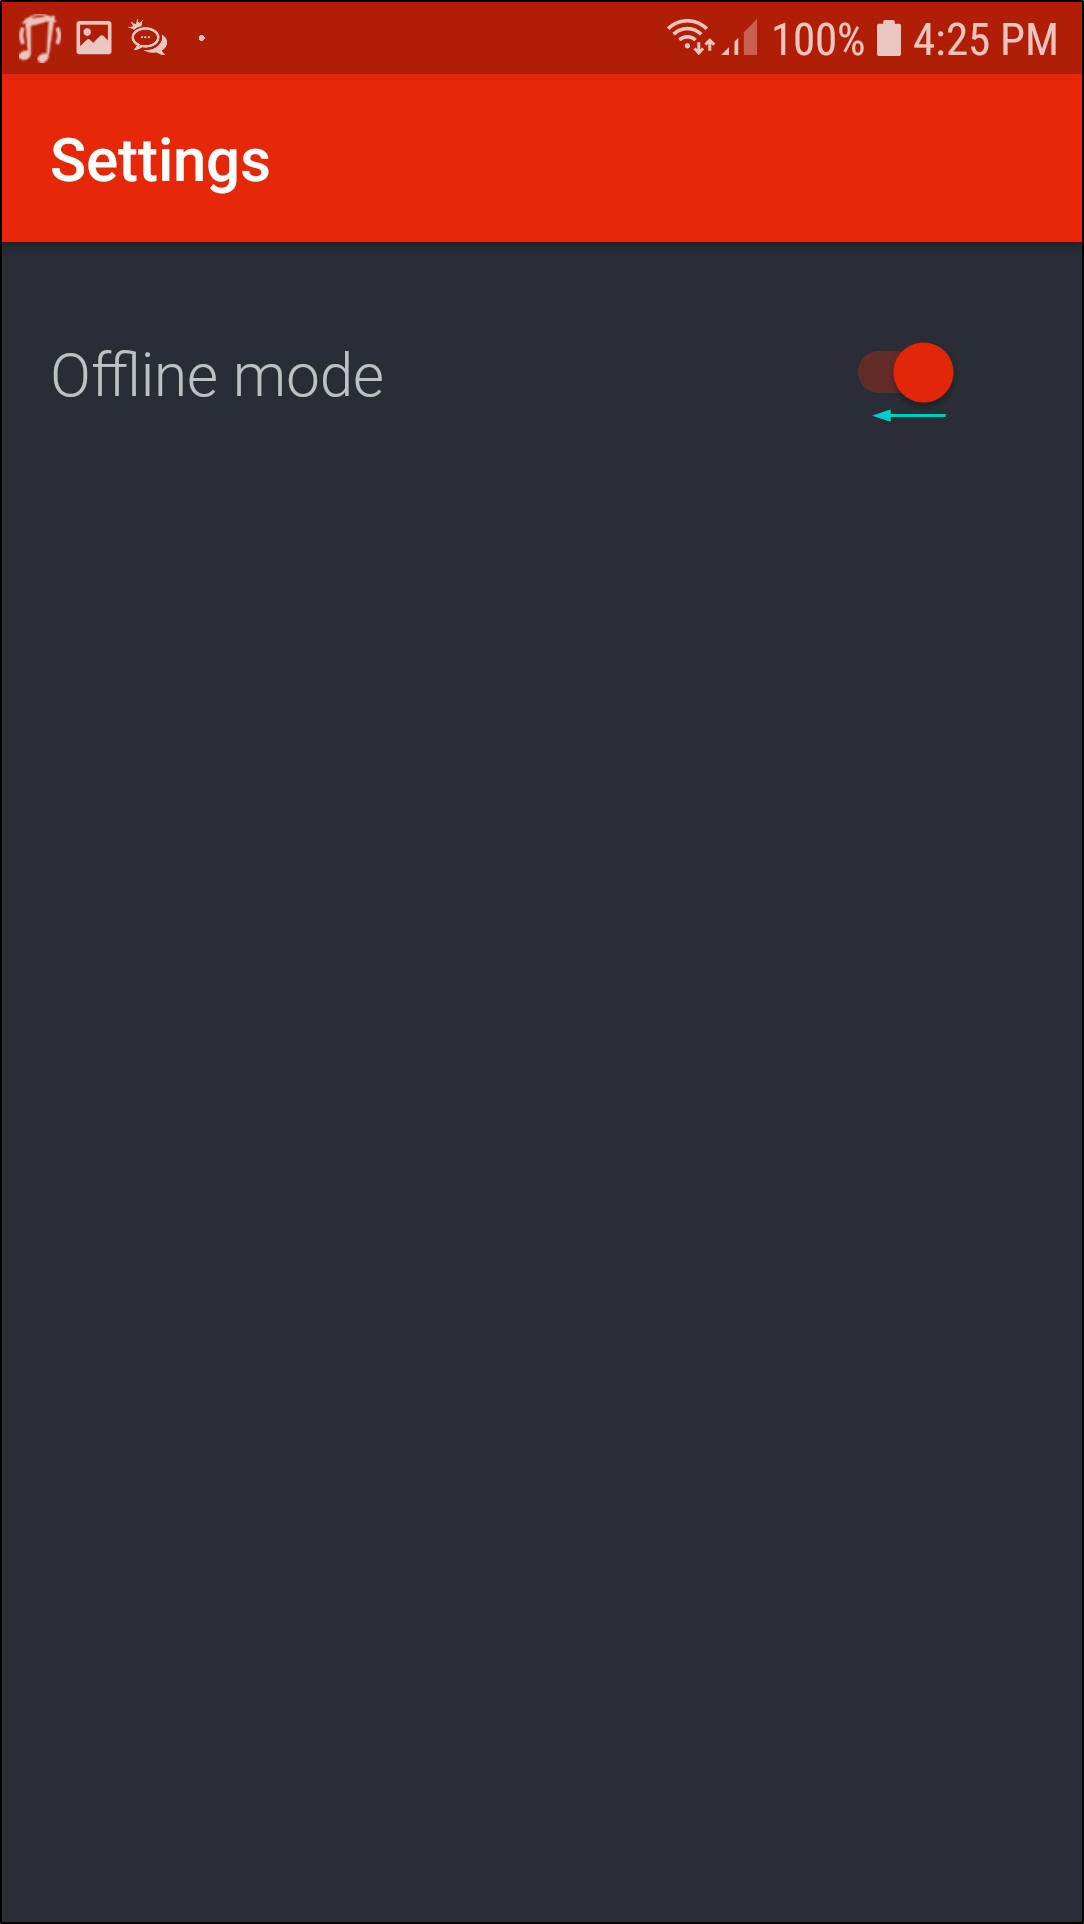
- The Toggle button will now be to your left and grey in colour.
MNU.150.002