Companion Apps
Introduction to BPO Auto Call Invoice Service
(RSI_AutoInvoiceService)
Requirements
- RSI v1.24.0.5 or later.
- The call must either originate from a Sales Order with a valid salesman, or be a service call with a technician linked.
- For the call to be review by the service for auto invoicing, the call and underlying work orders(s) should be set to status ‘Complete’.
-
Can be used in conjunction with:
- RSI_AutoComplete
- RSI_CloseCallService applications.
- the BPO_PostingEngine must be installed and configured
- Cannot be used with ‘Enforce Error Code on Call Closure’ set to Yes
- If the company configuration ‘ReadingRequired’ is set to yes – a call or its underlying work order(s) cannot be closed without adding a meter reading to the call or underlying work order.
Introduction
BPO_AutoCallInvoice attempts to automatically invoice items for completed calls. A Daily Scheduled Task is created during installation to run BPO_AutoCallInvoice at 2:00am every day. Any completed calls that cannot be invoiced are added to a tsv file that can be opened in Microsoft Excel. This exception list includes call summary information and the reason the call cannot be invoiced so that it can be resolved for invoicing.
Completed calls that have no outstanding items and have billable items will be invoiced. The invoice status will be set to ‘New’ and will need to be printed and emailed to the client as required.
A message will be emailed to the selected person in the AutoCallInvoice static data file, for calls that have items outstanding, such as un-actioned Part Requests etc.
Installation
- Double click on the 'BPO_AutoCallInvoice' install file.
- Note: Check that you have the latest version.

- The Installation Wizard will open.
- Click on Next.

- The default location for installation is:
-
C:\Program Files (x86)\CO3 Technologies (Pty) LTD\BPOAutoCallInvoice\
-
It is recommended that you keep this default location. Keeping a standard will make upgrades easier.
- Ensure that Everyone is selected for the install.
- Click on the Next button.

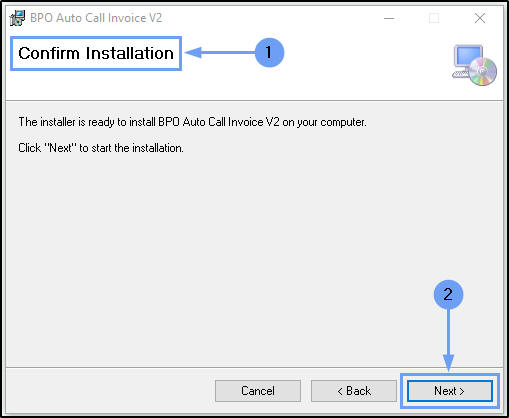
- The installer will ask you to Confirm Installation.
- Click on Next to start the installation.
- The BPO Auto Call Invoice installation will begin.
- Wait for it to be completed.

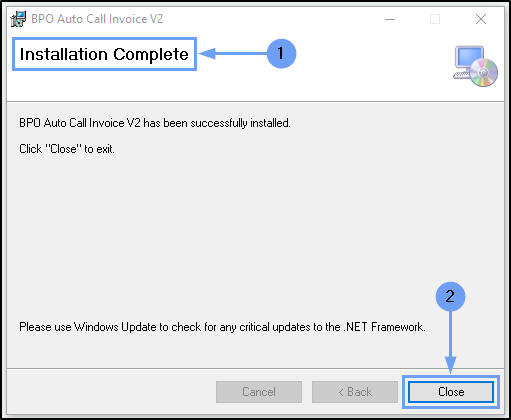
- Once Installation is Complete.
- Click on Close.
Environment Configuration
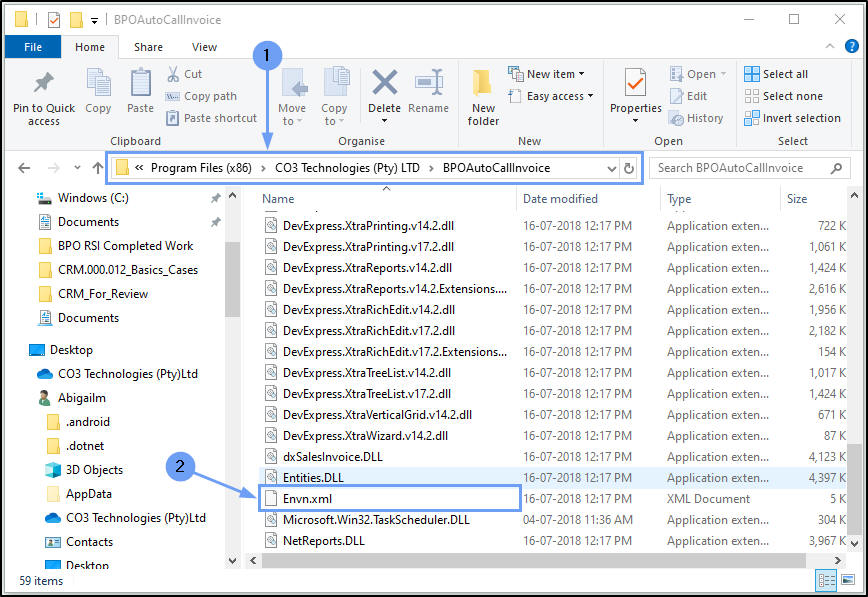
- In your File Explorer, search for the following file location:
-
C:\Program Files (x86)\CO3 Technologies (Pty) LTD\BPOAutoCallInvoice
- Right click on the Envn.xml file.
- The File menu will open.
- Select to Edit with Notepad++.
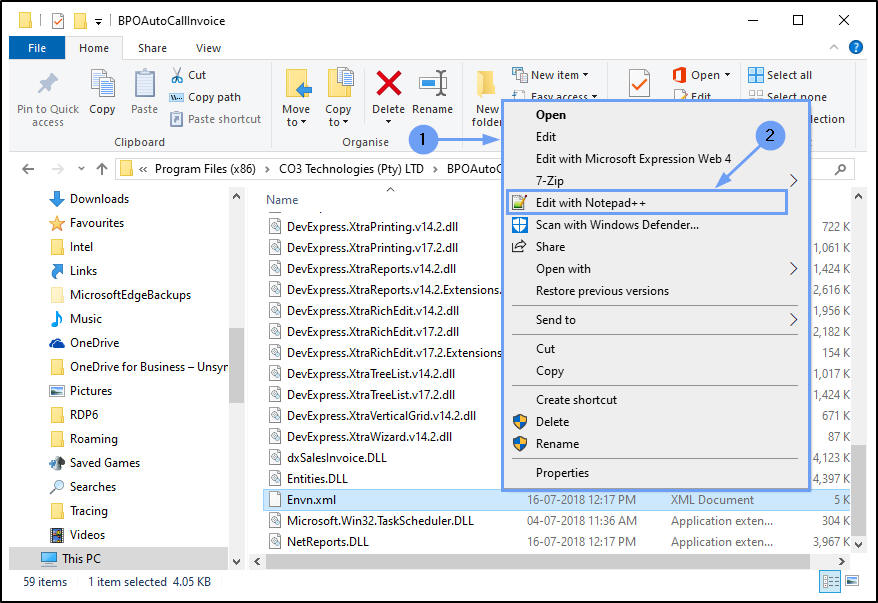
The xml file will open in Notepad++.
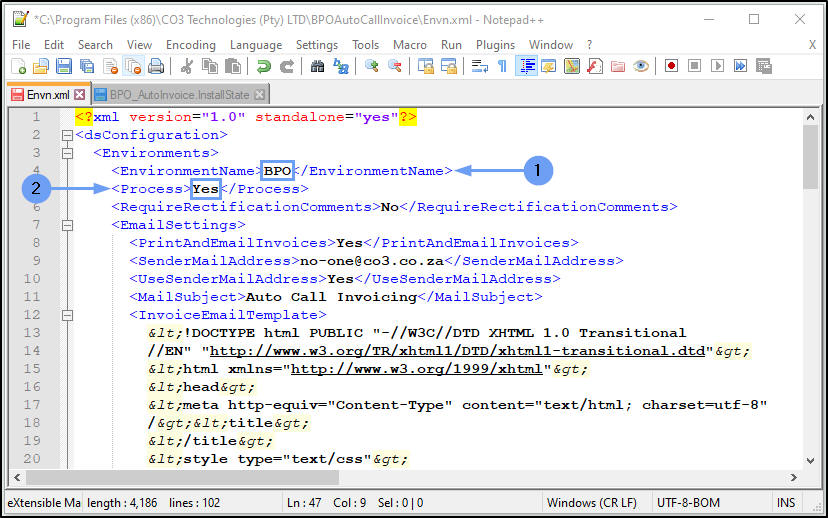
- Type in the Environment Name as defined for this database, in the Service Manager.
- Select Yes to Process the selected environment.
Service / Static Data Configuration
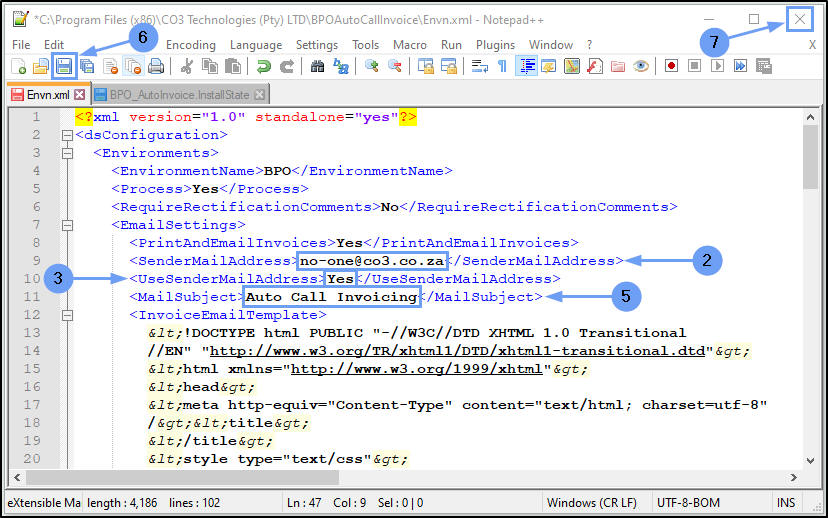
In order to email the Invoice to your client, you need configure these email settings:
- SMTP Server: Type your company's SMTP server details ? CHECK ?
- Sender Mail Address: Type in the email address that should be used for the Sent From address.
- Use Sender Mail Address: Select Yes to display the Sent From address.
- Copy To Address: Type in the email address(es) that should be copied in on the email when it is sent. ? CHECK ?
- Mail Subject and Mail Body: These are populated with defaults, but you can type in any changes, as required. ? CHECK ?
- When you have finished editing the details, click on Save.
- Close Notepad++.
Configured Scheduled Task
Once you have done the service configuration, you need to set up a Scheduled Task in Windows. Ensure that the service runs whether user is logged in or not and runs with Administrator rights. Test the Scheduled Task to ensure it is configured and running correctly.
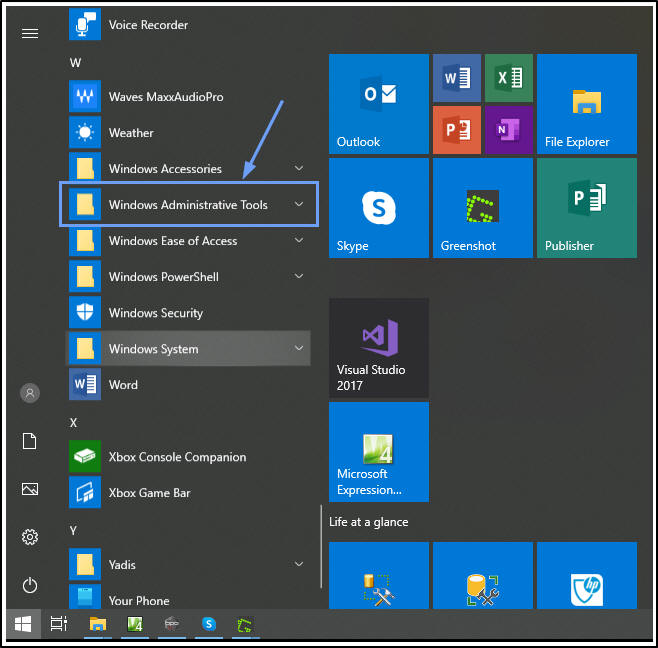
- Select the Windows icon in your taskbar.

- In the Windows pop up menu, search for and select Windows Administrative Tools.
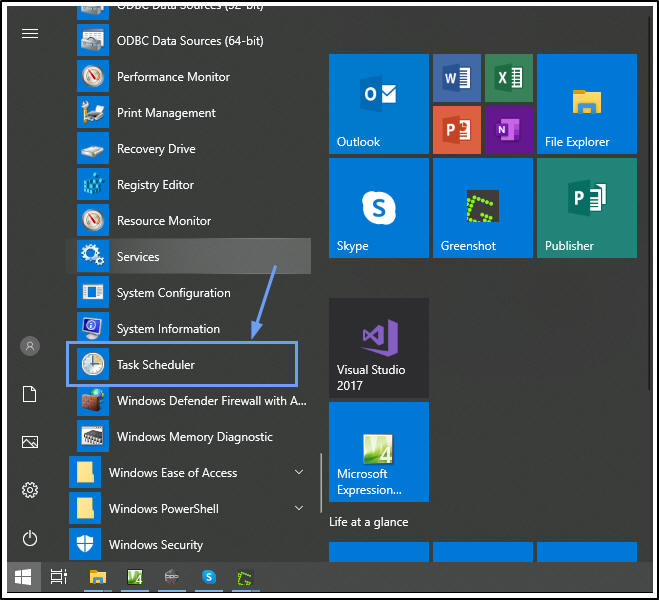
- In the Tools pop up menu, search for and select Task Scheduler.
- The Task Scheduler screen will open.
- Click on Task Scheduler library.

- Select BPO_AutoCallInvoice in the Name panel.
- Ensure that the service runs whether user is logged in or not and that it
- Runs with Administrator rights.
- Test the Scheduled Task to ensure it is configured and running correctly ? CHECK ?.

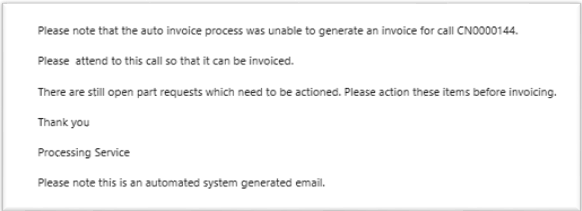
Example Email
-
A message will be emailed to the selected person in the BPO_AutoCallInvoice
static data file, for calls that have items outstanding, such as
un-actioned Part Requests, etc.
CAP.003.001