Security
User and Group Security - Create a New User
Before creating a new user , remember the difference between a user and an employee.
Each employee within the company is loaded onto the system as an Employee, with his/her details. These details would relate to what the company needs to know about its employees and can include the following:
- Personal Details, e.g. Phone Number and Email Address
- Banking Details
- Licenses and Training Details
- Craft Details (Skill or Job Title)
By loading your employees correctly, you will be able to keep track of employee shifts and manage your resources more efficiently.
Users on the other hand, are employees (or management), who require access to the system and therefore require a user login.
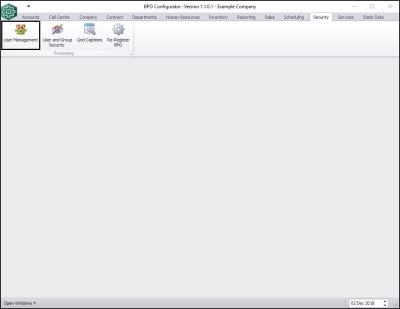
| Ribbon Access: Security > User Management |
-
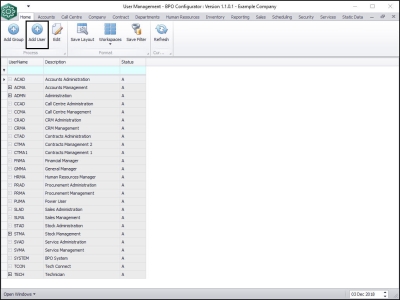
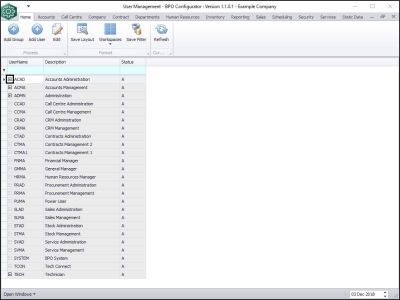
The User Management screen will be displayed.
- Click on Add User.
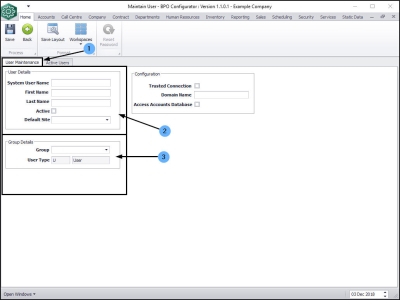
The Maintain User screen will be displayed.
- Ensure that the User Maintenance tab is selected.
- User Details
- System User Name: Type in the name the user will use to log in to BPO. The standard convention is: User's First Name with the first letter of their Surname appended without a space, e.g. TomS (for Tom Seger).
- First Name: Type in the user's first name.
- Last Name: Type in the user's last name.
- Active: Set this user as 'Active' by clicking on this check box.
- Default Site: You can click on the drop-down arrow and select from the drop-down list, the default site for this user.
- Group Details
- Group: You can click on the drop-down arrow and select from the drop-down list, the group that this user belongs to.
- User Type: This will auto populate with U - User and is un-editable.
- Note:
BPO will pull through the user's Windows login name to the BPO
Username first during login, so use this for the username if you wish to
simplify login. The username is not case sensitive.
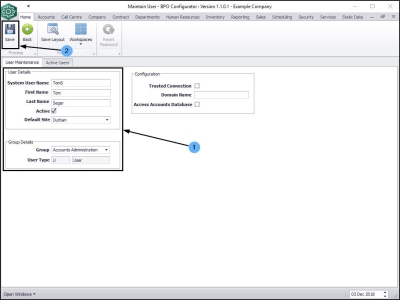
- When you have finished adding the new user details,
- Click on Save.
You will return to the User Management screen.
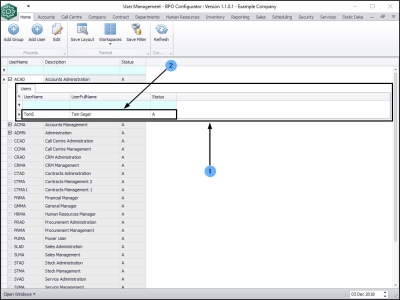
- Click on the expand button in front of the group that you linked the new user to.
- In this example, the new user was linked to the Accounts Administration group.
- The Users frame will be expanded for that group.
- Here you can see that the new user has been added to this group user list.
-
Note:
A default password is assigned to the user on save:
P@ssword123
. This should be changed by the user as soon as possible by following the
Changing your Password process.
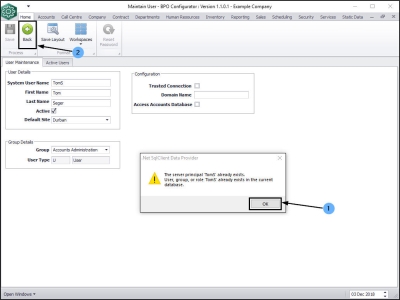
- To prevent duplicates in the system, you may get the following message when you try to save the new user details in the Maintain User screen:
- The server principal '[ ]' already exists. User, group, or role '[ ]' already exists in the current database.
- Click on OK and then on Back to return to the User Management screen, where you can check the group list to see if the user is indeed already on the system.
MNU.085.005
