Static Data
Static Data - Calls: Call Priority
| Ribbon Access: Static Data> Static Data |
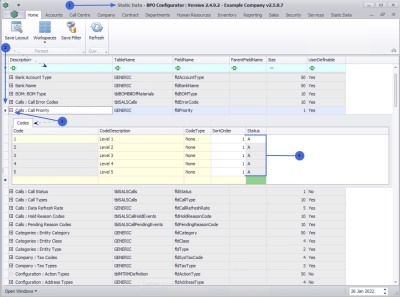
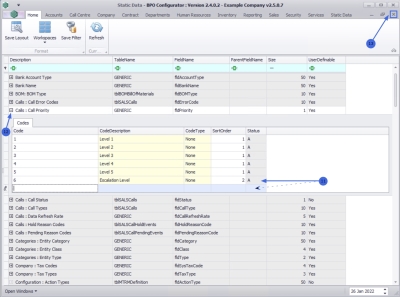
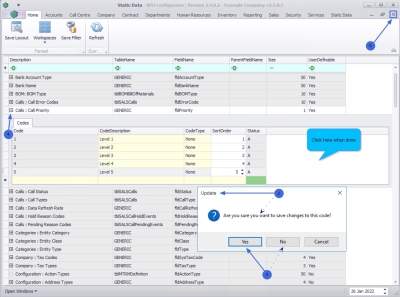
- The Static Data listing screen will be displayed.
- Use the filter row or scroll down the list until you find the Calls: Call Priority row.
- Click on the expand icon to expand the Codes frame.
- From here you can view the call priority codes currently on the system.
Add a Call Priority
-
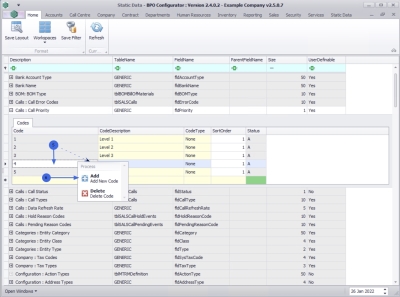
 Right click in a
row in the
Codes
data grid to display the Process menu.
- Click on Add - Add New Code.
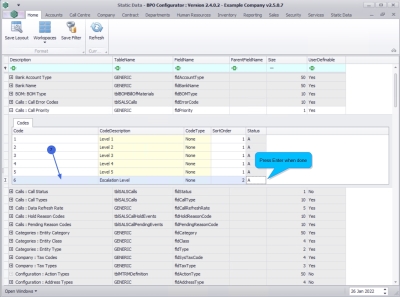
- An available row will be added in the Codes data grid for adding the new Call Priority Code.
- Code: Click in this text box to type in a one digit code for the new call priority code.
- Code Description: Click in the text box to type a description for the call priority code.
- Code Type: This field will auto populate as None and may remain as is.
- Sort Order: Click in the text box to type in or use the arrow indicators to select the sort order for the new error code.
- Status: The status field will auto populate with an A - Active status.
- When you have finished adding the call priority code details, press Enter.
-
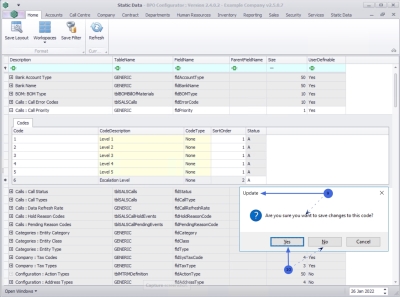
When you receive the
Update message to confirm;
- Are you sure you want to save changes to this code?
- Click on Yes to save the code, or
- Click on No to remove the information from the row, enabling you to add new call error information.
- The call priority code will be saved and a new row will be added to the Codes data grid.
- Collapse the Codes frame.
- Close the screen when done.
Remove a Call Priority
You may need to remove a Call Priority Code that is no longer required.
-
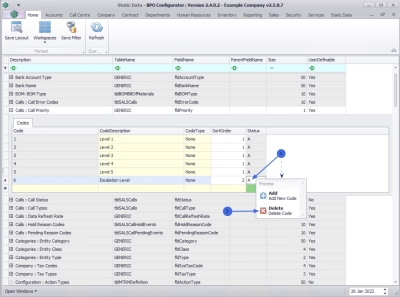
 Right click in the
row of the
Priority Code that is no longer required to display the Process menu.
- Click on Delete - Delete Code.
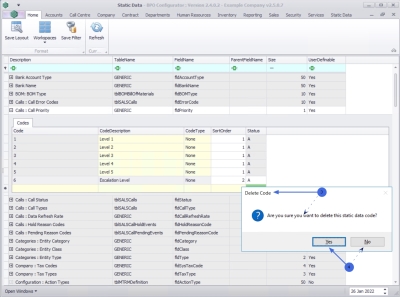
- When you receive the Delete Code message to confirm;
- Are you sure you want to delete this static data code?
- Click on Yes to remove the code, or
- Click on No to ignore the request and to leave the code in the Call Priority Code list.
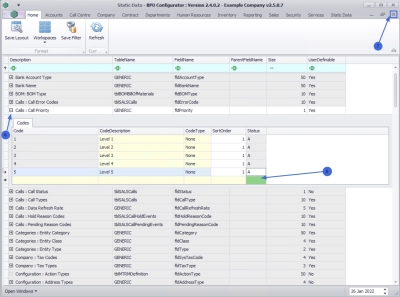
- The Call Priority Code will be removed from the list.
- Collapse the Codes frame.
- Close the screen when done.
Edit Call Priority
You can make changes to the Code Description, Code Type or the Sort Order of the Call Priority Code.
- Code Description: Click in the field and replace the existing description with the new description, if required.
- Code Type: Click in the field to replace the existing code type with a new code type, if required.
- Sort Order: Click in the field to type in, or use the arrow indicators to select a new sort order, if required.
- When you have made the required changes, click anywhere on the Codes frame.
- You receive the Update message to confirm,
- Are you sure you want to save changes to this code?
- Click on Yes to save the changes, or
- Click on No to ignore the change and leave the code as is.
- Collapse the Codes frame.
- Close the screen when done.
MNU.108.056

