Company
Sites - Site Management
Also known as a Company Branch. A branch of a company is a location, main or other, where the same or similar business operations are performed. These branches are all part of the parent company and fall within the same legal entity. Sites are created on Nucleus in order to distinguish transactions by branch, and to define site specific configuration.
| Ribbon Access: Company > Sites |
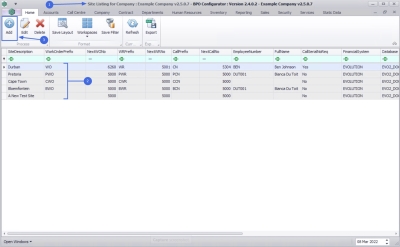
- The Site Listing for Company : [Company Name] screen will be displayed.
- For multi sited companies any sites already created will be listed in the data grid.
Add a Site
- Click on Add.
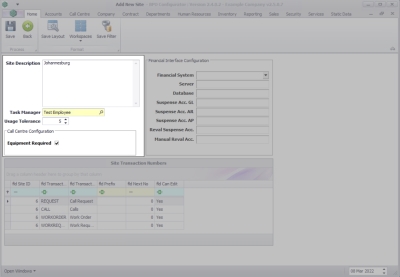
- The Add New Site screen will be displayed.
- Site Configuration:
- Site Description: Click to type in the name of the site or branch you are creating.
- Task Manager:
Click on the search button to auto populate the task manager for the site.
 Note that you will need to edit the site and then link the responsible Service Controller to the new site.
- Usage Tolerance: Click to type in or use the arrow indicators to select the percentage variation in meter readings allowed before a warning is raised, for the site.
- Call Centre Configuration:
- Equipment Required: Click to select the check box to ensure that calls cannot be saved without linking a serialised item.
- Site Configuration:
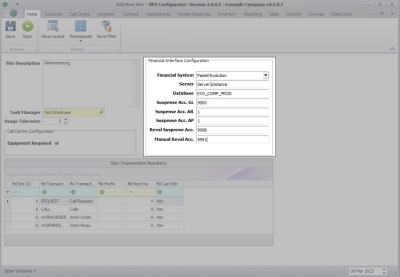
- Financial Interface Configuration:
- Financial System: Click on the down arrow to select the system you wish to integrate with BPO.
- Server: Click to type in the server name where the financial system database is held.
- Database: Click to type in the financial server database name.
- Suspense Acc. GL: Click to type in the GL suspense account for the current site.
- Suspense Acc. AR: Click to type in the AR suspense account for the current site.
- Suspense Acc. AP: Click to type in the AP suspense account for the current site.
- Reval Suspense Acc.: Click to type in the revaluation account for the current site.
- Manual Reval Acc.: Click to type in the manual revaluation account for the current site.
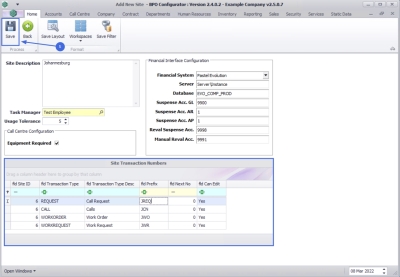
- Site Transaction Numbers
- Site ID: Specify the Site ID position in the Site drop-down list. When the Site ID is set to the number 6, then the site will appear 6th on the list.
- Transaction Type: The transaction types have been auto populated REQUEST, CALL, WORKORDER and WORKREQUEST. Click in the relevant field to modify the transaction type, if required.
- Transaction Type Desc: The description for the transaction type has been auto populated. Click in the relevant field to modify the transaction description, if required.
- Prefix: Click to type in a transactional reference prefix for the site. These prefixes will be appended to the transaction type document specified.
- Next No: If the next prefix number is NOT zero for each transaction type, will only allow the prefix code to be edited.
- Can Edit: Click to specify Yes or No in the relevant field for the transaction type to be edited or not.
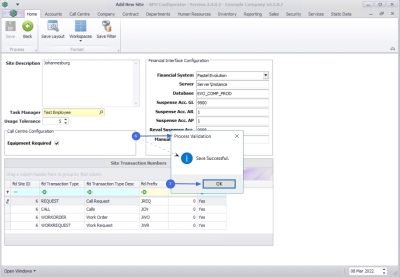
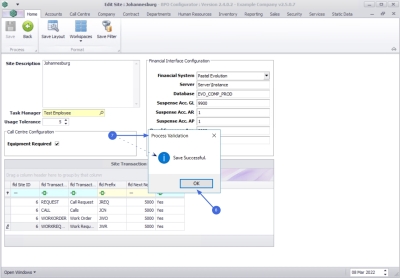
- When you have finished adding the site description, call centre configuration and financial configuration details, click on Save.
- When you receive the Process Validation message to confirm;
- Save Successful.
- Click on OK.
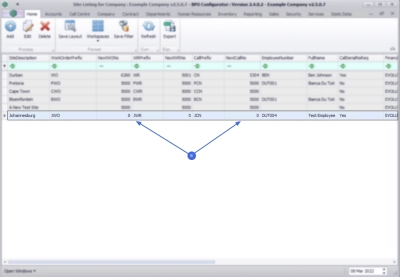
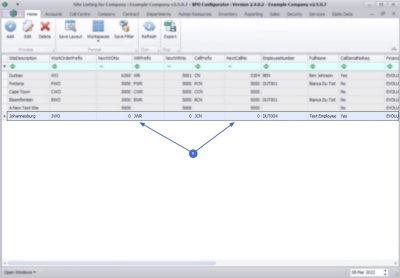
- You will return to the updated Site Listing for Company screen where you can view the new site details.
Edit Site
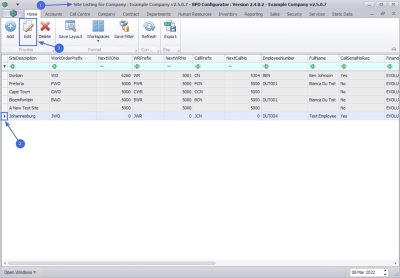
- From the Site Listing for Company : [Company Name] screen,
- Click on the row of the site you wish to edit.
- Click on Edit.
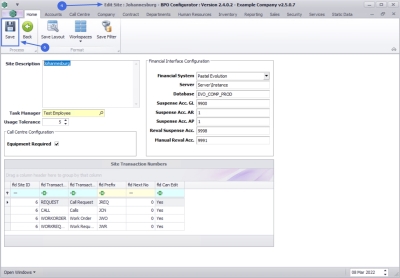
- The Edit Site : [Site Name] screen will be displayed.
- Make the changes as required to the Site, Call Centre Configuration, Financial Interface Configuration or the Site Transaction numbers as required.
- Click on Save.
- When you receive the Process Validation message to confirm;
- Save Successful.
- Click on OK.
- You will return to the updated Site Listing for Company screen where you can view the updated site details.
Delete Site
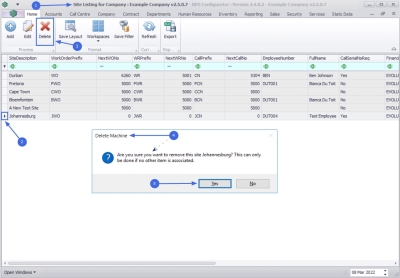
- From the Site Listing for Company : [Company Name] screen,
- Click on the row of the site you with to remove.
- Click on Delete.
- When you receive the Delete Machine message to confirm;
- Are you sure you want to remove this site [Site Name]? This can only be done if no other item is associated.
- Click on Yes.
Export
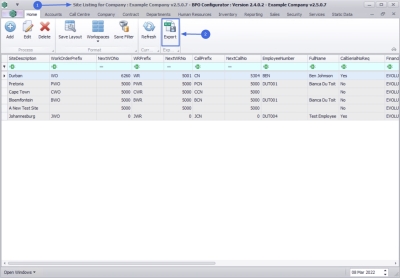
- From the Site Listing for Company : [Company Name] screen,
- Click on Export.
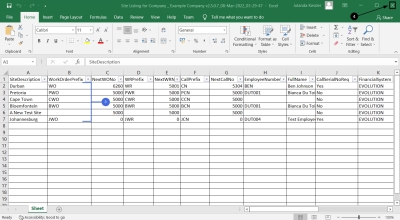
- A list of all the Sites for the company is listed in an Excel Spreadsheet where it can be maintained using the standard Excel features.
- Close the screen to return to the Site Listing for Company screen.
MNU.091.002

