Departments
Set Up
A department must be set up in order to link invoice items to a specific department, e.g. Sales. If a site is selected, then the department will pull through on the Sales Order and Sales Invoice item lines automatically. If you have more than one department, you must select the relevant department for each line.
Departments need to set up to categorise Contracts.
If you have a segmented ledger and post general ledger entries based on departments, you need to ensure that Sales Orders, Sales Invoices, Contracts and Employees are linked to a department.
An employee can only be linked to one department type but can be linked to that department type in more than one site.
| Ribbon Access: Configurator > Departments > Departments |
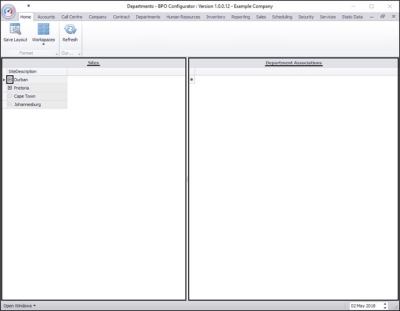
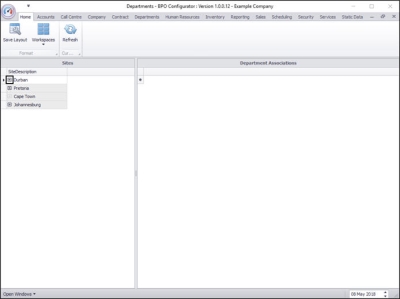
The Departments screen will be displayed. This screen is divided into two frames:
- Sites
- Department Associations
Department Associations will be addressed further on in this manual.
Sites Frame
- Note: Each site has an expand button in front of it. If this button is bold, that shows us that there are already departments linked to this site. If the expand button is faint then that particular site has no linked departments.
In this image you can see that Durban and Pretoria have linked Departments (bold expand button) and Cape Town and Johannesburg do not have any linked departments (faint expand buttons).
- Click on the expand button in front of one of the sites.
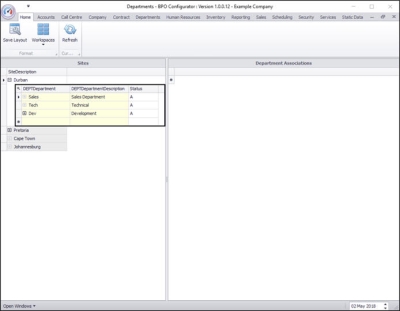
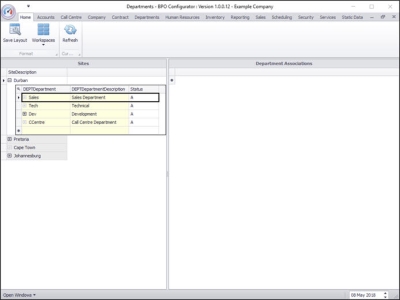
- In this image Durban has been selected.
Departments Frame
- The Departments frame for this site will be expanded.
- Here you can view a list of all the departments currently linked to this site.
- In this image, there is a
- Sales
- Technical and
- Development
Add a Department
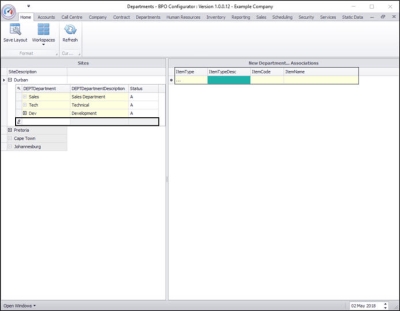
- Click in the final row of the Departments frame. This row will now be 'activated' and you can now type in the new department details.
- DEPTDepartment: Type in the code for this new department.
- DEPTDepartment Description: Type in a description for this new department.
- Status: This will auto populate with A - Active.
- (You will note that the Associations frame has populated with an Item Type data grid and the frame title has changed to New Department... Associations as you clicked on the new row. This will be addressed further on in the manual).
- When you have finished entering the new department details, either press Tab or Enter on your keyboard.
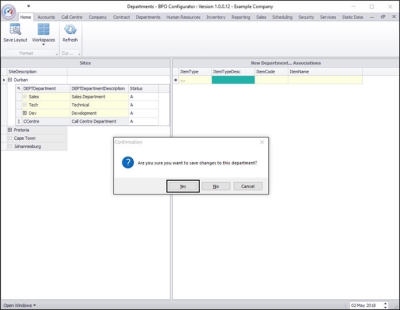
- A Confirmation message box will pop up asking;
- Are you sure you want to save changes to this department?
- Click on Yes.
- As you click on Yes, a new row will be created in the currently open Departments data grid.
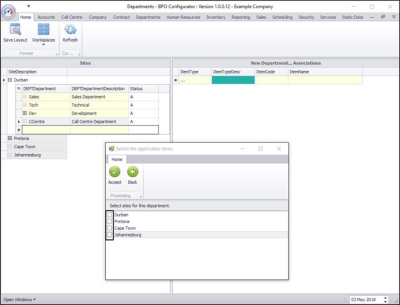
- A Select the applicable items screen will pop up.
- Here you can click on the check box(es) to link this new department to any or all of the site(s) listed in this screen.
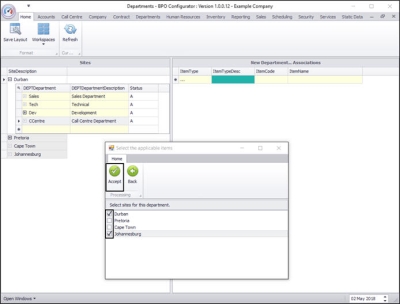
- In this image, a site that already contains departments (Durban) has been selected as well as a site that has no departments linked to it (Johannesburg).
- Note: Until this point, Johannesburg had a faint expand icon - indicating no linked departments.
- When you have made your site selection(s), click on Accept.
- The new department details will be saved in the selected sites.
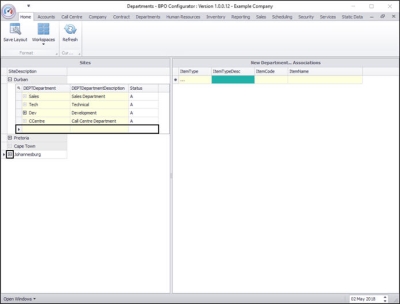
- The new row will now be 'activated' in the open Durban Departments data grid.
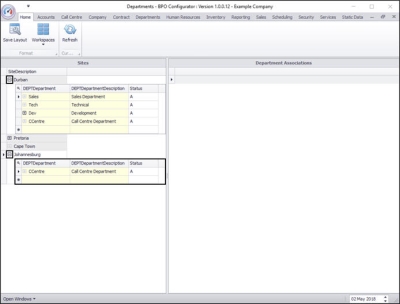
- You will note that Johannesburg now has a bold expand button. Click on this button.
- The Johannesburg Departments frame will be expanded. Here you can view the newly added department details.
- Collapse all the open Department frames when you have finished adding departments.
View Department Associations
- In the Departments screen, select a site by clicking on the expand button in front of that site.
- In this image, Durban has been selected.
- The Departments frame for Durban will be expanded.
- Click anywhere in the row of the department that you wish to view the associations of.
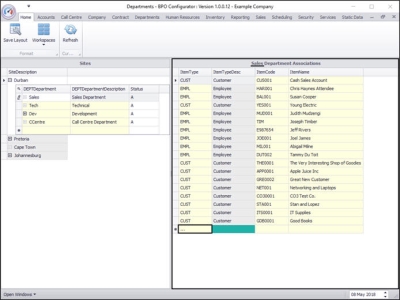
- In this image, the Sales Department has been selected
- The Department Associations frame will now populate with all the associations linked to this department.
- Note: You will see that the title of the frame has changed to Sales Department Associations. If the Technical Department had been initially selected, the title would have changed to Technical Associations.
Add an Association
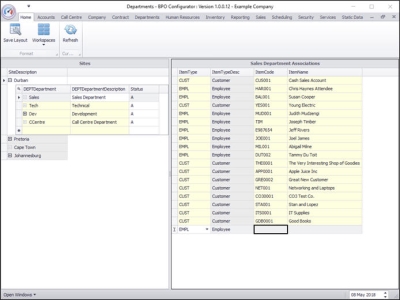
- Click in the Item Type text box in the final row of the Associations data grid.
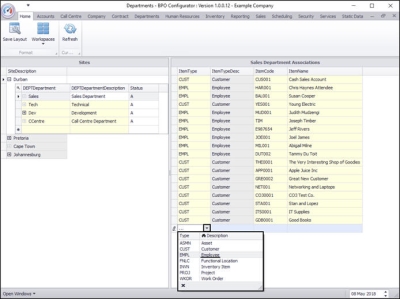
- A drop-down arrow will be revealed. Click on this arrow to display the Item Type menu.
- Click on the Item Type that you wish to associate with this department.
- In this image, Employee has been selected.
- The Item Type and Item Description text boxes will now populate with the selected details.
- Click in the Item Code text box.
- An ellipsis button will be revealed.
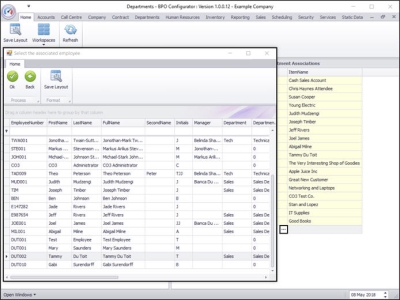
- Click on this button to display the Select the associated employee pop up screen.
- Note: This pop up screen will change according to your initial Item Type selection. If, for example, you selected Asset, then the correlating pop up screen would be Select the related asset.
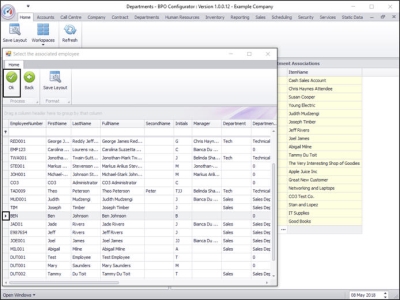
- Click on the row selector in front of the employee that you wish to link to this department.
- Click on Ok.
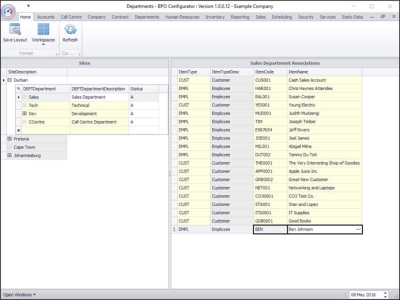
- The selected employee details will now populate the Item Code and Item Name text boxes.
- Press Tab or Enter on you keyboard.
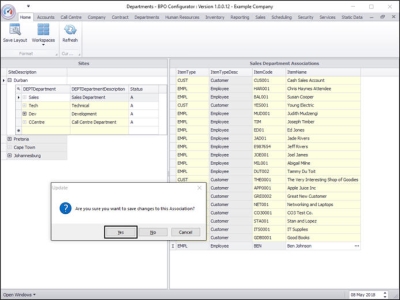
- An Update message box will appear asking;
- Are you sure you want to save the changes to this association?
- Click on Yes.
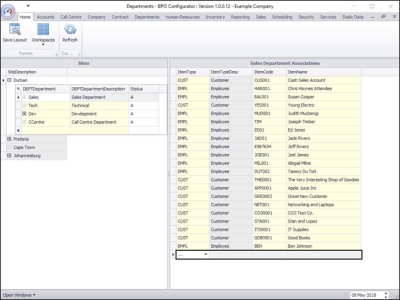
- The details will be saved and a new row will be created in the Associations data grid.
Note about Sub-Departments
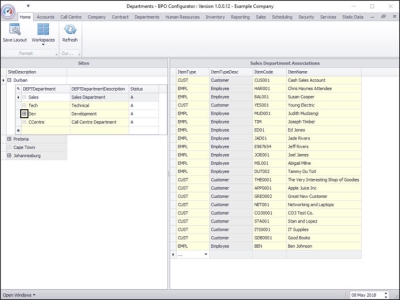
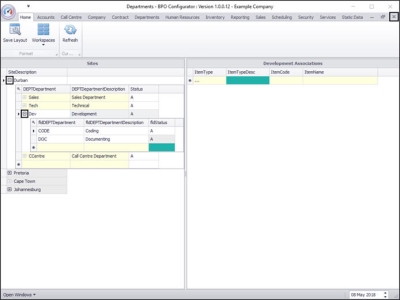
- In the Durban Departments data grid, you will note that one of the departments; Development, has an active /bold expand button in front of it.
- This indicates that there is one or more linked sub-departments.
- Click on this expand button.
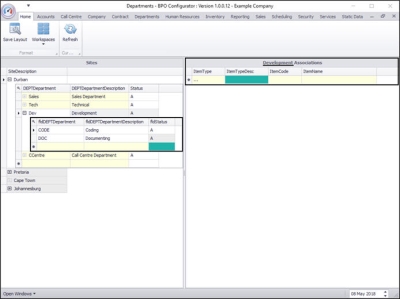
- The Development Department frame will be expanded.
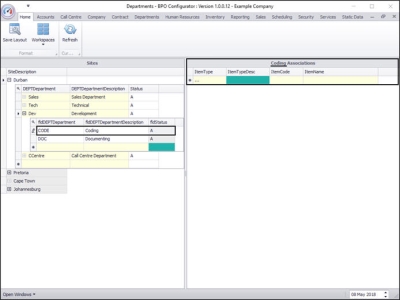
- Here you can view two linked sub-departments:
- Coding and
- Documentation.
- Note: As you clicked on the Development Department expand button the Associations screen title and data grid content changed to the correlating Development Associations.
- In this image, no associations have been added to this department yet.
- Click anywhere in the row of one of the sub folders.
- In this image, Coding has been selected.
- You will see that as you clicked on the Coding Department row, the Associations frame title and data grid content changes to the correlating Coding Associations.
- In this image, no associations have been added to this department yet.
- When you have finished working in the Departments screen, collapse the open data grids and close the screen
BPO.MNU.094

