We are currently updating our site; thank you for your patience.
Static Data
Static Data - Part Requests State
Follow the process to add or edit a part request State.
| Ribbon Access: Configurator > Static Data > Static Data |
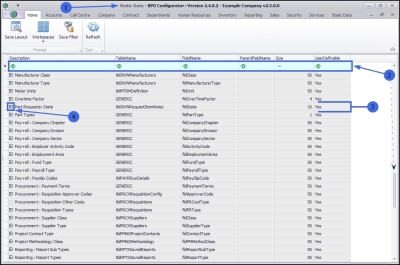
Find the Part Requests: State row
- The Static Data listing screen will be displayed.
- Use the filter row or scroll down the list until you find
- the Part Requests: State row.
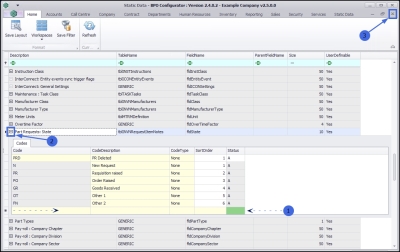
- Click on the expand icon in this row.
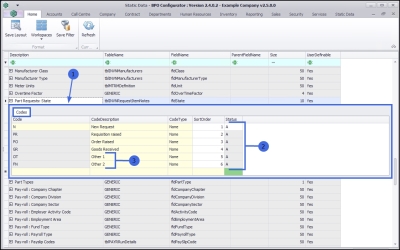
- The Part Requests: State Codes frame will be expanded.
- In this example, there are currently 6 codes set up on the system.
- Only the Other 1 and Other 2 codes should be edited, as the pre-existing codes are used by BPO to show the user the State of the associated procurement process if a part requisition was raised against the part request.
Add a Part Request State
If you wished to add a new part request state:
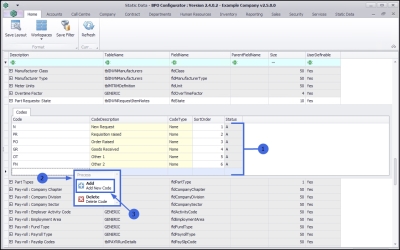
- Right click anywhere in a row of the Codes data grid.
- A Process menu will pop up.
- Click on Add - Add New Code.
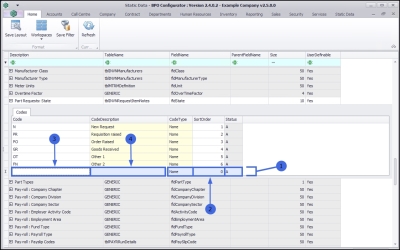
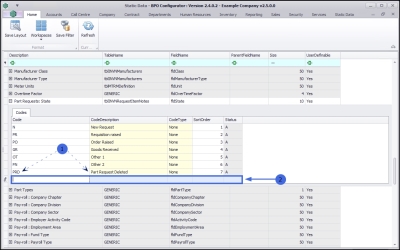
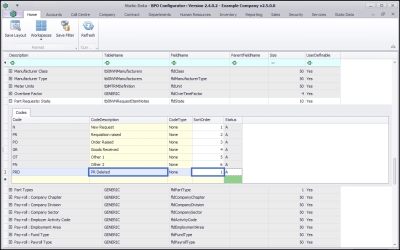
- The final row in the Codes data grid will now be 'activated'.
- The Code Type, Sort Order and Status columns will auto populate.
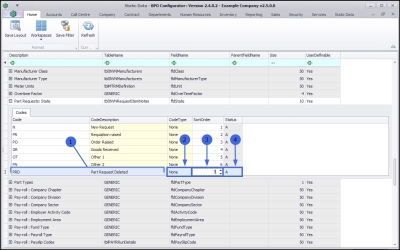
- Code: Click in this text box and type in a code specific for this new Part Request State.
- Code Description: Click in this text box and type in a description for this new Part Request State code.
- Once you have added a Code and Code Description,
- Type None into the Code Type text box.
- Sort Order can remain as 0 or you can re-number it as explained below.
- The Status can remain as A: Active
Note on Sort Order
The sort order is the order in which this new Part Request State will appear in the Requests State drop-down list in BPO2. If each Part Request State has the same number e.g. 1, then the drop-down list will usually default to an alphabetical order in BPO2. If you wish the Part Request State to be listed in a certain order then number each one in the order that you wish to view them.
-
If you wish to change
the Sort Order number:
- Click in this text box and either type in the new number
- Or use the arrow indicators revealed, to select the sort order number for this new Part Request State.
Save a Part Request State
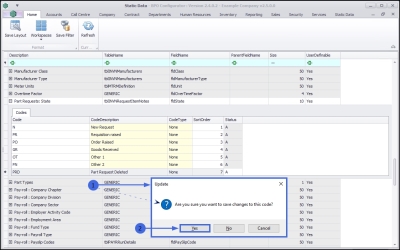
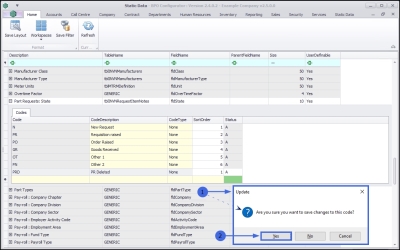
When you have finished adding the new Part Request State details, eitherTab along to the end of the row or press Enter on your keyboard or click outside of the data grid.
- An Update message box will appear with the following prompt:
- Are you sure you want to save changes to this code?
- Click on Yes.
- The new Part Request State details will be saved.
- A new row will be added to the Codes data grid.
Edit a Part Request State
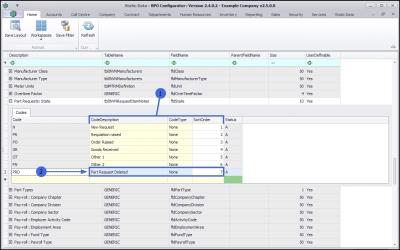
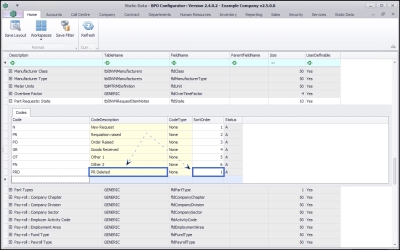
- The following fields can be edited: Code Description, Code Type and Sort Order.
- In the row of the Part Request State that you wish to edit, type in the changes, as required.
- In this example, the Code Description has been shortened and the Sort Order has been changed to 1.
- Either Tab along to the end of the row or press Enter on your keyboard or click outside of the data grid.
- An Update message box will appear with the following prompt:
- Are you sure you want to save changes to this code?
- Click on Yes.
The edited details will be saved.
Delete a Part Request State
You may wish to delete a Part Request State that is no longer applicable.
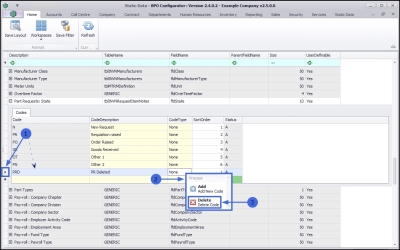
- Select and right click in the row of the Part Request State that you wish to delete.
- The Process menu will pop up.
- Click on Delete: Delete Code.
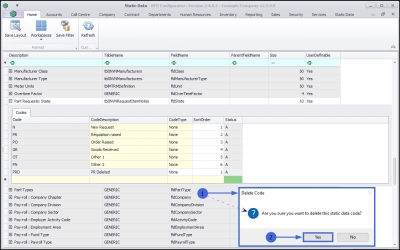
- A Delete Code message box will pop up asking;
- Are you sure you want to delete this static data code?
- Click on Yes.
- The selected Part Request State will be removed from the data grid.
- When you have finished deleting Codes, collapse the data grid and
- Close the screen.
MNU.108.055

