Maintenance
Instructions - Add / Edit / Delete and View Digital Documents
You can scan in and link documents relating to the task instruction.
Remember that these documents need to be saved on the server in a shared folder.
| Ribbon Access: Maintenance / Projects > Instructions |

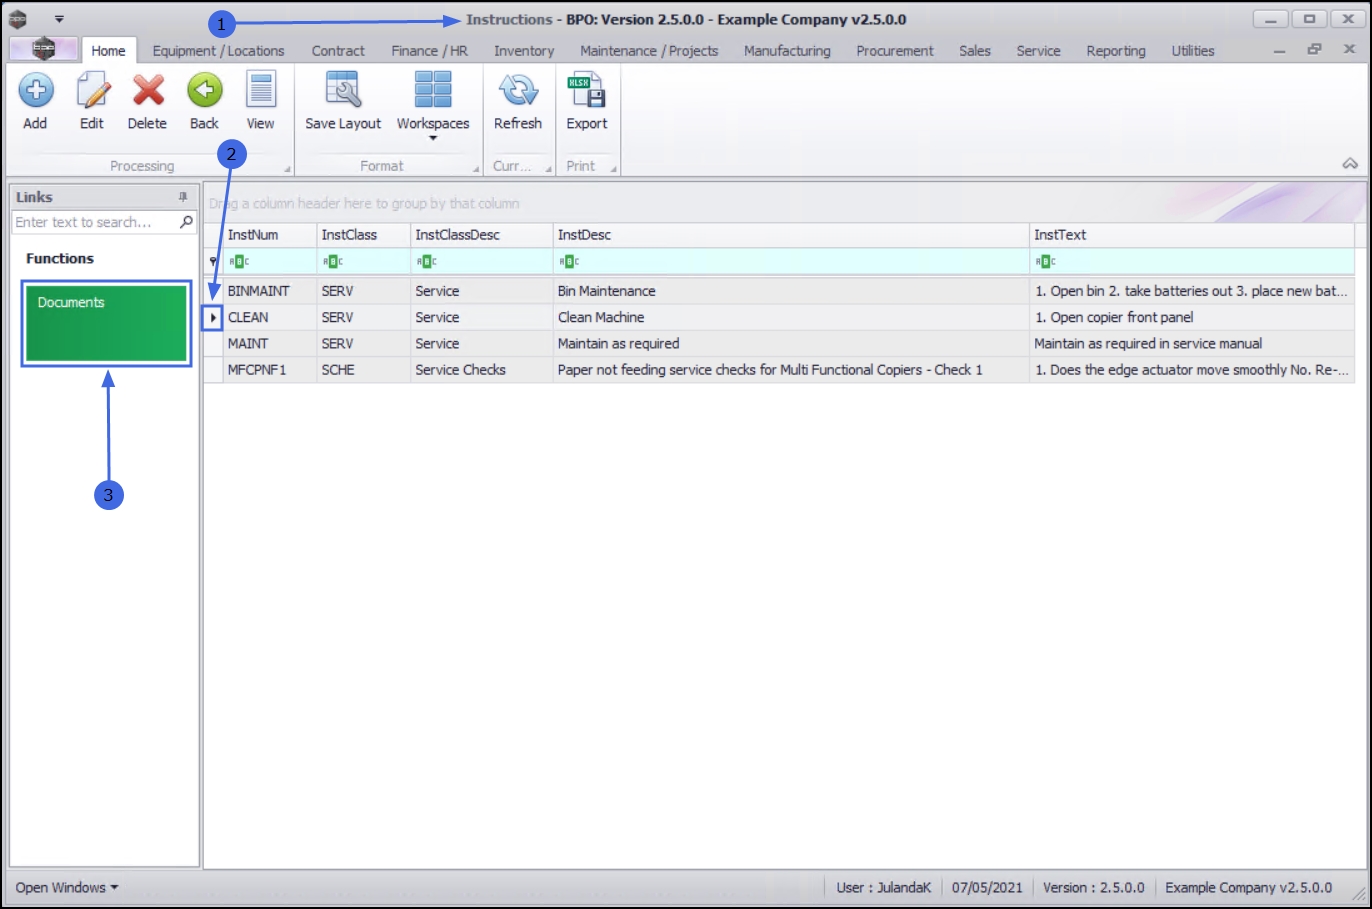
- The Instructions listing screen will be displayed.
- Click on the row of the instruction you wish to link a digital document to.
- Click on the Documents tile.
Add a Digital Document
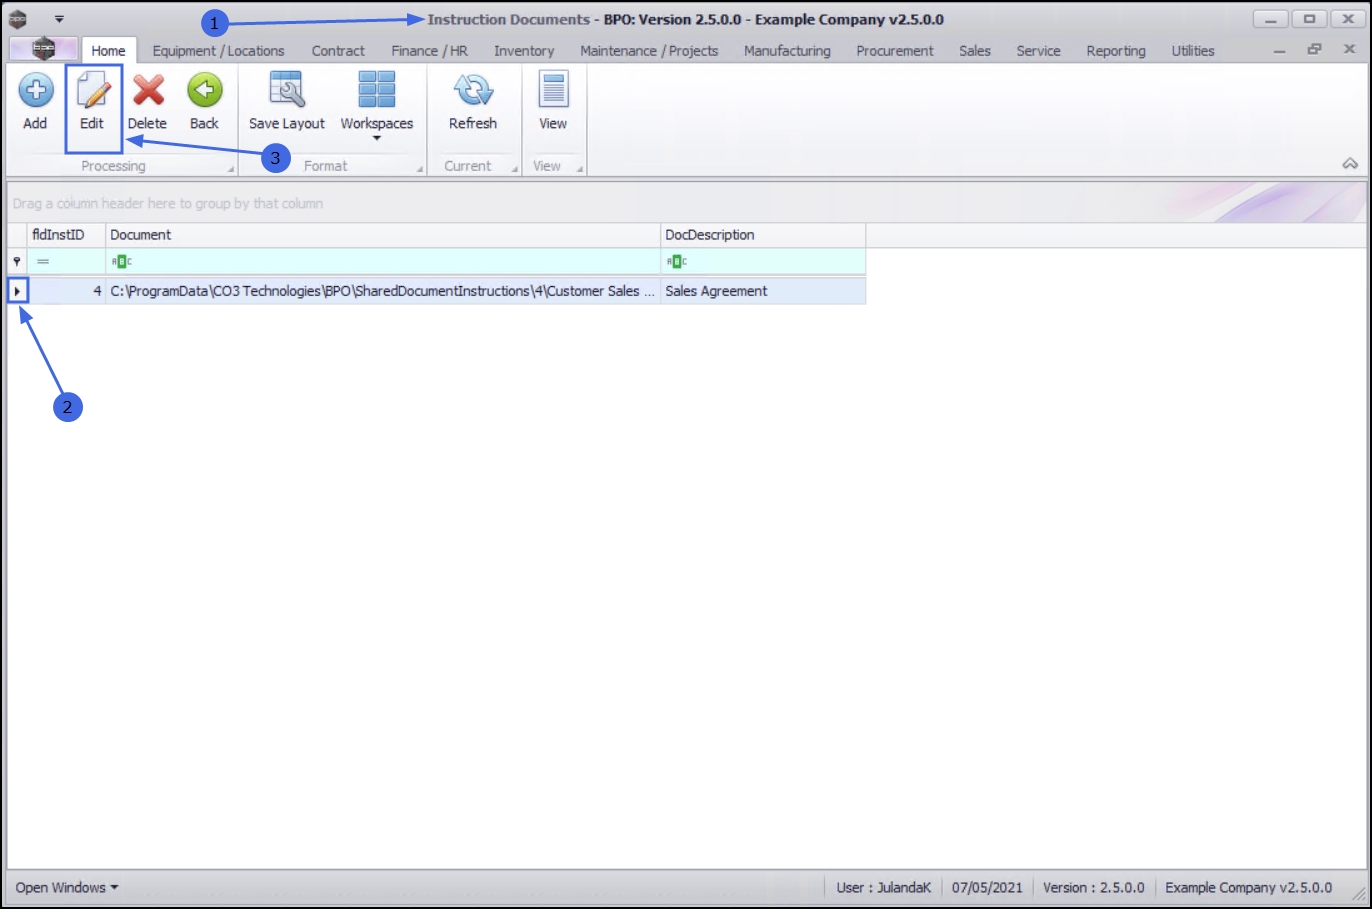
- The Instruction Documents screen will be displayed.
- From this screen you can view a list of the documents (if any) that are linked to this instruction.
- Click on Add.
 Short cut key: Right click to display the All groups menu list. Click on Add.

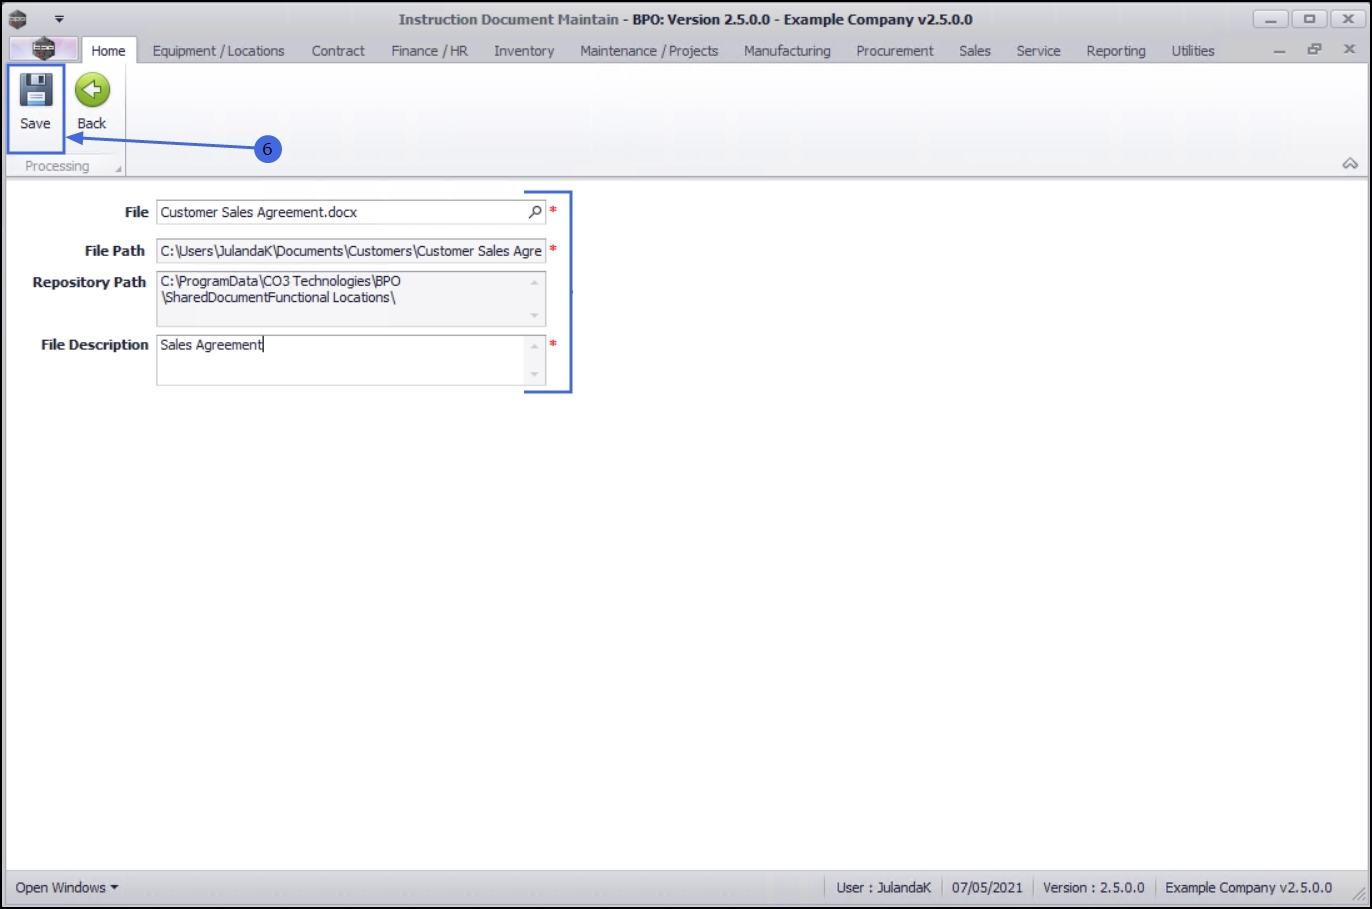
- The Instruction Document Maintain screen will be displayed.
- Click on the search button in the File text box to display the Select File screen.
- Search for and select the document that you wish to link to this instruction.
![]() Important to remember that the document needs to be saved on the server in a shared folder.
Important to remember that the document needs to be saved on the server in a shared folder.
- Click on Open.

File Location Details
- File: This field is populated with the selected file name.
- File Path: This field is populated with the selected file path.
- Repository Path: This field will populate with to the repository path set up in the Configurator.
- File Description: Click in the text box and type in a description for the document.
Save the Document link
- When you have finished adding the document details, click on Save.
- You will return to the Instruction Documents screen.
- The details of the document you have linked to the Instruction can now be viewed.

Edit a Linked Document
The edit feature allows you to make changes only to the File Description of the linked document.
- From the Instruction Documents listing screen,
- Click on the row of the Document you wish to edit.
- Click on Edit. Short cut key: Right click to display the All groups menu list. Click on Edit.
- The Instruction Document Maintain screen will be displayed.
 Note that the fields for File, File Path and Repository Path have been greyed out indicating that they cannot be changed.
 - Make the required changes to the File Description.
Save the changes
- Click on Save to save the change or
- Click on Back to return to the Document listing screen without saving any changes.

Delete/Remove a Linked file
- From the Instruction Documents listing screen,
- Click in the row of the document you wish to delete from the instruction.
- Click on Delete.Short cut key: Right click to display the All groups menu list. Click on Delete.
- When you receive the Delete Document message to confirm;
- Are you sure you want to delete this Document?
- Click on Yes if you are certain about your selection, or
- Click on No to ignore the request and to leave the document on the Instruction Documents screen.

View a Linked Document
The View feature allows you to view and edit the content of the linked document.
- From the Instruction Documents listing screen.
- Click in the row of the document you wish to view.
- Click on View.Short cut key: Right click to display the All groups menu list. Click on View.
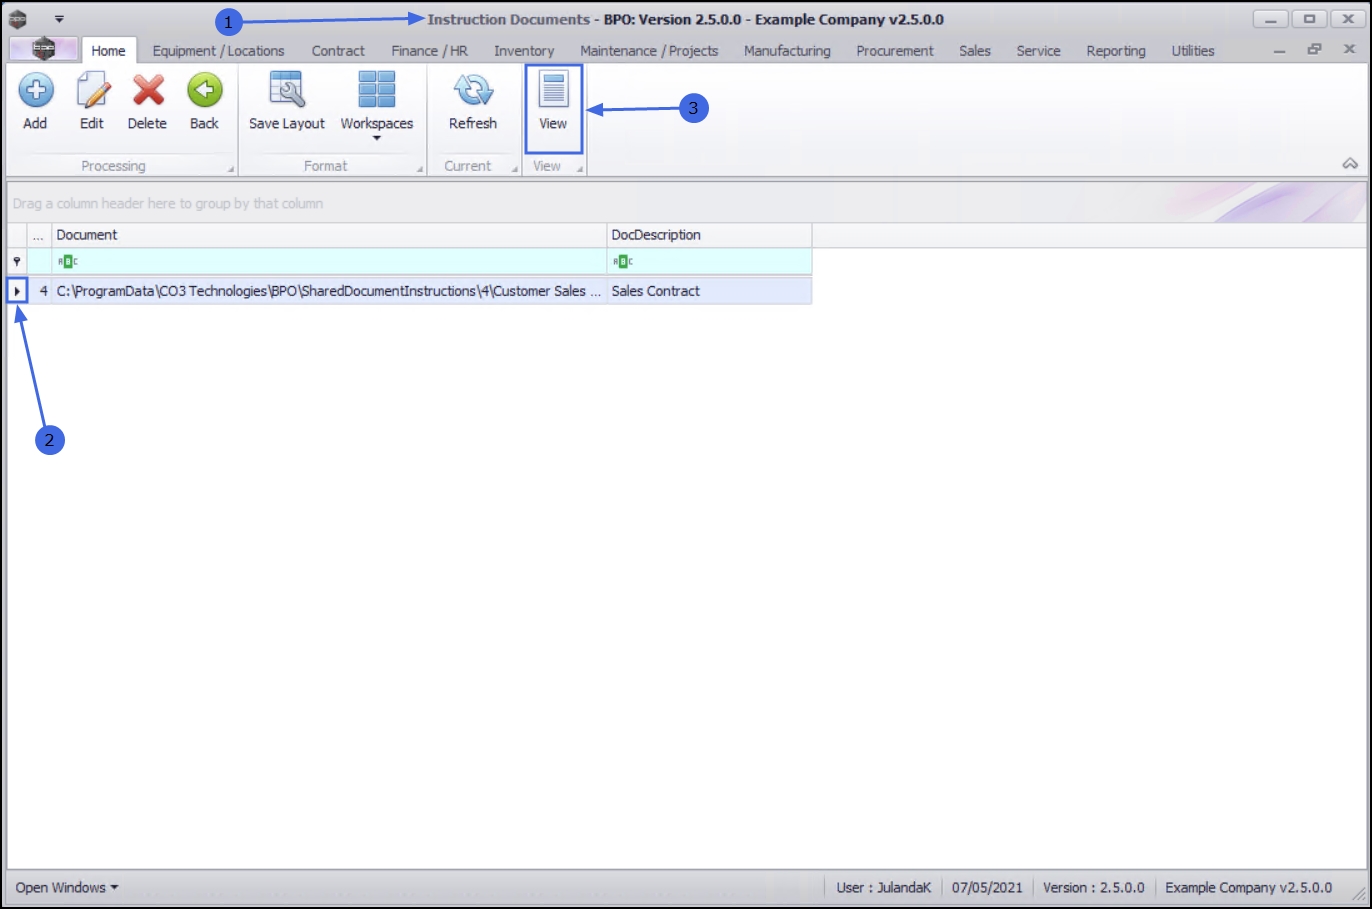
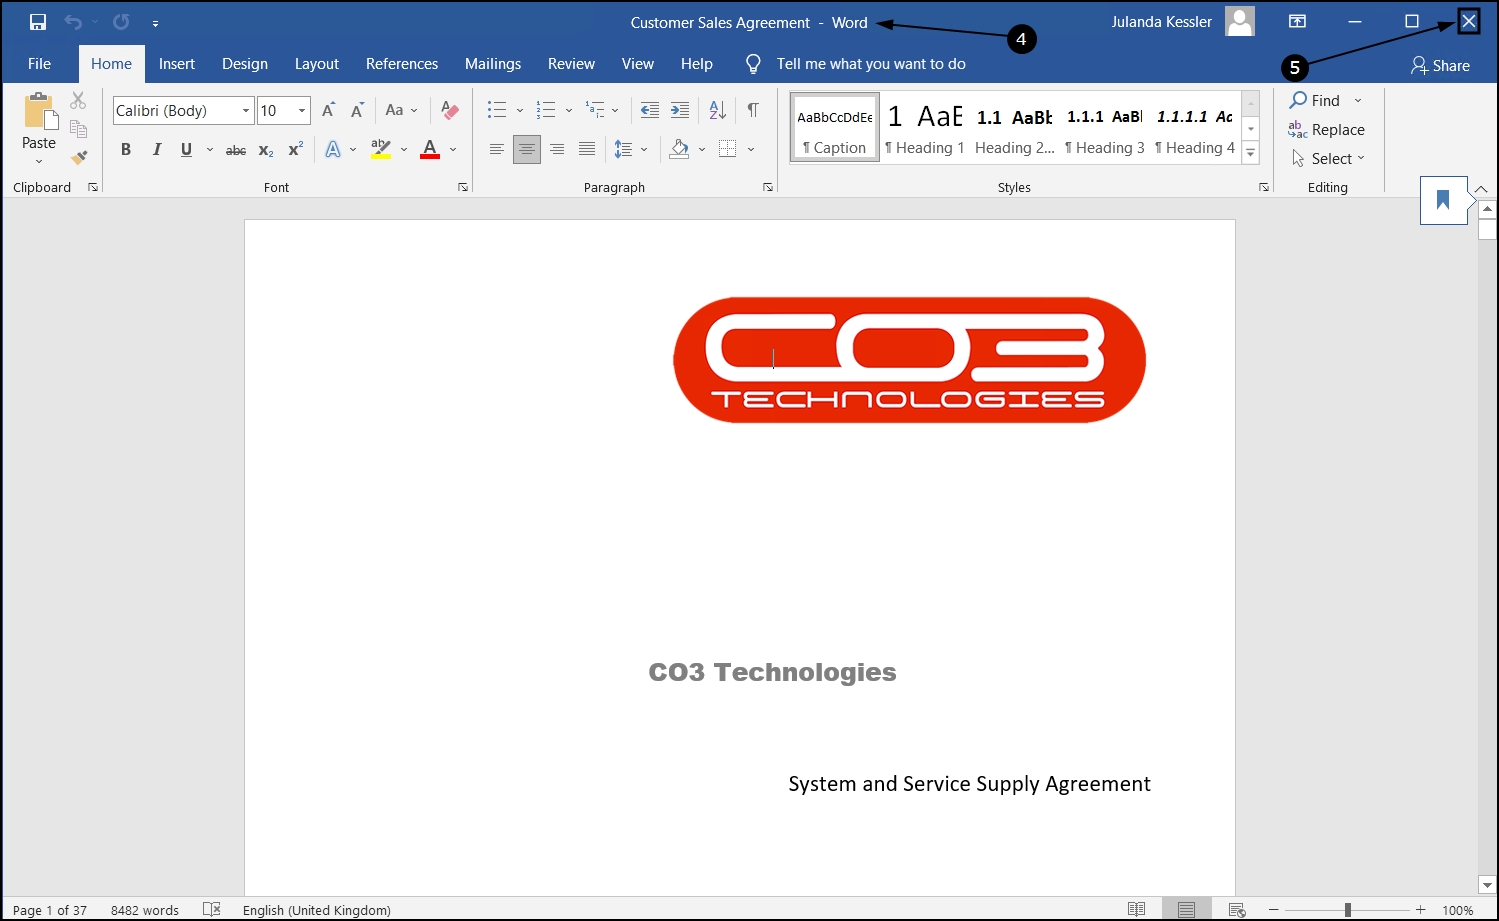
- The document will open in the software format that it was created in, e.g Microsoft Word or Excel.
- The example has the Sales Contract saved as a Microsoft Word document.
- Make the necessary changes and save the document in Microsoft Word.
- Close Word or Excel.
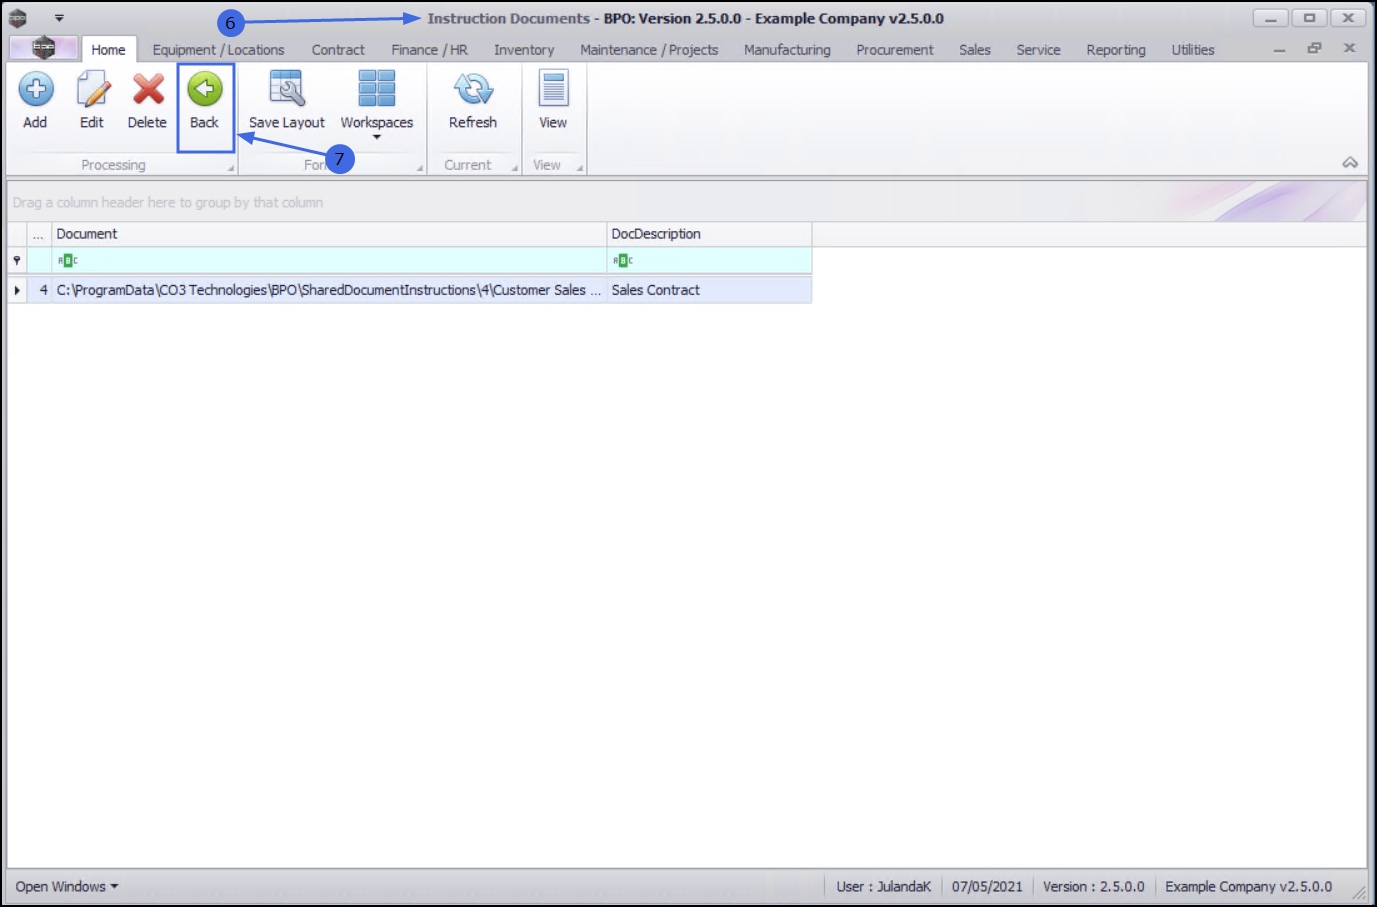
- You will return to the Instruction Documents screen.
- Click on Back to return to the Instructions listing screen.
MNU.043.004