Manufacturing
Production - Close a Production Run
Only once all parts have been issued and subcons, time, expenses, (if any) have been logged, can the production run be closed.
Closing the production run will 'consume' the stock issue to the production work order, and the system will generate a manufactured product which will be visible in stock.
You will have the opportunity to note how many items were produced. If less products were produced, the surplus parts issued must first be returned to store (if they are re-useable), before the production is closed.
| Ribbon Access: Manufacturing > Production |
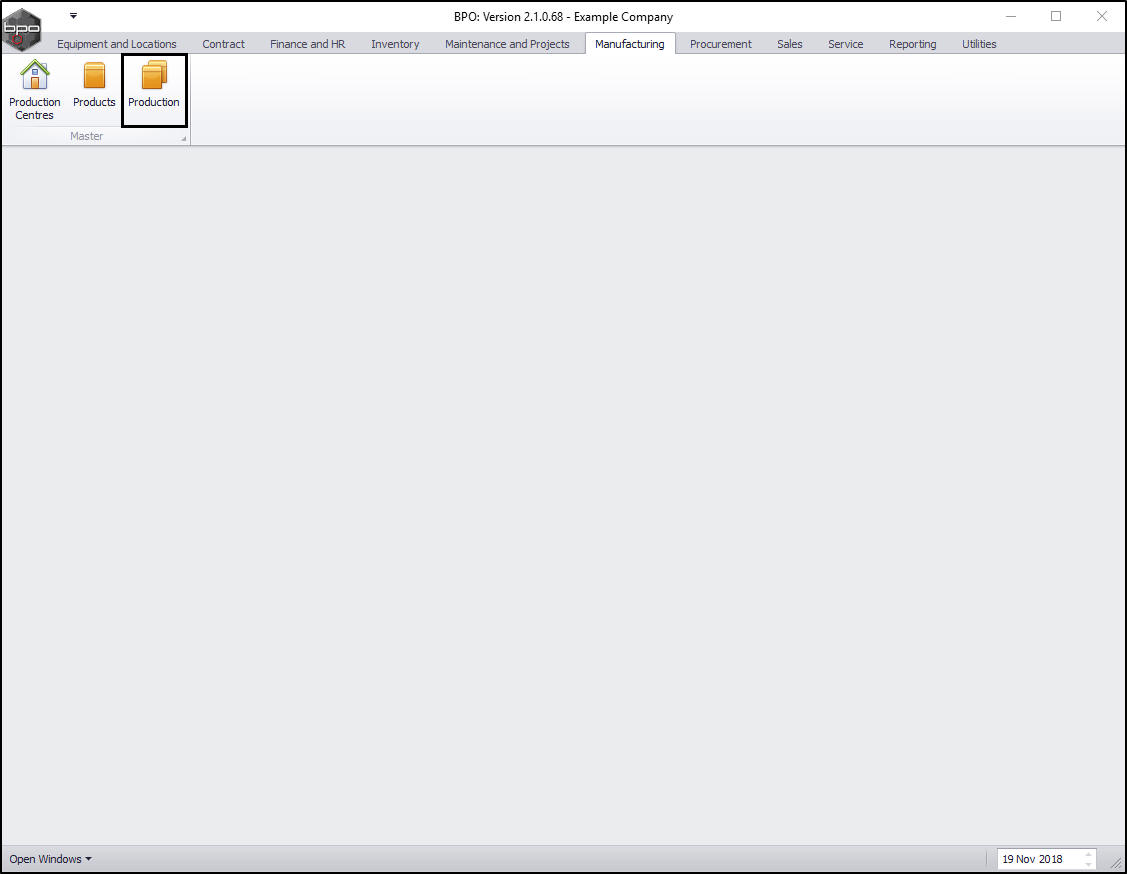
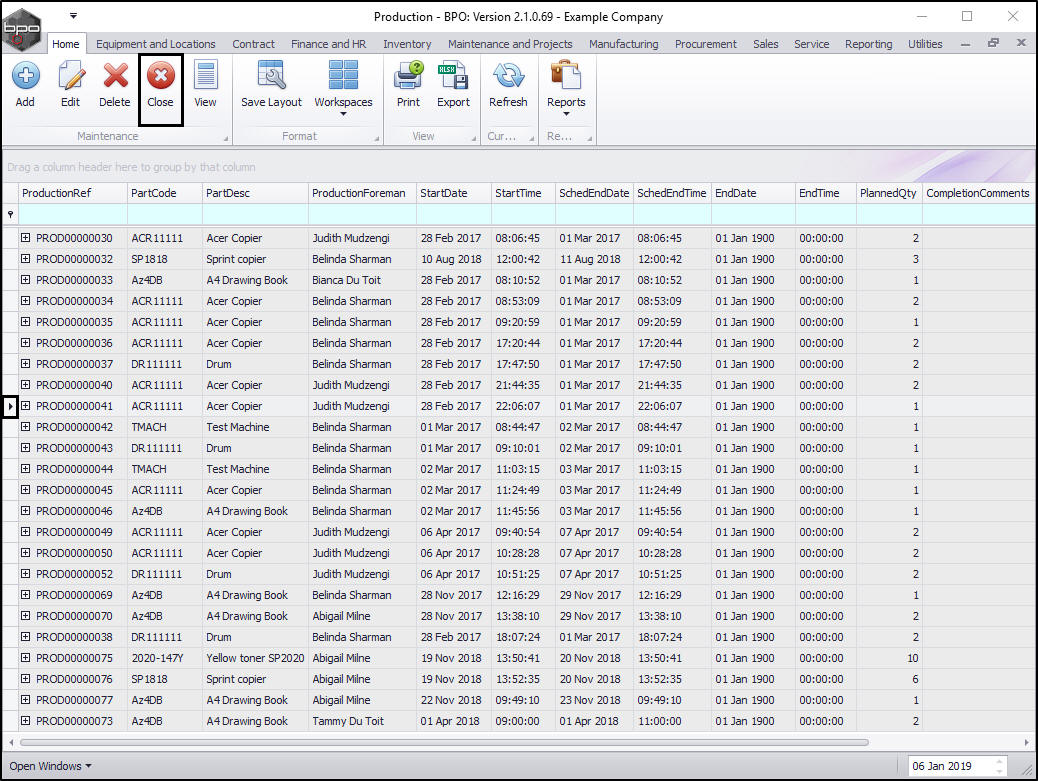
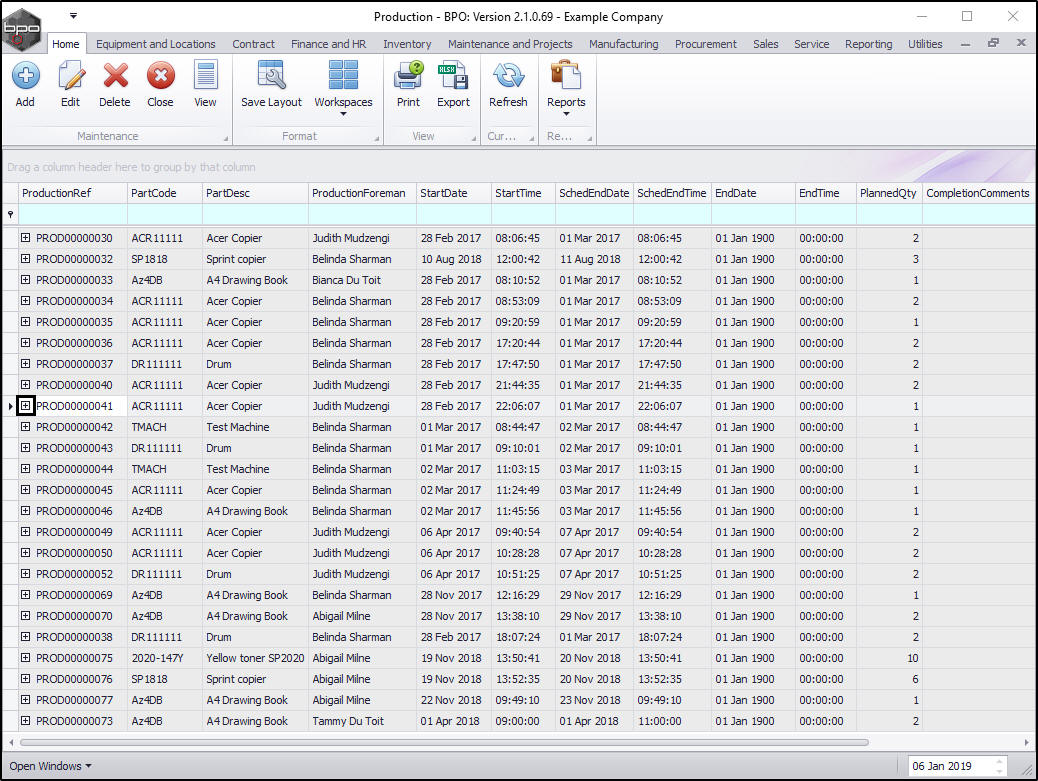
The Production listing screen will be displayed.
Close a Production Run
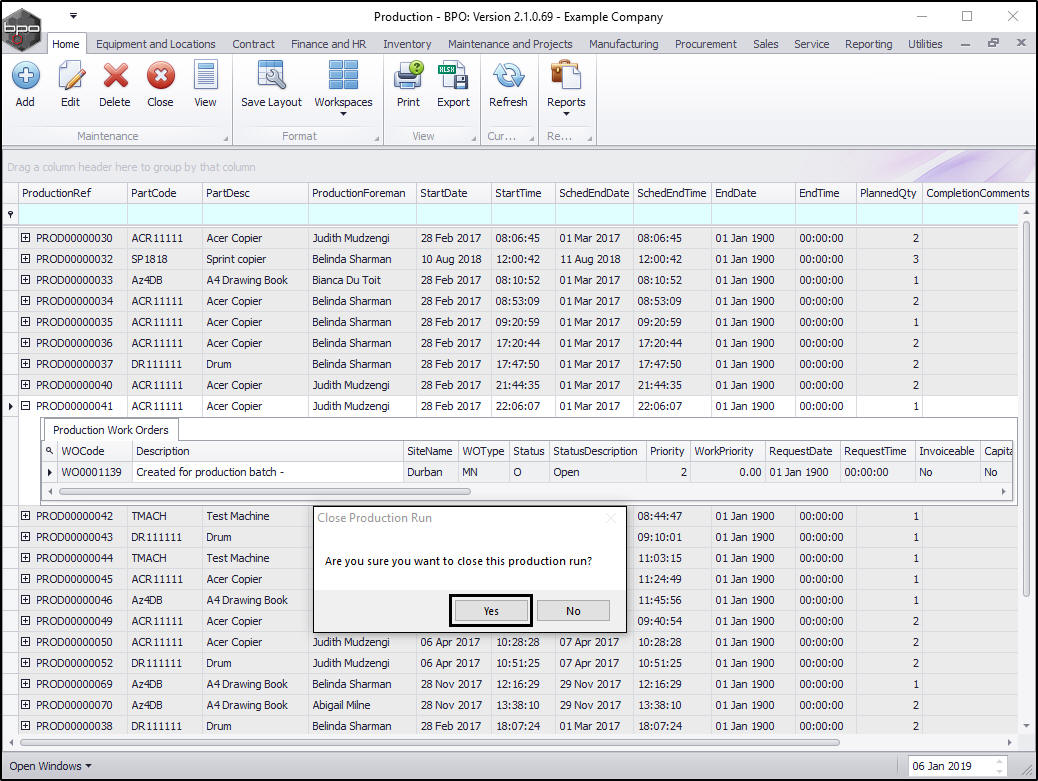
- Select the row of the production run that you wish to close.
- In this example, an Acer Copier (A-class item) has been selected.
- Click on Close.
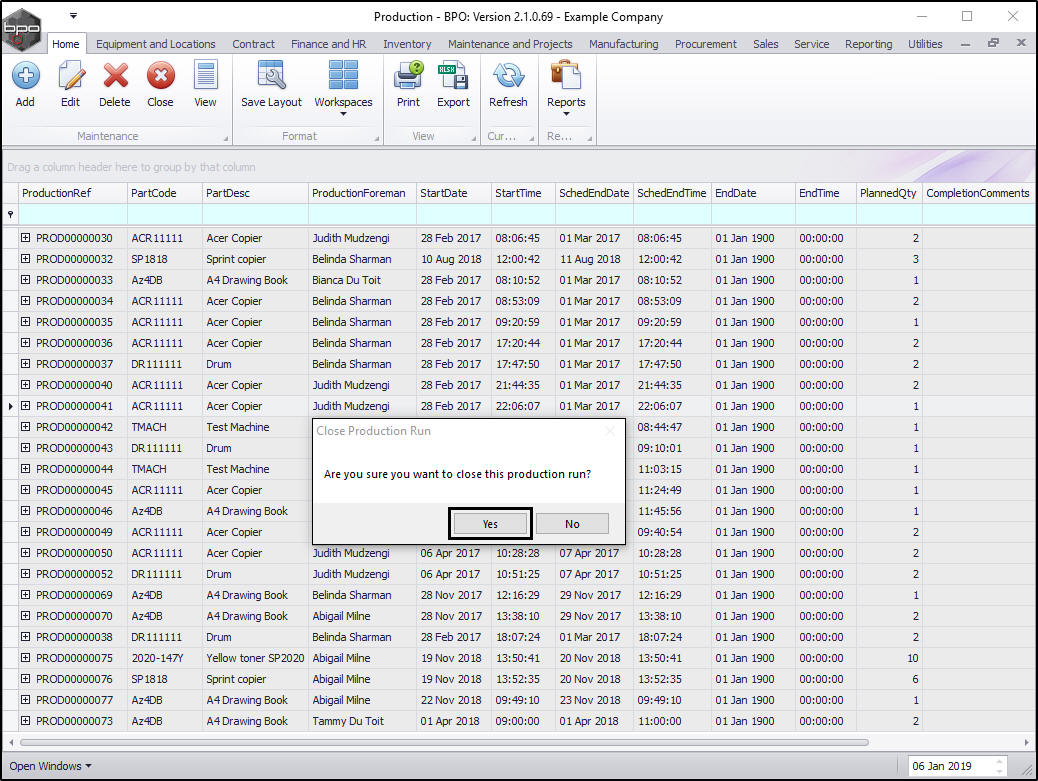
- A Close Production Run message box will pop up asking;
- Are you sure you want to close this production run?
- Click on Yes.
Production Issues
Outstanding Part Requests
- If there are outstanding part requests linked to this production run then an Input Validation message box will pop up informing you that:
- There are still open part requests which need to be actioned. Please action these items before closing.
- Click on OK.
- Open the Work Order Maintain screen and issue the outstanding part requests if they have been approved.

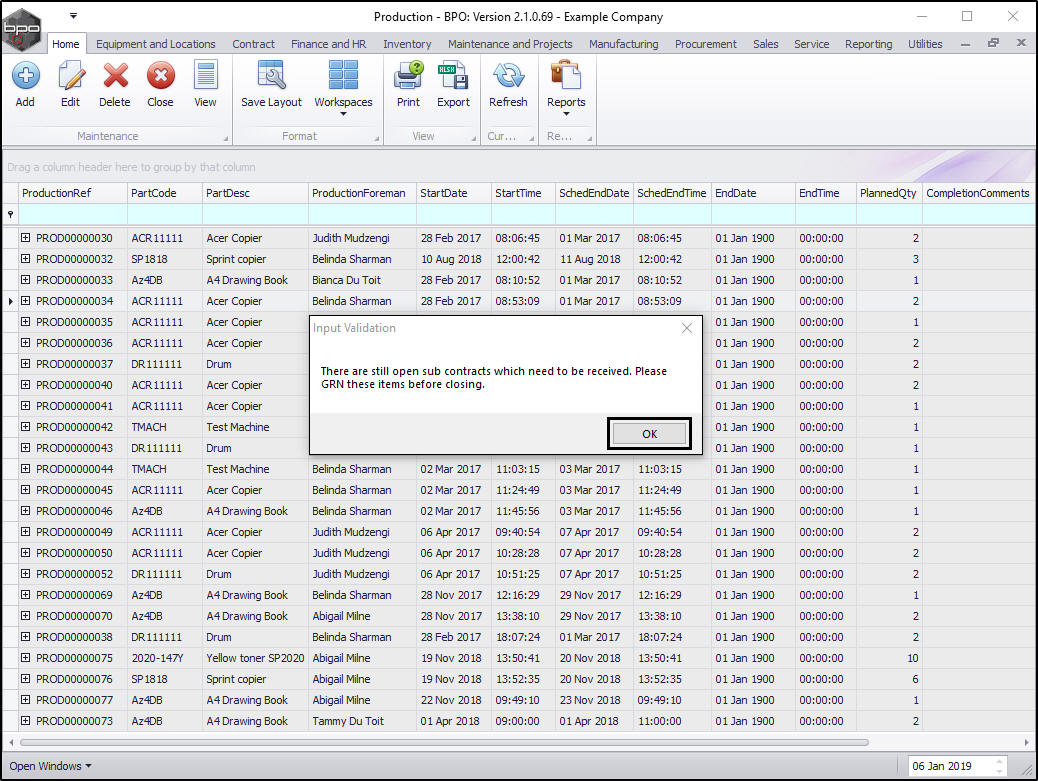
- You may also receive the following Input Validation message;
- There are still open sub contracts which need to be received. Please GRN these items before closing.
- Click on OK.
- Receive the third party services before attempting to close the production run again.
- You can also open the Work Order Maintain screen and procure third party services.
-
Note:
If there are
no outstanding part requests and
no open sub contracts to be received, the system will take you straight to the
Production Completion screen. Click on either
Production Completion for A/B class items or Production Completion for C class items for more information.
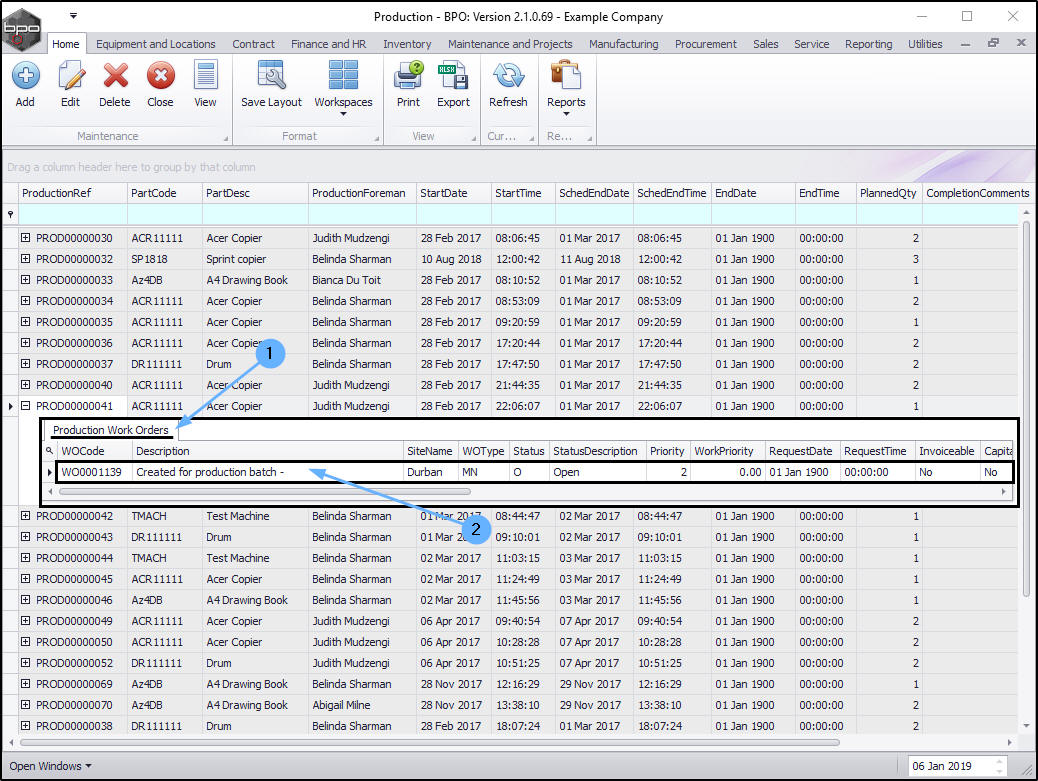
Opening the Production Work Order
You can open the production Work Order from the Production Listing screen for further processing
- Click on the expand button in the row of your selected production run.
- The Production Work Orders frame will be expanded.
- Here you can view the work order linked to the selected production run.
- Double click anywhere in the row of this work order.
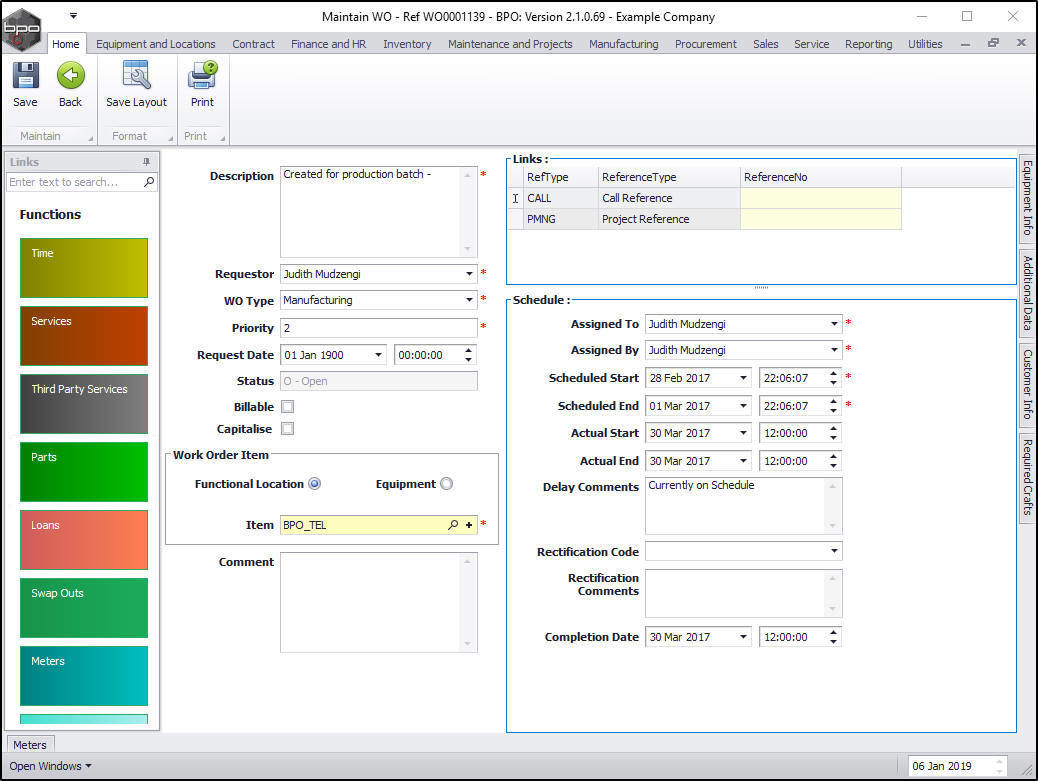
Action Production Work Orders
- The Maintain WO - Ref [ ] screen will be displayed.
- From this screen, you can add part requests, issue parts, procure third party services, log time, add internal services etc.
To return to the Production [ ] listing screen after further processing:
- Click on the Open Windows drop-down arrow in your current screen to display
- the Open Windows menu and
- select Production.

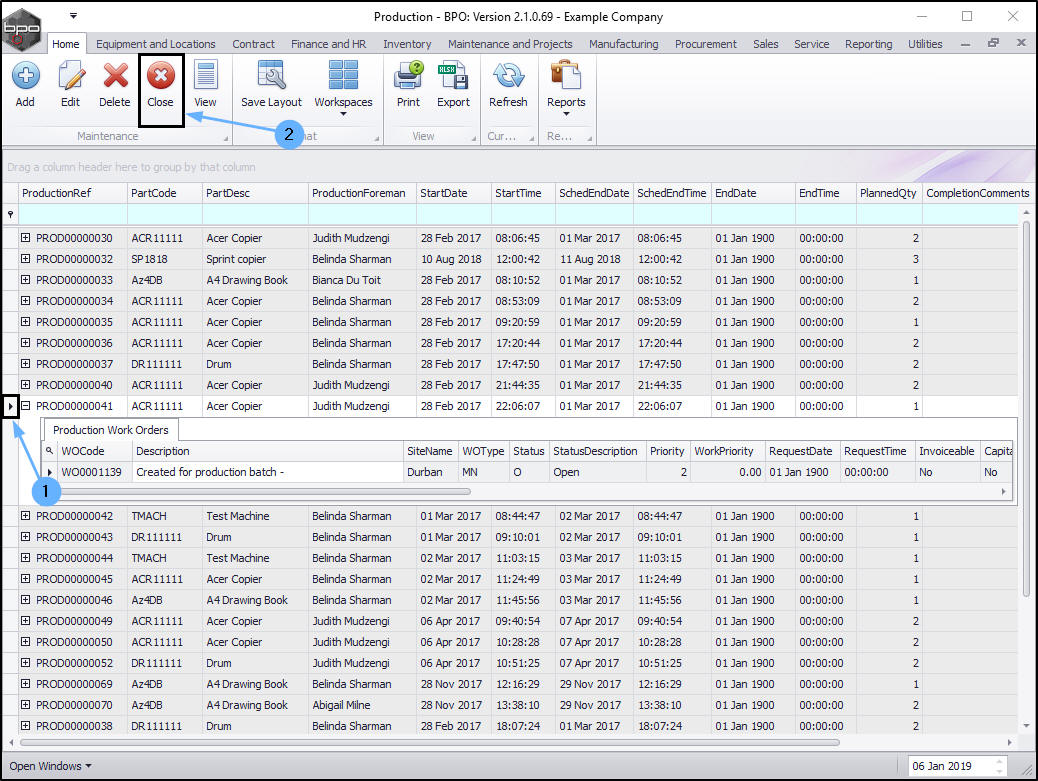
You will return to the Production listing screen.
Now you can try to close the production run again.
- Ensure that the row selector is in front of the same production run that you wished to close.
- Click on Close.
- A Close Production Run message box will pop up asking;
- Are you sure you want to close this production run?
- Click on Yes.
Production Completion - A/B-class Product
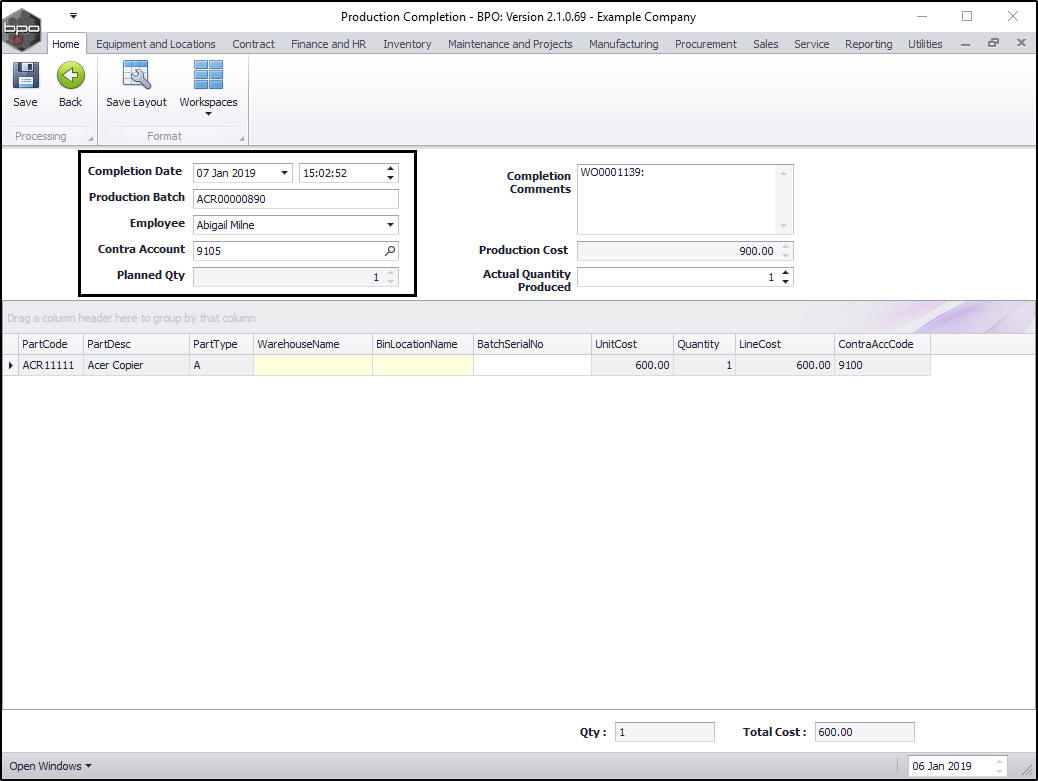
The Production Completion screen will be displayed. Check all the production details:
- Completion Date (and Time) This will populate with the current date and time.
- Completion Date: You can either type in or click on the drop-down arrow and use the calendar function to select an alternative date.
- Completion Time: You can either type in or use the directional arrows to select an alternative date.
- Production Batch: This will auto populate with the batch serial number set up on this production run.
- Employee: This will populate with the employee currently logged on to the system but you can click on the drop-down arrow and select an alternative employee if required.
- Contra Account: This will populate with the chart of account number initially set up for this production run. You can click on the search button and select an alternative account number if required.
- Planned Quantity This will auto populate with the quantity that was initially planned to be produced.
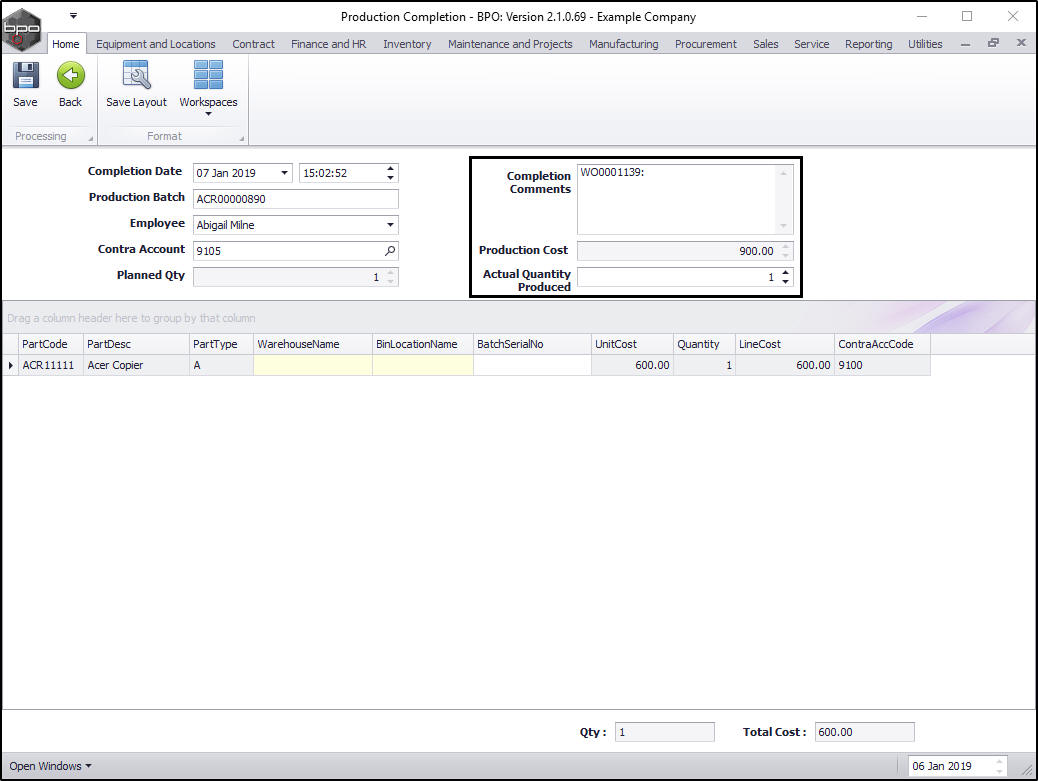
- Completion Comments: This will populate with the linked work order number. You can add other comments as required.
- Production Cost: This is the total cost of the production run (the sum of the parts used to make the product). This is not dependant on the amount of units produced in the production run.
- Actual Quantity Produced: Check that the Actual Quantity Produced is correct. If not, either type or use the directional arrows to select the quantity that has actually been produced.
Change the Actual Quantity Produced - A/B-class Product
- In this example, you can see that the Actual Quantity Produced is the same as the Planned Quantity and this is also reflected in the Quantity column in the parts data grid.
- Line Cost: this is the Unit Cost divided by the actual quantity produced. (In this image the line cost is 600 ÷ 1 = 600)
- Unit Cost: this is the cost of producing 1 unit.
- Production Cost: this is the total cost of production according to the system cost of the parts used (this will not be according to Standard Price - even if this is selected).
- Quantity column: this will record only 1 per line (as this is an A or B-class item.)
- Quantity field: this will reflect the total of A or B-class items produced.
- Total Cost: this is the Unit Cost x the Actual Quantity produced.

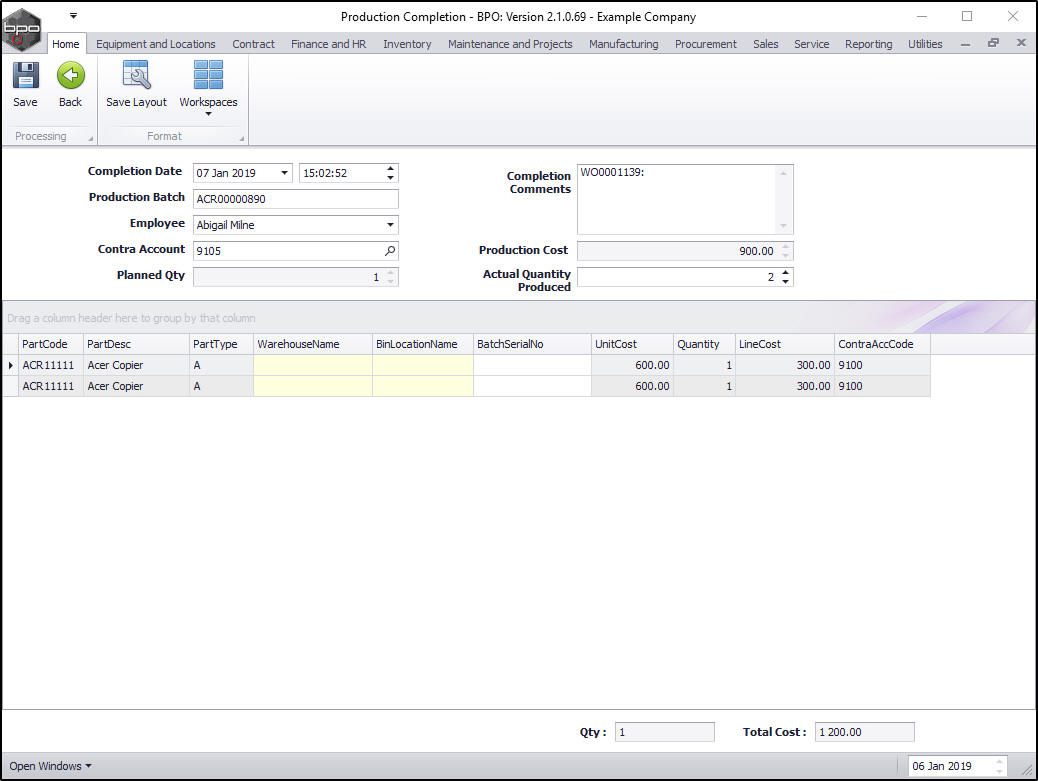
In this example the Actual Quantity Produced has been increased to 2.
- The new Actual Quantity (2) will reflect in the Quantity column in the Parts data grid.
- Note: As this is an A-Class item each item is placed in a single row (as opposed to a C-Class items where the quantity increase or decrease will reflect in the Quantity column of the same row).
- The Planned Quantity figure will remain the same.
- The Line Cost is the Unit Cost divided by the actual quantity produced. (Therefore in this image, the line cost is 600 ÷ 2 = 300)
- The Unit Cost per item line will remain the same.
In this example the Actual Quantity Produced has been increased to 3.
- The new Actual Quantity (3) will reflect in the Quantity column in the Parts data grid.
- Note: As this is an A-Class item each item is placed in a single row (as opposed to a C-Class items where the quantity increase will reflect in the Quantity column of the same row).
- The Planned Quantity figure will remain the same.
- The Line Cost is the Unit Cost divided by the actual quantity produced. (Therefore in this image, the line cost is 600 ÷ 3 = 200)
- The Unit Cost per item line will remain the same.

Move down to the Parts data grid.
- You will note that this data grid auto populates with the:
- Part Code: This is the code as set up on the part.
- Part Description: This is the description as set up on the part.
- Part Type: This is the type as set up on the part.
- Warehouse Name: (where the unit will be sent after production). This field will only be populated if a default warehouse and bin has been set up on the part.
- Bin Location Name: This field will only be populated if a default warehouse and bin has been set up on the part.
- Batch Serial No: This is the Production Batch No.
- Unit Cost: This is.
- Quantity: This reflects the quantity as entered in the Actual Quantity Produced column.
- Line Cost: This is the total cost of the production run (the sum of the parts used to make the product).
- Contra Account Code: This is the default Contra Account Code as set up on the part.

Select an (Alternative) Receiving Warehouse A /B-class Product
You can select a receiving warehouse and bin or change the receiving warehouse and bin, if a default one has been set up on the part.
In this example, there is no default warehouse and bin already set up on this part code.
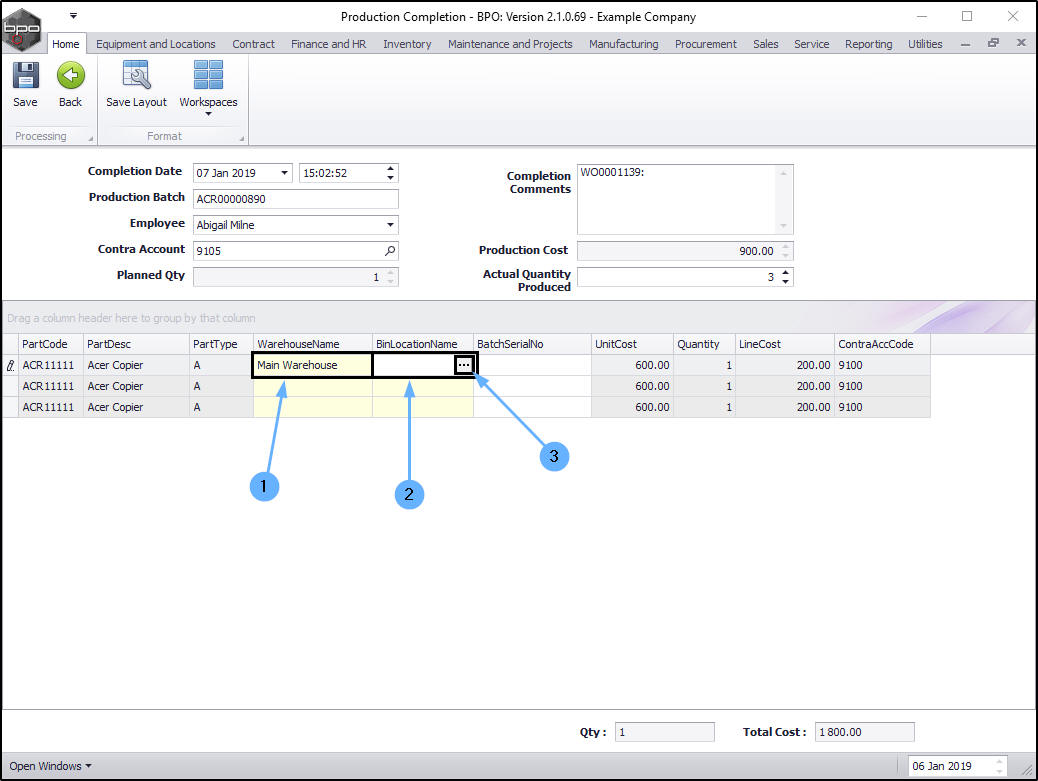
- Click in the Warehouse Name field.
- An ellipsis button will be revealed, click on this button.

- The Select a Warehouse screen will pop up.
- Select the row of the alternative warehouse where you wish to receive these parts.
- Click on OK.
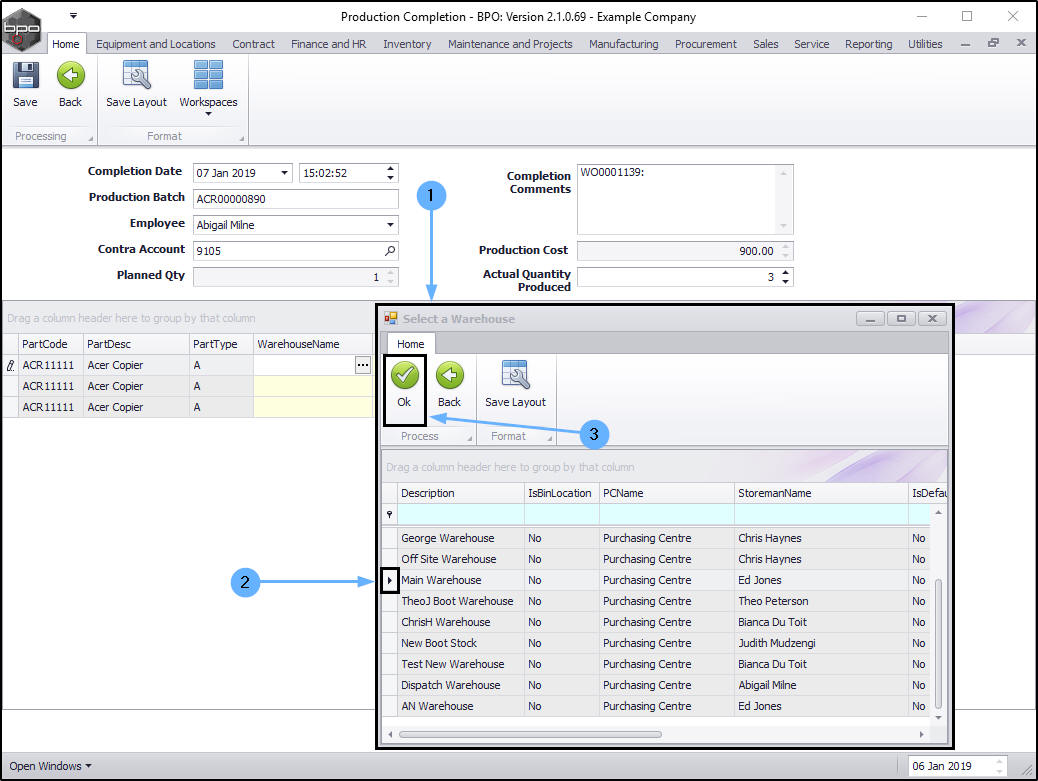
- The Warehouse Name field will now be populated with the selected warehouse name.
Select Alternative Receiving Bin
- Click in the Bin Location Name field.
- An ellipsis button will be revealed, click on this button.
- The Select a Bin screen will pop up.
- Click on the row selector in front of the bin you wish to receive this part into.
- Click on OK.

- The Bin Location Name field will now be populated with the selected bin name.
Allocate Batch/Serial Number - A/B-class Product
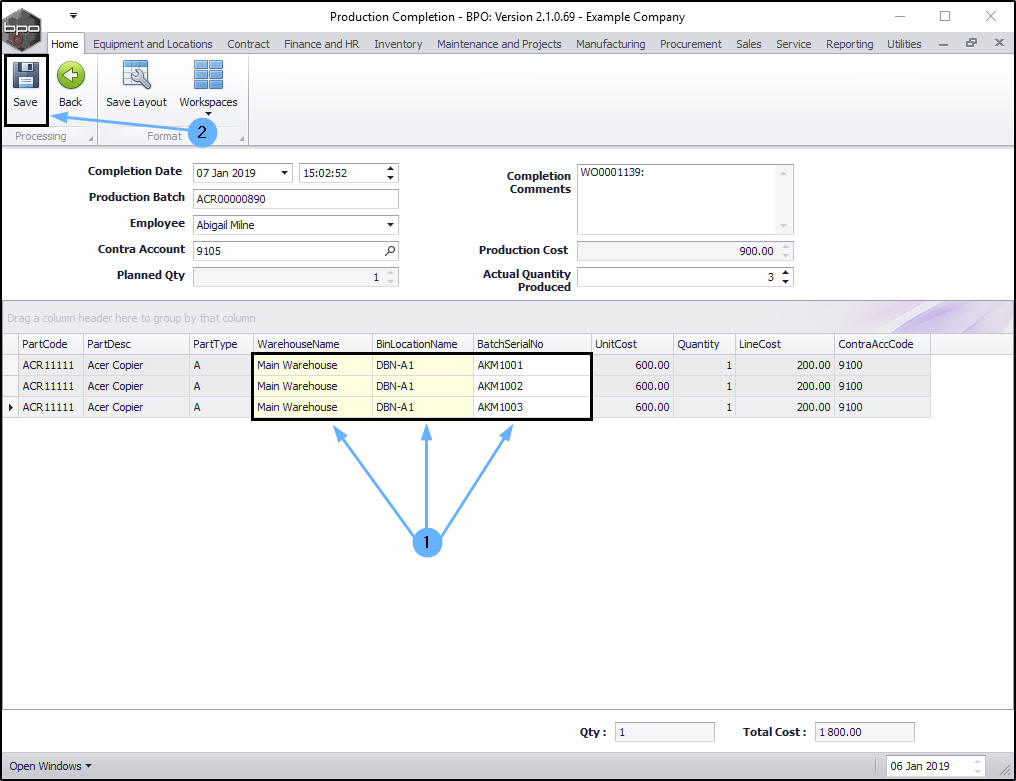
- Click in the Batch Serial No text box and type in a serial number for this A-Class item.
- Note 1: Remember that each A or B-Class item must have a unique and traceable serial number.
- Note 2: If Auto Serial No was selected, then the serial number will auto populate.

- Keep adding to the Warehouse Name , Bin Location Name and Batch Serial No columns using the above method until they are all filled in.
- When you have finished checking and/or editing the details in this screen, click on Save.
Stock Adjustment Report - A/B-class Product
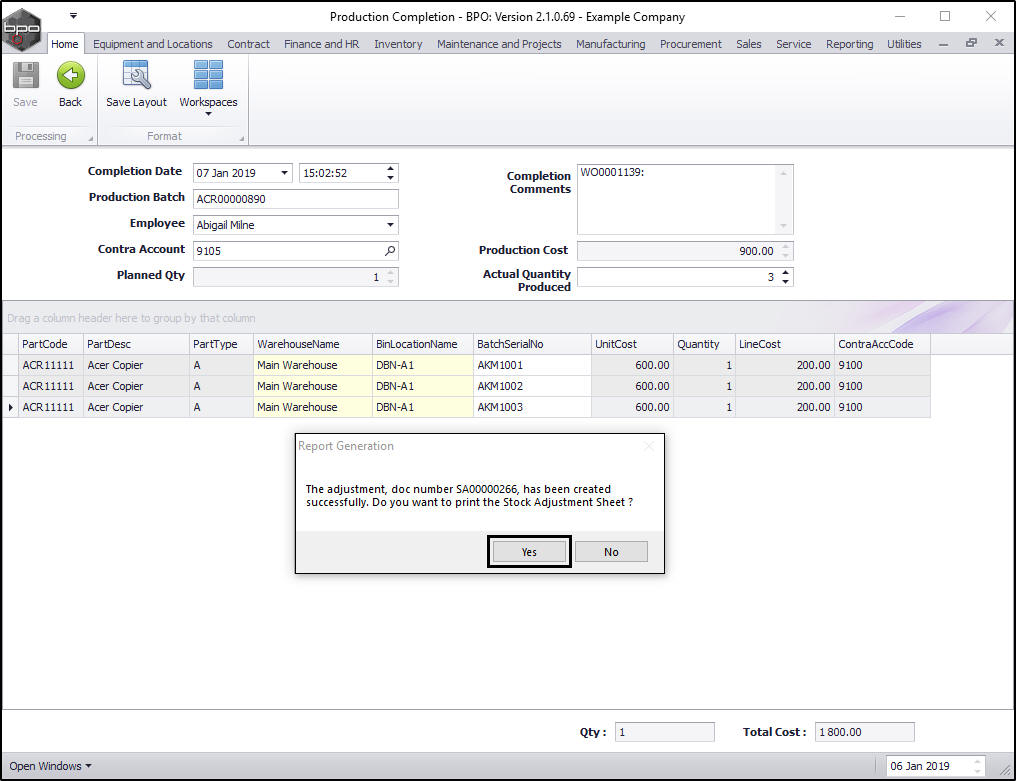
- A Report Generation message box will pop up, asking;
- The adjustment, doc number [ ], has been created successfully. Do you want to print the Stock Adjustment Sheet?
- Click on Yes.
The Report Preview screen will be displayed.
- The report will state which warehouse and bin the produced items will be received into.
- The serial number(s) will be recorded.
- It will state the quantity that is being received.
- It will state the Unit Cost and Line Cost of the product(s).
- From here you can View, Print, Export or Email the Stock Adjustment report.
- Close the Report Preview screen when you are done.

You will return to the Production listing screen.
- The production run will be removed from the Production listing screen.

View Stock Generated A/B-class Product
- You can view the stock generated in the Stock Status screen.
| Ribbon Access: Inventory > Stock |

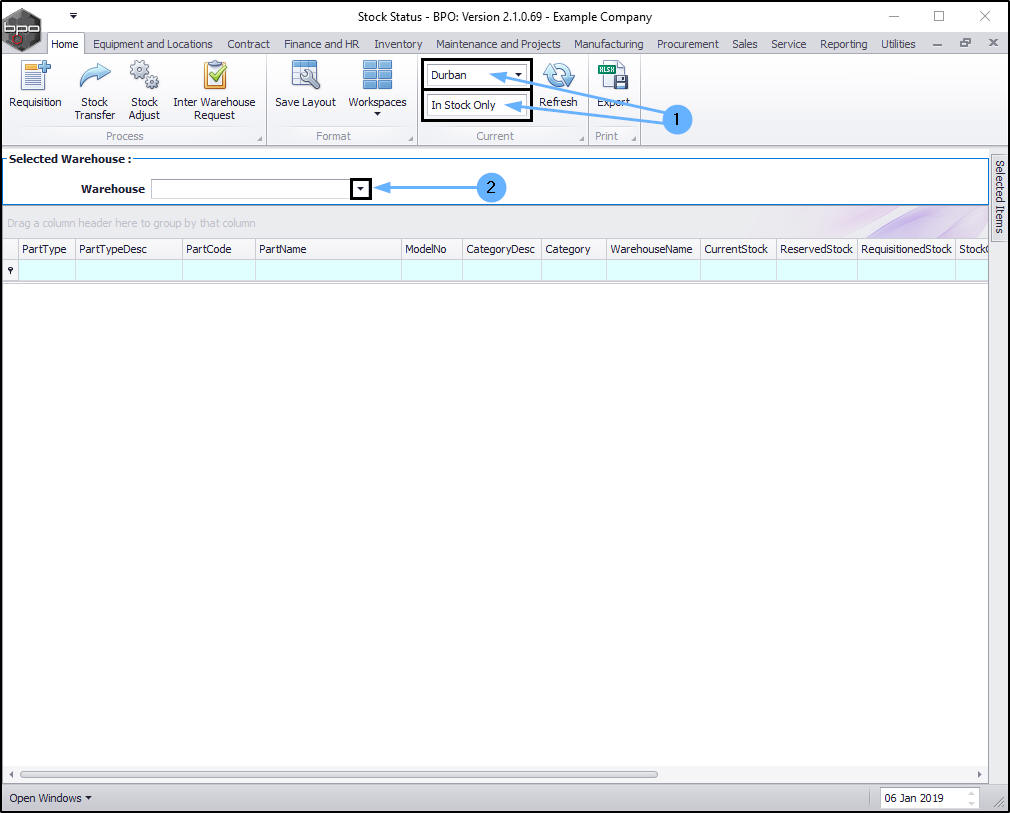
The Stock Status screen will be displayed.
- Ensure that you have selected the site that the receiving warehouse is in and that the status is set to In Stock Only.
- Click on the drop-down arrow in the Warehouse field to select the receiving warehouse.
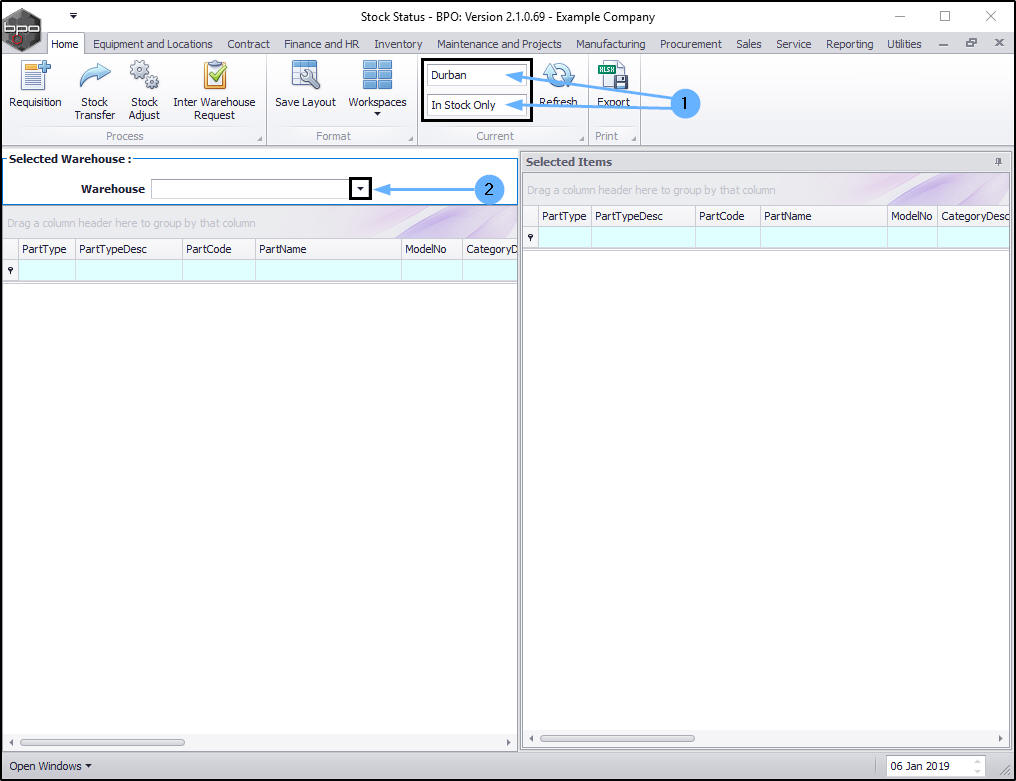
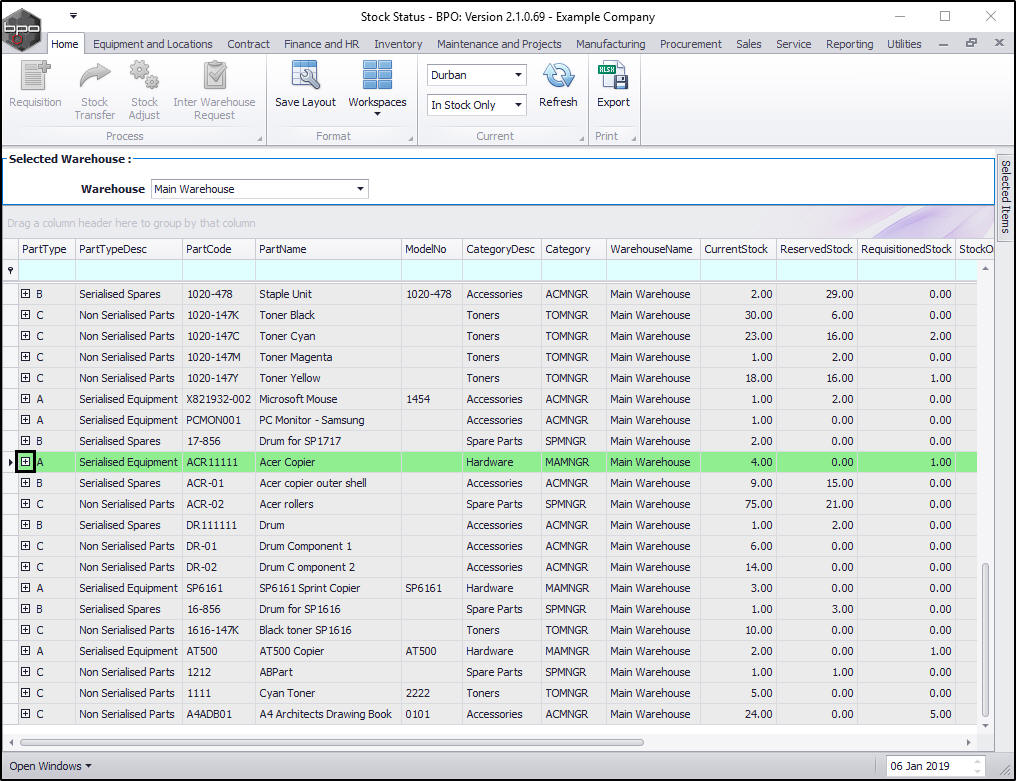
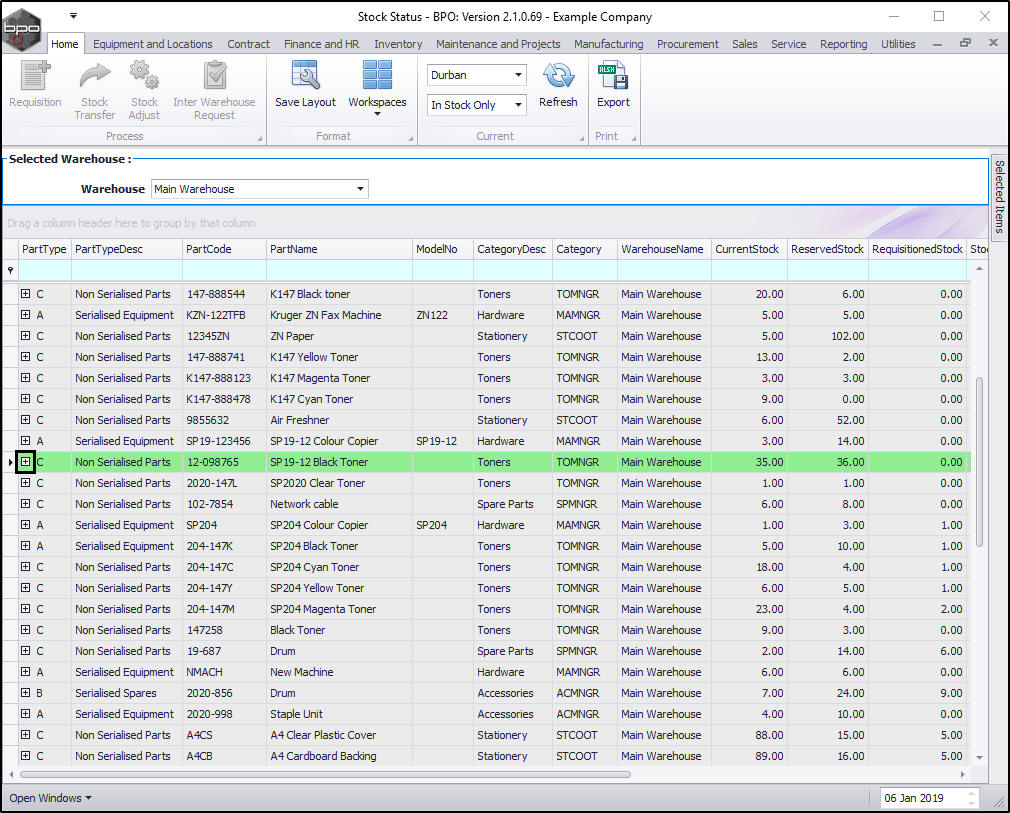
The Selected Warehouse frame will populate with the Type, Description and Codes of all the parts in stock.
- Use the Filter Row or scroll down the list to find the produced part.
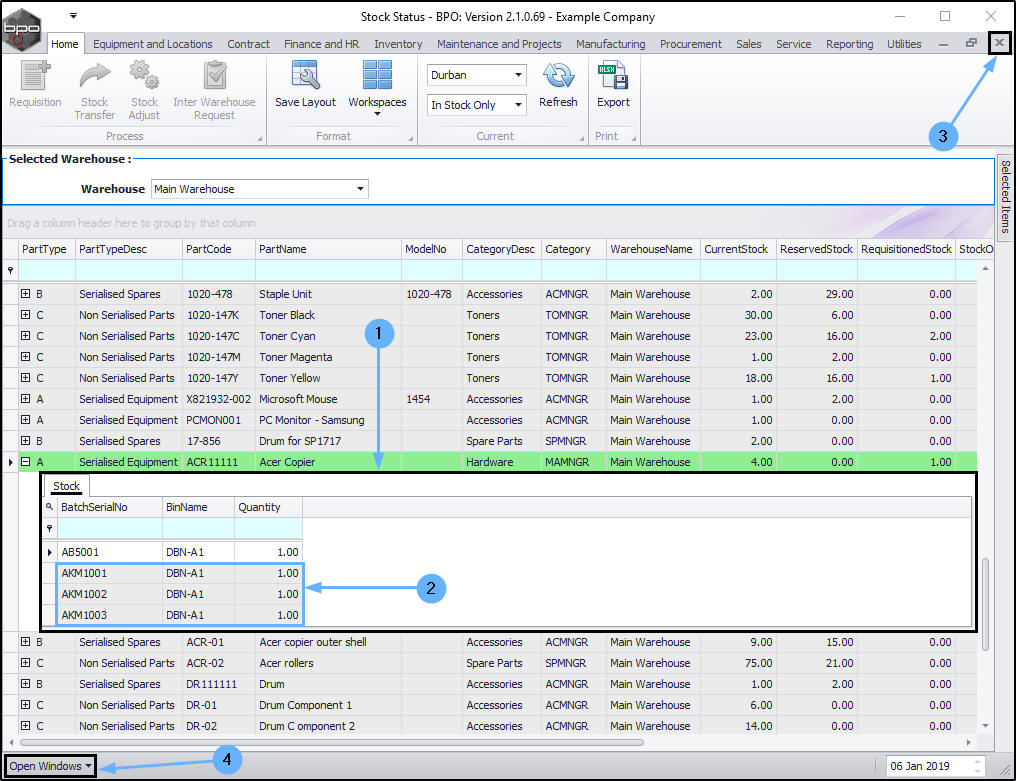
- Click on the expand button in the row of the part.
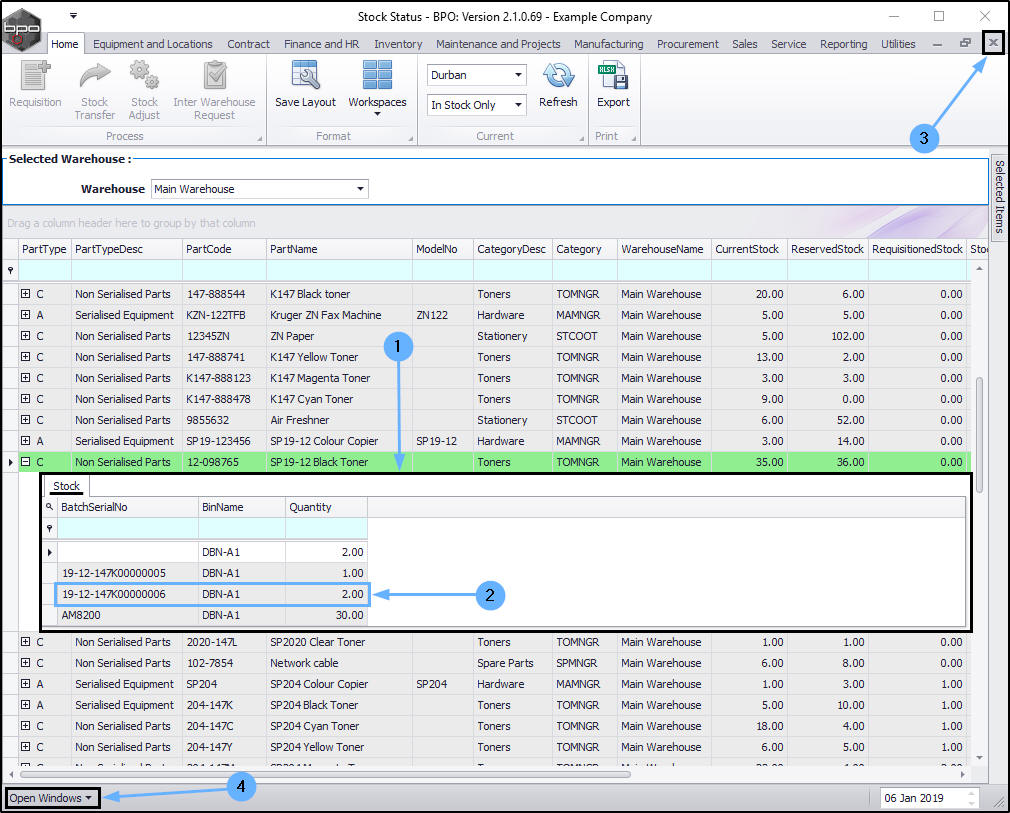
- The Stock frame will be expanded.
- Here you can view the Main Warehouse, DBN-A1 Bin contains 3 items with 3 unique serial numbers as set up in the production run.
- Close the screen when you are done.
- Use the Open Windows menu to return to the Production screen.
-
Either
-
Or
Production Completion - C-class.Product
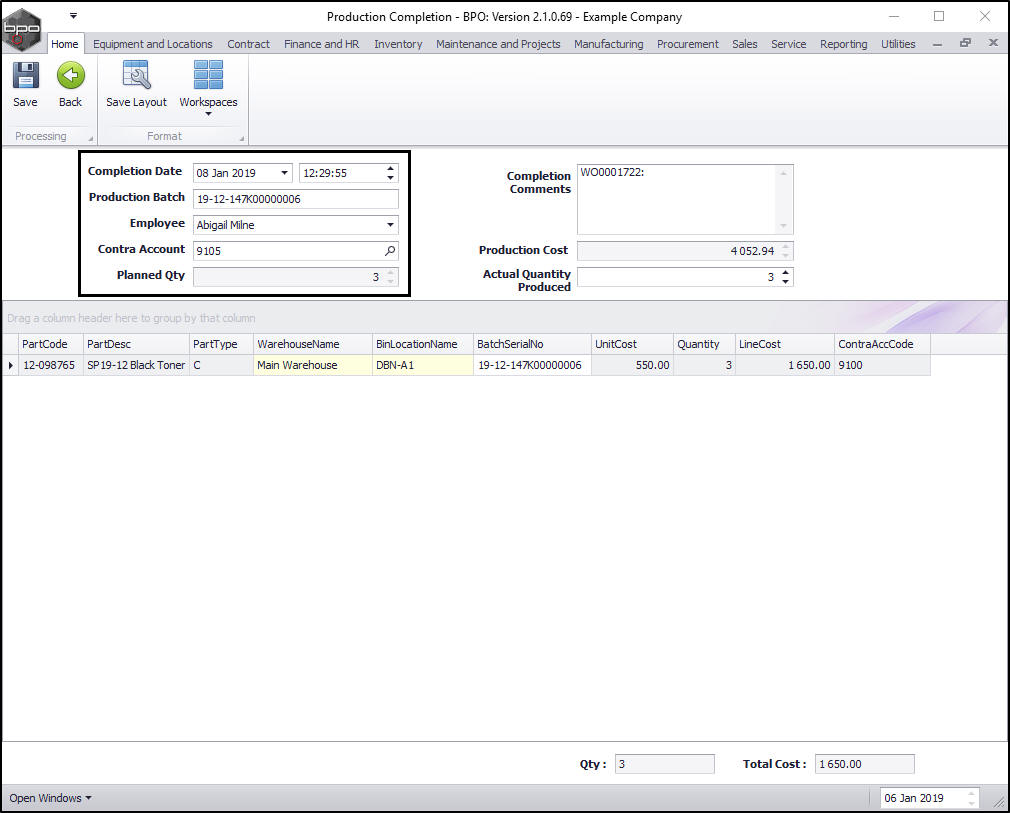
The Production Completion screen will be displayed. Check all the production details:
- Completion Date (and Time) This will populate with the current date and time.
- Completion Date: You can either type in or click on the drop-down arrow and use the calendar function to select an alternative date.
- Completion Time: You can either type in or use the directional arrows to select an alternative date.
- Production Batch: This will auto populate with the batch serial number set up on this production run.
- Employee: This will populate with the employee currently logged on to the system but you can click on the drop-down arrow and select an alternative employee if required.
- Contra Account: This will populate with the chart of account number initially set up for this production run. You can click on the search button and select an alternative account number if required.
- Planned Quantity This will auto populate with the quantity that was initially planned to be produced.
- Completion Comments: This will populate with the linked work order number. You can add other comments as required.
- Production Cost: This is the total cost of the production run (the sum of the parts used to make the product). This is not dependant on the amount of units produced in the production run.
- Actual Quantity Produced: Check that the Actual Quantity Produced is correct. If not, either type or use the directional arrows to select the quantity that has actually been produced.

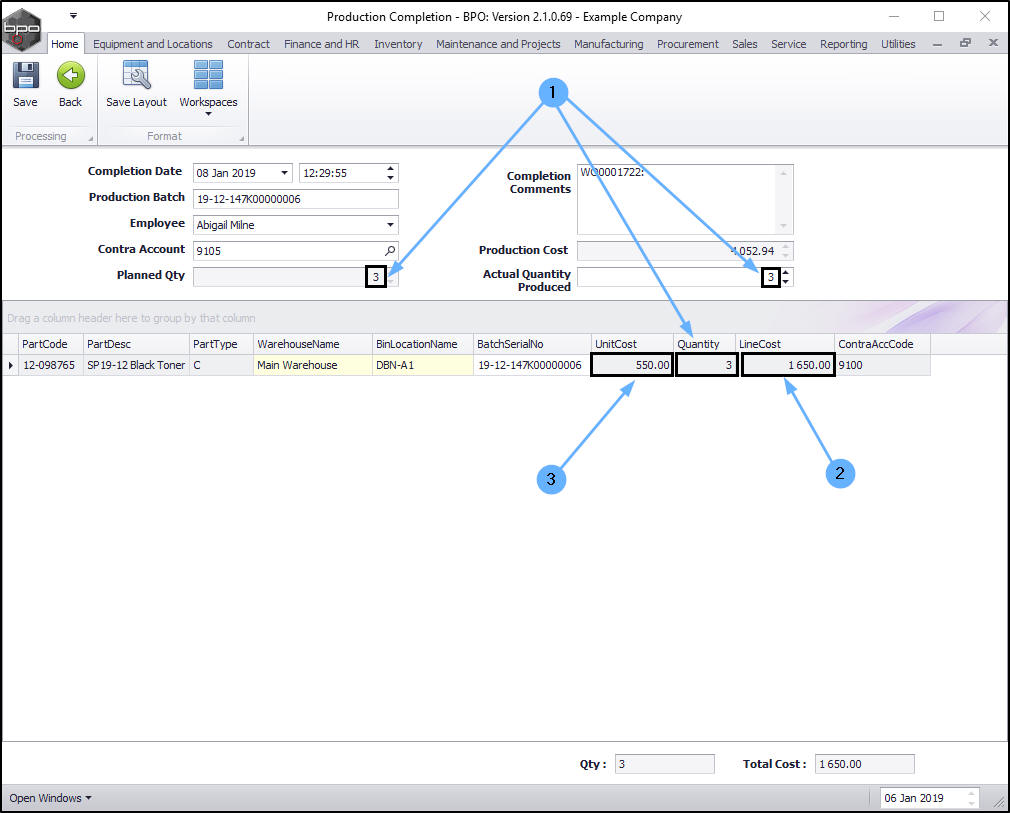
Change the Actual Quantity Produced - C-class Product
- In this example, you can see that the Actual Quantity Produced is the same as the Planned Quantity and this is also reflected in the Quantity column in the parts data grid.
- The totalLine Cost will remain the same no matter what the Actual Quantity Produced is.
- The Unit Cost is the cost of producing 1 unit.
- The Production Cost is
- In this example, 3 'units' will be produced so the Line Cost is R1650 divided by 3 which equals R550.
- Quantity and Total Cost???
In this example the Actual Quantity Produced has been increased to 4.
- The new Actual Quantity (4) will reflect in the Quantity column in the Parts data grid.
- Note: As this is a C-Class items, the quantity increase or decrease will reflect in the Quantity column of the same row).
- The Planned Quantity figure will remain the same.
- The totalLine Cost will remain the same.
- The Unit Cost per item line will remain the same.
- Quantity and Total Cost ???

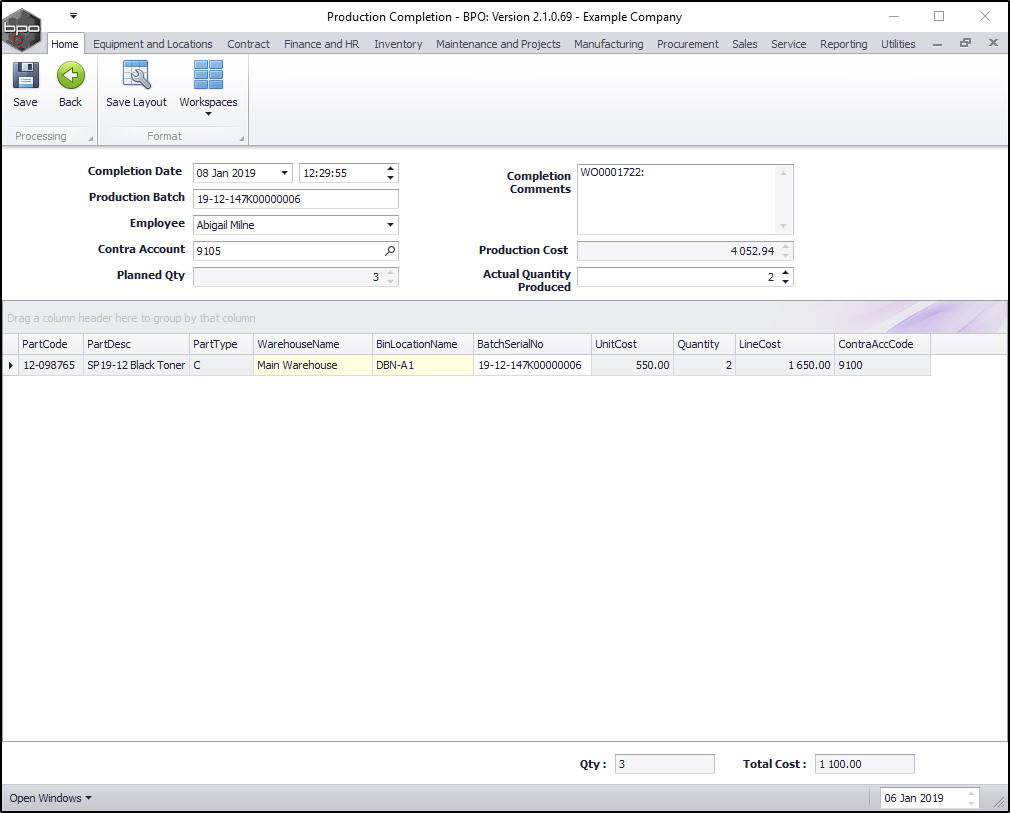
In this example the Actual Quantity Produced has been decreased to 2.
- The new Actual Quantity (2) will reflect in the Quantity column in the Parts data grid.
- Note: As this is an A-Class item each item is placed in a single row (as opposed to a C-Class items where the quantity increase or decrease will reflect in the Quantity column of the same row).
- The Planned Quantity figure will remain the same.
- The totalLine Cost will remain the same but will be divided equally per item line.
- The Unit Cost per item line will remain the same.
- Quantity and Total Cost ???
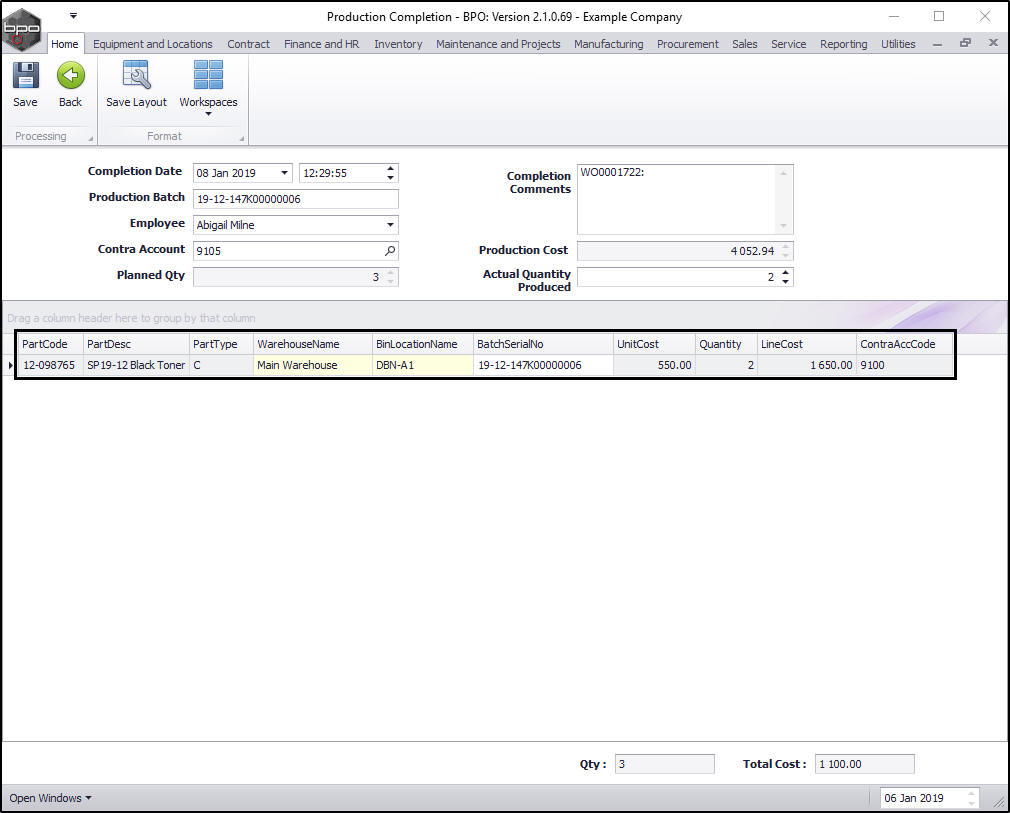
Move down to the Parts data grid.
- You will note that this data grid auto populates with the:
- Part Code: This is the code as set up on the part.
- Part Description: This is the description as set up on the part.
- Part Type: This is the type as set up on the part.
- Warehouse Name: (where the unit will be sent after production). This field will only be populated if a default warehouse and bin has been set up on the part.
- Bin Location Name: This field will only be populated if a default warehouse and bin has been set up on the part.
- Batch Serial No: This is the Production Batch No.
- Unit Cost: This is the cost of producing 1 unit.
- Quantity: This reflects the quantity as entered in the Actual Quantity Produced column.
- Line Cost: This is the total cost of the production run (the sum of the parts used to make the product).
- Contra Account Code: This is the default Contra Account Code as set up on the part.
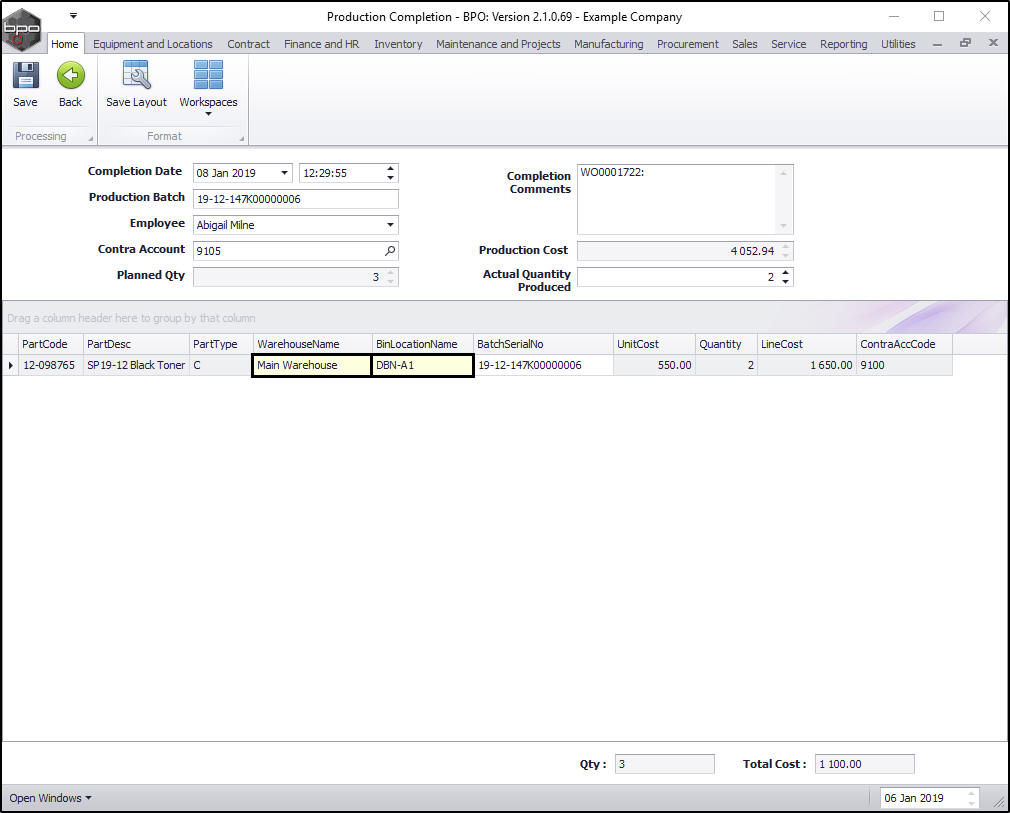
Select an (Alternative) Receiving Warehouse and Bin - C-class Product
You can select a receiving warehouse and bin or change the receiving warehouse and bin, if a default one has been set up on the part.
In this example, there is a default warehouse and bin already set up on this part code.
- Follow the same process: Select an (Alternative) Receiving Warehouse and Bin as explained above for an A-Class item.
Batch/Serial Number - C-class Product
- You will note that the Batch Serial No text box is already populated with a batch number for this batch of C-Class items. This is because Auto Serial No was selected, if this setting was not selected, the Batch Serial No text box would be blank and you will have to type in the batch number.
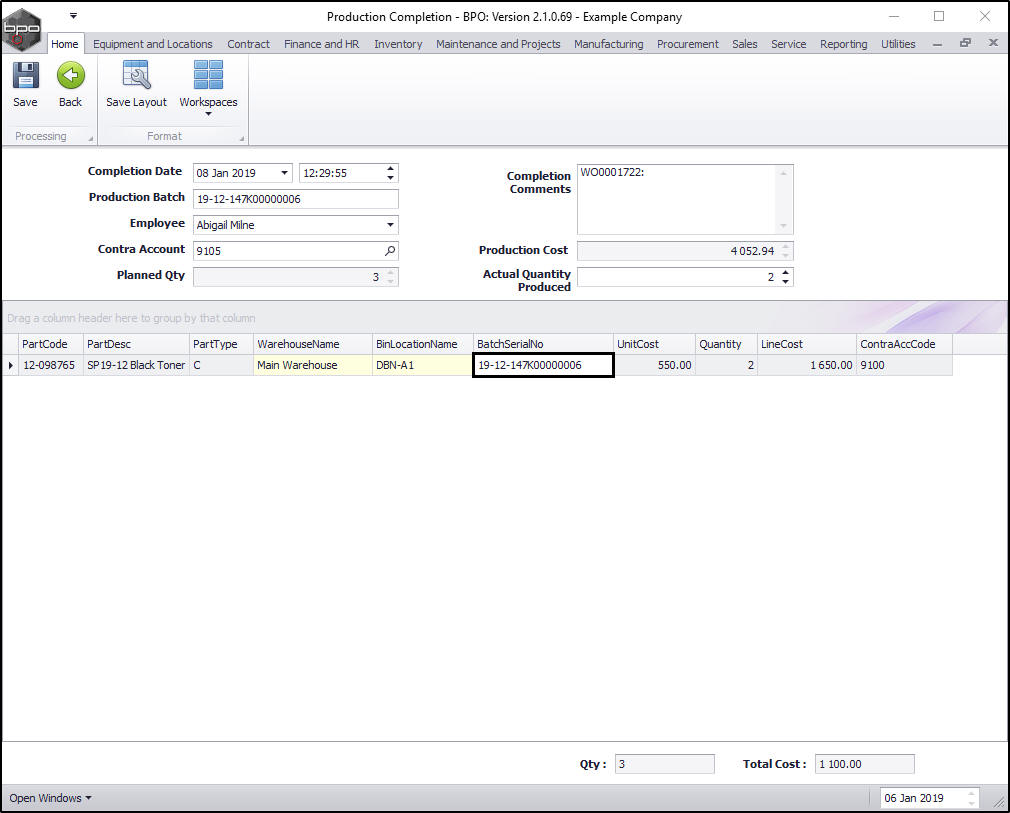
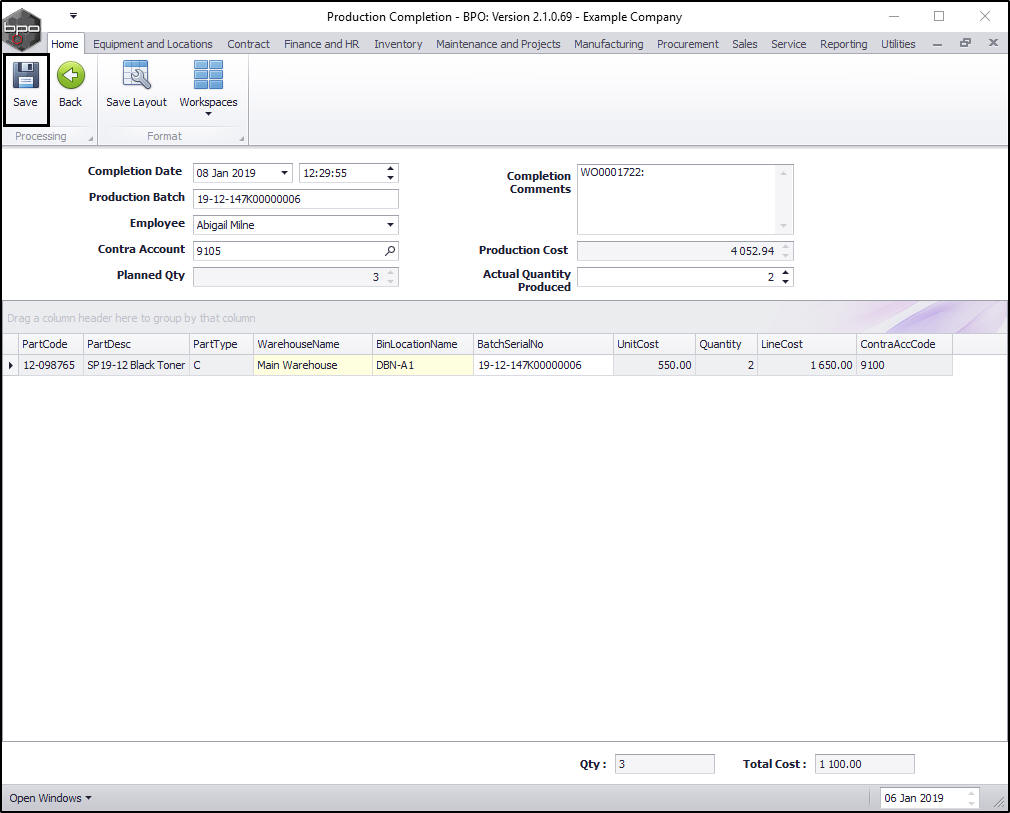
- When you have finished checking/editing the details in this screen, click on Save.
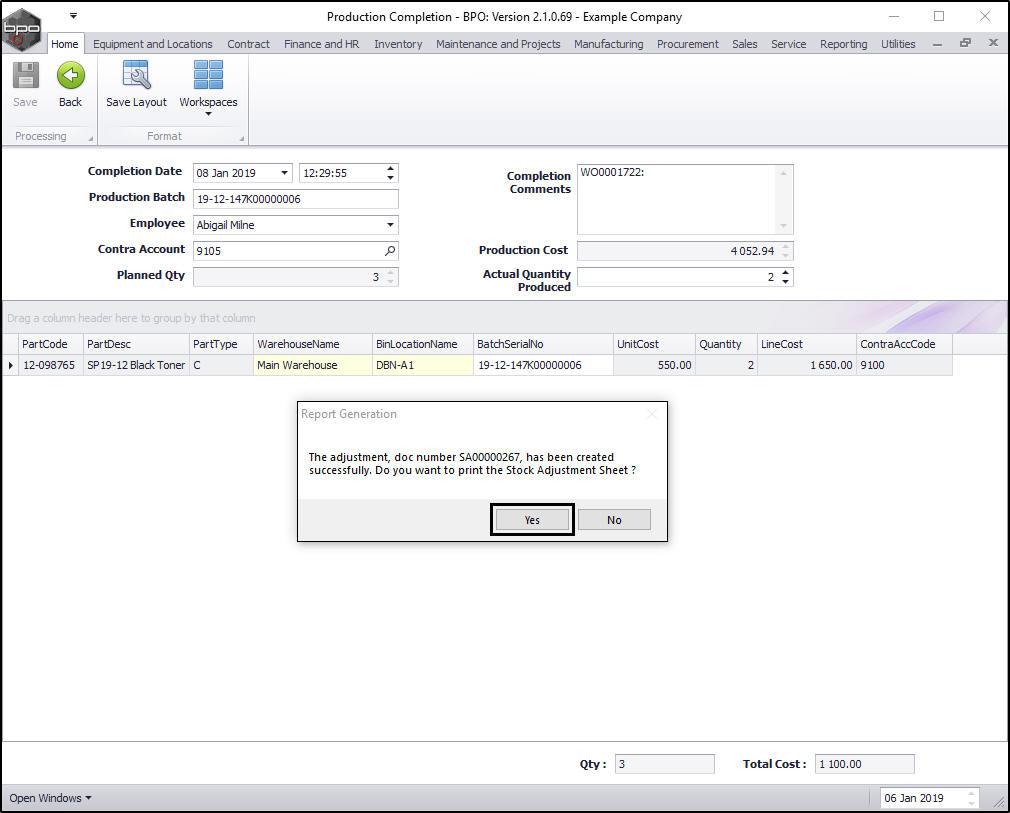
Stock Adjustment Report - C-class Product
- A Report Generation message box will pop up, asking;
- The adjustment, doc number [ ], has been created successfully. Do you want to print the Stock Adjustment Sheet?
- Click on Yes.
The Report Preview screen will be displayed.
- The report will state which warehouse and bin the produced items will be received into.
- The Batch number will be recorded.
- It will state the quantity that is being received.
- It will state the Unit Cost and Line Cost of the product(s).
- From here you can View, Print, Export or Email the Stock Adjustment report.
- Close the Report Preview screen when you are done.

You will return to the Production listing screen.
- The production run will be removed from the Production listing screen.
View Stock Generated - C-class Product
- You can view the stock generated in the Stock Status screen.
| Ribbon Access: Inventory > Stock |
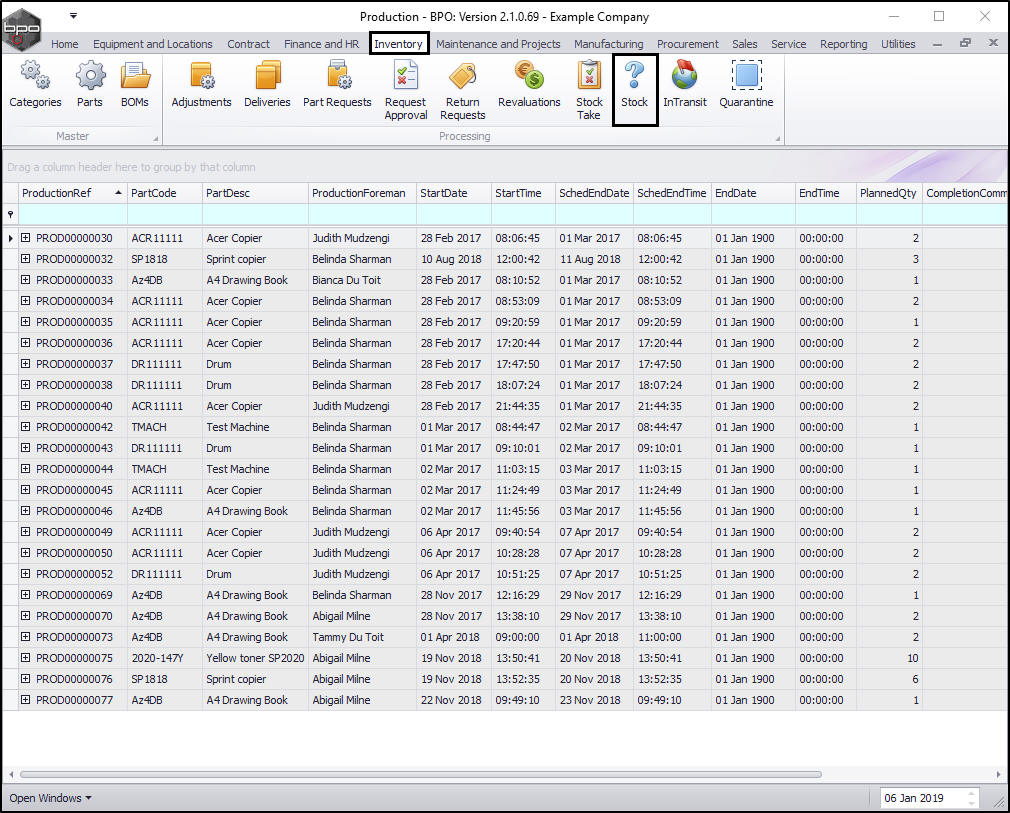
The Stock Status screen will be displayed.
- Ensure that you have selected the site that the receiving warehouse is in and that the status is set to In Stock Only.
- Click on the drop-down arrow in the Warehouse field to select the receiving warehouse.
The Selected Warehouse frame will populate with the Type, Description and Codes of all the parts in stock.
- Use the Filter Row or scroll down the list to find the produced part.
- Click on the expand button in the row of the part.
- The Stock frame will be expanded.
- Here you can view the Main Warehouse, DBN-A1 Bin contains 2 items with the batch number as set up in the production run.
- Close the screen when you are done.
- Use the Open Windows menu to return to the Production screen.
-
Either
-
Or
MNU.051.006