Projects
Projects - For Contract
This screen displays items linked to the selected project that have been processed, but still need to be linked to a new or existing contract. The items displayed can be:
- A or B-class internal assets issued (New Deal Rental)
- A or B-class serialised stock invoiced and issued (New Deal Sale)
| Ribbon Access: Maintenance / Projects > Projects |

- The Project Listing screen will be displayed.
- Click on the row of the project that has item(s) waiting to be linked.
- Click on the For Contract tile.
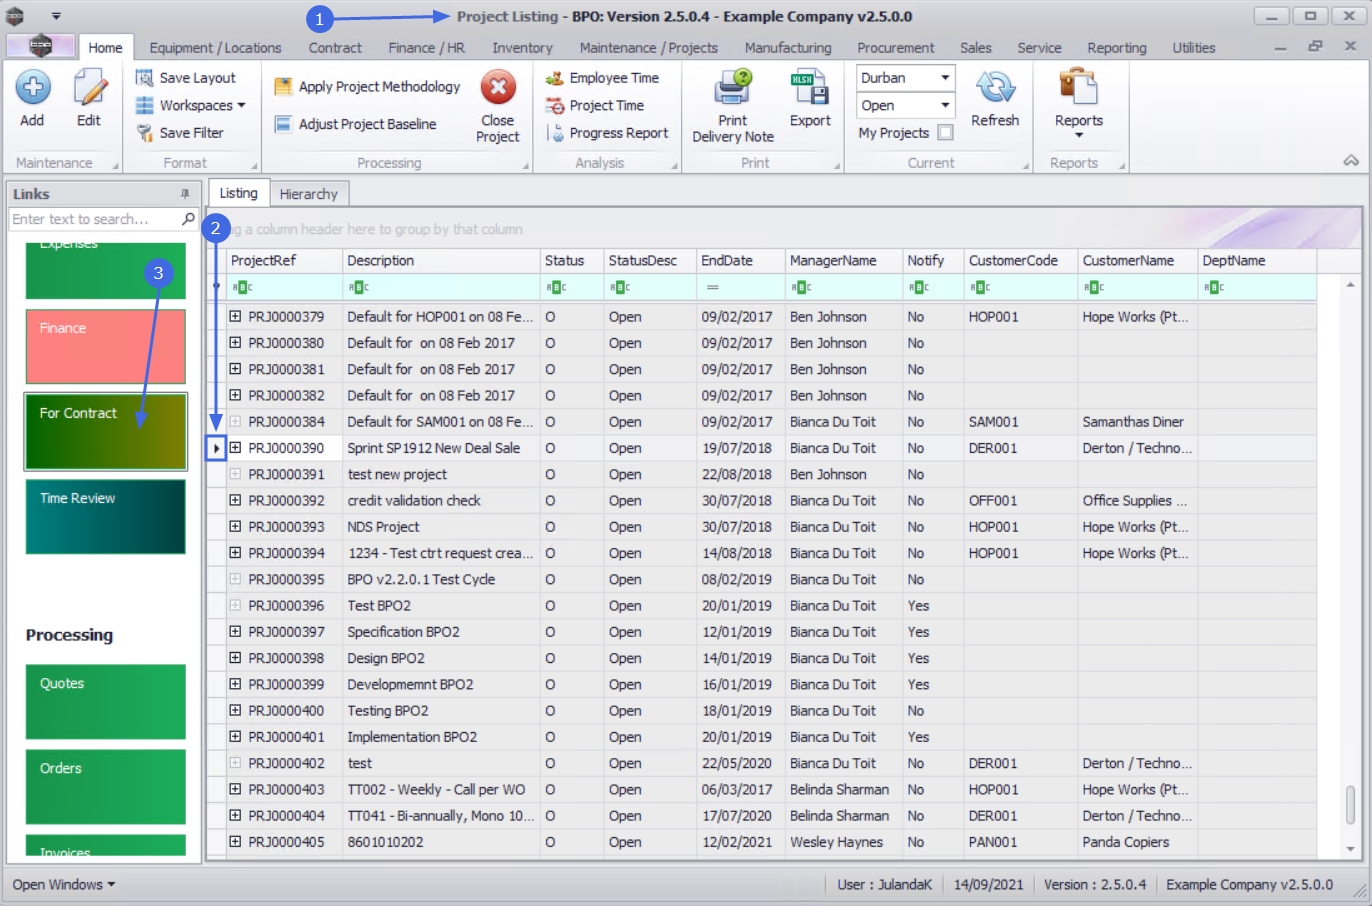
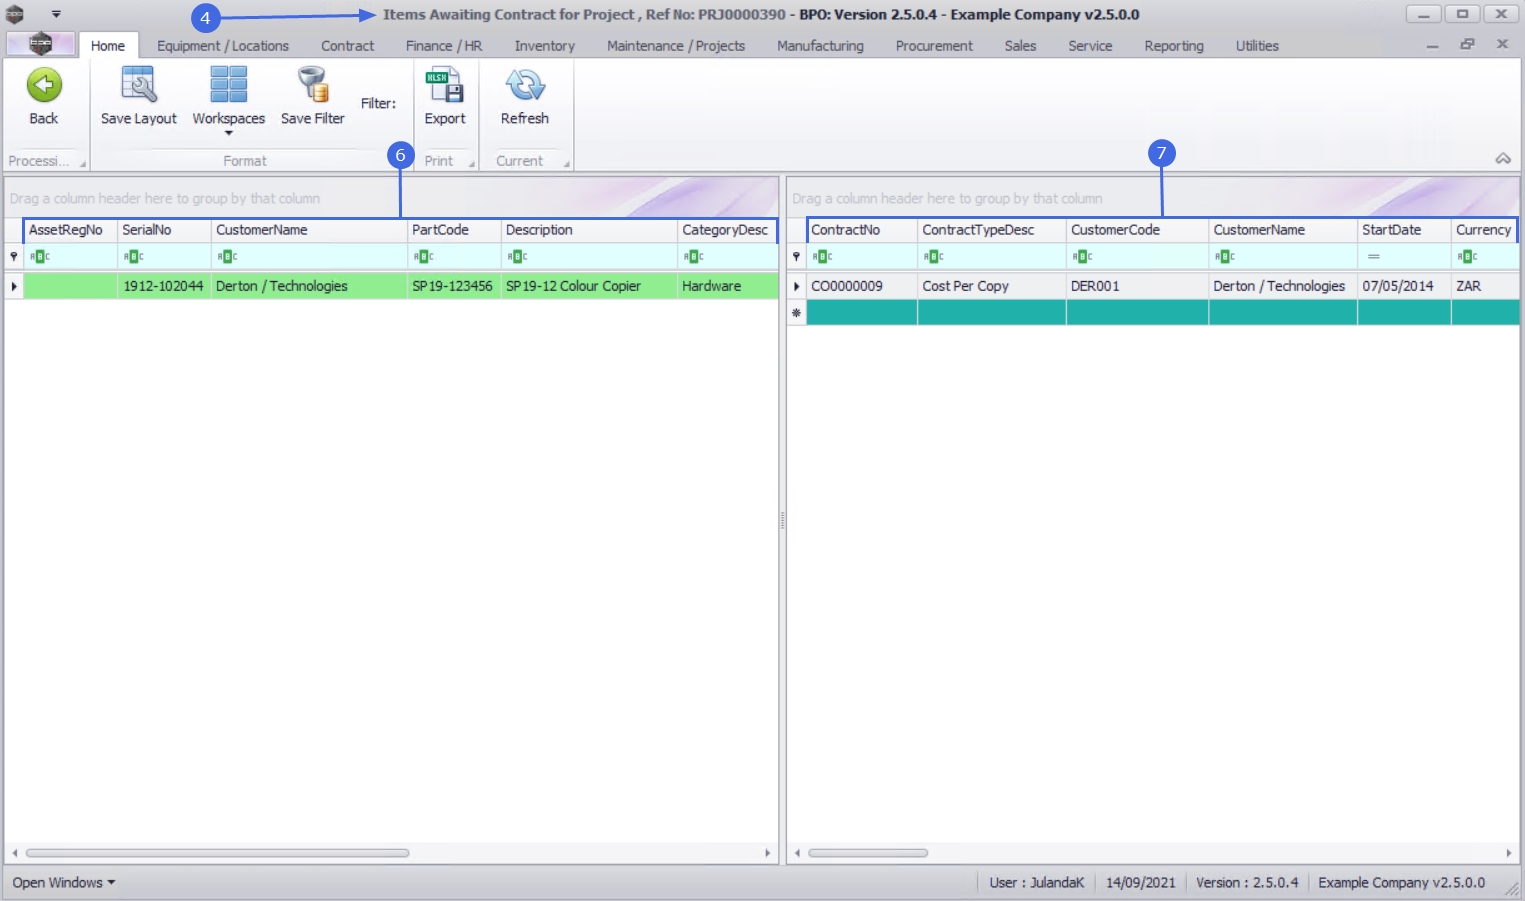
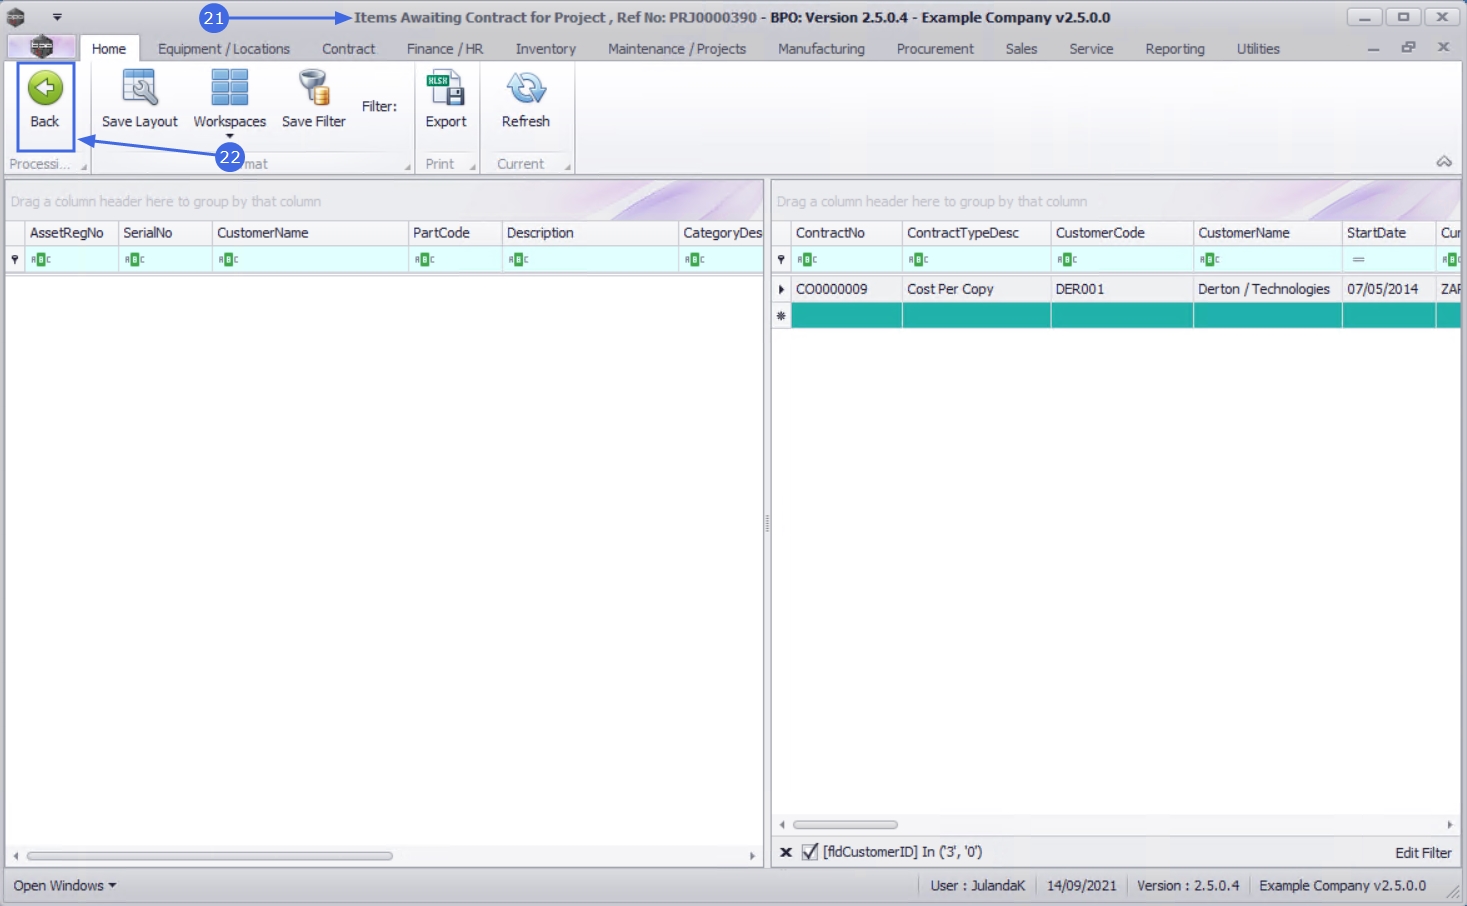
- The Items Awaiting Contract for Project , Ref No: [project ref number] screen will be displayed.
- This screen is divided into 2 data grids:
- Data grid 1: displays all the items linked to the selected project waiting to be allocated to a contract. These items can either be client assets or internal assets. For internal assets to be displayed, a New Deal Project process has to be completed first.
- Data grid 2:
displays all the existing contracts for the
customer
linked to the project.
 Deleted or Closed contracts will not display on this screen.
Link Item(s) to Contract
- Select Multiple Item Lines - Block or a single item in data grid 1, that you wish to add to a contract.
- Click on the line separator of the selected item(s), hold and drag the contract item to an existing or new contract, in data grid 2.
- As it is 'dropped', the Drop Validation message will display requesting;
- Do you want to add these items(s) to contract no. [contract number], for customer [Customer Name]?
- Click on Yes.
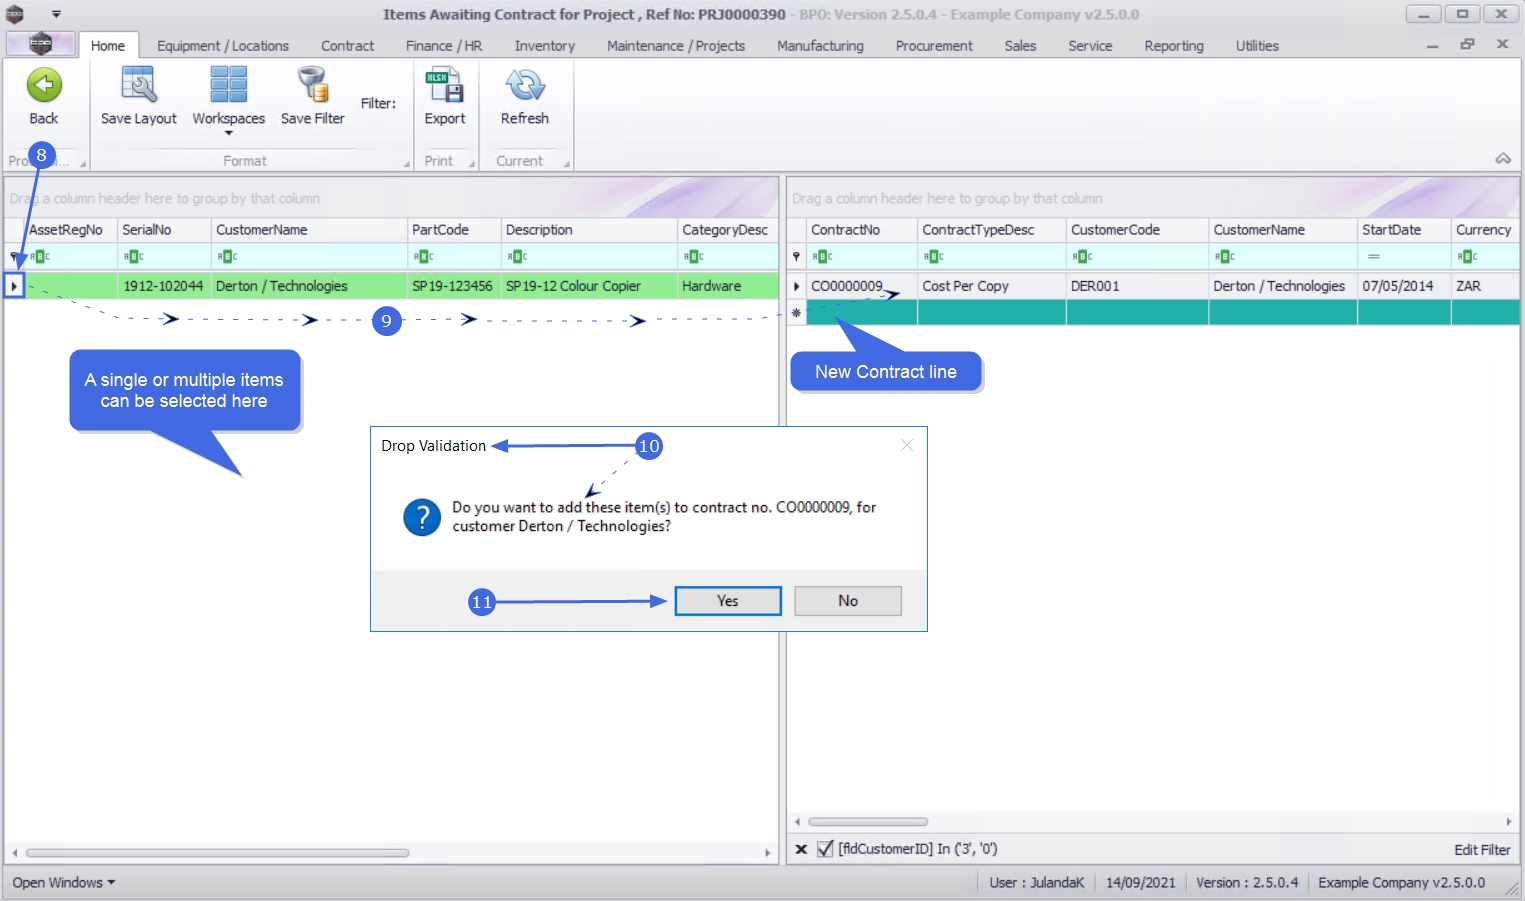
- The Maintenance for Contract No. screen will be displayed.
- The contract item you have added will be listed last in the Parts data grid.
Part Items Frame
-
The Items frame for the part with sub grids will expand, for adding information to:
- Item Fees
- Item Meters
- Item Inclusions
- Item Contacts
- Complete the Part Item frames as required.
![]() For a detailed handling of this topic refer to Add a New Contract
For a detailed handling of this topic refer to Add a New Contract
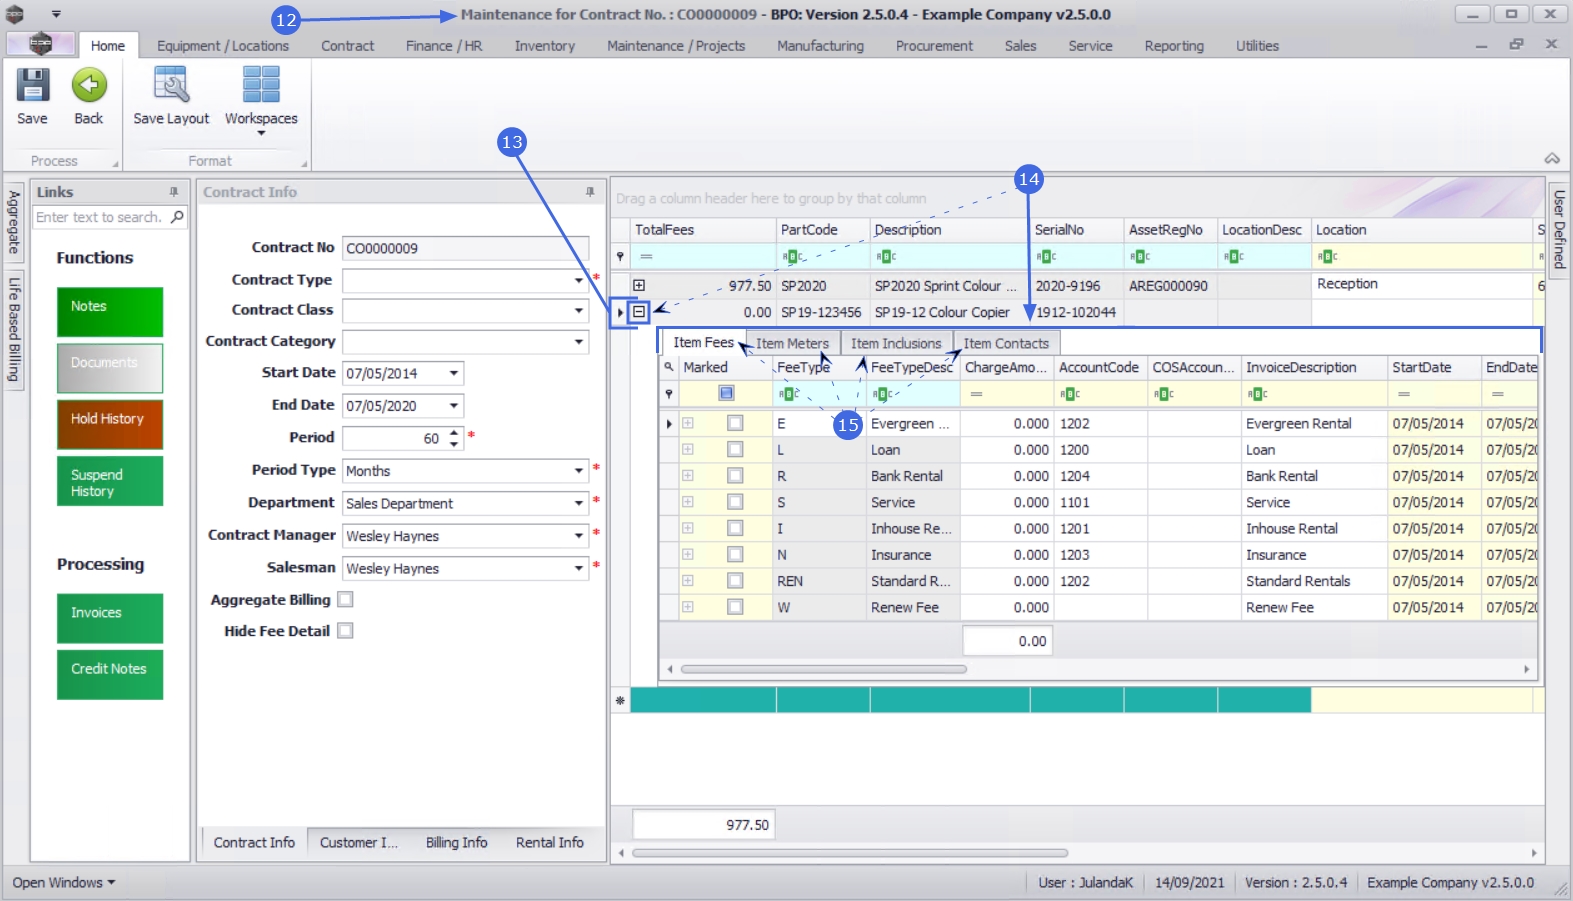
- The scroll bar at the bottom indicates that further information is available. Scroll right to view all the contract item information.
- You can link or edit the:
- Location
- Shipping Address
- COS Account Code
- SLA Hours
- Travel Radius
- Travel Charge
- Complete the Contract Info, Customer Info and Billing Info and Rental Info and Life Based Billing info.
Save Item For Contract
- Click on Save.

- The item will be linked to the existing contract and the contract details will be saved.
- You will return to the Items Awaiting Contract for Project listing screen.
- Click on Back to return to the Project Listing screen.
MNU.058.029