Sales
Introduction to Credit Notes
This manual provides an overview of the processes and functionality available from the Sales Credit Note listing screen.
A Sales Credit Note is a document issued by the seller and sent to the buyer when there is a reduction in the amount payable to the seller, due to an error in the original invoice or other reasons. It is the reversal, in part or full, of a Sales Invoice.
Sales Credit Notes need to go through an approval process in order to complete the transaction.
When doing a Credit Note for stock items, you have an option to return the stock item and replace it.
All item types can be credited, but when crediting stock, a decision must be made as to whether or not to return stock and if replacement of the part is required. This will raise a return request that must be actioned by the storeman to return the part to warehouse. However, when crediting a Point Of Sales (POS) Invoice, the stock will be returned automatically to the designated Auto Issue warehouse.
![]() Examples where parts may not need to be returned to store:
Examples where parts may not need to be returned to store:
- Items that have been Invoiced with an incorrect Selling Price, will only require a partial credit, where only the incorrect portion of the Selling Price for the Item will be credited.
- Stock items that falls under a Customer's Contract inclusions and was billed in error. The stock or part will remain with the Customer, but the Invoice should not have been raised and a Credit Note therefore needs to be issued for these items.
![]() Examples where parts may require stock return:
Examples where parts may require stock return:
- Items that are damaged or faulty will be brought back into store for repair or write off; and a working part can be issued against the part request in its place, then invoiced.
- The incorrect part was issued and invoiced. This requires return of the incorrect item; then request, issue and invoicing of the correct part.
| Ribbon Access: Sales > Credit Notes |

- The Sales Credit Notes listing screen will be displayed.
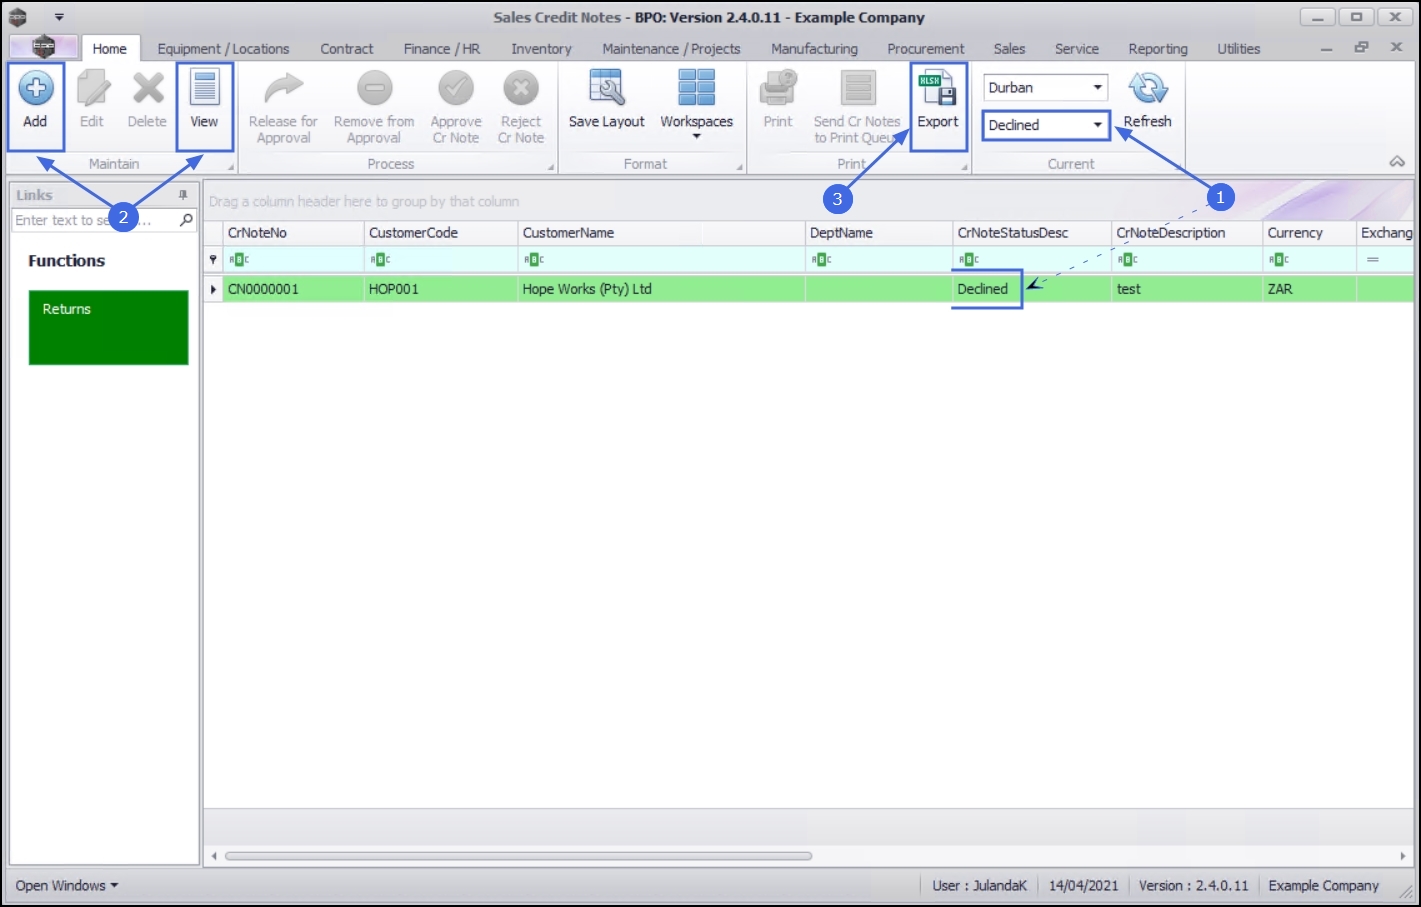
- Select the Site you wish to work in.
- The example has Durban selected.
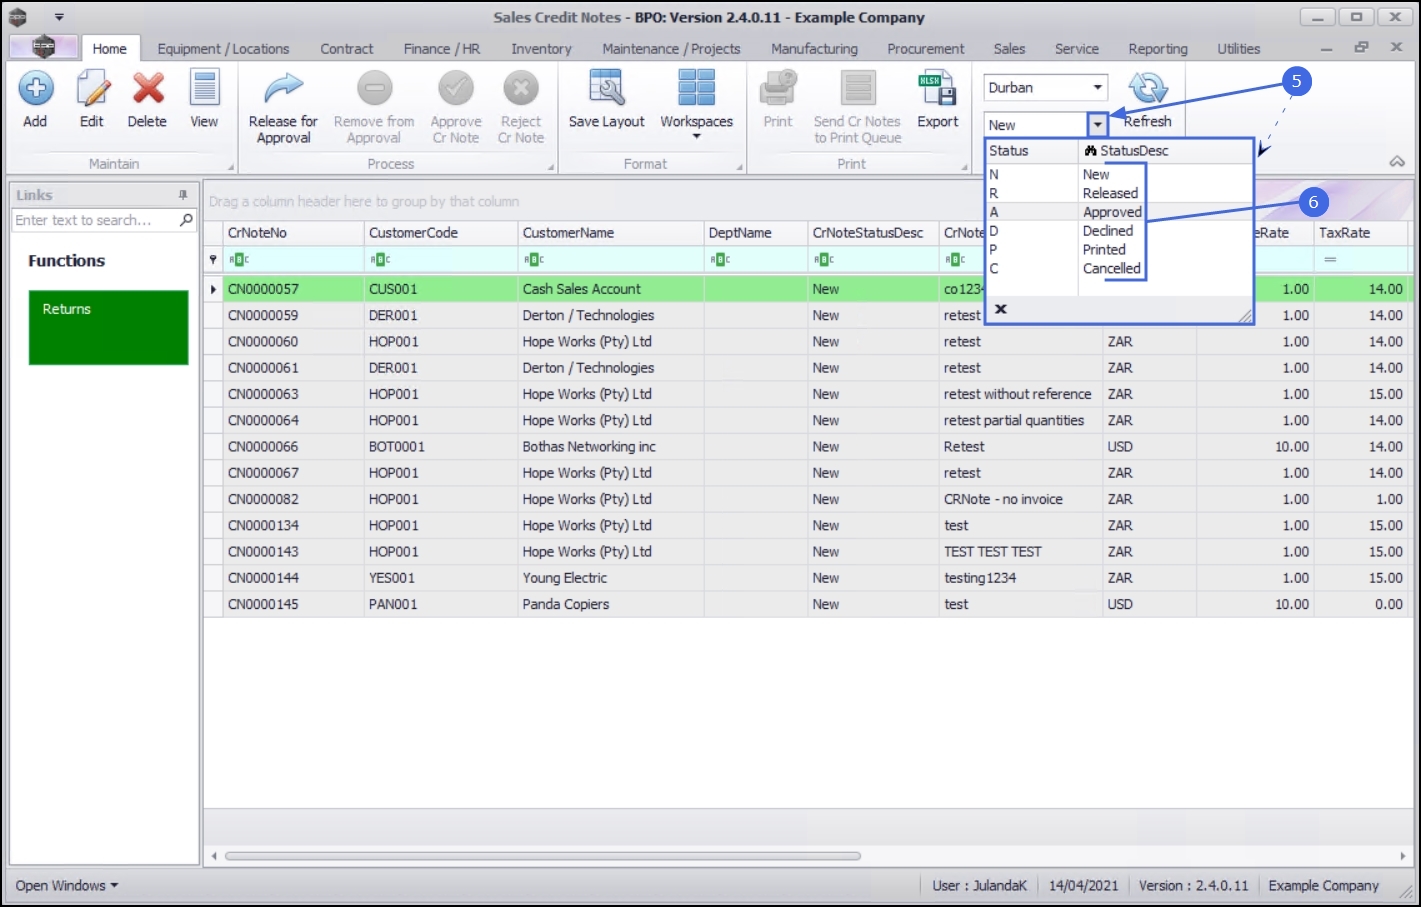
- The Status will open by default in the New status.
- The list of sales credit notes
displayed, will always be linked to the selected status.
- The sales credit notes in the Cr Notes Status Desc column has been filtered using the Status selected as New .

Filter by Credit Note Status
To view sales credit notes in a different status:
- Click on the down arrow in the Status field to display the Status drop-down list.
- Click on the status option you wish to view.
Maintain Buttons
There are various ribbon toolbar action buttons available depending on the screen status and will display as available (bold) or unavailable (greyed out).
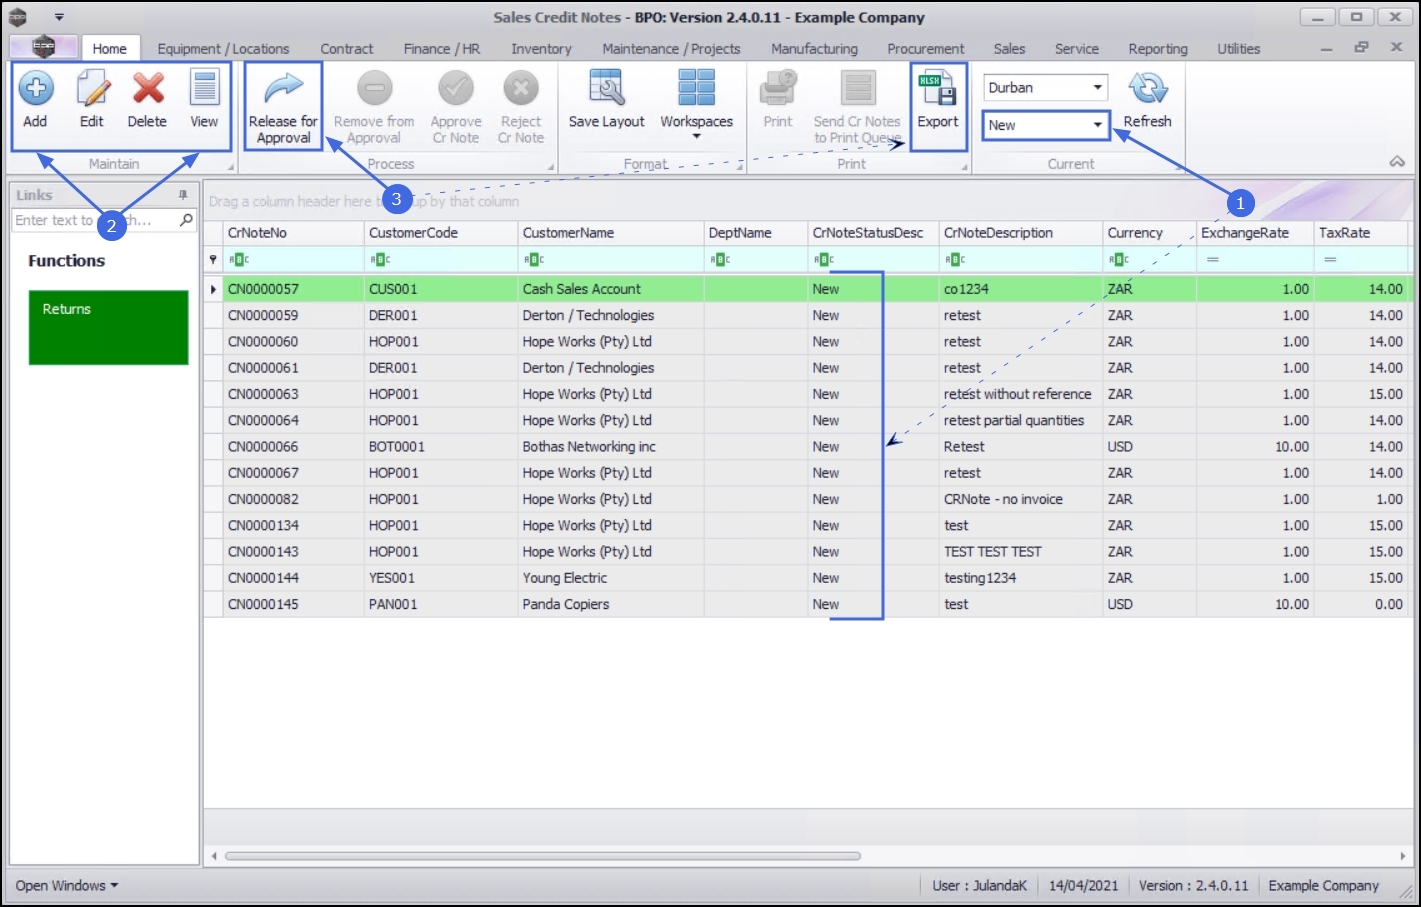
New Status
- Change the Status to New.
- In this status, you can Credit Notes - Issue a Credit Note, Credit Notes - Edit Credit Note, Credit Notes - Cancel a Credit Note and Credit Notes - View a Credit Note.
- You can Credit Notes - Release for Approval and Export a list of all the New Credit Notes to a Microsoft Excel Spreadsheet.
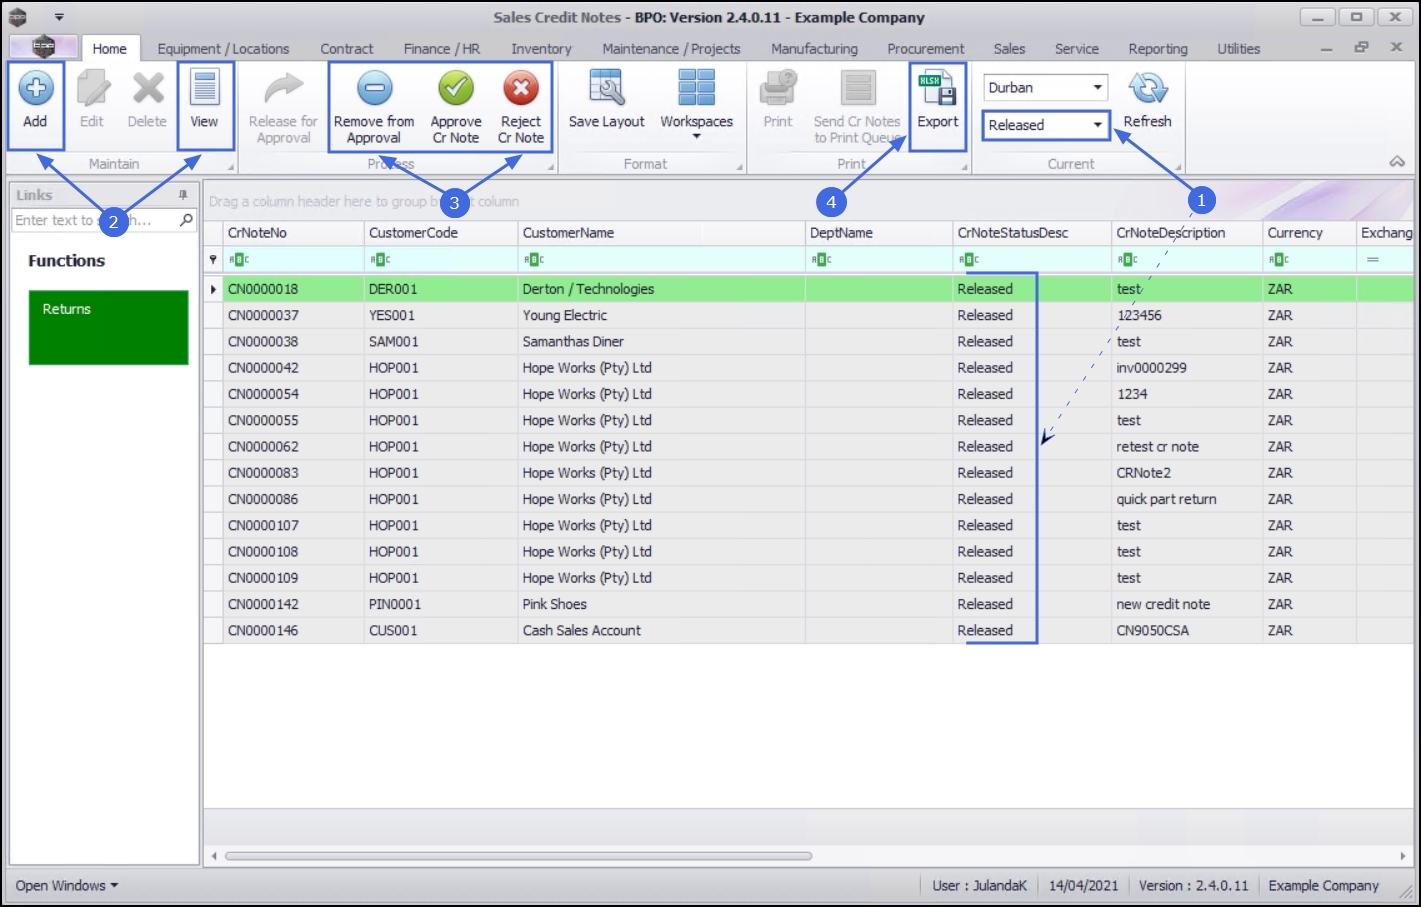
Released Status
- Change the Status to Released.
- In this status, you can Credit Notes - Issue a Credit Note and Credit Notes - View a Credit Note.
- You can also Credit Notes - Place on Hold, Credit Notes - Approve Credit Note or Reject Credit Note.
- You can also Export the list of released Credit Notes to a Microsoft Excel Spreadsheet.
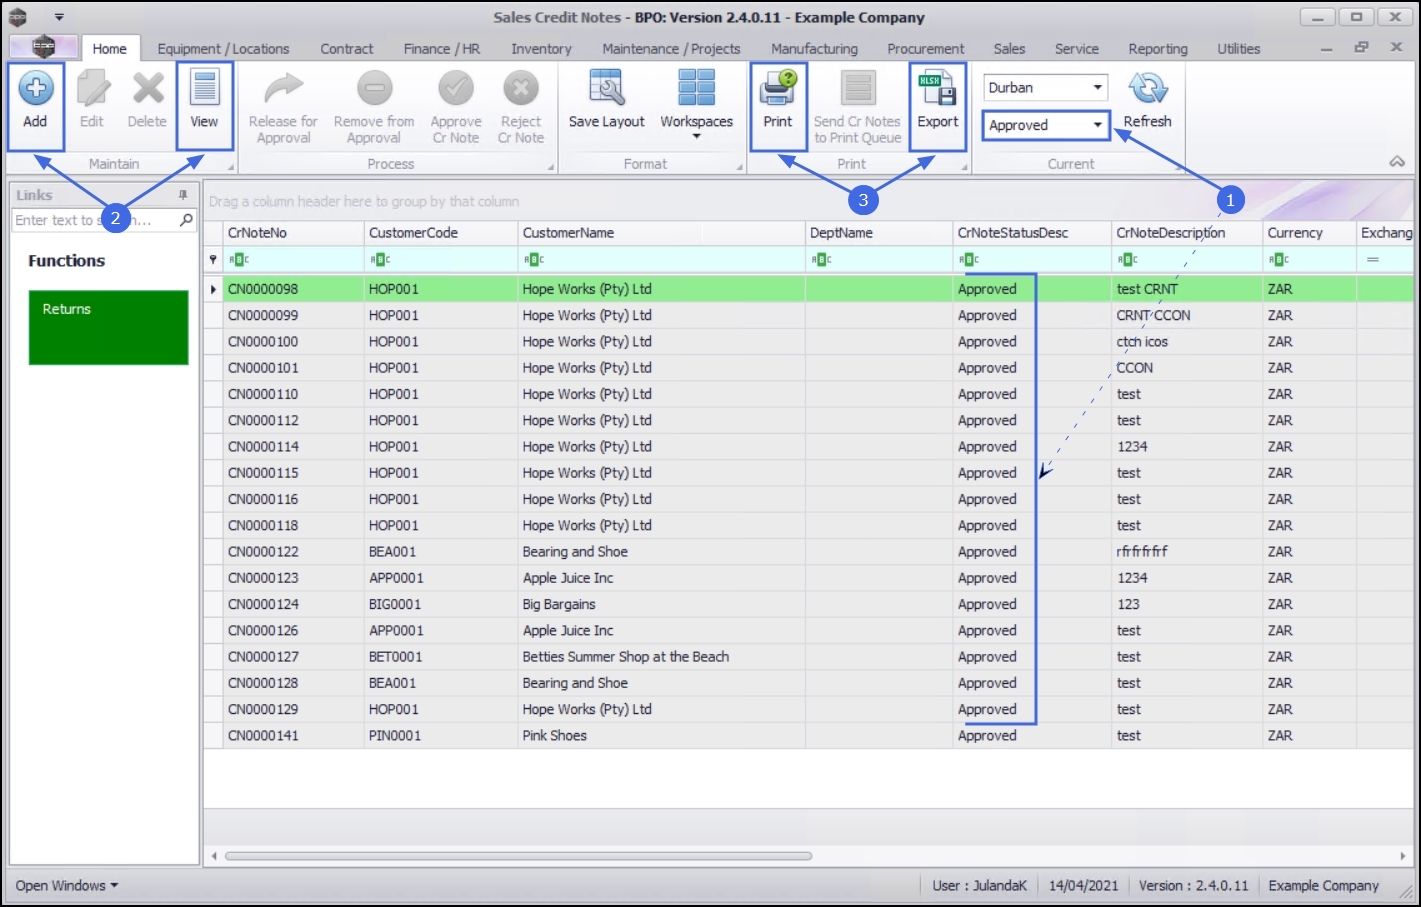
Approved Status
- Change the Status to Approved.
- In this status, you can Credit Notes - Issue a Credit Note and Credit Notes - View a Credit Note.
- You also now have the option to Print the Credit Note and Export the list of approved Credit Notes to a Microsoft Excel Spreadsheet.
Declined Status
- Change the Status to Declined.
- In this status, you can Credit Notes - Issue a Credit Note and Credit Notes - View a Credit Note.
- You are also able to Export the list of the declined Credit Notes to a Microsoft Excel Spreadsheet.
Printed Status
- Change the Status to Printed.
- In this status, you can Credit Notes - Issue a Credit Note and Credit Notes - View a Credit Note.
- You can Print or send Credit Note(s) to the Print Queue as well as Export a list of all printed Credit Notes to a Microsoft Excel Spreadsheet.

Cancelled Status
- Change the Status to Cancelled.
- In this status, you can Credit Notes - Issue a Credit Note and Credit Notes - View a Credit Note.
- You are also able to Export the list of cancelled Credit Notes to a Microsoft Excel Spreadsheet.

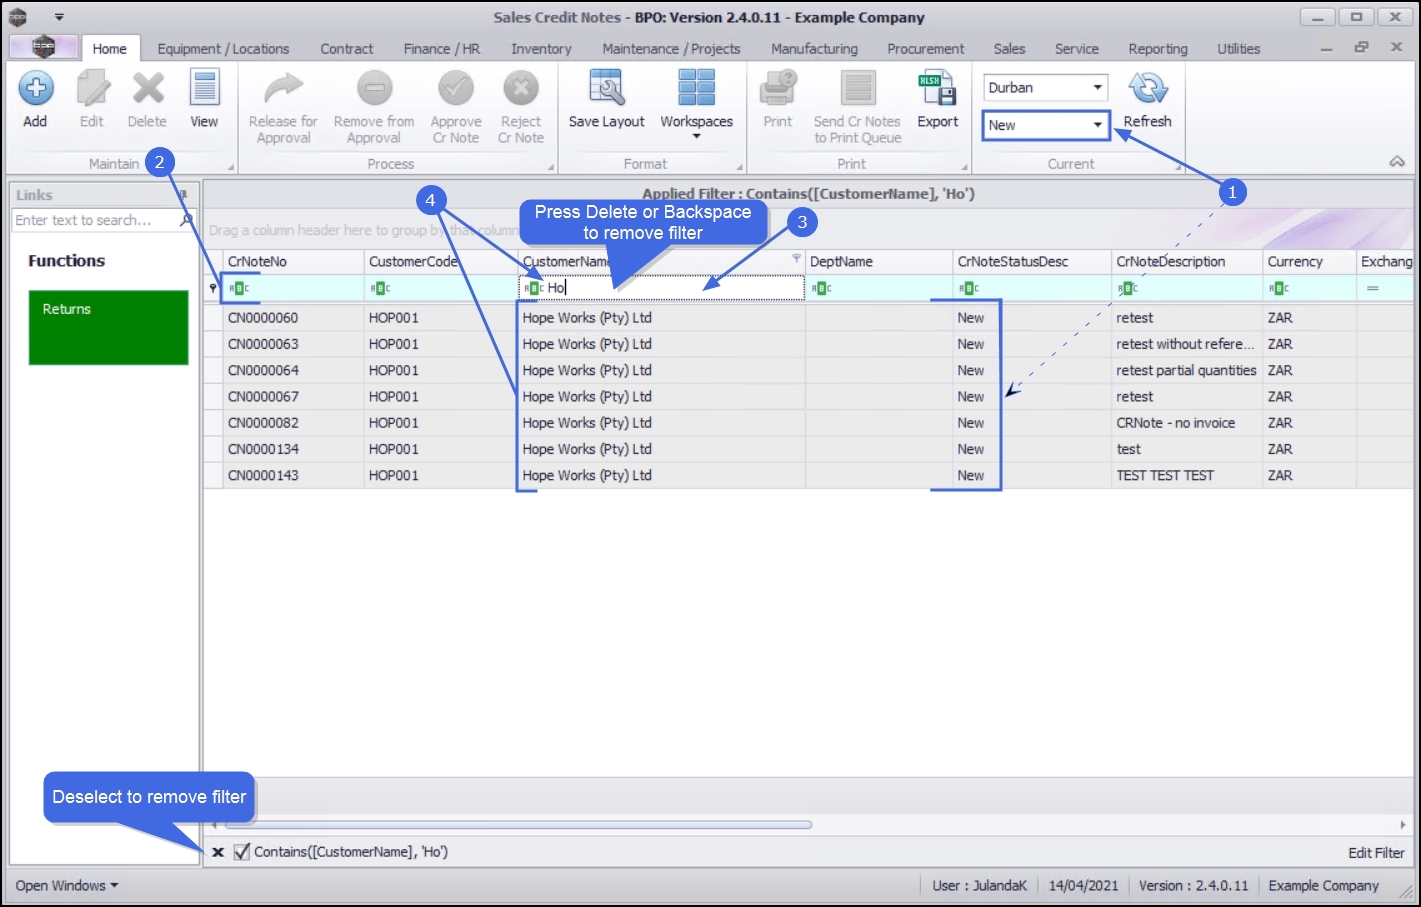
Filter by Customer
- The Status option allows you to filter the list of Credit Notes in the credit note data grid based on the selected filter.
- The example is listing all the New Credit Notes
- You can further refine the list by using the filter row in the data grid.
- Click in the filter field of the filter row in line with the column you wish to filter.
- The example has Customer Name selected.
- Start typing the text you wish to filter the list with.
- The example is using the customer name Hope Works (Pty) Ltd.
Remove Filter
To remove the filter, press Backspace or Delete to remove the filter text, or click on the filter tick box to deselect the filter option. This will return the Credit Note list screen for the Status you have selected.
Functions Tile

|
From the Returns tile you can view the Credit Notes - Returns linked to a selected Credit Note . |
BPO.MNU.064