Sales
Introduction to Point of Sale (POS) Lite
- This process is for Customers with an over the counter or "sales shop" environment.
- A Company Configuration flag needs to be set to Auto Sale Stock Issue. This means that stock can be auto issued from the Auto Issue Warehouse at time of invoice via the POS Lite screen.
- This stock needs to be specifically stored in a 'Stock Warehouse' that is configured for Auto Issues. There should be only one of these warehouses per site, containing one bin.
- The identification of a customer as a 'cash sales account' must be configured in the Sales Office(s)
- The default site of the user is used to determine the auto issue warehouse and the cash sales account.
- For a multi-site environment, users must be in a site specific group (User Right Access Code: Site)
| Ribbon Access: Sales > POS Lite |

- The Invoices listing screen will display with a list of all the Cash Sale Invoices that have been processed.
The Processing Buttons
- From this screen you can utilize the following Processing buttons:
- Add a new Transaction Invoice
- Print the Tax Invoice
The Invoices Data Grid
- The data grid lists all the Sales Transactions that have been processed, in descending order.
- An Invoice Number is automatically generated for each transaction and will follow sequentially.
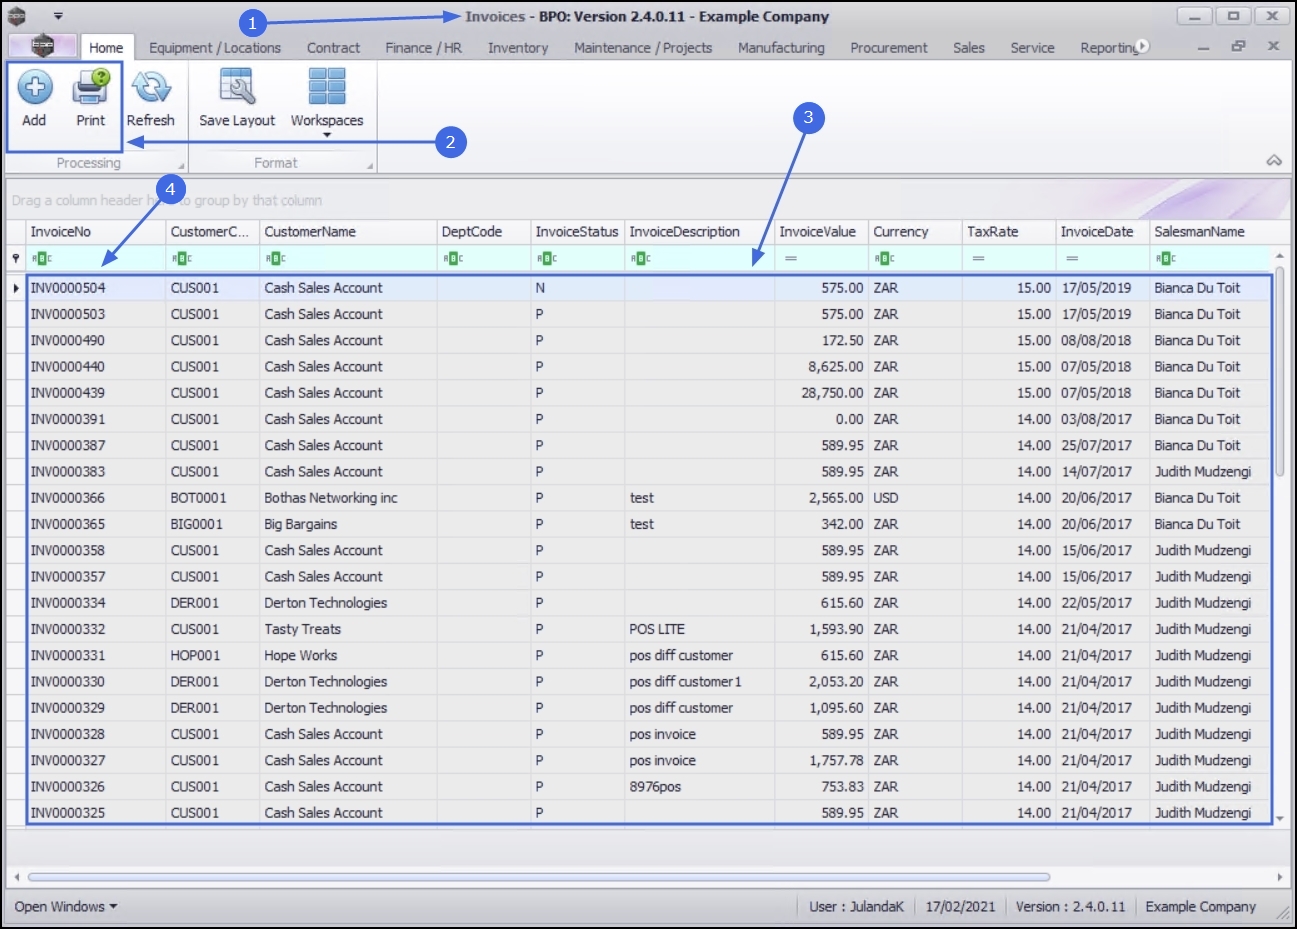
Column Filtering
List by Customer Name
- Click on the filter in the Customer Name field to display the Filter option screen.
- Scroll to the Customer Name and click in the check box next to it.
- For the purpose of this manual, Cash Sales Account has been selected.
![]() Note that only the Cash Sales Account entries are now listed.
Note that only the Cash Sales Account entries are now listed.
- Close the screen if you are happy with your selection or Clear Filter to reset the filter to the default list.

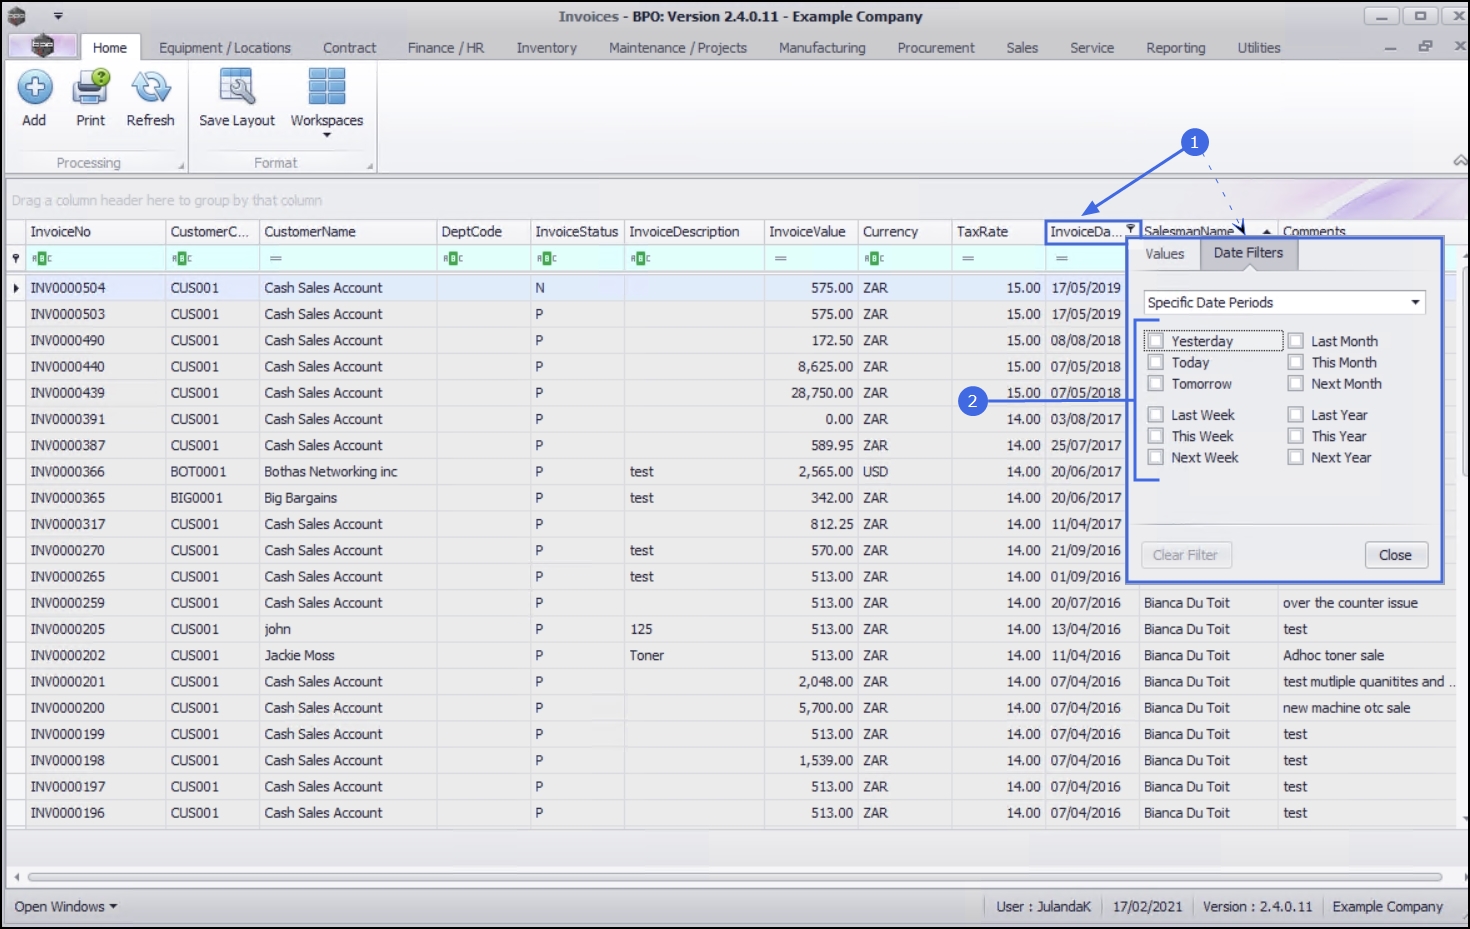
List by Date
- Click on the filter in the Invoice Date field to display the Filter option screen.
- The Date Filters options will display.
- Click in the check box next to the date periods(s) you wish to display.
- More than one check box can be ticked, if required.
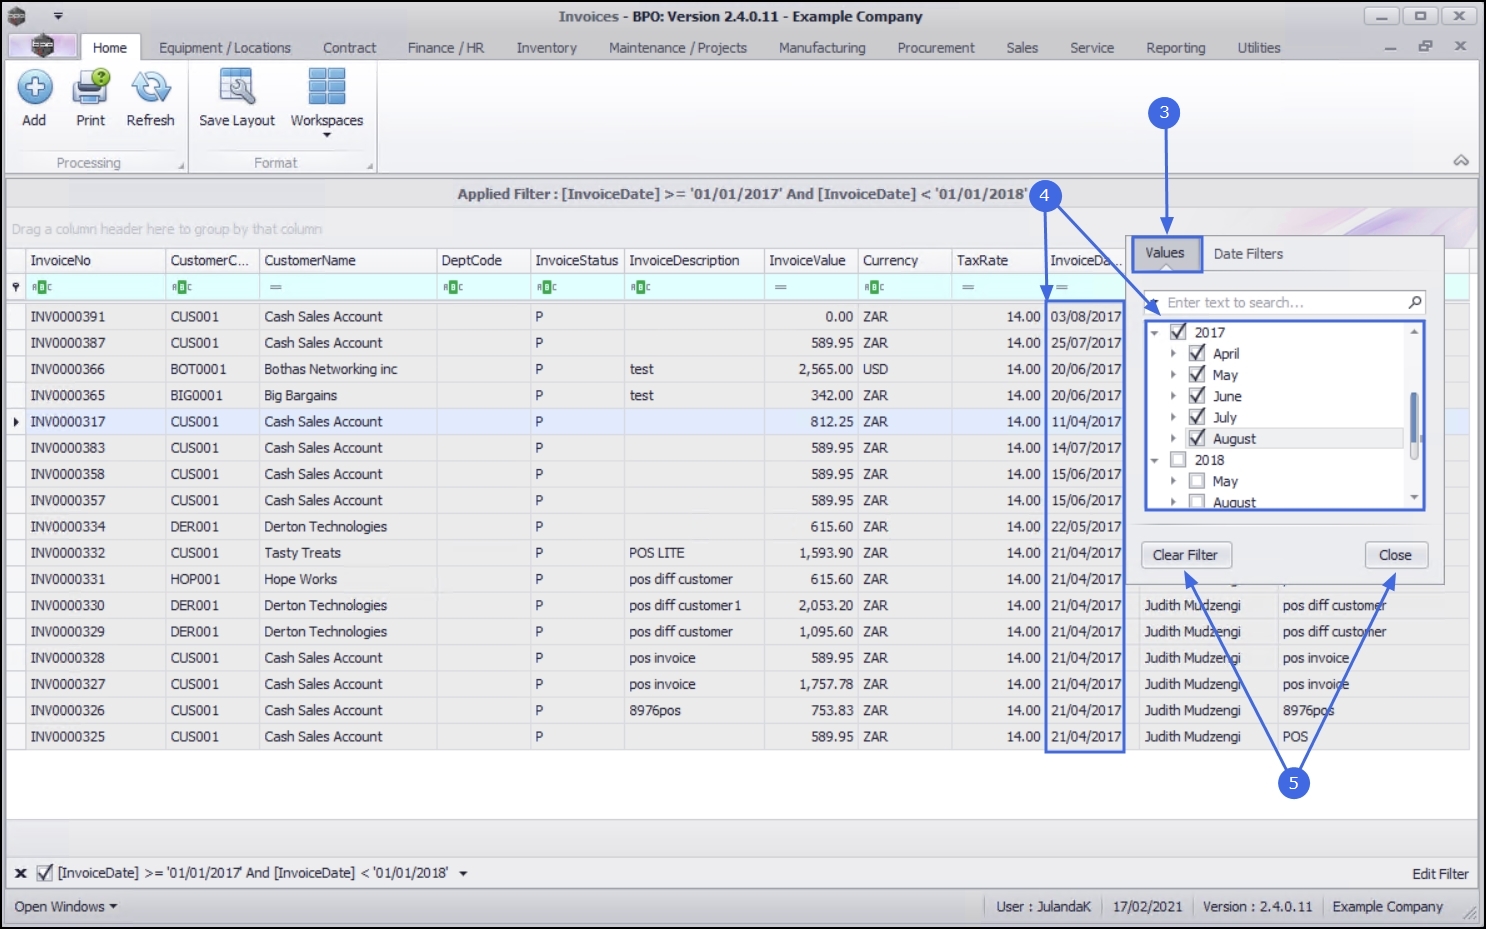
List by Values
- Click on the Values tab to display the date values from the Invoices listing screen.
- Click on the check box(es) you wish to display.
- For the purpose of this manual we have selected 2017 to display all the information for the year 2017.
![]() Note that the information returned will only be for 2017. The Invoice Date column will only displays 2017 dates.
Note that the information returned will only be for 2017. The Invoice Date column will only displays 2017 dates.
- Close the if you are happy with your selection or Clear Filter to reset the filter to the default list.
BPO.MNU.068