Sales
Customers - Documents
The Documents tile allows you to link, view or delete a customer's digital documents effortlessly. All your customer documents can be kept in one place by making use of this link.
These documents need to be saved in a shared folder on the server.
| Ribbon Access: Sales > Customers |

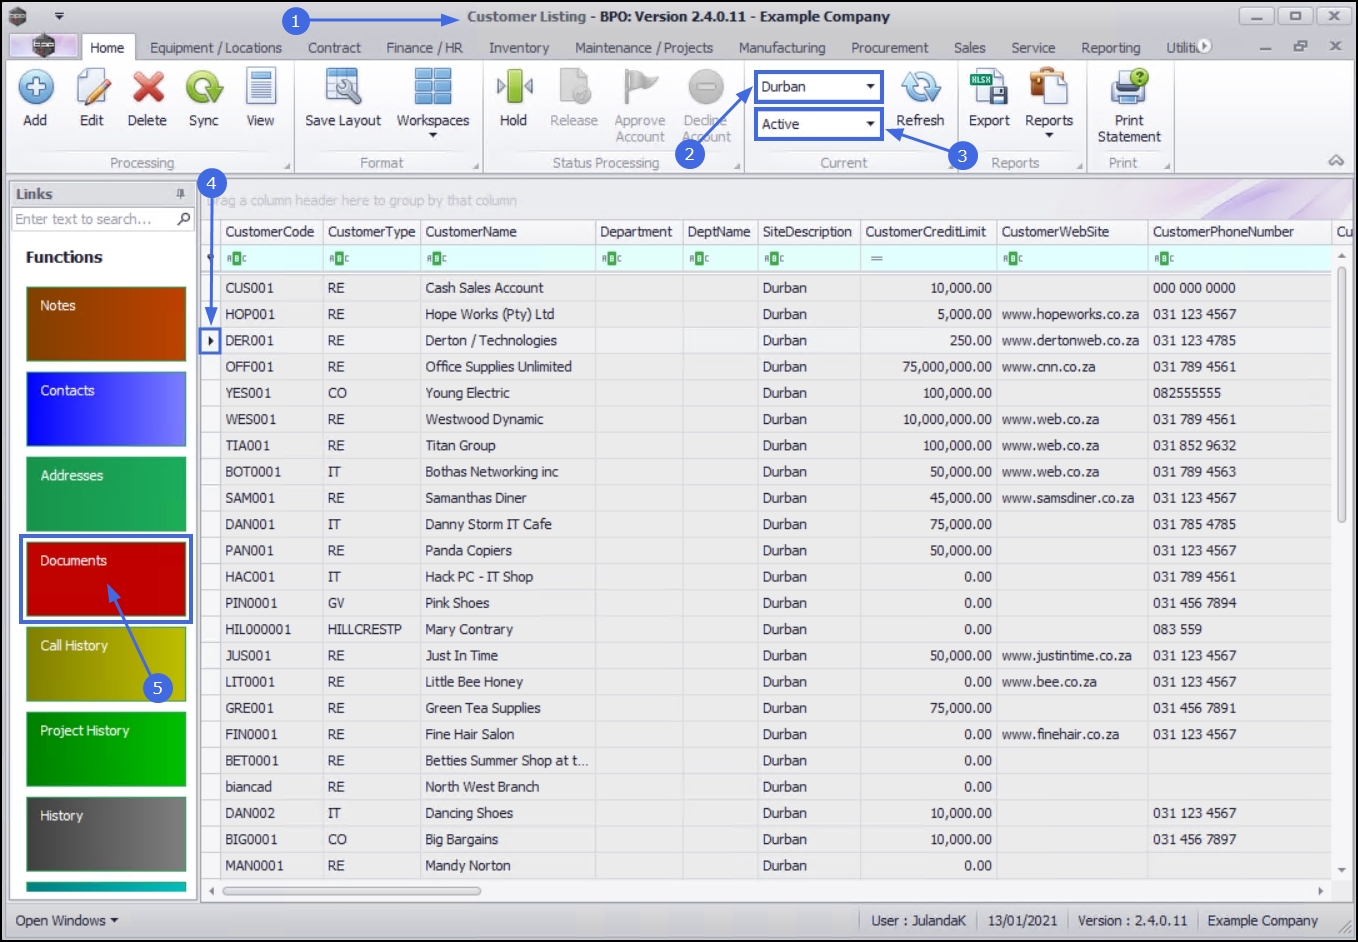
- The Customer Listing screen will be displayed.
- Select the Site where the Customer can be located.
- The example has Durban selected.
- Select the Status for the Customer.
- The example has Active selected.
- Select the row of the customer you wish to link documents to.
- Click on the Documents tile.
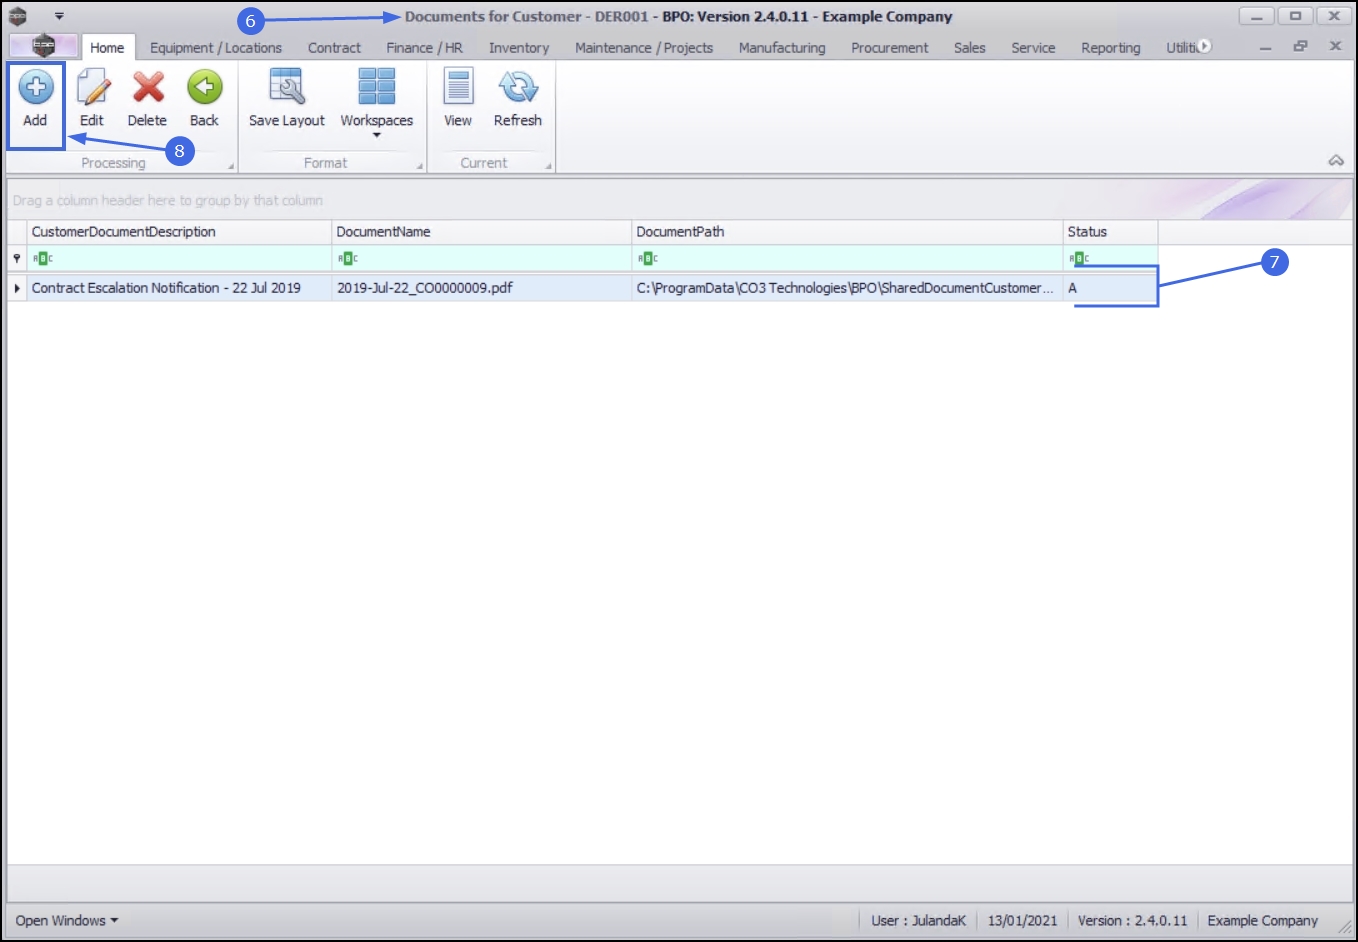
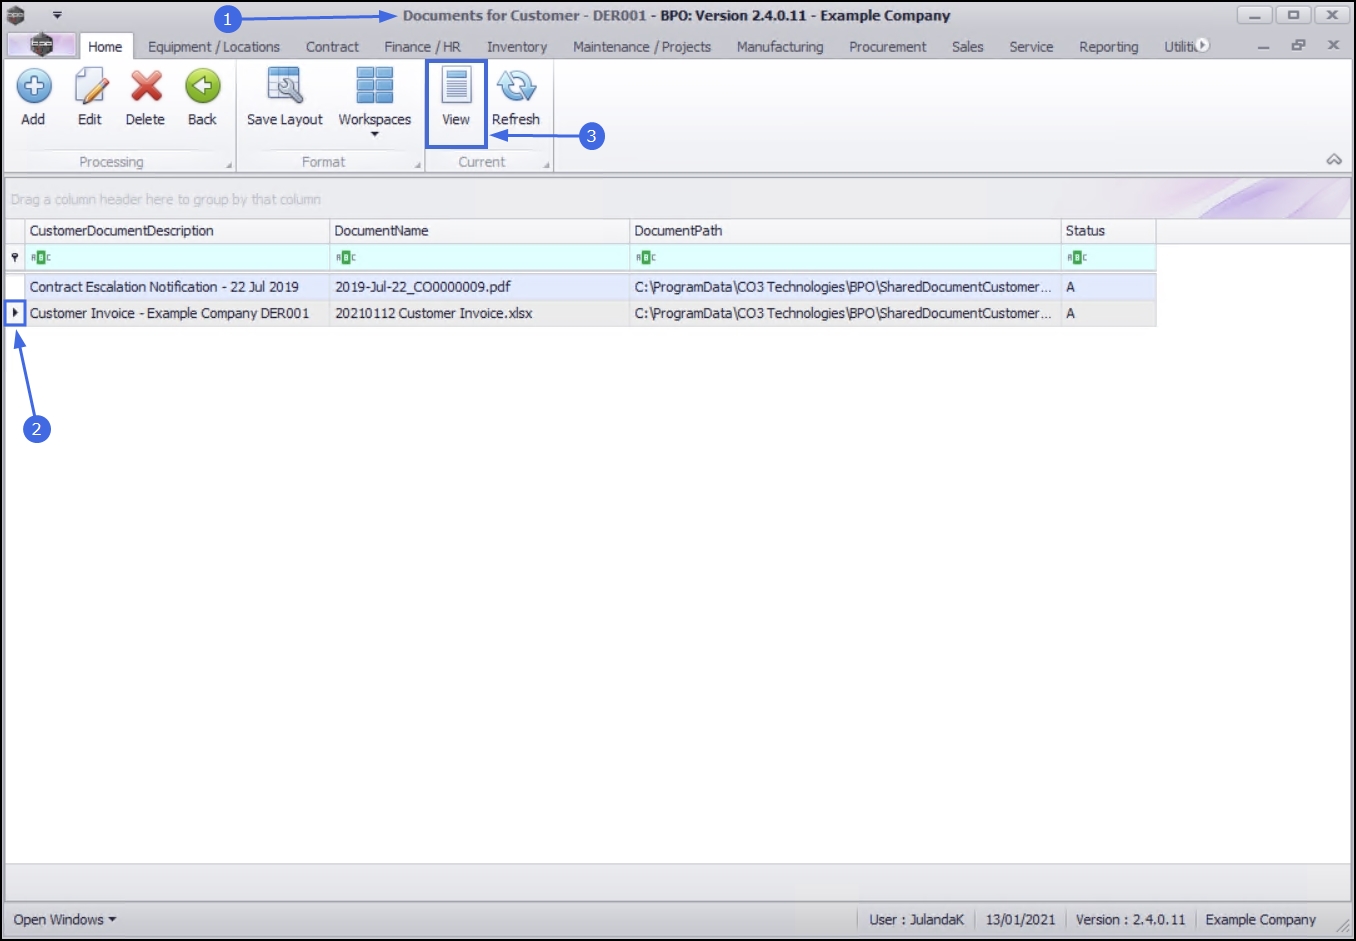
- The Documents for Customer - [customer code] screen will be displayed.
- A list of all the documents currently linked to the selected customer will display.
Link Document
- Click on Add.
![]() Short cut key: Right click to display the Process menu list. Click on Add.
Short cut key: Right click to display the Process menu list. Click on Add.
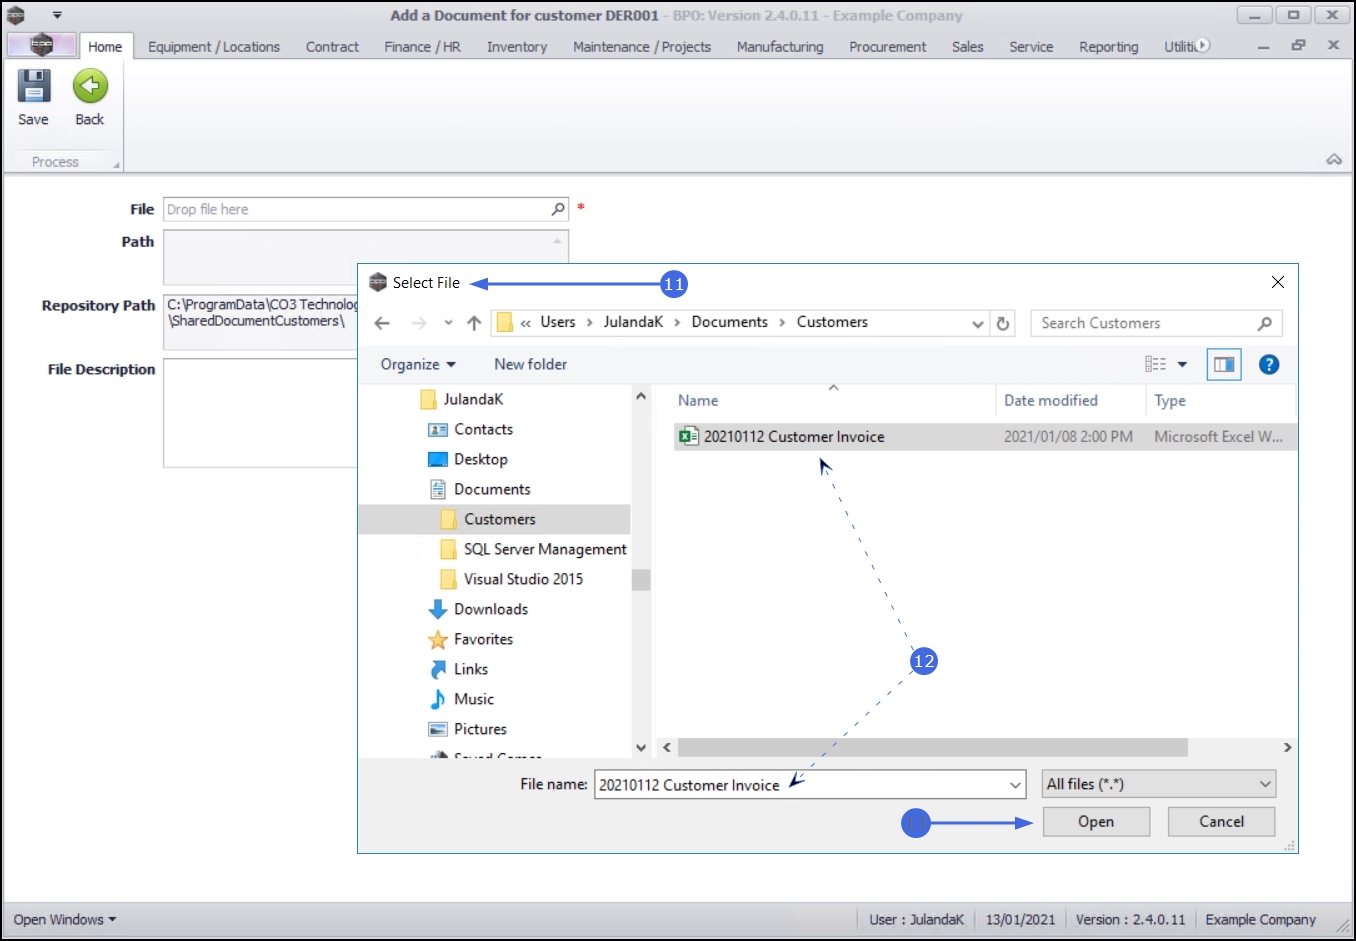
- The Add a Document for customer [customer code] screen will be displayed.
 Note that the Repository Path field is populated with the path configured in your Company Configuration.
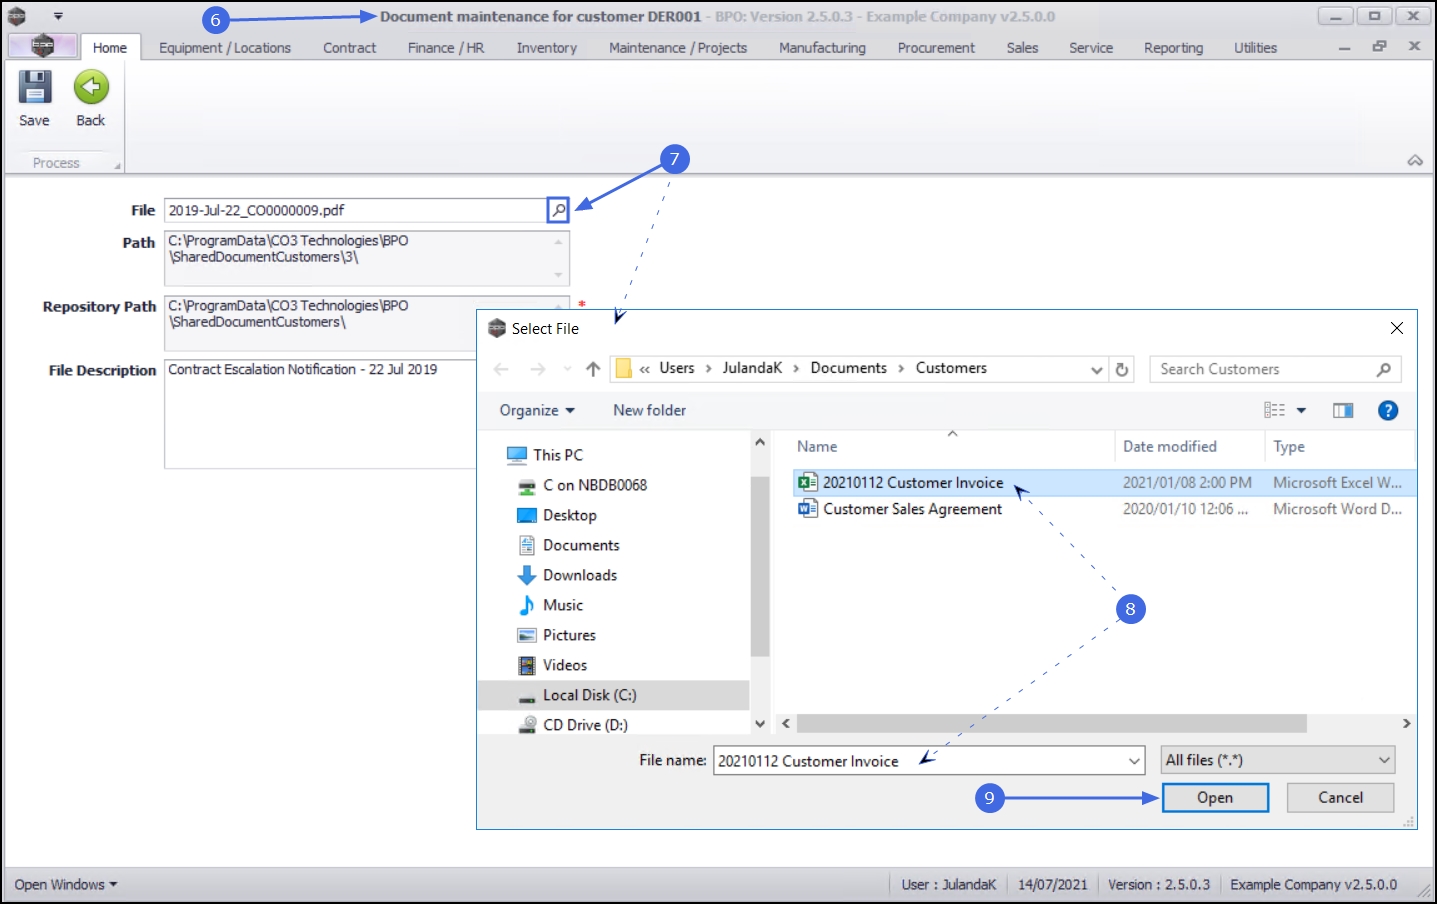
- Click on the search button in the File field.

- The Select File screen will display.
- Locate the file on your server / computer that you wish to link.
 Ensure that the document name appear in the File name: field
by clicking on the document to select it.
Ensure that the document name appear in the File name: field
by clicking on the document to select it. - Click on Open.
- The File and Path fields will be populated with the details of the selected document.
- Type a description of the document in the File Description field.
- Click on Save to save the link.

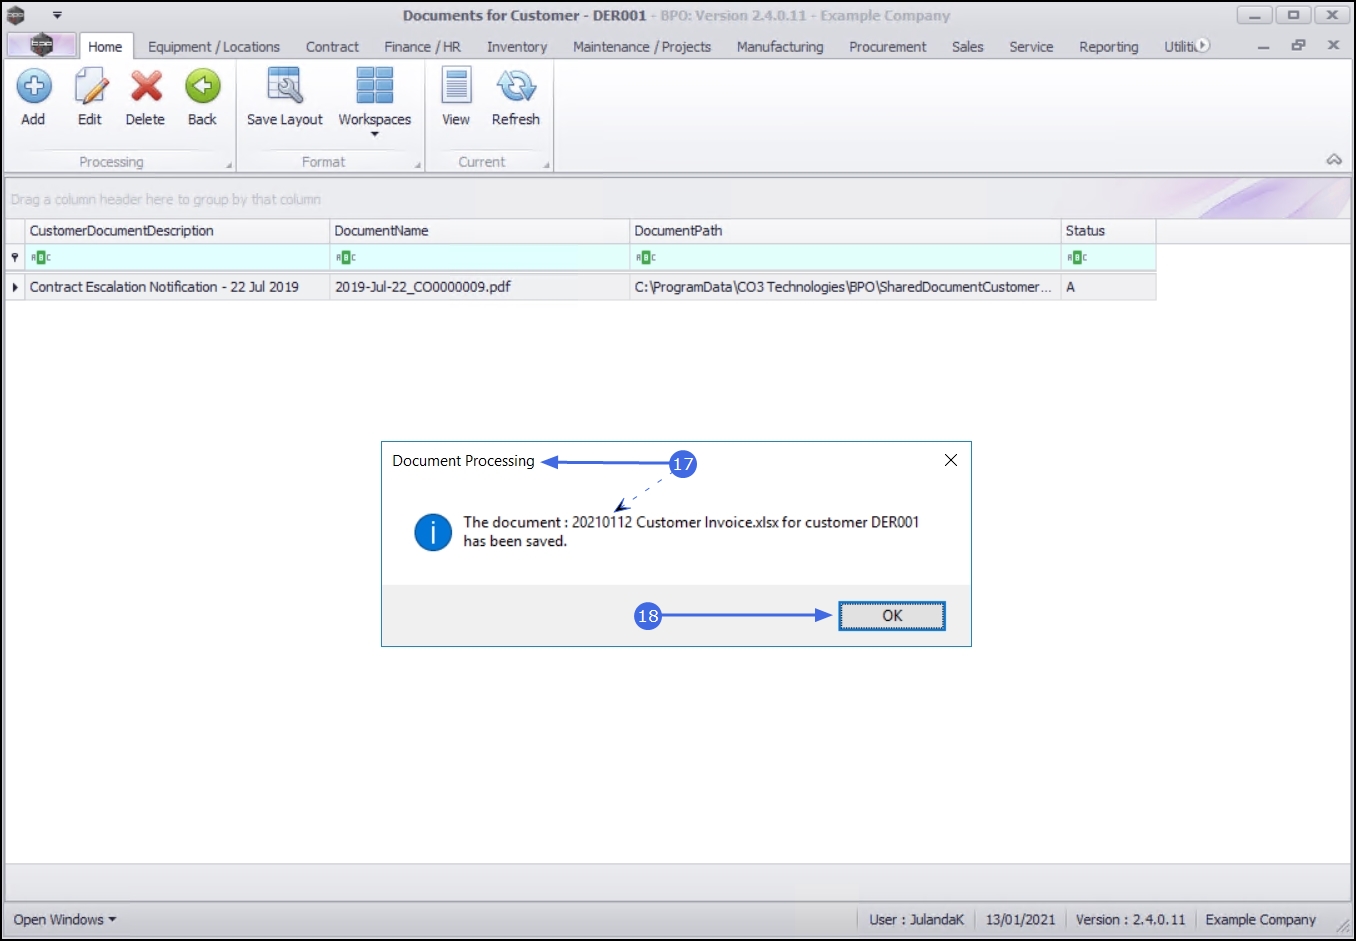
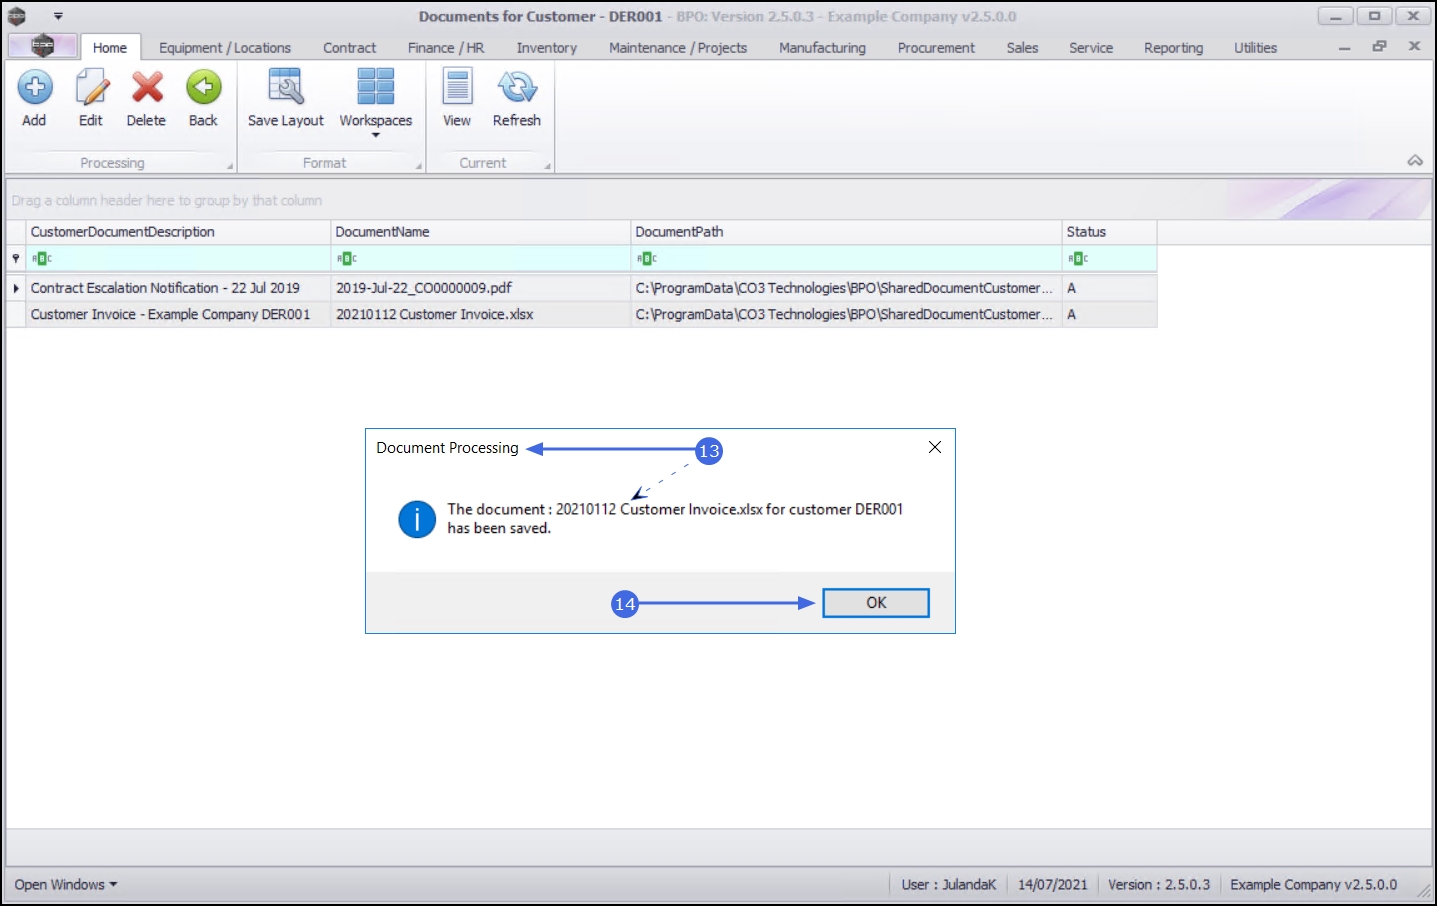
- When you receive the Document Processing message to confirm that;
- The document: [document name] for customer [customer code] has been saved.
-
Click on OK.
BPO does not save the physical document, but a link to where the document has been saved.
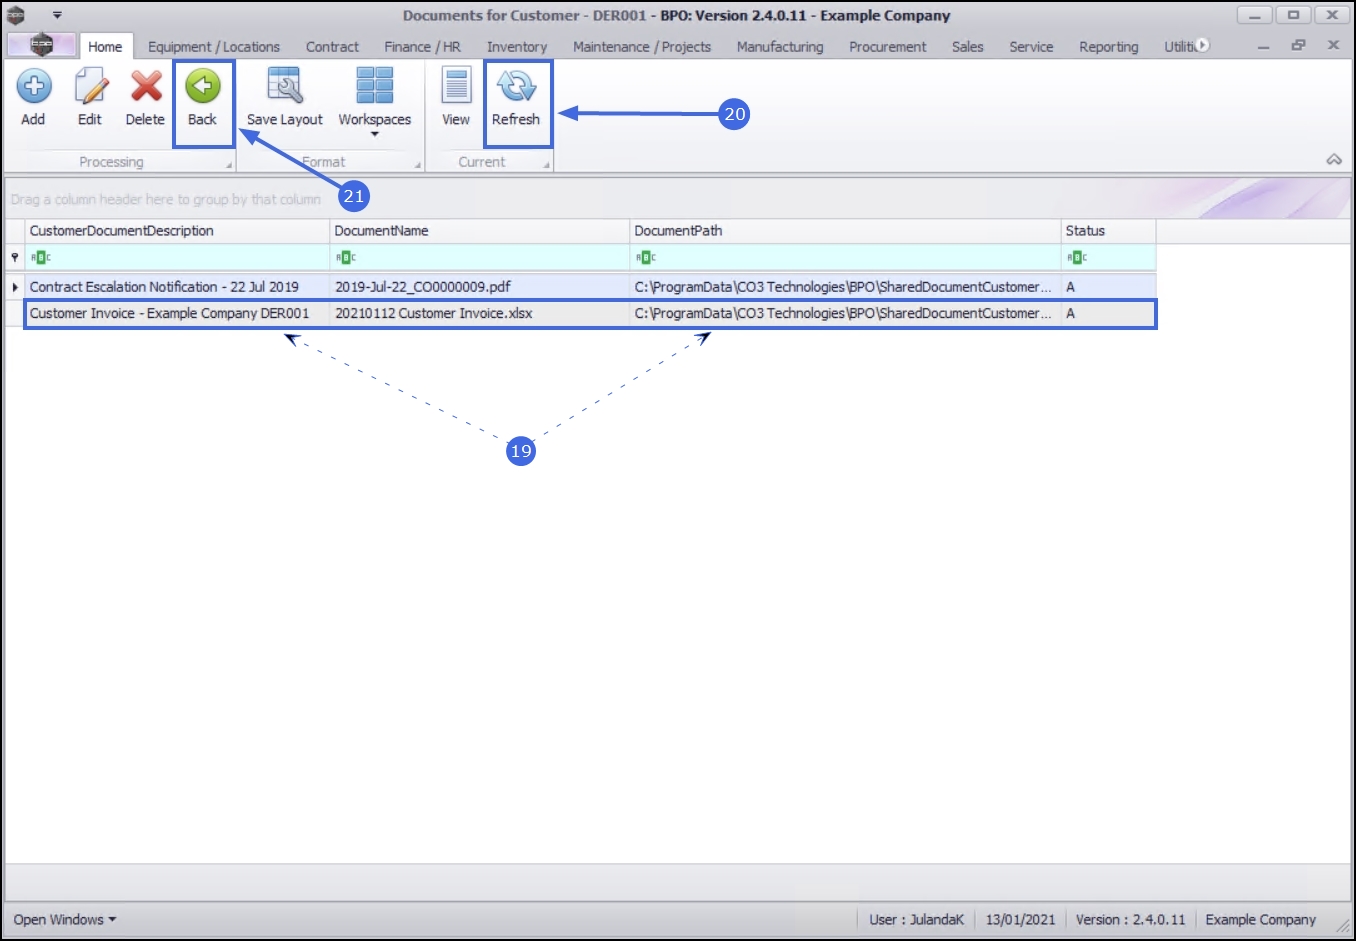
- The Documents for Customer screen has been updated with the document you have linked.
- Click on Refresh to update your screen, if required.
- Click on Back to return to the Customer Listing Screen.
Edit Document
- From the Documents for Customer - [customer code] screen,
- Select the row of the document you wish to edit.
- Click on Edit.
![]() Short cut key: Right click to display the Process menu list. Click on Edit.
Short cut key: Right click to display the Process menu list. Click on Edit.

- When you receive the Document message to confirm;
- Are you sure you want to edit the document [document name], for [customer name]?
- Click on Yes.

- The Document maintenance for customer [customer code] screen will be displayed with the selected file information populating the fields.
- To edit the document currently linked to the customer, click on the search button in the File field to display the Select File screen.
- Locate the file you wish to replace the current file with, on your server / computer. Ensure that the document name appear in the File name: field
by clicking on the document to select it.
- Click on Open.
- The File and Path fields will be populated with the new document details you have selected.
- Type a description of the document in the File Description field, if required.
- Click on Save to save the link.

- When you receive the Document Processing message to confirm that;
- The document: [document name] for customer [customer name] has been saved.
-
Click on OK.
Note that BPO does not save the physical document, but a link to where the document has been saved.
- The Documents for Customer screen has been updated with the document you have linked.
- Click on Refresh to update your screen, if required.
- Click on Back to return to the Customer Listing Screen.

Delete Document
- From the Documents for Customer - [customer code] screen,
- Select the row of the document you wish to remove.
- Click on Delete.
![]() Short cut key: Right click to display the Process menu list. Click on Delete.
Short cut key: Right click to display the Process menu list. Click on Delete.

- When you receive the Delete Document message to confirm;
- Are you sure you want to remove this document?
- Click on Yes if you are certain about your selection.

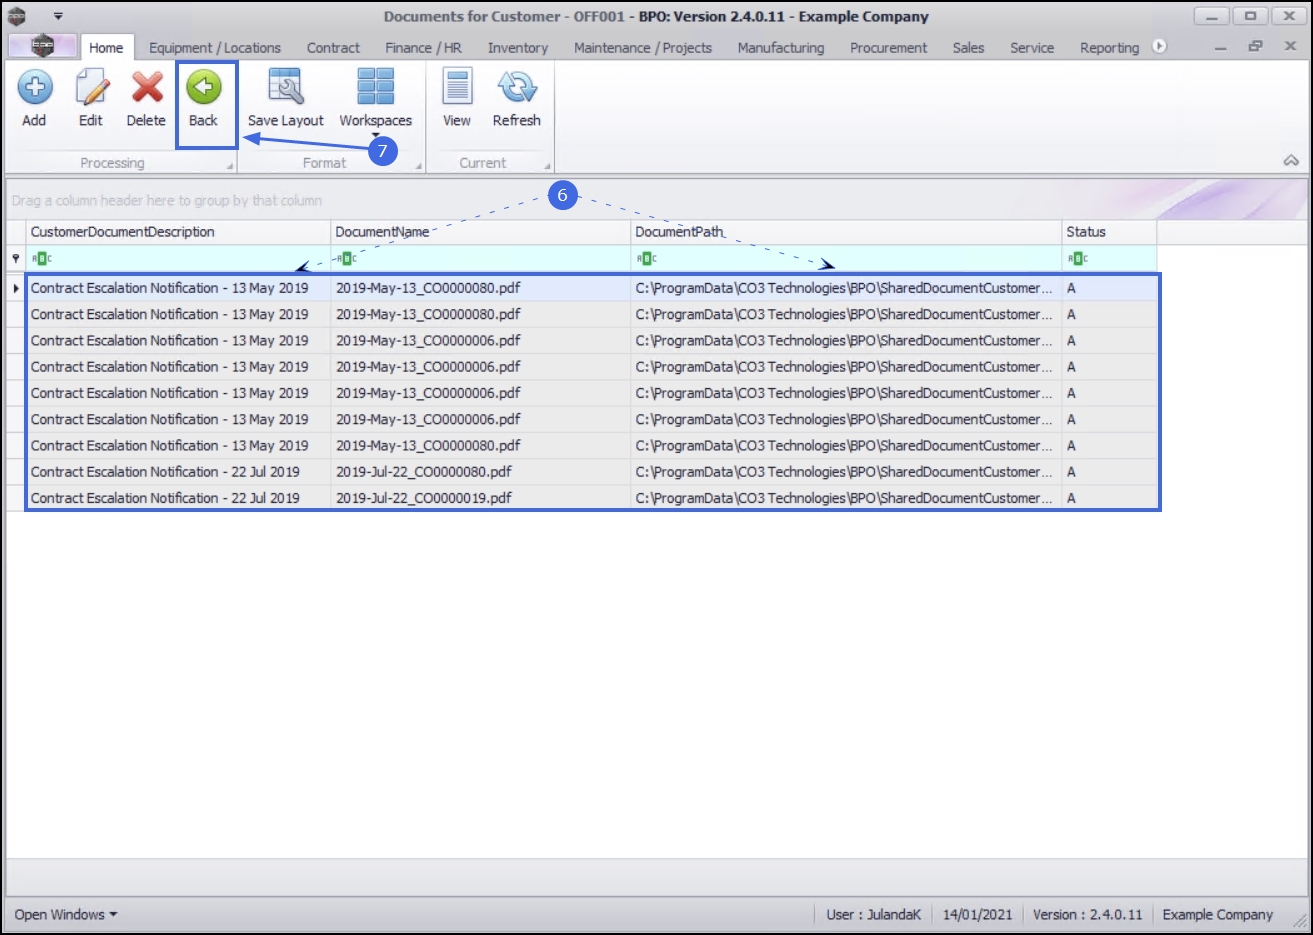
- The document has now been deleted from the Documents for Customer screen.
- Click on Back to return to the Customer Listing Screen.
View Document
- From the Documents for Customer - [customer code] screen,
- Select the row of the document you wish to view.
- Click on View.
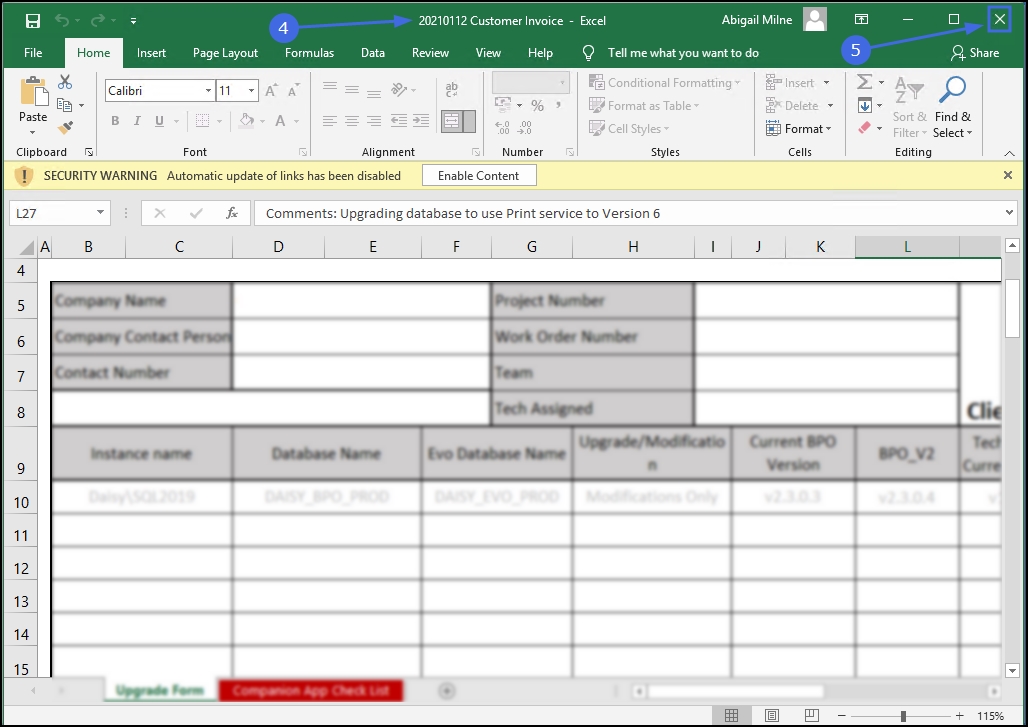
- The digital document will open within the relevant program for you to view the document in.
- In this example, an Excel document has opened.
- When you have finished reviewing the document, close the document screen that you are in, to return to the Documents for Customer screen.
MNU.061.005