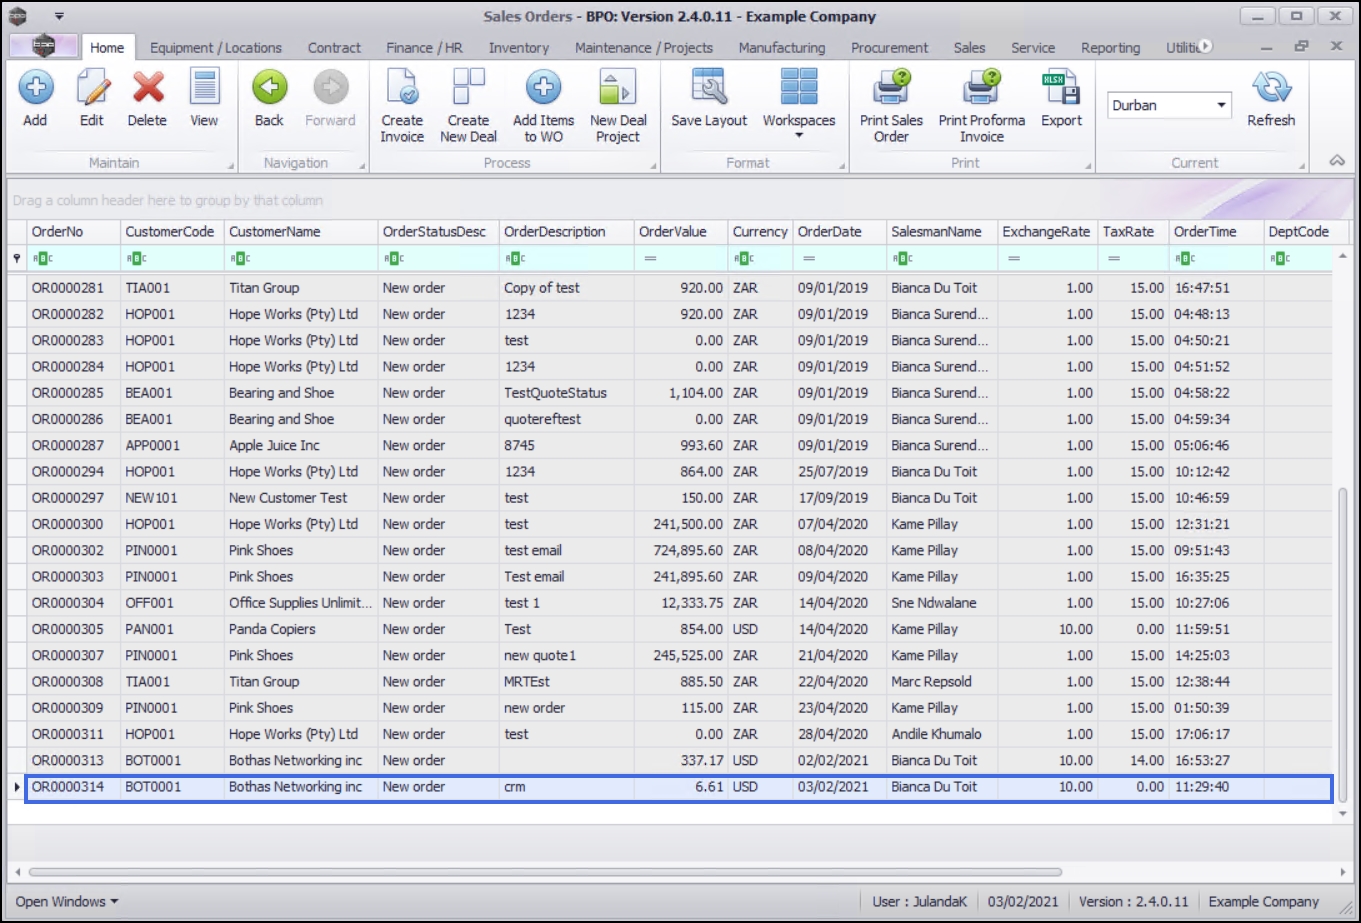
Sales
Customers - Quotes
The Quotes tile direct you to the Sales Quotes listing screen for a selected Customer.
| Ribbon Access: Sales > Customers |

- The Customer Listing screen will be displayed.
- Select the Site where the customer can be located.
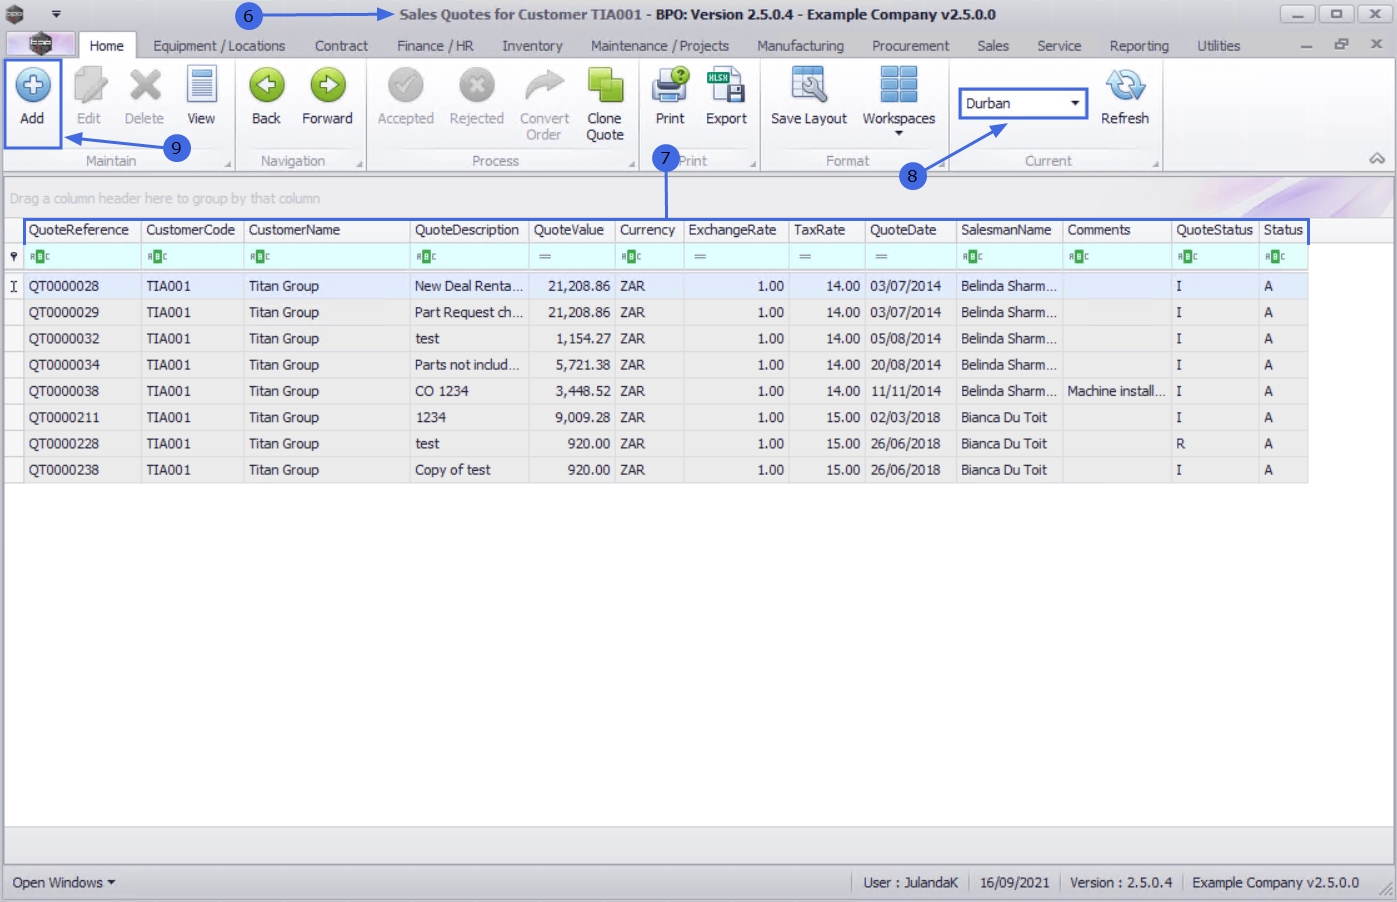
- The example has Durban selected.
- Select the Status for the customer.
- The example has Active selected.
- Select the row of the customer whose sales quotes you wish to work with.
- Click on the Quotes tile.

- The Sales Quotes for Customer [customer code] screen will display.
- All the quotes for the selected customer will be listed.
- The Site filter on this screen gives you the ability to change the site for the selected customer, where the customer has multiple sites.
Add Quote
- Click on Add.
 Short cut key: Right click to display the All groups menu list. Click on Add.
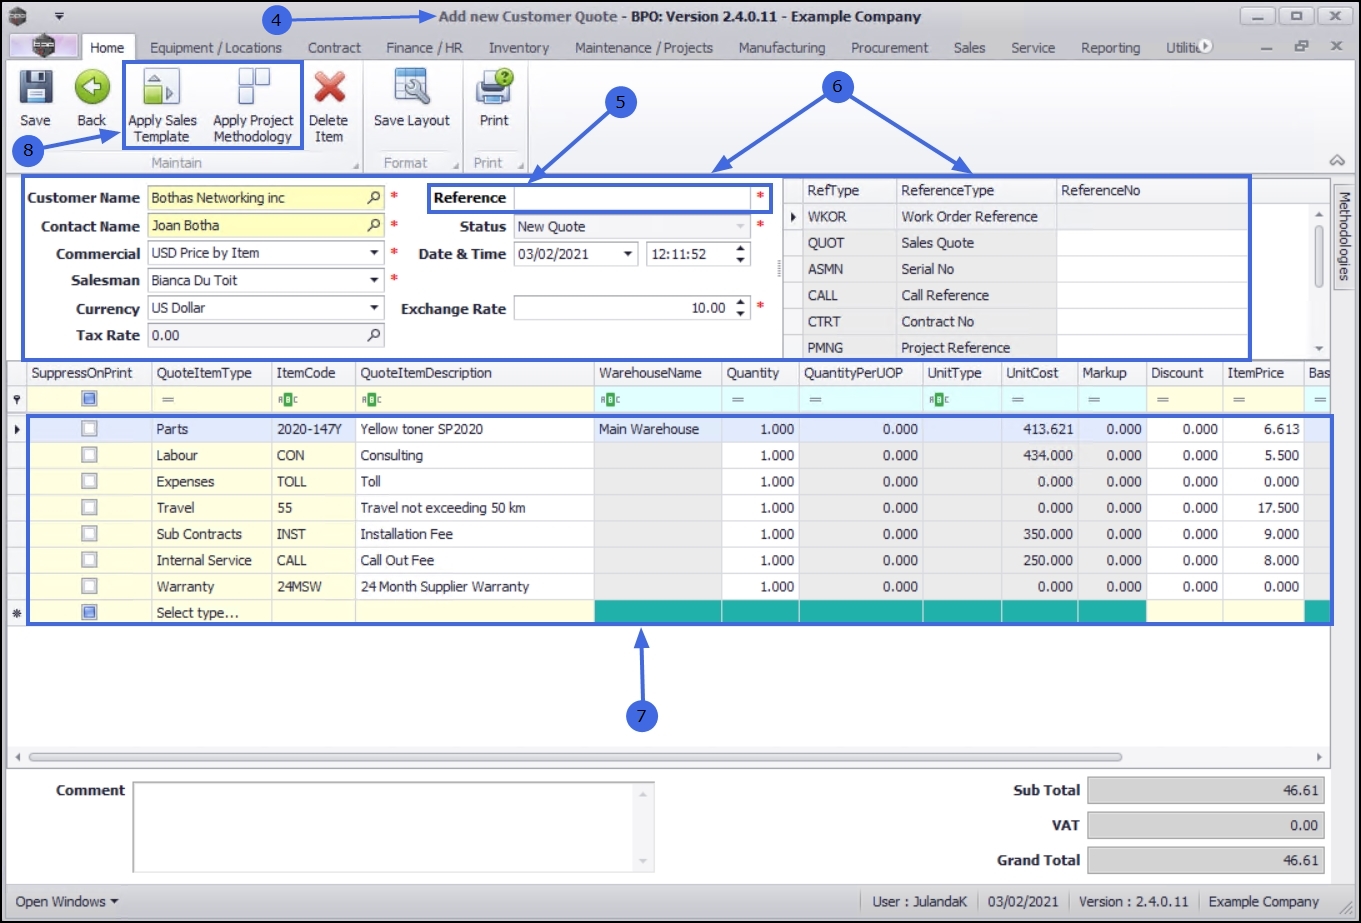
- The Add new Customer Quote screen will display.
- You have the option to Apply a Sales Template or Apply a Project Methodology to the new sales quote.
- Click Save to save the quote as a New Quote and return to the Customer Listing screen.

Edit Quote
![]() Only Quotes with a N - New Quote in the Quote Status column can be edited.
Only Quotes with a N - New Quote in the Quote Status column can be edited.
- Select the row of the Sales Quote you wish to edit.
- Click on Edit. Short cut key: Right click to display the Process menu list. Click on Edit.
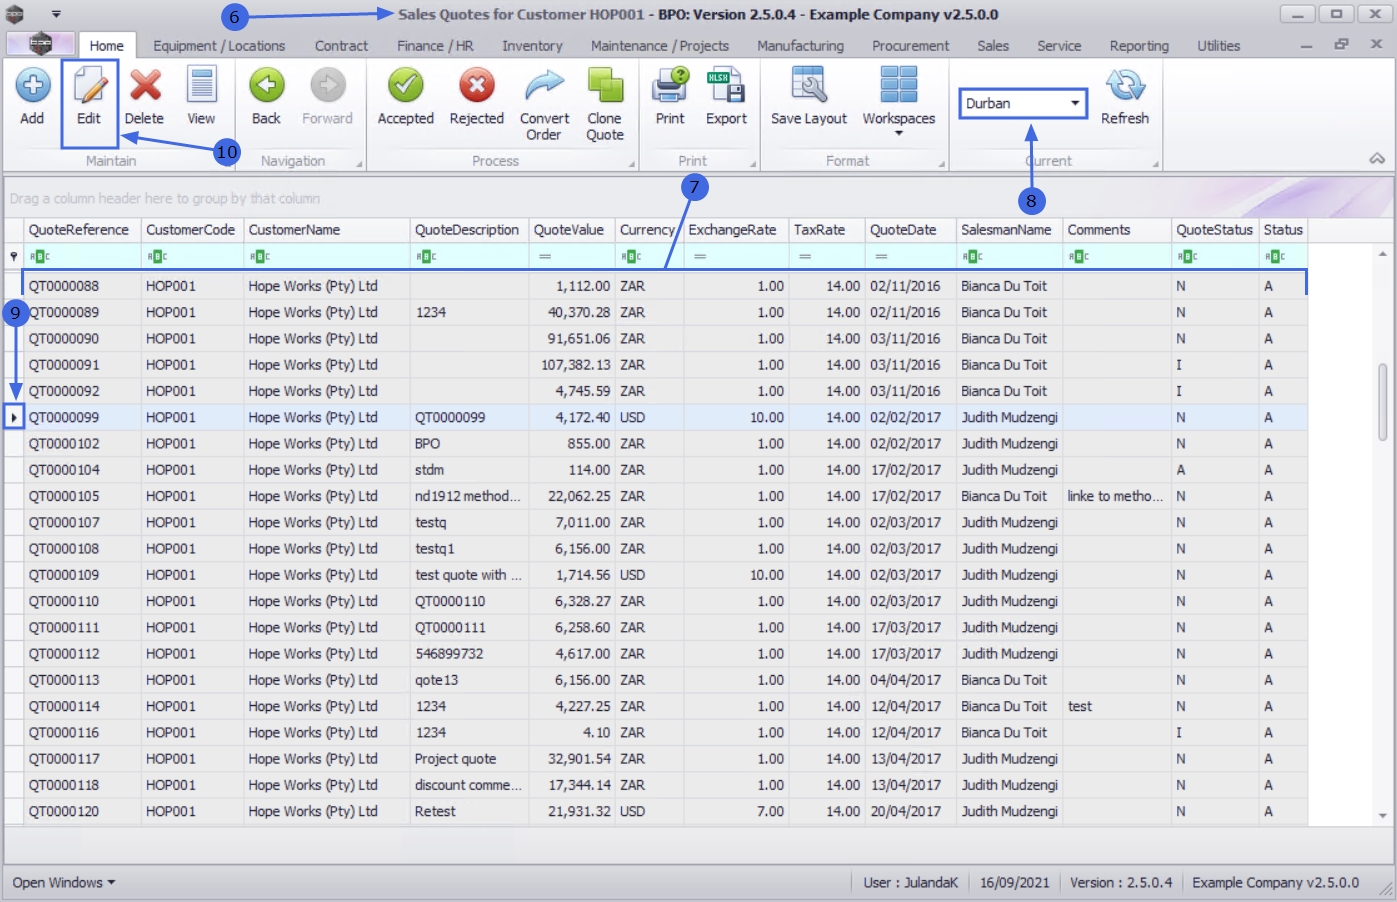
- The Edit Customer Quote - QT[quote number] screen will display.
- You have the option to Apply a Sales Template and Apply a Project Methodology to the already created sales quote.
- Make changes to the Heading Information or to Items in the Sales Items grid.
- Click on Save to save the changes to the Sales Quote and return to the Customer Listing screen.

Delete Quote
![]() Only Quotes with a N - New Quote in the Quote Status column can be deleted.
Only Quotes with a N - New Quote in the Quote Status column can be deleted.
- From the Sales Quotes for Customer [customer code] listing screen,
- Click on the row of the Sales Quote you wish to remove.
- Click on Delete. Short cut key: Right click to display the Process menu list. Click on Delete.
- When you receive the Confirm delete quote message to confirm;
- Are you sure you want to delete this quote?
- Click on Yes if you are certain about your selection.
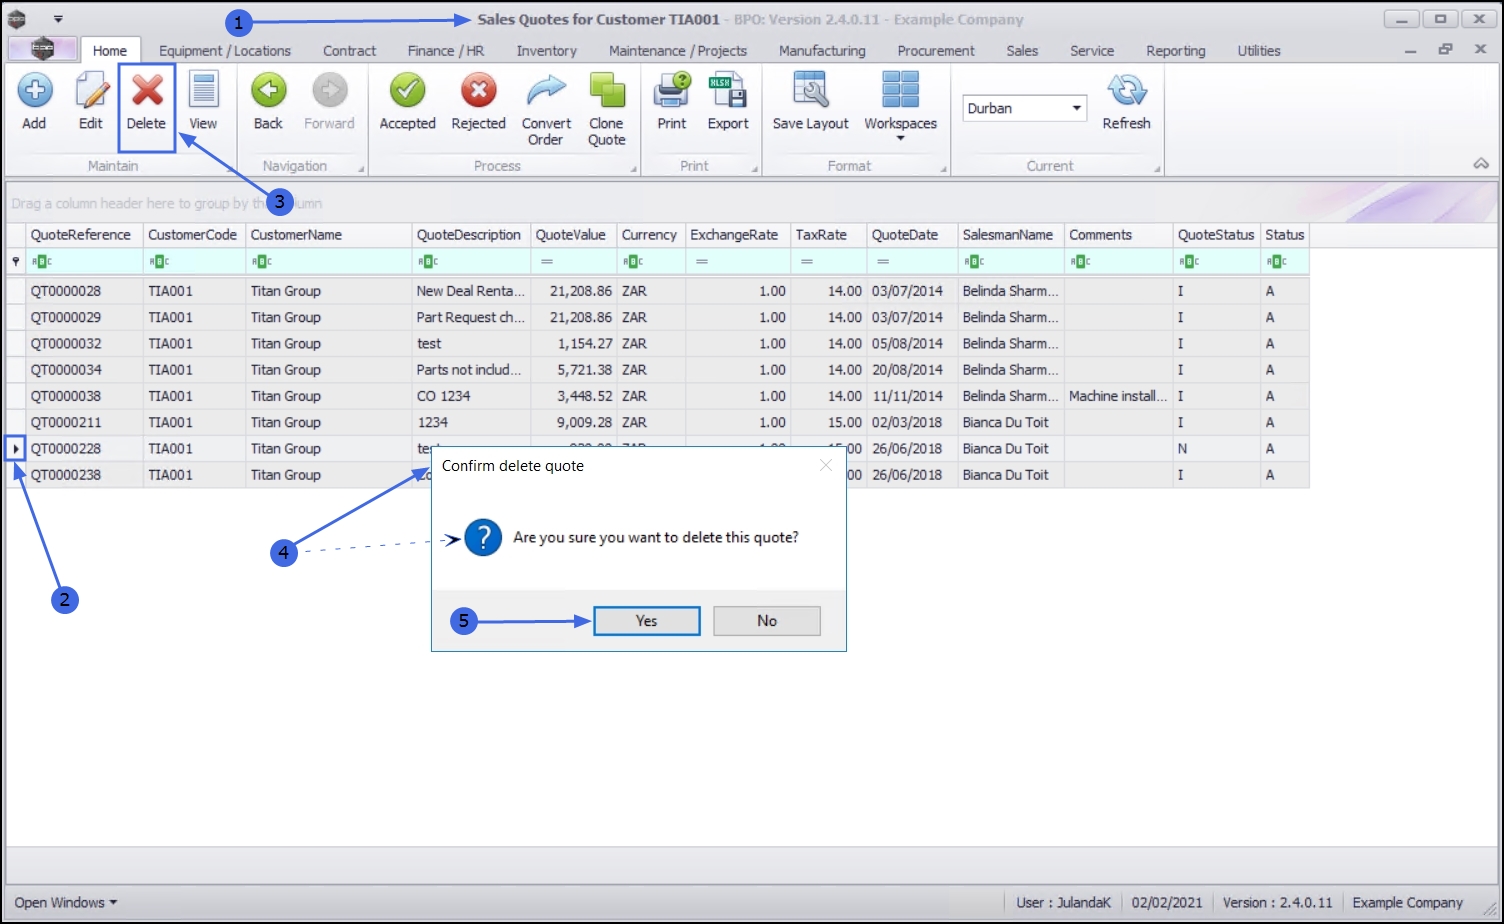
The Sales Quote will be removed from the Sales Quotes for Customer listing screen.
View Quote
![]() A Quote in any Quote Status can be Viewed.
A Quote in any Quote Status can be Viewed.
- From the Sales Quotes for Customer [customer code] listing screen,
- Click on the row of the Sales Quote you wish to view.
- Click on View
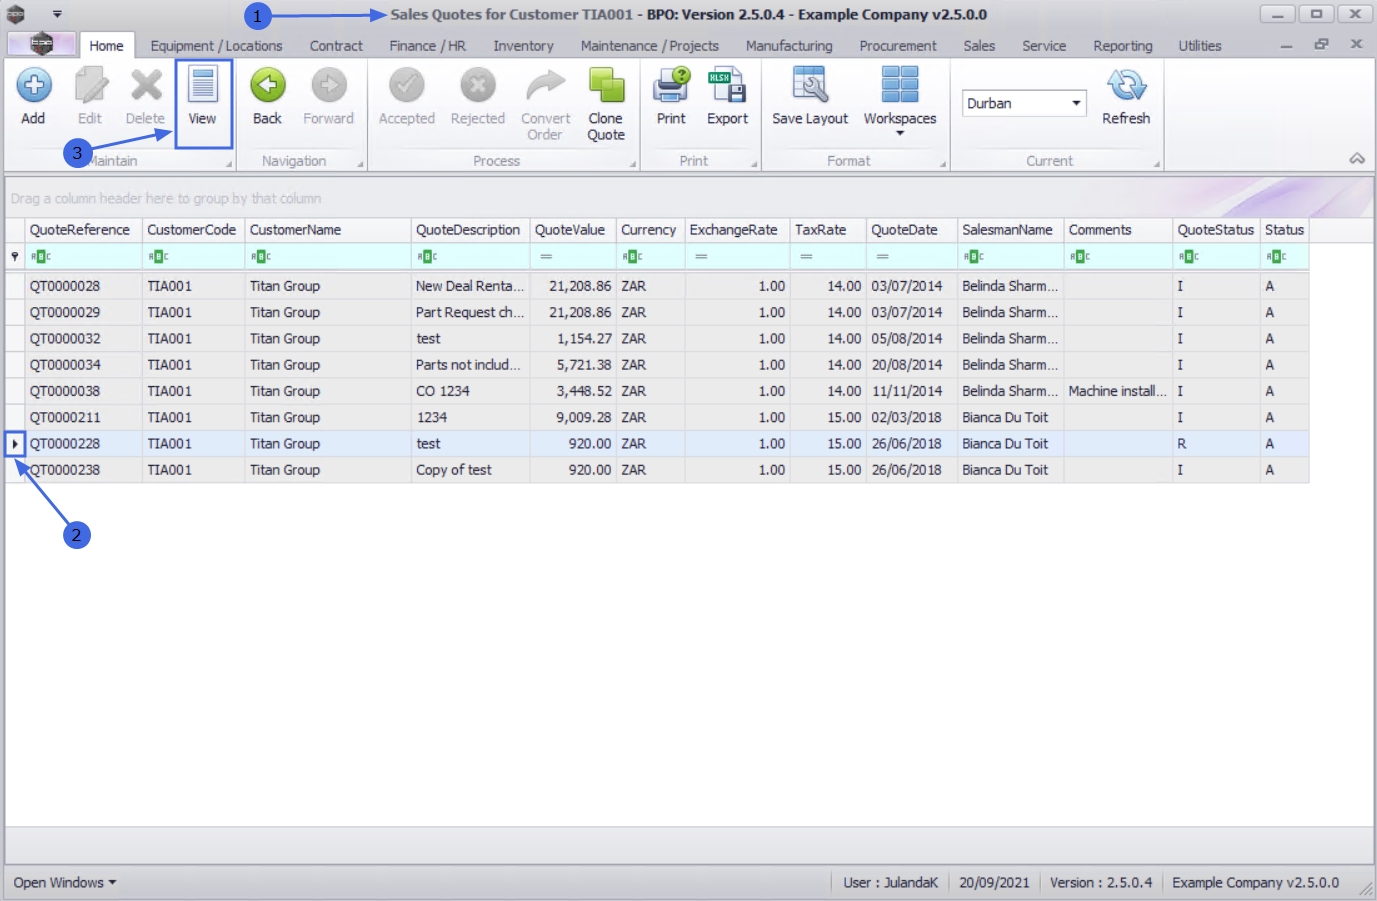
- The View Customer Quote - QT[quote number] screen will display.
 No changes can be made to the information on the Quote.
 - Click on Back to return to the Sales Quotes for Customer listing screen.

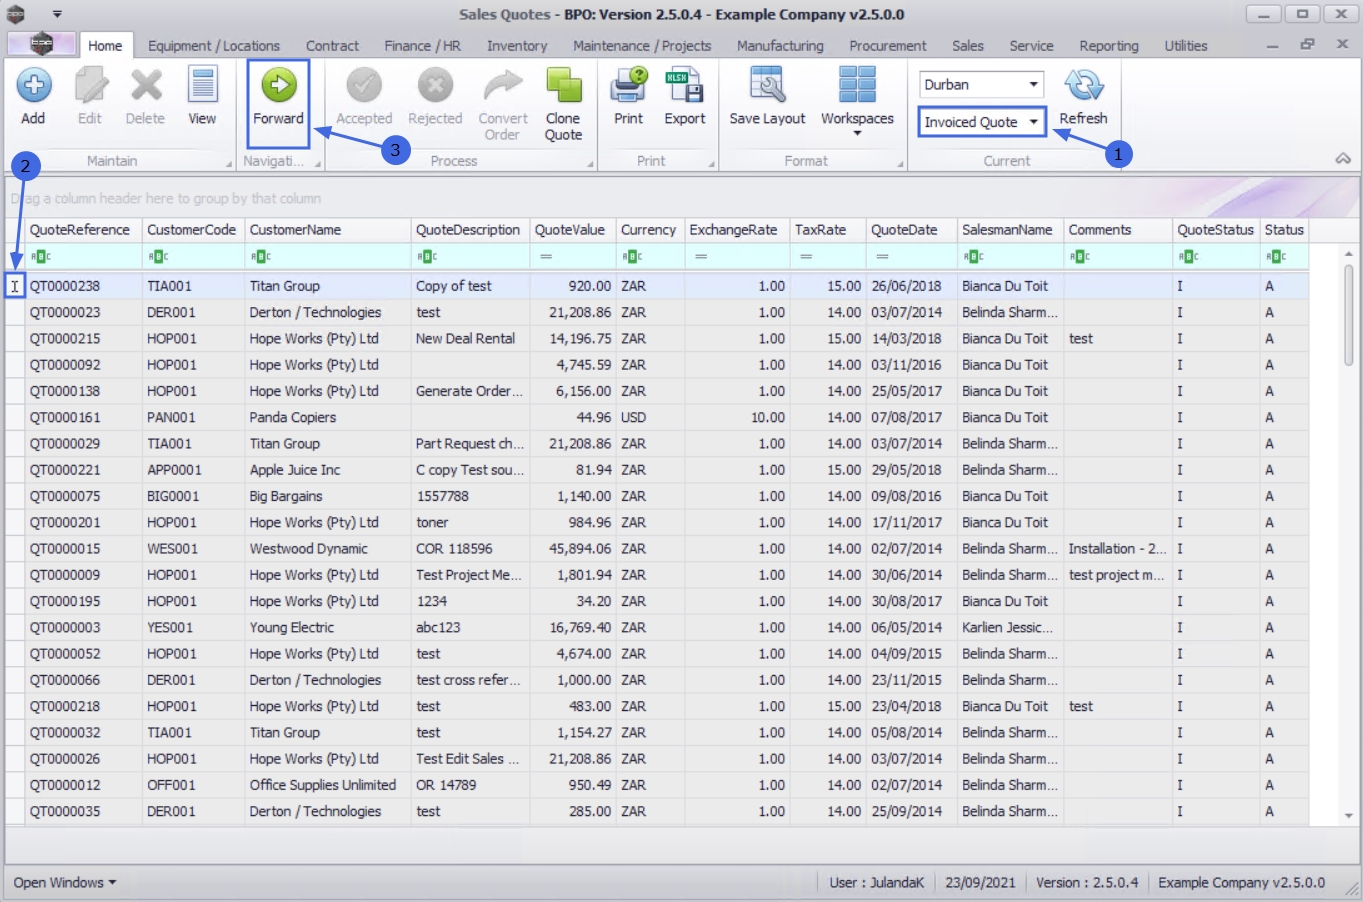
Forward Navigation
- The Forward navigation button is only available in the Invoiced Quote status after the Sales Quote has been Converted to Order.
- This feature enables the user to quickly navigate to related documentation.
- You can navigate to the Sales Orders listing screen where you can view the Sales Order that has been created from the selected Sales Quote.
- Change the Status to Invoiced Quote to display a list of all invoiced quotes.
- Click on the row of the Invoiced Quote that you wish to view.
- Click on Forward to navigate to the Sales Orders listing screen.
- If the Forward navigation is available (not greyed out) then further downstream process documents related to the selected order is available and you can thus navigate to those downstream documents, e.g. the linked Sales Invoice, the new deal Call or Project.
Back Navigation
- The Back navigation button is available and by clicking on it will allow you to navigate back until you return to the Sales Quotes listing screen.

Accept Quote
![]() Only quotes with a N - New Quote in the Quote Status can be Accepted.
Only quotes with a N - New Quote in the Quote Status can be Accepted.
- From the Sales Quotes for Customer [customer code] listing screen,
- Click on the row of the Sales Quote you wish to accept.
- Click on Accepted. Short cut key: Right click to display the All groups menu list. Click on Accepted.
- The Input Validation message screen, will prompt for your response;
- Are you sure you want to update this quote, no. [ ] to be Accepted? Answer 'Yes' to mark it as Accepted.
- If you are sure of your selection, click Yes to proceed.

The Quote Status for the selected Quote has changed to [A] - Accepted on the Sales Quotes for Customer listing Screen.
Reject Quote
![]() A quote can be rejected from the Sales Quotes for Customer [ ] listing screen where the Quote Status is set to [N] - New Quote or [A] - Accepted.
A quote can be rejected from the Sales Quotes for Customer [ ] listing screen where the Quote Status is set to [N] - New Quote or [A] - Accepted.
- From the Sales Quotes for Customer [customer code] listing screen,
- Click on the row of the Sales Quote you that needs to be rejected.
- Click on Rejected. Short cut key: Right click to display the All groups menu list. Click on Rejected.
- The Input Validation screen, will prompt your response;
- Are you sure you want to update this quote, no. QT[quote number] to be Rejected? Answer 'Yes' to mark it as Rejected.
- If you are sure of your selection, click Yes to proceed.
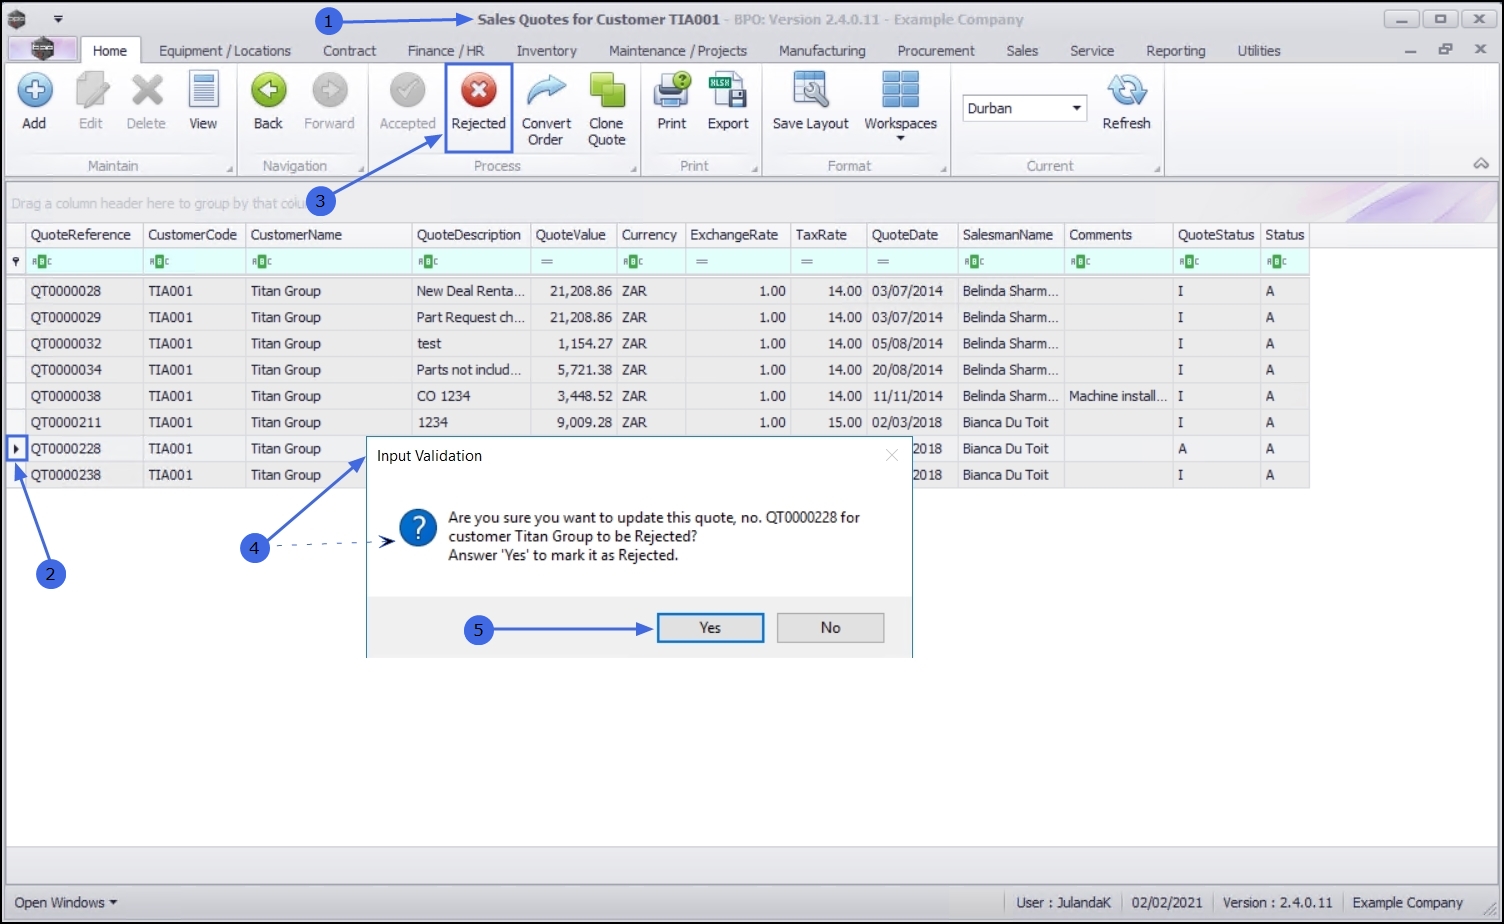
The Quote Status for the selected Quote has changed to [R] - Rejected on the Sales Quotes for Customer listing Screen.
Convert Quote to Order
![]() A quote can be converted to a sales order from the Sales Quotes for Customer [ ] listing screen where the Quote Status is set to [N] - New Quote or [A] - Accepted.
A quote can be converted to a sales order from the Sales Quotes for Customer [ ] listing screen where the Quote Status is set to [N] - New Quote or [A] - Accepted.
- From the Sales Quotes for Customer [customer code] listing screen,
- Click on the row of the Sales Quote that you wish to convert to a sales order.
- Click on Convert Order. Short cut key: Right click to display the All groups menu list. Click on Order.
![]() You will receive three (3) prompt messages to confirm the transaction:
You will receive three (3) prompt messages to confirm the transaction:
First Order Generation message
- The Order Generationmessage will prompt for your response;
- Are you sure you want to convert quote QT[quote number], for Customer [customer code] to an order?
- Click on Yes, if you are certain about your selection.

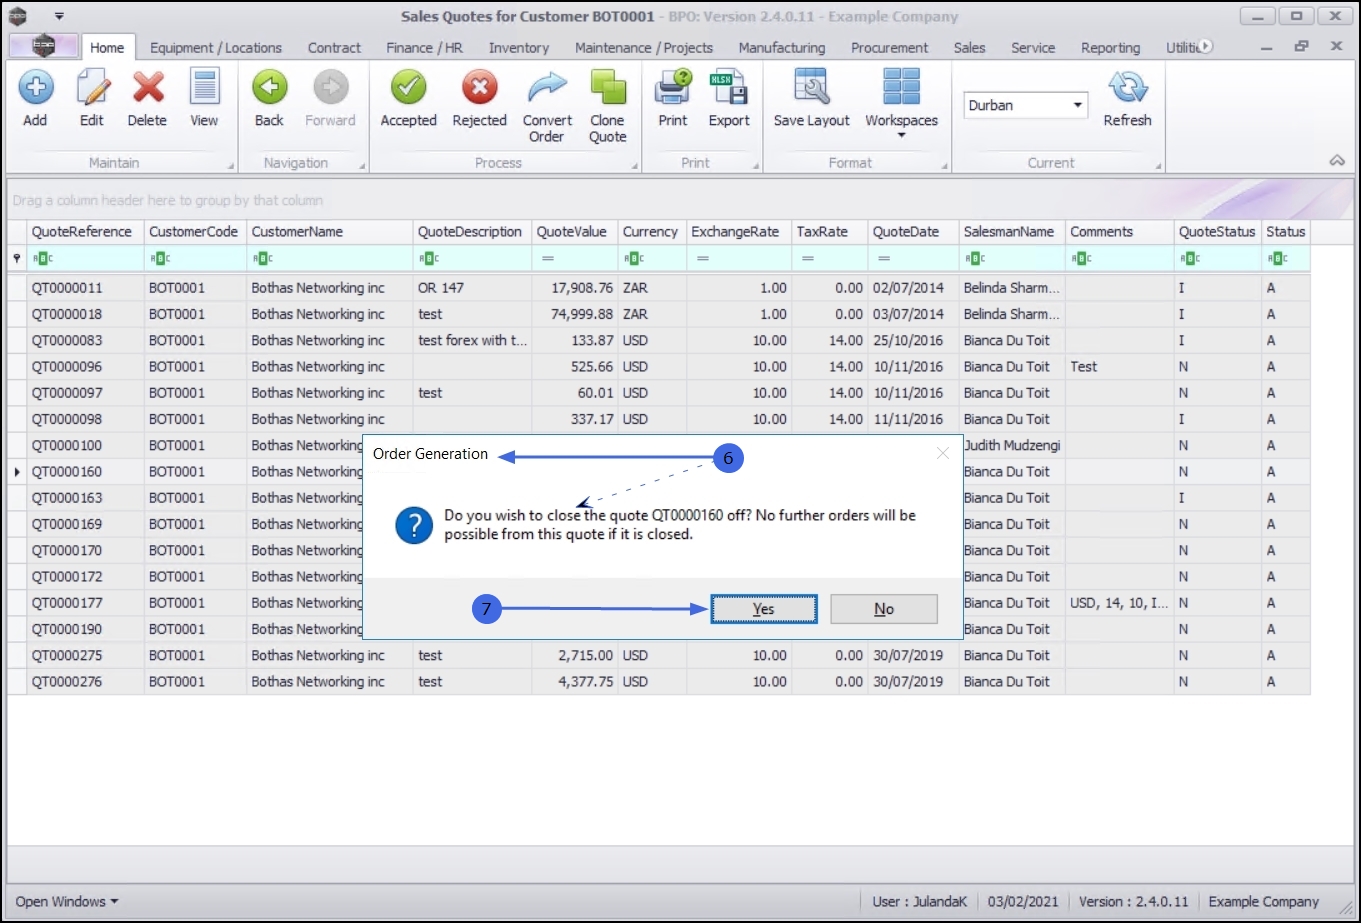
Second Order Generation message
- The Order Generationmessage will prompt for confirmation;
- Do you wish to close the quote QT[quote number] off? No further orders will be possible from this quote if it is closed.
- If you are sure of your selection, click Yes to proceed.
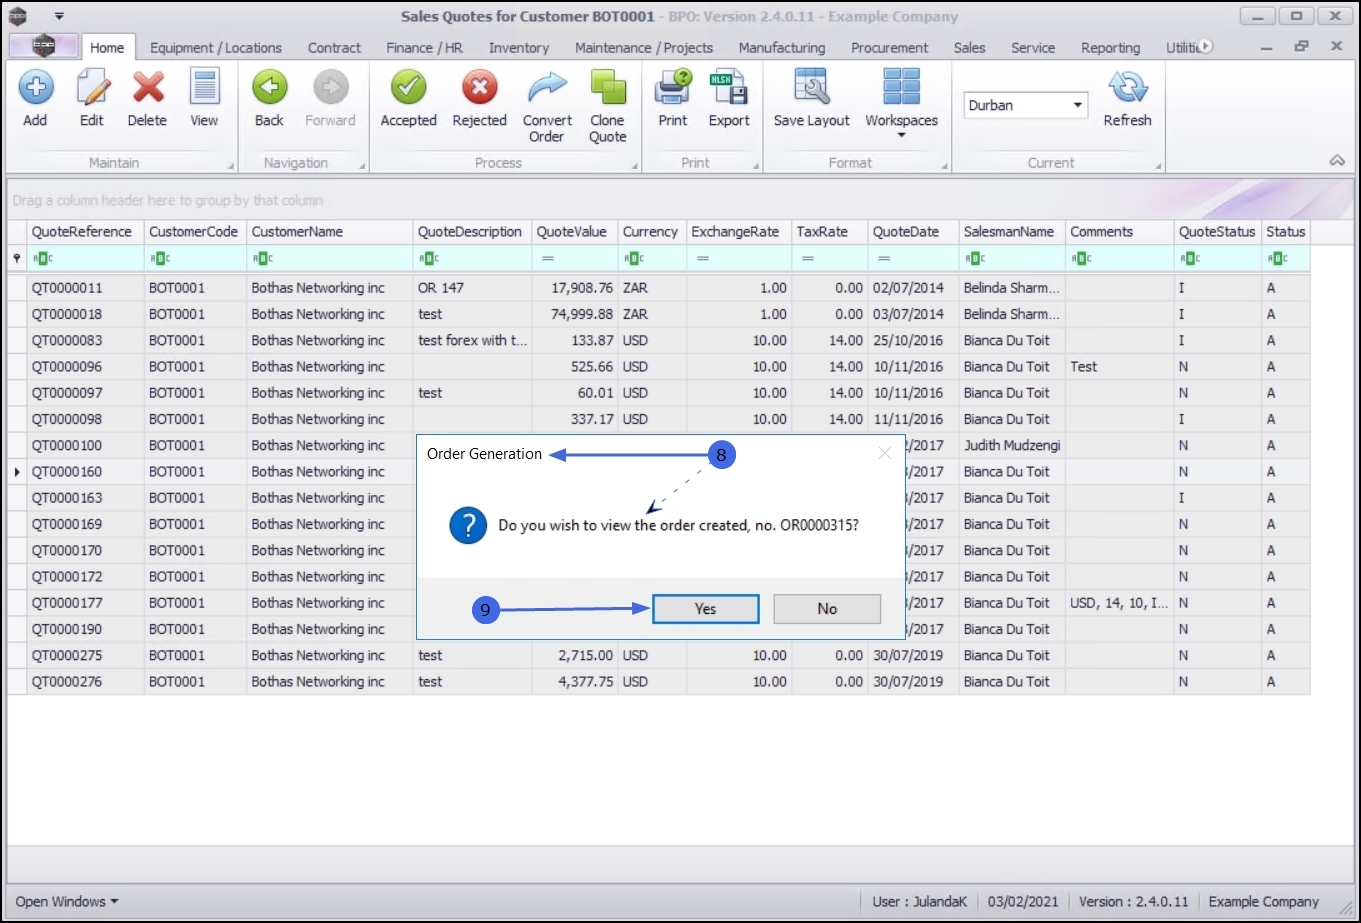
Third Order Generation message
- The Order Generation message will next prompt you;
- Do you wish to view the order created, no. OR[order number]?
- Click Yes to view the order.
- Selecting No will leave you on the Sales Quotes for Customer screen.
The Sales Orders listing screen will display the a list of all New Orders for the Site you have selected.
For a detailed handling of this topic refer to Quotes - Convert to Sales Order
Clone a Quote
The nature of cloning a quote is to save time when creating new quotes for customers. Using this method, ensures that most of the details of the quote would remain the same. You may wish to edit some of the details, for example, the customer, the discount amount or add items such as a warranty to the quote.
- From the Sales Quotes for Customer [customer code] screen,
- Select the row of the quote you wish to clone.
- Click on Clone Quote. Short cut key: Right click to display the All groups menu list. Click on Clone.

- The Add new Customer Quote screen will display.
 It is important that a new Reference is entered as it is used to find and identify the quote once it has been processed.
 - You can edit any of the Customer Heading, Financial Heading or Cross Reference details, if required.
- Edit any Item details, if required.
- You can also choose to apply a Sales Template, which will be appended to the existing quote items, and / or apply a Project Methodology to the cloned quote, if required.
For a detailed review of this procedure click on the link to redirect to Quotes - Clone a Quote.
Print Quote
- From the Sales Quotes for Customer [customer code] listing screen,
- Click on the row of the Quote you wish to print.
- Click on Print.
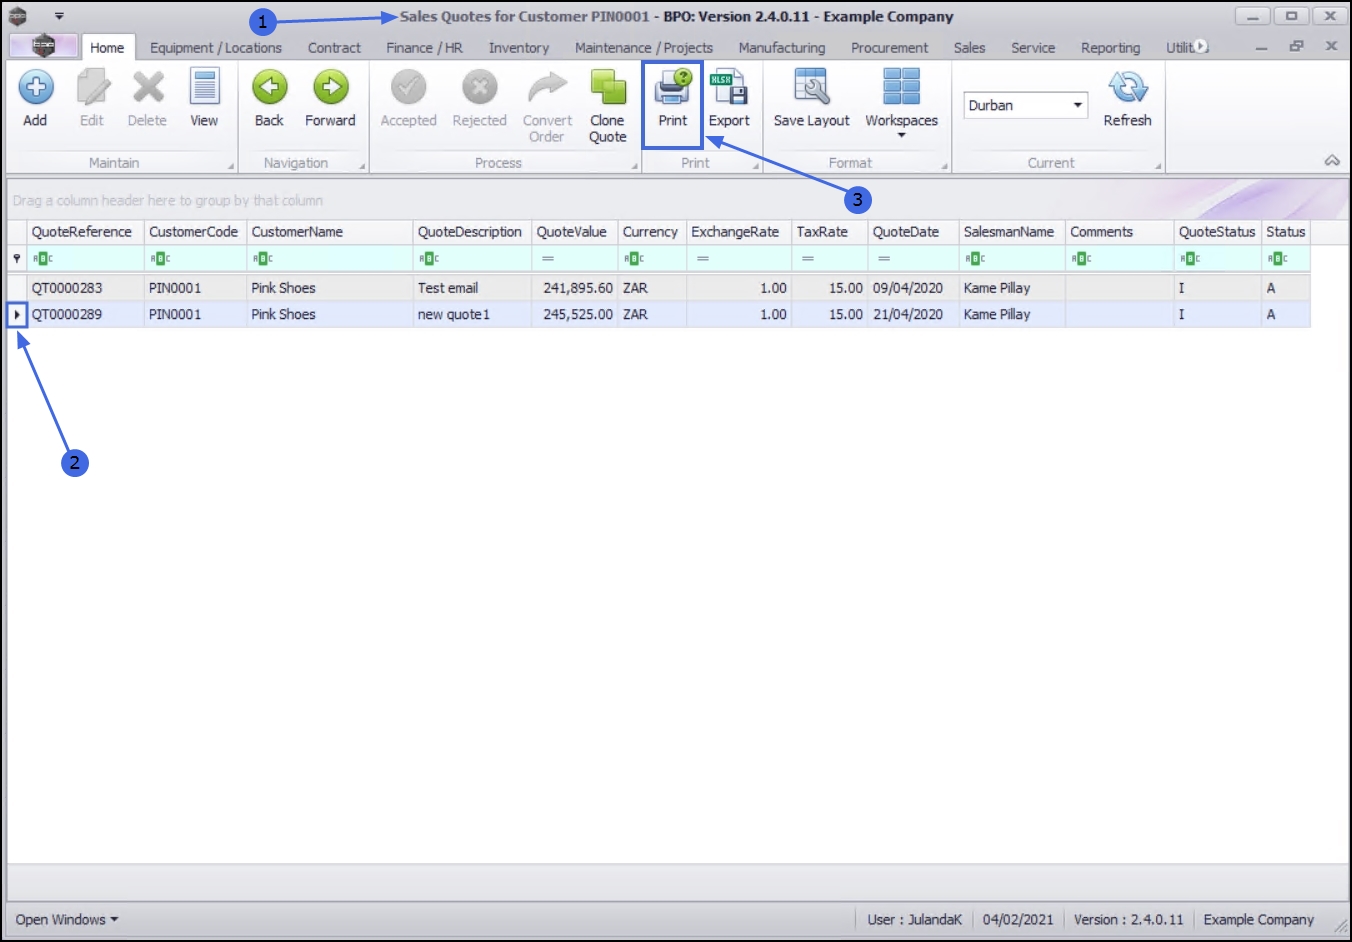
- The Select the option as desired message screen will display.
- Click on the radio button of the option you require. When selecting to Email the Quote, the quote will be emailed via the BPO Email Service on the server (not from MS Outlook).
- The example has Print Quote selected.
- Click Accept to proceed.
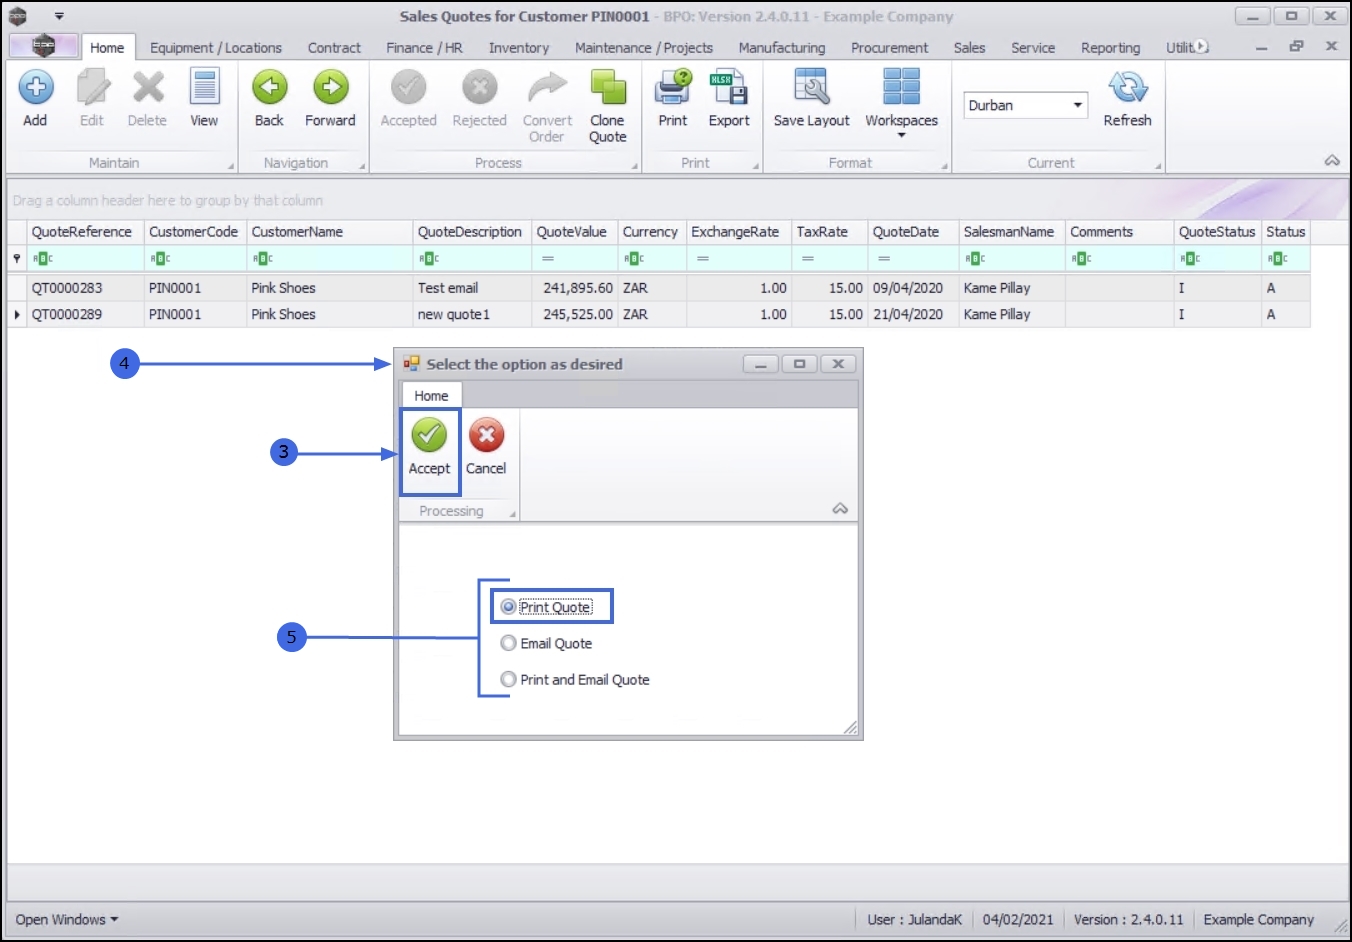
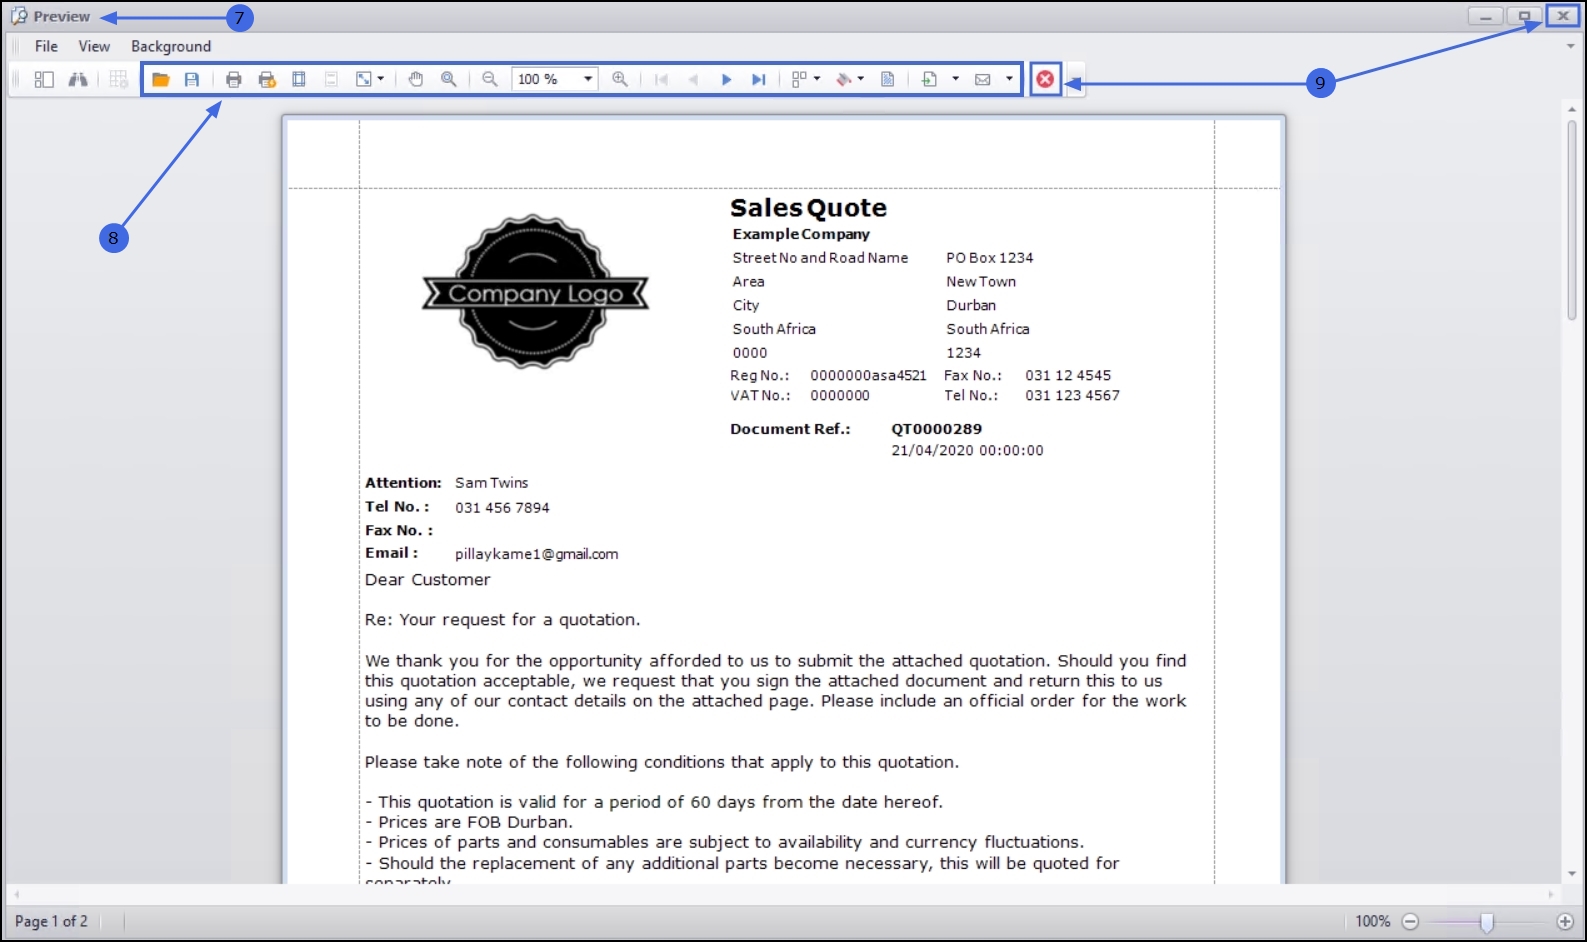
- The Sales Quote will display in the Preview screen.
- From here you can make cosmetic changes to the document, as well as Save, Print, Export, Add a Watermark or Email the Sales Quote.
- Click Close to return to the Sales Quotes for Customer screen.
MNU.061.033