Sales
Customers - Contract Invoices
The Contract Invoices tile for a Customer allows you to create a manual Contract Invoice, to bill a machine on a contract, for either fees, meters, or both, within the current billing period. This will prevent a contract invoice from being raised at month end for the contract (fees and/or meters). However, if you create a contract invoice for fees only, the meters will bill month end, without the fees.
![]() It is important to note, that manual Contract Invoices should only be used to fix a problem as a last resort.
It is important to note, that manual Contract Invoices should only be used to fix a problem as a last resort.
This manual provide a brief outline of the process from the Contract Invoices Tile. For a detailed handling of this topic refer to Manual Contract Invoice - Unconsolidated Customer
| Ribbon Access: Sales > Customers |

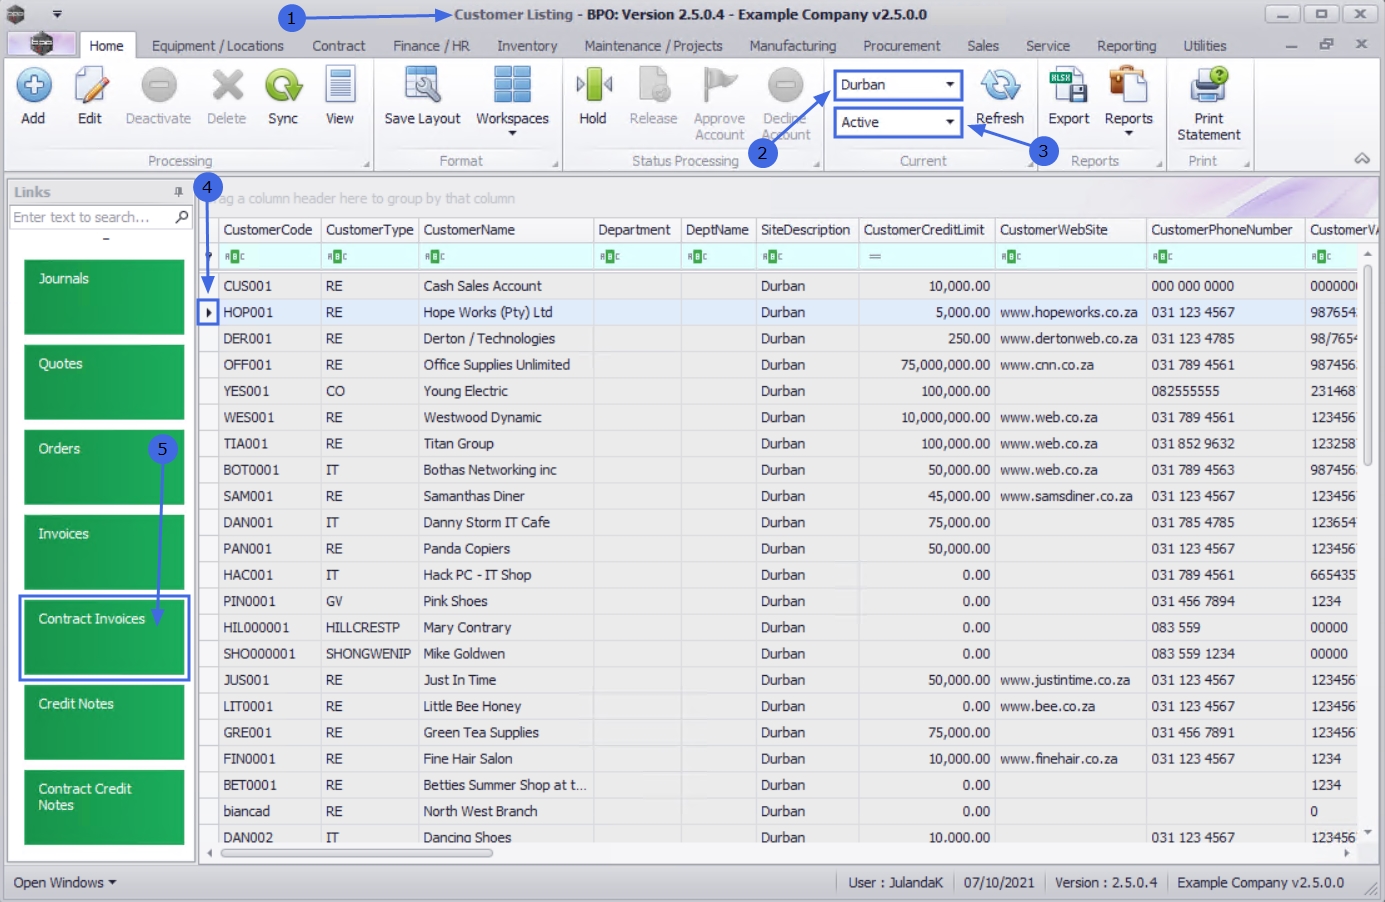
- The Customer Listing screen will be displayed.
-
Select the Site where the customer can be located.
- The example has Durban selected.
- Select the Status for the customer.
- The example has Active selected.
- Select the row of the customer whose contract invoices you wish to work with.
- Click on the Contract Invoices tile.
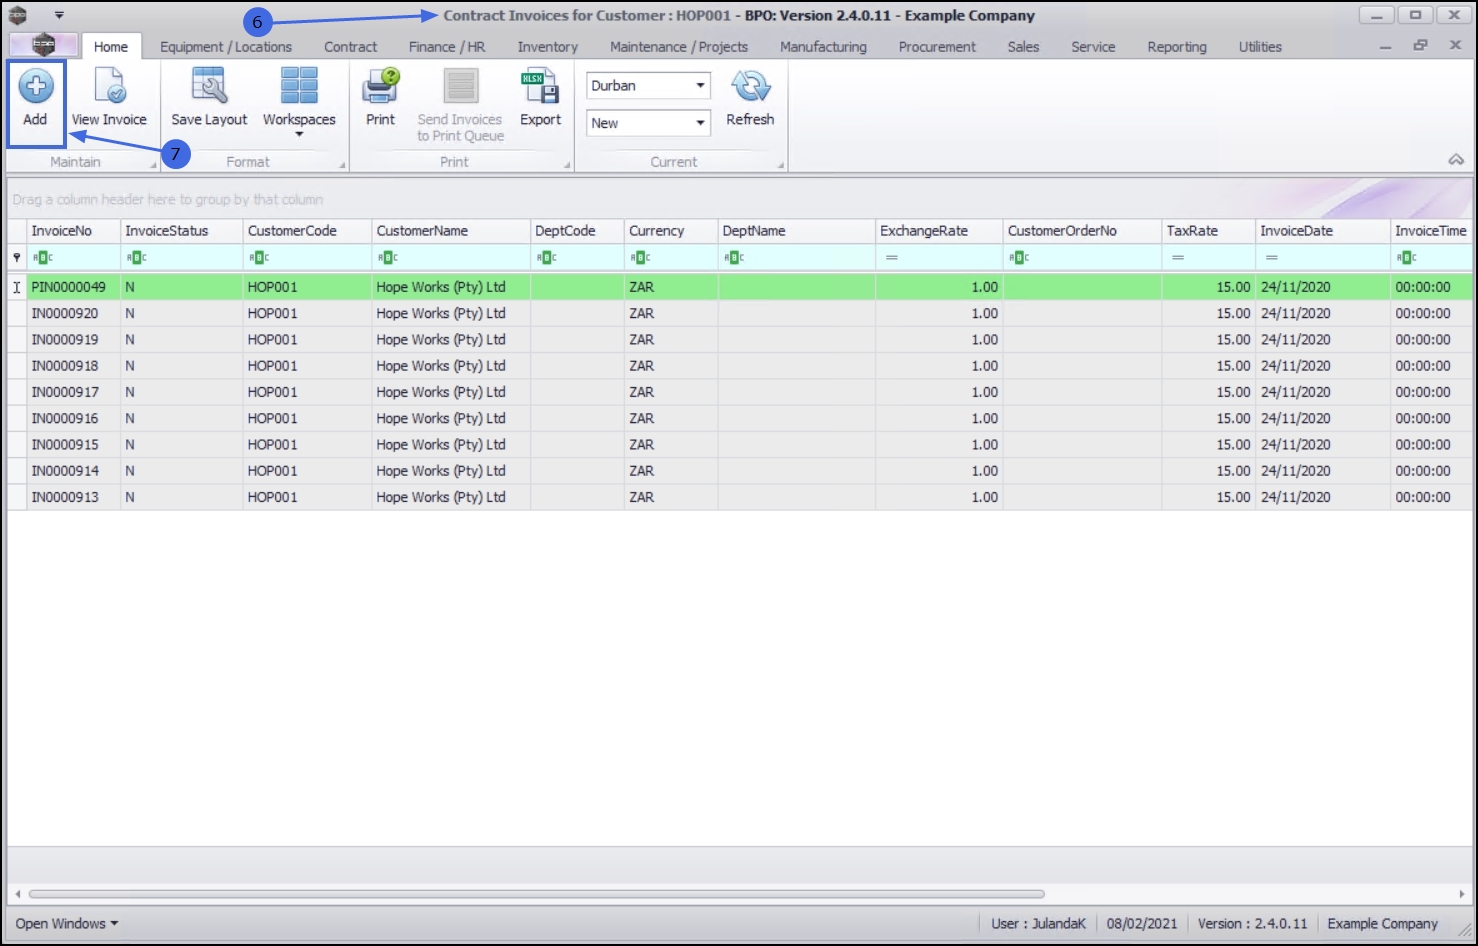
- The Contract Invoices for Customer : [customer code] screen will display.
Add Contract Invoice
- Click on Add.
 Short cut key: Right click to display the Process menu list. Click on Add.
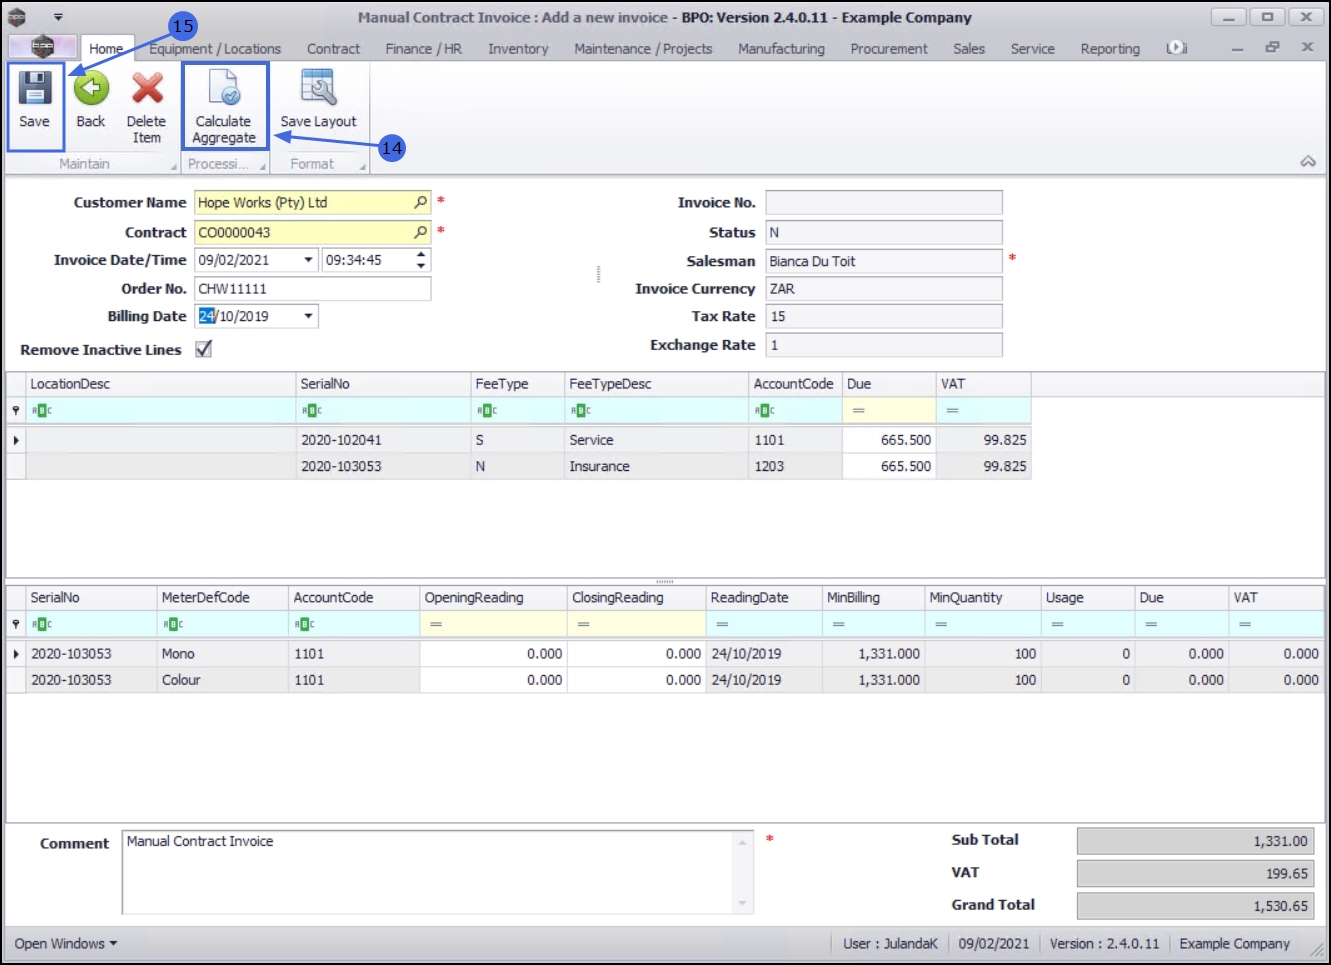
- The Maintain Contract Invoice: Add a new invoice screen will display.
- Complete the Contract Invoice Header Information.
- The Item Fees Grid and Meter Fees Grid will automatically update with the item(s) and meter(s) details that have originally been set up on the selected contract.
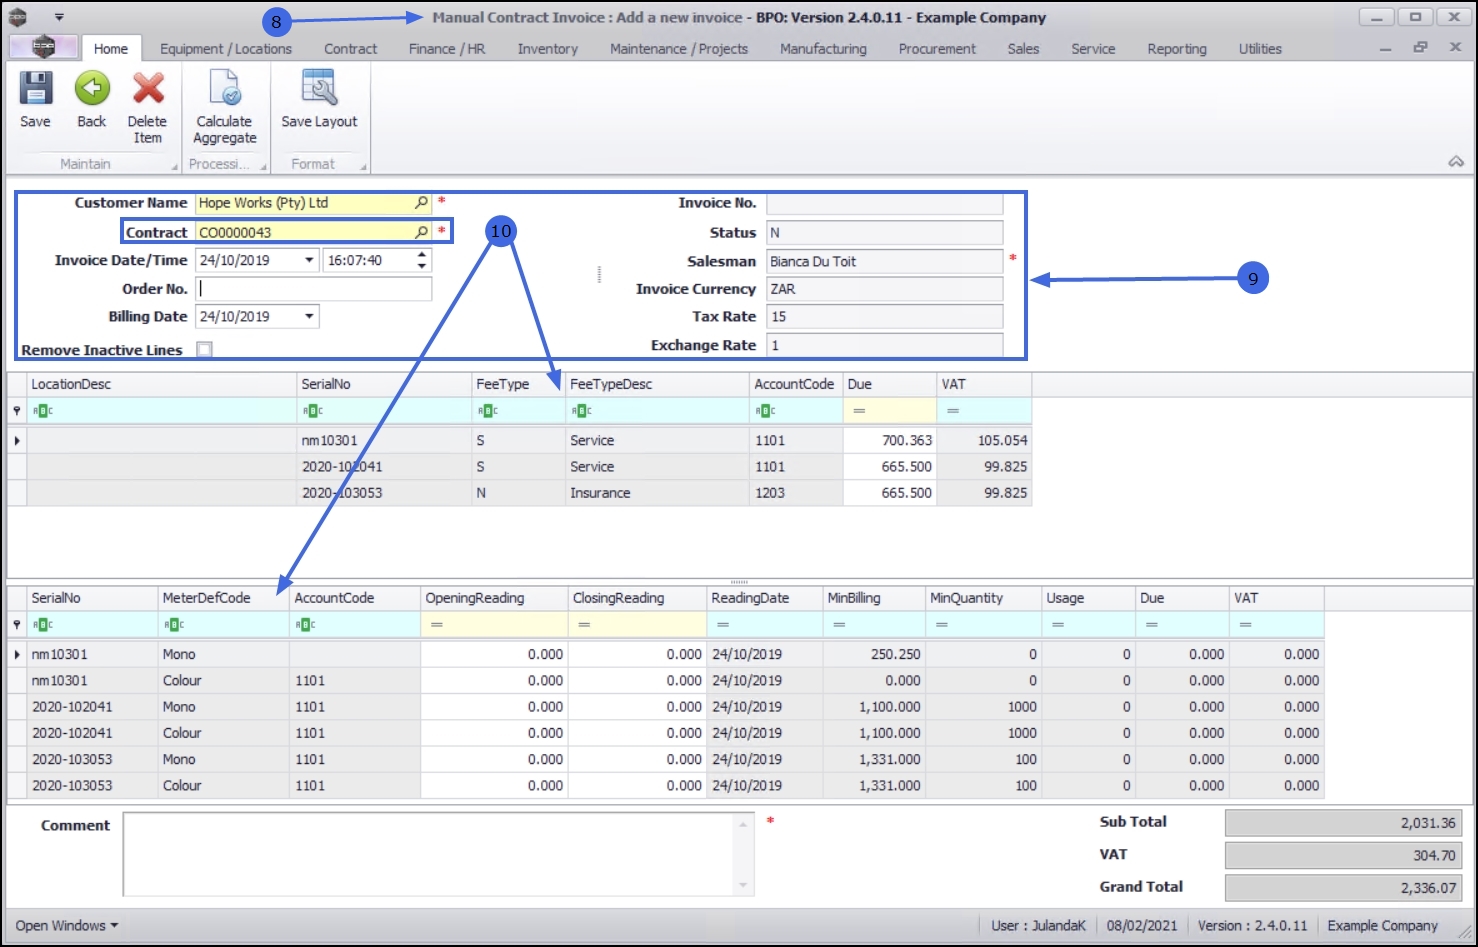
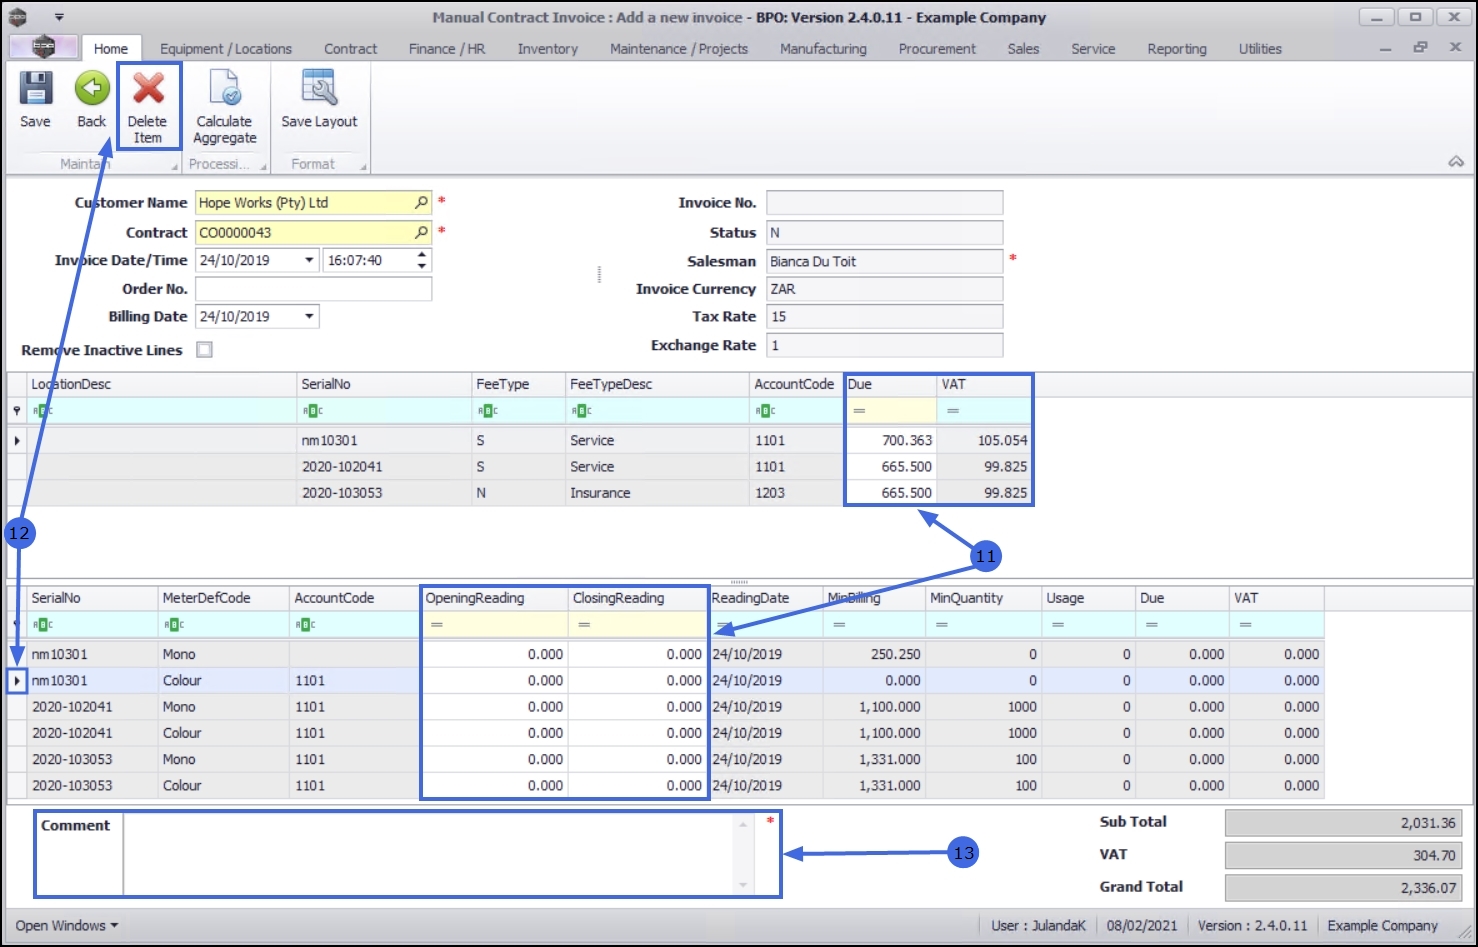
- Ensure that the correct Fee and Meter charges have been listed.
- Delete any items that you do not wish to bill, by selecting the row of the item and clicking on the Delete Item button.
- Type in a Comments relevant to this Contract Invoice.
 Note that this field is mandatory.
Aggregate Billing
- Click on Calculate Aggregate to recalculate the aggregate billing charge. The correct amount will be billed regardless, but this will give you the ability to view the charges before saving the manual Contract Invoice.
 A contract cannot be configured for Aggregate Billing where the customer is consolidated.
- Click on Save to save the new Manual Contract and to return to the Contract Invoices for Customer screen.
Comment and Order
The comment and order number will appear on the Contract Invoice.
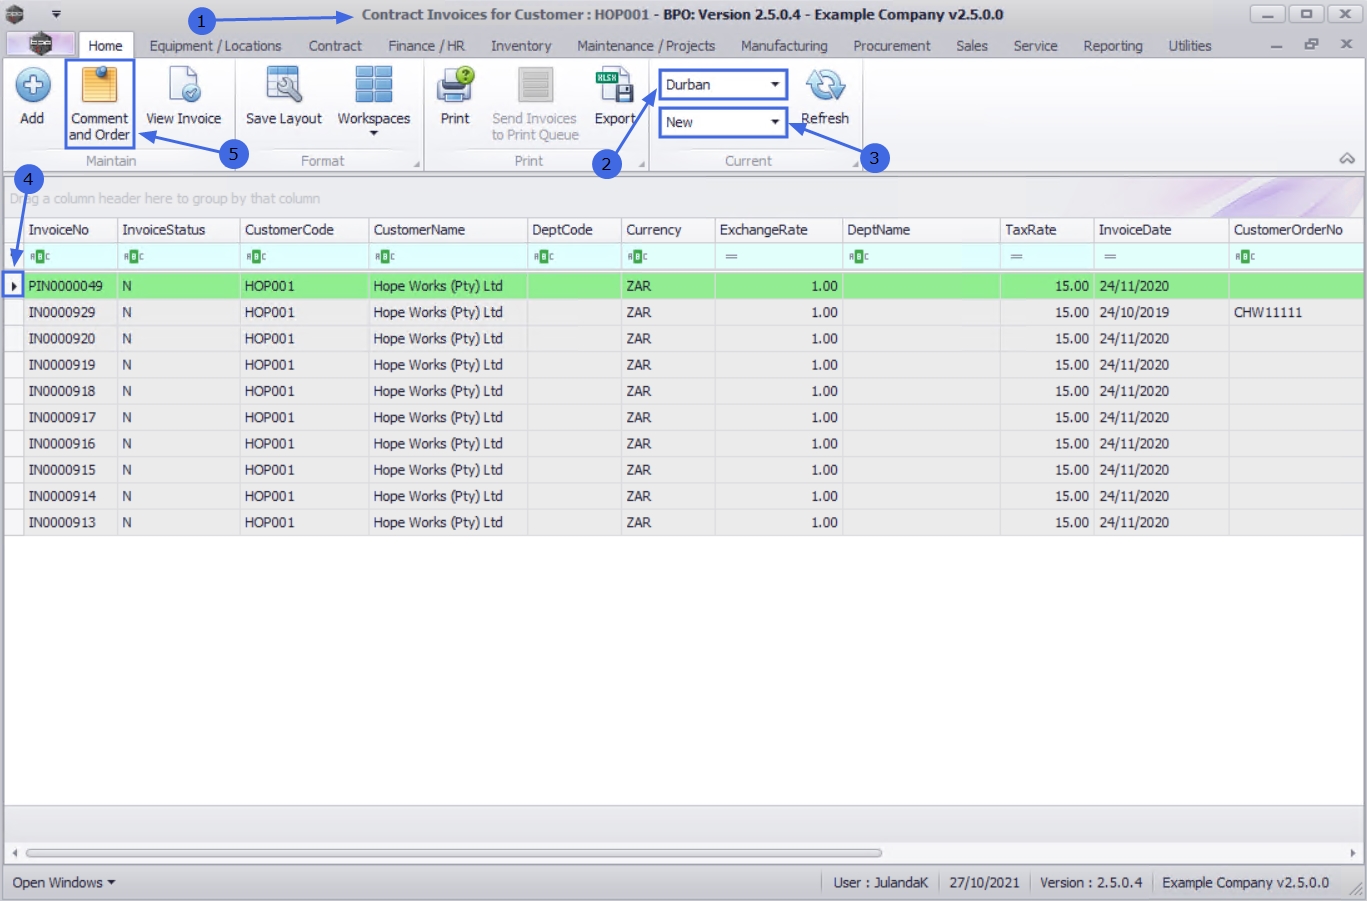
- From the Contract Invoices for Customer : [customer name] screen,
- Ensure that the correct Site has been selected.
- The example has Durban selected.
- Select the Status of the contract invoice.
- The example has New selected.
- Click on the row of the Invoice you would like to add a comment and order number to.
- Click on Comment and Order. Short cut key: Right click to display the Process menu list. Click on Comments and References.
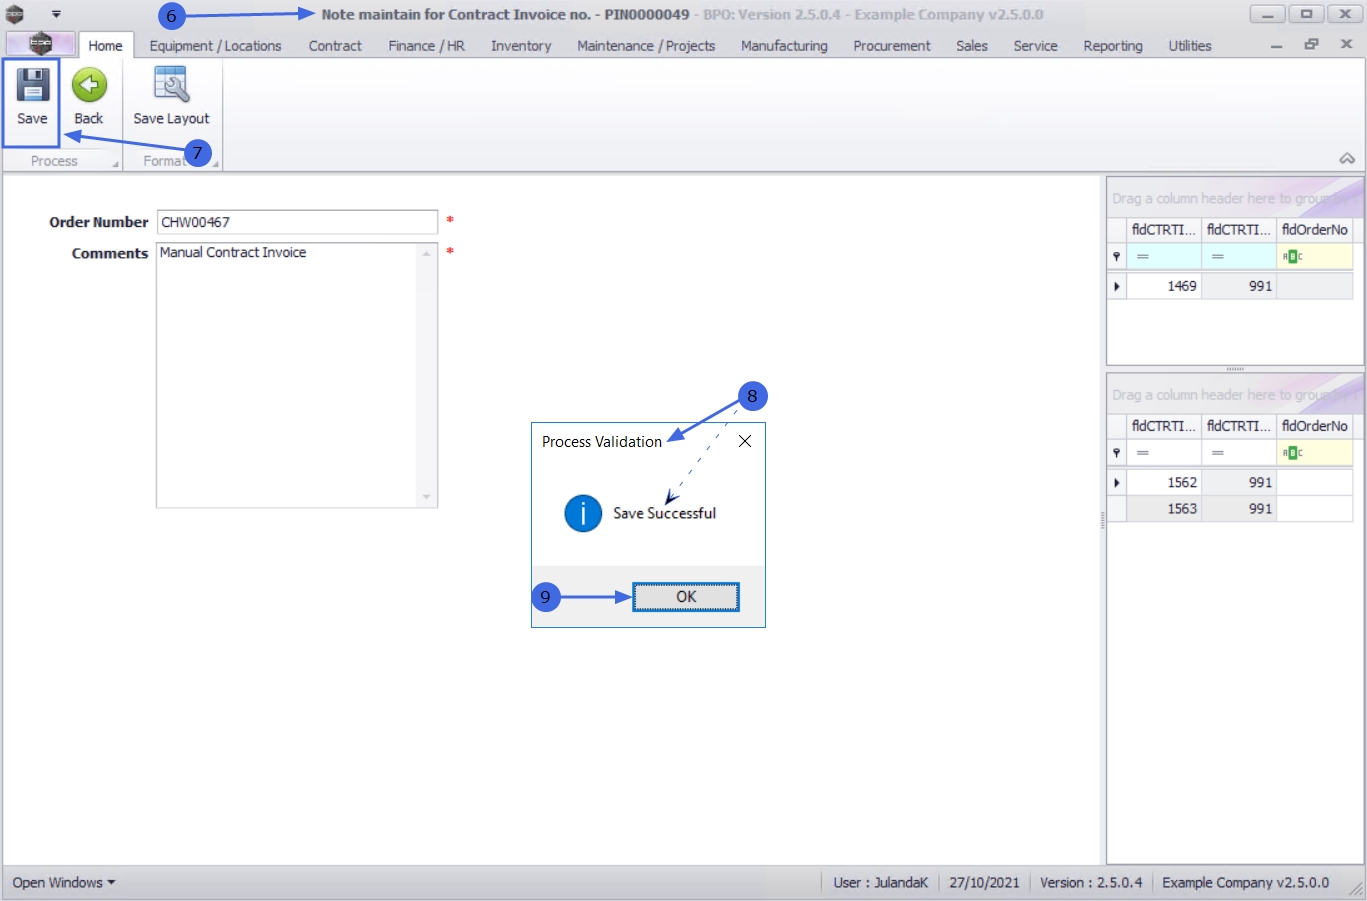
- The Note maintain for Contract Invoice no. - PIN[invoice number] screen will display.
- Order Number: Type in the order number that has been linked to the contract invoice.
- Comments: Click in the comments text box to start typing a comment for the contract invoice.
- Click on Save.
- When you receive the Process Validation message to confirm that;
- Save Successful
- Click on OK.
You will return to the Contract Invoices for Customer screen.
View the contract number and comments on the contract invoice by clicking on View Invoice.
View Contract Invoice
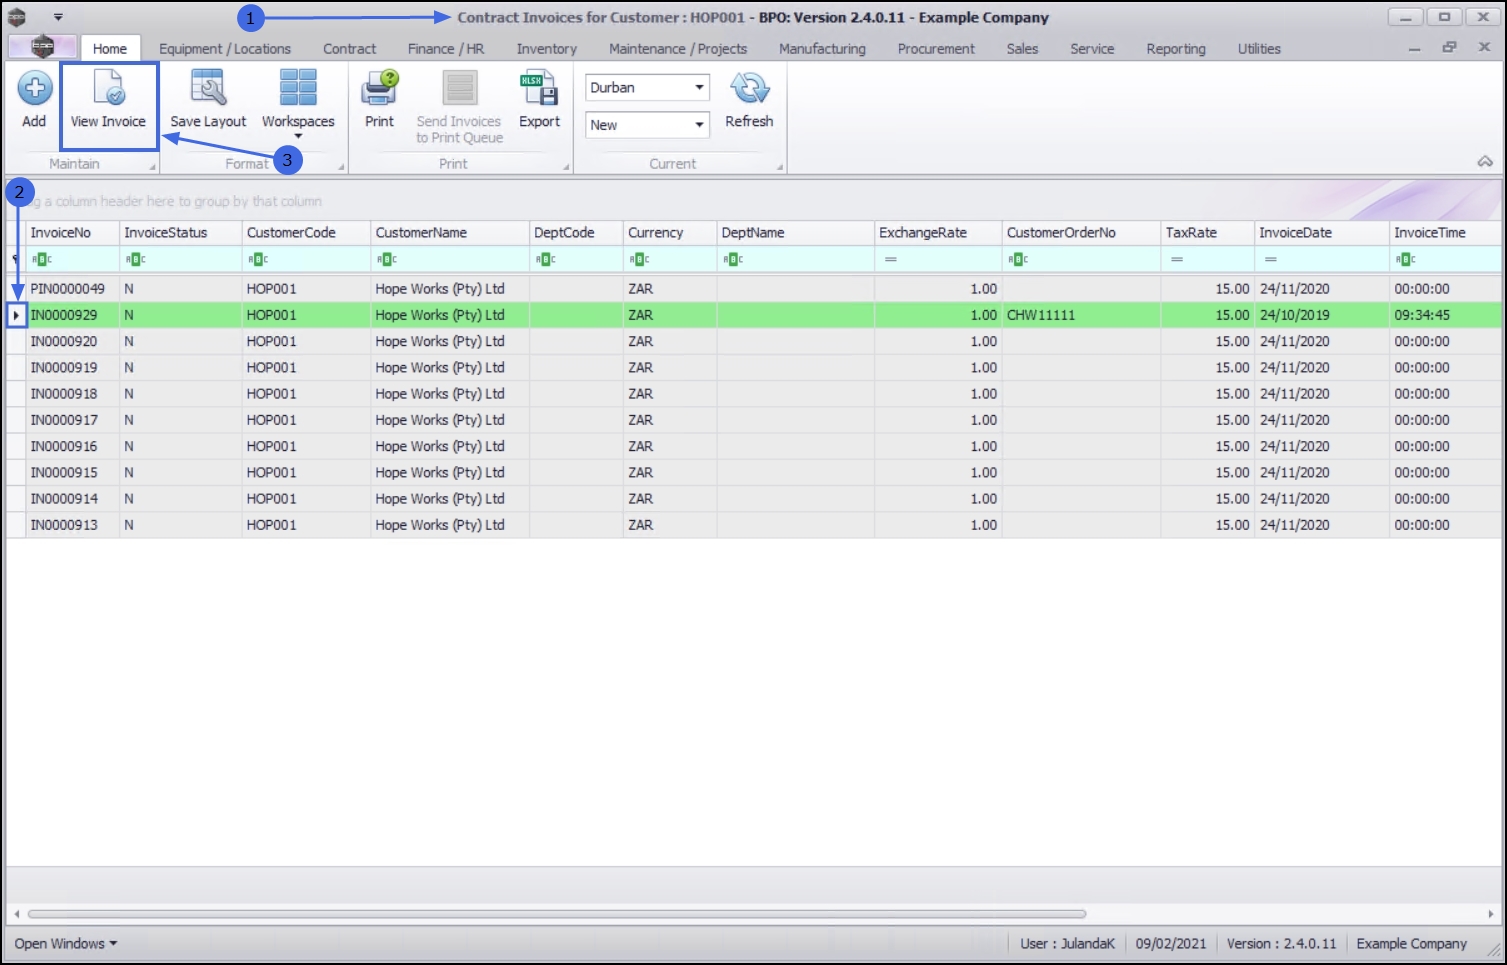
- From the Contract Invoices for Customer [customer code] screen.
- Select the row of the Contract Invoice you wish to view.
- Click on View Invoice.
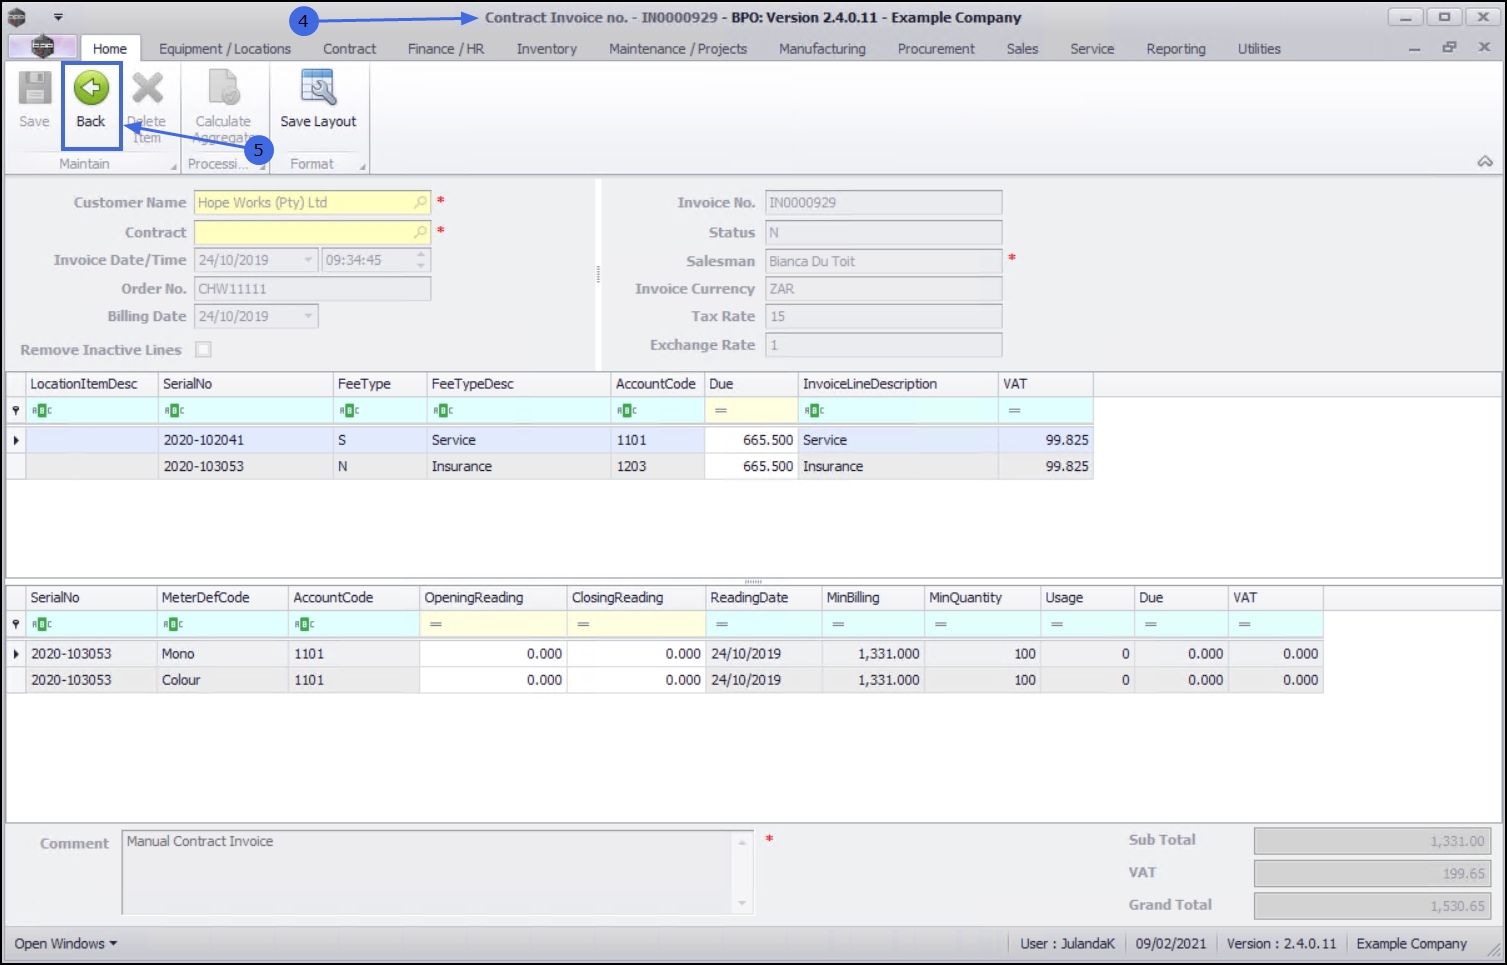
- The Contract Invoice no. - INV[invoice number] will display. Note that this is for viewing the contract invoice only and no changes can be made in this screen.
- Click on Back to return to the Contract Invoices for Customer screen.
Print Contract Invoices
- From the Contract Invoices for Customer : [customer code] screen,
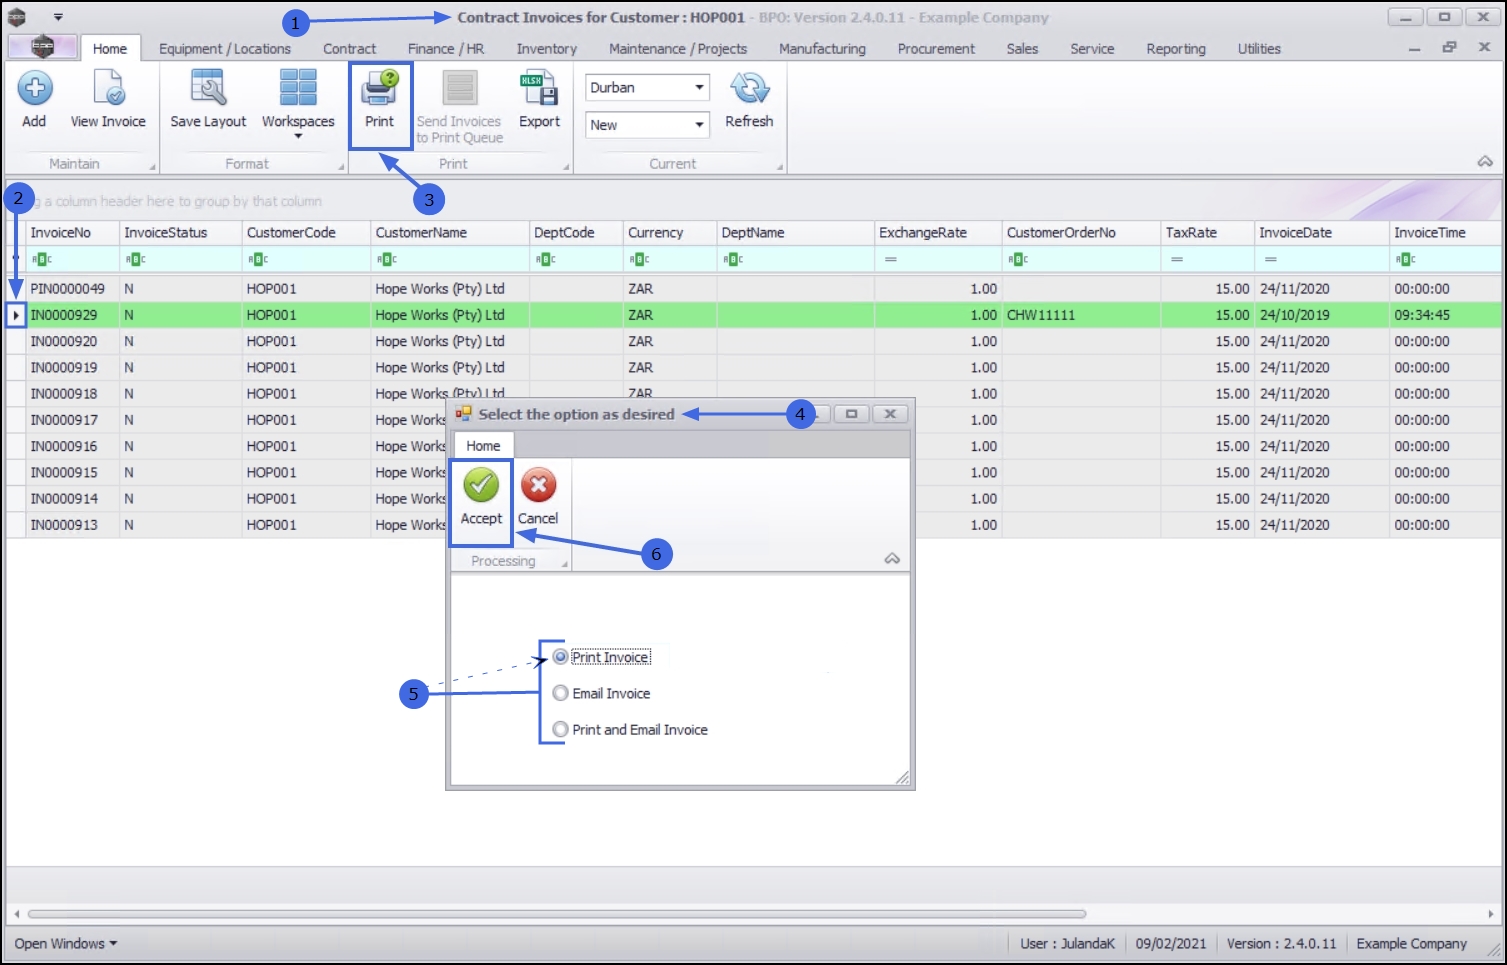
- Select the row of the Contract Invoice you wish to print.
- Click on Print.
- The Select the option as desired message will display.
- Click on the radio button of the option you require.
 When selecting to Email Invoice, the invoice will be emailed via the BPO Email Service on the server and not from MS Outlook.
 - The example has Print Invoice selected.
- Click on Accept to proceed.
- The Tax Invoice will display in the Preview screen.
- From this screen you can make cosmetic changes to the document, as well as Save, Print, Add a Watermark, Export or Email the Invoice.
- Click on Close to return to the Sales Invoices for Customer screen.

Send Invoices to Print Queue
- You can send Invoices to the Print Queue directly from the Contract Invoices for Customer [customer code] listing screen, instead of going to the Print Queue Reprint screen. This means that a batch of invoices can be send to the customer.
- Print Queue is only available where the status is set to Printed.
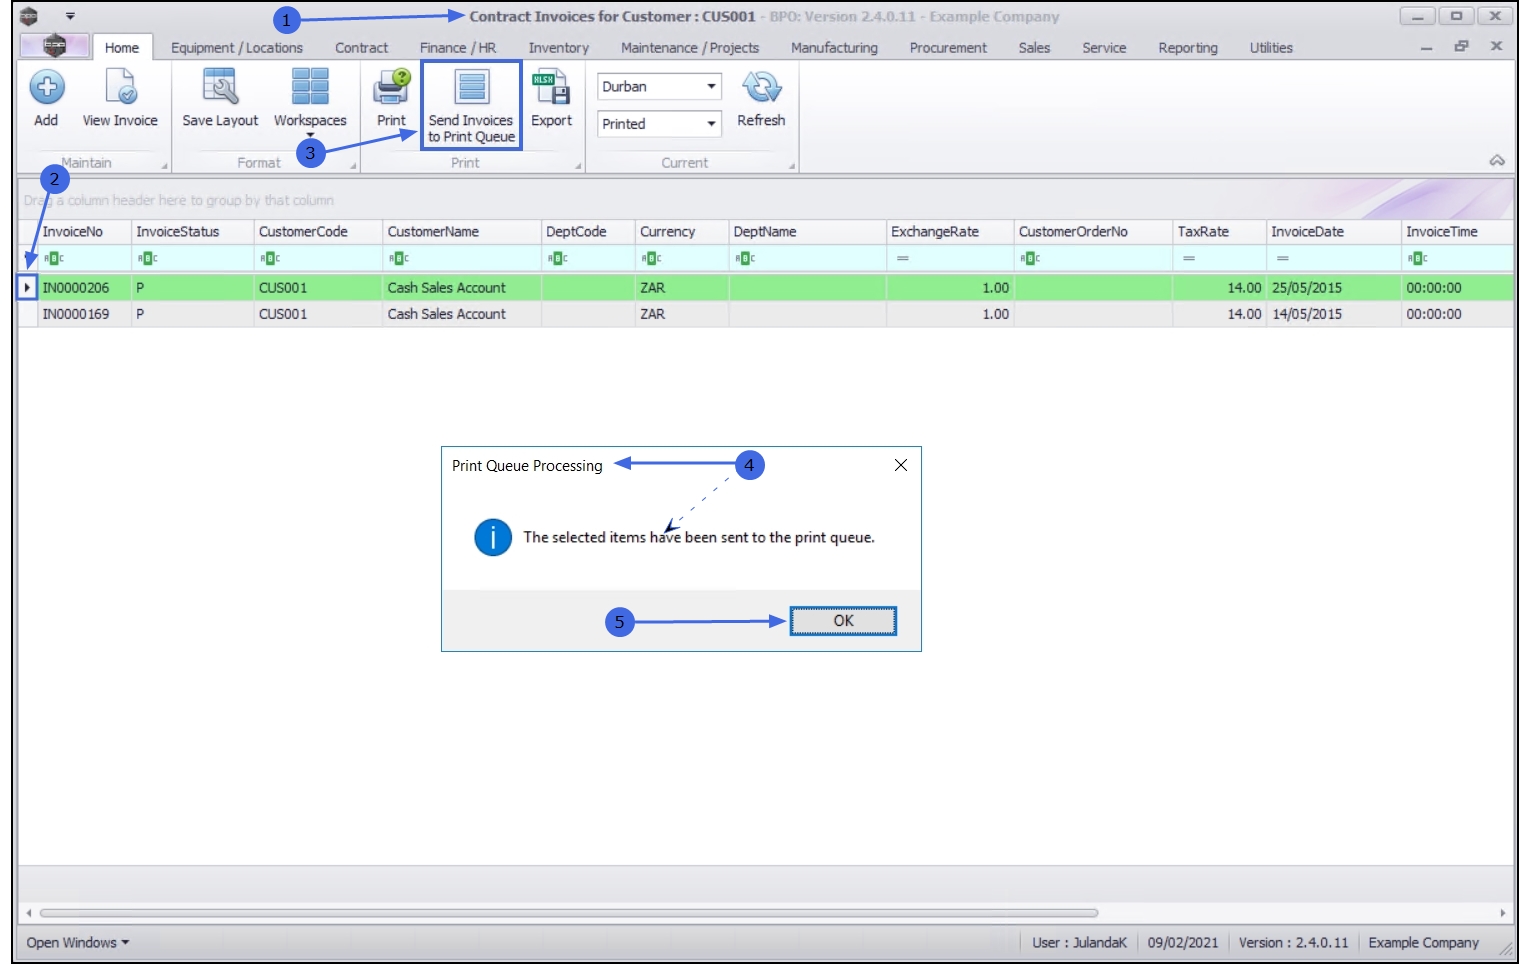
- From the Contract Invoices for Customer : [customer code] screen,
- Select the Contract Invoice(s) you wish to send to the Print Queue.
-
 To Select a Range: Select the row of the first invoice. Hold down the Shift key on your keyboard and click in the row selector next to the last invoice in your list.
 -
To Select alternate Invoices: Hold down the Ctrl (Control) key on your keyboard and click in the row of each Invoice you wish to include in the Print Queue.
- Click on Send Invoices to Print Queue.
- When you receive the Print Queue Processing message to inform you that;
- The selected items have been sent to the print queue.
- Click on OK to proceed.
MNU.061.035