Contract
Balances
Contract balances are unused service hours / support time from a client's contractual agreement. The services hours are included in a contract as the quantity of a craft inclusion linked to a contract item. The service hours are consumed when time logged by an employee with a craft linked to a contract item as a craft inclusion is reviewed as SLA.
| Ribbon Access: Contract > Balances |

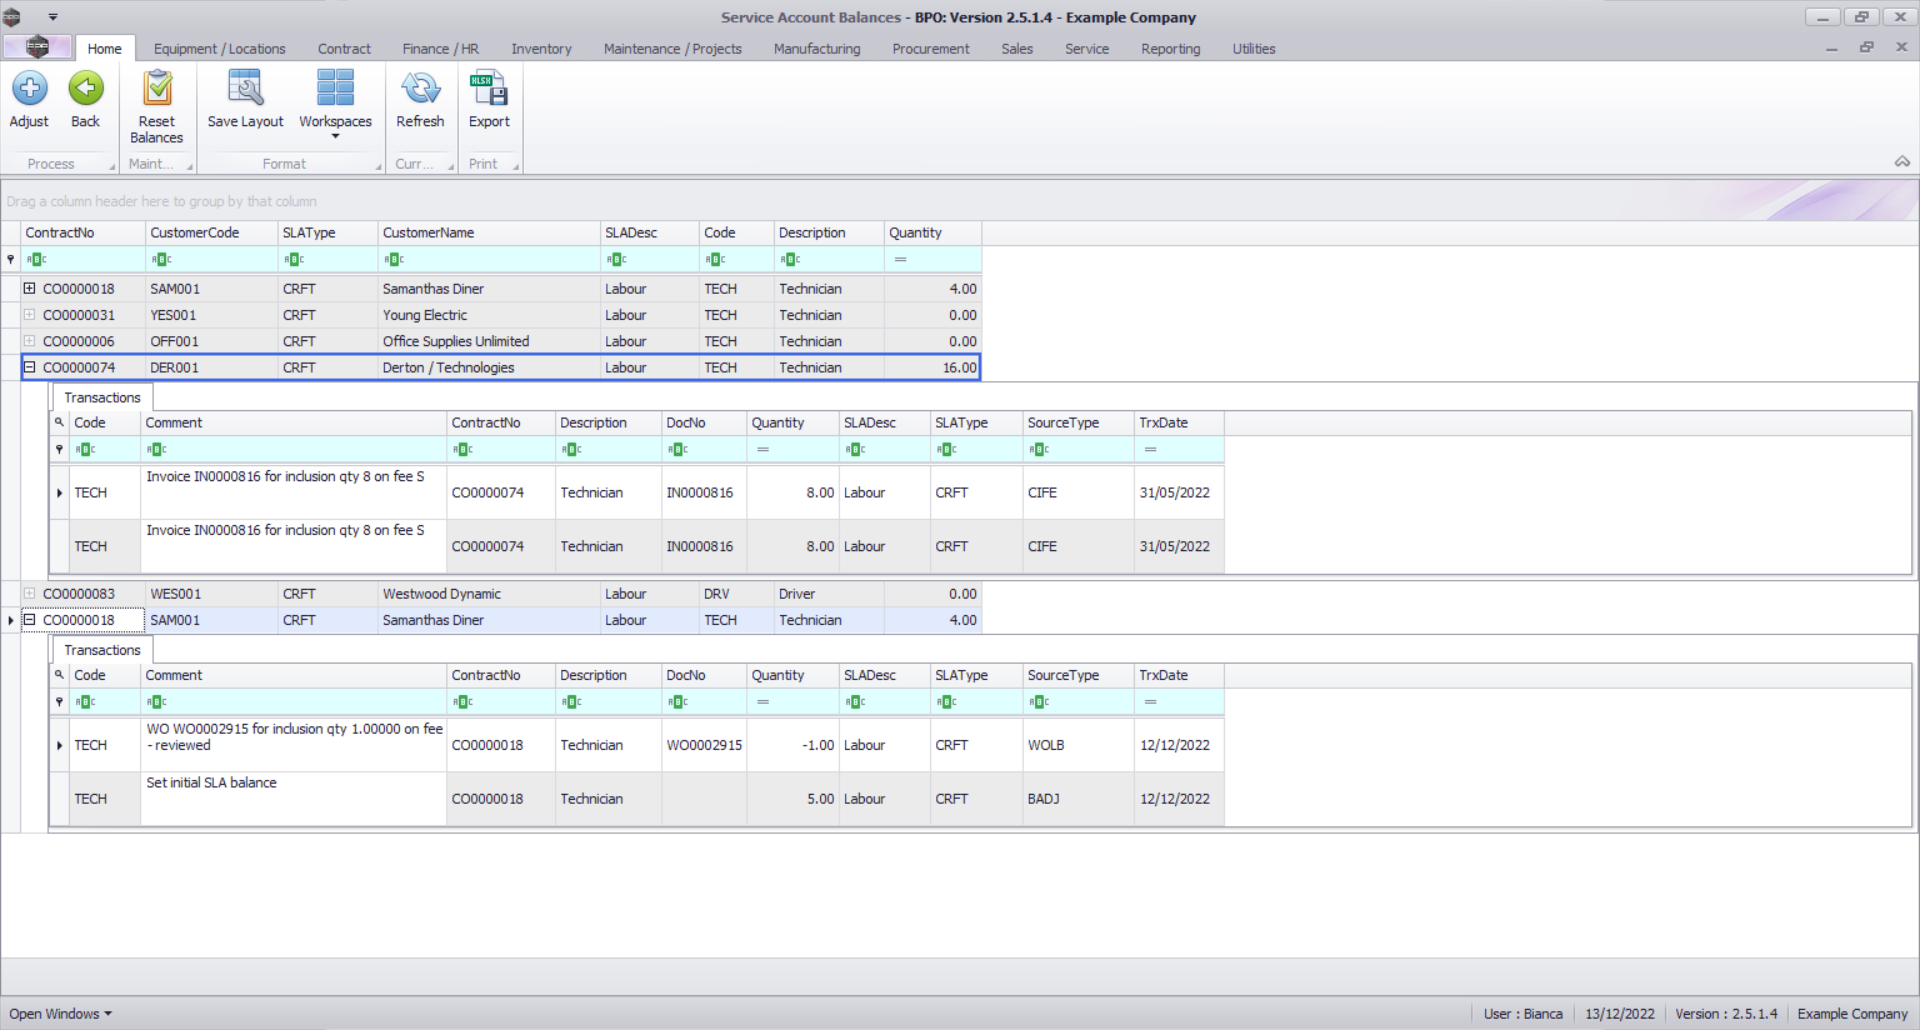
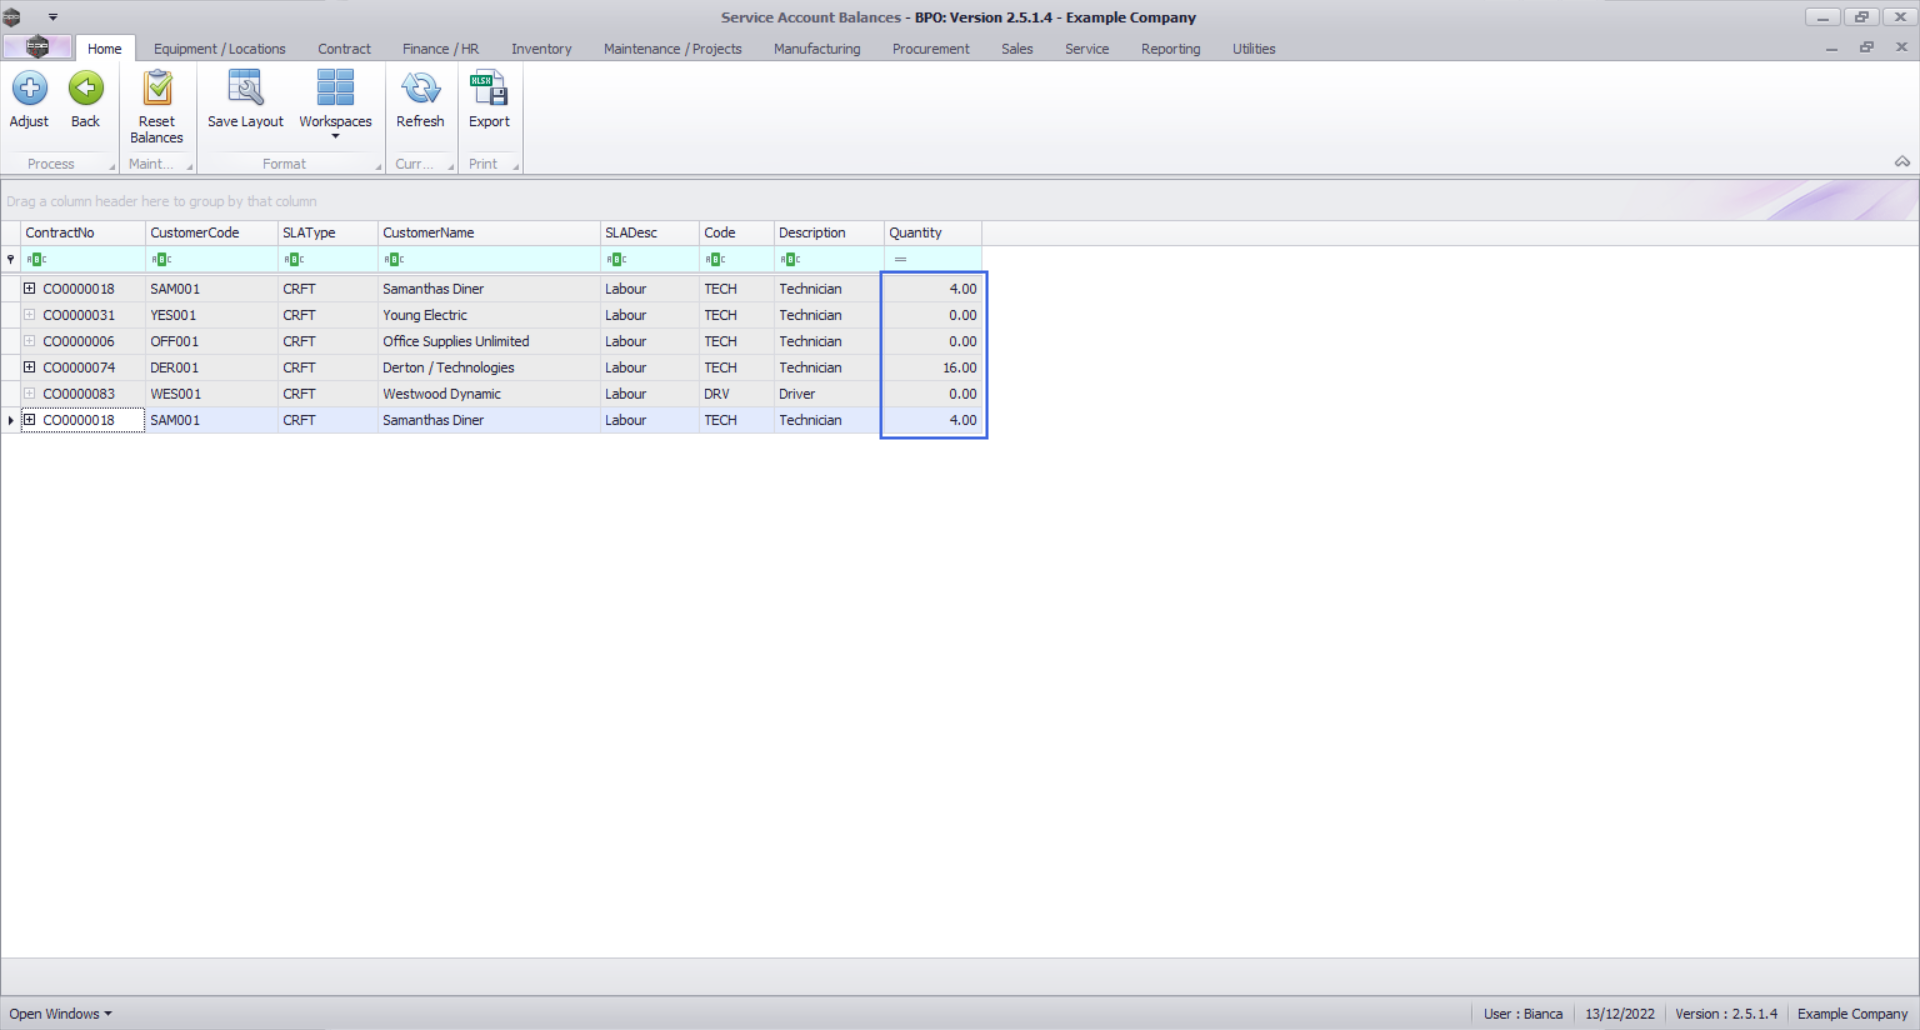
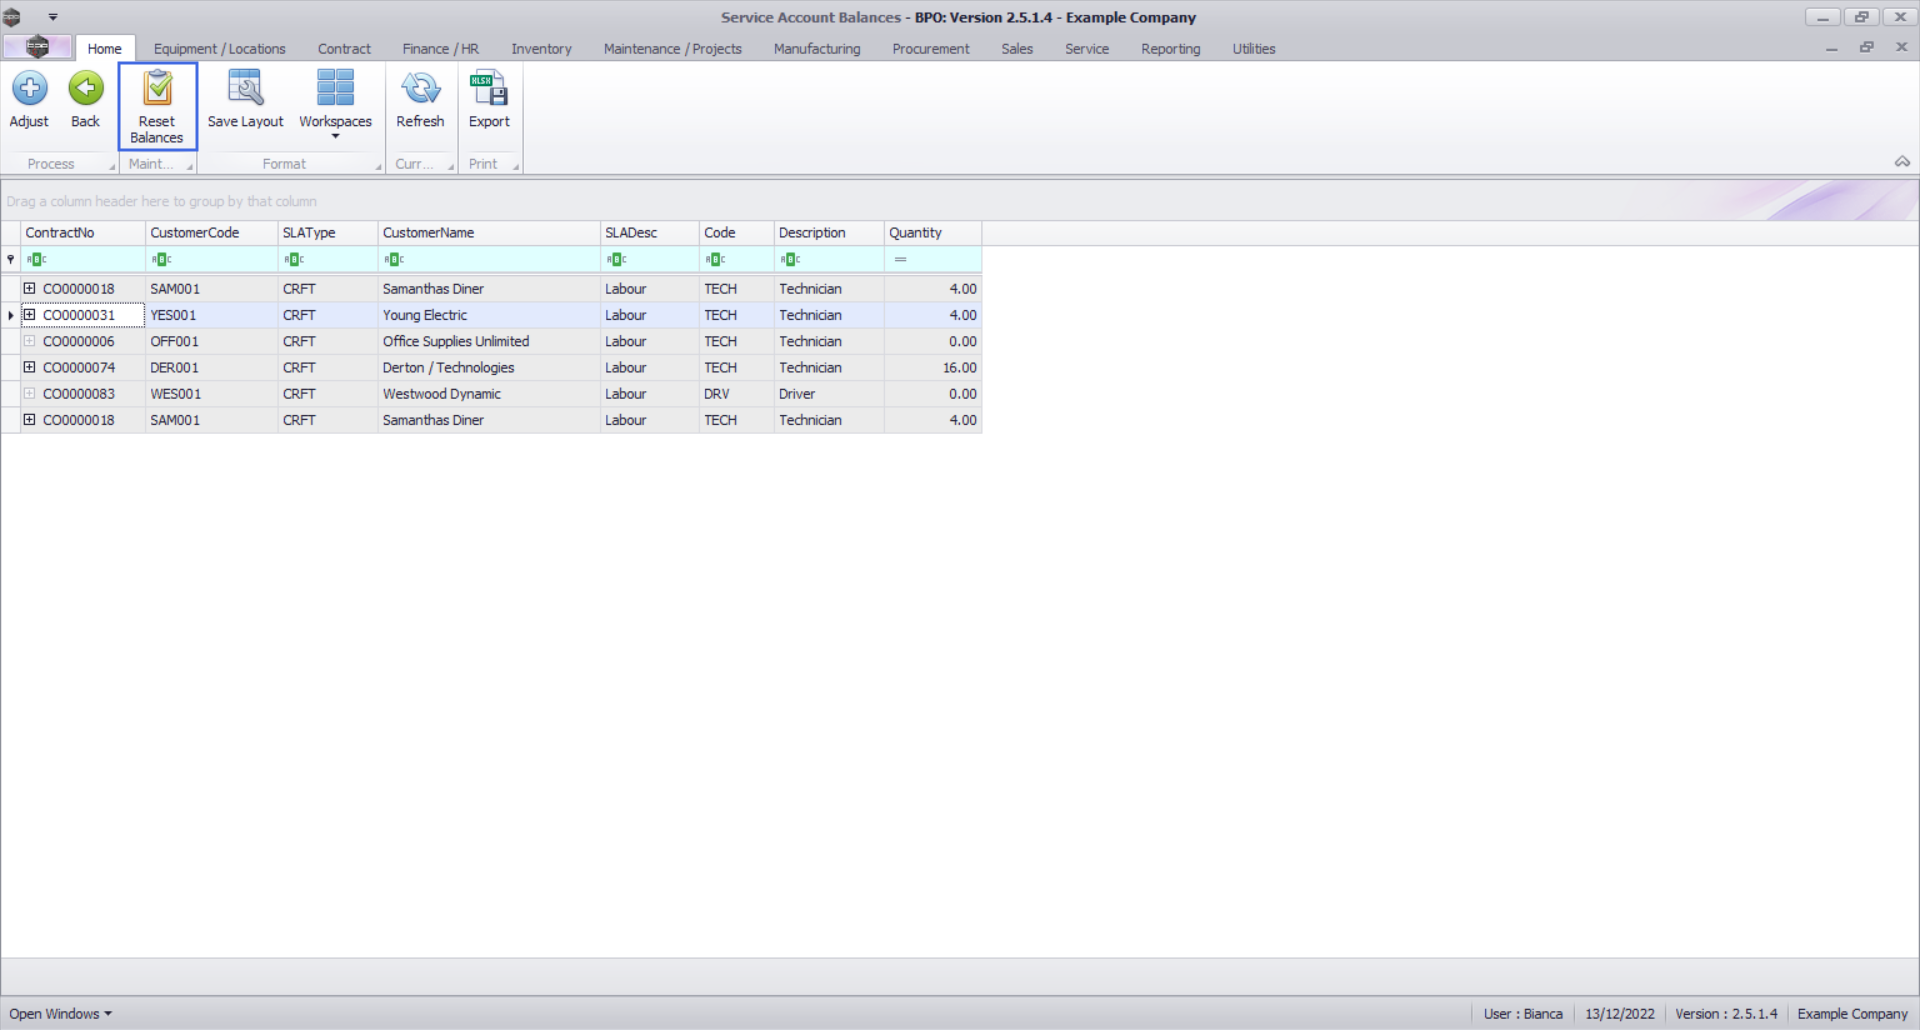
Service Account Balances screen
- In this screen, all contracts with crafts linked as craft inclusions will be displayed in this screen.
- If an item has transactions, the Transactions docking panel will auto expand showing the underlying transactions.
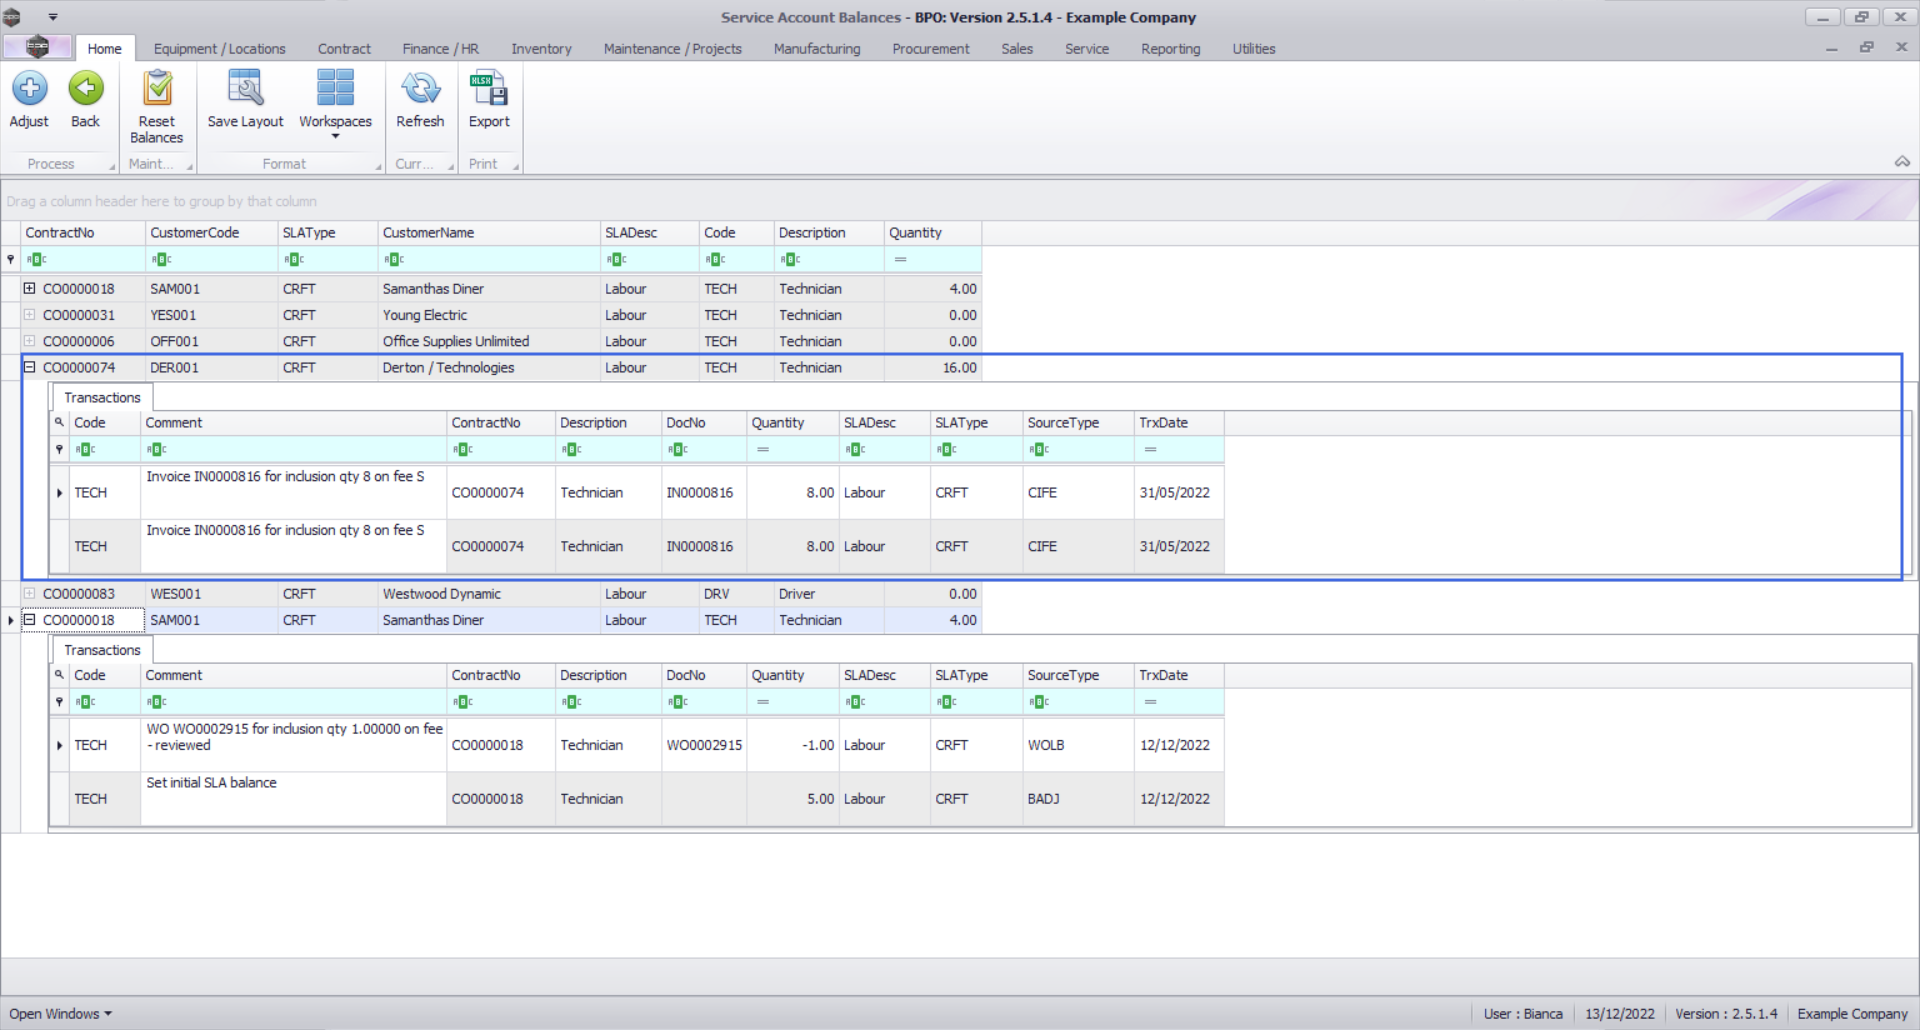
Contract Details Panel
- ContractNo: This shows the contract number.
- CustomerCode: This shows the customer code.
- CustomerName: This shows the customer description.
- SLAType: This shows the type of the contract inclusion linked to the contract item.
- SLADesc: This shows the description of the contract inclusion linked to the contract item.
- Code: This shows the craft code.
- Description: This shows the craft description.
- Quantity: This shows the remaining number of unused service or support hours.
Transactions Panel
- Code: This shows the craft code.
- Comment: This shows the comment about the selected transaction.
- ContractNo: This shows the contract number.
- Description: This shows the craft description.
- DocNo: This shows the document number linked to the selected transaction.
- Quantity: This shows either the debited or credited service or support hours depending on the type of transaction selected .
- SLADesc: This shows the description of the contract inclusion linked to the contract item.
- SLAType: This shows the type of the contract inclusion linked to the contract item.
- SourceType: This shows the type of transaction.
- TrxDate: This shows the transaction date.
- To close the Transaction panel, click on the Collapse button.
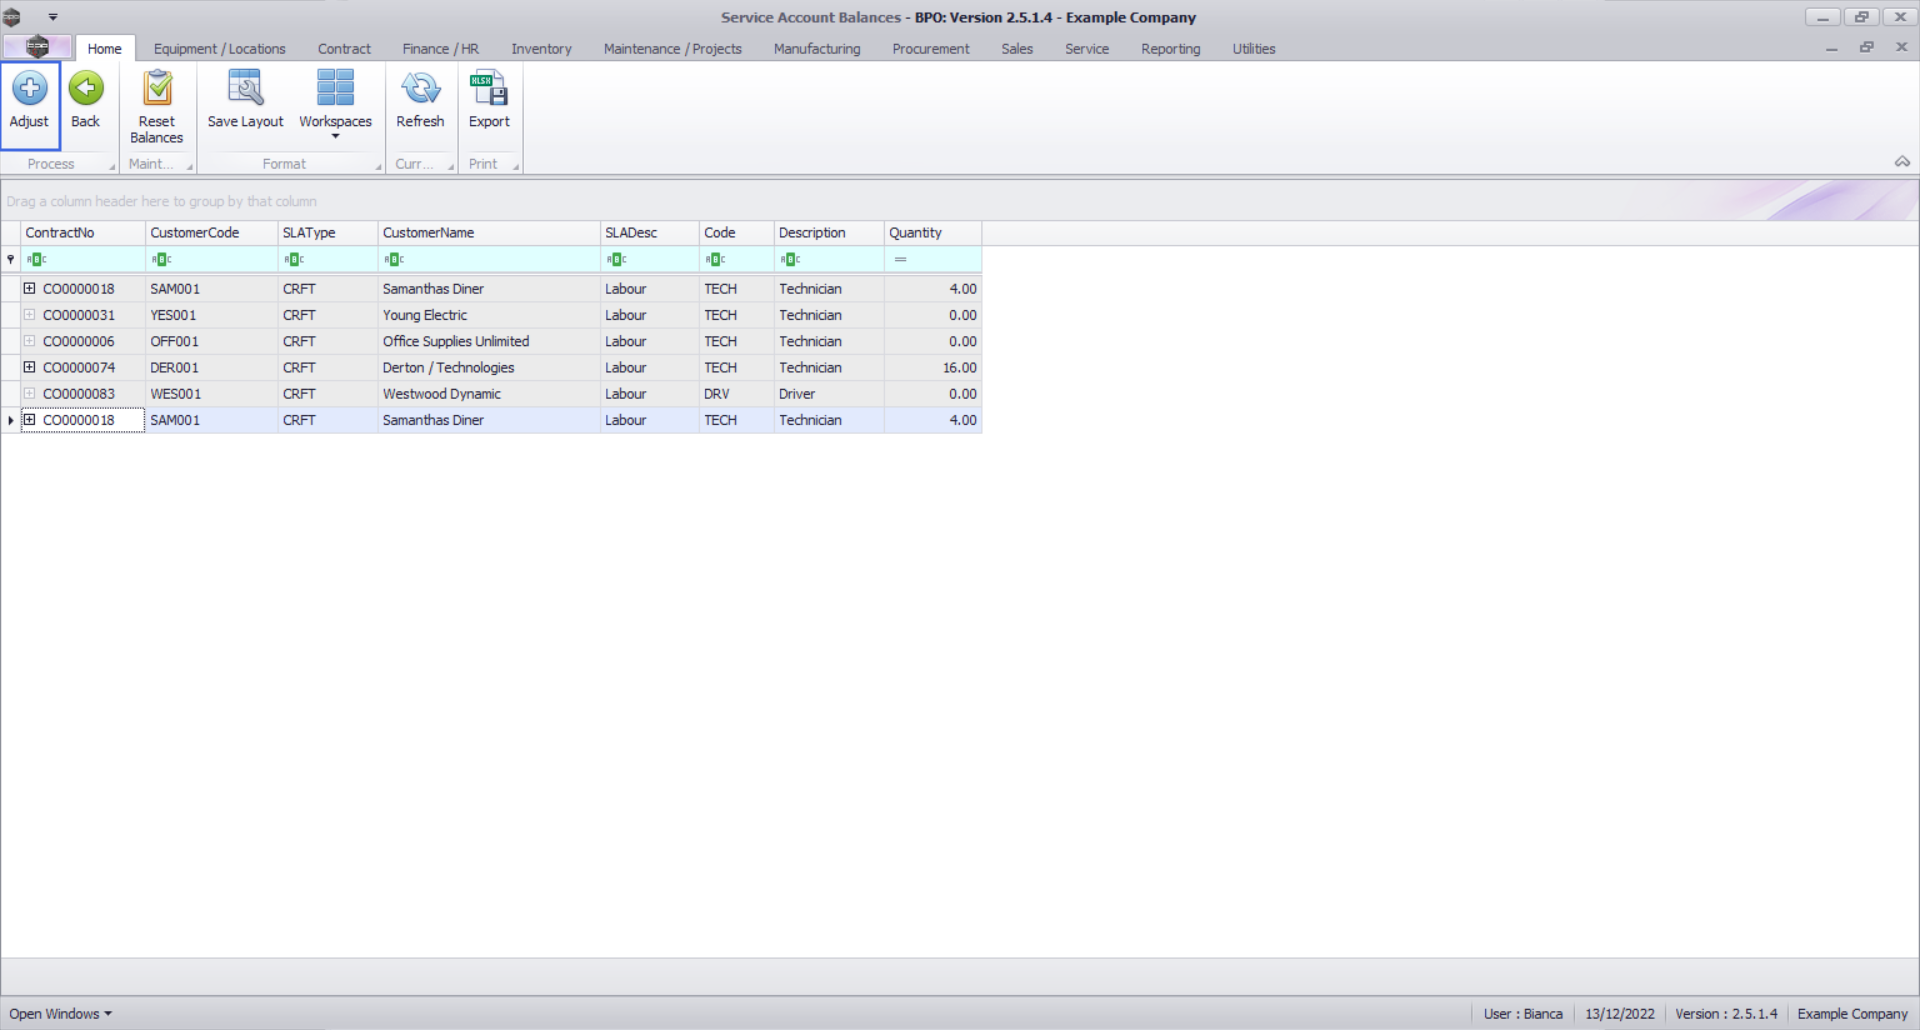
Adjust Service Account Balance
- Initially, all balances will reflect as zero in the Service Account Balances screen.
- The contract manager should then adjust each balance to match the corresponding craft inclusion quantity in the Contracts screen. It is recommended that this should be done for all balances at once.
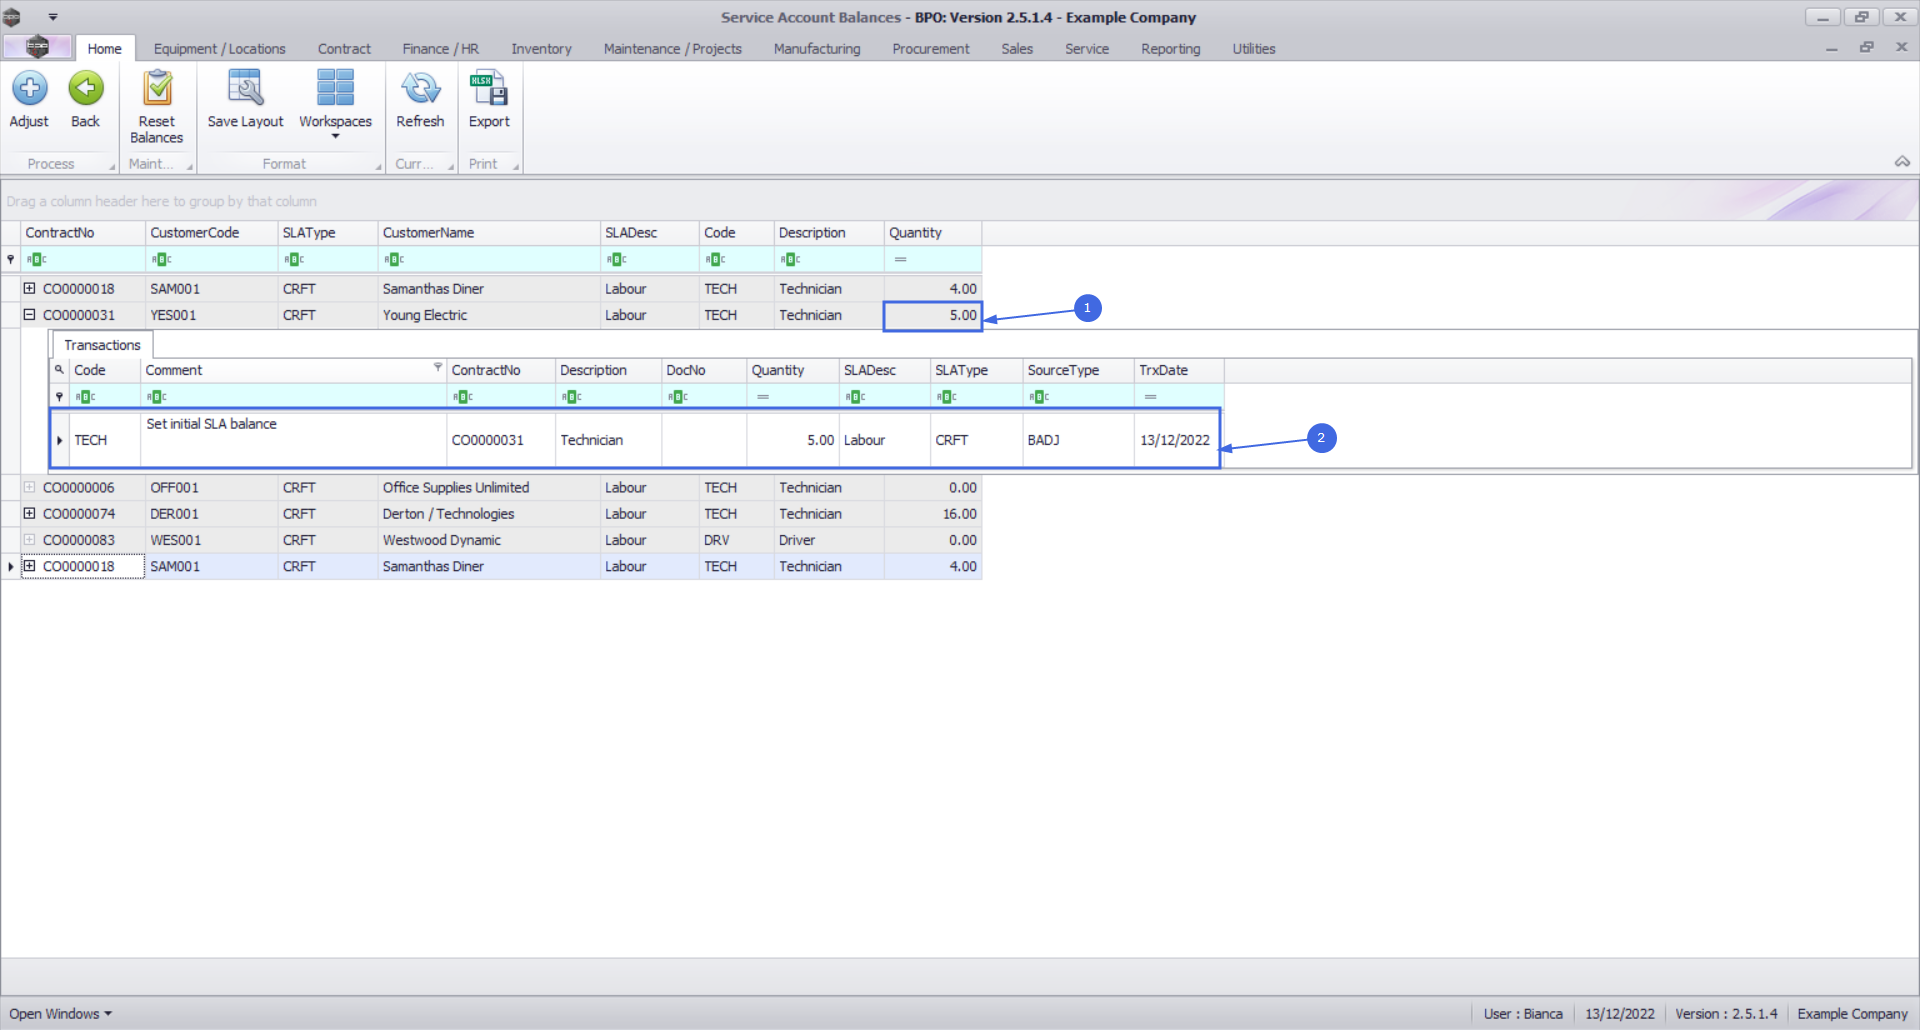
- To adjust the Quantity, click on the row selector in front of the item you would like to adjust the balance for.
- Click on Adjust.
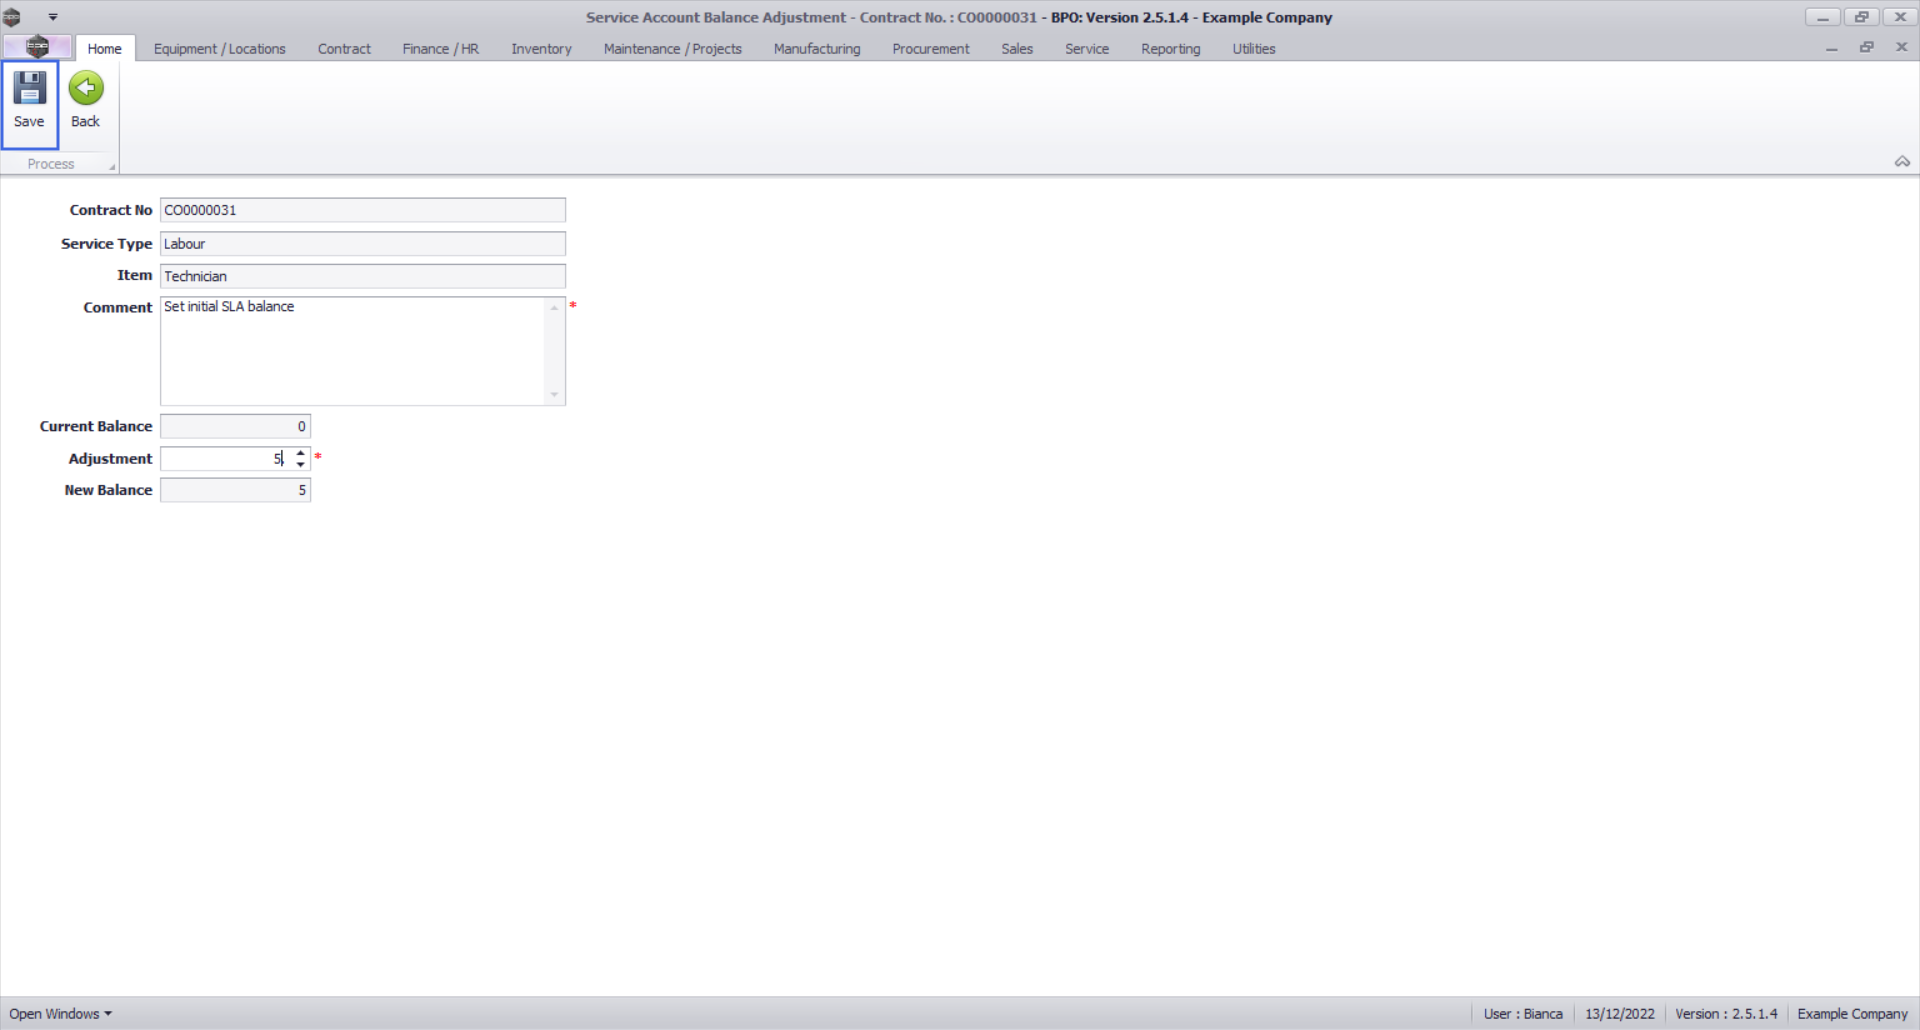
The Service Account Balance Adjustment screen will be displayed.
- Contract No: This will auto populate with the contract number and cannot be changed.
- Service Type: This will auto populate with the service type and cannot be changed.
- Item: This will auto populate with the item and cannot be changed.
- Comment: Type in the relevant comment.
- Current Balance: This will auto populate with the current quantity and cannot be changed.
- Adjustment: Type in the number of hours you would like the current quantity to be adjusted by.
- New Balance: This will auto populate with the new balance.
- When you are done, click on Save.
- You will return to the Service Account Balances screen.
- A Service Account Processing message will pop up telling you;
- The contract service account balance has been adjusted successfully.
- Click on OK.
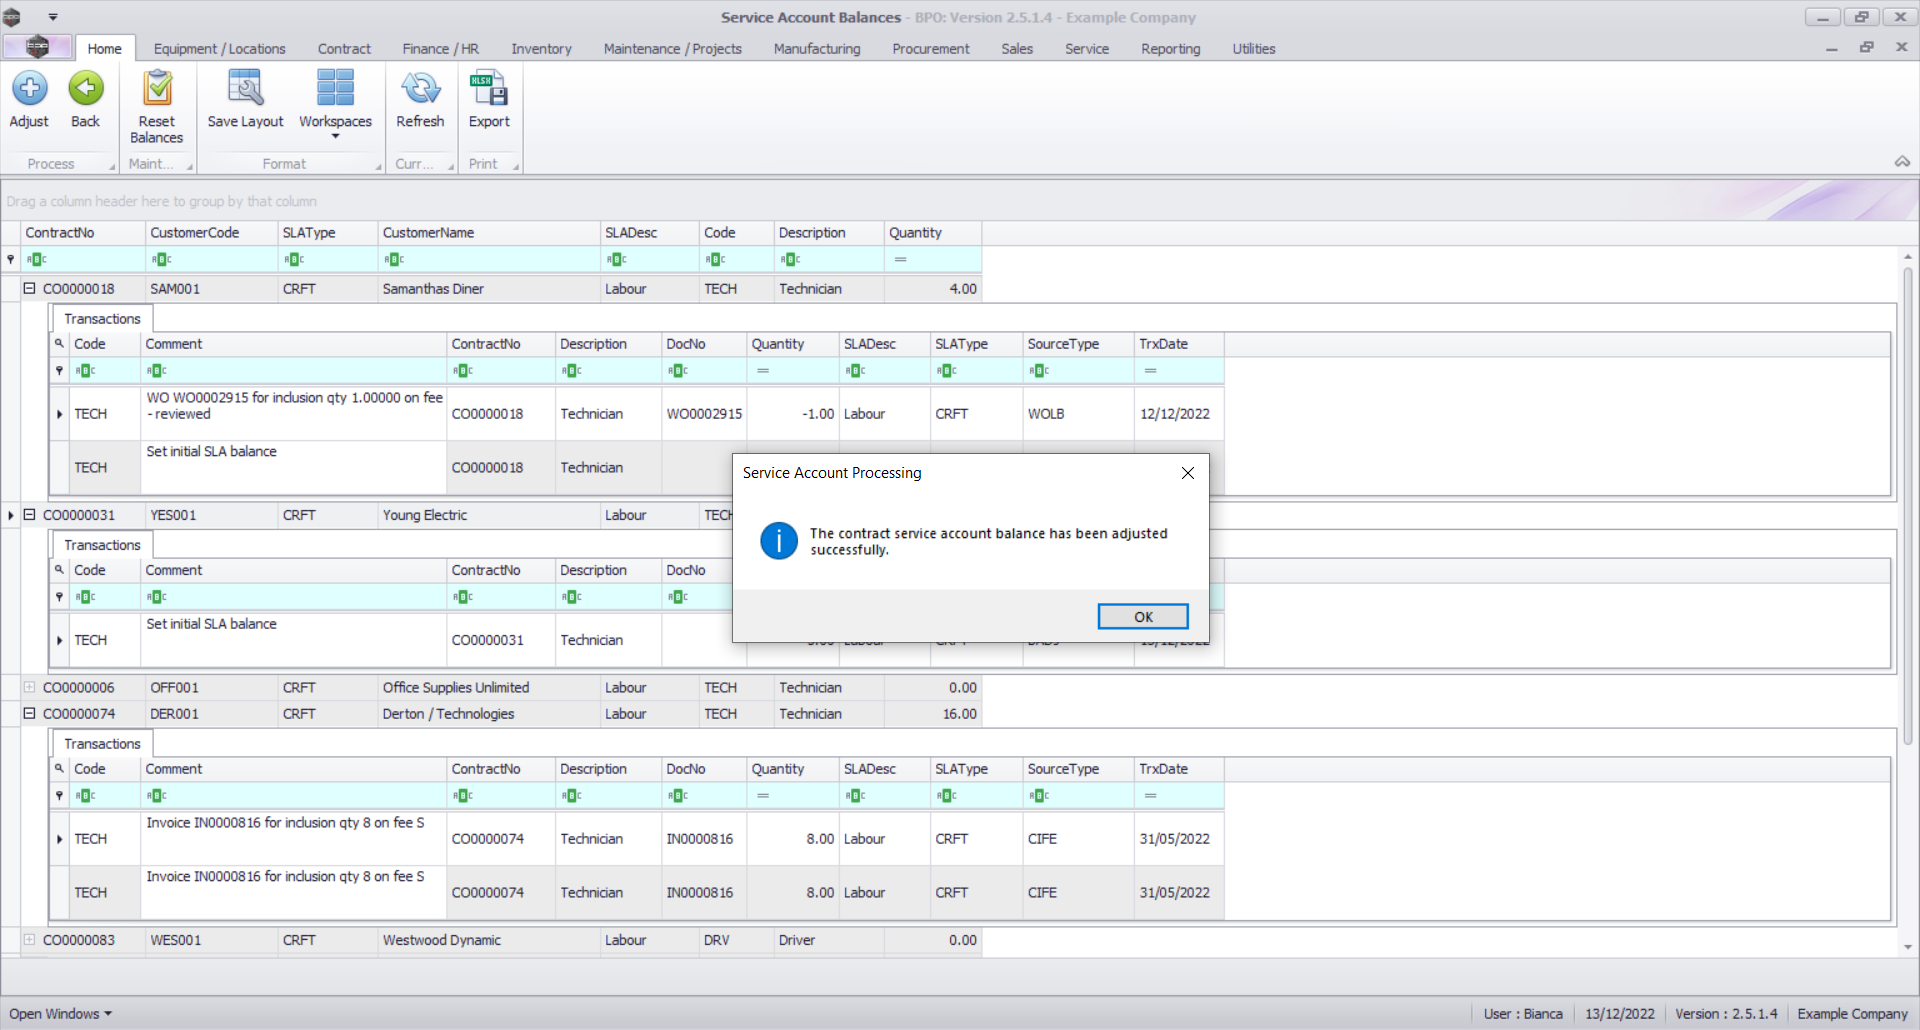
- The Quantity will now reflect the adjustment made in the prior steps.
- The adjustment transactional record will now be displayed in the Transactions panel.
Effect of Time Review on Service Account Balances
- If time is reviewed and apportioned as SLA on an item in the Time Review screen, this will reduce the service account balance (unused service / support hours) of the item.
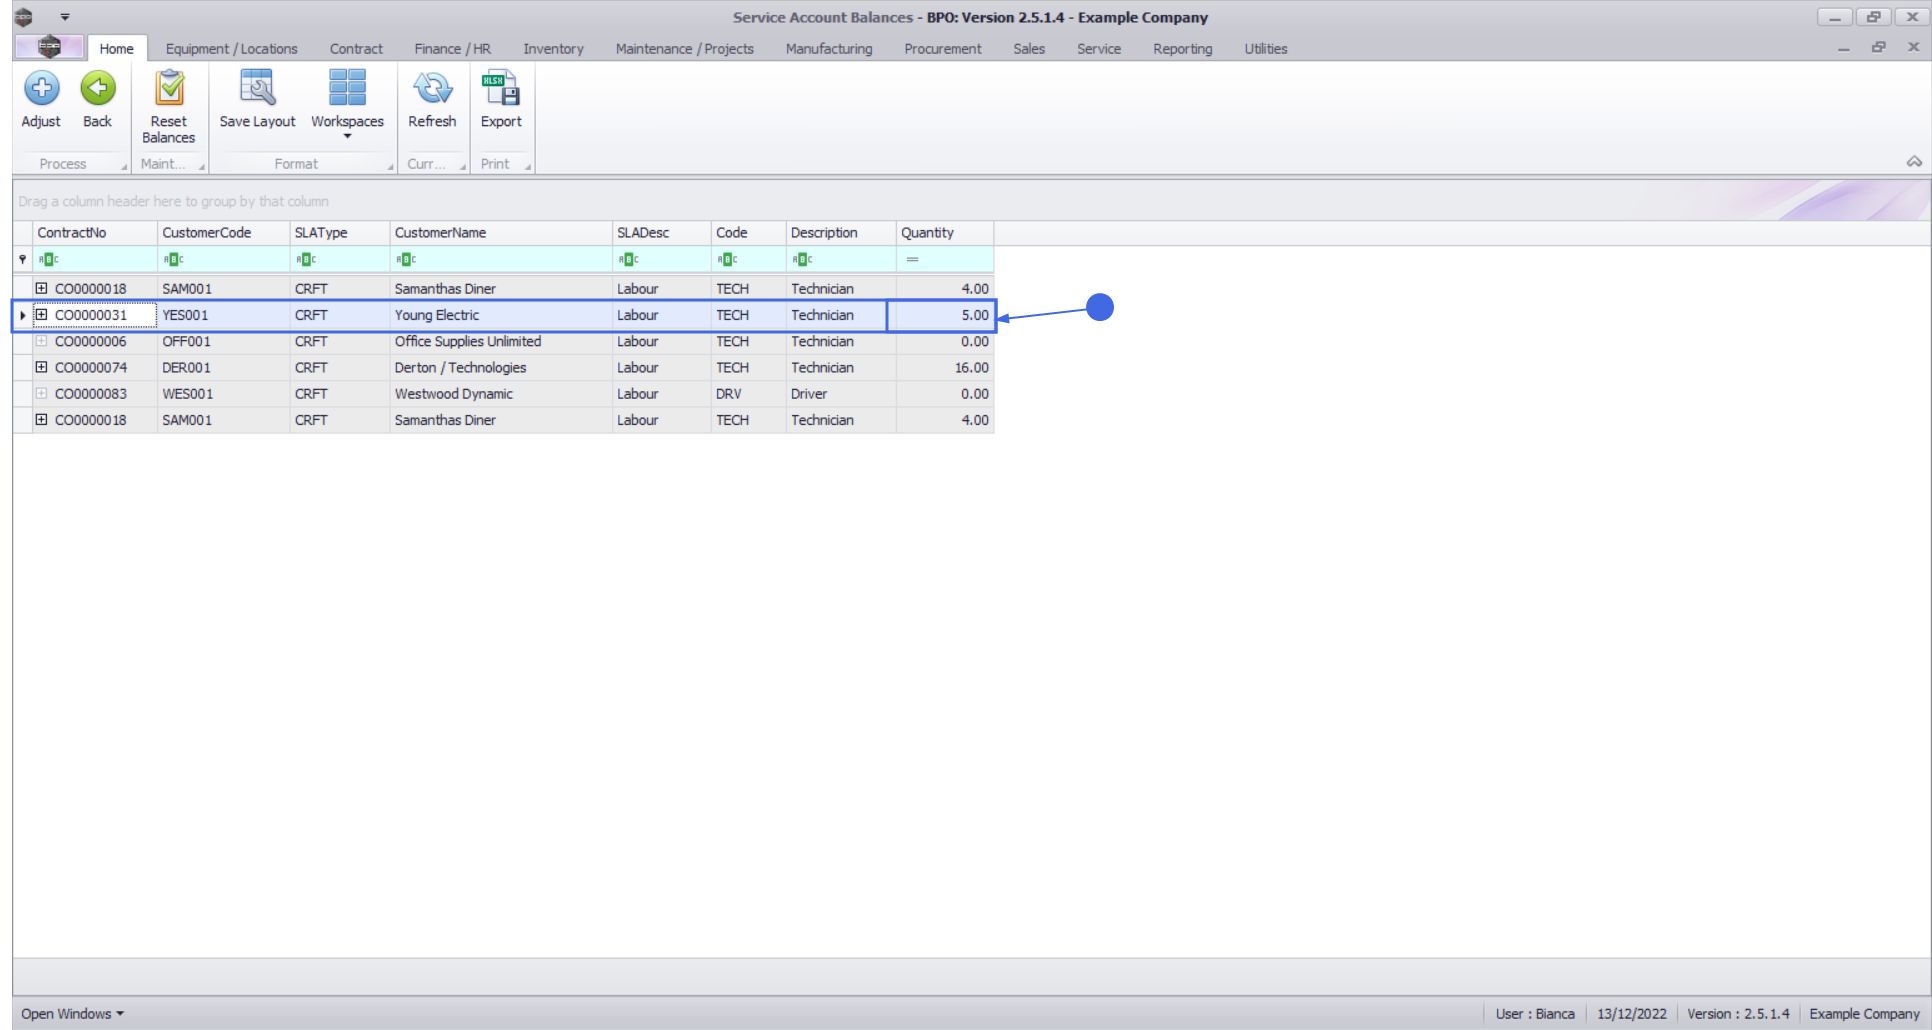
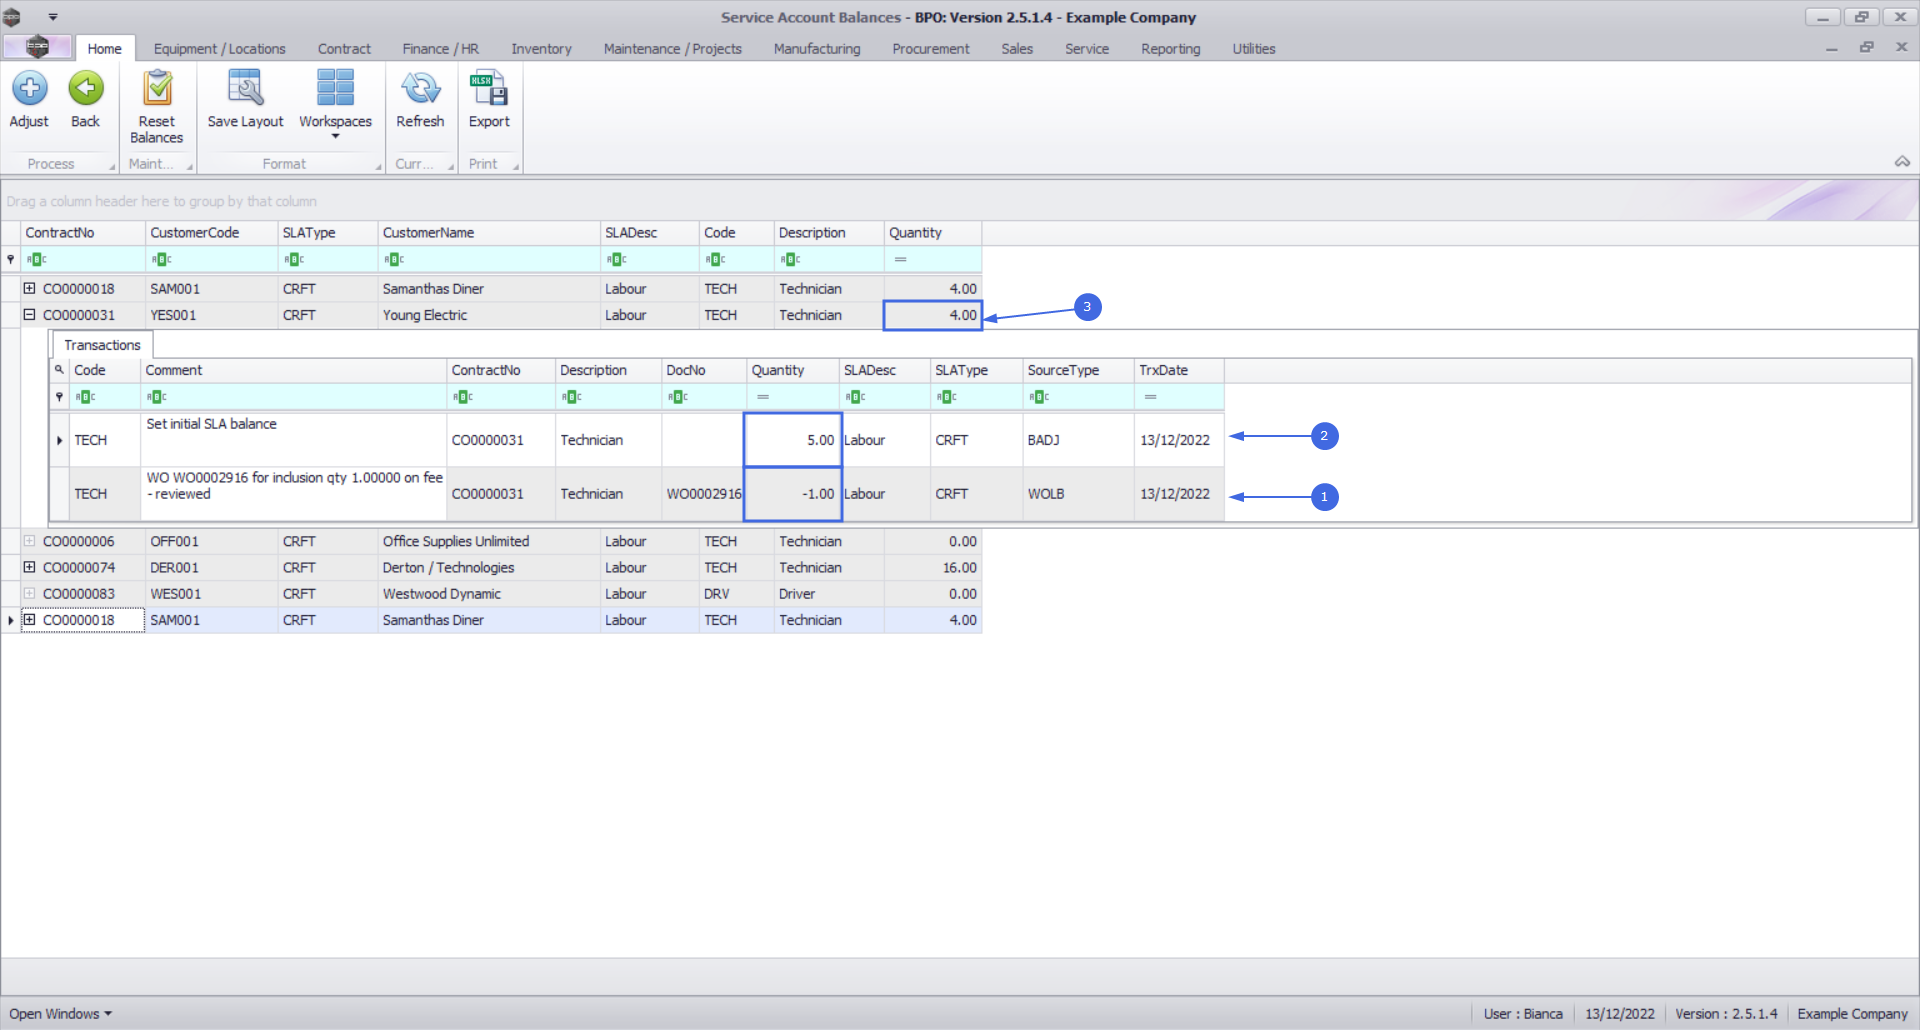
- In this image, contract - CO0000031 , craft - Technician with an initial Quantity of 5 will be used as an example.
- After logging 1 hour technician time against the work order and then reviewed and allocated as SLA in the Time Review screen , the Quantity is now 4.

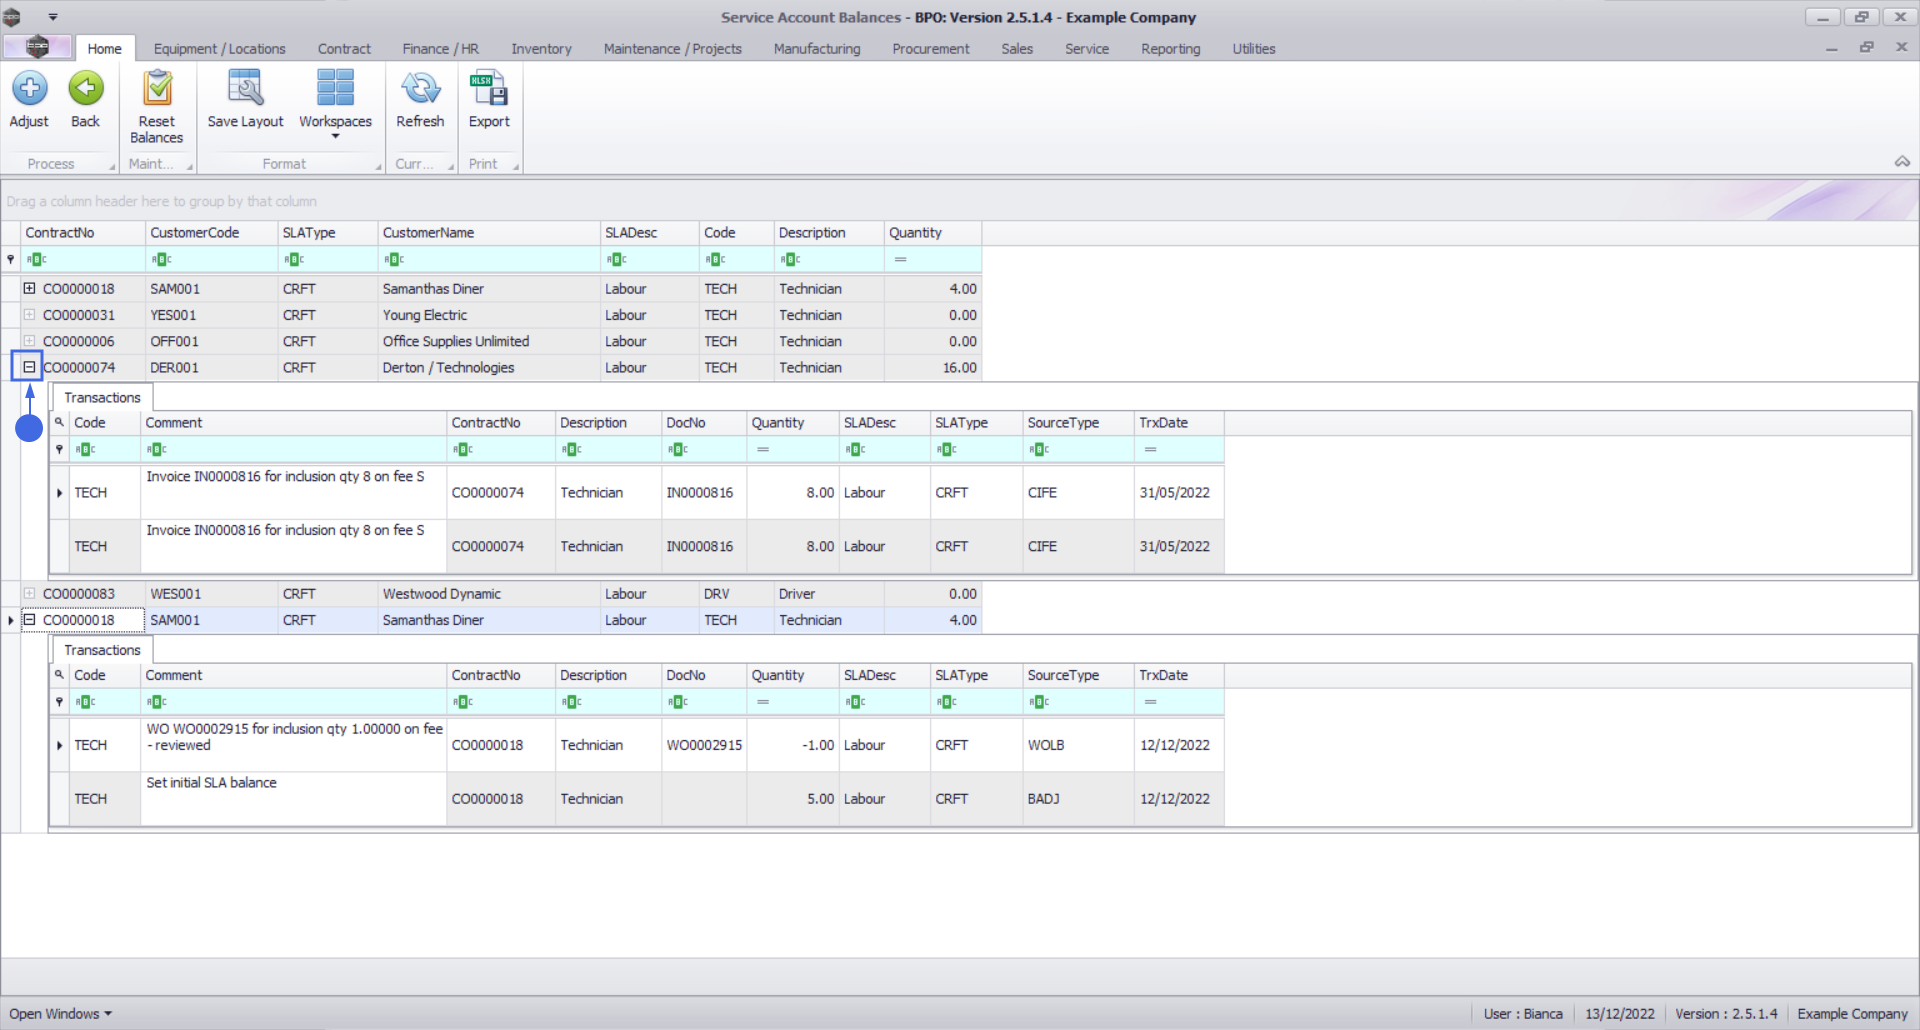
- To view the individual transactions, click on the Expand button.

- The Transactions panel will be displayed.
- From the Transactions panel, all the transactions linked to the selected item can be viewed.
- In this example,
- Initially the Quantity was 5 hours.
- 2 hours were then allocated as SLA in the Time Review screen against work order - DWO0002915 linked to the selected item.
- Therefore in this case, the Quantity is now (5 - 1) = 4 hours.
- Note: A negative ( - ) sign in the Quantity field shows that time was spent / consumed.
Reset Balances
- Balances can be reset after every billing cycle to include the new service hours for the current billing cycle. The balances can be cumulative or can expire at the end of each billing cycle depending on the contractual agreement.
- For example, if a client has a monthly contract with 6 support or service hours included in the contract (as a craft inclusion), after the monthly billing run, the service hours balance has to be reset to include the 6 hours for the new month.
- If the services hours are cumulative, then the unused hours from the previous month will be carried over to the new month. The total balance for the new month will then be the summation of unused hours from the previous month and the current month's hours.
- If the service hours are not cumulative, it means the unused hours from the previous month will fall away and only the current month's hours will be considered.
- This works only on items with linked transactions (where the Expand button is not greyed out).
- Click on Reset Balances.
- The Service Account Reset screen will be displayed.
- All items with linked transactions will be displayed in this screen.
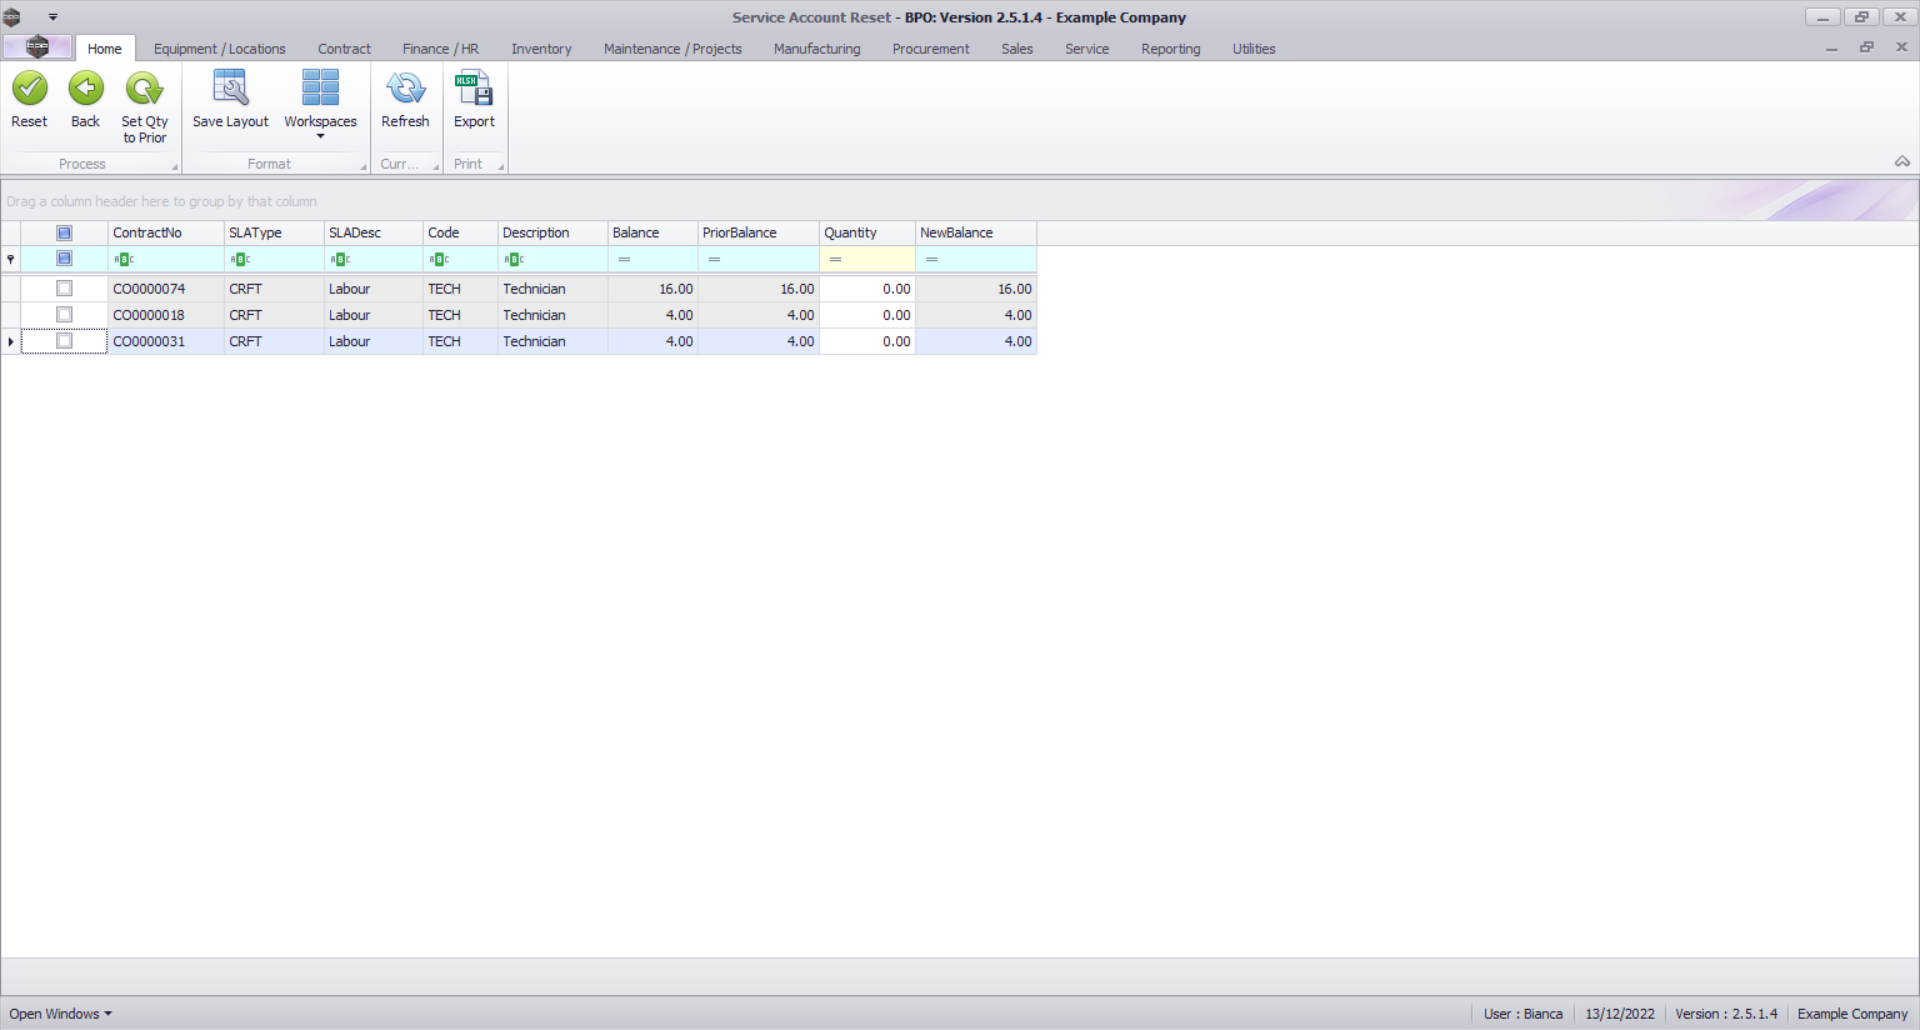
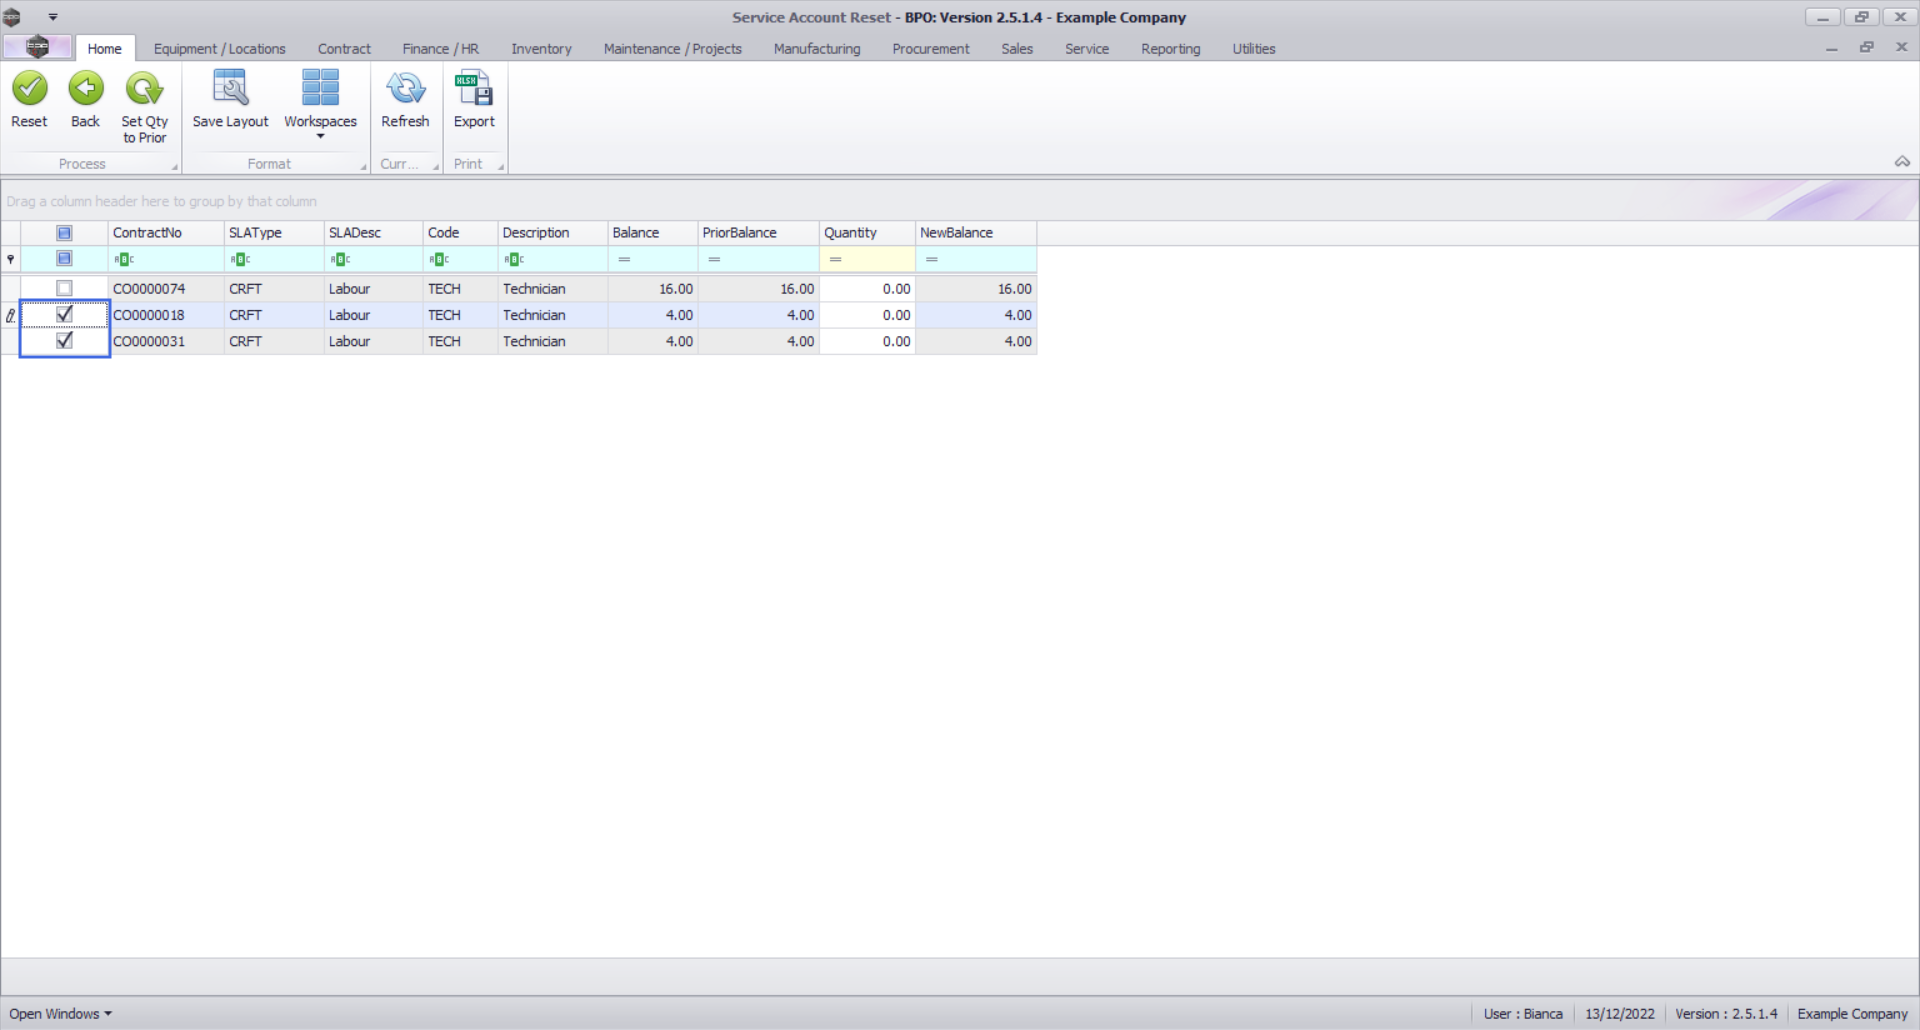
- Select the item you wish to reset the quantity (balance) for.
- Note that you can multi-select items.
- You can either reset the items manually or set the quantity to prior.
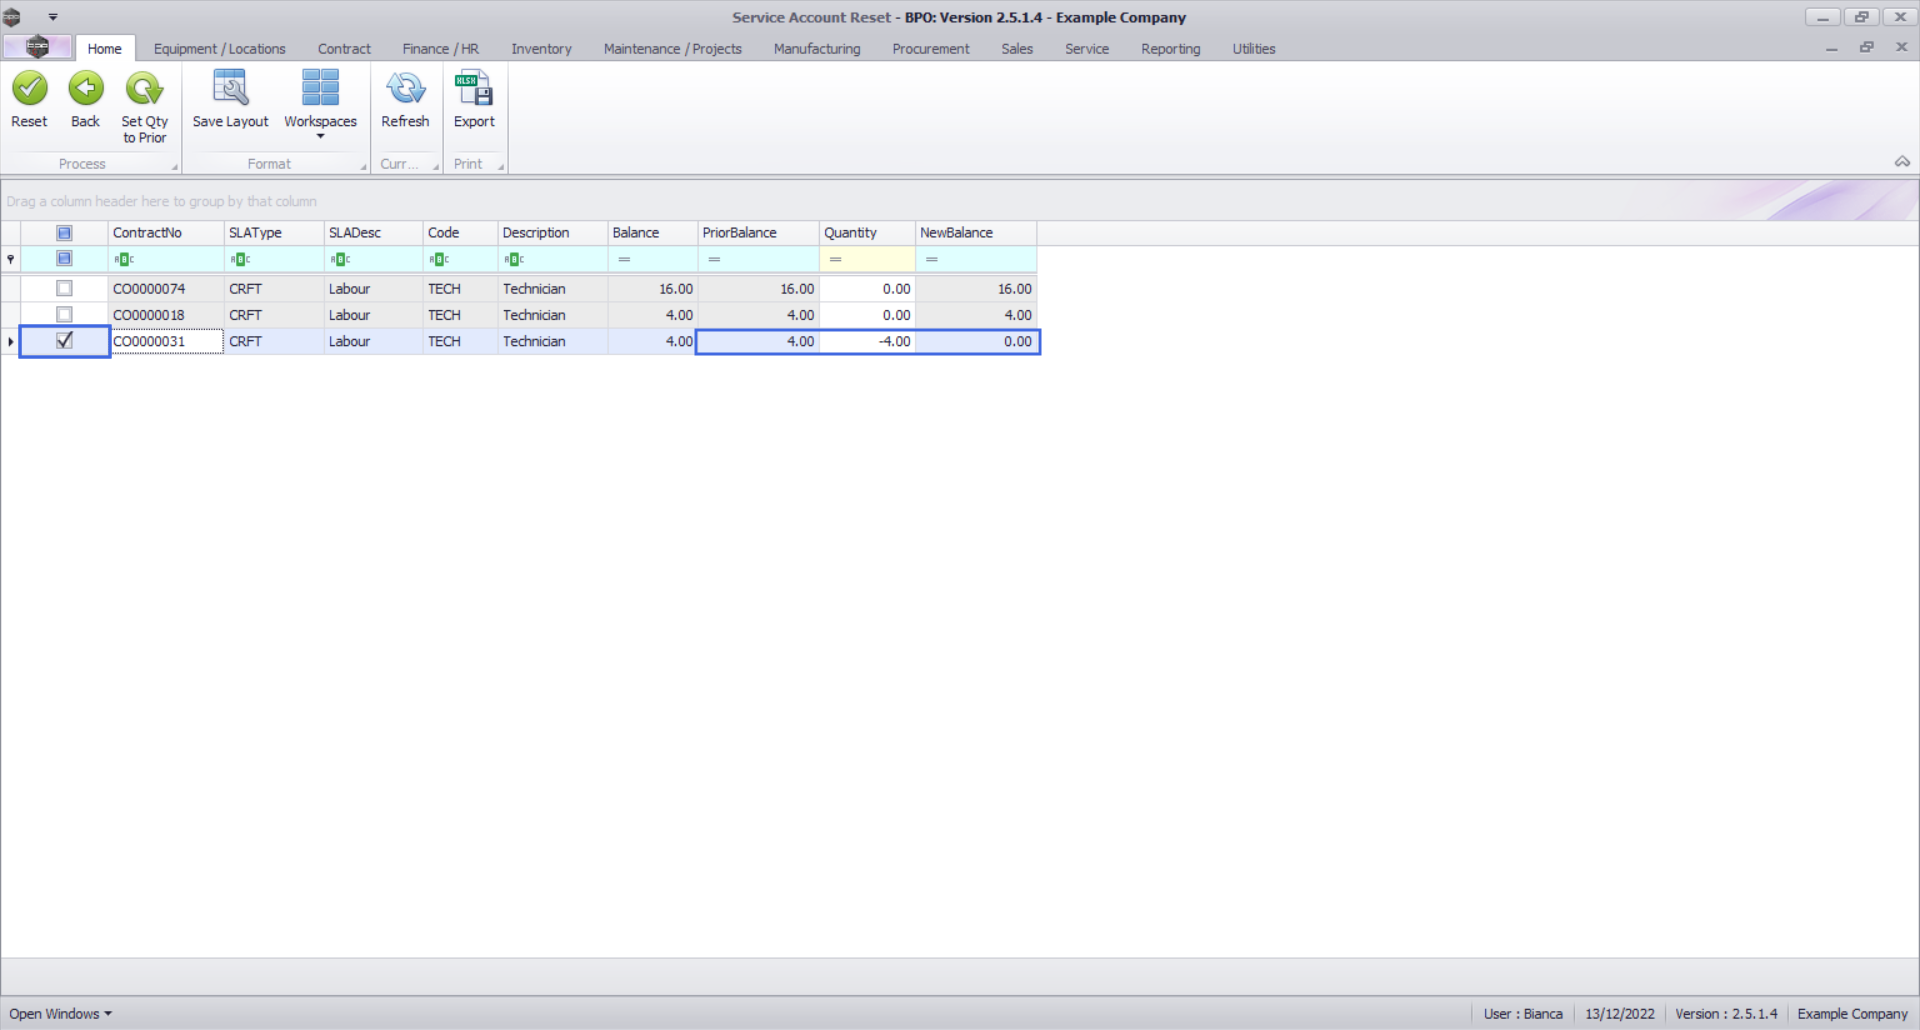
Set Quantity to Prior
- Click on Set Qty to Prior.
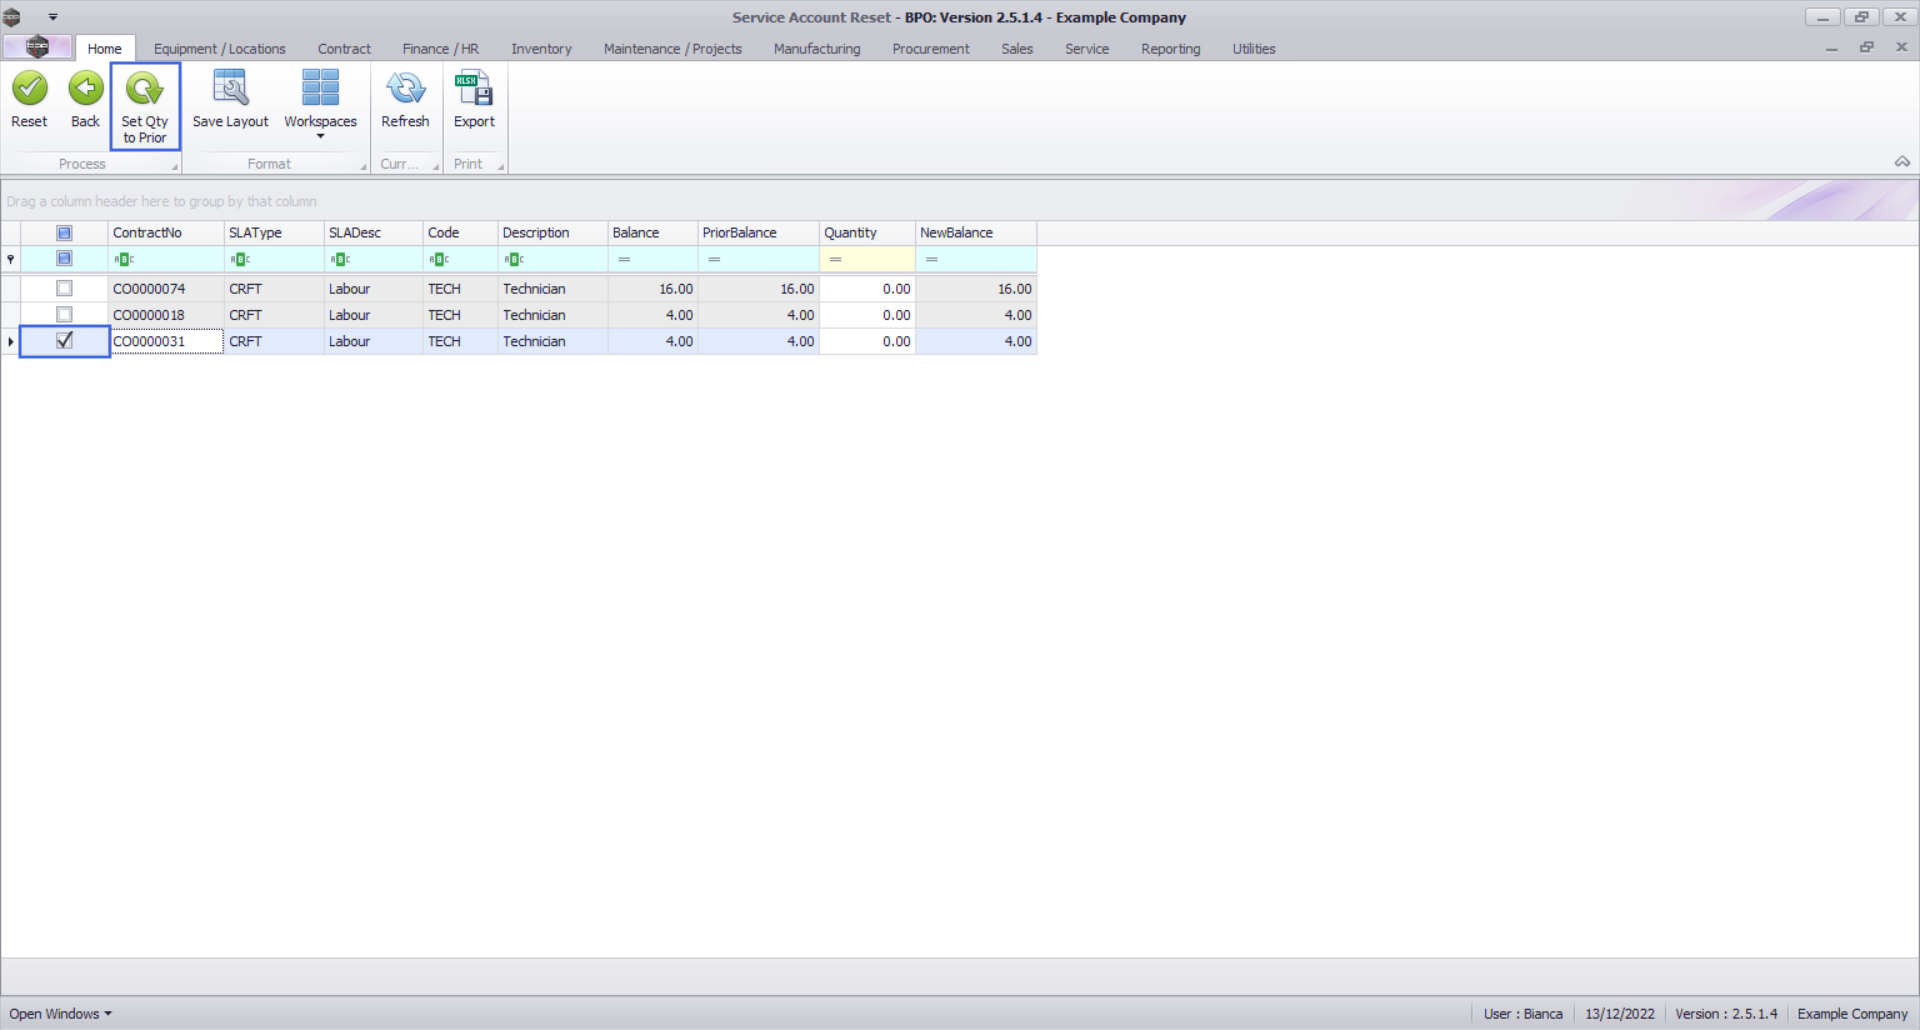
- The New Balance field will be auto populated with the prior quantity.
- In the image below, the New Balance is zero because only one billing run has been done and this is the first time the balance reset process is being done.
- After the next billing run, the reset to prior transaction will be non-zero but will take value of the Prior Balance.
- Note: If you had multi selected items, all the selected fields will be auto adjusted accordingly.
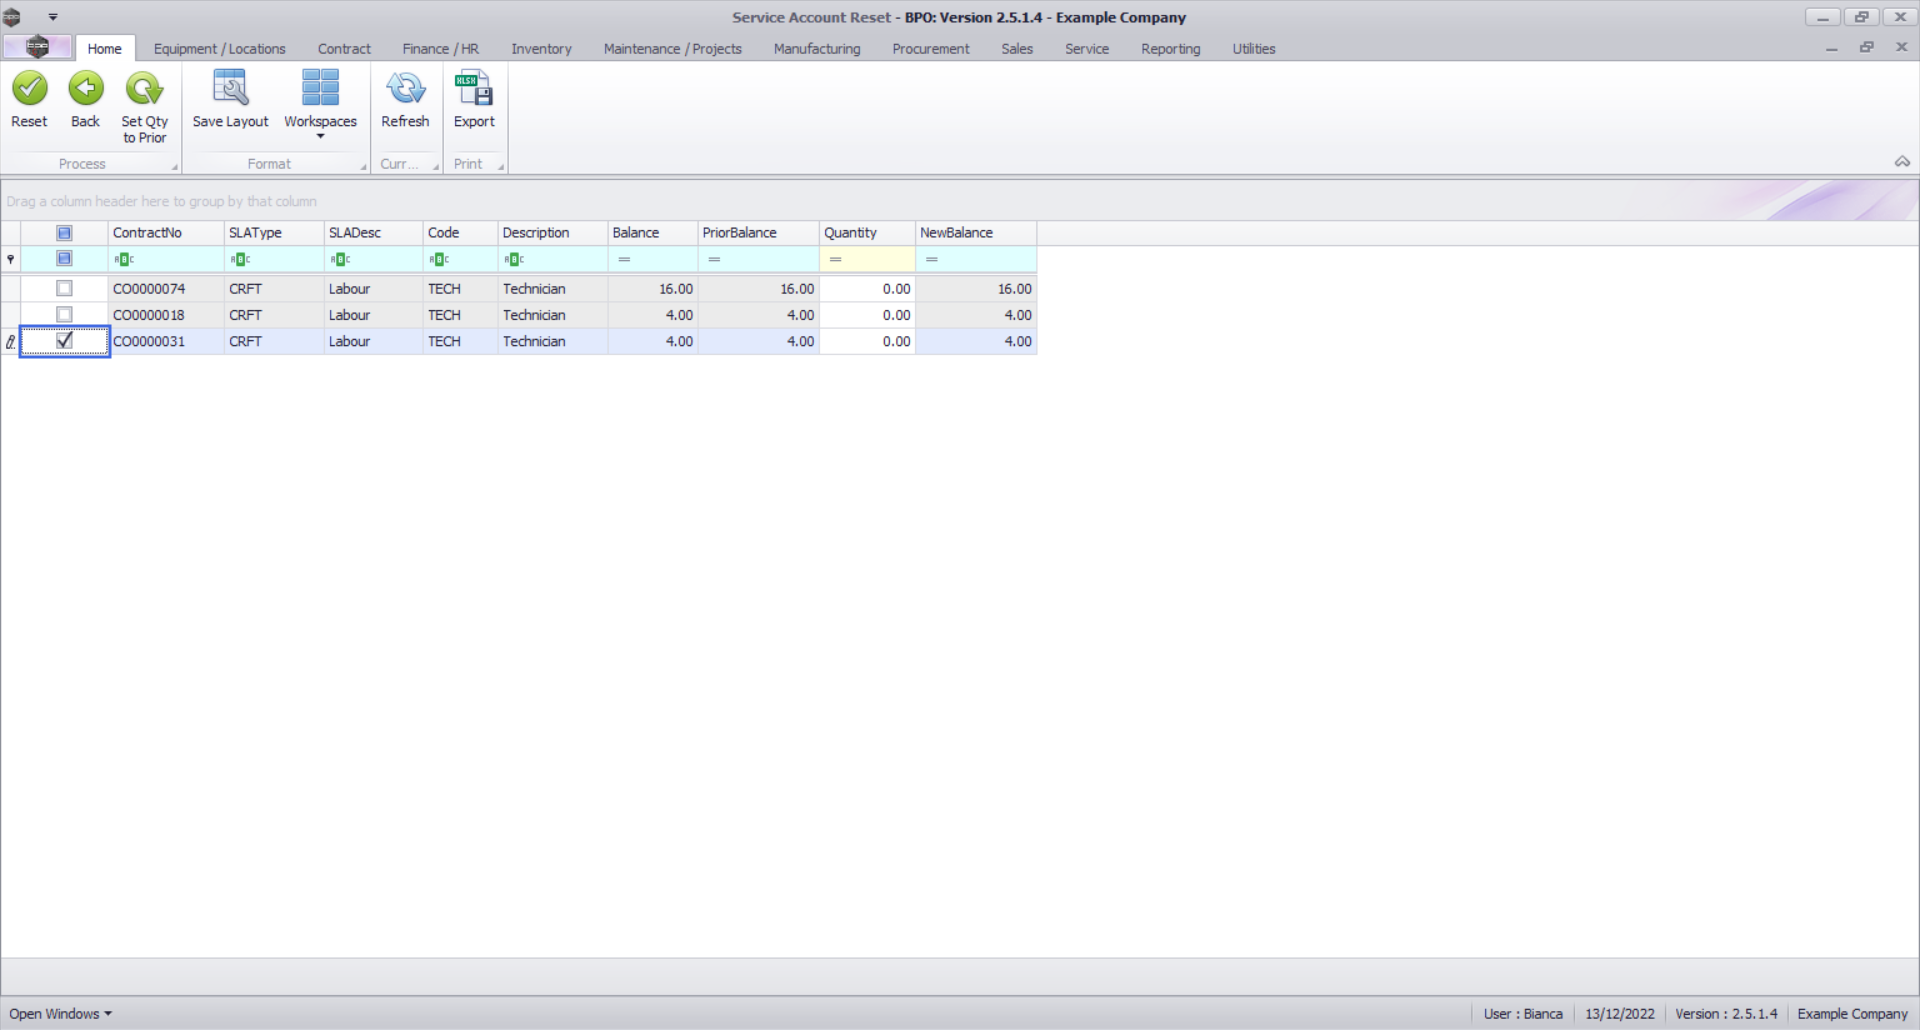
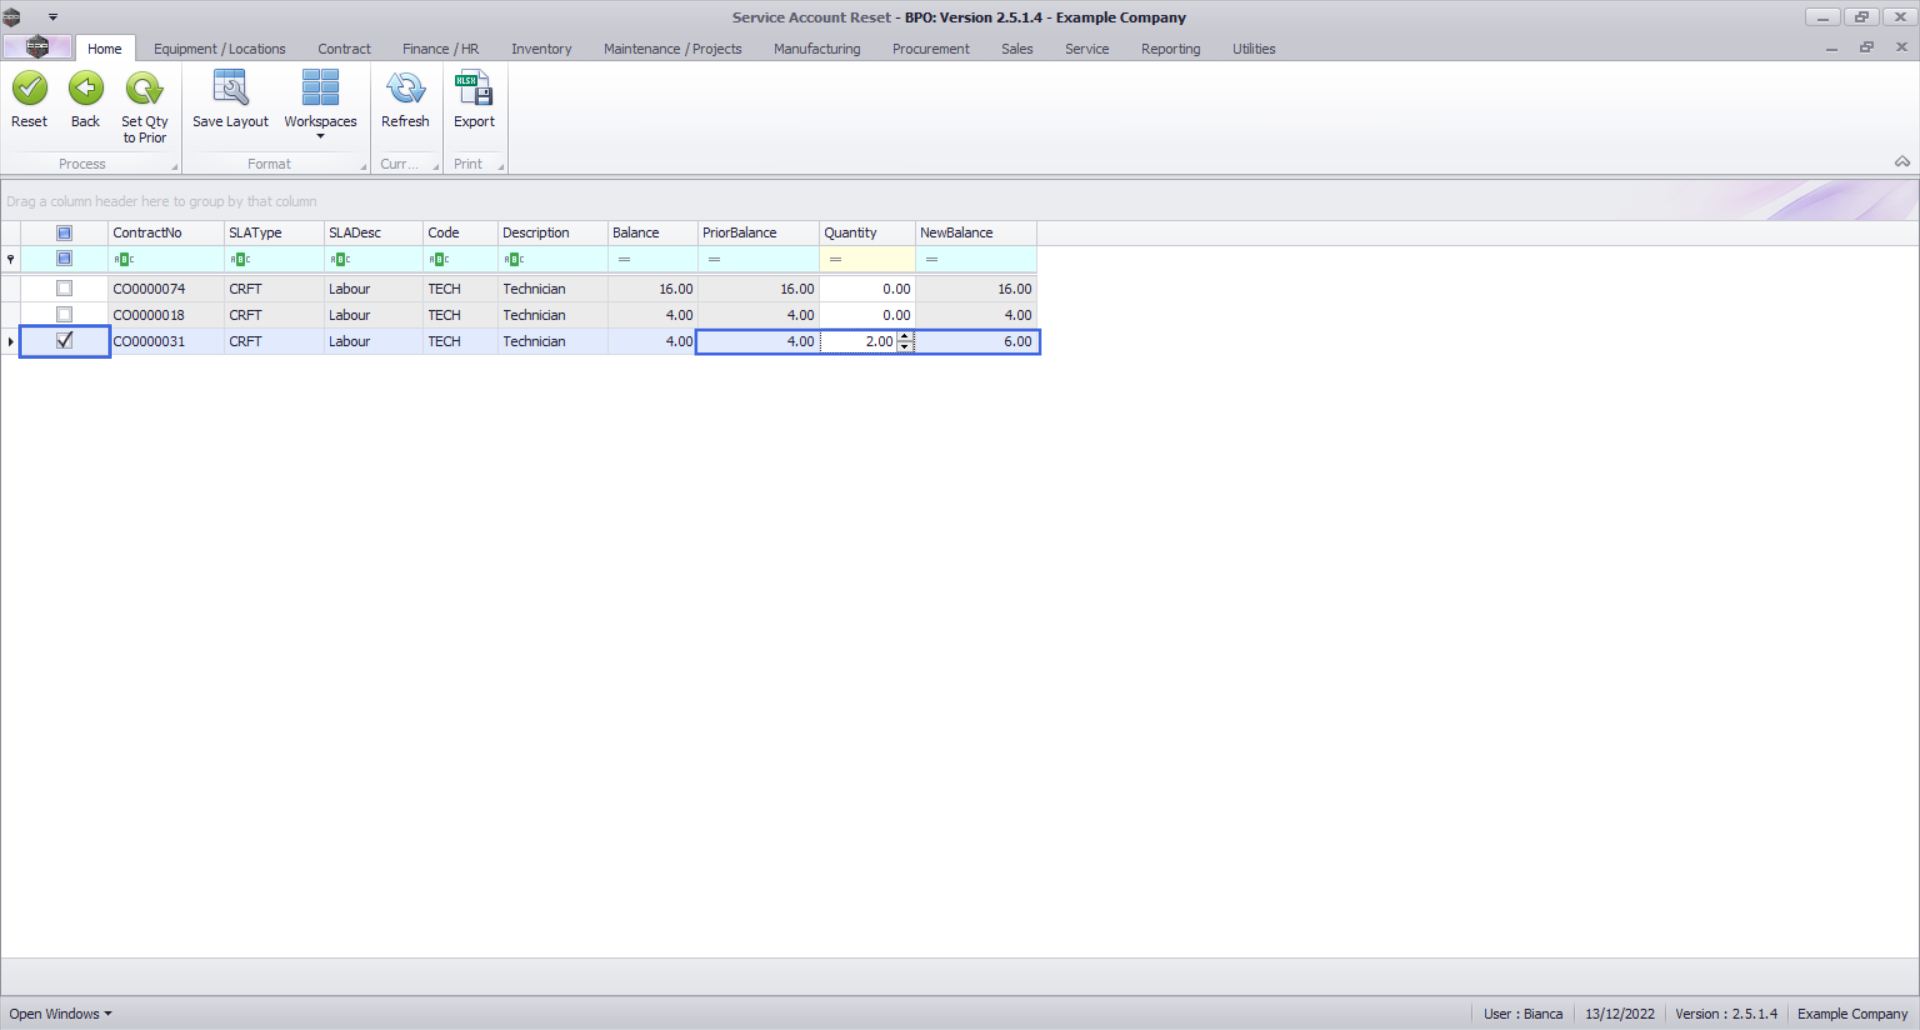
Setting the Quantity Manually
- In the Quantity field of the selected item, type in the amount of hours you would like to reset the current quantity by.
- The New Balance field will auto-adjust to reflect the value that has been typed in the Quantity field.
- New Balance = Prior Balance + Quantity
- In this image, 2 has been typed in as the Quantity and the New Balance = 4+ 2 = 6.
- Note: If you had multi selected items, type in the desired quantity on each selected item.
Resetting Items
- When you are done, click on Reset.
- A Service Account Reset message will pop up asking you;
- Are you sure you want to reset the selected service account balances?
- Click on Yes.
- Note: For the purpose of this manual, the item where the quantity was set manually will be used going forth as an example.
- The Balance, Prior Balance and New Balance fields will now display the new value.
- The Quantity field will now display as 0.
- Click on Back.
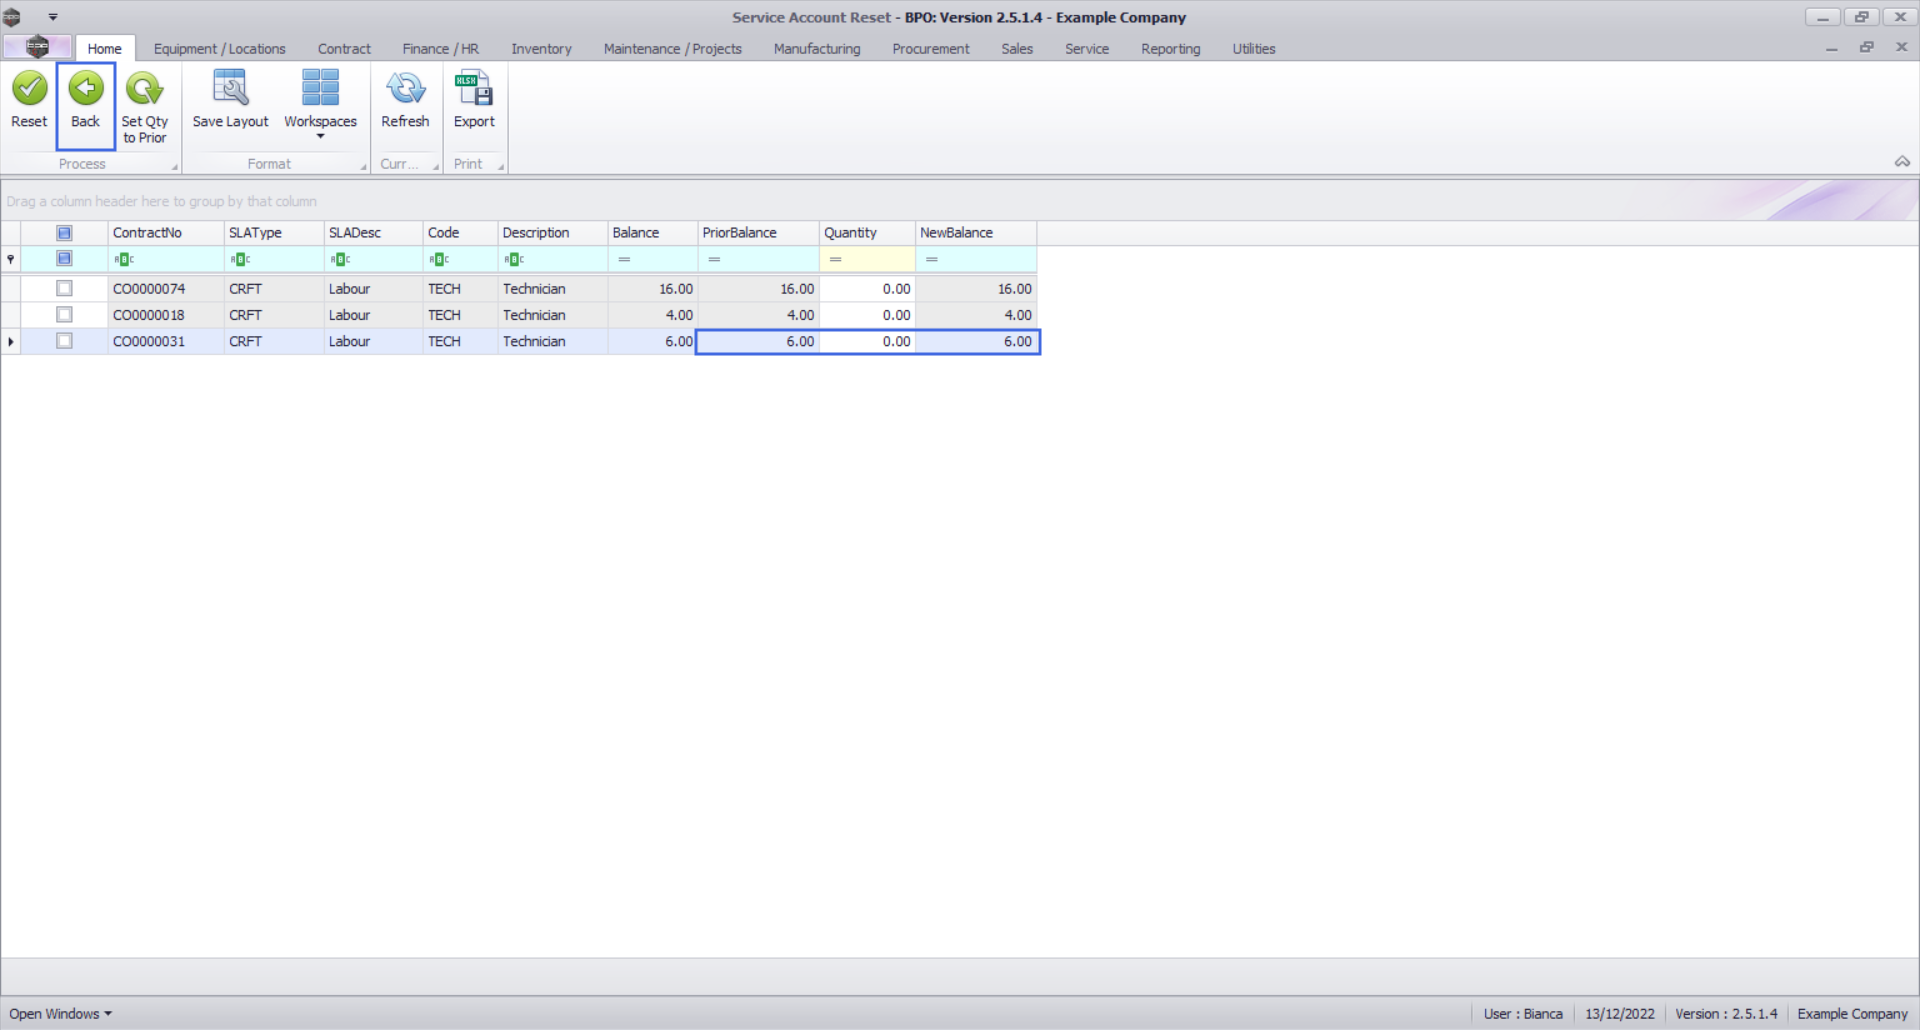
You will return to the Service Account Balances listing screen
- The new value will now be displayed in the Quantity field.
- The reset transactional record will now be displayed in the Transactions panel.

MNU.112.054