Inventory
Receive Stock Transfer from In-Transit Warehouse
Stock must be transferred to the In-Transit warehouse before the goods can be received into the Destination Warehouse. Refer to In-Transit Inter-Warehouse Transfer or Action Stock Transfer Request.
- You can transfer and receive items from warehouse to warehouse in the same site e.g.
- the Main Warehouse in Durban to the In-Transit Warehouse to the George Warehouse in Durban.
- Or you can transfer and receive items warehouse to warehouse in different sites e.g.
- the Main Warehouse in Durban to the In-Transit Warehouse to the PTA Warehouse in Pretoria.
You will need to ensure that the Company Configuration Enforce In-transit flag is set to 'Yes' to be able to complete this process.
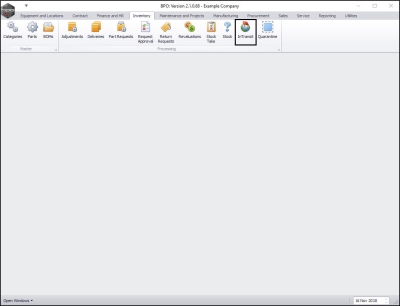
| Ribbon Access: Inventory > Stock |
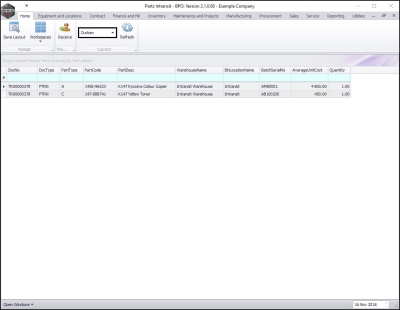
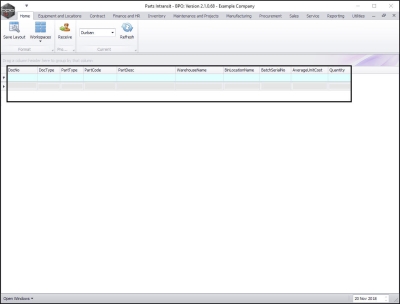
The Parts In-Transit listing screen will be displayed.
Select the Site
- Select the site where the item(s) are being received.
- In this image Durban has been selected.
Select Items to Receive
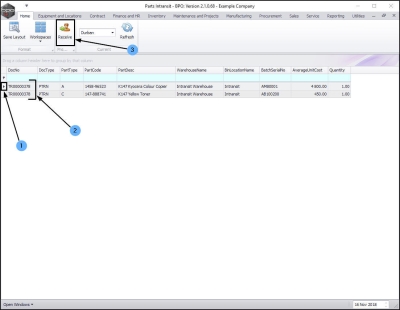
- Click on the row selector in front of the document number that contains detail(s) of the items that you wish to receive from 'In Transit'.
- If there is more than 1 item linked to the transfer document then all of these items will be pulled across to the Parts Intransit screen.
- Click on Receive.
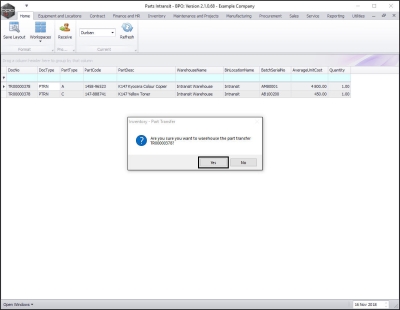
- An Inventory - Part Transfer message box will pop up asking;
- Are you sure you want to warehouse the part transfer [ ]?
- Click on Yes.
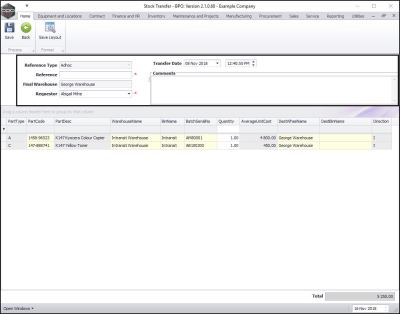
The Stock Transfer screen will be displayed.
Stock Transfer Details
- Reference Type: This will auto populate with Adhoc.
- Reference: Type in a reference for this transfer.
- Final Warehouse: This will populate with the final warehouse as selected in the In-Transit Inter-Warehouse Transfer process.
- Requestor: This will populate with the person currently logged on to the system but you can click on the drop-down arrow and select an alternative employee if required.
-
Transfer Date and Time:
This will populate with the current date and time.
- Transfer Date: You can either type in or click on the drop-down arrow and use the calendar function to select an alternative date if required.
- Transfer Time: You can either type in or use the directional arrows to select an alternative time if required.
- Comments: Type in a comment relevant to this transfer, if required.
Destination Warehouse
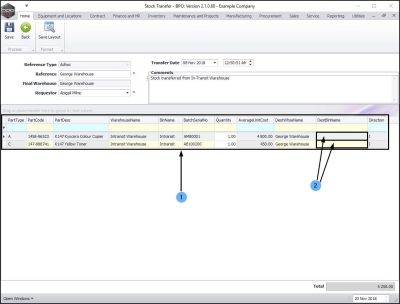
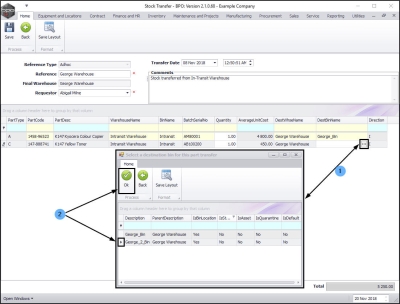
- The Parts data grid will display all the information of the parts to be transferred including the Destination Warehouse Name.
- If there is more than one warehouse bin linked to the destination warehouse then the system will leave this field(s) blank for you to select the bin.
Select Destination Bin
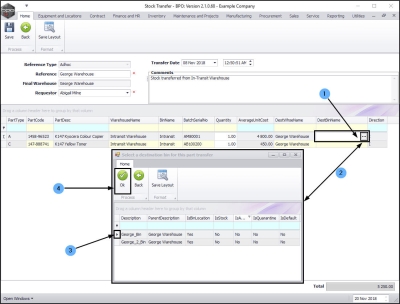
- Click in the Destination Bin Name field of one of the items to be transferred. An ellipsis button will be displayed.
- Click on this button to bring up the Select a destination bin for this part transfer screen.
- Click on the row selector in front of the bin you wish to receive this item into.
- In this image, George_Bin has been selected.
- Click on Ok.
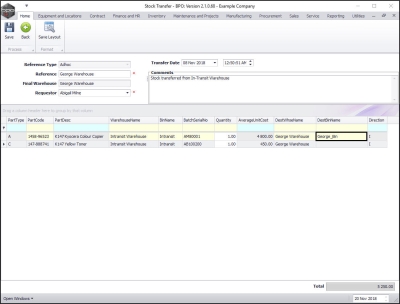
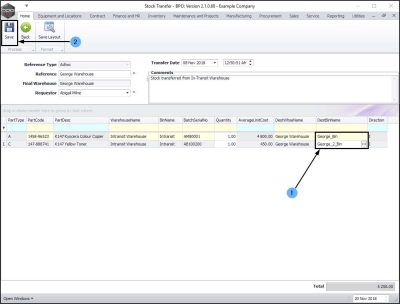
- The selected bin will populate the Destination Bin Name field.
- Follow the same process to bring up the Select screen again
- and select a bin for each item in the Stock Transfer screen.
- In this image, a different bin: George_2_Bin has been selected.
- When you are finished with your selection(s)
Save Transfer Details
- Click on Save.
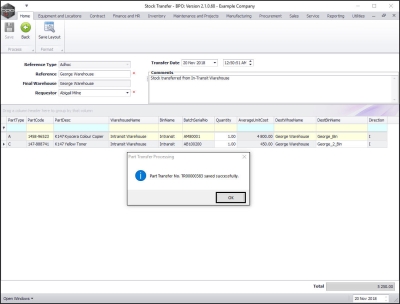
- A Part Transfer Processing message box will pop up informing you that;
- Part Transfer NO. [ ] has been saved successfully.
- Click on OK.
Print Transfer Note
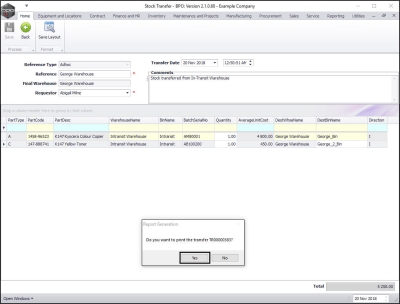
- A Report Generation message box will pop up, asking:
- Do you wish to print the transfer [ ]?
- Click on Yes.
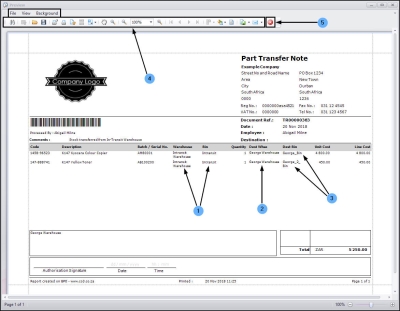
The Report Preview screen for the Part Transfer Note will be displayed.
- You can see that the items have been transferred from the Intransit Warehouse and Intransit Bin to
- the destination George Warehouse
- and to the 2 different destination bins.
- From here you can View, Print, Export or Email the Part Transfer Note.
- Close the Report Preview screen when you are done.
- You will return to the Parts Intransit screen, where you can see the items selected for transfer have now been removed from this screen.
MNU.037.013
