Sales
Quotes - Print a Sales Quote
When using the Email option to send a Sales Quote, please note that it will be mailed via the BPO Email Service on the server and not from Microsoft Outlook on your local PC.
A Sales Quote can also be printed from the Add, Edit or View a Sales Quote screens.
| Ribbon Access: Sales > Quotes |

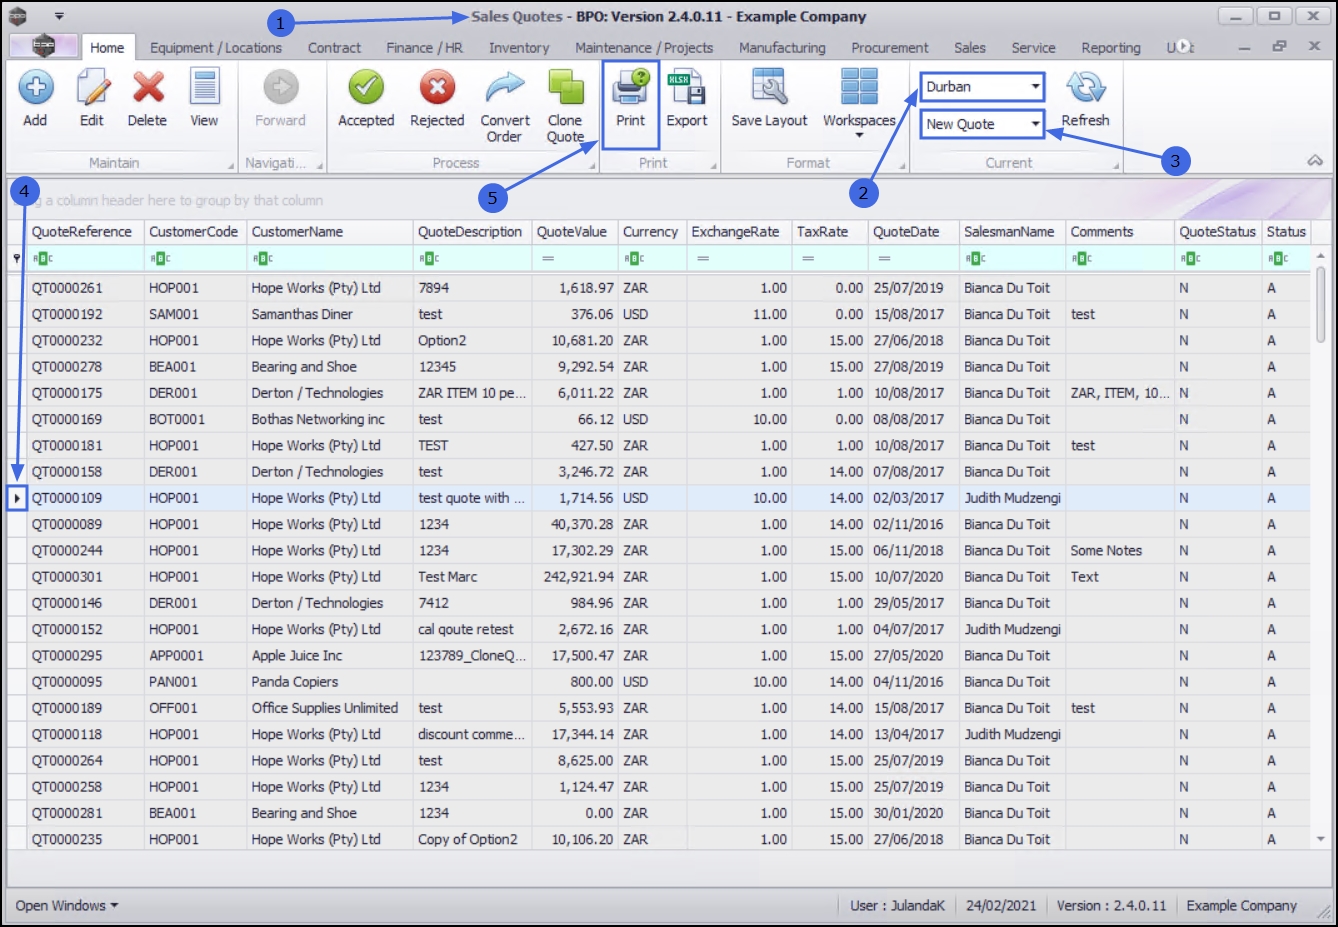
- The Sales Quotes listing screen will display.
- Select the Site you wish to work in.
- The example has Durban selected.
-
Select the Status of the quote you wish to print.
You can print a Quote in any Status.
- The example has New quote selected.
- Click on the row of the quote you wish to print.
- Click on Print.
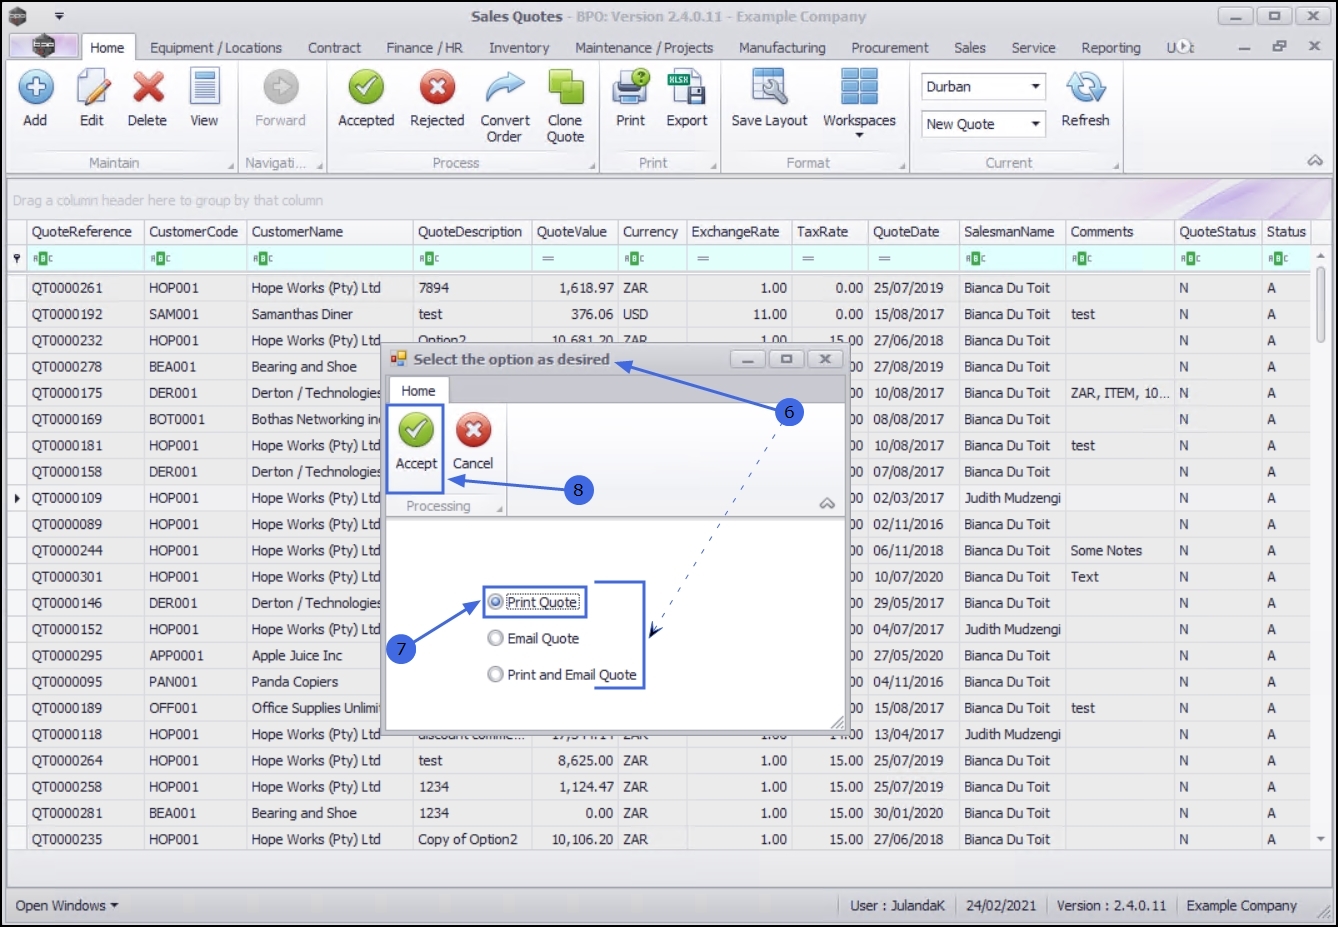
- The Select the option as desired screen will display the following
options;
 Print Quote (Open the quote in Report Preview
to view, print, export or email)
Print Quote (Open the quote in Report Preview
to view, print, export or email)
- Email Quote (Specify the email recipients and the system will generate a .pdf attachment of the quote)
- Print/Email Quote (both the Report Preview and
Email screens will pop up)
Print Quote
- To Print the Quote to the Preview window, click the Print Quote radio button.
- Click on Accept.
Report Preview Screen
- The Sales Quote will display in the Report Preview screen where Print Quote or Print and Email Quote is selected.
- The Sales Quote cover page will display. (This needs to be configured in your company set-up)
- From the preview screen you can make cosmetic changes to the Quote, as well as Save, Zoom, Add a Watermark, Export or Email.

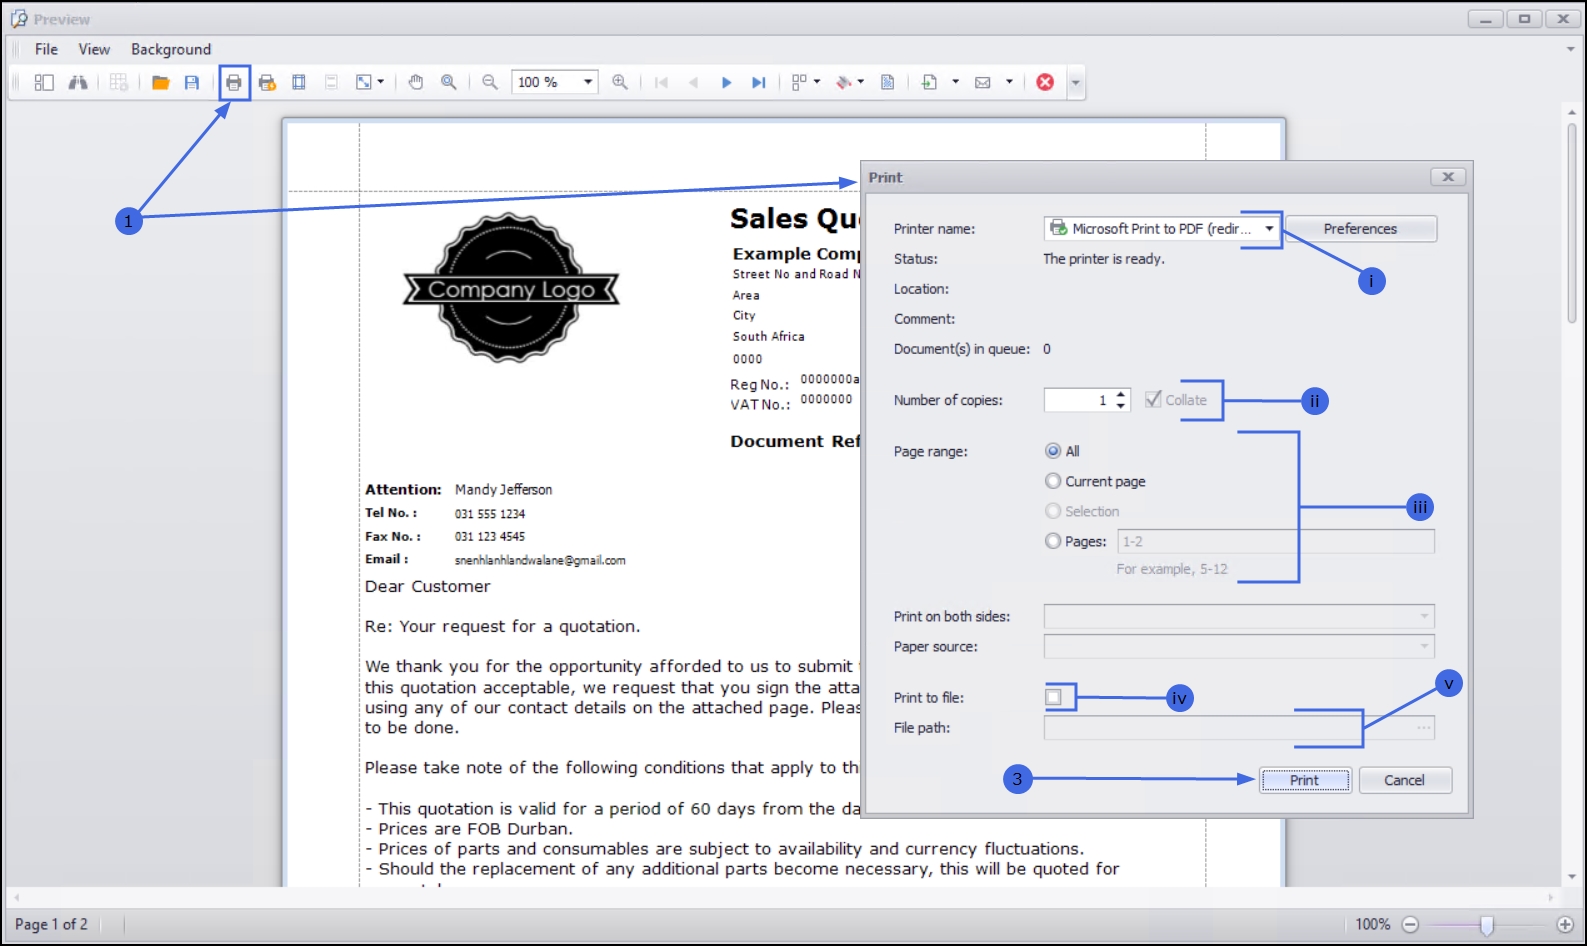
Print Options Screen
- Clicked Print to display the Print Options Screen.
-
The Print Options Screen will display. From this screen specify;
- Printer name: The default printer name will display,
- Number of copies: If more than one copy of the quote is required, either type the number or use the arrow indicators to select the number of copies that needs to be printed.
- When multiple copies of the document is requested, Collated has been selected by default. This feature can be deselected if so prefer.
- Page range: You can specify the page range by selecting the radio button to print;
- All - print All the pages,
- Current page will only print the cover page or
- Pages allow you to specify the pages to print.
- Print to file: By tick this check box will allow you to print the Sales Quote to a .pdf file.
- File path: Specify the directory location you would like the .pdf file to be saved, e.g. c:\CustomerDocuments\SalesQuotes
- Click on Print to proceed.
Print and Email Quote
![]() If you get an error when trying to email the document, ask your administrator to make sure that the correct shared folder location has been configured in BPO, and that you have the relevant folder rights to access the shared folder on the server.
If you get an error when trying to email the document, ask your administrator to make sure that the correct shared folder location has been configured in BPO, and that you have the relevant folder rights to access the shared folder on the server.
- From the Select the option as desired screen,
-
Click on the Email Quote or Print and Email Quote radio button.
- The example has Email Quote selected.
- Click on Accept.
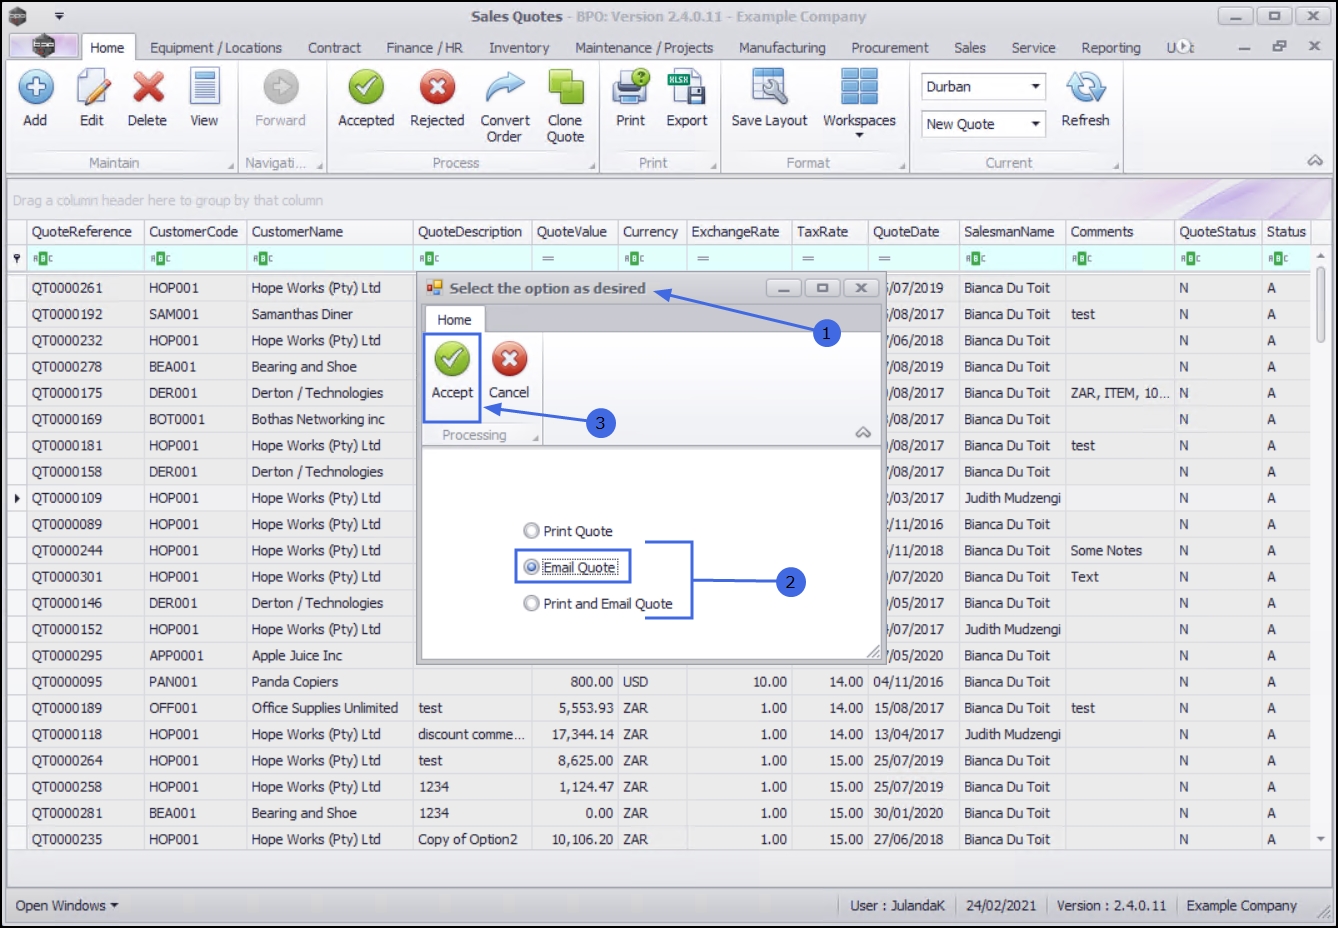
- The Email Sales Quote: [ ] screen will be displayed.
Email Header Information
- Employee: This field will display the name of the employee currently logged on. Click on the drop-down arrow to choose an alternative name, if required.
- From: Type the email address for the employee will display in this field. Type an alternative email address, if required
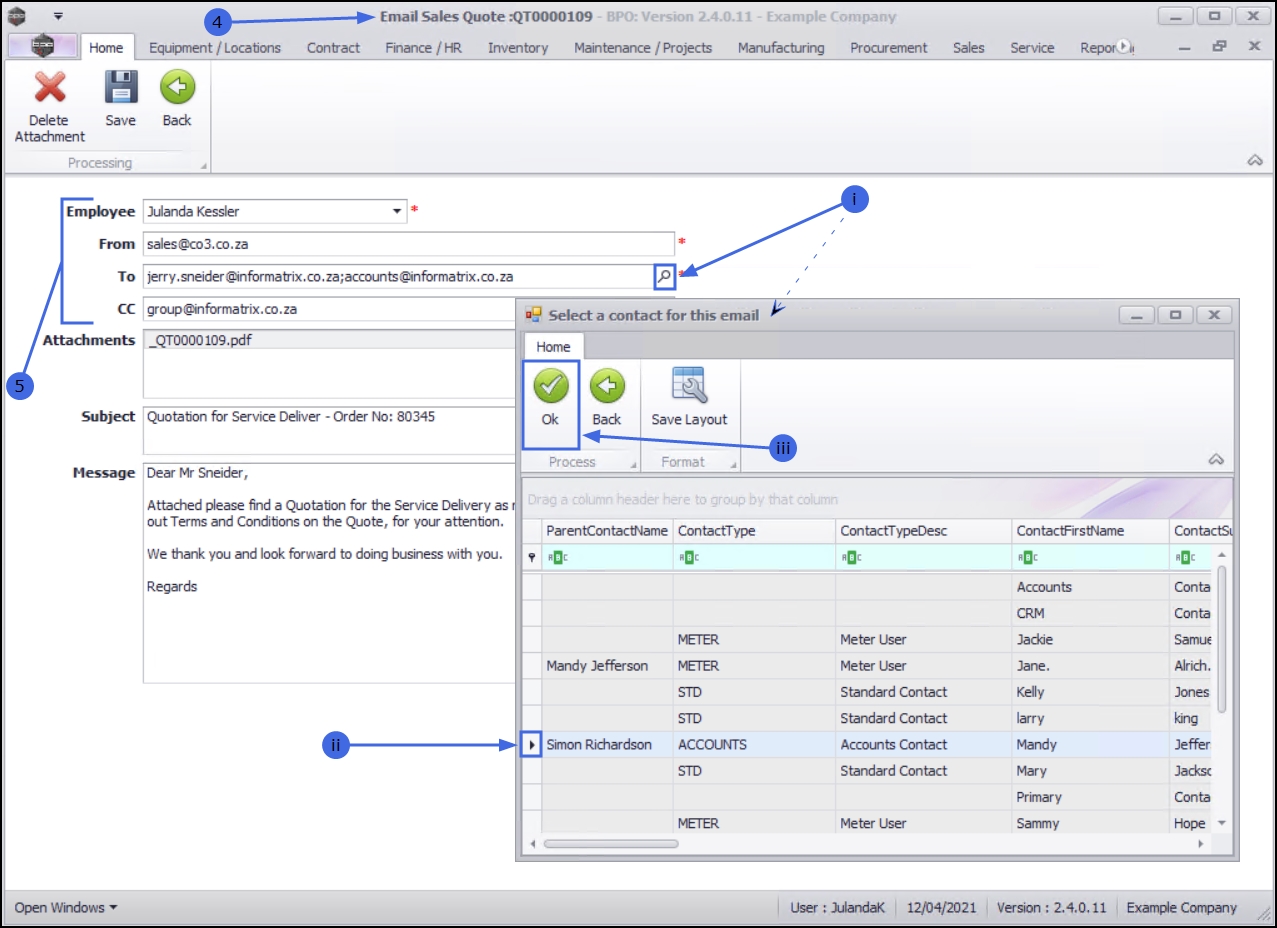
- To: To add a contact email, either type the email address or use the search button to select email address from the Select a Contact for email screen.
- Click on the search button to display the Select a contact for this email screen.
- Click on the row of the email address of the Customer Contact you wish to add.
- Click on OK.
- CC: If a group email address has been set up on the quote or accounts contact, then the group email address will display here.
Additional email addresses can be added to either the To: or CC: by separating the email address with a [;].
- The example has the accounts contact person added to To:jerry.sneider@informatrix.co.za;accounts@informatrix.co.za
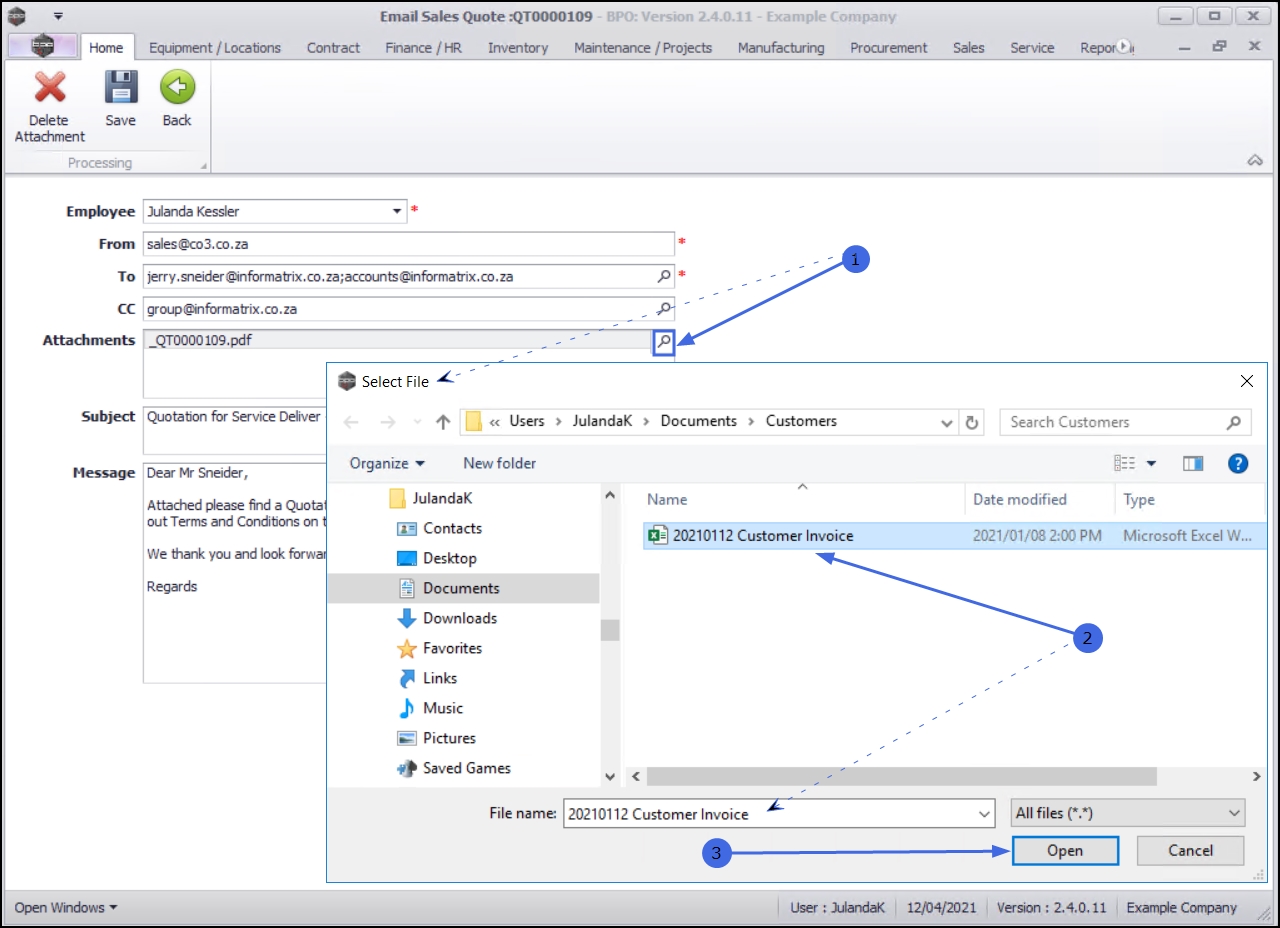
Email Attachments
- Attachments:
BPO will create a PDF of the quote and attach it automatically. You can
attach additional documentation if required).
- To add an additional attachment, click the search button in the Attachments field to display the Select File window.
- You can browse to find the file location of the document you wish to attach, then click on the file you wish to attach.
- Once you have selected the file, click on Open.
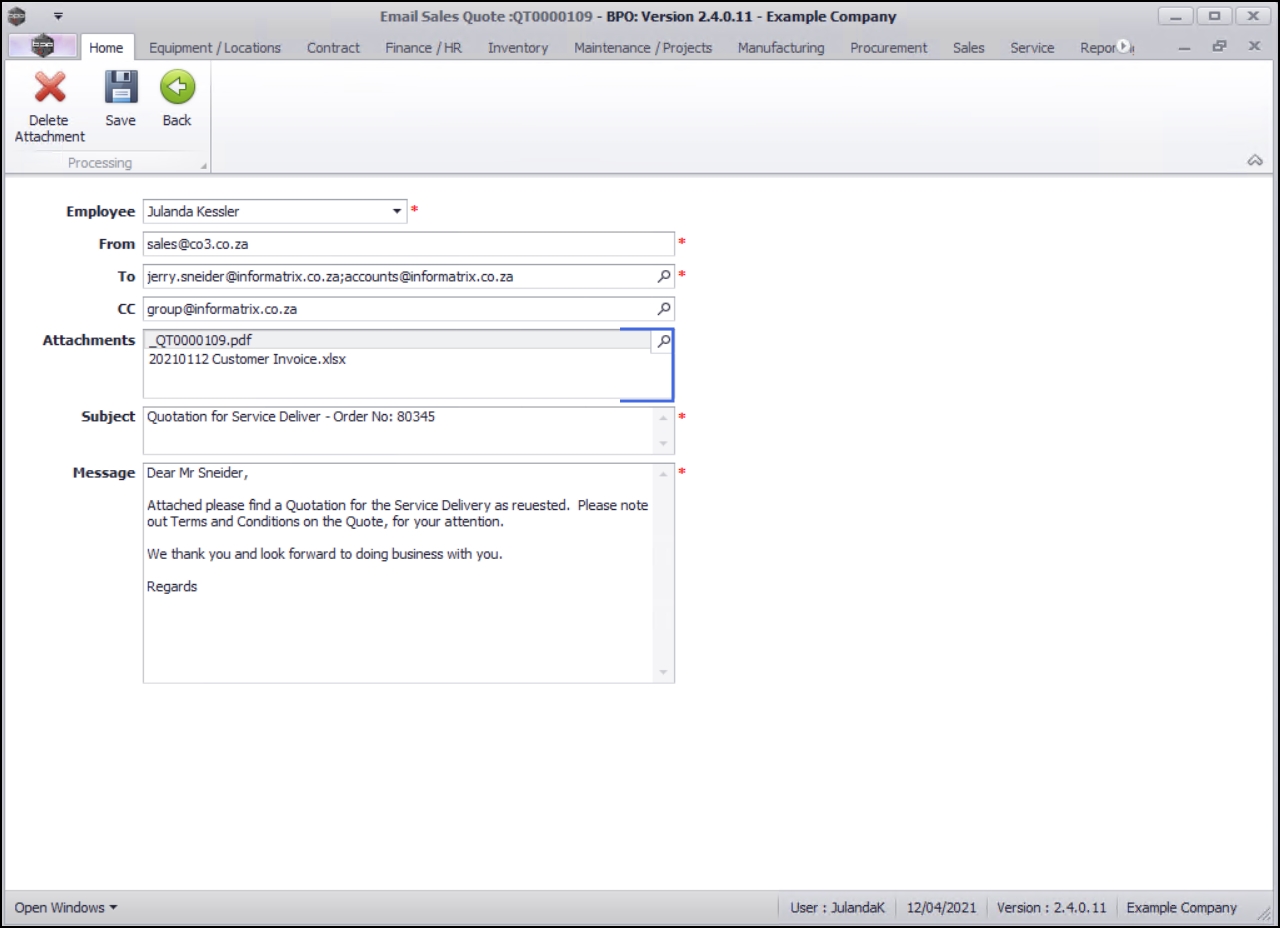
- The document has been added as an Attachment.
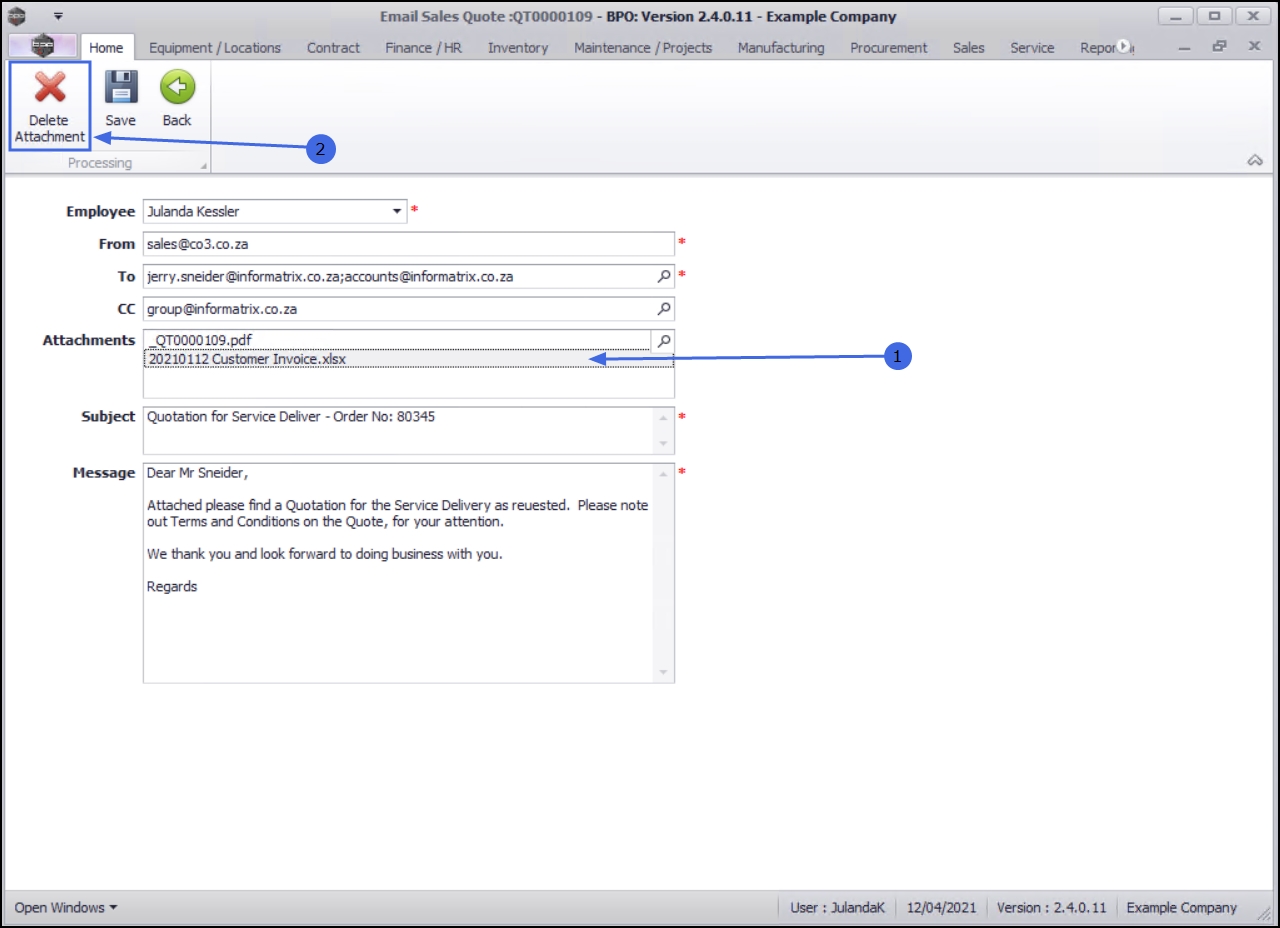
Delete Attachment
You may choose to delete an obsolete or incorrectly attached document.
- Click on the attachment you wish to remove.
- Click on Delete Attachment.
Email Subject and Message
- Subject: Type the subject line for the email. Remember that the subject is the first information relating to your email, that the Customer sees.
- Message: Type the email body text in the message box.
Save and Send Email Quote
- Once you have completed your email, click on Save.

The email will be sent from the server and you will return to the Sales Quotes listing screen.
MNU.062.005