Sales
Services - Items Supplied
From the items supplied tile you can;
- Add /Link A Supplier to A Service Definition
- Edit a Supplier Information
- Delete/Remove a Supplier from a Service
The system facilitates multiple suppliers per service definition, but only one supplier is marked as the primary supplier and will be the default supplier when purchase requisitions are raised. This can be changed on the purchase requisition if the stock is sourced from a different supplier.
Each time a service is purchased from the primary supplier, the unit cost will be updated to the latest purchase price.
![]() Note that the expected delivery date is calculated based on the
purchase order date, plus the
lead time.
Note that the expected delivery date is calculated based on the
purchase order date, plus the
lead time.
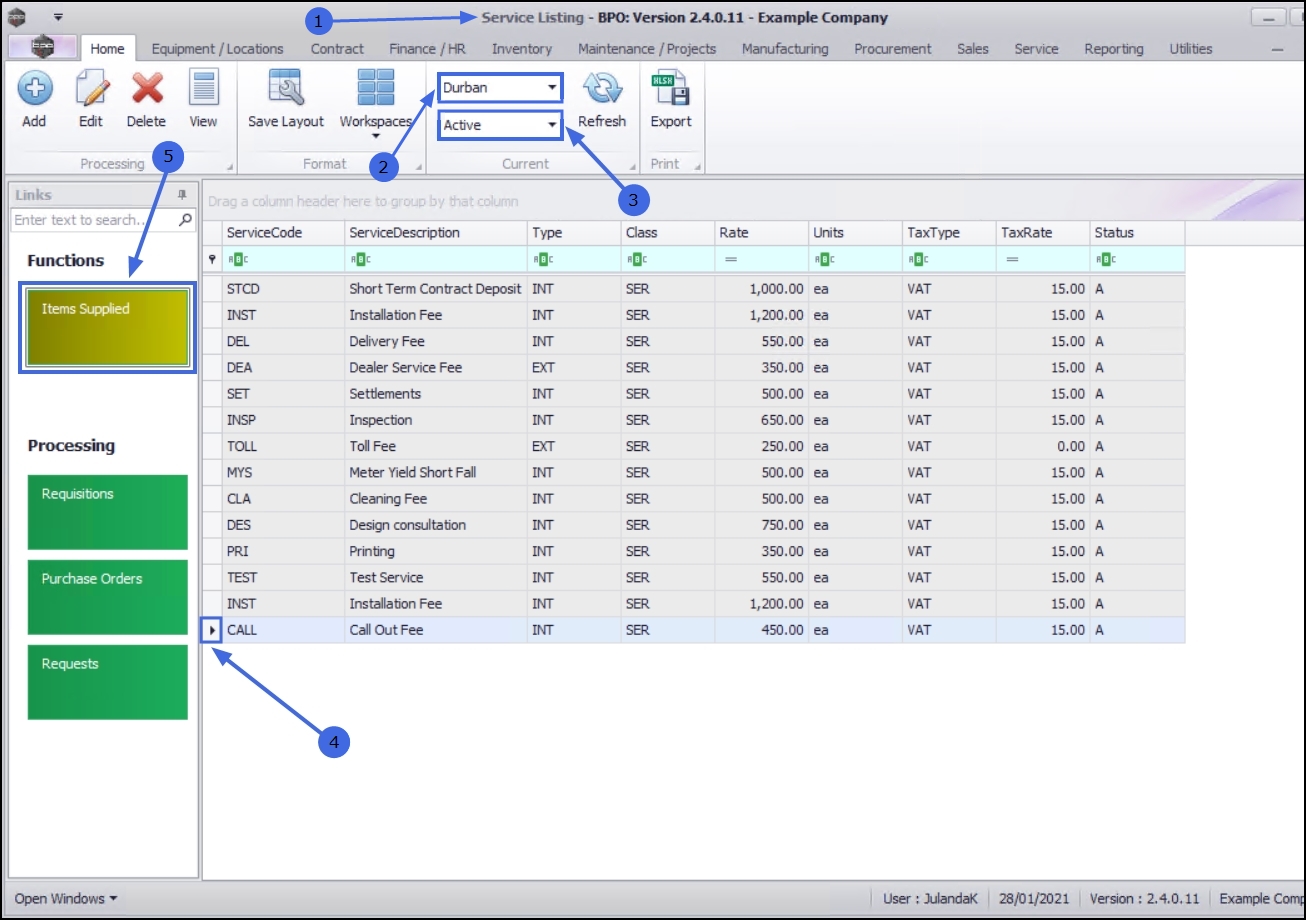
| Ribbon Access: Sales > Services |

- The Service Listing screen will display.
- Select the Site where the service can be located.
- The example has Durban selected.
- Change the Status to Active.
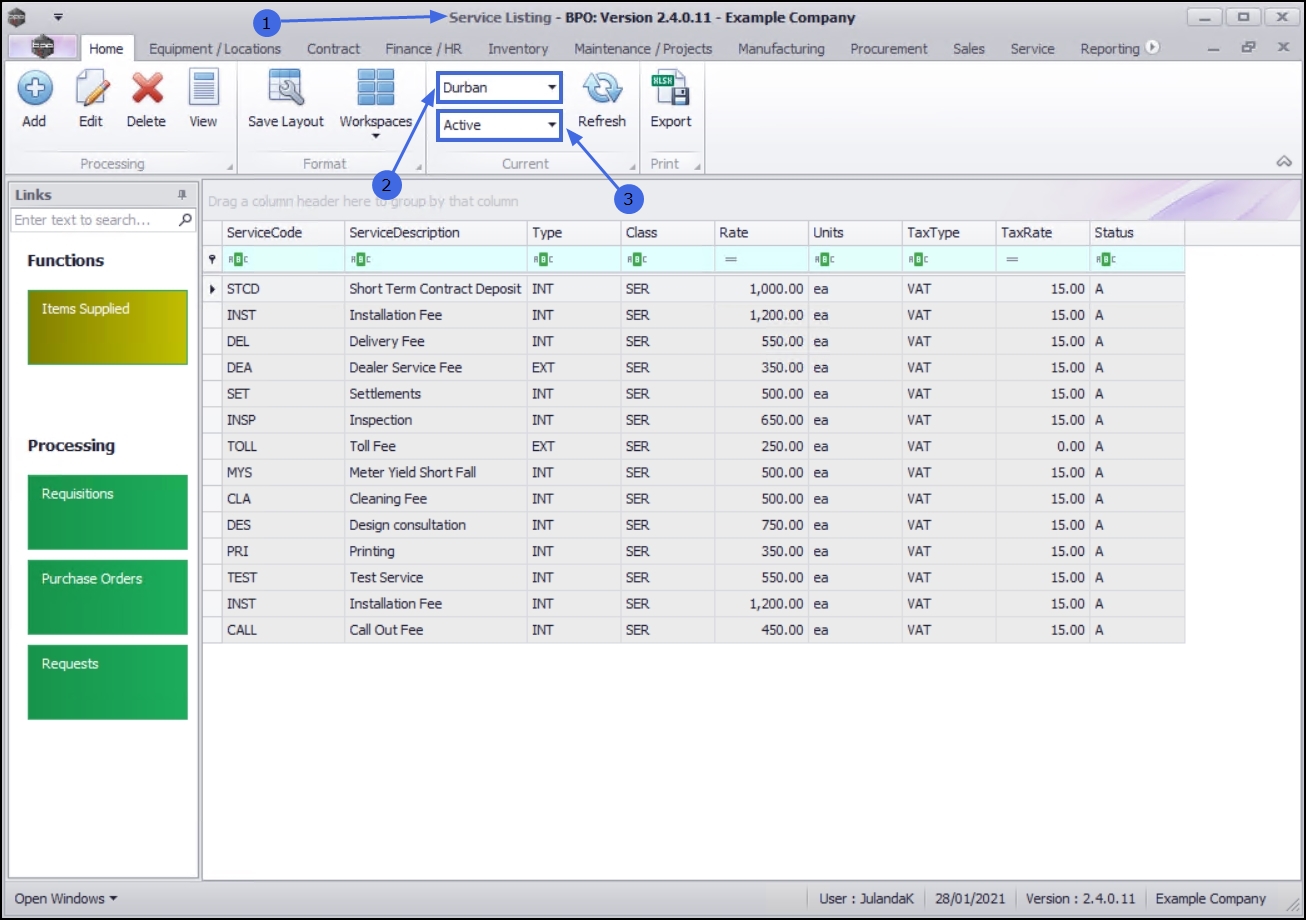
- Click on the row of the service you wish to link a supplier to.
- Click on the Items Supplied tile.

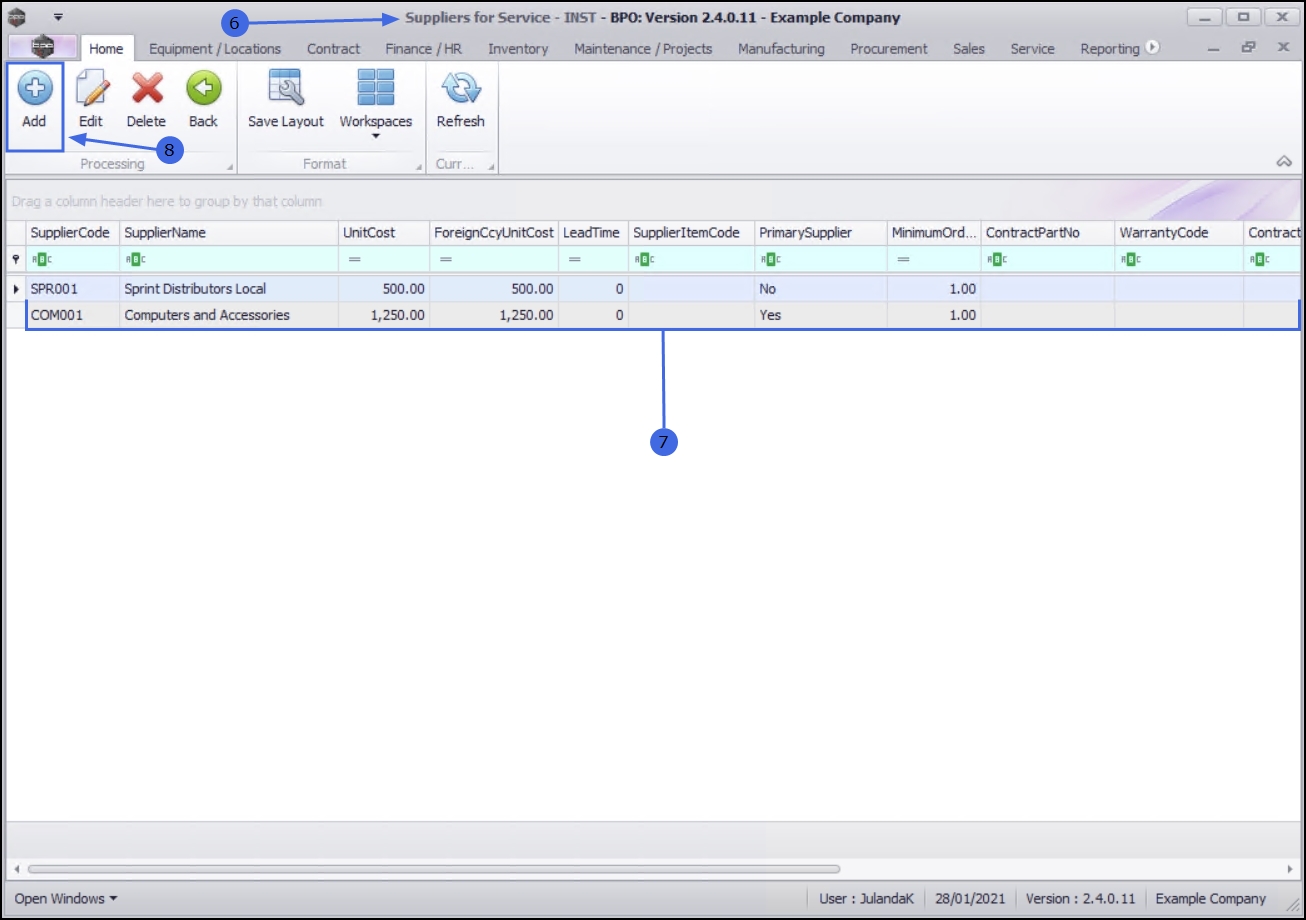
- The Suppliers for Service - [service code] screen will be displayed.
- A list of all the suppliers that are linked to the service and is currently providing a service is displayed.
- Click on Add.
 Short cut key: Right click to display the Process menu list. Click on Add.
The system will automatically place the linked supplier on a newly created requisition when a supplier has been linked to a service definition, along with the unit cost and lead time linked to that supplier.
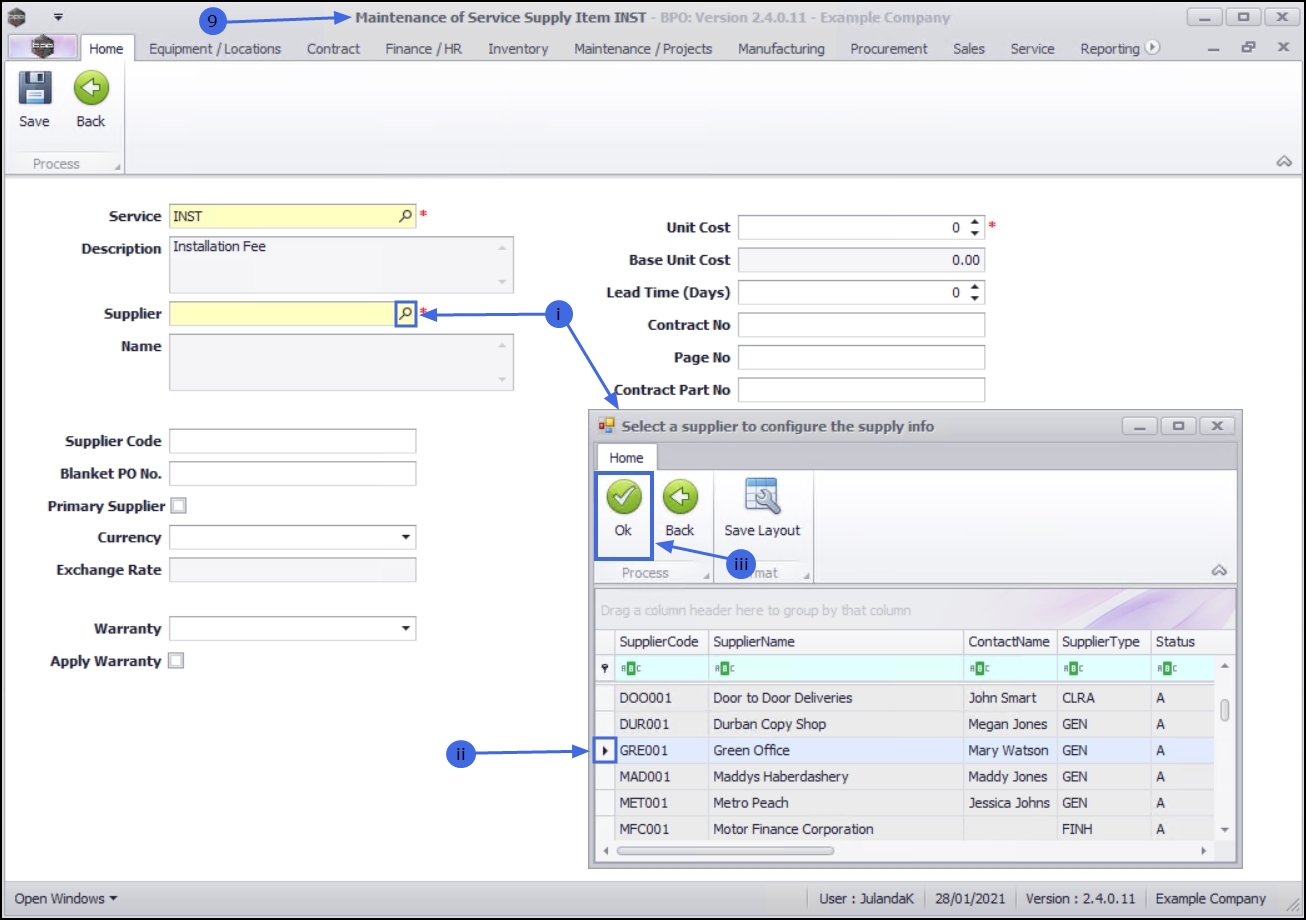
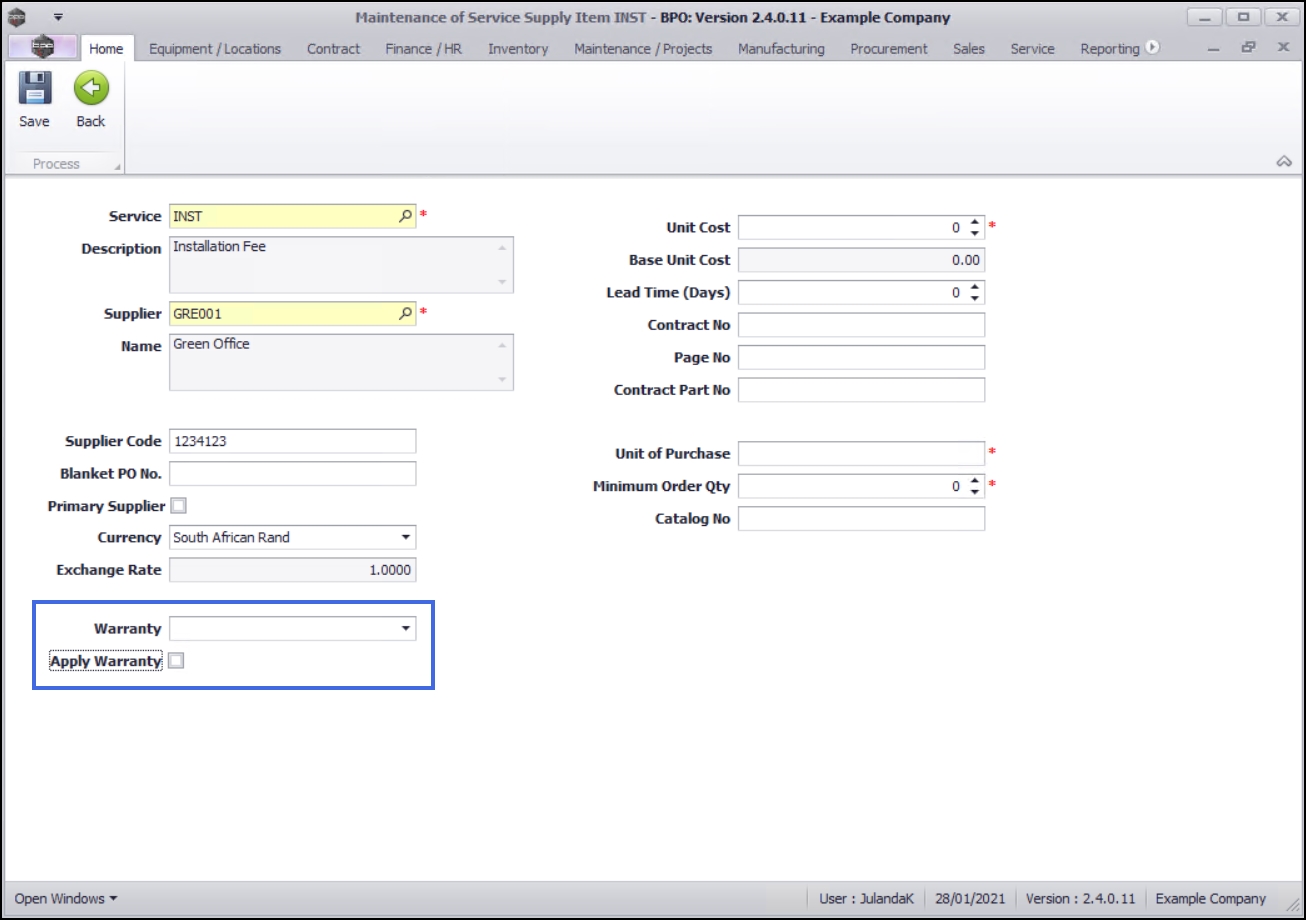
- The Maintenance of Service Supply Item [service item code] screen will be displayed.
Supplier Identification
- Service: This field will populate with the service code selected in the previous screen.
- Description: This field will populate with the service code description selected in the previous screen.
- Supplier:
To link the supplier click on the search button.
- The Select a supplier to configure the supply info screen will display.
- Click on the row of the supplier you wish to link to the service.
- Click on OK.
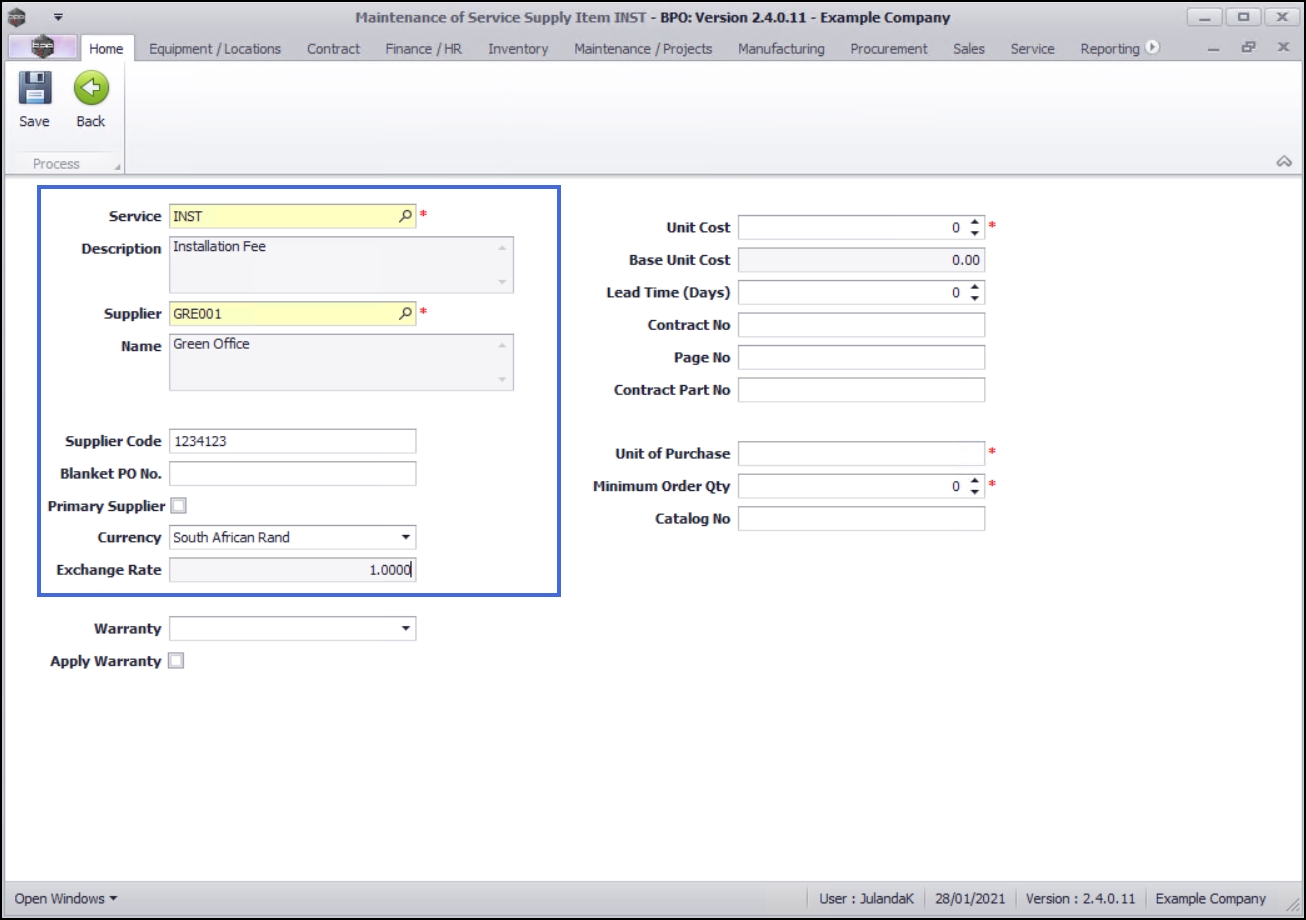
- Name: This field will auto populate with the Supplier Name after you have selected the Supplier Code.
- Supplier Code: Type in the code used by the Supplier for the service. This will filter through to the purchase order.
- Blanket PO No: The purchase order number is similar to an 'account no' that the supplier gives the company. Type in the number if applicable, otherwise leave this field blank.
- Primary Supplier:
Click on the check box if this is the primary supplier
 This will be the supplier that you regularly buy a particular part/item from. The primary supplier is linked to the part definition. Any purchase requisitions raised for this part definition will be created with the primary suppliers details linked. The purchase requisition can be edited to link an alternative supplier, if required..
 Note that each part definition can have only one primary supplier.
- Currency: This field will auto populate with the currency already set up on this supplier.
- Exchange Rate: If the supplier currency (above) is not the currency used by the company, then this field will populate with the current exchange rate, for instance if the supplier currency field was dollars $ and the company currency is rands R then this exchange rate field would populate with 10, as the current exchange rate is 10 rand for 1 dollar.
Default Warranty Details
- Warranty A warranty is a written assurance for an item given by the maker or supplier. This guarantee holds themselves responsible to repair or replace the item if it or its parts are defective.:
If the Supplier offers a warranty for this service, click on the down arrow to select the warranty applicable, from the drop-down menu.

- Apply Warranty: Mark this check box if the warranty selected in the previous field should be linked to the service.
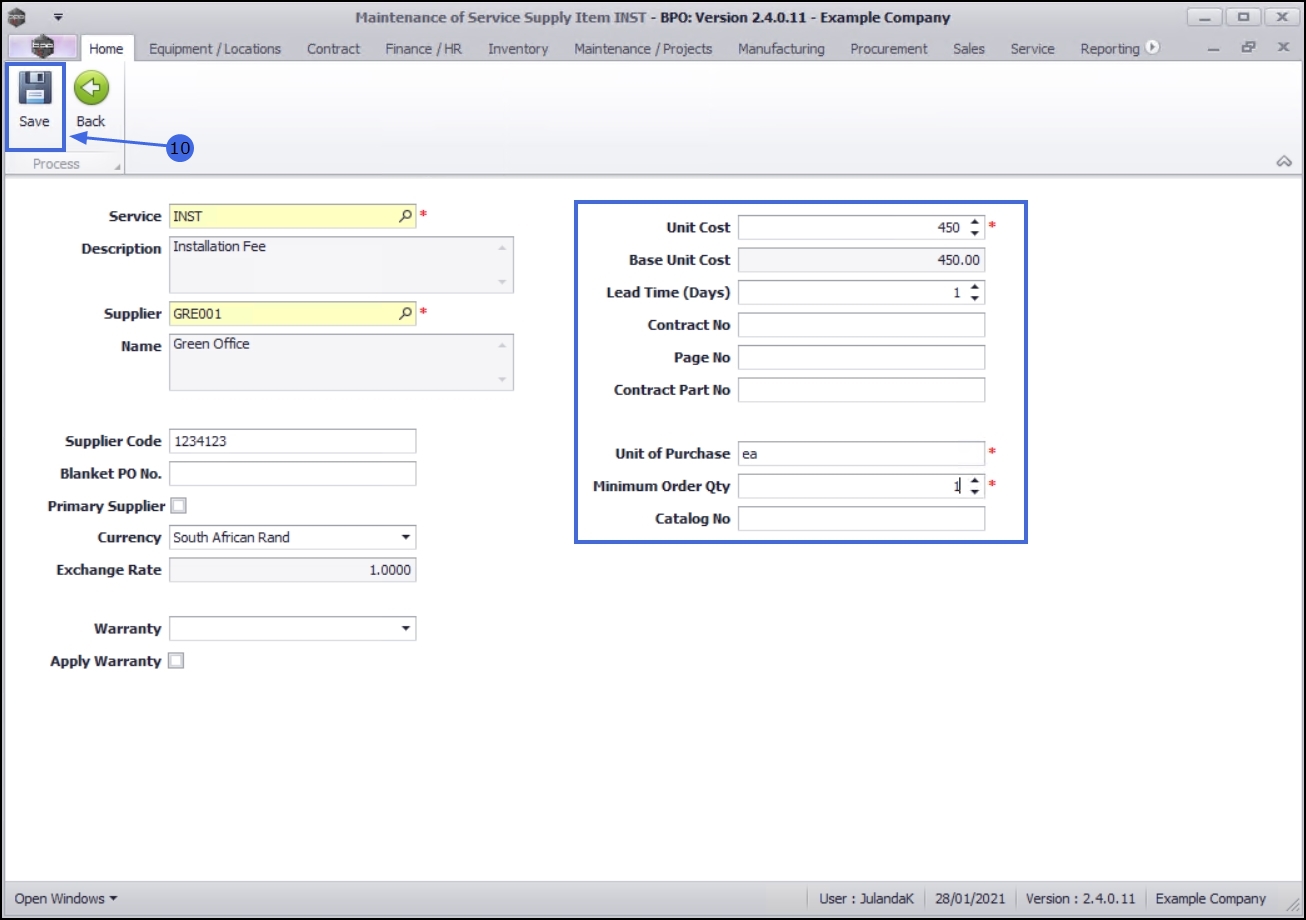
Ordering
- Unit Cost: Type in the cost per unit.
- Base Unit Cost: This field is greyed out as it is not edible by the user. The system will calculate this figure according to the entries in the Unit Cost and Exchange Rate fields. If the supplier Currency is the same as the company and the Exchange Rate field is blank, then the Base Unit Cost figure will be the same as the Unit Cost figure.
- Lead Time The lead time is the amount of time between when an order is placed with a supplier and the time that order is delivered and received by the company. (Days):
Type in the lead time (in days).
The expected delivery date for the service is calculated based on the Purchase Order date, plus the supplier lead time.
- Contract No: If you have a contract with the Supplier, type in the contract number or leave this field blank if not applicable.
- Page No: If you have a contract with the Supplier, type in the contract page number that relates to this part or leave this field blank if not applicable.
- Contract Part No: If you have a contract with the Supplier, type in the part number agreed to on this contract or leave this field blank if not applicable.
- Unit of Purchase: Type in the unit that ties up with this service, if applicable. Usually the default of 'ea' (each) is used.
- Minimum Order Qty: This is the minimum the supplier will supply per order. For example, a supplier may have a minimum limit of 10 items per order.
- Catalog No: Type in the catalogue number as per the supplier's catalogue, if applicable.
- When you have finished adding the details for the Supplier, click on Save .
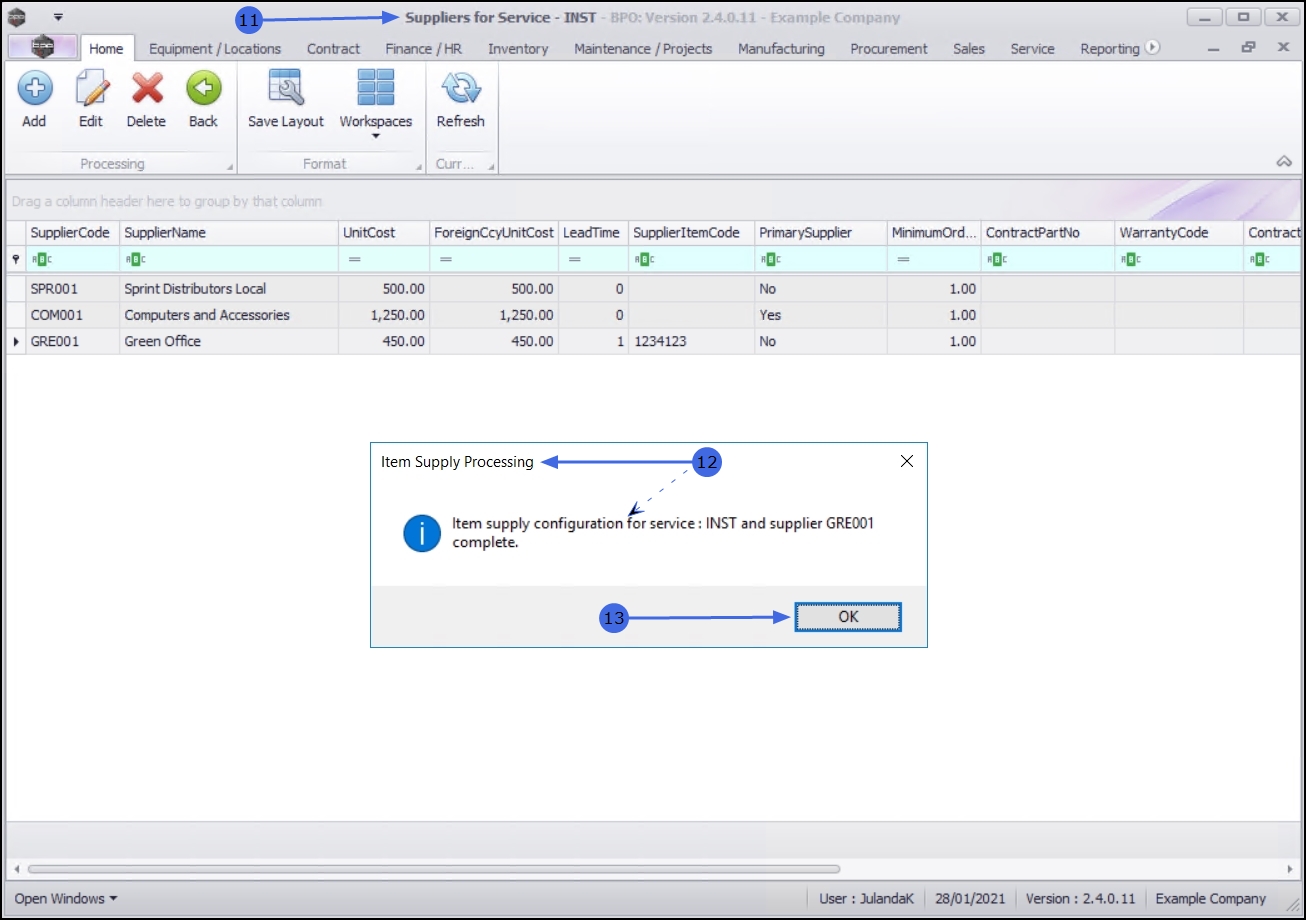
- You will return to the Suppliers for Service screen.
-
When you receive the
Item Supply Processing
message to confirm that;
- Item supply configuration for service: [service code] and supplier [supplier code] complete.
- Click on OK.
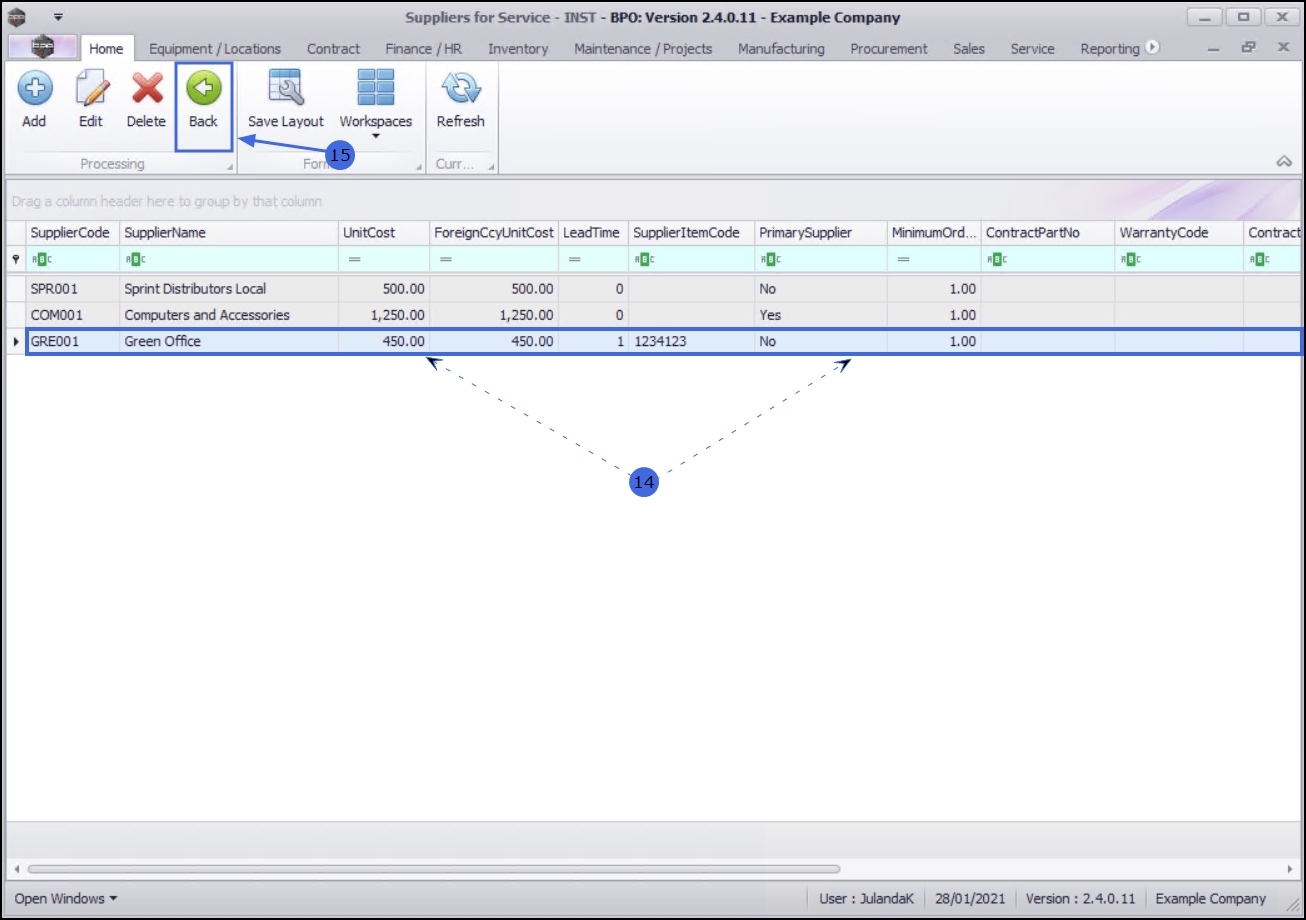
- The Supplier details for the service you have linked, will be listed on the Suppliers for Service screen.
- Click on Back to return to the Service listing screen.
Edit Service item for Supplier
You can make changes to the supplier information e.g. update the Unit Cost or change a Supplier for this service.
- From the Service Listing screen,
- Select the Site where the service can be located.
- The example has Durban selected.
- Select the Status for the service.
- The example has Active selected.
- Click on the row of the Service you need to change.
- Click on the Items Supplied tile.
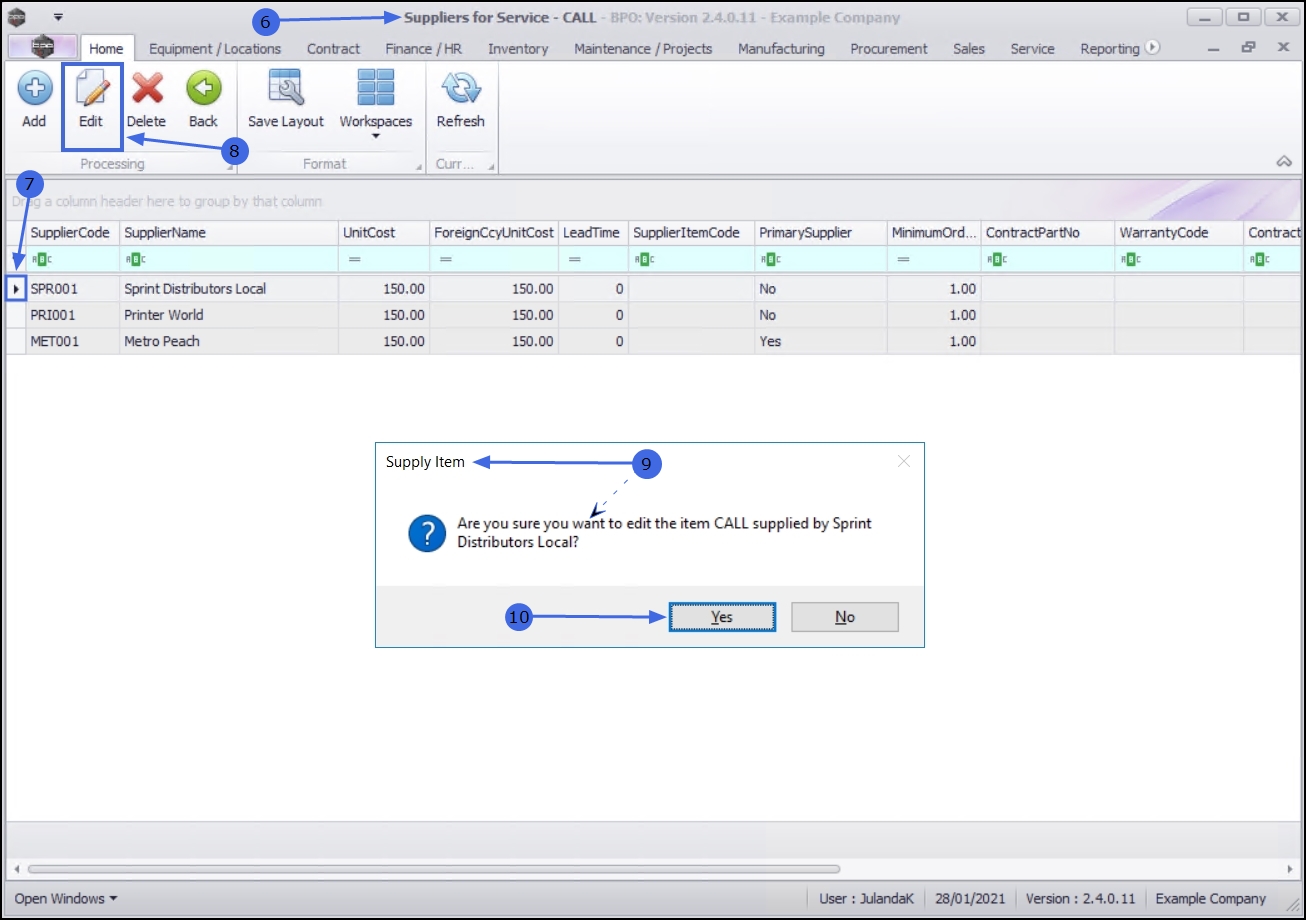
- From the Suppliers for Service - [service code] screen,
- Click on the row of the service the supplier is linked to.
- Click on Edit. Short cut key: Right click to display the Process menu list. Click on Edit.
- When you receive the Supply Item message to confirm;
- Are you sure you want to edit the item [item code] supplied by [supplier name]?
- Click on Yes.
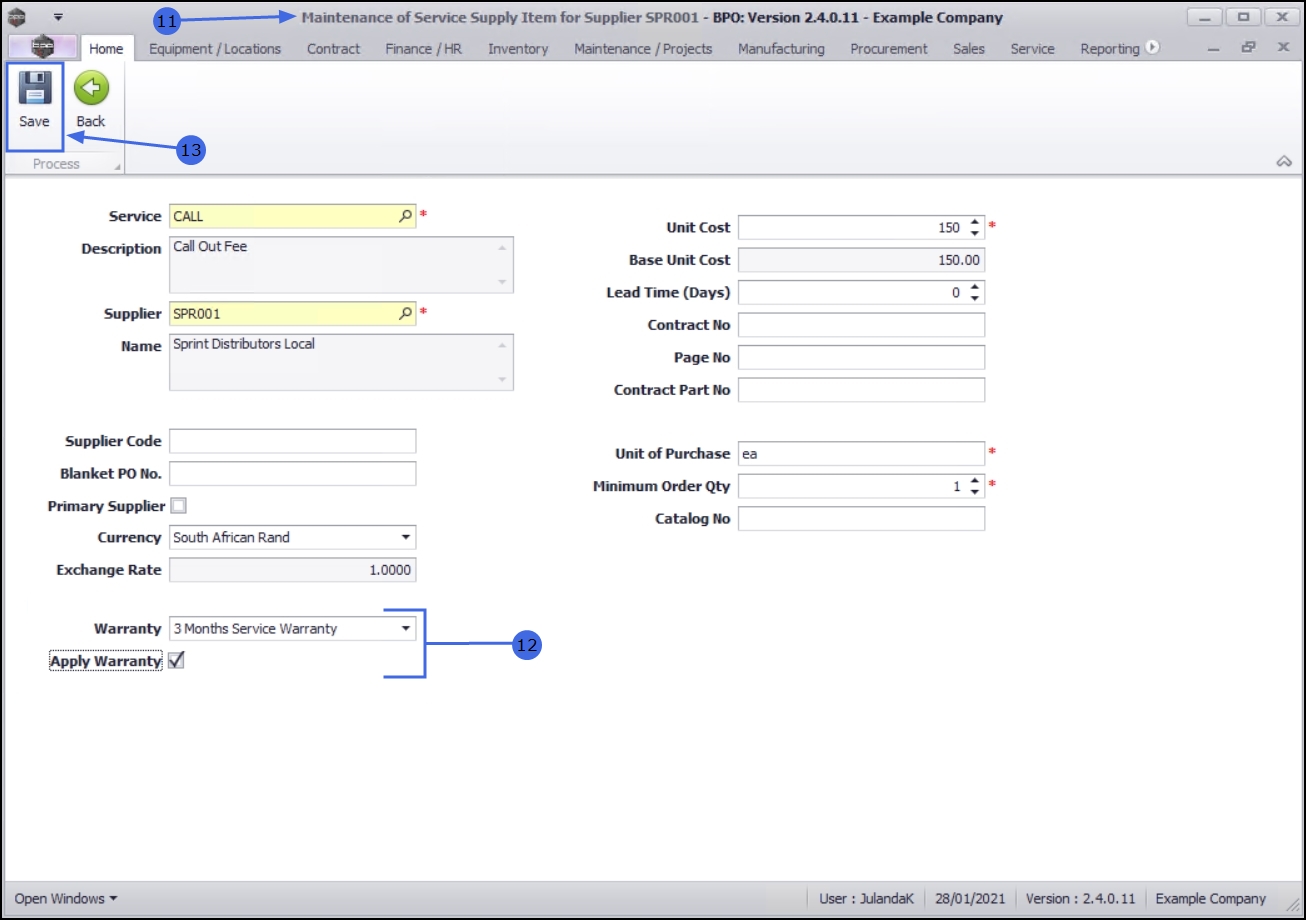
- The Maintenance of Service Supply Item for Supplier [supplier code] screen will display.
- For the purpose of this manual, the Warranty Code for the Supplier has been updated.
Refer to Supplier Identificationfor details on the fields that needs to edit.
- After making the required changes, click on Save.
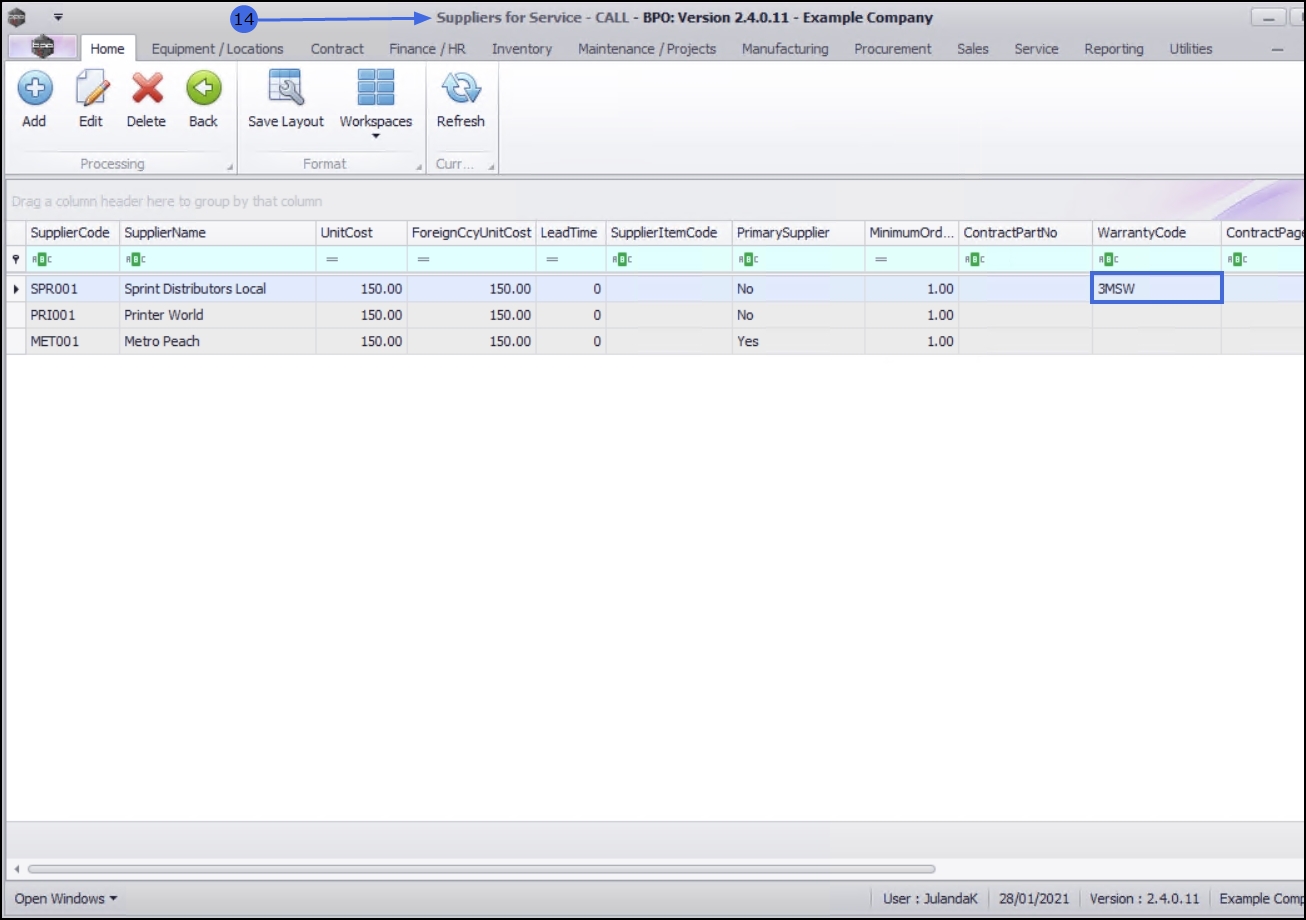
- You will return to the Suppliers for Service screen where you can view the updated information.
Delete/Remove a Supplier for a Service
- From the Service Listing screen,
- Select the Site where the service can be located.
- The example has Durban selected.
- Select the Status for the service.
- The example has Active selected.
- Click on the row of the Service you need to remove the supplier for.
- Click on the Items Supplied tab.
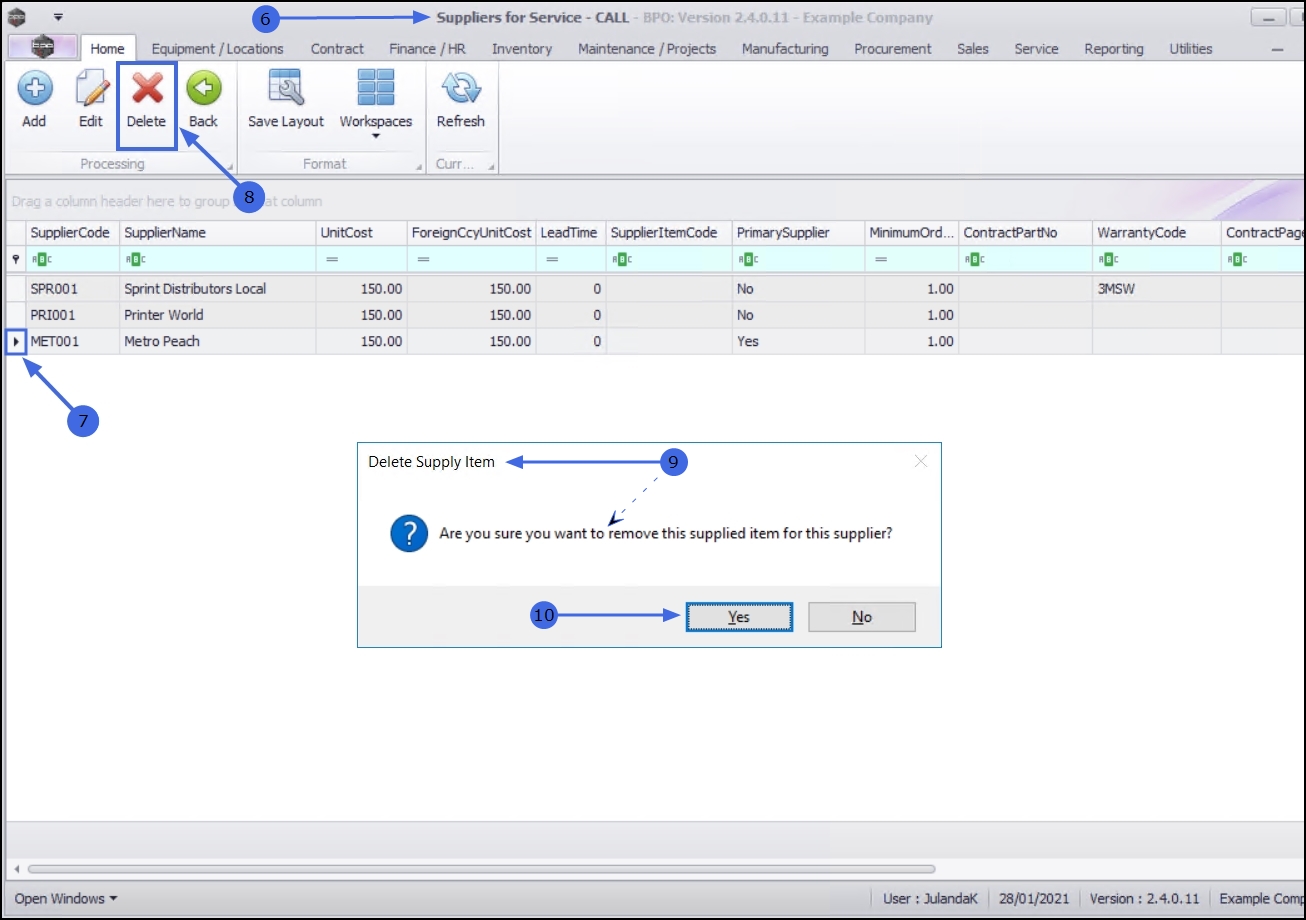
- The Suppliers for Service - [service code] screen will display.
- Click on the row of the Supplier you wish to remove / delete.
- Click on Delete. Short cut key: Right click to display the Process menu list. Click on Delete.
- When you receive the Delete Supply Item message to confirm;
- Are you sure you want to remove this supplied item from this supplier?
- Click on Yes in you are certain about your selection.
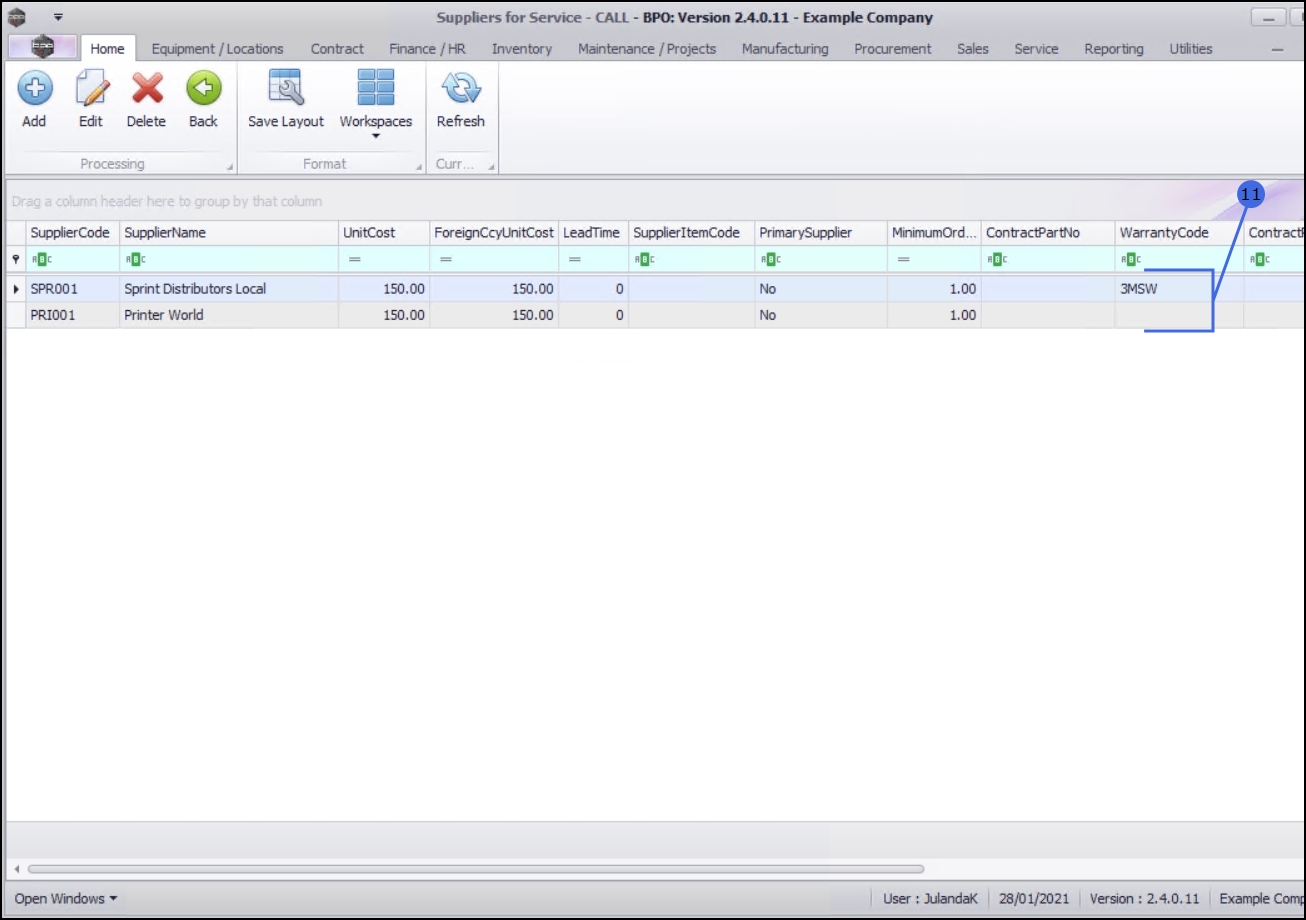
- The Supplier has been removed from the Suppliers for Service screen.
MNU.065.002