Sales
Services - Purchase Orders
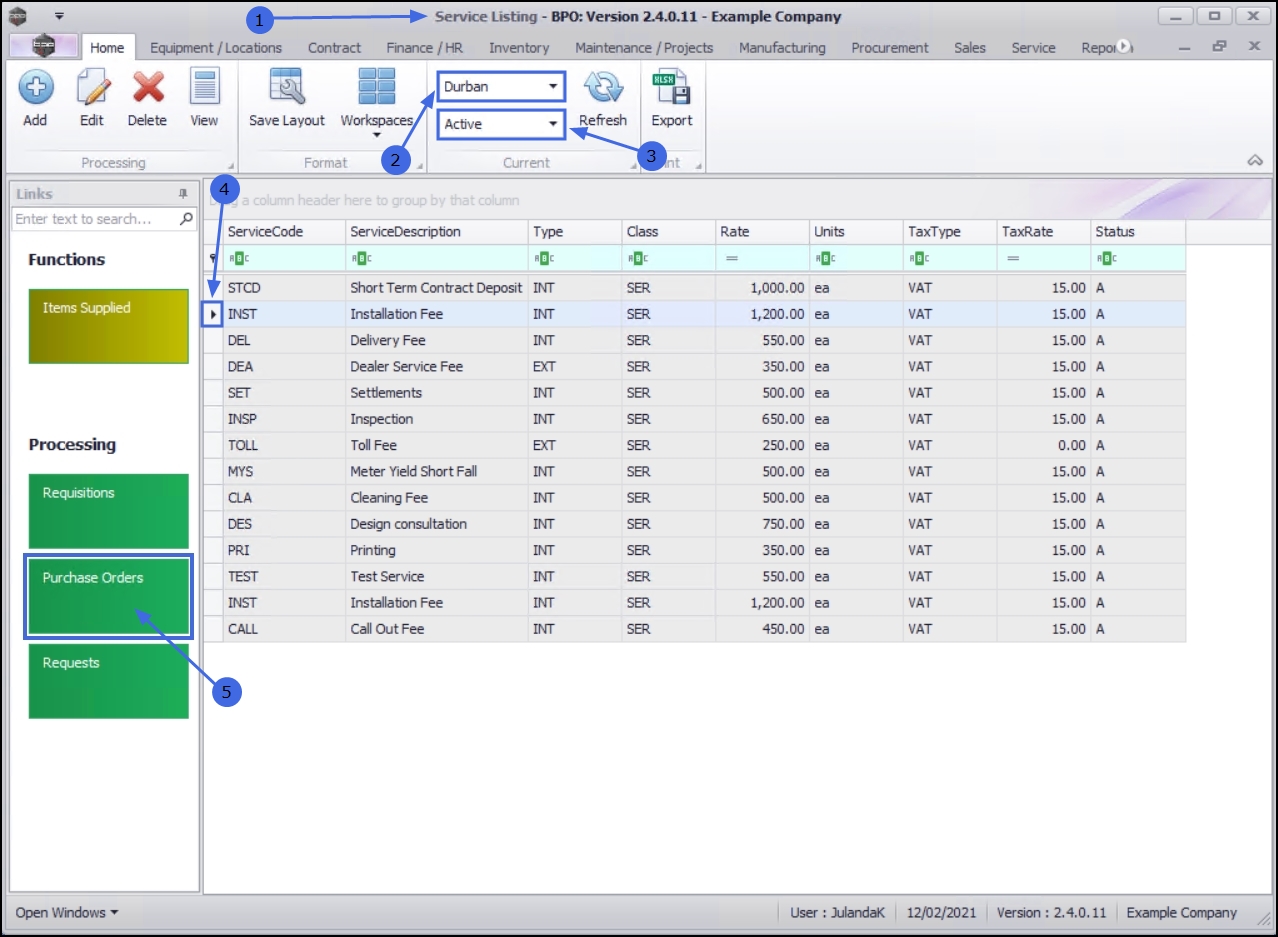
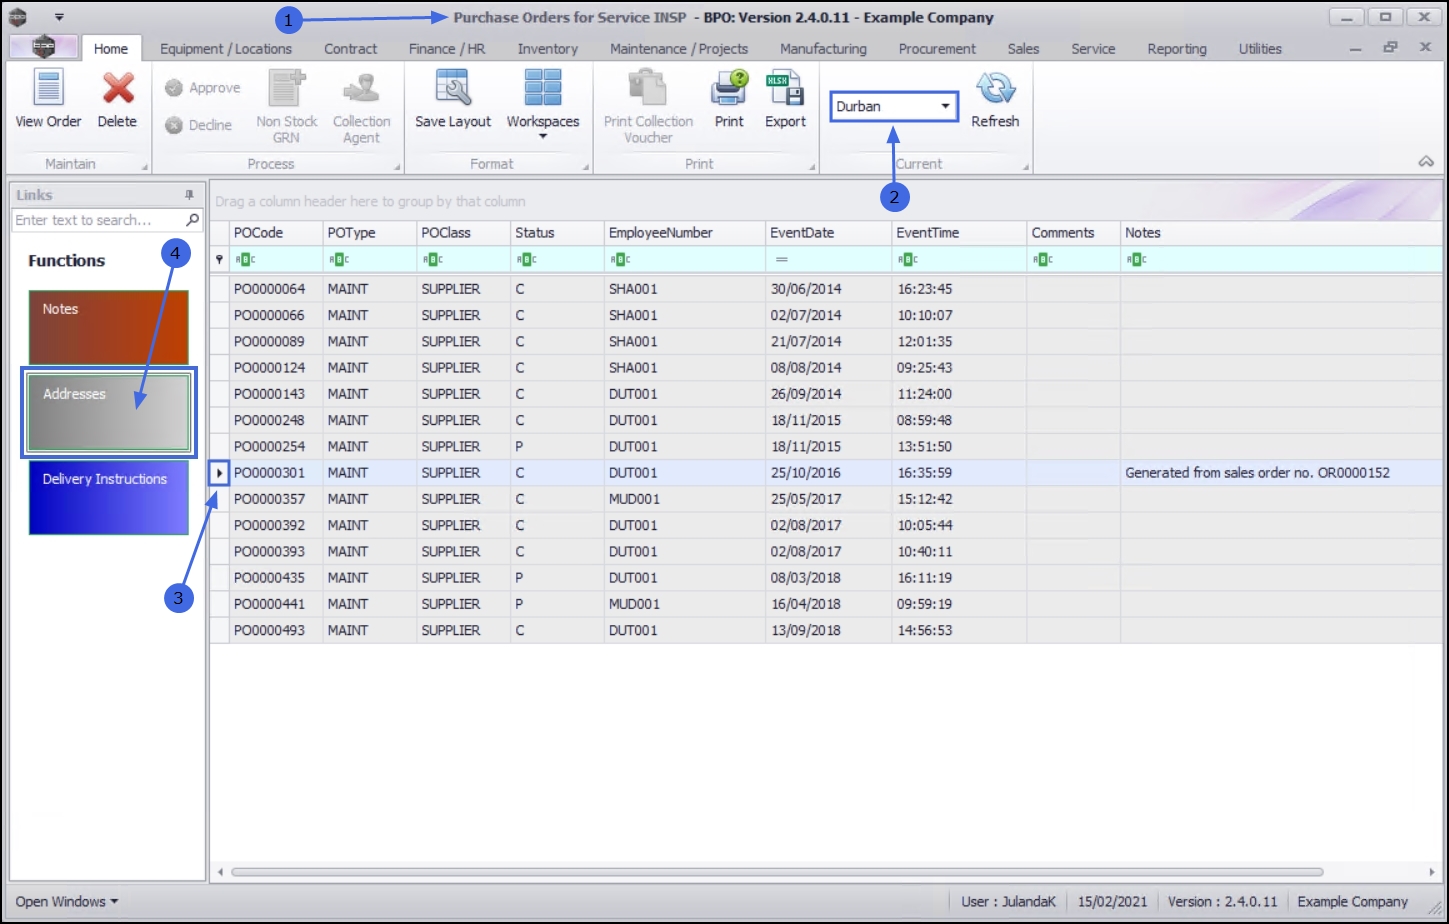
The purchase orders tile from the Service Listing screen will display a list of all the Purchase Orders linked to the Service. You will be able to View and Delete a purchase order or issue Non Stock GRN's for a purchase order. Notes and Delivery Instructions can be added for a Purchase Order.
| Ribbon Access: Sales > Services |

- The Service Listing screen will display.
-
Select the Site you wish to work in.
- The example has Durban selected.
- The Service Listing screen will open in the Active status by default, as you will most likely be working with Services in this status.
- Click on the down arrow to change the status to Inactive if required.
- Click on the row of the service you wish to work with.
- Click on the Purchase Orders tile.
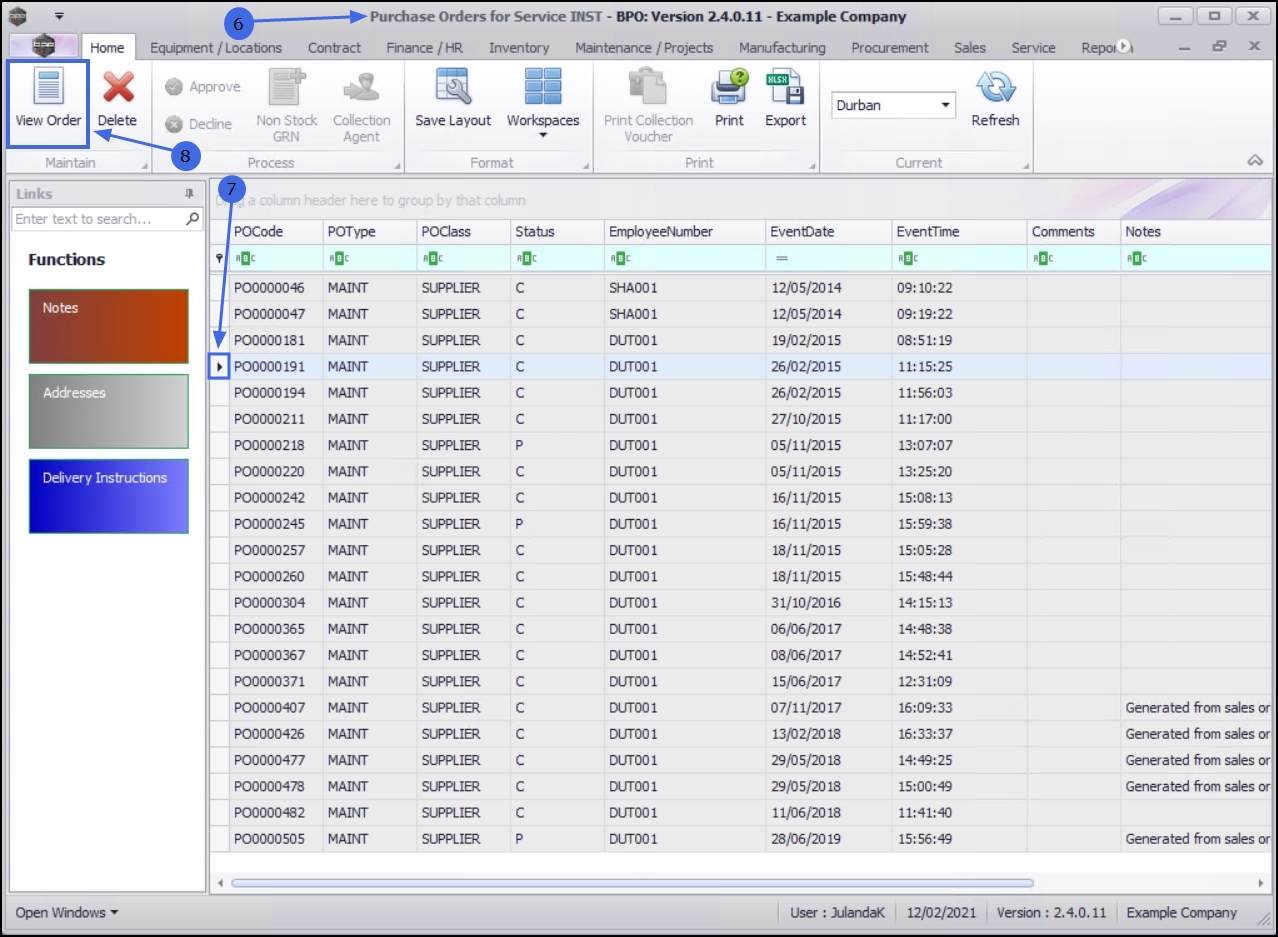
- The Purchase Order for Service [service code] screen will display.
View Purchase Order
- Click on the row of the purchase order you wish to view.
- Click on View Order.
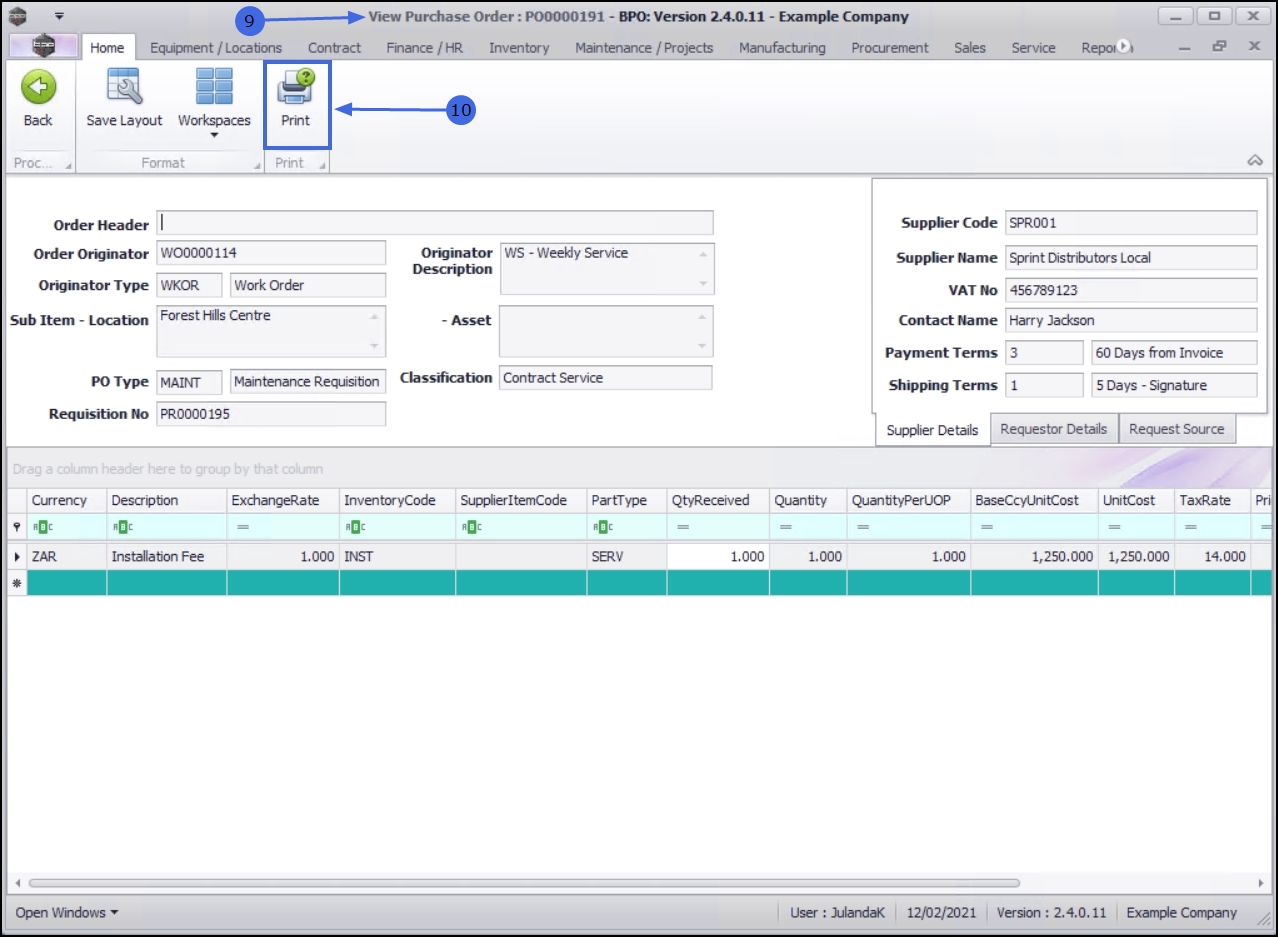
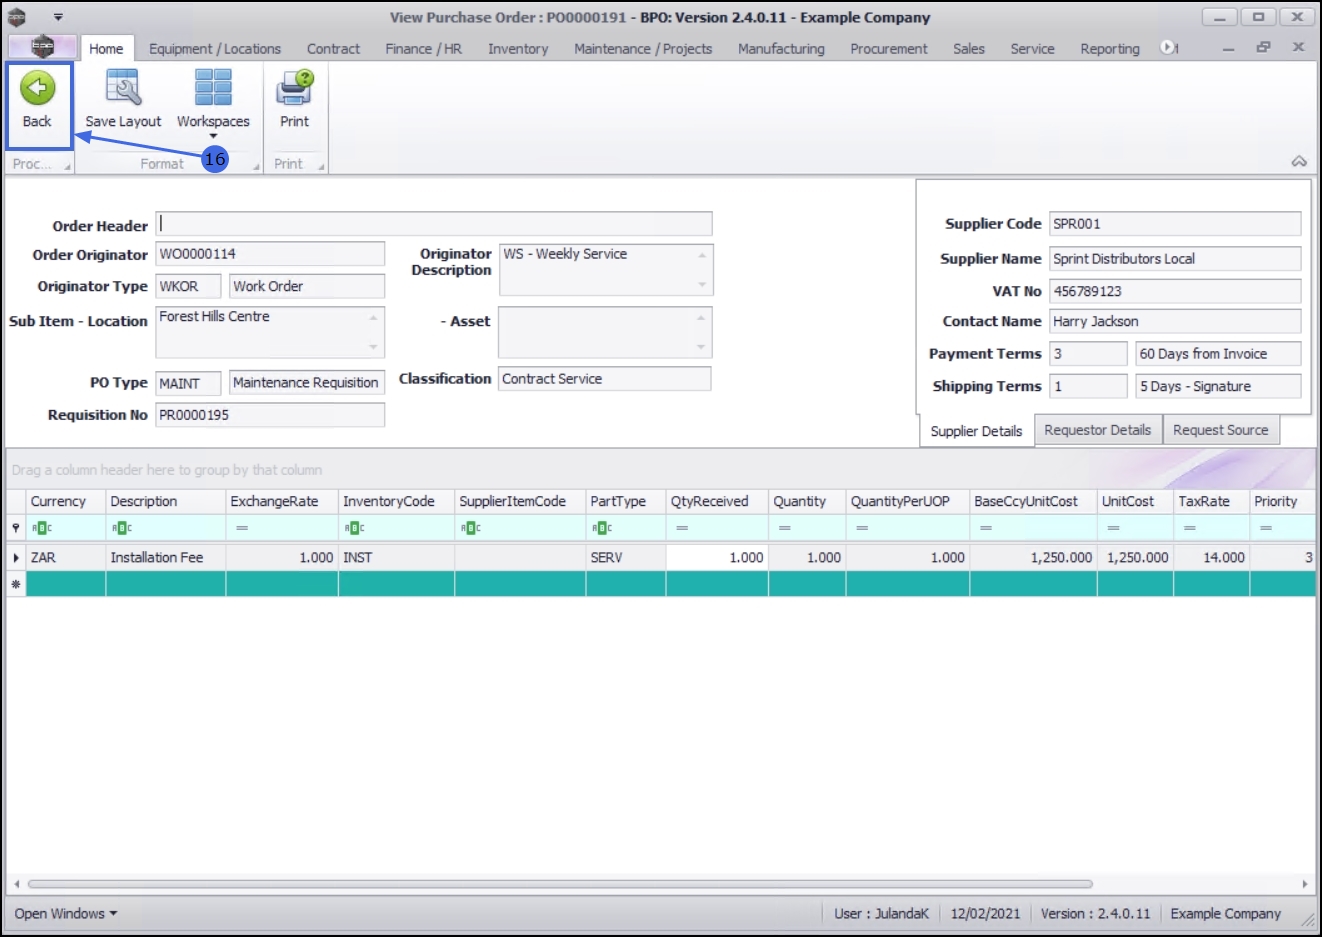
- The View Purchase Order : PO[purchase order number] screen will display.
![]() Note that you will not be able to make any changes to the purchase order from this screen.
Note that you will not be able to make any changes to the purchase order from this screen.
Print Purchase Order
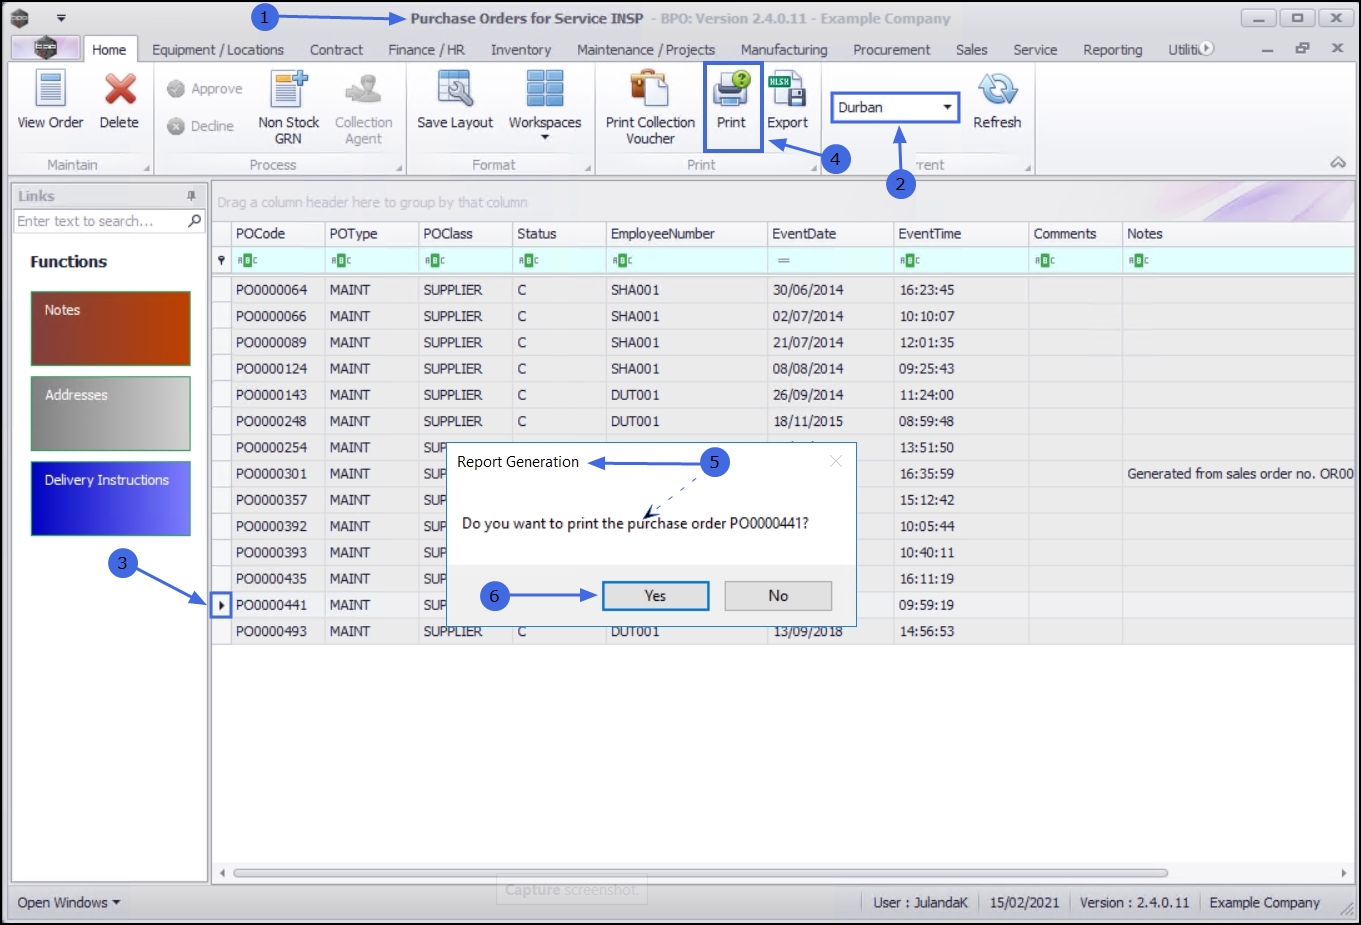
- Click on Print to print a copy or the purchase order.
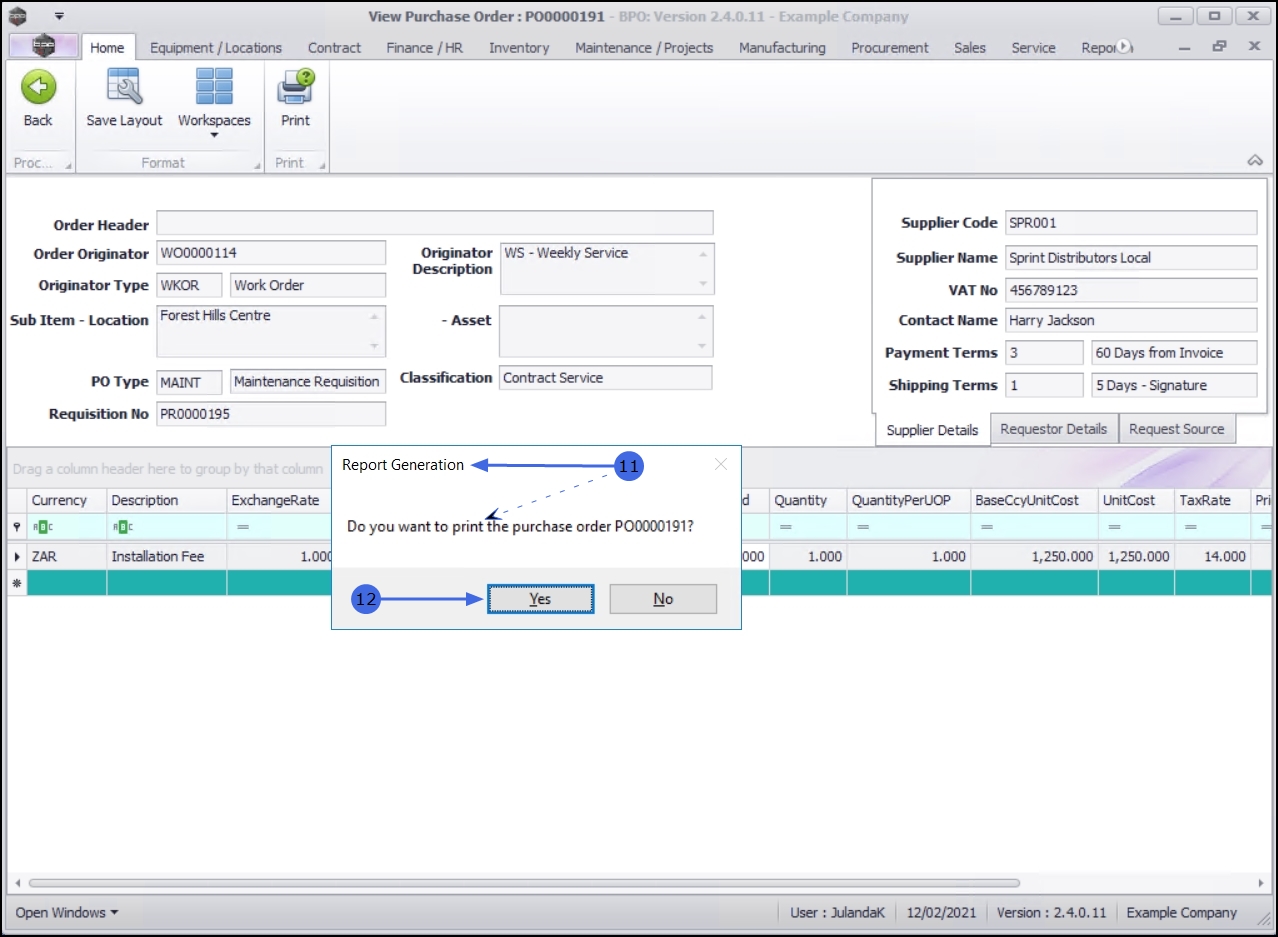
- When you receive the Report Generation message to confirm;
- Do you want to print the purchase order PO[purchase order number]?
- Click on Yes.
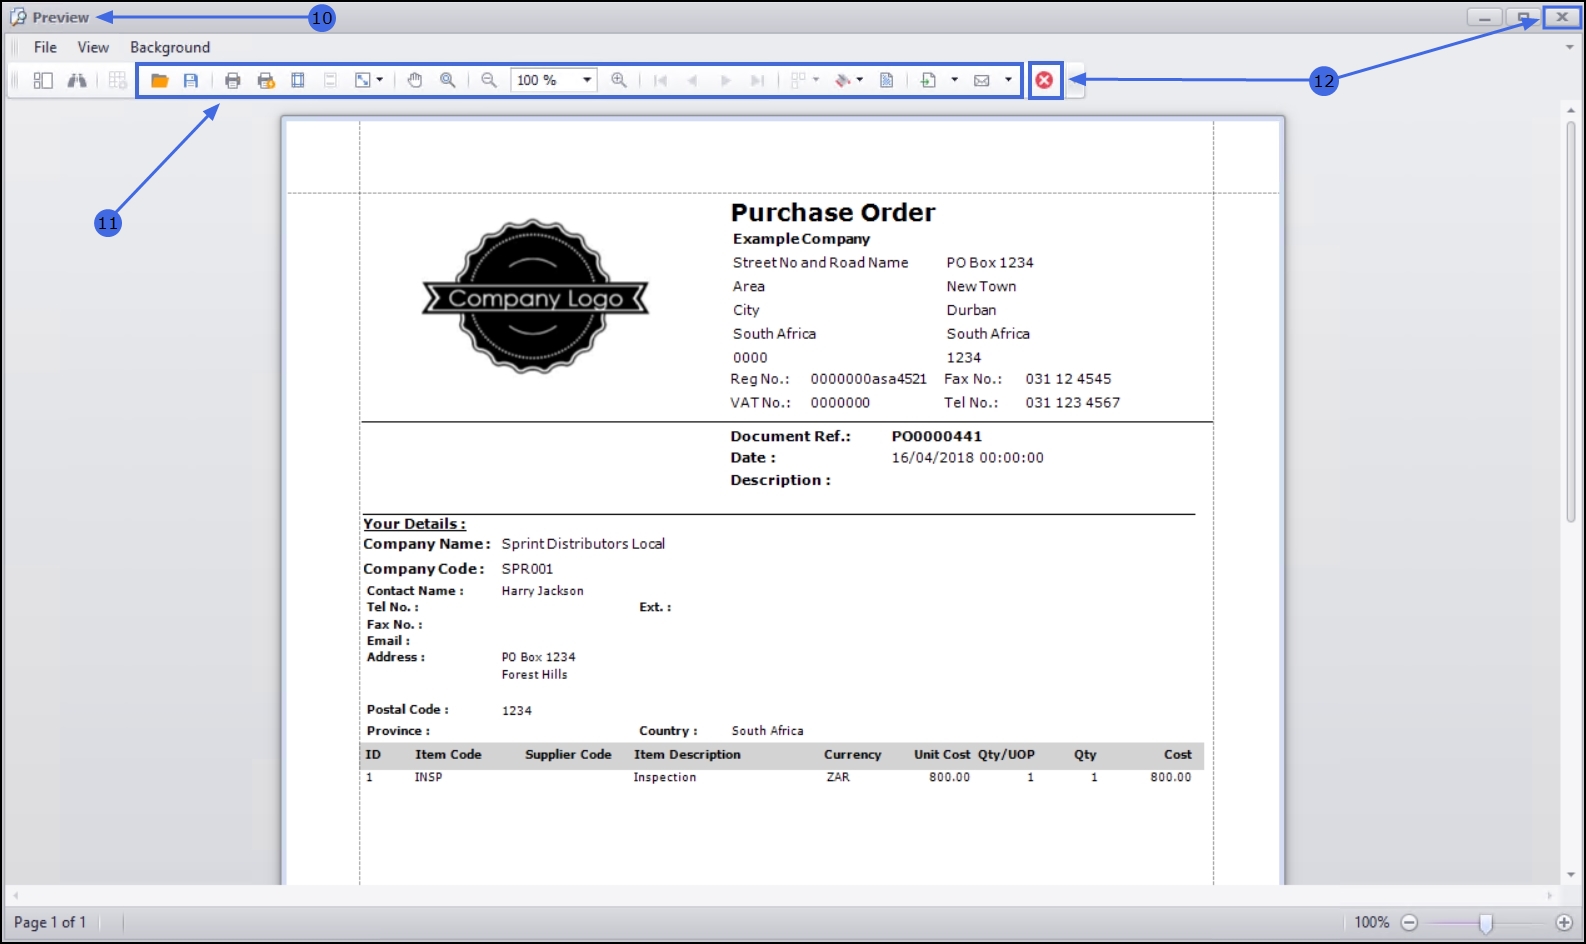
- The Purchase Order will display in the Preview screen.
- From this screen you can make cosmetic changes to the document as well as Save, Print, Add a Watermark, Export or Email the purchase order.
- Click on Close to return to the View Purchase Order screen.

- Click on Back to return to the Purchase Order for Service listing screen.
Delete / Close a Purchase Order
- From the Purchase Orders for Service [service code] listing screen,
- Ensure that the correct Site has been selected.
- Click on the down arrow to select an alternative site from the drop-down list.
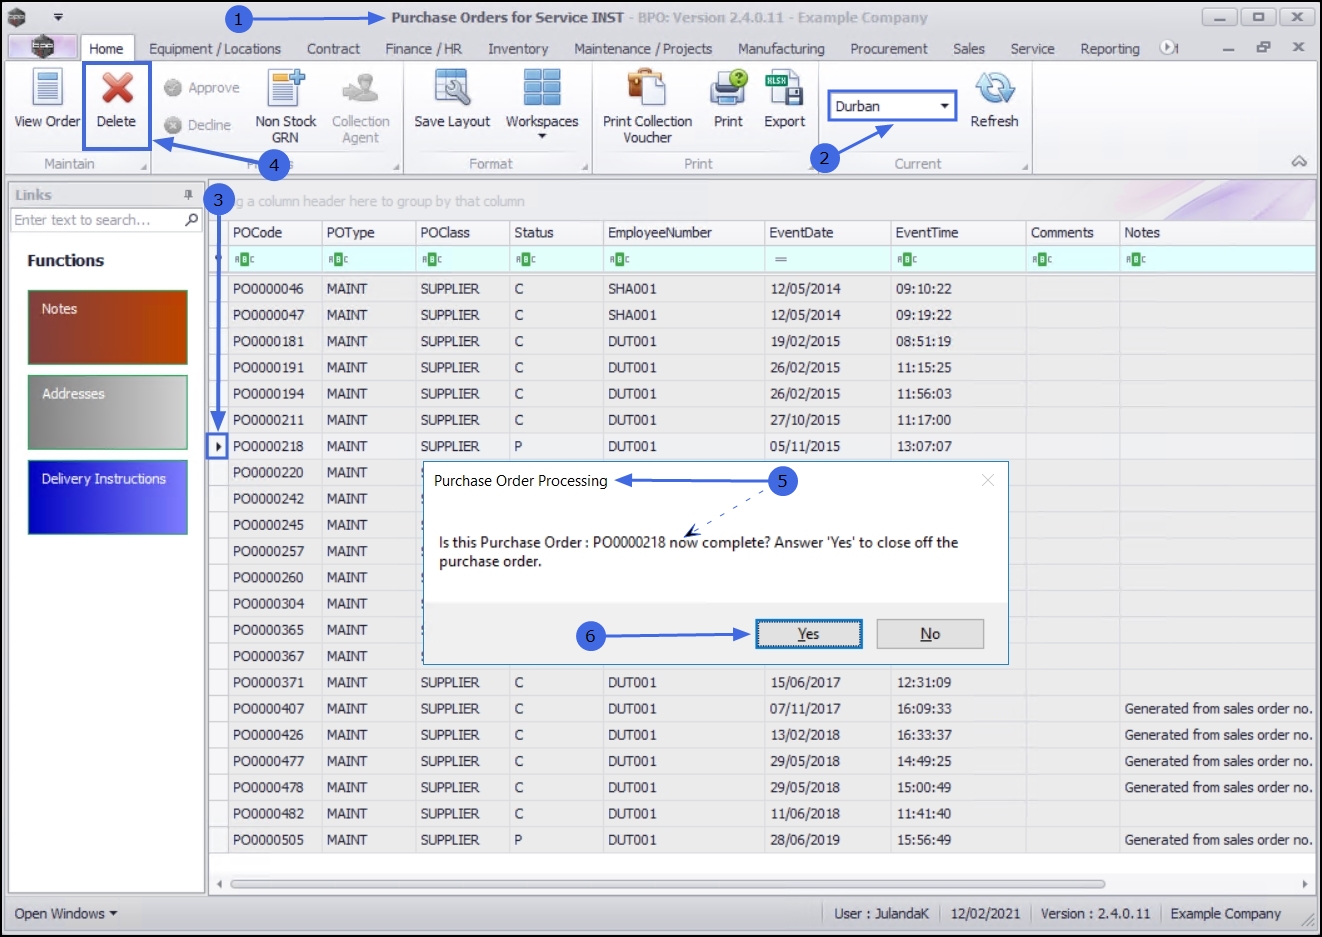
- Click on the row of the purchase order you wish to delete.
- Click on Delete.
- When you receive the Purchase Order Processing message to confirm;
- Is this Purchase Order : PO[purchase order number] now complete? Answer 'Yes' to close off the purchase order.
- Click on Yes if you are certain about your selection.
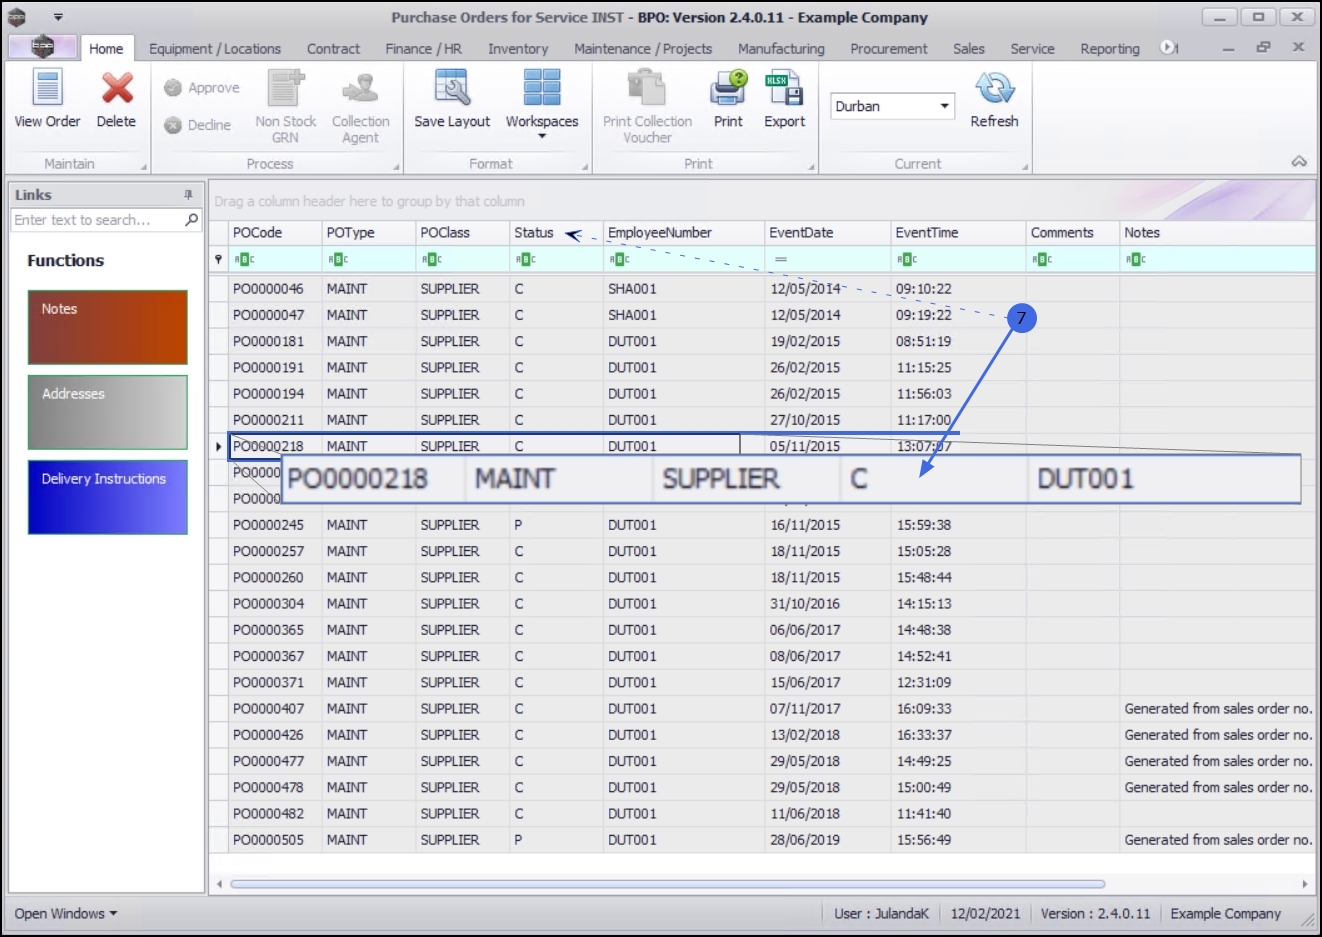
- Note that the Status for the Purchase Order have been updated to C - Closed.
Create a Non Stock Goods Received note (GRN)
- From the Purchase Orders for Service [service code] screen,
- Ensure that the correct Site has been selected.
- Click on the down arrow to select an alternative site from the drop-down list.
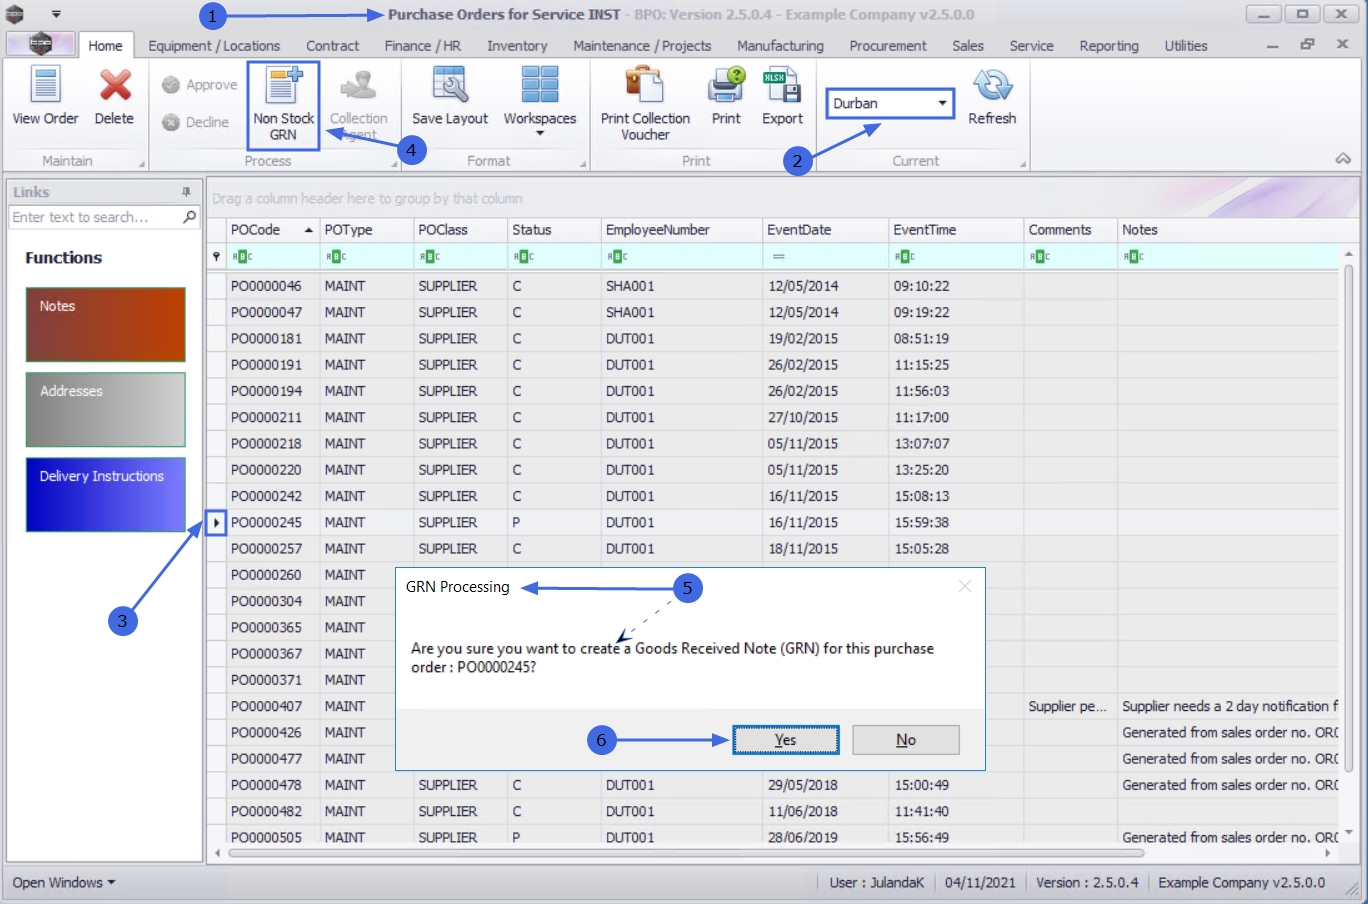
- Click on the row of the Purchase Order you want to create a Non Stock GRN for.
- Click on Non Stock GRN.
![]() Short cut key: Right click to display the Process menu list. Click on GRN.
Short cut key: Right click to display the Process menu list. Click on GRN.
- When you receive the GRN Processing message to confirm;
- Are you sure you want to create a Goods Received Note (GRN) for this purchase order : PO[purchase order number]?
- Click on Yes.
- The Create Non Stock GRN screen will display.
Non Stock GRN Heading
- Supplier: This field will auto populate with the Supplier linked to the purchase order.
- PO No: This field will auto populate with the and Purchase Order Number.
- Event Date/Time: The date will display the current date.
- Date: Type in or click on the down arrow to change the date, using the calendar function, if required.
- Time: Type in or use the arrow indicators to select an alternative time.
- Generate Supplier Invoice: Click to select the check box if you would like to generate a supplier invoice for the Non Stock GRN.
- Leave this check box un-selected if you want to generate a GRN without a Supplier invoice.
- Invoice No.: Type in the Invoice number, if required.
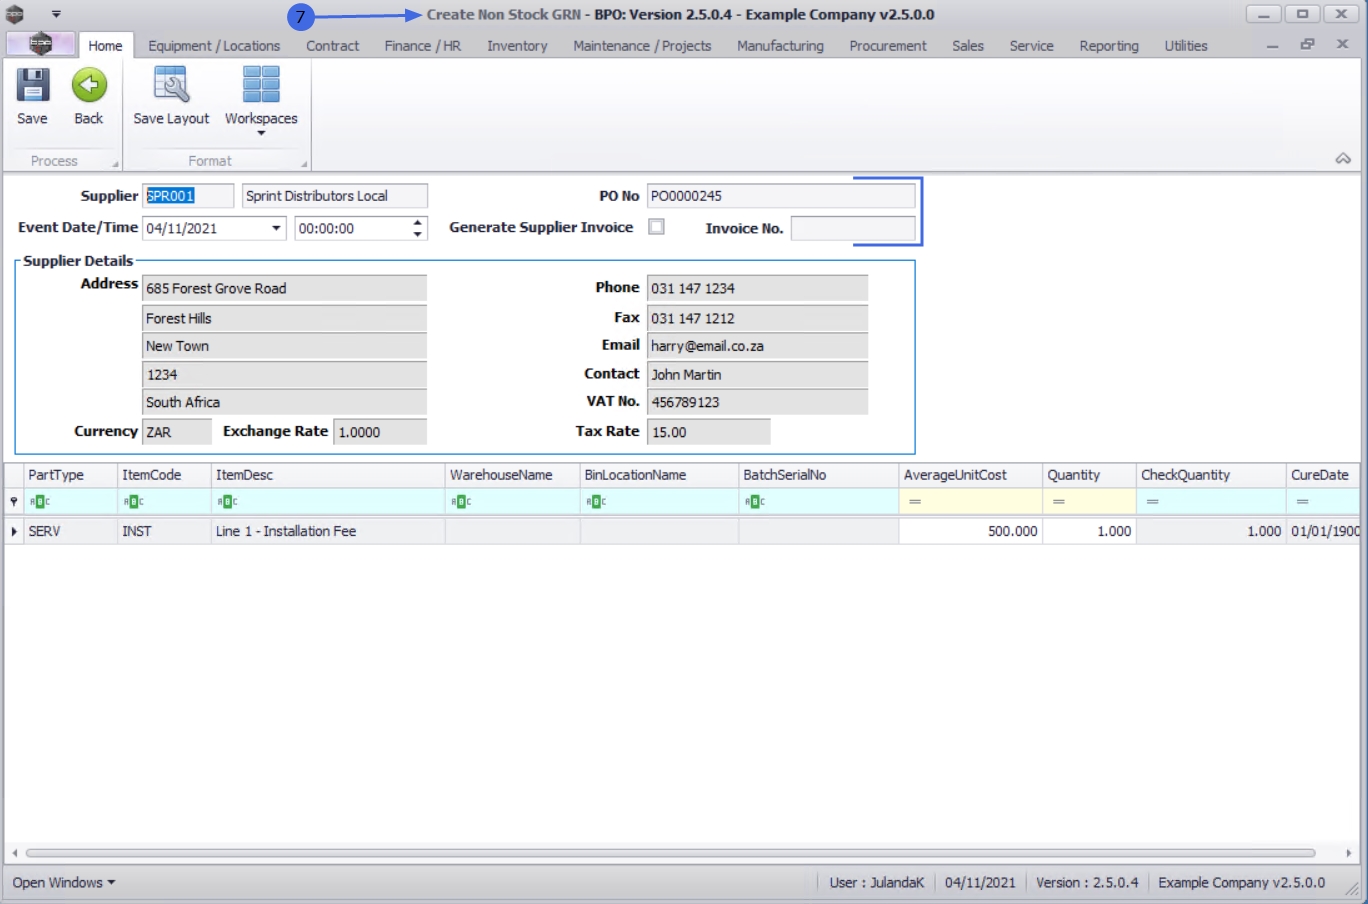
Supplier Details
The information for the supplier details is linked to the Supplier code and will auto populate the fields. No changes can be made to the Supplier details from this screen.
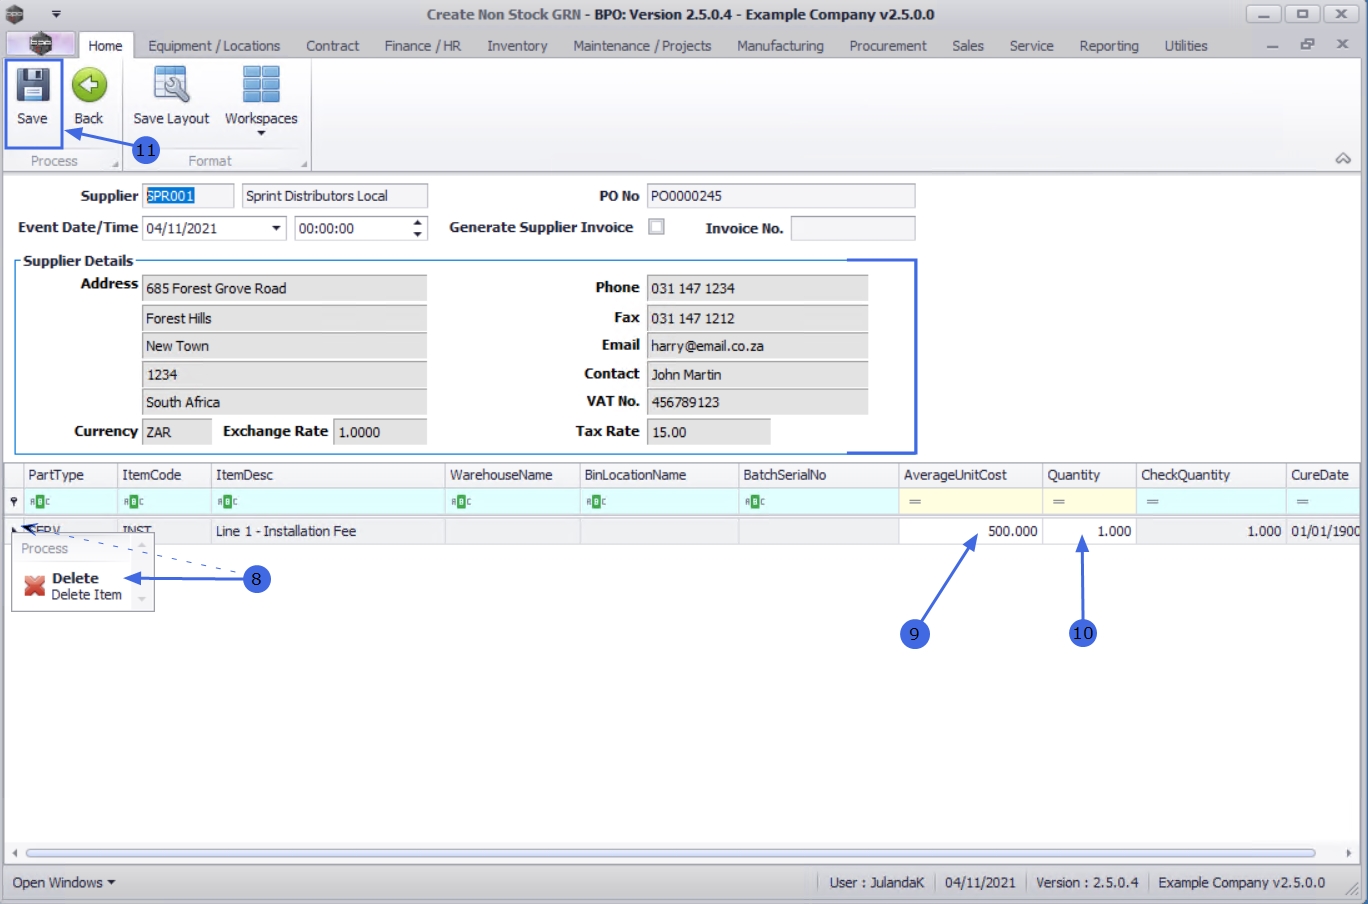
Non Stock GRN Line Item
- Remove any Non Stock Items that you wish to exclude, for example an Inspection, a Call Out or a Cleaning Fee.
 Short cut key: Right click on the row to display Process menu, click on Delete
 - When you receive the Delete Row message to confirm;
- Are you sure you want to delete this row for item?
- Click on Yes if you are certain about removing the item from the Non Stock GRN.
- When you receive the Delete Row message to confirm;
- Click in the Average Unit Cost text box to type in or use the directional arrows to adjust the unit cost.
- Click in the Quantity text box to type in or use the directional arrows to adjust the quantity.
- Click on Save.
For a detailed handling of this topic refer to Non Stock Supplier Returns
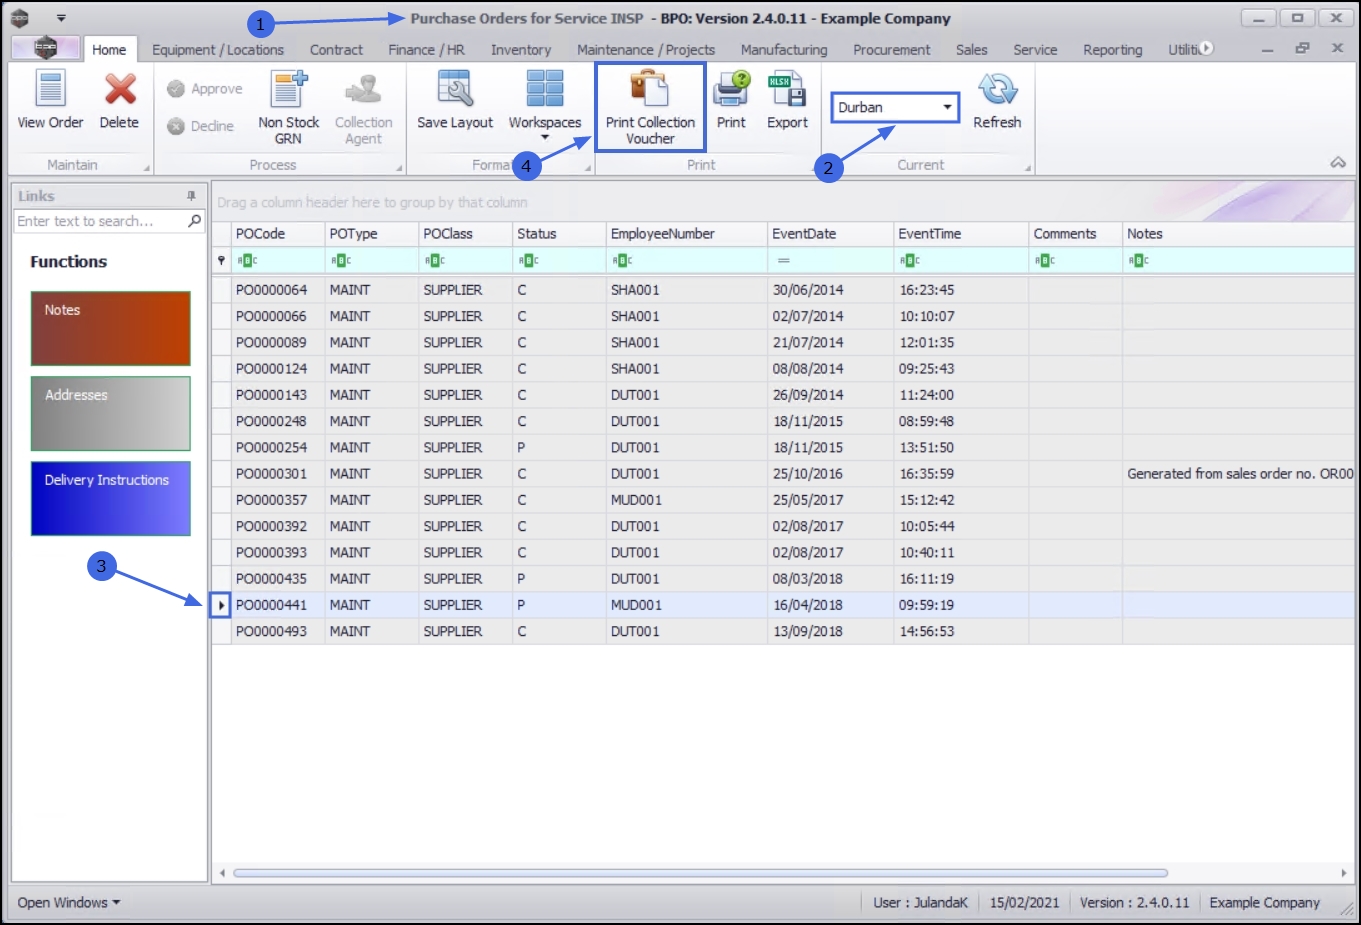
Print Collection Voucher
- From the Purchase Orders for Service [service code] screen,
- Ensure that the correct Site has been selected.
- Click on the down arrow to select an alternative site from the drop-down list.
- Click on the row of the Purchase Order you wish to print a collection voucher for.
- Click on Print Collection Voucher.
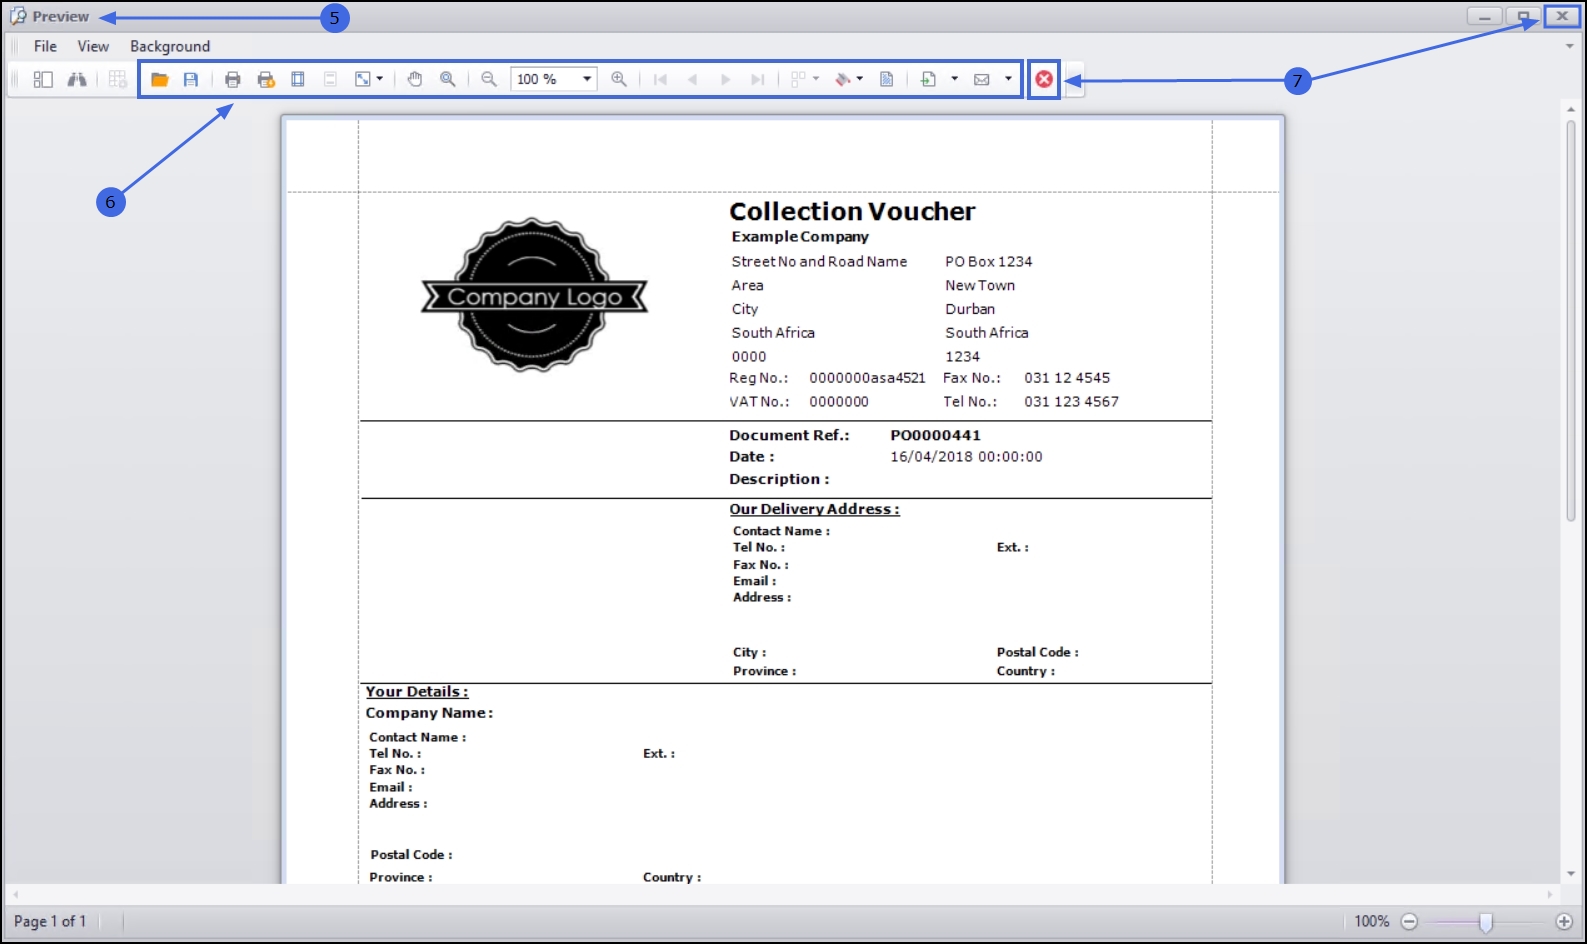
- The Collection Voucher will display in the Preview screen.
- From this screen you can make cosmetic changes to the document as well as Save, Print, Add a Watermark, Export or Email the Collection Voucher.
- Click on Close to return to the Purchase Orders for Service screen.
Print Purchase Order
- From the Purchase Order for Service [service code] screen,
- Ensure that the correct Site has been selected.
- Click on the down arrow to select an alternative site from the drop-down list, if required.
- Click on the row of the Purchase order you wish to print.
- Click on Print.
- When you receive the Report Generation message to confirm;
- Do you want to print the purchase order PO[purchase order number]?
- Click on Yes.
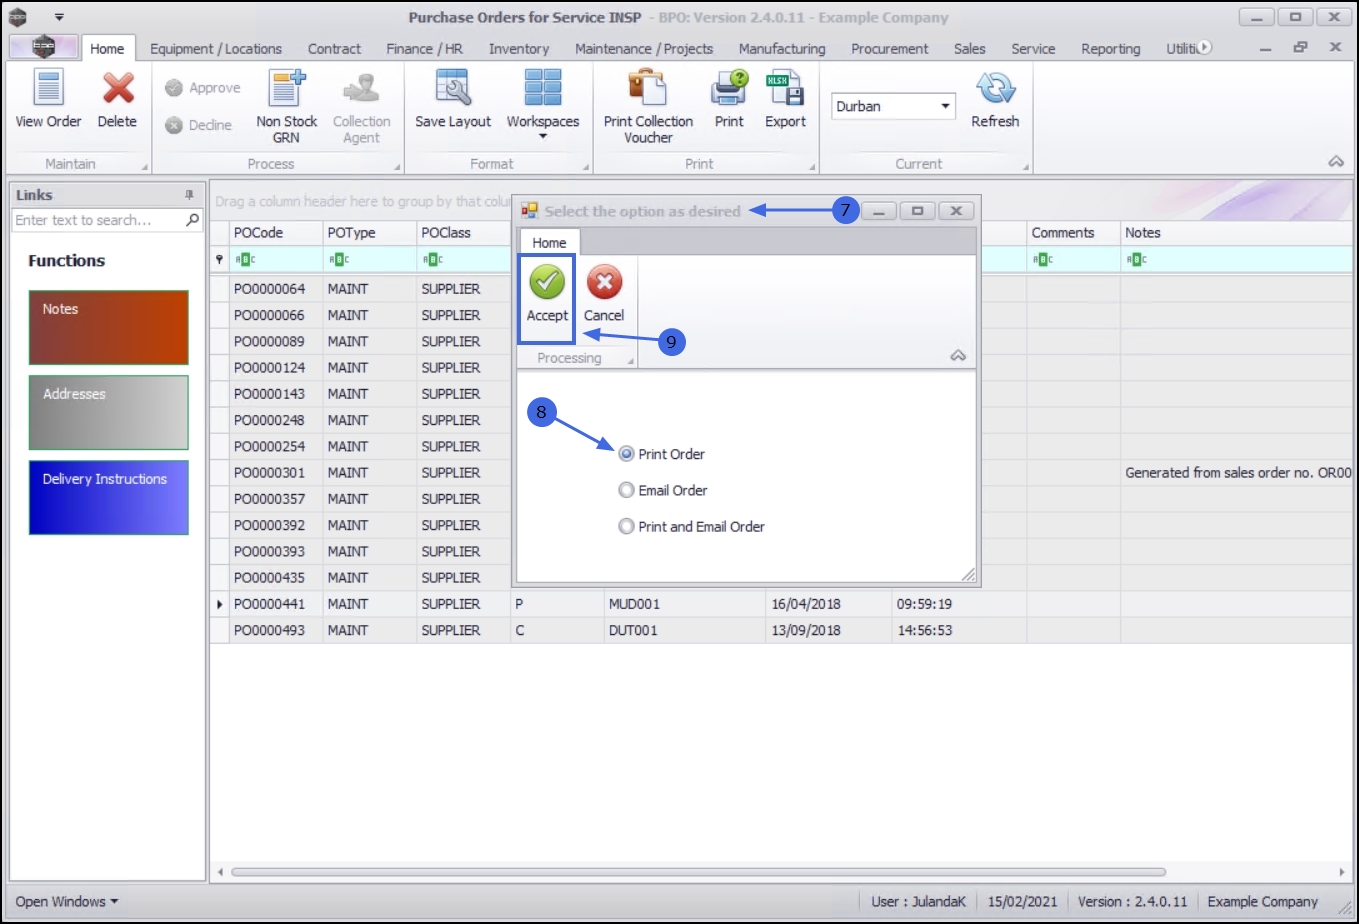
- The Select the option as desired screen will display.
 Print Order will open the purchase order in the Report Preview to view, print, export or email.
- Email Order will attach documents, add recipients, the system will create a .PDF and email the Invoice.
- Print and Email Order will display both the Report Preview and Email screens.
- For the purpose of this manual Print Order has been selected.
- Click on Accept.
- The Purchase Order will display in the Preview screen.
- From this screen you can make cosmetic changes to the document, as well asSave, Print, Add a Watermark, Export or Email the Collection Voucher.
- Click on Closeto return to the Purchase Orders for Service screen.
Functions Tiles
Notes
- From the Purchase Order for Service [service code] screen,
- Ensure that the correct Site has been selected.
- Click on the down arrow to select an alternative site from the drop-down list, if required.
- Click on the rowof the Purchase Order you need to create a Note for.
- Click on the Notes tile.

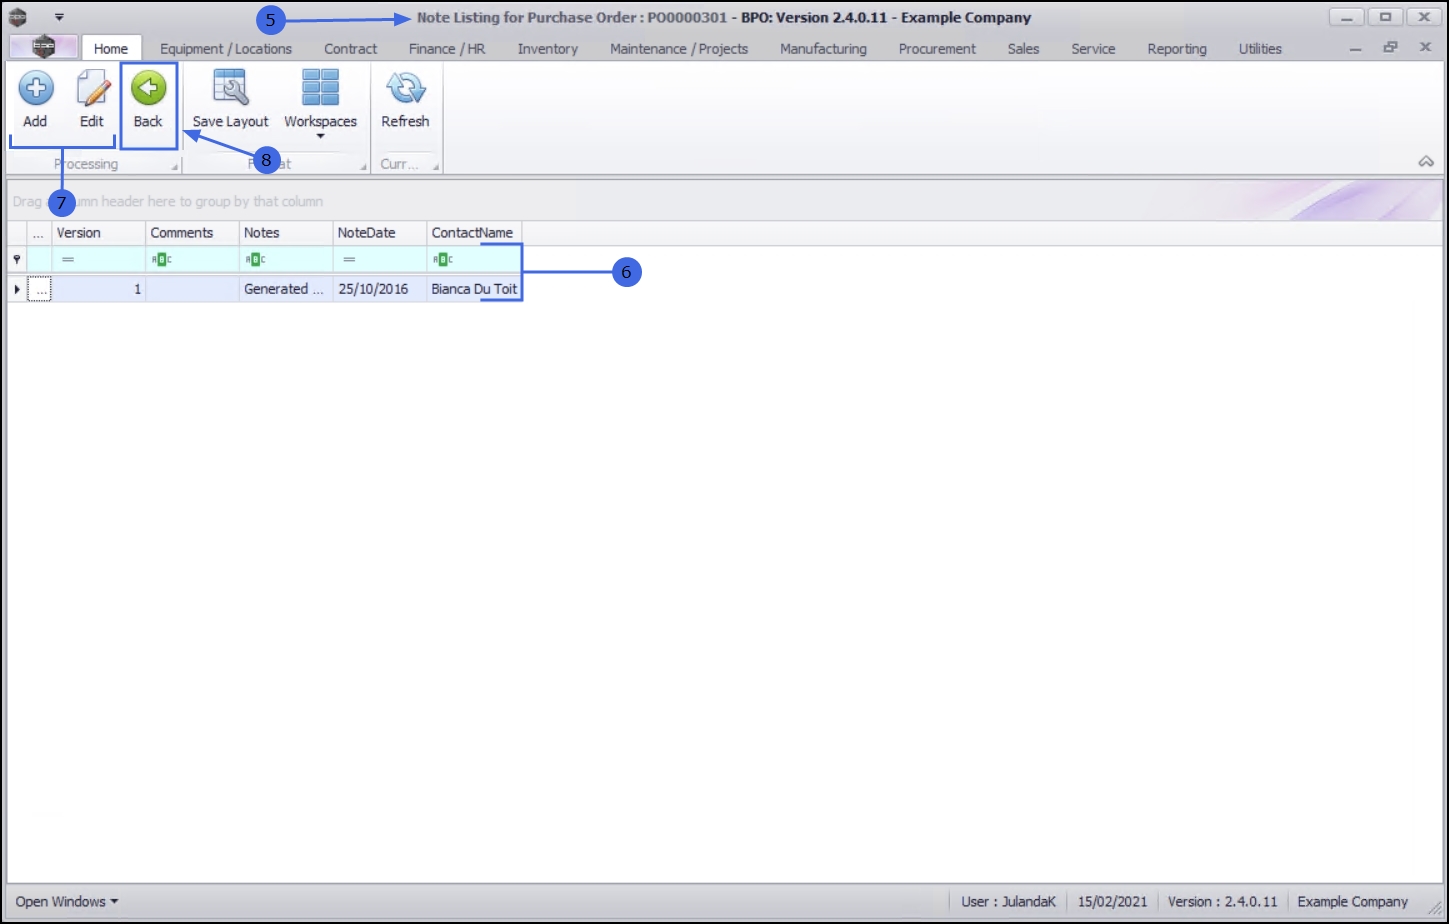
- The Note Listing for Purchase Order : PO[purchase order number] screen will display.
- Any notes linked to the Purchase Order will display on the listing screen.
- Click on Add to create a note or, click on Edit if you need to make changes to an existing note. For a detailed handling of the topic refer to Parts - Purchase Orders - Notes
- Click on Back to return to the Purchase Orders for Service screen.
Addresses
- From the Purchase Order for Service [service code] screen,
- Ensure that the correct Site has been selected.
- Click on the down arrow to select an alternative site from the drop-down list, if required.
- Click on the row of the Purchase Order you need to view the address for.
- Click on the Addresses tile.
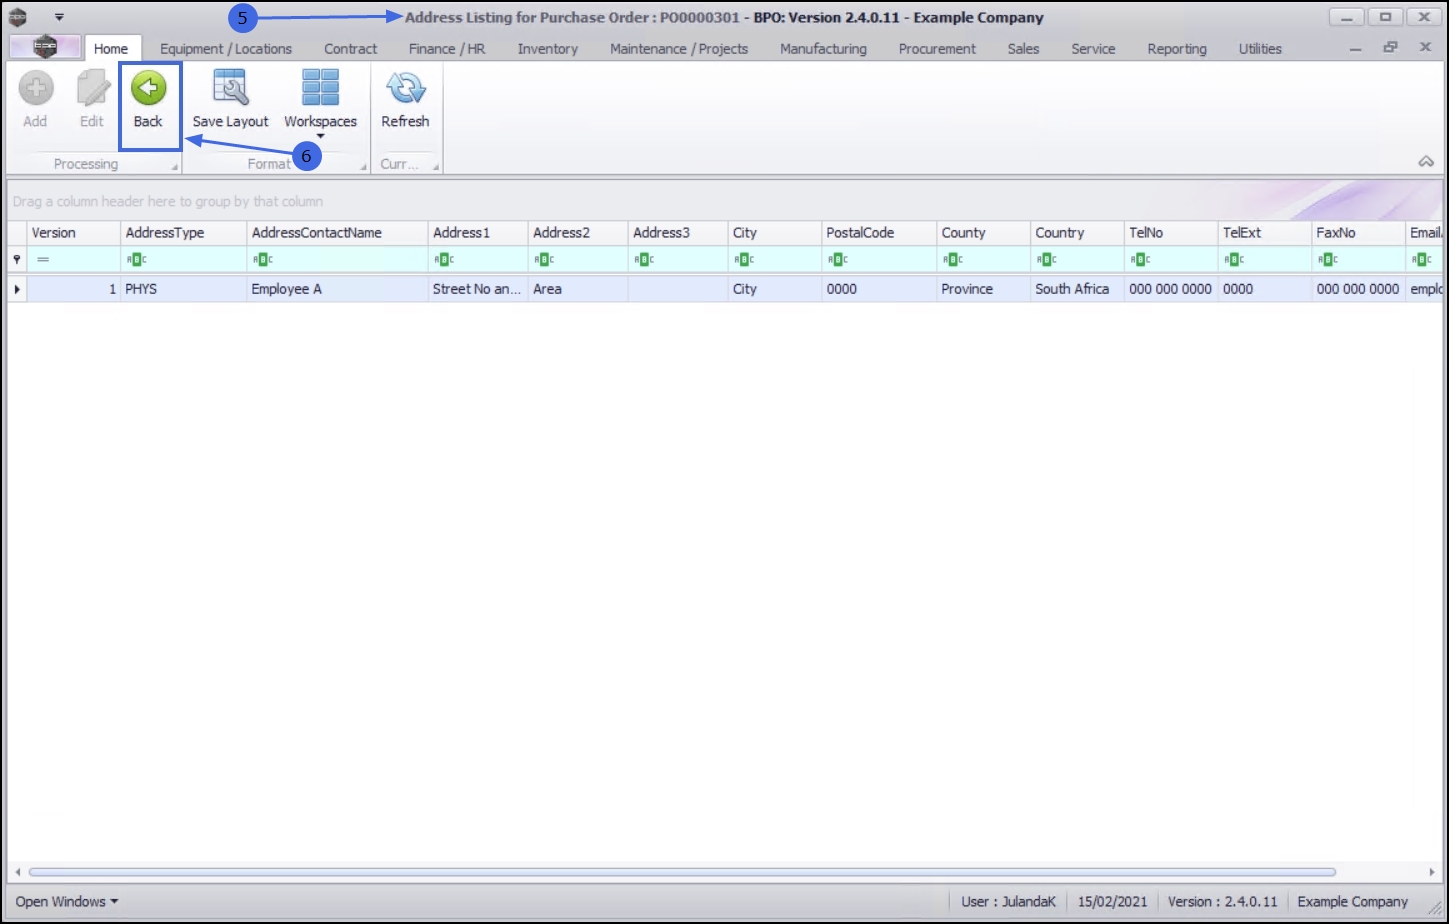
- The Address Listing for Purchase Order : PO[purchase order number] screen will display.
 Note that this is a view only screen and you will not be able to add or make changes to the information on this screen.
 - Click Back to return to the Purchase Orders for Service screen.
- For details on how to Add and Edit Addresses on a Purchase order, refer to Parts - Purchase Orders - Addresses
Delivery Instructions
- From the Purchase Order for Service [service code] screen,
- Ensure that the correct Site has been selected.
- Click on the down arrow to select an alternative site from the drop-down list, if required.
- Click on the row of the purchase order, you need to work with.
- Click on the Delivery Instructions tile.
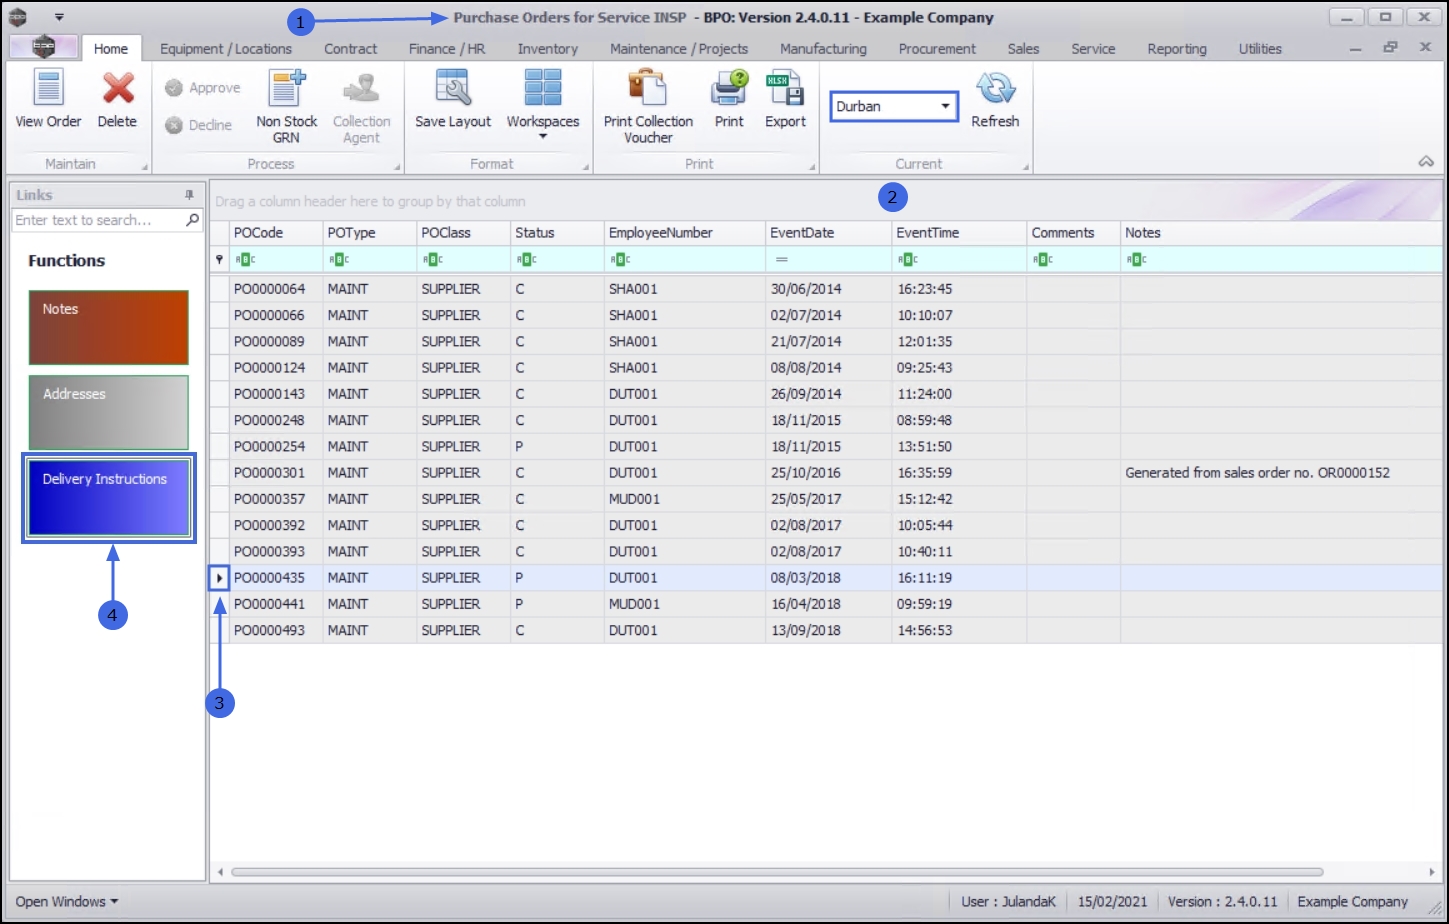
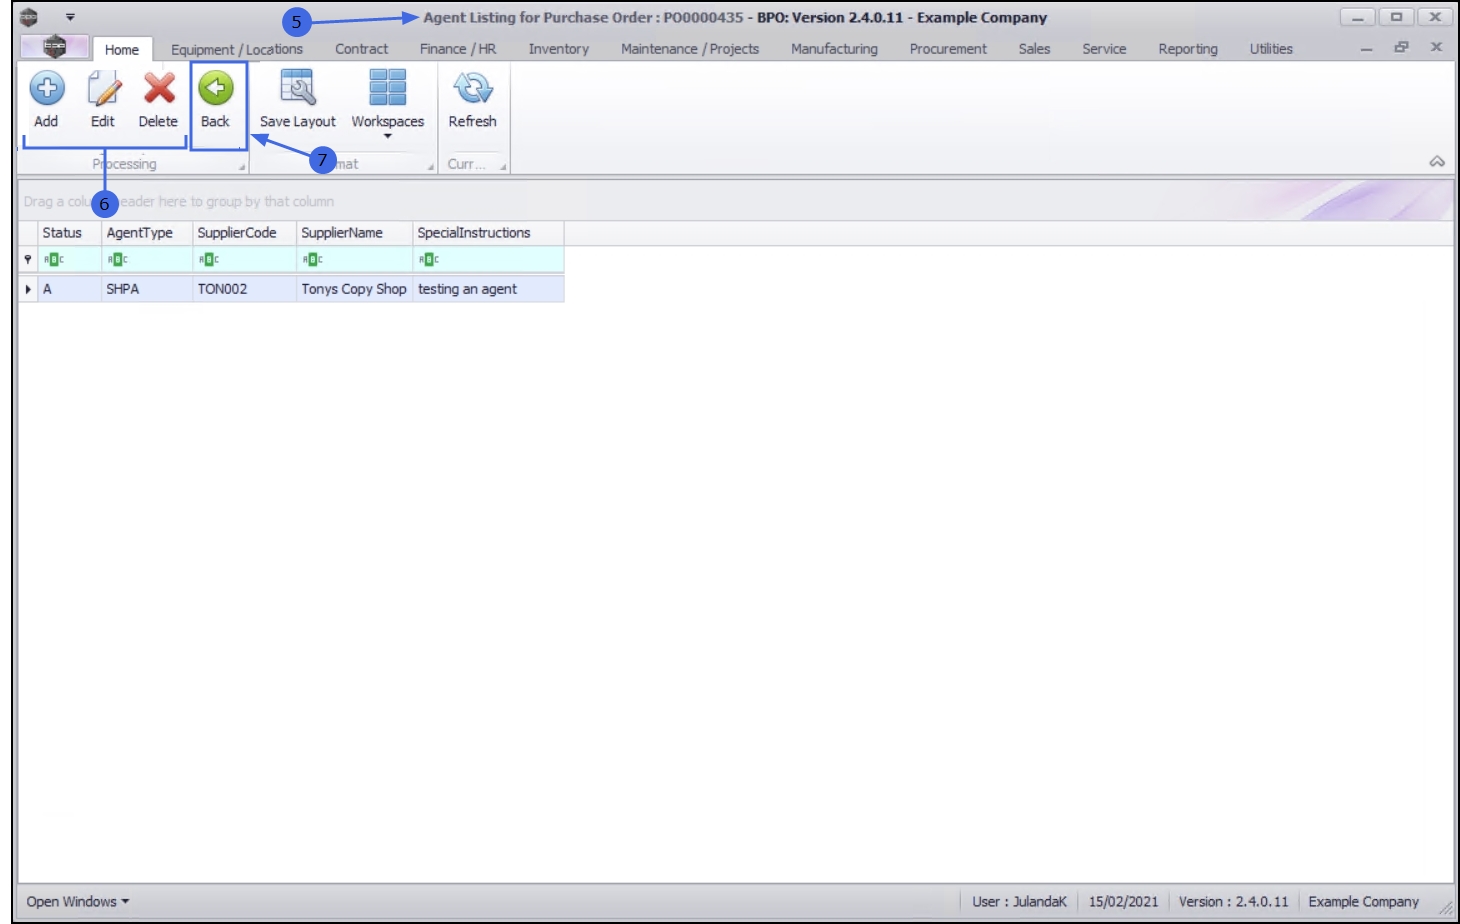
- The Agent Listing for Purchase Order : PO[purchase order number] screen will display.
- From this screen you can Add a supplier, Edit to change or Delete the supplier from the purchase order. Refer to Parts - Purchase Orders - Delivery Instructions
- Click Back to return to the Purchase Orders for Service screen.
MNU.065.008