We are currently updating our site; thank you for your patience.
Manufacturing
Production - Add Expenses
There may be additional expenses incurred during production. These will need to be added to the work order that is linked to the production run.
| Ribbon Access: Manufacturing > Production |
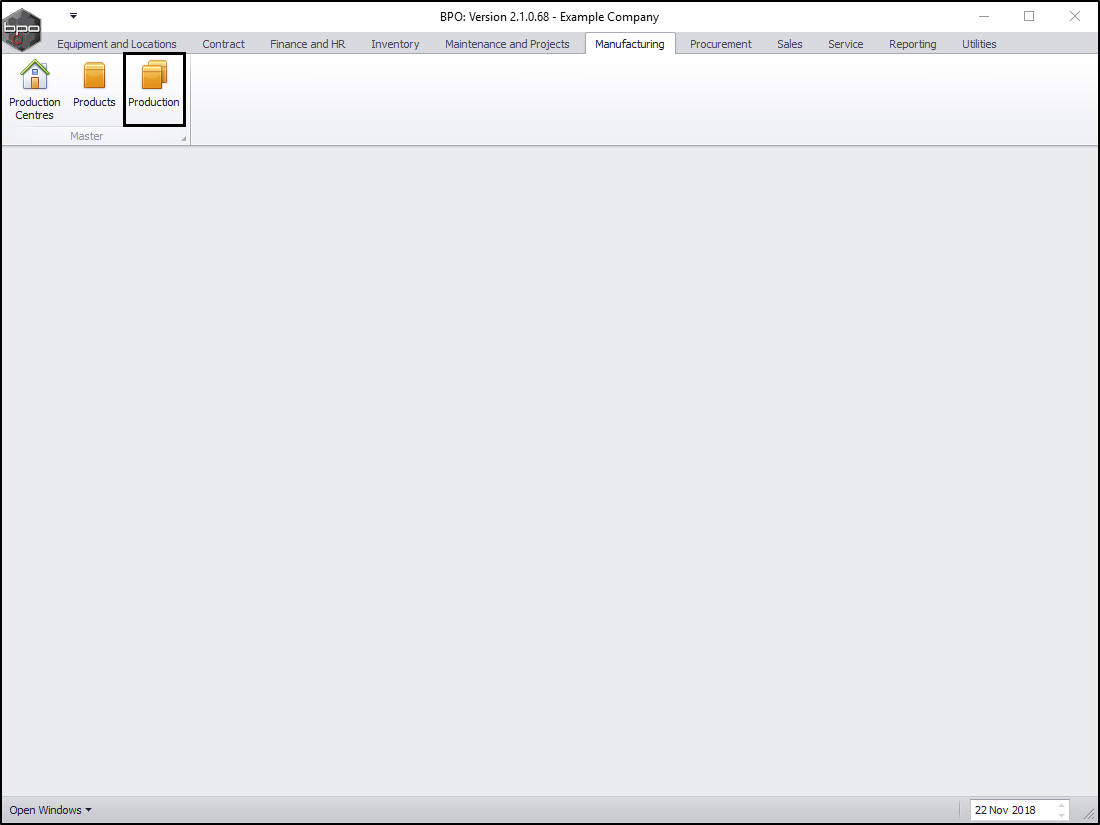
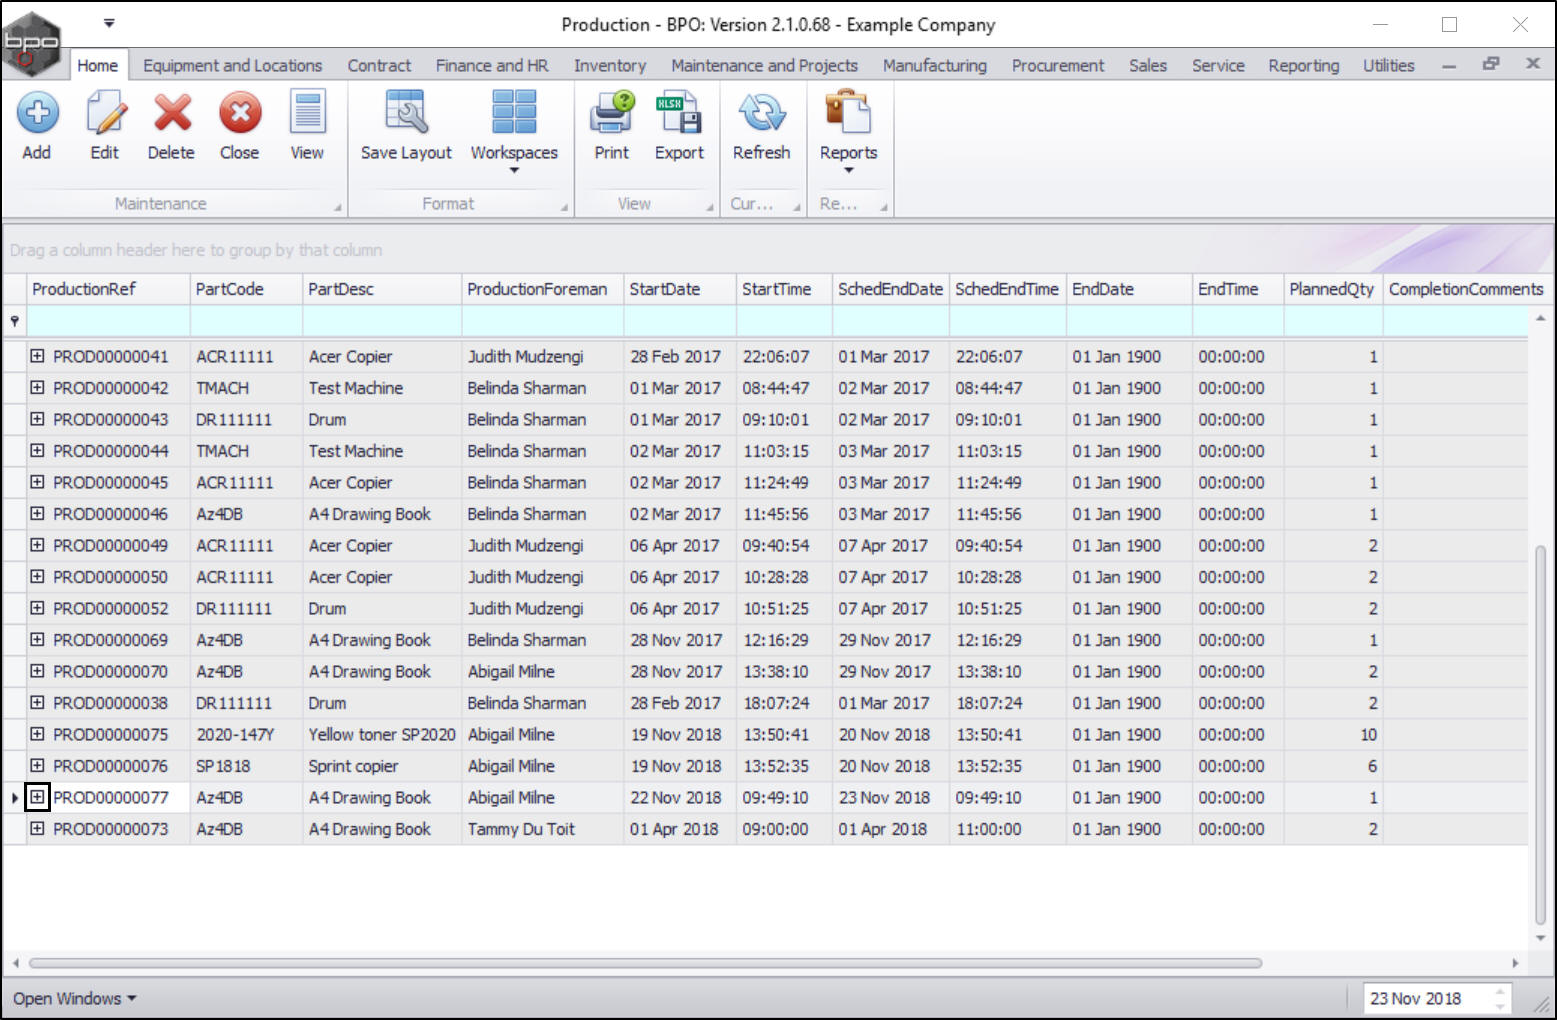
The Production listing screen will be displayed.
Add Expenses via the Production Listing screen
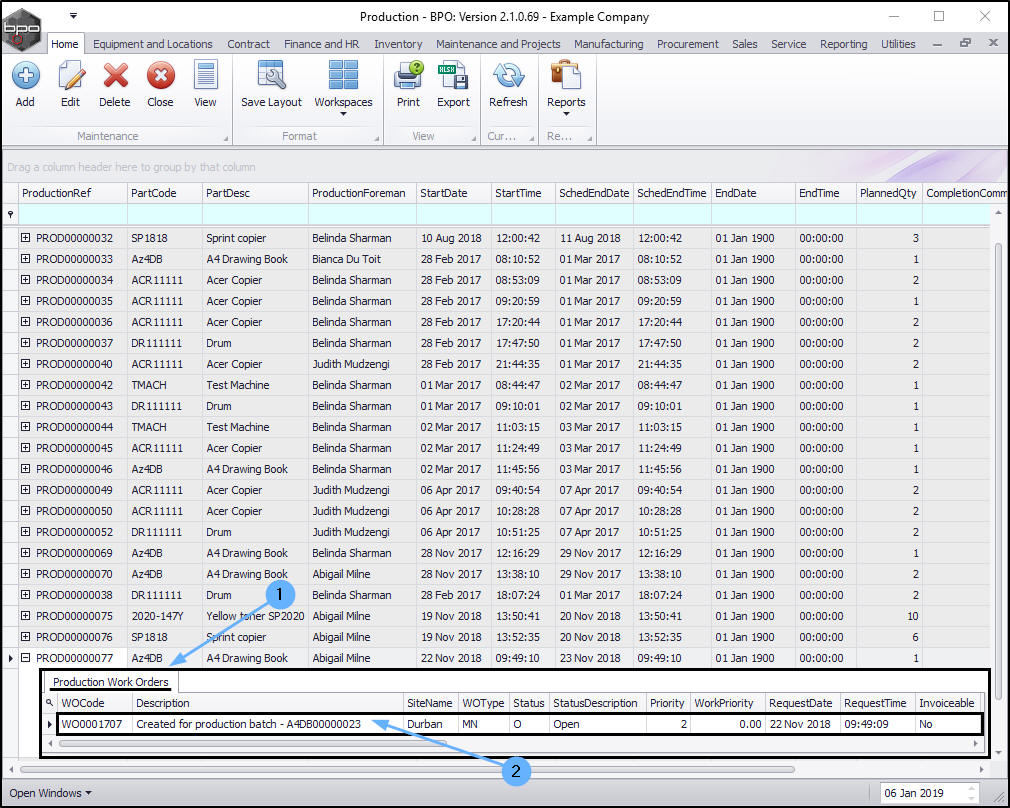
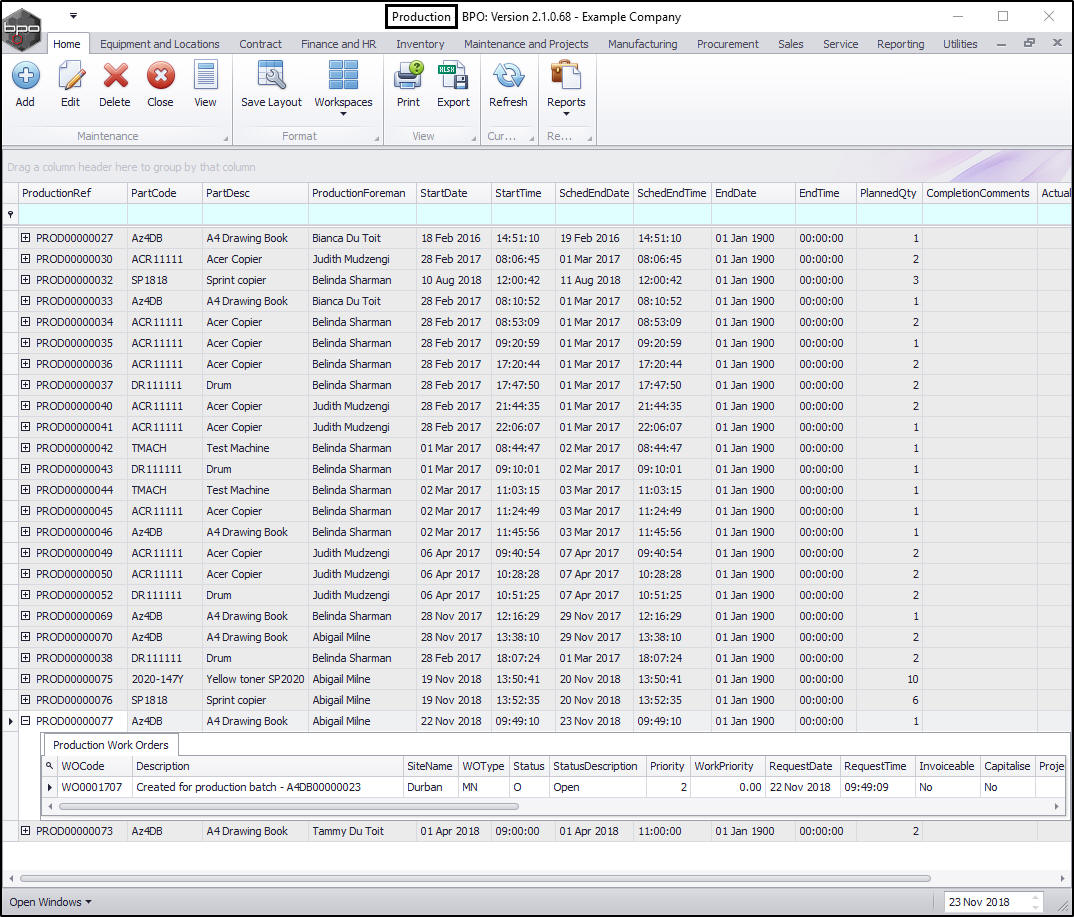
Select Production Run
- Click on the expand button in the row of the production runwhere you wish to log expenses.
The Production Work Orders frame will be expanded.
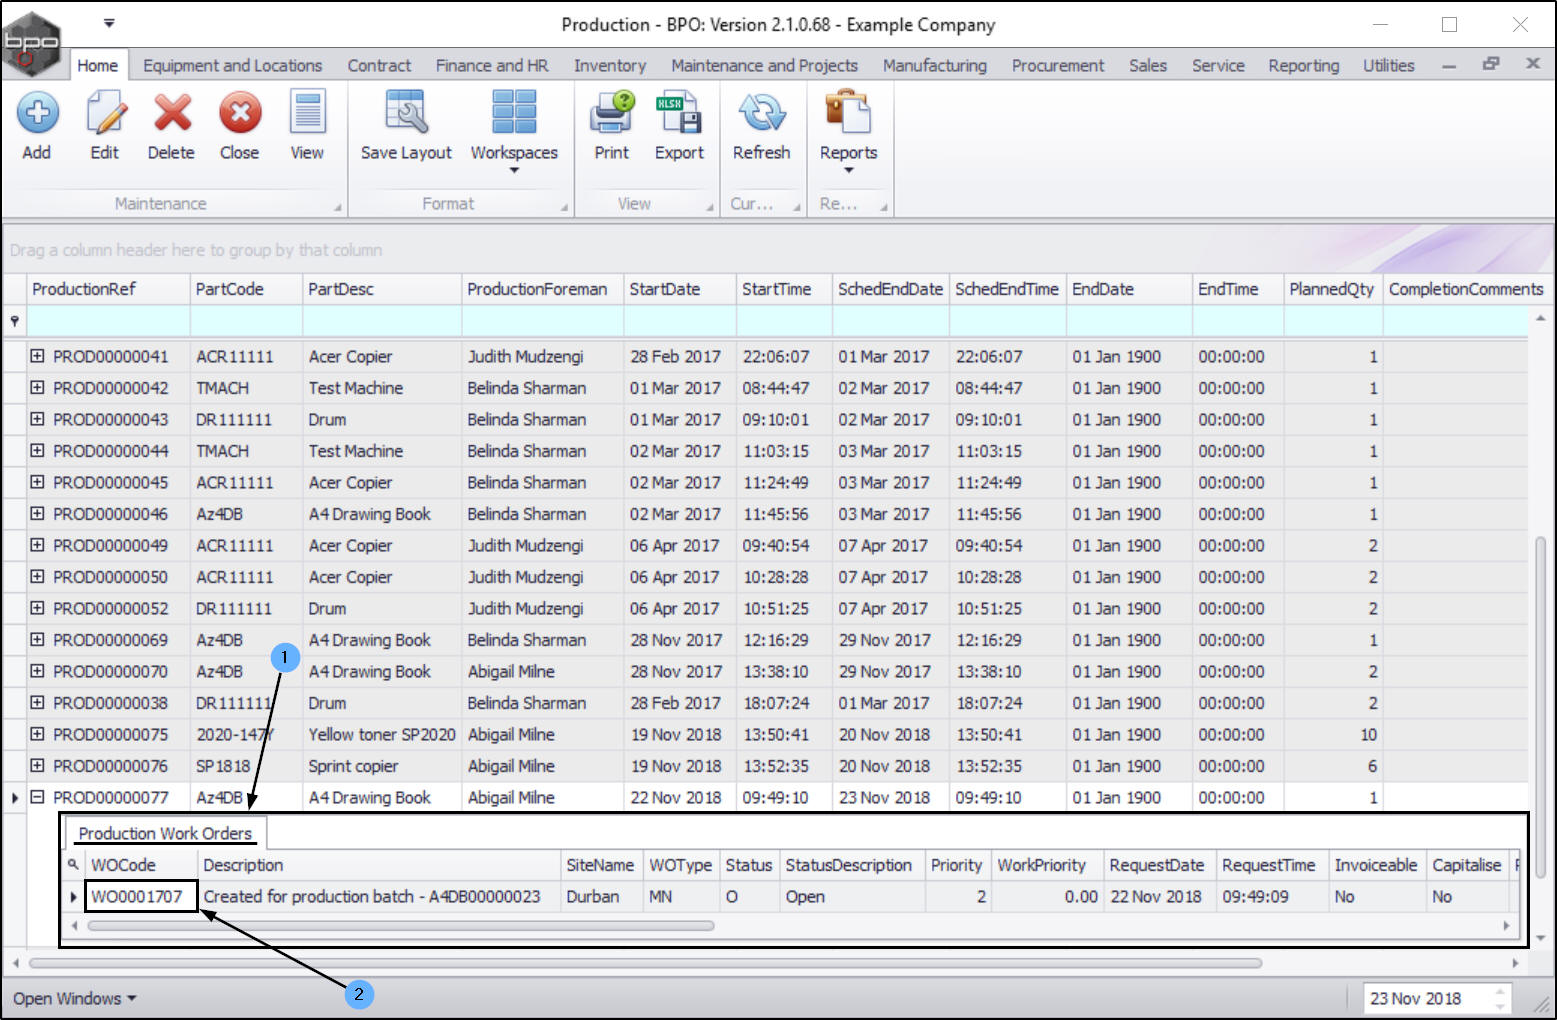
Select Work Order
- Double click anywhere in the row of the work order.
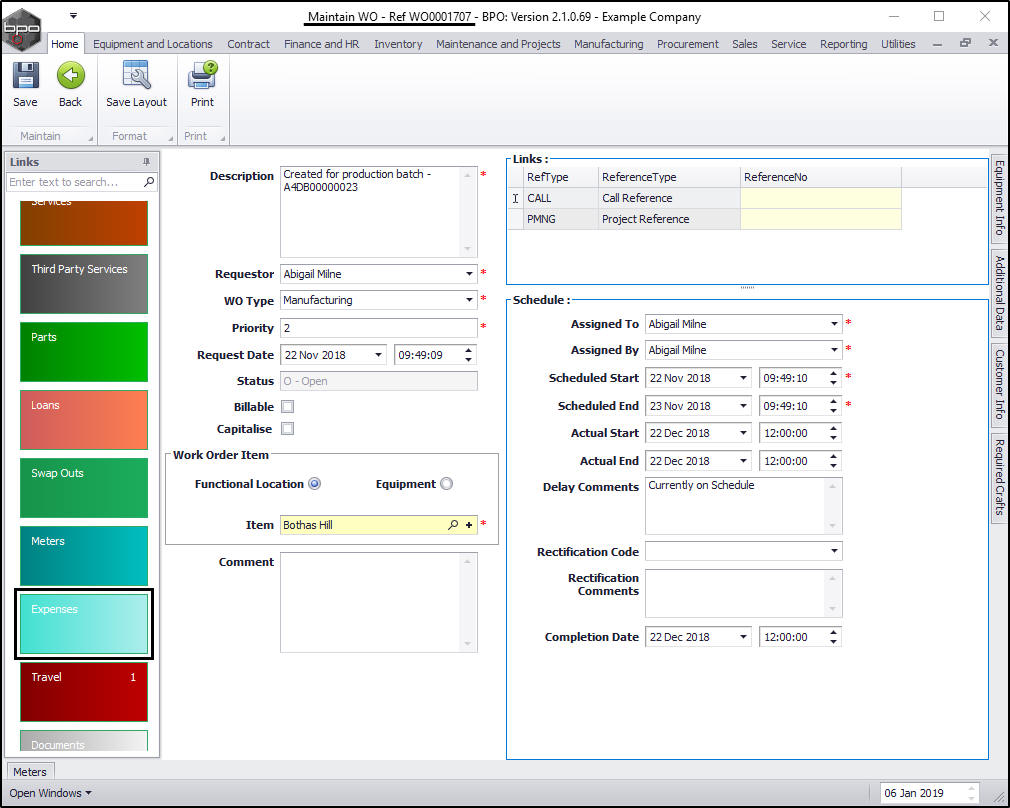
The Maintain WO - Ref [ ] screen will be displayed.
Select the Expenses Tile
- Click on the Expenses tile.
The Expense Claims for WO Code [ ] screen will be displayed.
Add Expense Claim
- Click on Add.

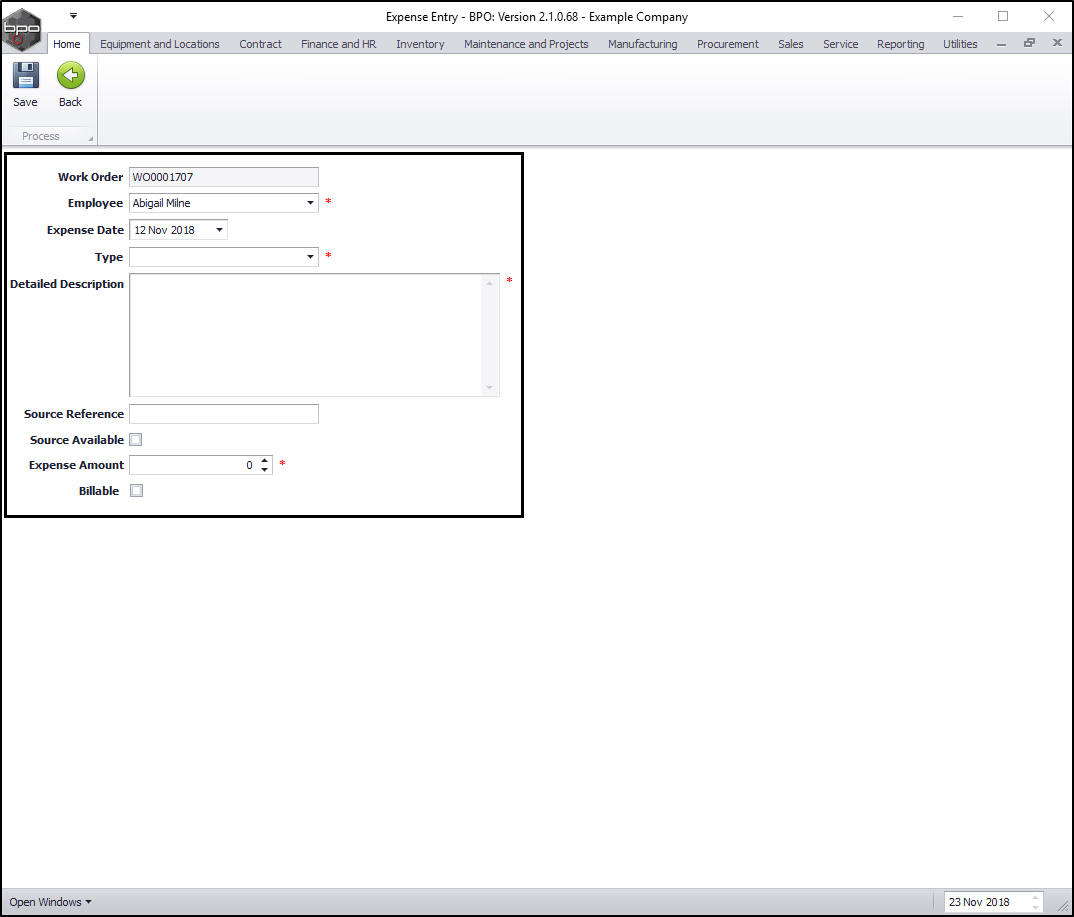
The Expense Entry screen will be displayed.
Add Expense Details
- Work Order: This will auto populate according to the work order initially selected.
- Employee: This will auto populate with the name of the person currently logged on to the system but you can click on the drop-down arrow and select an alternative employee from the menu if required.
- Expense Date: This will default to the current date. Either type in or click on the drop-down arrow and use the calendar function to select an alternative date if required.
- Type: Click on the drop-down arrow and select from the menu the type of expense.
- Detailed Description: Type in a description for the expenses.
- Source Reference: Type in the reference number of the receipt.
- Source Available: Select this checkbox if the receipt is available.
- Expense Amount: Type in or use the arrow indicators to select the total amount of the expense.
- Billable: Select this check box if the service is billable.
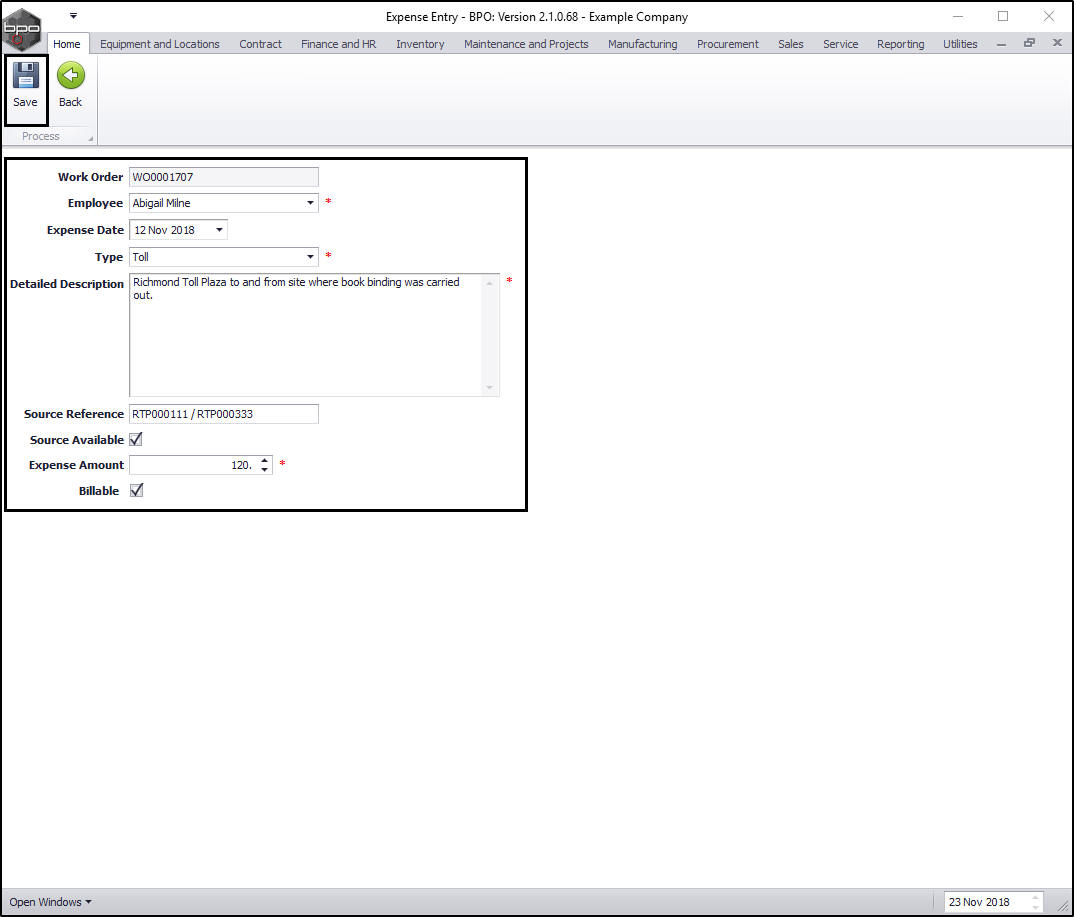
Save Expense Claim
- When you have finished adding details to this screen, click on Save.
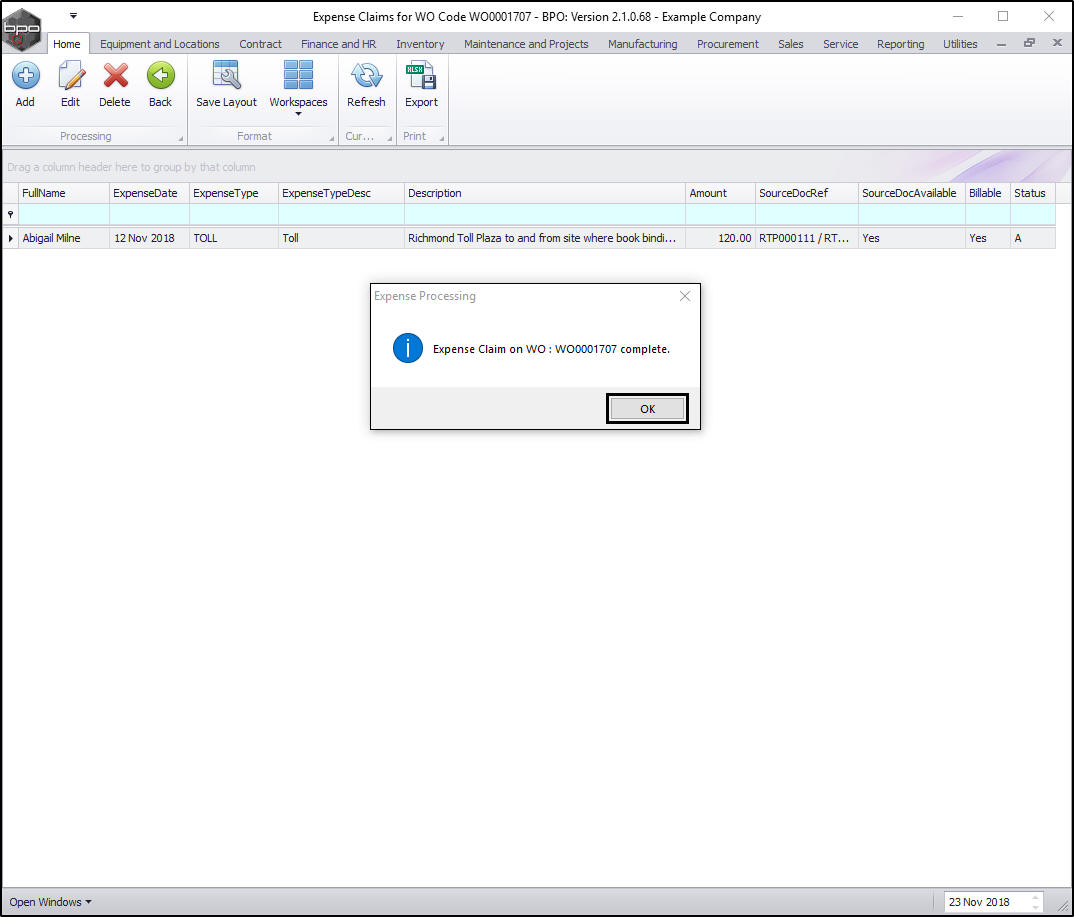
You will return to the Expense Claims for WO Code [ ] screen.
- An Expense Processing message box will pop up informing you that;
- Expense Claim on WO: [ ] complete.
- Click on OK.
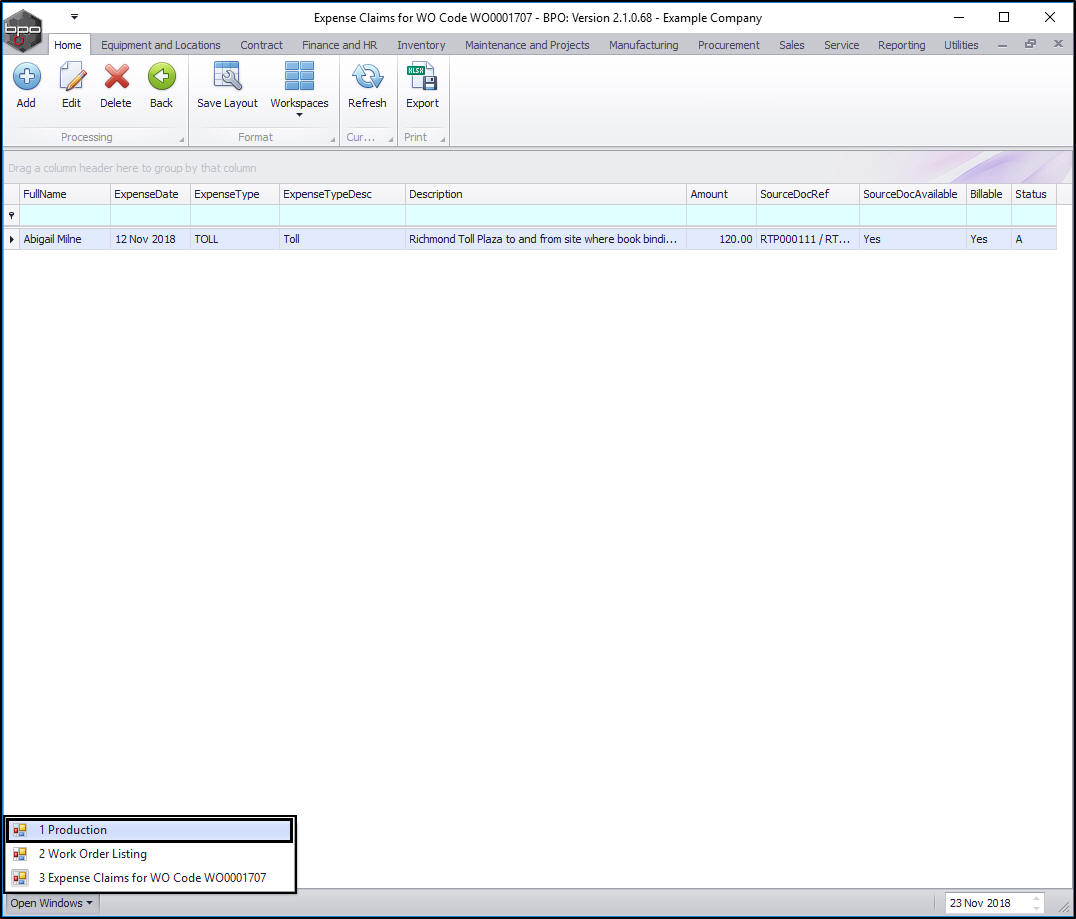
View Added Expense Claim
- You can now view the added expense claim.
Return to the Production Screen
- Click on Back or Close the screen when you are done. (You can keep closing screens until you return to the Production Listing screen).
- Alternatively, click on the drop-down arrow next to Open Windows.
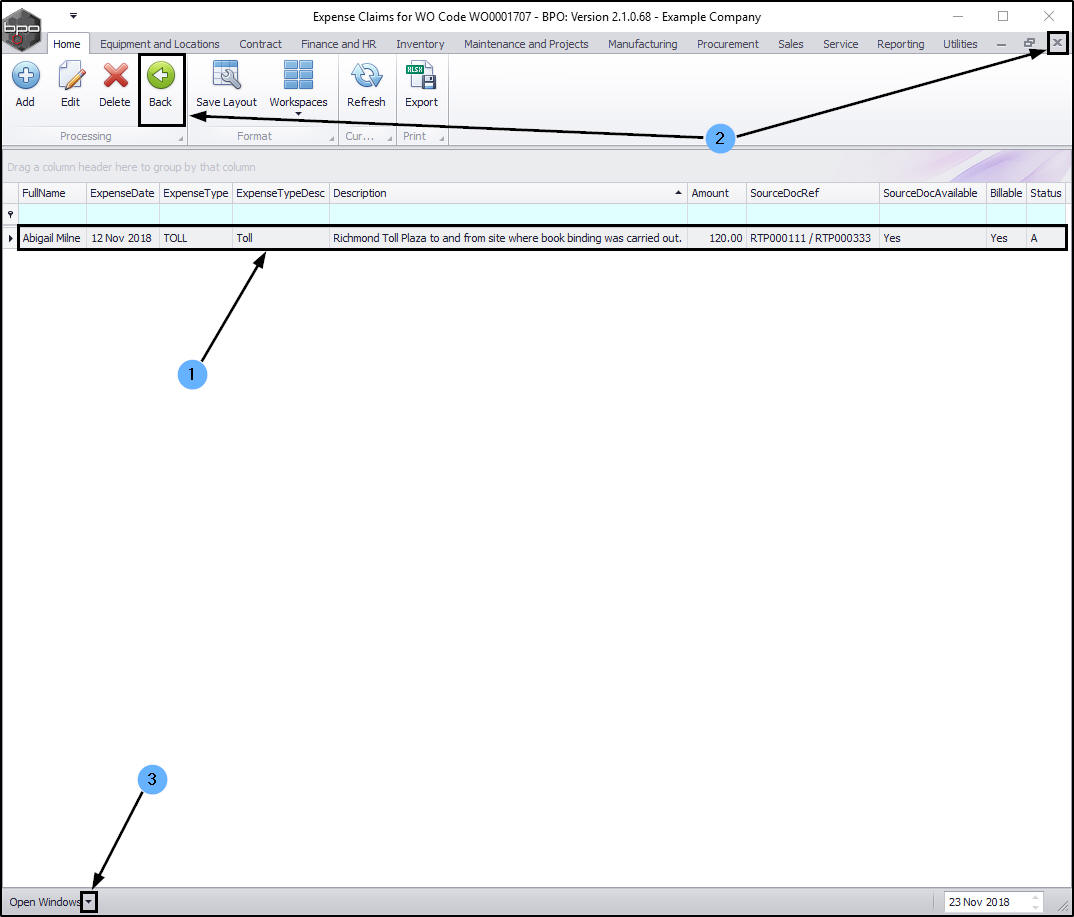
- A list of open windows will be displayed.
- Select the window that you wish to return to.
- In this example we have selected to return to the Production screen.
- You will return to the Production screen where this process was begun.
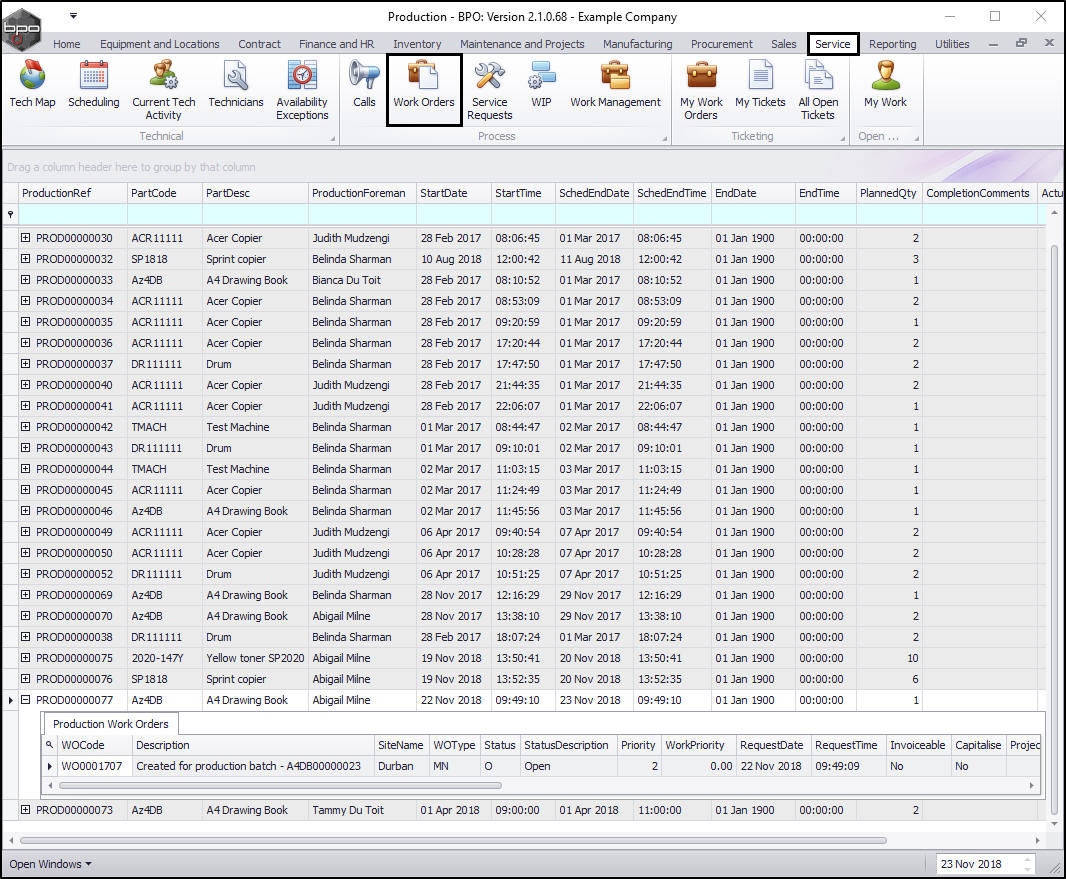
Add Expenses via the Work Orders Listing Screen
Select Production Run
- Click on the expand button in the row of the production run where you wish to log expenses.
The Production Work Orders frame will be expanded.
Note the Work Order No.
- Make a note of the Work Order No. linked to the production run.
Navigate to the Work Order Listing Screen
- Now navigate via the Service tab, to the Work Order listing screen.
| Ribbon Access: Service > Work Orders |
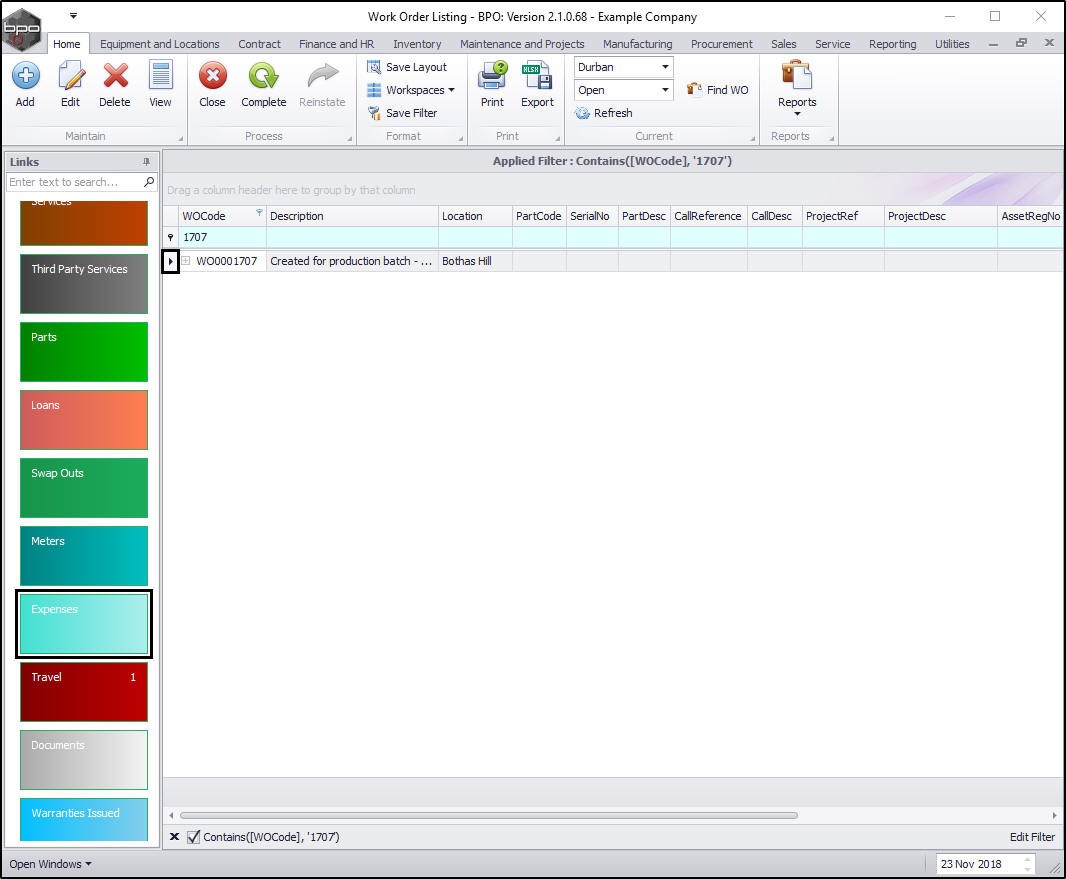
In the Work Order Listing screen,
Select the Site and Status
- Ensure that the correct site and status are selected.
Select the Work Order
- Use the Find WO button or the Filter Row to search for the work order.

Select the Expenses Tile
- Once the work order has been found and selected, click on the Expenses tile.
The Expense Claims for WO Code [ ] screen will be displayed.
Add Expense Claim
- Click on Add.

The Expense Entry screen will be displayed.
Add Expense Details
- Work Order: This will auto populate according to the work order initially selected.
- Employee: This will auto populate with the name of the person currently logged on to the system but you can click on the drop-down arrow and select an alternative employee from the menu if required.
- Expense Date: This will default to the current date. Either type in or click on the drop-down arrow and use the calendar function to select an alternative date if required.
- Type: Click on the drop-down arrow and select from the menu the type of expense.
- Detailed Description: Type in a description for the expenses.
- Source Reference: Type in the reference number of the receipt if available.
- Source Available: Select this checkbox if the receipt is available.
- Expense Amount: Type in or use the arrow indicators to select the total amount of the expense.
- Billable: Select this check box if the service is billable.
Save Expense Details
- When you have finished adding details to this screen, click on Save.
You will return to the Expense Claims for WO Code [ ] screen.
- An Expense Processing message box will pop up informing you that;
- Expense Claim on WO: [ ] complete.
- Click on OK.
View Added Expense Claim
- You can now view the expense claim.
Return to the Production Listing Screen
- Click on Back or Close the screen when you are done. (You can keep closing screens until you return to the Production screen).
- Alternatively, click on the drop-down arrow next to Open Windows.
- A list of open windows will be displayed.
- Select the window that you wish to return to.
- In this example we have selected to return to the Production screen.
- You will return to the Production screen where this process was begun.
MNU.051.011