We are currently updating our site; thank you for your patience.
Procurement
Add / Edit / Delete Invoice
Supplier Invoices are created once Goods and/or Services are received, and can be created automatically off the back of a goods received note if received at the same time, or added later (e.g. month end) when received from the Supplier.
Supplier Invoices must be accepted to be processed in full.
Deleting a supplier invoice will re-open the GRN.
| Ribbon Access: Procurement > Invoices |
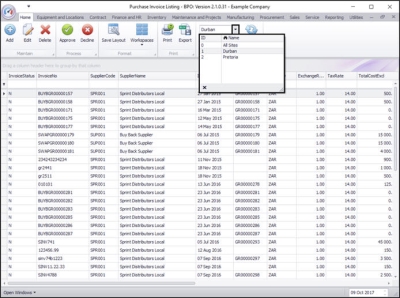
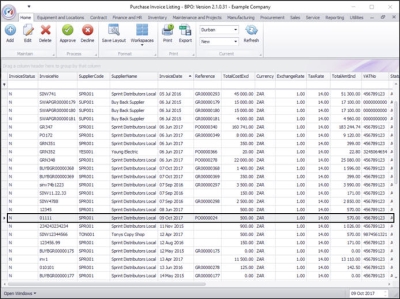
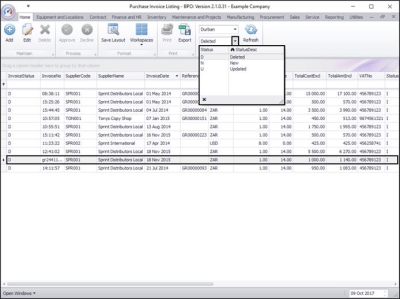
Select the Status
- This screen will open by default in the New status.
- You can click on the drop-down arrow in this field and
- select an alternative status from the drop-down menu, if required.
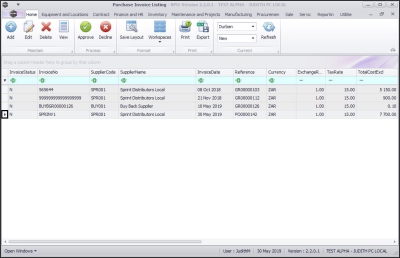
- The Purchase Invoices listed in the data grid, will be according to the site and status selection.
View Purchase Invoice Details
- Select the row of the Purchase Invoice that you wish to view.
- Click on View.
The Edit Supplier Invoice - [ ] screen will be displayed.
- As you have navigated here via the View button - you can only view all the supplier details and item details of this Purchase Invoice.
- You will note there is no Save button, only a Back button. This is because the supplier invoice details are uneditable - this is a 'View' only screen. Click on this Back button to return to the Purchase Invoice Listing screen.
Add a Purchase Invoice
- In the Purchase Invoice Listing screen, click on Add.
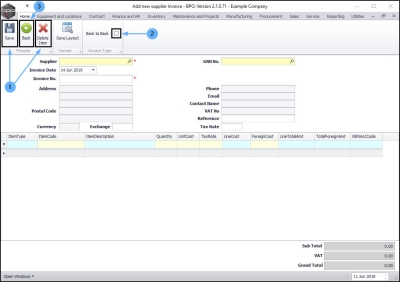
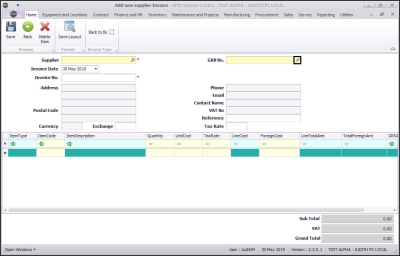
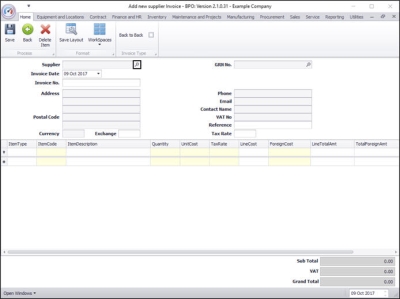
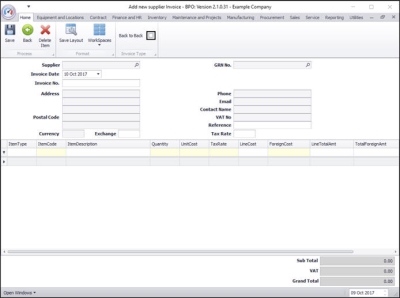
The Add new supplier Invoice screen will be displayed.
- From here you can follow the process to Add, Edit and Save a supplier invoice.
- You can also Delete an Item from the supplier invoice, if required.
- From here, you can also create a Back to Back supplier invoice.
- Click on Back to return to the Purchase Invoice Listing screen.
View and Edit Purchase Invoice Details
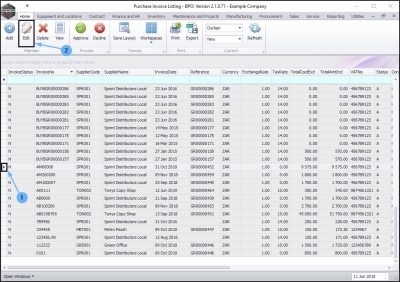
In the Purchase Invoice Listing screen,
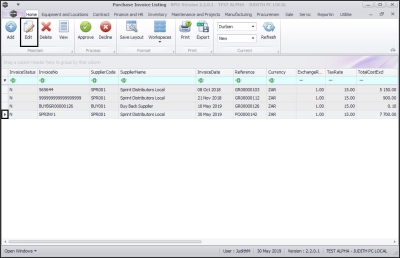
- Click on the row selector in front of the Purchase Invoice that you wish to view or edit the details of
- Click on Edit.
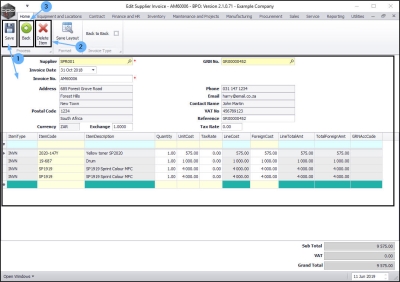
The Edit Supplier Invoice - [ ] screen will be displayed.
- As you have navigated here via the Edit button, you can now follow the process to Edit the details and then Save the edited Supplier Invoice.
- You can Delete an Item from the Supplier Invoice.
- If you do not wish to make or save any changes, you can click on Back to return to the Purchase Invoice Listing screen.
View and Edit Supplier Invoice Items
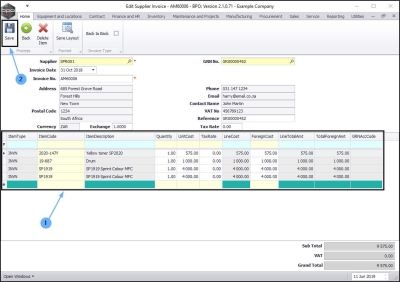
- You can View items invoiced by going through the Items data grid and follow the process to edit or delete an item from the supplier invoice, as required.
Save the Edited Supplier Invoice
- Save the edited details when you are done.
Delete a Supplier Invoice
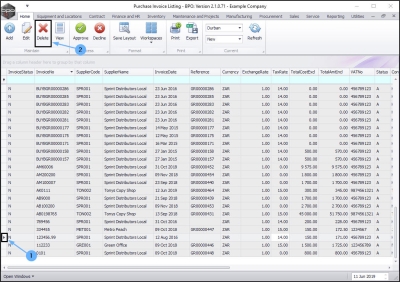
In the Purchase Invoice Listing screen,
- Select the row of the supplier invoice that you wish to delete.
- Follow the process to Delete the supplier invoice.
Add Supplier Invoice
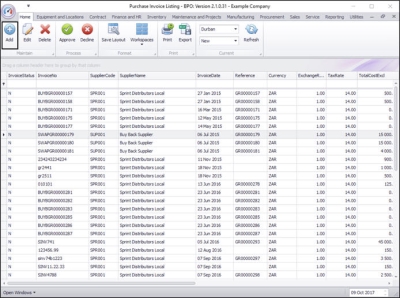
The Purchase Invoice Listing screen will be displayed.
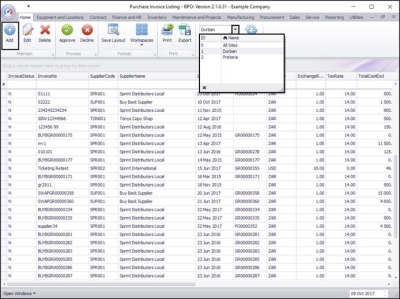
- Select the Site.
- In this image, Durban has been selected.
- Click on Add.
Selecting GRN No. First
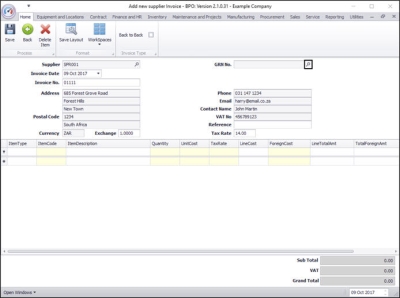
The Add new supplier Invoice screen will be displayed.
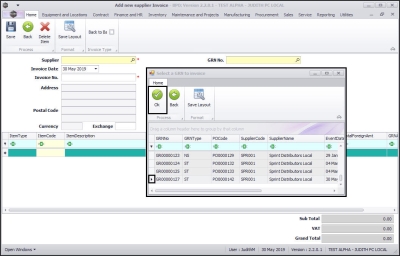
- Click on the search button in the GRN No. field.
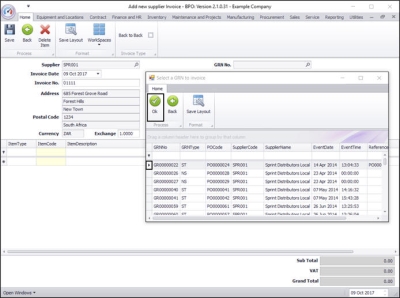
The Select a GRN to invoice screen will be displayed.
- Click on the row selector in front of the GRN that you wish to invoice.
- Click on Ok.
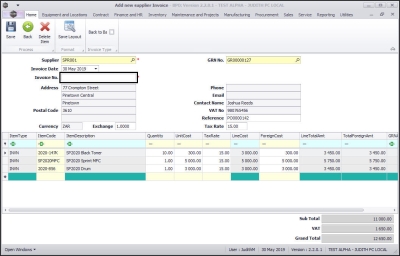
- All the fields will auto populate except the Invoice No. field.
- Type in the relevant invoice number in the Invoice No. field
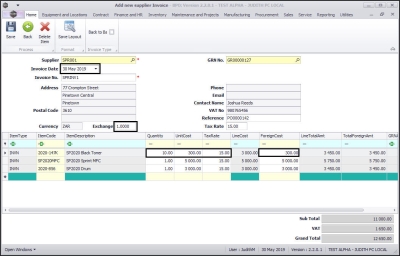
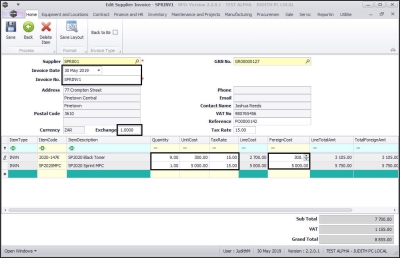
- You can edit the following fields if required:
- Invoice Date
- Exchange
- Quantity
- Unit Cost
- Tax Rate
- Foreign Cost
Partial Invoice
You may have received a partial shipment from a supplier in which case you may wish to edit the quantity of the
Edit the Quantity
You can create an invoice for less than the quantity that was initially received.
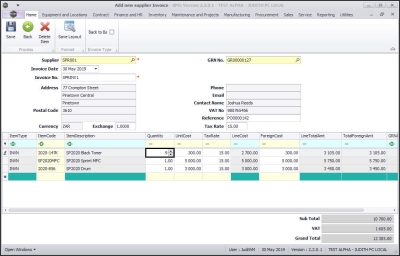
- In the Quantity text box, type in or use the arrows to input the desired quantity.
- In this image, the quantity for 2020-147K has been changed from 10 to 9.
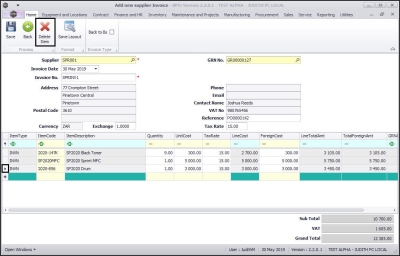
Delete an Item
- You can delete an item from the supplier invoice.
- Click on the row selector in front of the item that you wish to delete from the invoice.
- Click on Delete Item.
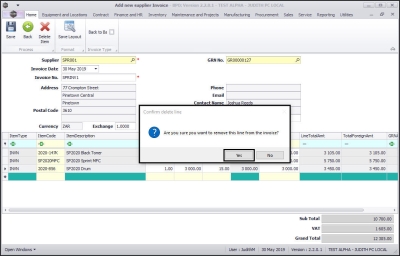
- A Confirm delete line message will pop up asking you;
- Are you sure you want to remove this line from the invoice?
- Click on Yes.
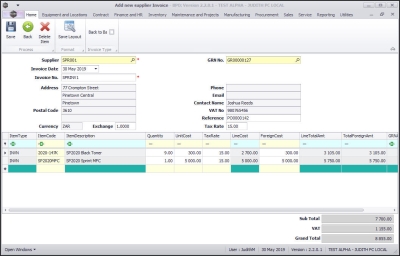
- The item will be removed from the invoice.
- Repeat the same process for other items, if required.
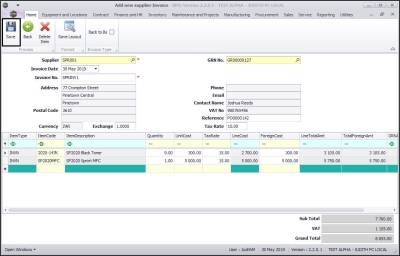
Save the Invoice (GRN not fully invoiced)
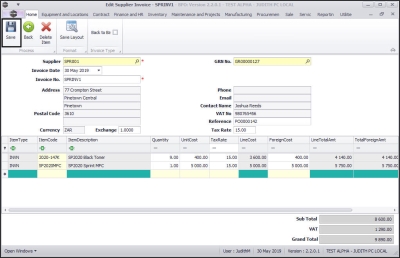
- Click on Save.
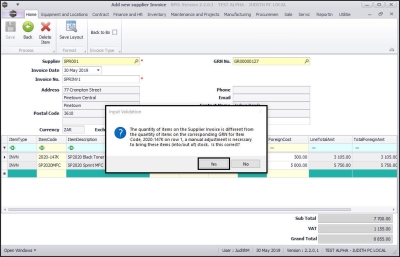
- If you changed the quantity on any of the items, an Input Validation message will pop up asking you;
- The quantity of items on the Supplier Invoice is different from the quantity of items on the corresponding GRN for item Code [ ] on row [ ], a manual adjustment is necessary to bring these items (into /out) of stock. Is this correct?
- Click on Yes.
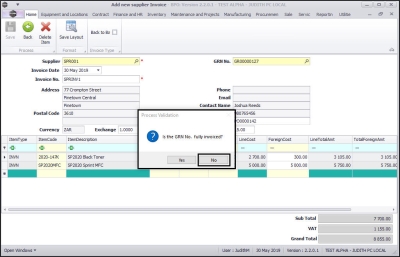
- A Process Validation message will pop up asking you;
- Is this GRN No. fully invoiced?
- Click on No.
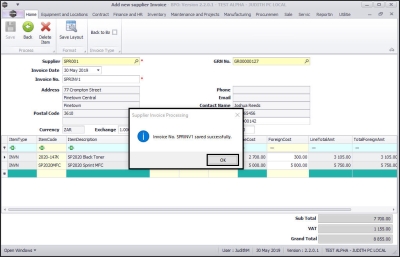
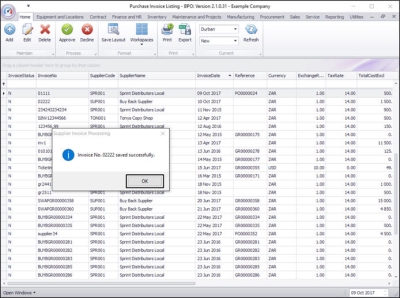
- A Supplier Invoice Processing message will pop up telling you;
- Invoice No. saved successfully.
- Click on OK.
Print the Invoice (GRN not fully invoiced)
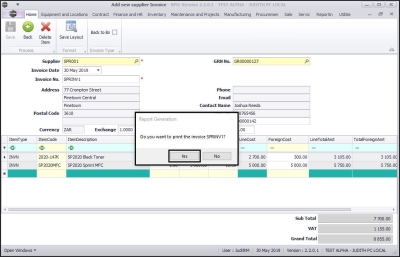
- A Report Generation message will pop up asking you;
- Do you want to print the invoice [ ]?
- Click on Yes if you want to print the invoice.
- For the purpose of this manual, Yes was selected.
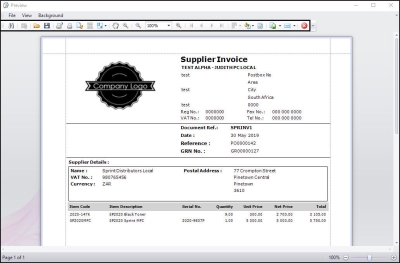
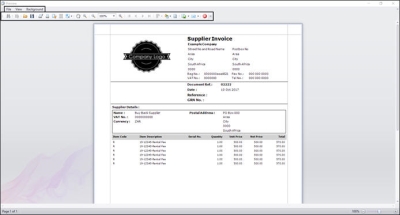
- The Report Preview screen will be displayed.
- From here you can View, Print, Export or Email.
- Close the Report Preview screen when done.
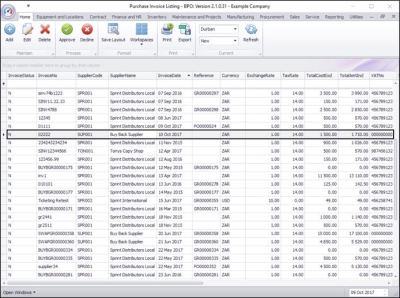
- The new invoice will be displayed in the Purchase Invoice Listing screen in Status - New
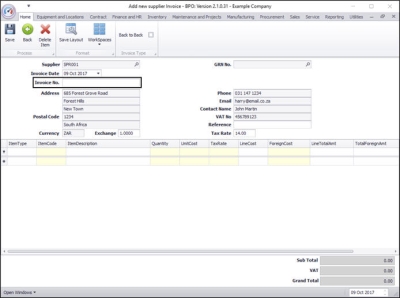
Select a Supplier First
- The Add new supplier Invoice screen will be displayed.
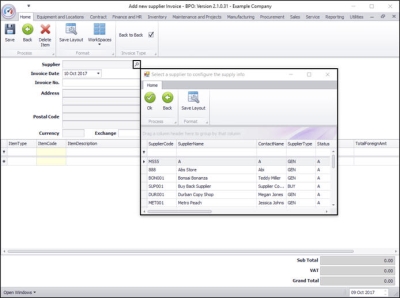
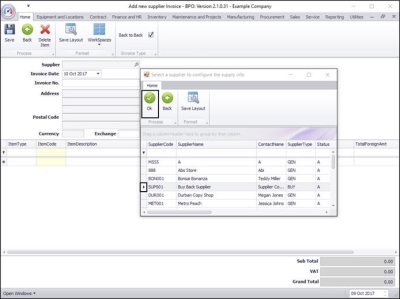
- Click on the search button in the Supplier field.
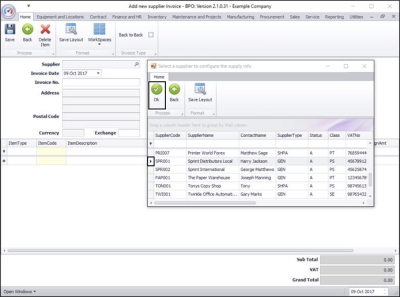
- The Select a supplier to configure the supply info screen will be displayed.
- Click on the row selector in front of the Supplier that you wish link this invoice to.
- Click on Ok.
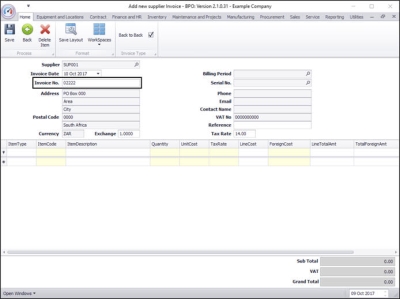
- The selected supplier details will auto populate the relevant fields.
- Type an invoice number in the Invoice No. field.
- Click on the search button in the GRN No. field.
- The Select a GRN to invoice screen will be displayed and will list all the GRN's linked to the selected supplier.
- Click on the row selector in front of the GRN that you wish to raise an invoice for.
- Click on Ok.
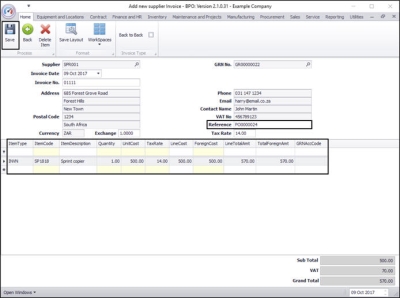
- The Items data grid will now display the items received.
- The Reference field will now display a PO reference number.
- Verify the details and click on Save.
Save Invoice (GRN fully invoiced)
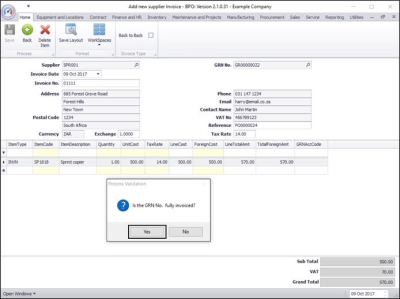
- A Process Validation message box will pop up asking;
- Is the GRN No. fully invoiced?
- Click on Yes.
Print Supplier Invoice (GRN fully invoiced)
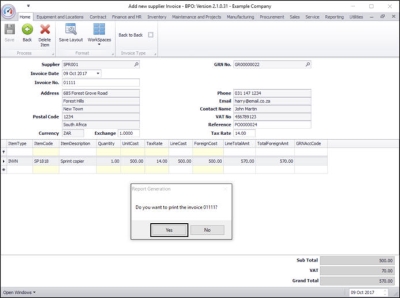
- A Report Generation message box will pop up asking;
- Do you want to print the invoice [ ]?
- Click on Yes.
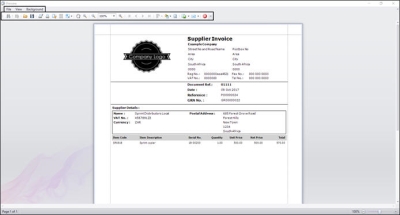
- The Report Preview screen will be displayed.
- From here you can View, Print, Export or Email.
- Close the Report Preview screen when done.
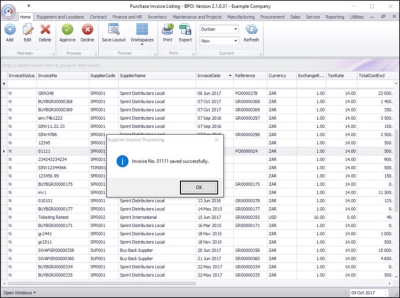
- A Supplier Invoice Processing screen will pop up informing you that;
- Invoice No. [ ] saved successfully.
- Click on OK.
- You can now view the newly created supplier invoice in the Purchase Invoice Listing screen.
- You can now follow the process to accept the Supplier Invoice .
Add Back to Back Supplier Invoice
In the Purchase Invoice Listing screen,
- Select the Site
- In this image Durban has been selected.
- Click on Add.
- The Add new supplier invoice screen will be displayed.
- Click on the Back to Back Invoice Type check box.
- Click on the search button in the Supplier field.
- The Select a supplier to configure the supply info screen will be displayed.
- Note: The Supplier here is the finance house who has invoiced your company for the bank rental that your company has invoiced the client.
- Click on the row selector in front of the Supplier you wish to create Back to Back invoices for .
- Click on Ok.
- Type in an Invoice Number for this Back to Back supplier invoice.
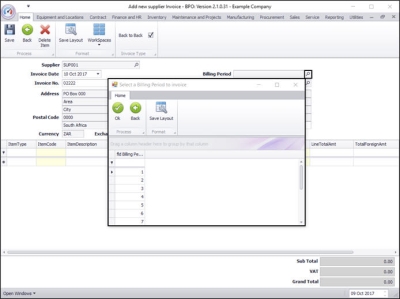
- Click on the search button in the Billing Period field.
- The Select a Billing Period to invoice screen will be displayed.
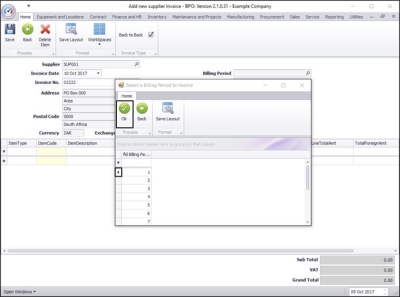
- Click on the row selector in front of the Billing Period you wish to invoice.
- Click on Ok.
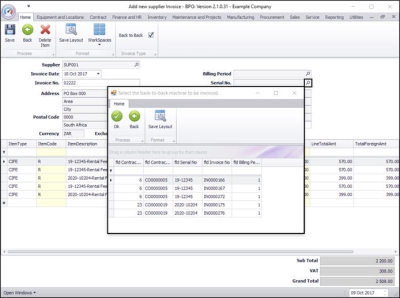
- Serial No : If the finance house has invoiced you per machine;
- Click on the search button in the Serial No. field.
- The Select a Billing Period to invoice screen will be displayed.
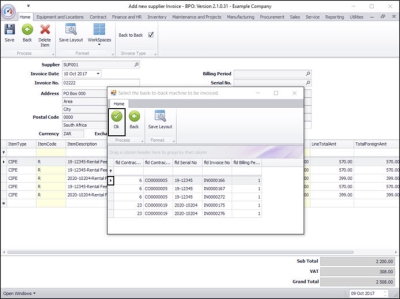
- You can search for and select the serial number. Otherwise all serial numbers invoiced via contract billing for this finance party will display.
- You can remove items from the list to ensure the invoice matches, and raise another Back to Back invoice for the remaining items.
- The rule is to ensure that this matches the Supplier's (finance party's) invoice to your company.
- Click on the row selector in front of the machine you wish to raise an invoice for.
- Click on Ok.
Save Back to Back Invoice
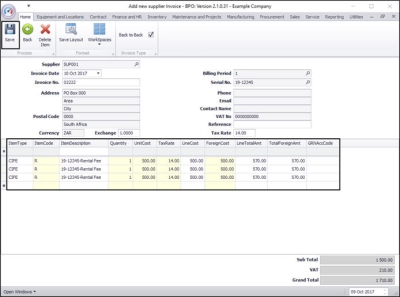
- The selected items will now be displayed in the Items data grid.
- Click on Save.
Print Back to Back Invoice
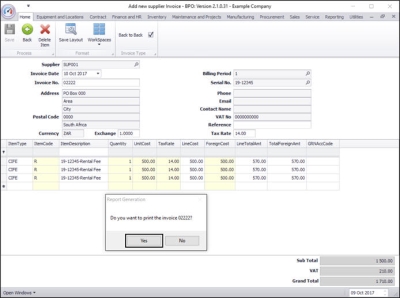
- A Report Generation message box will pop up asking;
- Do you want to print the invoice [ ]?
- Click on Yes if you do want to print it.
- The Report Preview screen will be displayed.
- From here you can View, Print, Export or Email.
- Close the Report Preview screen when done.
- A Supplier Invoice Processing message box will pop up informing you that;
- Invoice No. [ ] saved successfully.
- Click on OK.
- You can now view the newly raised invoice in the Purchase Invoice Listing screen.
You can now follow the process to accept the Supplier Invoice .
Edit Supplier Invoice
In the Purchase Invoice Listing screen,
- click on the row selector in front of the supplier invoice you wish to edit.
- Click on Edit.
- The Edit Supplier Invoice screen will be displayed.
- You can edit the following fields if required:
- Invoice Date
- Invoice No
- Exchange
- Quantity
- Unit Cost
- Tax Rate
- Foreign Cost
- You can also delete items if required.
- After making the required changes, click on Save.
- The processes that will follow will depend on whether you are fully invoicing the GRN or partially invoicing the GRN.
Delete Supplier Invoice
-
In the
Purchase Invoice Listing screen,
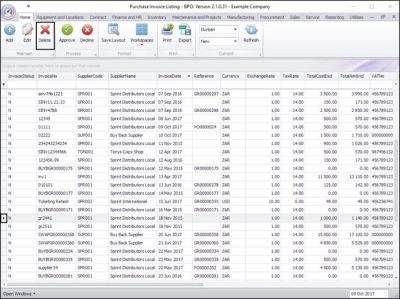
- click on the row selector in front of the supplier invoice you wish to delete.
- Click on Delete.
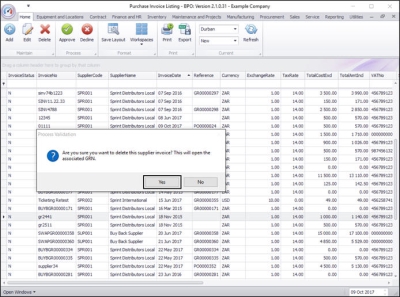
- A Process Validation message box will pop up asking;
- Are you sure that you want to delete this supplier invoice? This will open the associated GRN.
- Click on Yes.
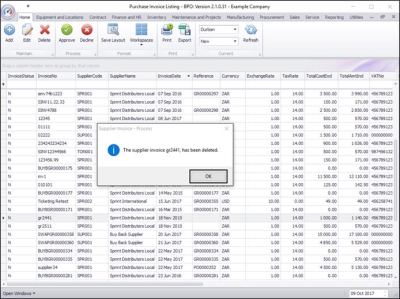
- A Supplier Invoice - Process message box will pop up informing you that;
- This supplier invoice [ ] has been deleted.
- Click on OK.
- The deleted invoice can now be viewed in the Purchase Invoice Listing screen where the status is set to Deleted.
MNU.132.001


