We are currently updating our site; thank you for your patience.
Projects
Work Order Allocation - Auto Create Projects
The Auto Create Projects process creates projects from work orders with matching parameters.
- Important Notes
- The default Project Manager for Auto Created Projects will use the Site Task Manager set up in the company site configuration.
- This person should not be configured as a Technician.
| Ribbon Access: Maintenance / Projects > Work Order Allocation |

- The Work Order Allocation listing screen will be displayed.
- This screen is divided into 2 frames:
- Unassigned Work Orders: This frame lists all the unassigned work orders.
- Project Work Orders: This frame lists the projects with linked work orders.

Single Work Order
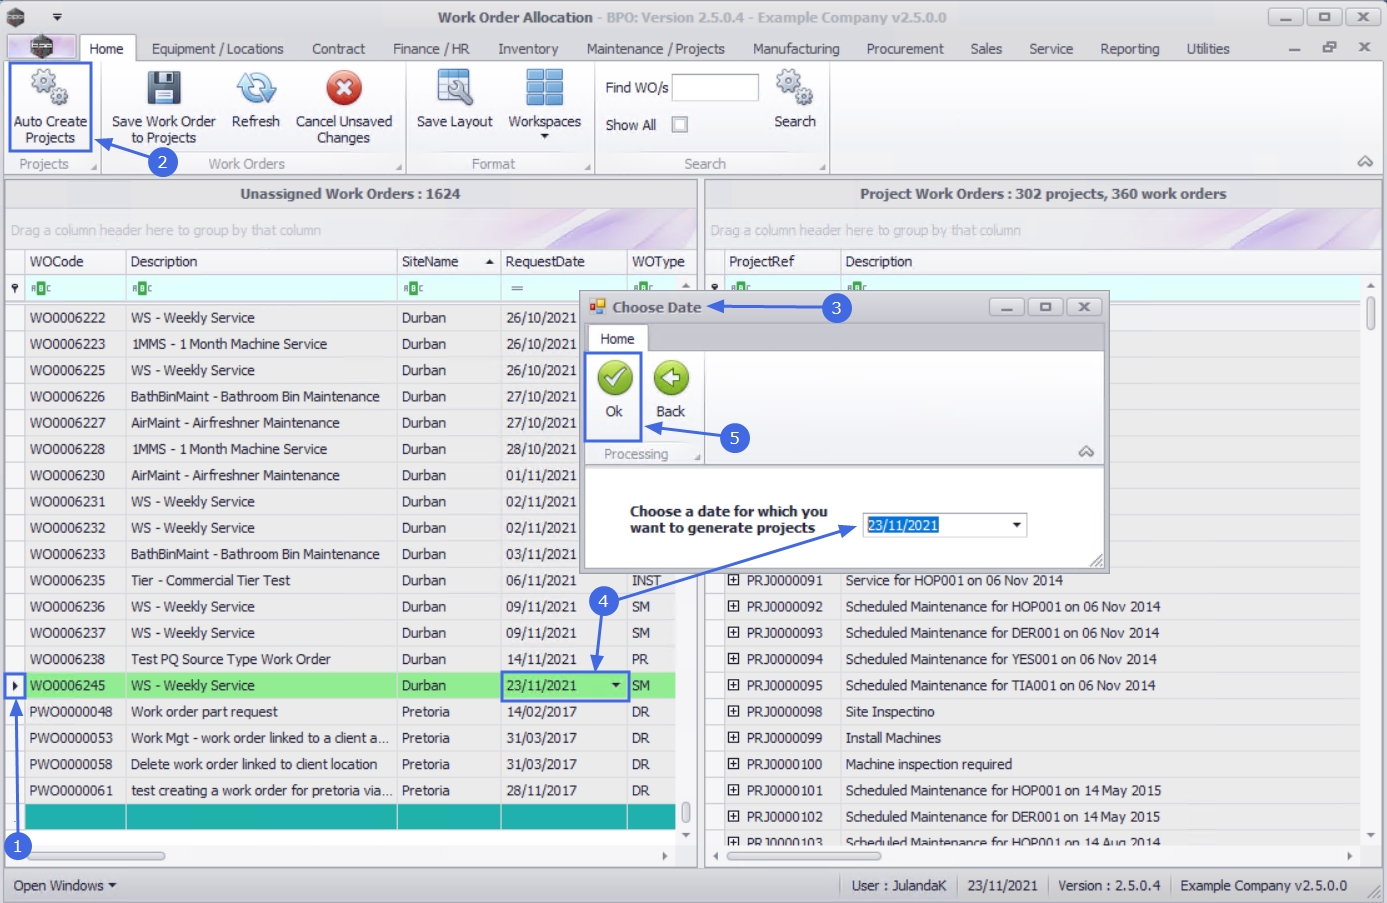
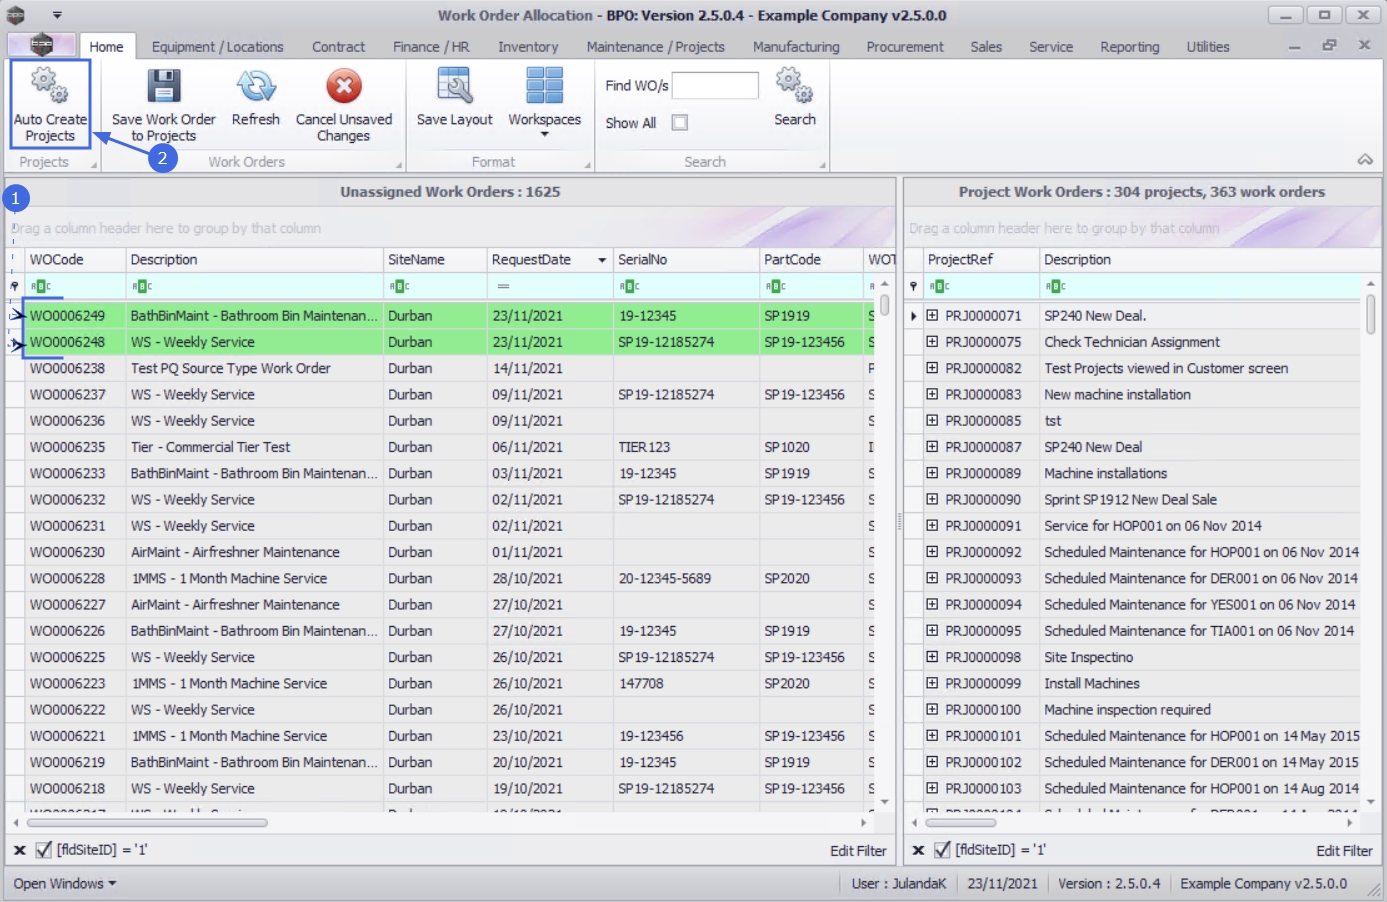
- In the Unassigned Work Orders frame, click in the row of the work order you wish to create a project for.
- Click on Auto Create Projects.
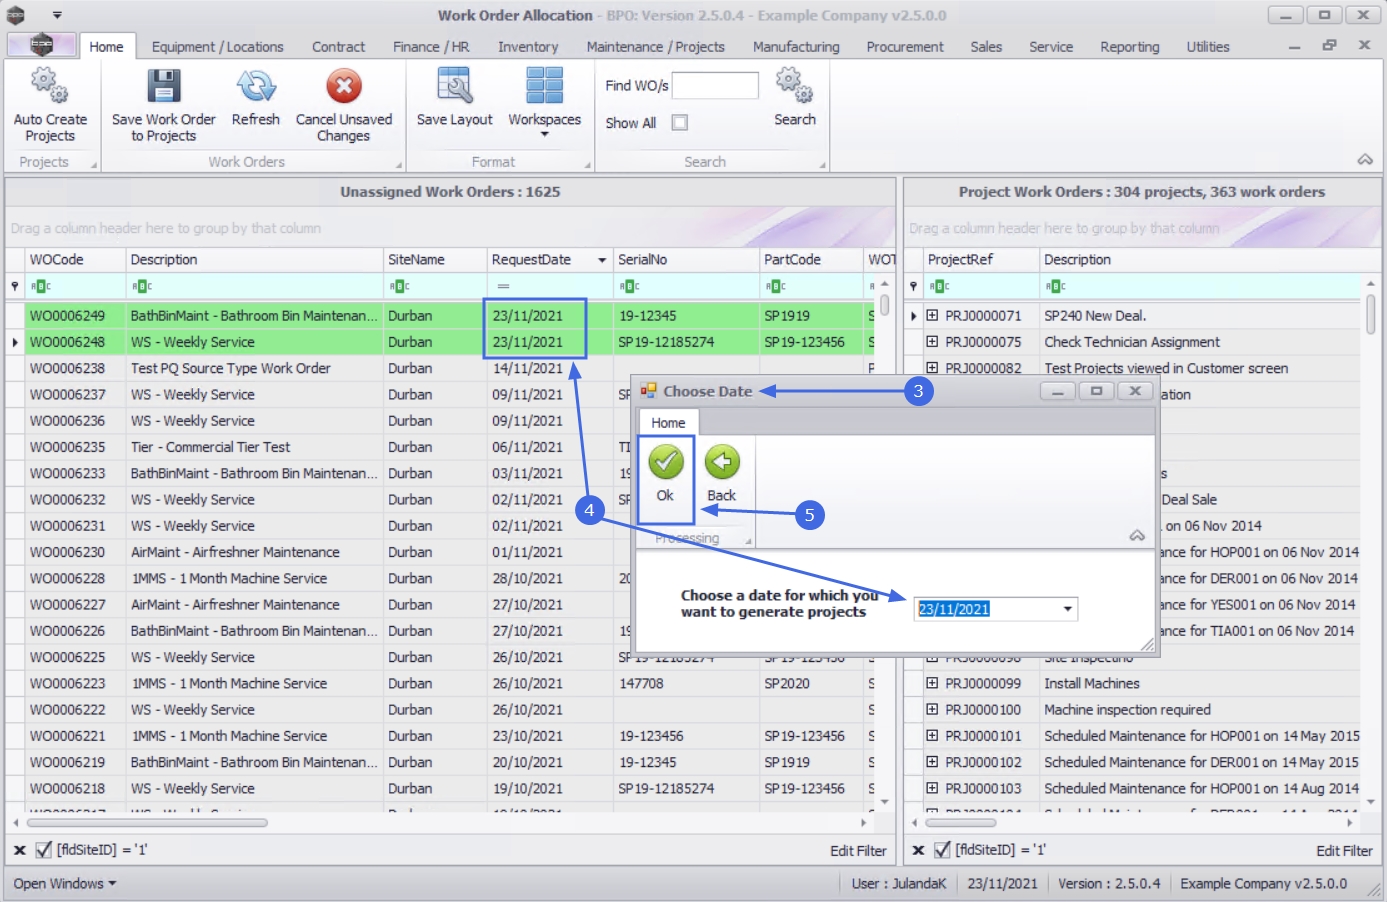
- The Choose Date screen will display.
-
The
date field
will display the current date.
Type in or click on the
down arrow
to use the calendar function to select the date to generate the project for.
 Note that the date for the Project has to match the Request Date of the work order.
- Click on OK.
- When you receive the Process Complete message to confirm that;
- 1 new project(s) created.
- Click on OK.
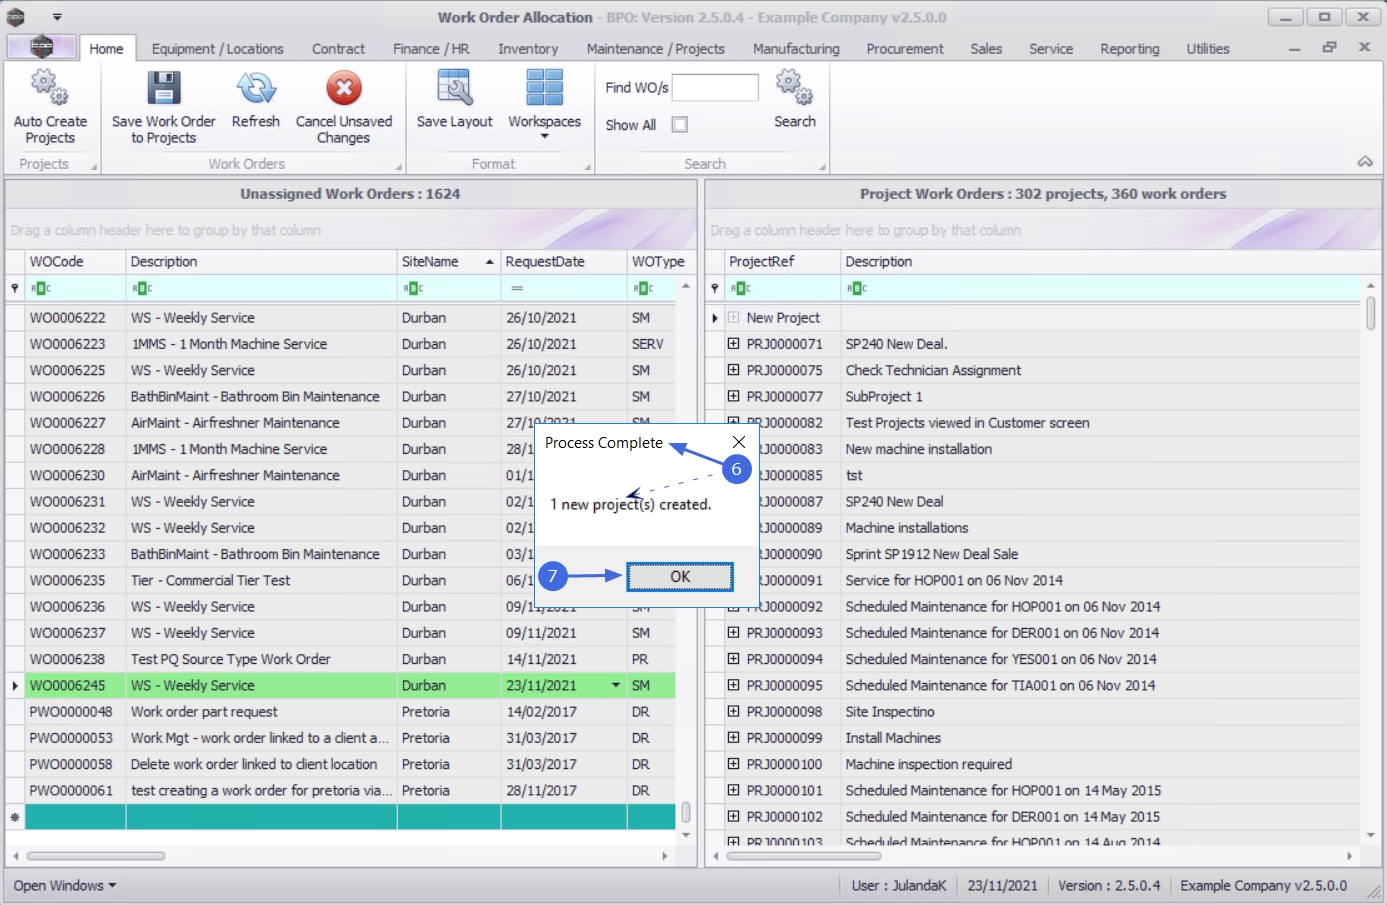
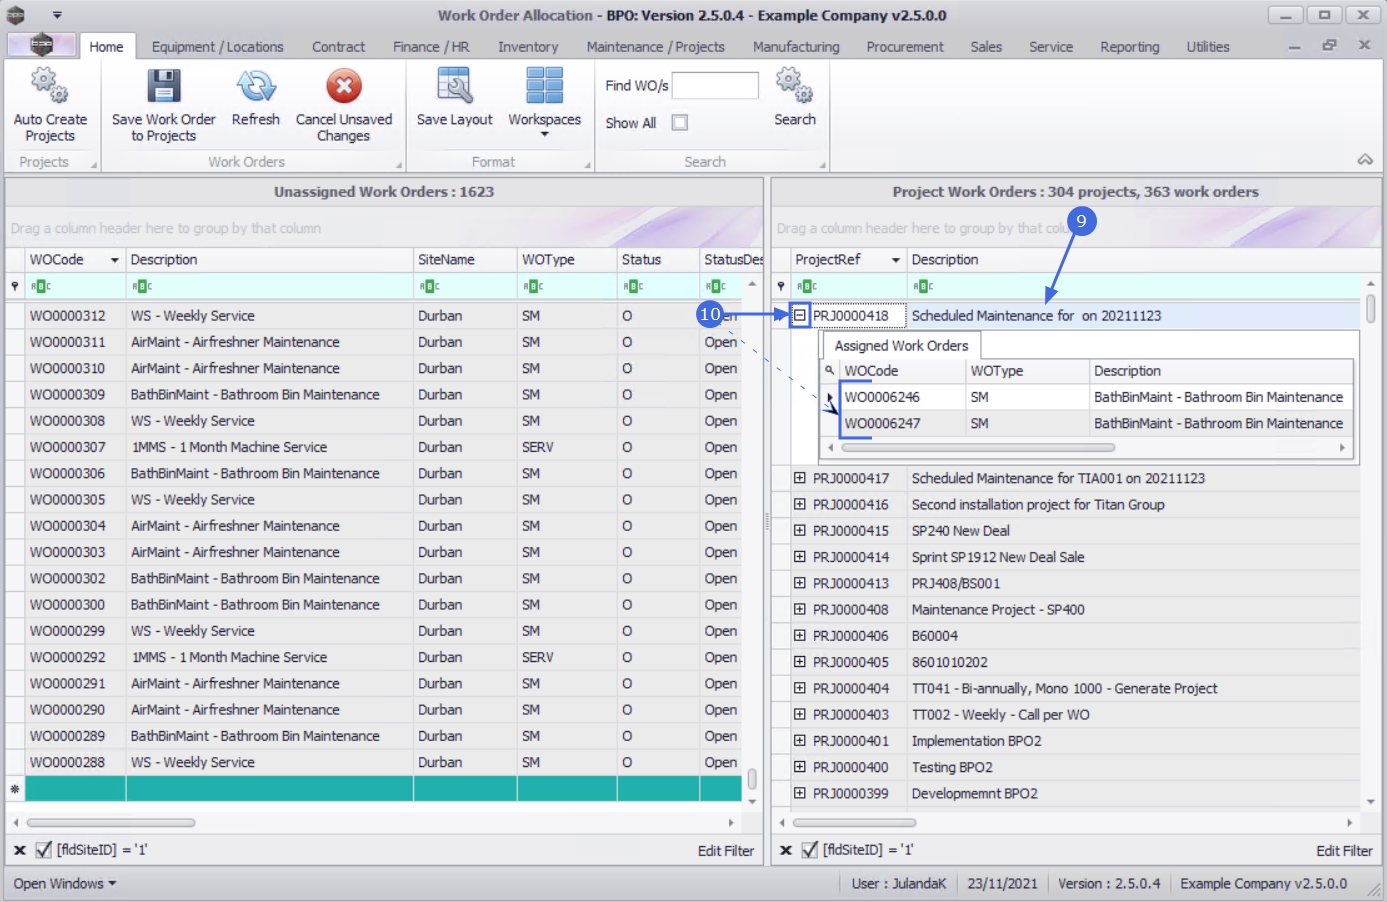
- The newly created project will be displayed in the Project Work Orders frame.
- Click on the expand button in the row of the new project to display the Assigned Work Orders frame.
- Click on Save Work Order to Projects.

Auto Create single Project with Multiple Work Orders
Important Note To create a single project from multiple work orders, the work order parameters have to be the same .
-
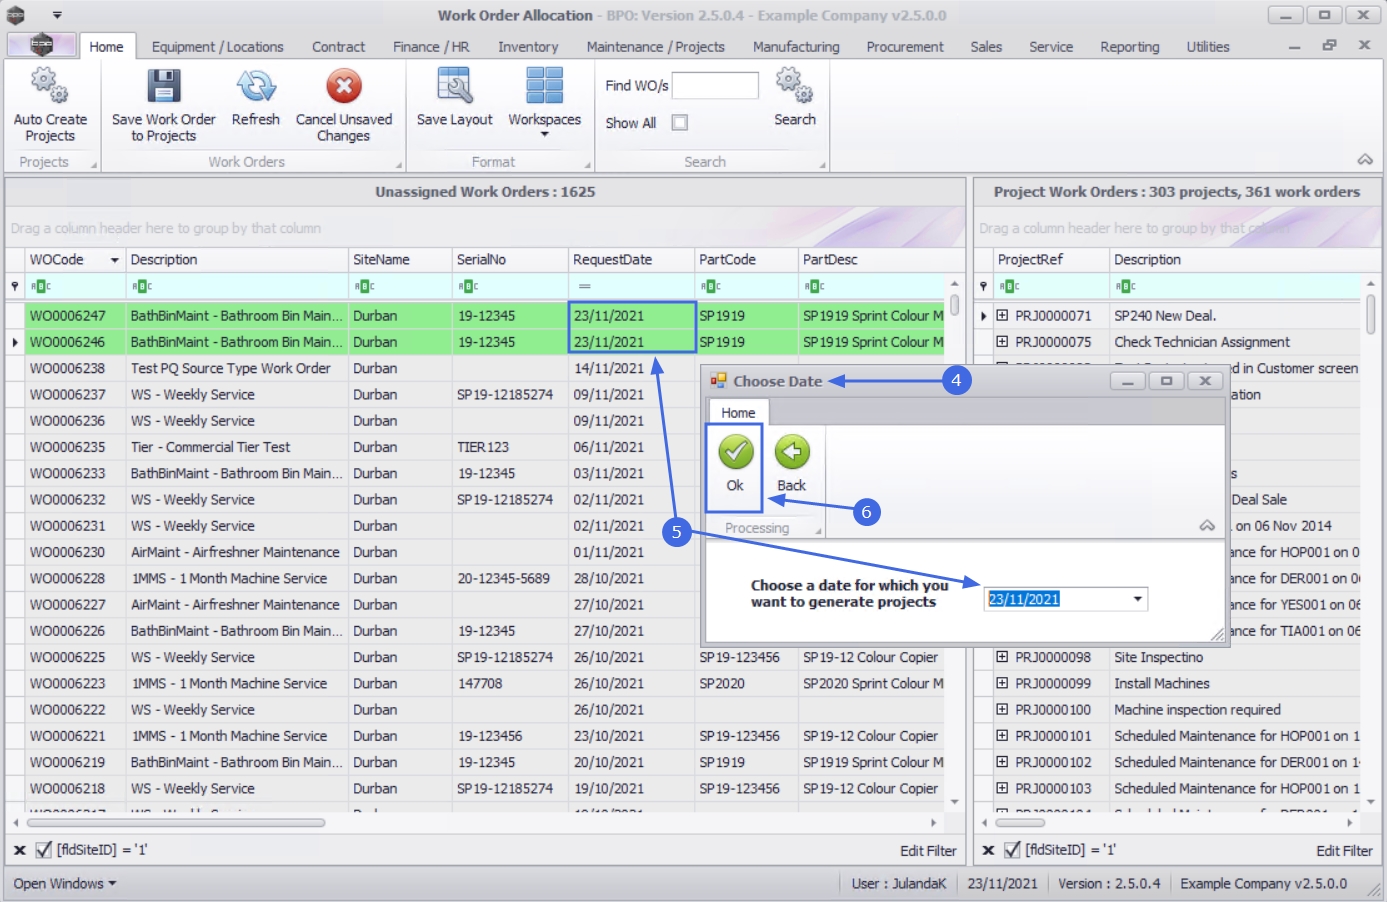
In the Unassigned Work Order frame, select the Work orders you wish to allocate to a project.
- To select multiple work orders, hold down the Ctrl key on the keyboard and use your mouse to click on the relevant work orders to select.
- Scroll right in this frame until you can view the parameters for the work orders to ensure that they are the same.
- Click on Auto Create Projects.

- The Choose Date screen will display.
-
The
date field
will auto populate with the current date.
Type in or click on the down
arrow
to use the calendar function to select an alternative date, if required. Note that the date for the Project has to match the Request Date of the work order.
- Click on OK.
- When you receive the Process Complete message to confirm that;
- 1 new project(s) created.
- Click on OK.
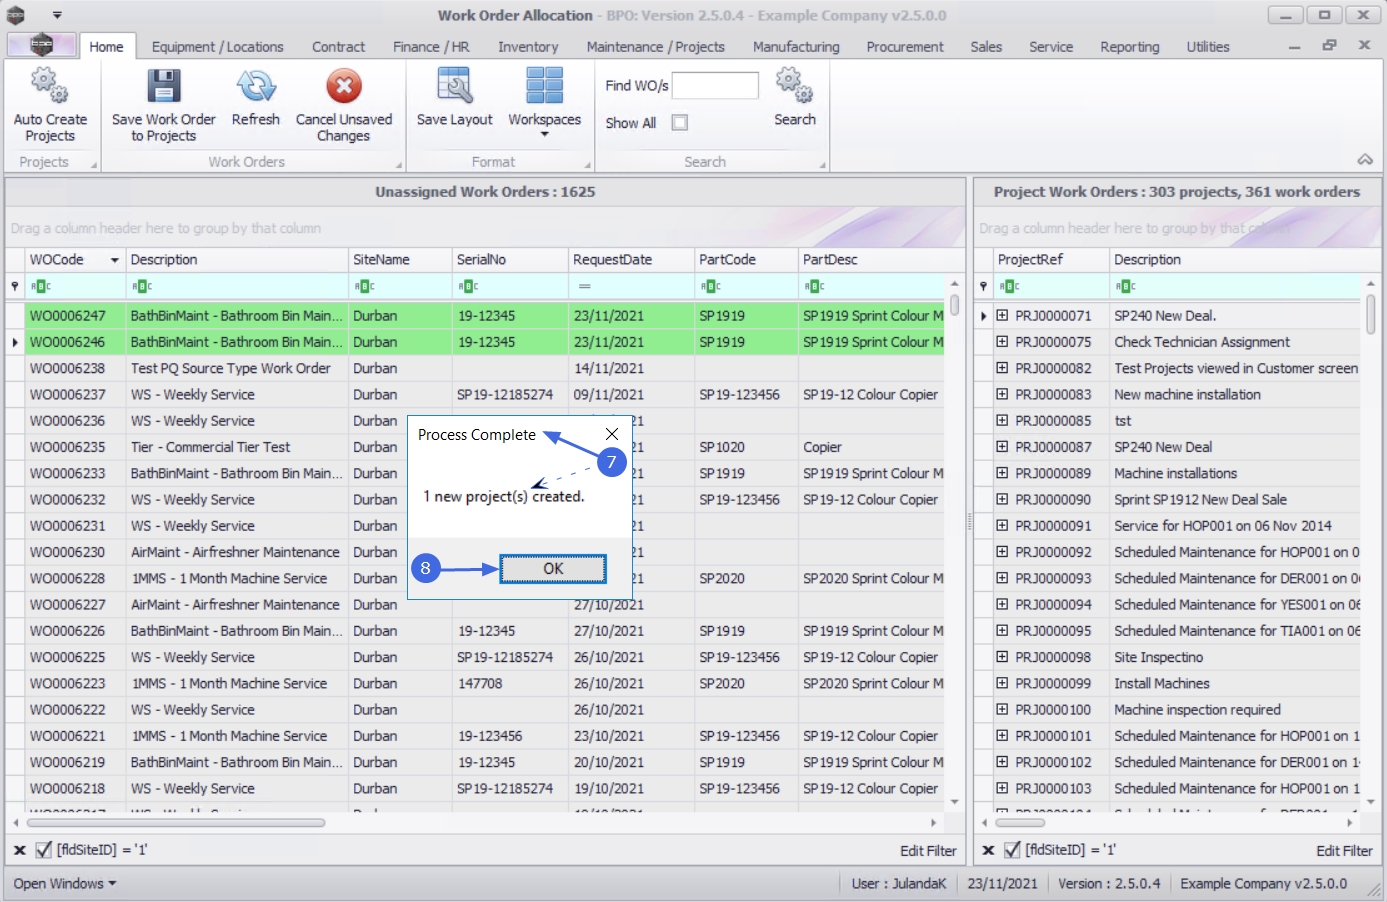
- The newly created project will be displayed in the Project Work Orders frame.
- Click on the Expand button of the new project, to view the linked work orders.
Auto Create Project from Multiple Work Orders
Note that when selecting Work Orders with different parameters, a separate project will be created for each work order.
-
In the Unassigned Work Order frame, select the Work orders you wish to allocate to a project.
- To select multiple work orders, hold down the Ctrl key on the keyboard and use your mouse to click on the relevant work orders to select.
- Click on Auto Create Projects.
- The Choose Date screen will display.
-
The
date field
will auto populate with the current date.
Type in or click on the down arrow
to use the calendar function to select an alternative date, if required.
Note that the date for the Project has to match the Request Date of the work order.
- Click on OK.
- The Process Complete message will display informing you that;
- 2 new project(s) created.
- Click on OK.

- The newly created projects will be displayed in the Project Work Orders frame.
- Click on the Expand icon of the new projects to view the Assigned Work Orders frames.

MNU.151.006