We are currently updating our site; thank you for your patience.
Sales
Customers - History
The History tile can be found in both the Customer Listing and the Customer Maintain screen. This tile will direct you to a data grid of historical changes made to the Customer or Commercial Details when you Customers - Add Customer or Customers - Edit Customer frames for a specific customer.
| Ribbon Access: Sales > Customers |
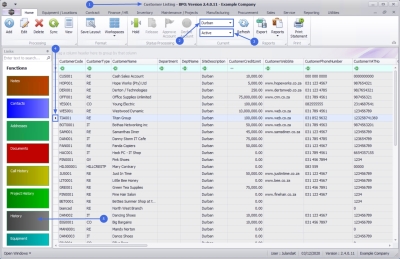
- The Customer Listing screen will display.
- Select the Site where the Customer can be located.
- The example has Durban selected.
- Select the Status for the customer whose history you wish to view.
- The example has Active selected.
- Click in the row of the customer for whom you wish to view the History.
- Click on the History tile.
![]() If the tile you are looking for is not visible in the list, hover over the Links panel until the up and down arrows appear. Use these arrows to navigate through the tile list or use the track ball/wheel on your mouse to scroll through the tile list.
If the tile you are looking for is not visible in the list, hover over the Links panel until the up and down arrows appear. Use these arrows to navigate through the tile list or use the track ball/wheel on your mouse to scroll through the tile list.
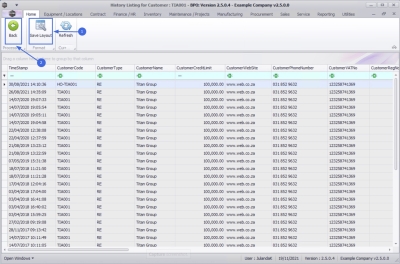
- The History Listing for Customer: [customer code] screen will display.
- All historical changes made in the Customer Details or Commercial frames linked to the selected Customer will be listed, with the most recent information at the top of the data grid.
 You will not be able to modify the information on this screen as the this feature provides the History listing for the customer only.
 - The scroll bars at the bottom and the side of the data grid indicates that more information is available. Use the scroll bars to navigate to the right and further down the screen.
Search for Specific History Period
- If you wish to search for a specific period of history for a customer, then you can utilise the filter search row. For a detailed handling of this topic refer to BPO2 Data Grid Filtering. For this example, we will search for all the historical information for 2020.
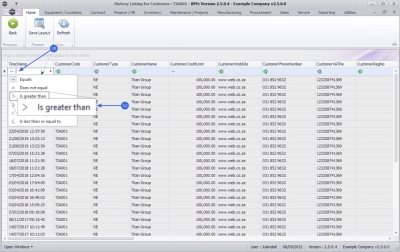
- Click on the [=] in the Time Stamp column to display the filter options menu.
- Select > - Is greater than.
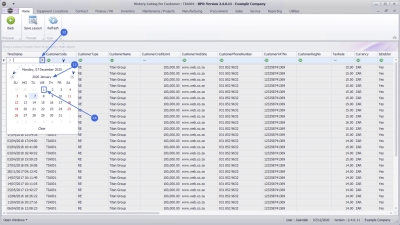
- Click on the down arrow in the Time Stamp column to display the Calendar function.
- Scroll to January 2020.
- Click on 1st January to update the filter search row with your search parameters.
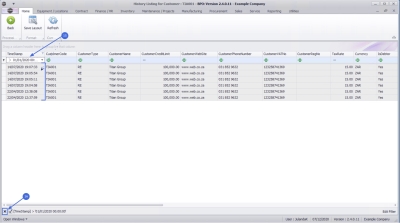
- The Time Stamp column reflect your search parameters and all the historical data from the 1st January 2020 until the current date will display in the data grid.
- Clear the search filter by deleting or back space over the text in the filter row of the TimeStamp column or click on the Delete icon in the Edit Filter row.
 For a detailed handling of this topic refer to BPO2 Data Grid Filtering.
Modifying Screen Layout
You may need to work with the column information that appear off the screen by dragging those columns to the view area of your screen.
![]() For more information about editing the rows and columns refer to BPO2 Data Grid Filtering.
For more information about editing the rows and columns refer to BPO2 Data Grid Filtering.
History Listing Ribbon Toolbar
- If you wish to keep any changes that you have made to the data grid layout, click on Save Layout.
- Click on Back to close the History Listing for the Customer and to return to the Customer Listing screen
MNU.061.021

