We are currently updating our site; thank you for your patience.
Service
Introduction to Scheduling
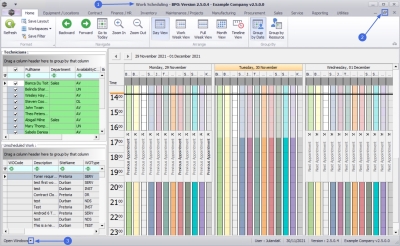
A Work Scheduling screen has been added within the BPO_V2 application interface. It is designed for and can only be used by companies using TechConnect (the Auto Accept Call Assignment configuration flag must be set to 'No'), who needs to schedule Installations in advance.
![]() Note
that this function should not be used for every day service calls.
Note
that this function should not be used for every day service calls.
Users can easily view a list of Technicians and Unscheduled Work.
Technician calendars can be viewed across multiple or a filtered list of Technicians, within a variety of calendar view options.
An Unscheduled Work Order can be dragged onto a Technician's calendar, which will create a Call or Project Assignment.
Assignments can be rescheduled or reassigned to another Technician if the assignment has not yet been accepted.
The assignment will be removed from the calendar when work has been completed.
| Ribbon Access: Service > Scheduling |
- The Work Scheduling screen will be displayed.
- Maximizing the screen will enable you to view all the information more clearly.
- If you have multiple screens open, navigate between the screens by clicking on the down arrow next to Open Windows and then click on the screen you wish to work in.
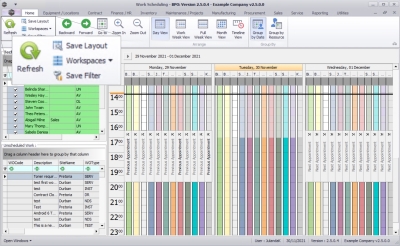
Format Action Buttons
- Refresh: Updates the Technicians, Unscheduled Work and Calendar frames.
- Save Layout: Any changes made to the column order in the Technicians and Unscheduled Work frames will be saved.
- Workspaces:
Workspaces refers to the grouping of windows on your desktop.
- The purpose of this function is to reduce clutter and to make the screen that you are working in easier to navigate in.
- You can capture multiple separate workspaces for different groups of related tasks. For example, a workspace you've named Reports could contain certain selected frames, panels and columns displaying the data that you use for preparing reports.
- You might set up other workspaces according to windows that you need to manage projects. All the Captured Workspaces can be saved and named and will then be listed in the drop-down list under Workspaces.
- Use Reset to reset the screen to it's original configuration before any adjustments were made.
- Save Filter: Click on the Save Filter button if you wish any of the applied filters in this screen to be saved.
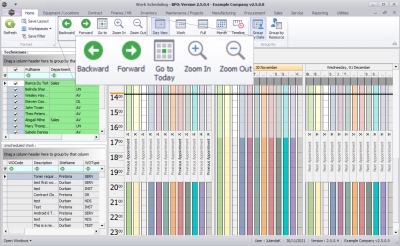
Navigate Buttons
- Backward and Forward: Navigate forward and backward in the calendar view.
- Go to Today: Navigates the calendar to the current day.
- Zoom In and Zoom Out: Increase or decrease the calendar view using the zoom buttons.
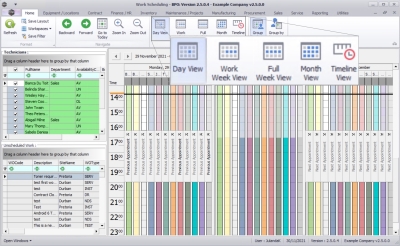
Arrange Buttons
- Day View: This view is the most detailed view of appointments for a specific day.
- Work Week View: This view provides a detailed view for the working days for a certain week.
- Full Week View: This view arranges appointments for a particular week in a compact form.
- Month View: This is a multi-week calendar view, which is useful for long term planning.
- Timeline View: This view plots appointments in relation to time.
![]() Refer to
Different Calendar Views
for further information and examples of each Arrange button.
Refer to
Different Calendar Views
for further information and examples of each Arrange button.
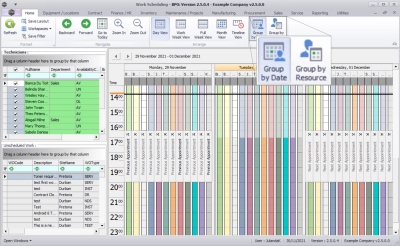
Group By Action Buttons
- Group by Date: Arrange the calendar view to group appointments by date.
- Group by Resource: Arrange the calendar view to group appointments by resource.
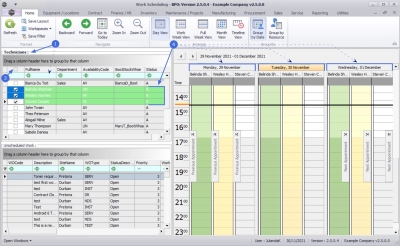
Technicians Grid
- All employees configured as Technicians will display in the Technicians grid.
- All Technicians will be selected by default.
- Click on the header check box to toggle between selecting or deselecting all Technicians.
- Deselecting all technicians will allow you to select only the Technicians you wish to view a Work Schedule for.
Filter Row
- Use the filter row to filter the Technician list. The Edit Filter row will display the selected filter(s).
- The example has Department set to filer for the Sales department.
- All the technician names linked to that department will be listed.
- Click on the X to clear the filter.
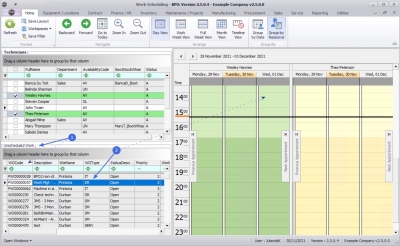
Unscheduled Work
- A list of all unassigned work orders (linked to Calls or Projects) will display in the Unscheduled Work grid.
- You can assign a work order by dragging and dropping an Unscheduled Work order to a Technicians calendar.
Calendar Frame
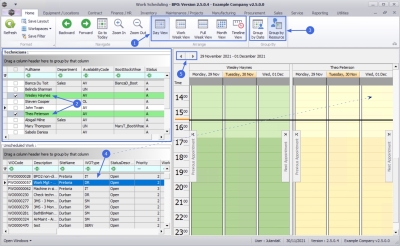
The Calendar frame is configured by the following:
- Arrange toolbar to change the calendar view (Day, Week, Month etc.)
- Technician selection in order to view the required Technicians.
- Group by Date or by Resource (Resource = Technician).
- Dropping unscheduled work into this area to assign work.
- Navigate buttons to navigate forward and back in the calendar.
Different Calendar Views
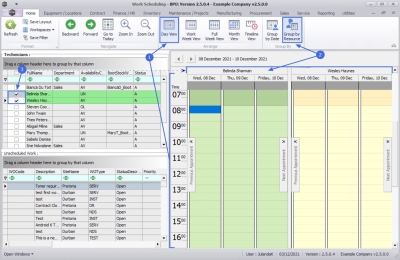
Day View / Group by Resource
- The image has Day View selected. This is the most detailed view of appointments for a specific day.
- The Group by Resource (Technician) configuration has been selected.
 Remember that the calendar will display only the technicians selected in the Technicians grid.
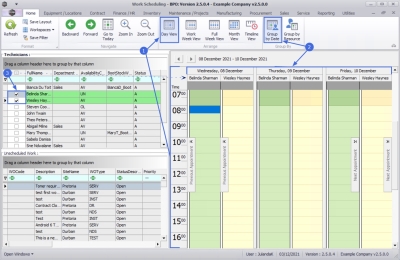
Day View / Group by Date
- The image has Day View selected. This is the most detailed view of appointments for a specific day.
- The Group by Date configuration has been selected.
-
 Remember that the calendar will display only the technicians selected in the Technicians grid.
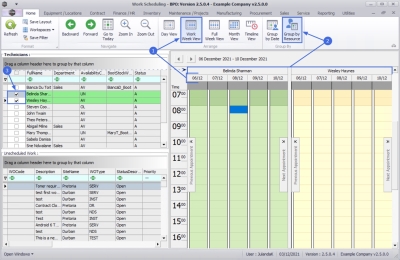
Work Week View / Group by Resource
- The image has Work Week View selected. This is a detailed view for the working days in a certain week.
- The Group by Resource configuration has been selected.
 Remember the calendar will display only the technicians selected in the Technicians grid.
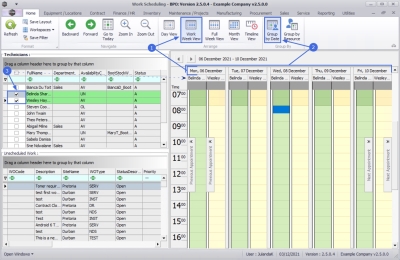
Work Week view / Group by Date
- The image has Work Week View selected. This is a detailed view for the working days in a work week - Monday to Friday.
- The Group by Date configuration has been selected.
-
 Remember the calendar will display only the technicians selected in the Technicians grid.
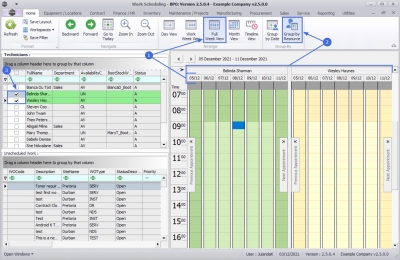
Full Week View / Group by Resource
- The image has Full Week View selected. This view arranges appointments for a particular week in a compact form and includes Saturday and Sunday.
- The Group by Resource configuration has been selected.
 Remember the calendar will display only the technicians selected in the Technicians grid.
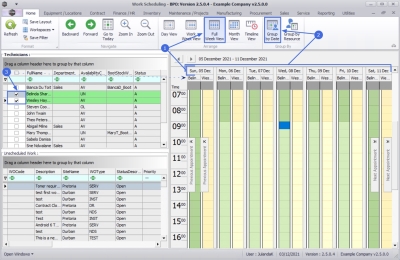
Full Week View / Group by Date
- The image has Full Week View selected. This view arranges appointments for a particular week in a compact form and includes Saturday and Sunday.
- The Group by Date configuration has been selected.
 Remember the calendar will display only the technicians selected in the Technicians grid.
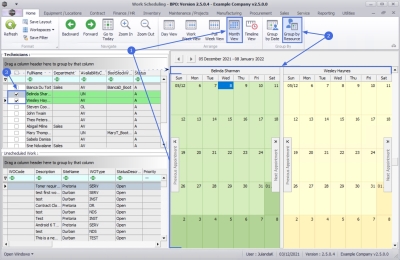
Month view / Group by Resource
- The image has Month View selected. This view is useful for long term planning.
- The Group by Resource configuration has been selected.
 Remember the calendar will display only the technicians selected in the Technicians grid.
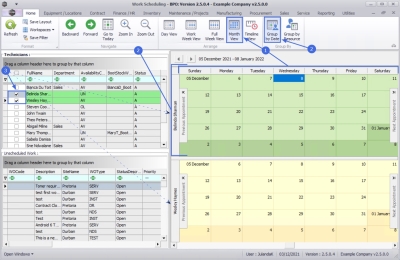
Month View / Group by Date
- The image has Month View selected. This view is useful for long term planning.
- The Group by Date configuration has been selected.
-
 Remember the calendar will display only the technicians selected in the Technicians grid.
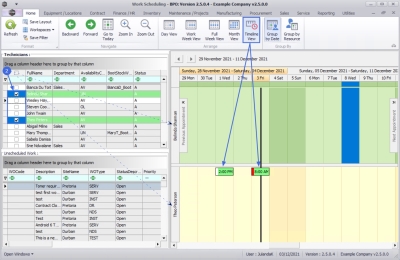
Timeline view
- The Time View functionality plots appointments in relation to time.
 Remember the calendar will display only the technicians selected in the Technicians grid.
BPO.MNU.070

