We are currently updating our site; thank you for your patience.
Service
Work Orders - Time Booking
| Ribbon Access: Service > Work Orders |
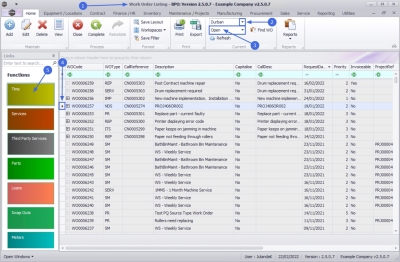
- The Work Orders Listing screen will be displayed.
- Select the Site where the work order was raised.
- The example has Durban selected.
- Set the Status to Open.
- Click on the row of the work order you wish to book time for.
- Click on the Time tile.
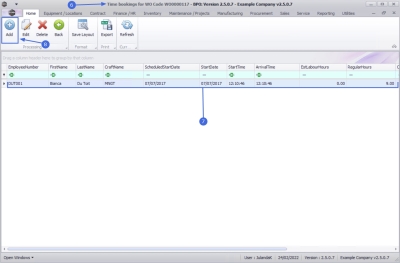
- The Time bookings for WO Code [work order code] screen will be displayed.
- Time that has already been logged for the work order will be listed in the data grid.
Add New Time Booking
- Click on Add.
![]() Short cut key: Right click to display the Process menu list. Click on Add.
Short cut key: Right click to display the Process menu list. Click on Add.
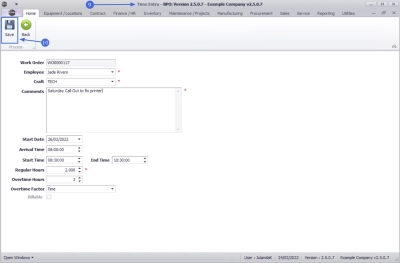
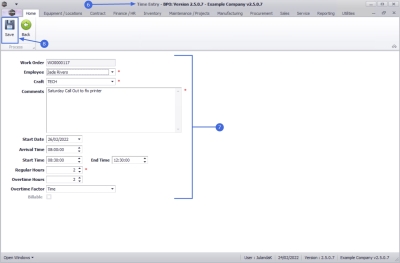
- The Time Entry screen will be displayed.
- Work Order: The work order field will auto populate with the work order number selected.
- Employee: The employee field will populate with the name of the person currently logged onto the system. Click on the down arrow to select an alternative person from the drop-down list, if required.
- Craft: Click on the down arrow to select the craft that needs to be assigned to the time entry, from the drop-down list.
 Note that the Craft selection available from the list will depend on the crafts linked to the employee selected.
 - Comments: Click in the text box to type comments relating to the work done on the work order.
 Note that the minimum length of the Comments field is 20 characters.
 - Start Date: The start date will default to the current date. Click to type in or click on the down arrow to use the calendar function to select an alternative date.
- Arrival Time:
 The time you arrive at your destination The arrival time will default to the system time at the time of logging time. Click to type in or use the arrow indicators to adjust the time to the correct arrival time.
 - Start Time:
 The actual time work started This field will default to the system time at the time of logging time. There may be a delay between the arrival and actual time work was started. Click to type in or use the arrow indicators to adjust the time to the actual time work was started.
 - End Time:
 The time work was completed This field will increment with 20 minutes from the start time. Click to type in or use the arrow indicators to adjust the end time to the actual time the work was completed.
 - Regular Hours: The regular hours will be calculated when the start and end times have been entered. Click to type in or use the arrow indicators to adjust the regular hours, if required.
- Overtime Hours: Click to type in or use the arrow indicators to record the overtime hours worked.
- Overtime Factor: Click on the down arrow to select the overtime factor related to the overtime worked.
- Billable: This field is not available when logging time. To set the time as billable or non-billable refer to Time Review - Review Time
- Click on Save when you have completed Booking the Time.
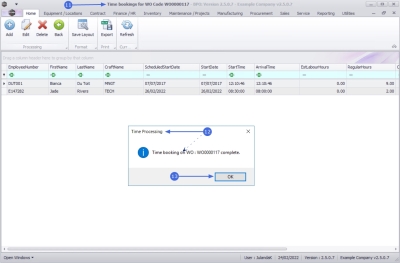
- You will return to the updated Time bookings for WO Code screen.
 Note that the Time Booking you have saved will display on the data grid in the background.
 - When you receive the Time Processing message to confirm;
- Time booking on WO : [work order code] complete.
- Click on OK.
Edit Time Booking
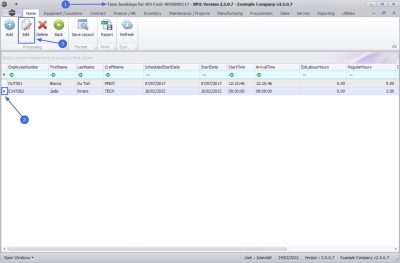
- From the Time bookings for WO Code [work order code] screen,
- Click on the row of the time booking you wish to edit.
- Click on Edit.
![]() Short cut key: Right click to display the Process menu list. Click on Edit.
Short cut key: Right click to display the Process menu list. Click on Edit.
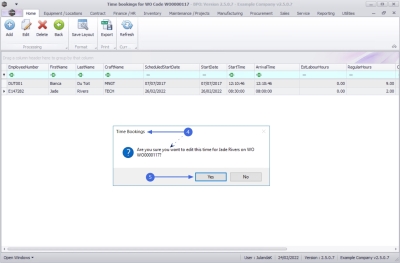
- When you receive the Time Bookings message to confirm;
- Are you sure you want to edit this time for [technician name] on WO [work order code]?
- Click on Yes.
- The Time Entry screen will be displayed.
- Make the necessary changes to the time entry.
 Refer to the Time Entry screen above for information on how to update the screen.
 - Click on Save when done.
- You will return to the updated Time bookings for WO Code screen.
 Note that the Time Booking you have saved will display on the data grid in the background.
 - When you receive the Time Processing message to confirm;
- Time booking on WO : [work order code] complete.
- Click on OK.
Delete Time Booking
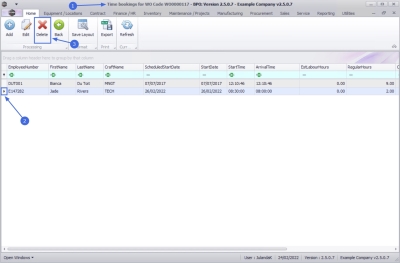
- From the Time bookings for WO Code [work order code] screen,
- Click on the row of the time booking you wish to delete.
- Click on Delete.
![]() Short cut key: Right click to display the Process menu list. Click on Delete.
Short cut key: Right click to display the Process menu list. Click on Delete.
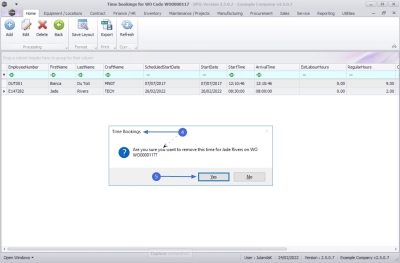
- When you receive the Time Bookings screen to confirm;
- Are you sure you want to remove this time for [technician name] on WO [work order code]?
- Click on Yes.
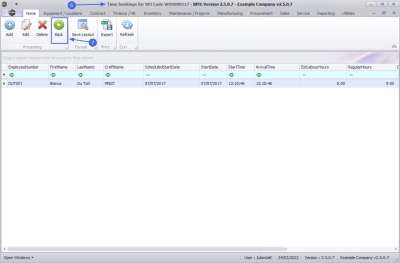
- The time booking has been removed from the Time bookings for WO Code screen.
- Click on Back to return to the Work Order Listing screen.
Export
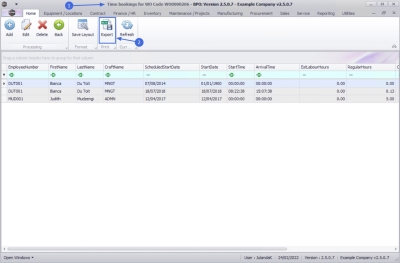
- From the Time booking for WO Code [work order code] screen,
- Click on Export.
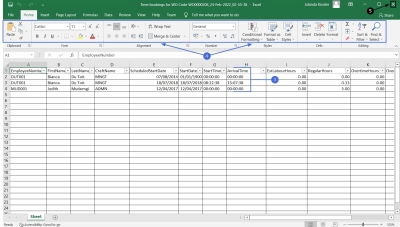
- The list of time booking for the work order will be exported to an Excel Spreadsheet.
- Edit and Save the document in Excel as required.
- Close the spread sheet to return to BPO.
MNU.072.010

