We are currently updating our site; thank you for your patience.
Service
Work Orders - Expenses
Confirm with your supervisor as to whether you will log your expenses, or whether the call centre administration will do this.
![]() Expenses will be updated automatically for clients using Tech Connect.
Expenses will be updated automatically for clients using Tech Connect.
| Ribbon Access: Service > Work Orders |
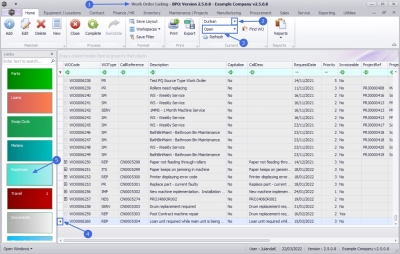
- The Work Order Listing screen will be displayed.
- Select the Site where the work order was assigned.
- The example has Durban selected.
- Set the Status to Open.
- Click on the row of the work order you wish to add an expense claim to.
- Click on the Expenses tile.
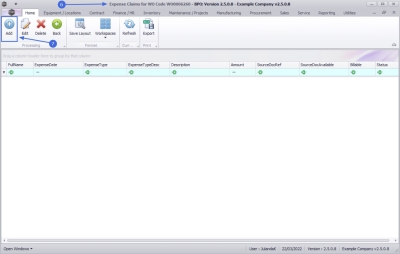
- The Expense Claims for WO Code [work order code] screen will be displayed.
Add Expense Claim
- Click on Add.
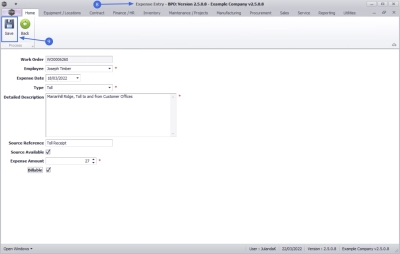
- The Expense Entry screen will be displayed.
- Work Order: The work order number selected will auto populate the field.
- Employee: The employee logging the expense entry will display in this field. Click on the search button to select the employee who incurred the expense.
- Expense Date: The current date will display. Click on the down arrow to select the date the expense was incurred, using the calendar function.
- Type:
Click on the down arrow to select
the Expense type.
 Refer to
Basic Static Data to add or edit an expense type.
 - Detailed Description: Type in the description or reason for the expenses.
- Source Reference: Type in the reference or proof for the expense, e.g. receipt information, if available.
- Source Available: Click to select the check box, if documentation, e.g receipt, for the expense, if available.
- Expense Amount: Click to type in or use the arrow indicators to select the rand value for the expense.
- Billable: Click to select the check box if the expense is billable. Leave unselected, if the expense is not billable.
- When you have finished adding the expense claim details, click on Save.
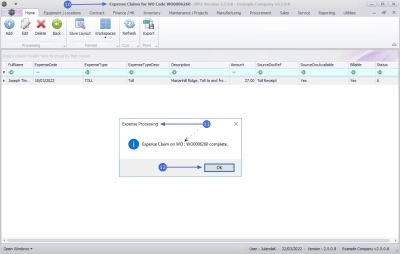
- You will return to the Expense Claims for WO Code screen.
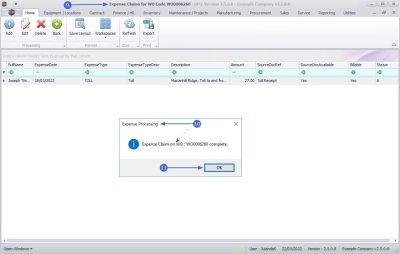
- When you receive the Expense Processing message to confirm that;
- Expense Claim on WO: [work order code] complete.
- Click on OK.
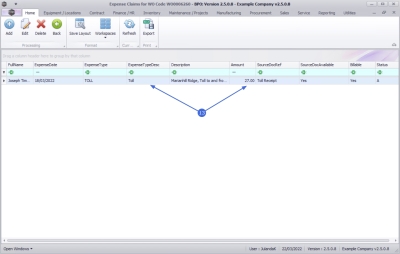
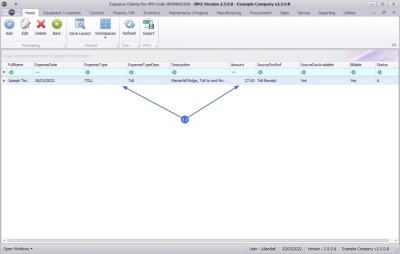
- The Expense Claim can be viewed in the Expense Claims for WO Code screen.
Edit Expense Claim
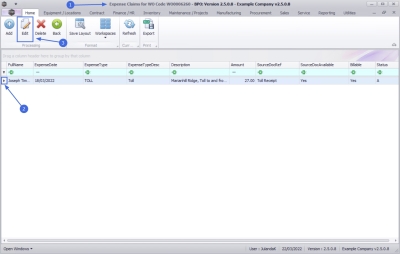
- From the Expense Claims for WO Code [work order code] screen,
- Click on the row of the expense claim you wish to edit.
- Click on Edit.
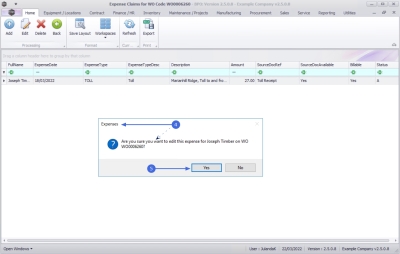
- When you receive the Expenses message to confirm;
- Are you sure you want to edit this expense for [employee name] on Work Order [work order code]?
- Click on Yes.
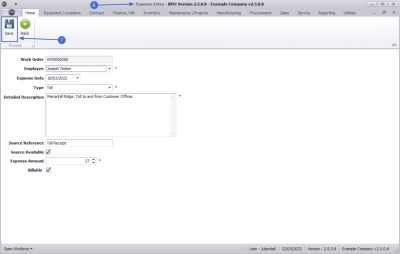
- The Expense Entry screen will be displayed.
- Make the required changes to the Expense entry.
- Click on Save.
- You will return to the Expense Claims for WO Code screen.
- An Expense Processing message will display informing you that;
- Expense Claim on WO: [work order code] complete.
- Click on OK.
- The updated details can be viewed in the Expense Claims for WO Code screen.
Delete an Expense Claim
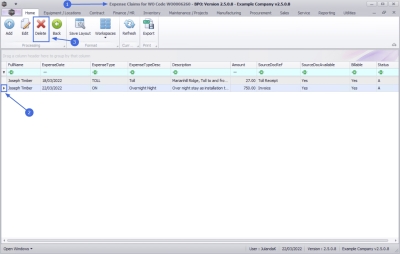
- From the Expense Claims for WO Code [work order code] screen,
- Click on the row of the expense claim you wish to delete.
- Click on Delete.
![]() Note that you can only remove an expense with an A - Active status.
Note that you can only remove an expense with an A - Active status.
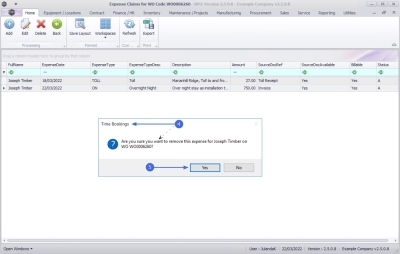
- When you receive the Expenses message to confirm;
- Are you sure you want to remove this expense for [employee name] on Work Order [work order code]?
- Click on Yes.
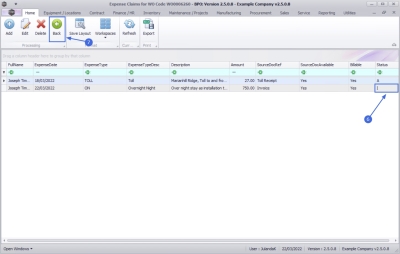
- The Status of the deleted expense will change to I - Inactive.
- Click on Back to return to the Work Order Listing screen.
MNU.072.017

