Service
Work Orders - Documents
The Documents tile allows you to link, view or delete digital documents to the work order. These documents need to be saved in a shared folder on the server.
| Ribbon Access: Service > Work Orders |

- The Work Order Listing screen will be displayed.
- Select the Site where the work order has been raised.
- The example has Durban selected.
- Select the Status.
- The example has Open selected.
- Click on the row of the work order you wish to link documents to.
- Click on the Documents tile.

- The Documents for Work Order - [work order code] screen will be displayed.
- Any documents that have already been linked to the work order will display in the data grid.
Add New Document
- Click on Add.
![]() Short cut key: Right click to display the Process menu list. Click on Add.
Short cut key: Right click to display the Process menu list. Click on Add.

-
The New Document for Work Order: [work order code] screen will be displayed.
- File: Click on the search button to display the Select File screen.
- Select the document that you wish to attach to the work order.
- Click on Open.
- File: Click on the search button to display the Select File screen.

- Path: The file path relevant to the document you have selected will display.
- Repository Path: The repository path is populated with the path configured in the Company Configuration.
- File Description: Click in the text box to type in a description for the document.
- Doc Type: Click on the down arrow to select the document type from the drop-down list.
Save Document link
- Click on Save to update the document link.

- When you receive the Document Processing message to confirm that;
- The document: [document name] for work order [work order code] has been saved.
- Click on OK.

- You will return to the updated Documents for Work Order screen.
- Click on Back to return to the Work Order Listing screen.

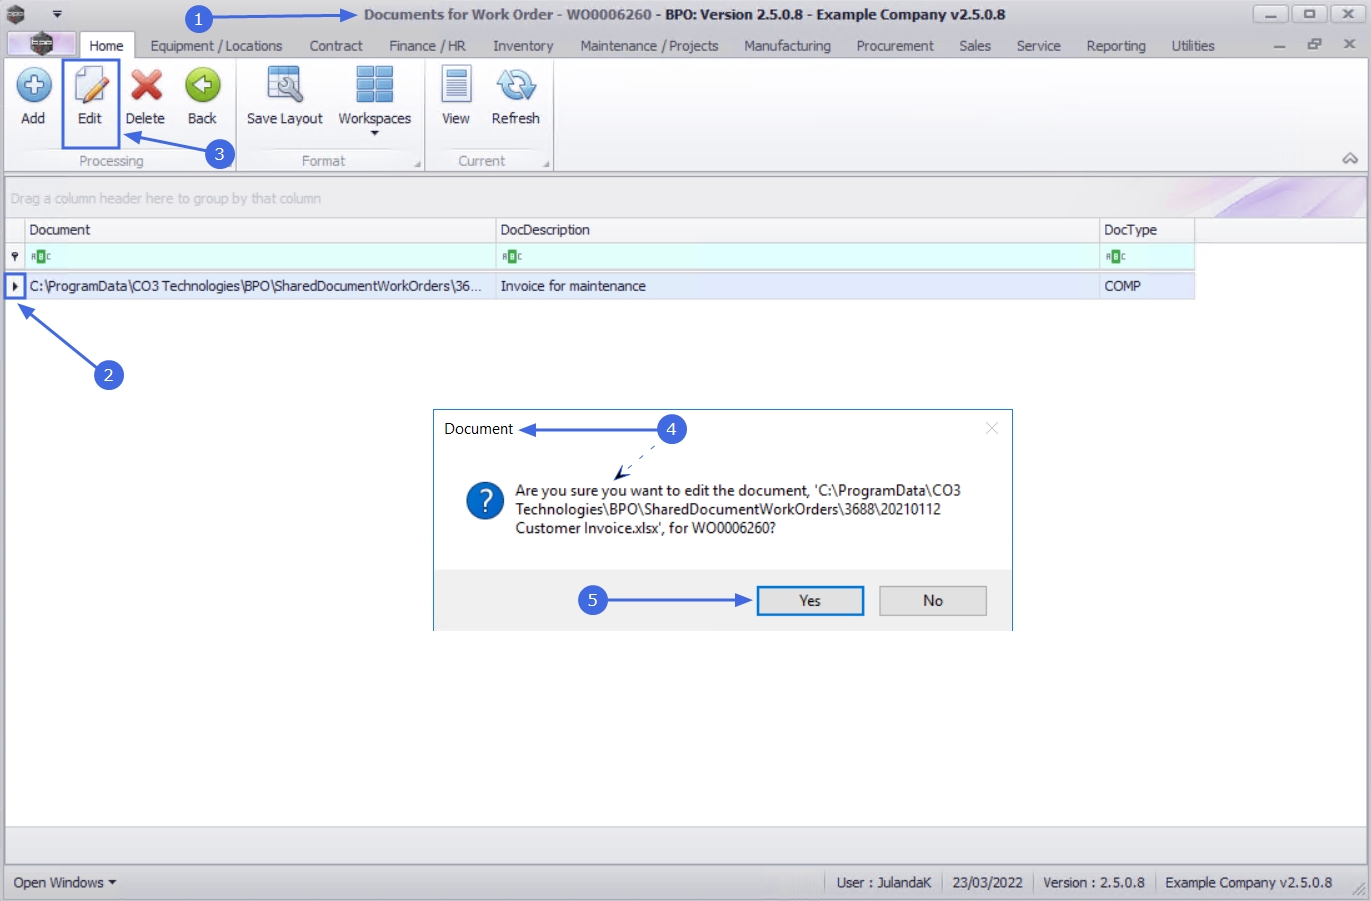
Edit Document
- From the Documents for Work Order - [work order code] screen,
- Click on the row of the document you wish to edit.
- Click on Edit.
![]() Short cut key: Right click to display the Process menu list. Click on Edit.
Short cut key: Right click to display the Process menu list. Click on Edit.
- When you receive the Document message to confirm;
- Are you sure you want to edit the document, [file path and document name] for [work order code]?
- Click on Yes.
- The Document Maintenance for Work Order : [work order code] screen will display.
- Make the necessary changes to the document maintenance screen as required.
- Click on Save.
- When you receive the Document Processing message to confirm;
- The document : [document name] for work order [work order code] has been saved.
- Click on OK.

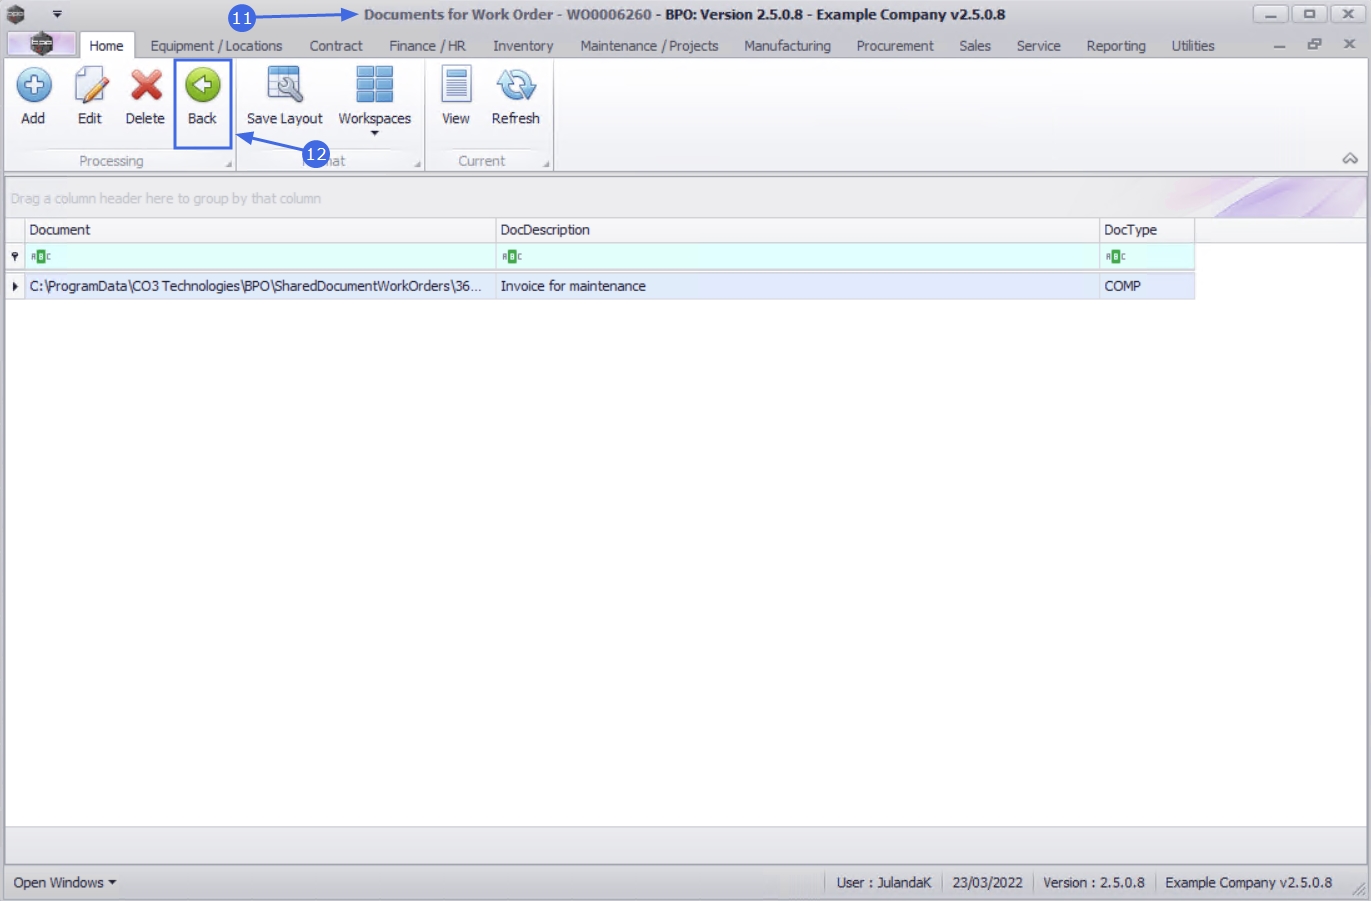
- You will return to the updated Documents for Work Order screen.
- Click on Back to return to the Work Order Listing screen.
Delete Document
- From the Documents for Work Order - [work order code] screen,
- Click in the row of the document you wish to remove from the work order.
- Click on Delete.
![]() Short cut key: Right click to display the Process menu list. Click on Delete.
Short cut key: Right click to display the Process menu list. Click on Delete.
- When you receive the Delete Document message to confirm;
- Are you sure you want to remove this document, [document path and file name], from work order [work order code]?
- Click on Yes.

- The document has been removed from the Documents for Work Order screen.
- Click on Back to return to the Work Order Listing screen.

View Document
- From the Documents for Work Order - [work order code] screen,
- Click in the row of the document you wish to view.
- Click on View.
![]() Short cut key: Right click to display the Process menu list. Click on View.
Short cut key: Right click to display the Process menu list. Click on View.

- The document will open within the relevant program.
- When you have finished reviewing the document, close the screen to return to the Documents for Work Order screen.

MNU.072.019