We are currently updating our site; thank you for your patience.
Contract
Set Contract Type
A contract type must be set up in order to load contracts and there are a few configuration and default items to carefully consider and set correctly.
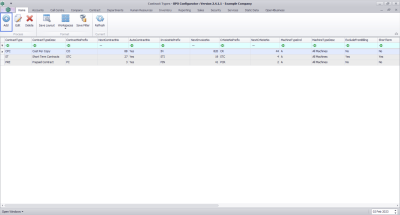
Ribbon Select Contracts > Contract Types
- The Contract Types listing screen will be displayed.
- Click on Add.
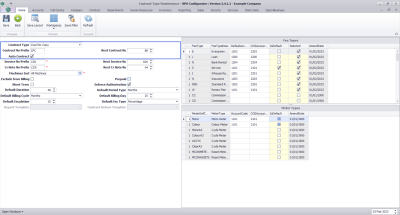
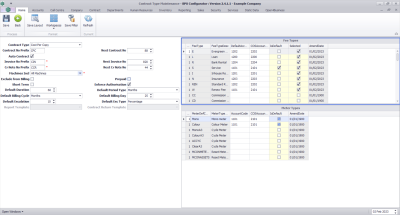
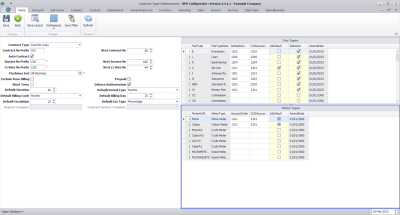
- The Contract Type Maintenance screen will be displayed.
Contract Information Details
- Contract Type:Click on the drop-down arrow and select the Contract Type from the list.
- Contract No Prefix: Type in a prefix code that will be linked to all the contracts in this type.
- Next Contract No: Type in or use the arrow indicators to select the next contract number to be used.
- Auto Contract: Click on this check box if you want the system to auto create the next contract number based on the Contract No Prefix and Next Contract No you have set up.
- This will be sequential, and allows for 7 digits after the prefix, which will be padded with 0. (For example, if the Prefix is CPC and the Next Contract No is 88, the system will number the next contract as CPC0000088 and the second as CPC0000089.
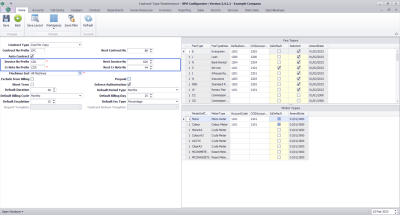
Contract Invoice No. / Credit Note No. Details
In the same way as noted above, the Contract Invoice and Contract Credit Notes for this contract type will be generated based on the Prefix and next Number sequentially as set below.
- Invoice No Prefix: Type in the Contract Invoice number prefix.
- Cr Note No Prefix: Type in the credit note number prefix
- Next Invoice No: Type in or use the arrow indicators to select the next invoice number.
- Next Cr Note No: Type in or use the arrow indicators to select the next credit note number.
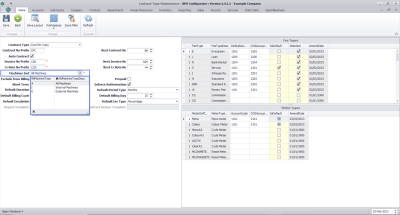
Machines Included in the Contract
- Click on the drop-down arrow and select from the menu the type of machines included in this contract.
- All Machines: indicates that Internal and External Machines will be available for selection on this contract type.
- Internal Machines Only internal assets
 An internal asset is an item which is being rented out, thereby creating a revenue. This will have been a serialised stock item that has been converted into an asset prior to rental. issued to a customer will be available for selection.
 - External Machines Only customer assets
 A customer asset is where a customer brings in a machine for service or repair that was bought elsewhere. A customer asset can also be a stock item that has been sold (and invoiced) to a customer. Customer assets can generate an income for your organisation via service or maintenance contracts. will be available for selection.
Billing Information Details
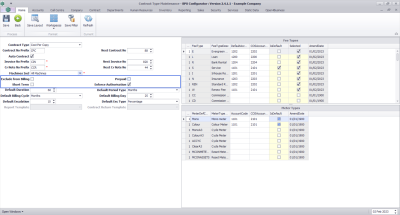
- Exclude from Billing: Click on this check box if you do notwant this type of contract will be made part of the month end billing run.
- Prepaid: Click on this check box if this type of contract is Prepaid For these contracts a set meter charge was paid ahead of contract creation, and meters are not billed until the usage limit is reached. However, fees will continue to bill based on the billing cycle. Once a prepaid contract reaches its limit, it will be put on hold via the BPO Contract Prepaid Service. The contract manager will then need to review the contract, amend the meter minimum billing details as required, and then re-approve the contract.
- Short Term: Click on this check box if you wish to identify this contract type as a Short Term Contract (Hour, Day or Week period). Only internal assets can be linked to these contracts. If this option is selected, please ensure that Enforce Authorisation is not selected and Exclude from Billing
- Enforce Authorisation: This check box should always be selected (except for Short Term contracts). Standard / Prepaid contracts should be reviewed, released for authorisation and authorised to ensure that month end billing is correct.
Contract Default Settings
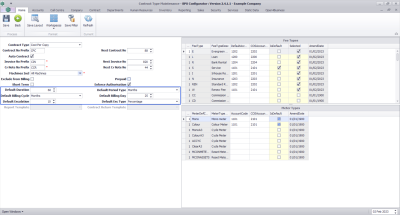
- Default Duration: Either Type in or use the arrow indicators to select the contract default duration.
- Default Period Type: Click on the drop-down arrow and select from the list the contract default period type (Bi-annual, Months, Quarterly, Years).
- Default Billing Cycle: Click on the drop-down arrow and select from the list the contract default billing frequency over which billing is carried out (Bi-annual, Months, Quarterly, Years).
- Default Billing Day: Either Type in or use the arrow indicators to select the contract default billing day. This is intended to align to a day of the month. For example here the billing day is set to 1. Thus the billing day will be on the first day of the month. (This applies only to yearly and quarterly contracts).
- Default Escalation: Either type in or use the arrow indicators to select the escalation amount, this will depend on the escalation type selected in the next step.
- Default Escalation Type: Click on the drop-down arrow and select from the list, an escalation type (usually percentage is used).
Contract Report Template and Contract Return Template
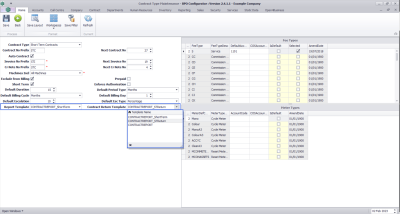
- Report Template:This option is only available when the Short Term check box is selected. (This is a Custom report based on the standard contract report in BPO, and can be modified as per your requirements for Short Term Contracts).
- Contract Return Template: This option is only available when the Short Term check box is selected. (This is a Custom report based on the standard contract report in BPO, and can be modified as per your requirements for Return of Items from Short Term Contracts).
On the right side of this screen are the Fee Types and Meter Types frames.
Fee Types
- Click on the check box in front of the applicable fee types that should be available for selection for this contract type.
- Update the selected Fee Types with the relevant Sales and Cost of Sales general ledger account codes.
- Note: These general ledger account codes will pull through automatically when setting up a contract fee. These account codes are used for financial postings when generating contract invoices.
Meter Types
- Click on the check box in front of the applicable meter types that should be available for this contract type.
- Update the selected Meter Types with the relevant Sales and Cost of Sales general ledger account codes.
- Note: These general ledger account codes will pull through automatically when setting up a contract meter. These account codes are used for financial postings when generating contract invoices.
Save Contract Type
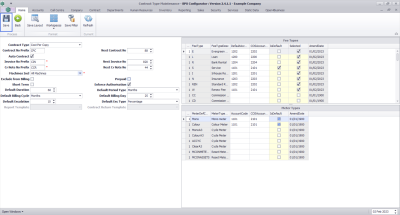
- When you have finished adding details to the Contract Type Maintenance screen, click on Save.
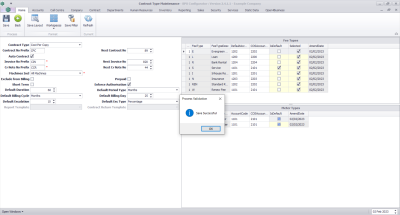
- A Process Validation message box will come up noting: Save Successful.
- You can close the Contract Type Maintenance screen and view the new Contract Type in the listing.
MNU.141.004

