We are currently updating our site; thank you for your patience.
User and Group Security
Procurement Authorisation
Security rights must be configured linking the Procurement Authorisation Configuration to the relevant User Group.
For example:
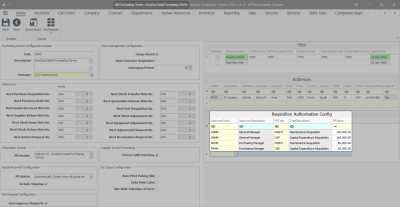
In the screenshot below - the Purchasing Manager may raise a maintenance requisition (stock / non-stock) up to the value of R50,000 before it requires a second approval from the General Manager, who has an authorisation limit up to R100,000.
The Purchasing Manager may also raise a capital expenditure requisition (buy-back) up to the value of R50,000 before it requires a second approval from the General Manager who has an authorisation limit up to R100,000.
Note: For more information about Purchase Centre requisition approval go to: Procurement Authorisation Configuration.
The Purchasing Manager's group must then be linked to this Purchasing Manager configuration, as detailed in this manual.
The same security configuration applies to the General Manager.
Ensure only the users that are given this authorisation are in the designated group. See User Group and Security for this information.
Access Levels:
- 1 - Unlimited Access: Access to all parts of the system.
- 2 - Full Access: Access to all parts of the system.
- 3 - Limited Access: Read Only.
- 4 - No Access: Not accessible in Nucleus Service.
Configure Procurement Authorisation for the Purchasing Manager
| Ribbon Access: Configurator > Security > User and Group Security |
- The User Rights screen will be displayed.
- Click on the drop-down arrow in the Find Group frame.
- A Group Name and Description drop-down list will be displayed.
- Scroll down this list until you find PRAD - Procurement Administration, click on this Group Name.
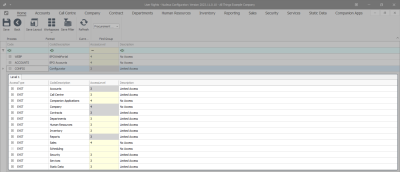
- A Code and Access Level data grid will be displayed.
- Select the Configurator row.
- Click on the expand button of the Configurator row.
- A drop-down data grid will appear showing Level 1.
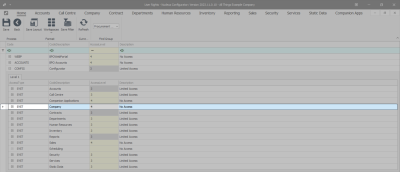
- Select the SYST - Company row.
- Click on the expand button of the selected row.
- A drop-down data grid will appear showing Level 2.
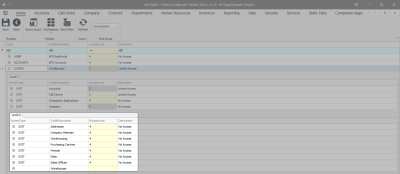
- Select the SYST - Purchasing Centres row.
- Click on the expand button of the selected row.
- A drop-down data grid will appear showing Level 3.
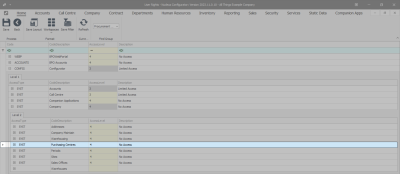
- You will note that currently the Purchasing Centres and Purchasing Centre Maintain Access Levels are set to 4 - No Access.
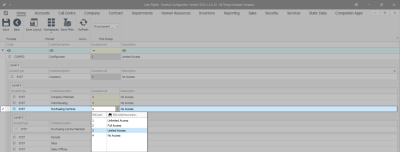
- Click in the Access Level field of the Purchasing Centres row to set the security level.
- A drop-down menu will appear and you will select an Access Level.
- In this image, 3 - Limited Access is selected.
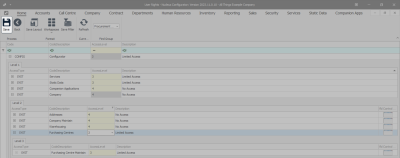
- Click on Save.
- A User Rights message will pop up saying -
- User Rights updated successfully.
- Click on OK.
- Click Refresh to update the saved changes.
- You will return to the User Rights screen.
- You can link the relevant User Groups to this Procurement Authorisation Configuration.
Configure Procurement Authorisation for the General Manager
| Ribbon Access:Configurator > Security > User and Group Security |
- The User Rights screen will be displayed.
- Click on the drop-down arrow in the Find Group ribbon frame.
- A Group Name and Description drop-down list will be displayed.
- Scroll down this list until you find PRMA - Procurement Management, click on this Group Name.
- A Code and Access Level data grid will be displayed.
- Select the Configurator row.
- Click on the expand button of the selected row.
- A drop-down data grid will appear showing Level 1.
- Select the SYST - Company row.
- Click on the expand button of the selected row.
- A drop-down data grid will appear showing Level 2.
- Select the SYST - Purchasing Centres row.
- Click on the expand button of the selected row.
- A drop-down data grid will appear showing the Access Level for Level 3.
- You will note that currently the Purchasing Centres and Purchasing Centre Maintain Access Levels are set to 4 - No Access.
- Click in the Access Level field of the Purchasing Centres row to set the security level.
- A drop-down menu will appear and you will select an Access Level.
- In this image, 3 - Limited Access is selected.
- Click on Save.
- A User Rights message will pop up saying -
- User Rights updated successfully.
- Click on OK.
- Click Refresh to update the saved changes.
- You will return to the User Rights screen.
- You can link the relevant User Groups to this Procurement Authorisation Configuration.
MNU.085.001
