Service
All Open Tickets
BPO_Ticketing is an application that gives the user the ability to view and / or work on Calls and / or Projects where they are the owner (responsible person) for the Call or the Project’s underlying work order.
It also gives the user the ability to create ticket assignments to pass the work to the next responsible person, as required.
| Ribbon Access: Service > All Open Tickets |

The All Open Tickets screen will be displayed.
- A list of all tickets (Work Orders) for all users is displayed.
- You can view tickets (Work Orders) that you have created and assigned to an employee. You can also see any tickets (Work Orders) that other employees have created and assigned.
- All tickets (Work Orders) are listed, regardless of status.
- This screen also lists the:
- the Work Order Type
- the Work Order Type Description
- the work order Priority (1 = Most Important, 5 = Least Important)
- any Notes linked to the work order
- the Create Date of each work order

- Read: This column shows whether the ticket has been read ( Yes ) or not ( No ).
- Reference: This column shows whether the ticket is linked to a Call, a Project or a stand alone Work Order
- Customer Code: If a ticket is linked to a customer - the customer code will be listed here.
- Customer Name: If a ticket is linked to a customer - the customer name will be listed here.
- the number of Days that the ticket has been Unattended
- the number of Days that the ticket has remained Open
- the Elapsed Hours

Important Notes
Ownership
- Ownership: If the user is not the responsible person:
The My Tickets Screen
- A User can see only tickets specifically assigned to them or what they have assigned to someone in the My Tickets screen.
Unread Tickets
- Unread tickets: these tickets have not been opened for viewing - the text will be in bold and the Read column will state No.
Read Tickets
- Read tickets: As soon as a ticket is opened for viewing – the text will no longer be in bold and the Read column will state Yes.

Ticket Colour
- Blue: The ticket has been assigned to another employee.
- Red: The ticket has been assigned to you and is for your attention.

View a Ticket
-
Either,
- Select a ticket.
- The colour of the ticket will change to grey.
- You can right click anywhere on the selected ticket to display a Process menu.
- from this menu, select Edit - Edit Ticket.

-
Or,
- Select the ticket.
- Click on Edit.
-
Or,
- Double click on the selected ticket.
- In this image, DWO0000239 has been selected.

The Ticket Maintain Screen
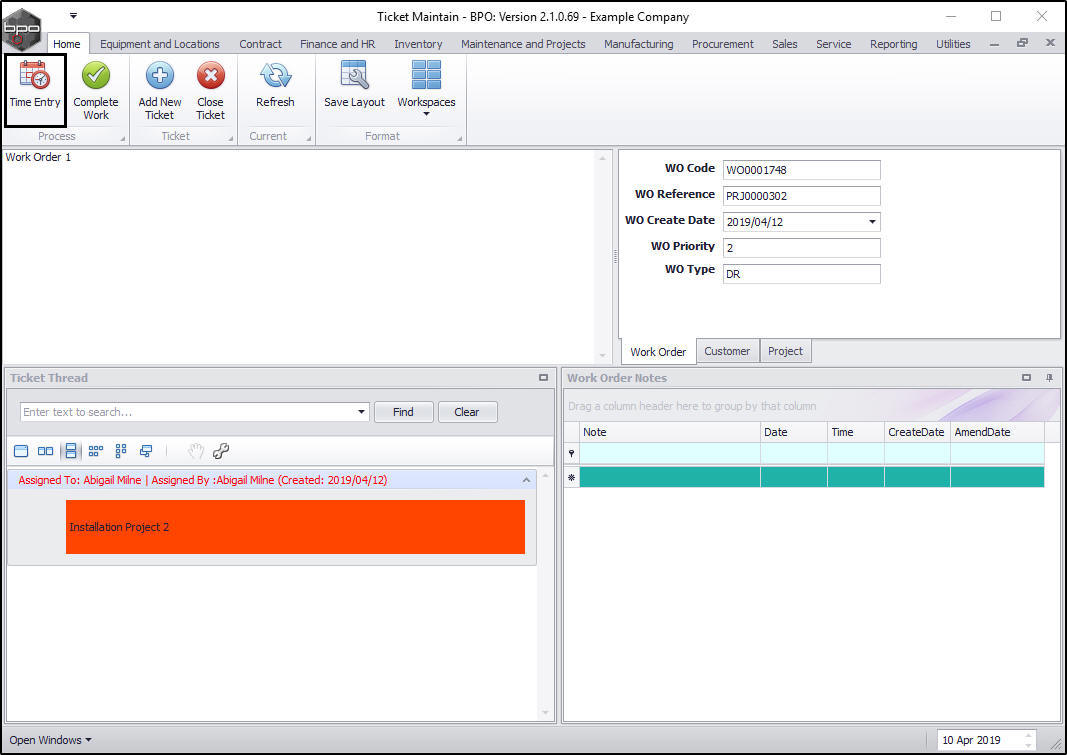
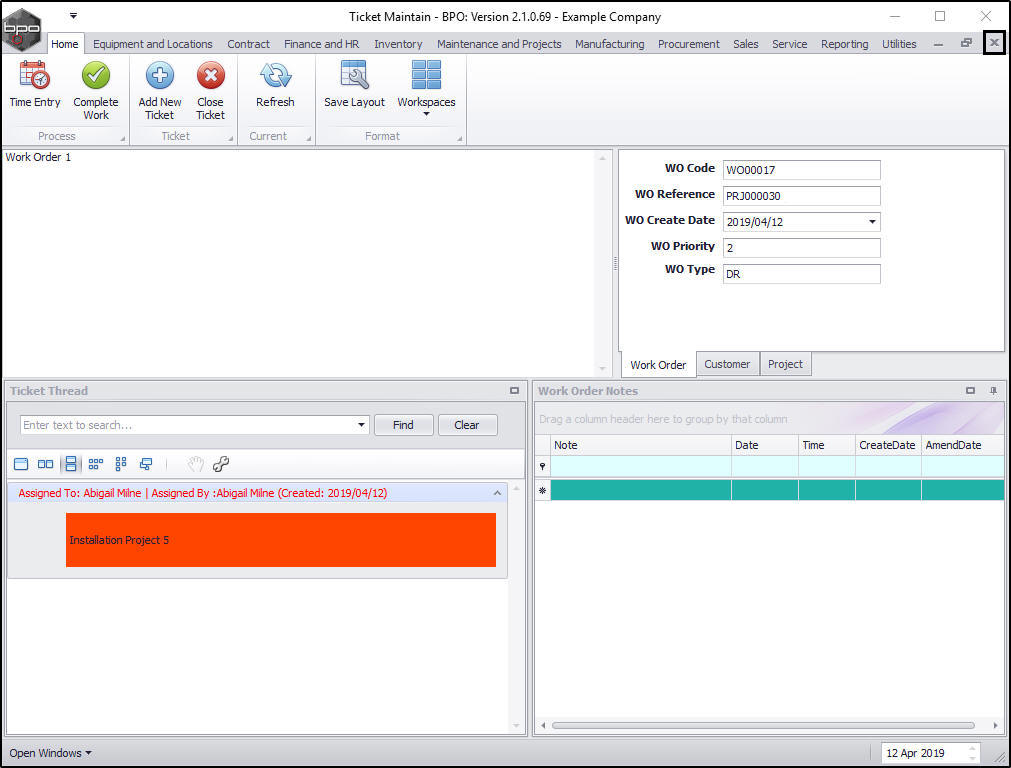
The Ticket Maintain Screen will open.
- Work Order Description: This is the work order description.
- Search field: To search for any ticket in the ticket thread; type in the text and click on Find. To clear the search; click on Clear.
- Customization bar: You can customize the look of the ticket thread to your liking by clicking on any of the icons. If you hover any icon, the icon description will pop up.
- Ticket Thread: This is where all tickets linked to the selected work order are displayed.
- Note: The tickets are in inverse chronological order. The recently created ticket will always be on top of the list.
- Assignment: You can see the assignor, assignee and the date the ticket was created.
- Comments: These are the tickets (comments) related to the work order.

-
Ticket Maintain Screen Tabs
- Work Order: Click on this tab to view the work order details.
- Customer: Click on this tab to view the customer details. All fields are populated if the work order is linked to a customer.
- Call / Project: Click on this tab to view the call/project details. All fields are populated if the work order is linked to a call / project.
-
Work Order Notes
- In this frame, you can view the linked work order notes and the date and time that they were created.

Assign a Ticket
In the All Open Tickets screen;
- Select the ticket you wish to assign to another employee.
- In this image, DWO0000264 was selected.
- You will note that the current Status of the ticket is N - New.
- Click on Edit

The Ticket Maintain screen will be displayed.
- Click on Add New Ticket.

- Assigned by: This will auto-populated with the name of the user currently logged onto the system.
- Assigned To: Click on the drop-down arrow and select the employee that you wish to assign the ticket to.
- Note: Type in the notes or instructions that you wish to relay to the person that you are assigning the ticket to.
- Click on Save.

The Add New Ticket screen and Ticket Maintain screen will close.
- You will return to the All Open Tickets screen.
- The selected ticket's status will change to C - closed.
- A new ticket will be displayed assigned to the new employee and set to status N - New.

Add Work Order Notes
- Select the ticket that you wish to add work order notes to.
- In this image, DWO0000232 was selected.
- Click on Edit.

The Ticket Maintain screen will be displayed.
- In the Work Order Notes frame,
- Type in the Note column in the first row of the data grid (not the filter row).
- The Date, Time and Create Date will auto populate with the current date and time.
- If you wish to create another note, press Enter on your keyboard and a new row will be created. Type the next note in this new row. You can add multiple notes.
- Close the screen when you are done.

Time Booking
The system will log your time as you work based on you Starting and Ending work.
- In the All Open Tickets screen, select the ticket that you wish to book time for.
- In this image, WO0001748 is selected.
- Click on Edit

The Ticket Maintain screen will be displayed.
- Click on Time Entry.
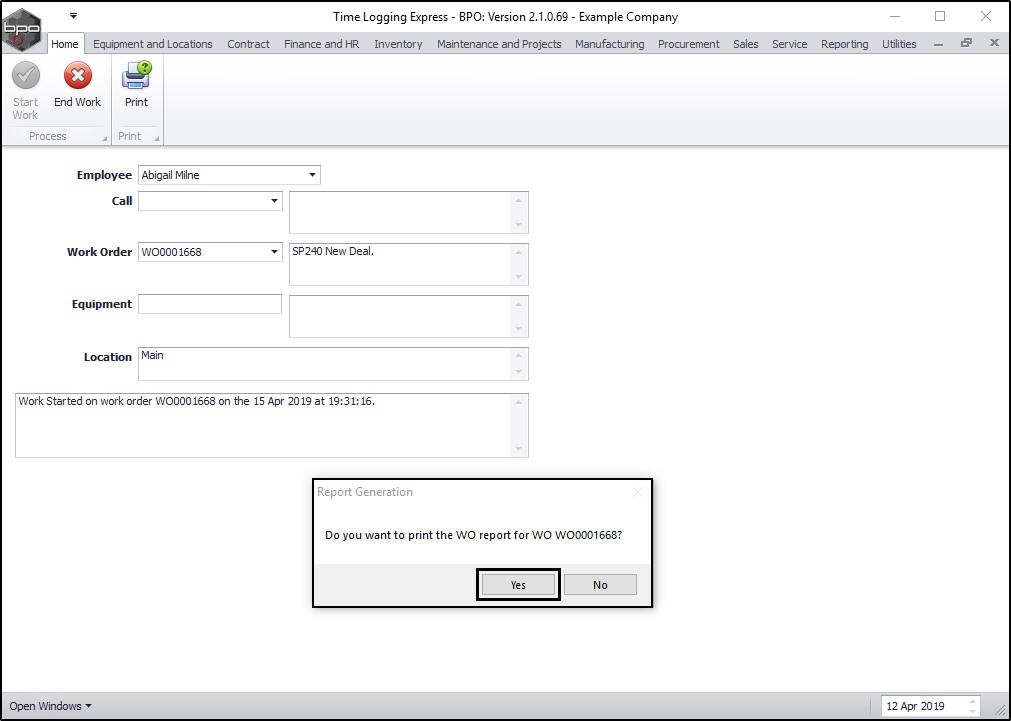
The Time Logging Express screen will be displayed.
- Employee: This will auto populated with the person currently logged on to the system.
- Call: This will auto populate with the call number and description if the work order is linked to a call.
- Work Order: This will auto populate with the work order number and description.
- Equipment: This will auto populate with the serial number and description if a machine is linked to the work order.
- Location: This will auto populate with the location if a functional location is linked to the work order.
- Status: The final unlabelled text box will contain a description of the current status of the work e.g. "Work not started".

Start Work
- Click on Start Work.

The Time Logging Express screen will close and you will return to the Ticket Maintain screen.
- A Call Processing message box will pop up informing you that;
- Call No: [ ] has been released.
- Click on Ok.

- The message box will close.
- To exit the screen, click on Close.

Important Note:
You cannot start work on a new ticket before ending work on the previous ticket.
- Although details of the current ticket will be displayed in the Time Logging Express screen,
- the Start Work button will be greyed out
- and the work status of the previous ticket will be displayed in the Work Status text box.
- If this is the case - take note of the work order number at the bottom of the screen, close this screen and go and end work on the previous ticket.
-
Note
: You can Print the Work Order Report from this screen.

End Work or Complete Work
If you need to stop the current work, use the End Work process. This will book your time for the current work. Remember to type in a note regarding what work was done during this time.
If the work is done, then use the Complete Work process.
End Work
- In the Ticket Maintain screen, click on Time Entry.

The Time Logging Express screen will be displayed.
- Click on End Work.

The Close Open Work screen will be displayed.
Ticket Details:
- Employee : This will auto populated with the person currently logged on to the system.
- Call : This will auto populate with the call number and description if the work order is linked to a call.
- Work Order : This will auto populate with the work order number and description.
- Equipment : This will auto populate with the serial number and description of the equipment item if such an item is linked to the work order.
- Location : This will auto populate with the location if a functional location is linked to the work order.

Prior Work, Tech Comments and Rectification Comments
- In this frame you can view prior work done and any Technician or Rectification comments logged.

Work State and Resolution Actions
- In the Work State frame, select one of the 3 listed Work States:
- Unresolved (Client) - once processed, this call will move to On Hold.
- Unresolved - once processed, this call will move to Pending.
- Resolved - once processed, this call will move to Complete.
- Click on the drop-down arrow in the Rectification Code field.

- Select from the Rectification Code drop-down menu, a Reason Code.
- In this example, Fixed- Fixed machine has been selected.

- Type in any relevant information in the Comments text box - this is mandatory.
- Click on End Work.

You now need to decide whether to end the work without assigning any work to the next person or whether to end the work and assign it to the next person.
End Work Without Assigning to the Next Person
- A Work Process message will pop up asking;
- Do you wish to assign this to the next person?
- Click on No.

The Close Open Work screen will close.
- The Time Logging Express screen will re-open.
- The Start Work button will be active while the End Work button is greyed out.
- The work status message will display as Last worked on [ ] ending at [ ] (This will be the current date and time.)
- Close the Time Logging Express screen.
- Note:
The work status message may also display as
Work
started on work order [ ] on the [ ]
, even though the End Work button was clicked on
in the previous step.

The Ticket Maintain screen will be displayed. Close this screen.
The All Open Tickets screen will be displayed. Here you can see that the work order has been removed from the list.
You can now decide whether or not to print the work order report.

End Work and Assign to the Next Person
- A Work Process message box will pop up asking;
- Do you wish to assign this to the next person?
- Click on Yes.

The Project Assignment or Call Assignment screen will be displayed.
- Assigned To : Click on the drop-down arrow and select the person you wish to assign the work order to.
- Detail : This will auto populate with the information linked to the work order but you can edit the text, if required.
- Assignment Date and Time : This will auto populate with the current date and time.
- Date : Either type in or click on the drop-down arrow and use the calendar function to select an alternative date, if required.
- Time :Either type in or use the arrow indicators to select an alternative time, if required.
- Assigned By : This will auto populate with the person currently logged on to the system. You can click on the drop-down arrow and select an alternative person, if required.
- Note:
You can assign the work order to yourself, if required.
For example, if you wished to add information to the detail below.

You can now decide whether to select an open work order or whether to create a new work order.
Select Open Work Order(s)
Go to the Open Work Orders frame and select the relevant work order.
- Important Note: You cannot select the current work order (the one that you are ending work on). If you do, you will receive an error message as shown below.

- Click on the check box(es) in front of the Open Work Order(s) that you wish to designate to the Assigned To person.
- In this example, WO0001756 has been selected.
- I have selected to assign it to myself.
- Click on Save.

The Time Logging Express screen will be displayed. Close this screen.

The Ticket Maintain screen will be displayed. Close this screen.

The All Open Tickets screen will be displayed.
- You will note that Work Order WO0001755 has been removed from the list.
- Work Order WO0001756 has now been assigned.

Create New Work Order
-
In the
Call Assignment or
Project Assignment screen,
- Tick the Create new Work Order box if you wish to create a new work order that you will designate to the selected Assigned To person.
- Click on Save.

- The Call Assignment or Project Assignment screen will close and the Time Logging Express screen will be displayed. Close this screen.

- The Ticket Maintain screen will be displayed. Close this screen.

The All Open Tickets screen will be displayed.
- You will note that Work Order WO0001756 has been removed from the list.
- A new Work Order WO0001757 has now been created.

Print Work Order Report
- In the All Open Tickets screen, select the ticket you wish to print the Work Order Report for.
- In this image, DWO0001668 is selected.
- Click on Edit.
- Note 1: You can also do this process once you have
started
or
ended
work in the Time Logging Express screen.
- Note 2: If you have not yet
started work
on the selected work order, the Work Order Report will be blank.

The Ticket Maintain screen will be displayed.
- Click on Time Entry.

- The Time Logging Express screen will be displayed.
- Click on Print.

- A Report Generation message box will pop up asking;
- Do you want to print the WO Report for WO [ ]?
- Click on Yes.
The Report Preview screen will be displayed.
- From here, you can View, Print, Export or Email the Work Order Report.
- Close the Report Preview screen when you are done.

Complete Work
You can use this functionality once your work has been completed, or if you can no longer continue with the work, for example there is a 'Parts Requirement' or you are 'Awaiting Client Confirmation'.
- Select the ticket you wish to complete work for.
- Click on Edit.
- In this image, DWO0000242 is selected.

- The Ticket Maintain screen will be displayed.
- Click on Complete Work.

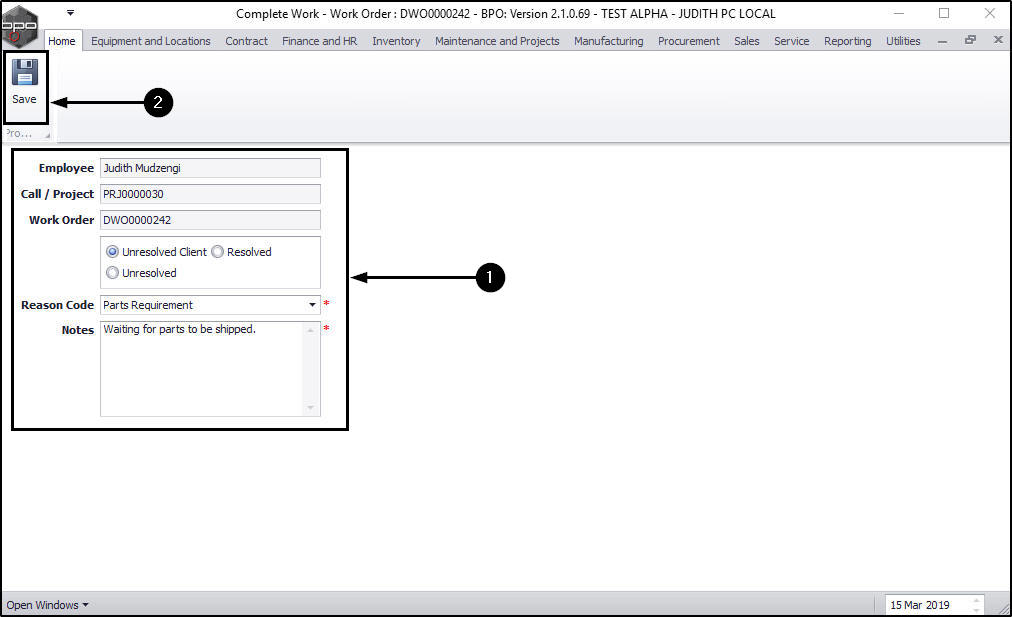
The Complete Work - Work Order: [ ] screen will be displayed.
- Complete Work Details:
- Employee: This will auto populate with the name of the employee currently logged onto the system.
- Call/Project: This will auto populate with the call/project number if the work order is linked to a project or call.
- Work Order: This will auto populate with the work order number.
- Resolution Actions: Select one of the 3 resolution actions
- Resolved - once processed, this call will move to Complete.
- Unresolved - once processed, this call will move to Pending.
- Unresolved (Client) - once processed, this call will move to On Hold.
- Reason Code: Click on the down arrow and select the reason code.
- Notes: Type in the relevant notes.
- Click on Save.
- A Start Work message box will pop up informing you that;
- Work Order: [ ] Completed.
- Click on OK.

- The Start Work message box will close.
- Exit this screen.

Close Ticket
Once all work has been completed, a ticket thread can be closed.
- Select the ticket you wish to complete work for.
- In this image, DWO0000170 was selected.
- Click on Edit.

- The Ticket Maintain screen will be displayed.
- Click on Close Ticket.

- A Ticket Thread message will pop up informing you that;
- Ticket Thread closed.
- Click on Ok.
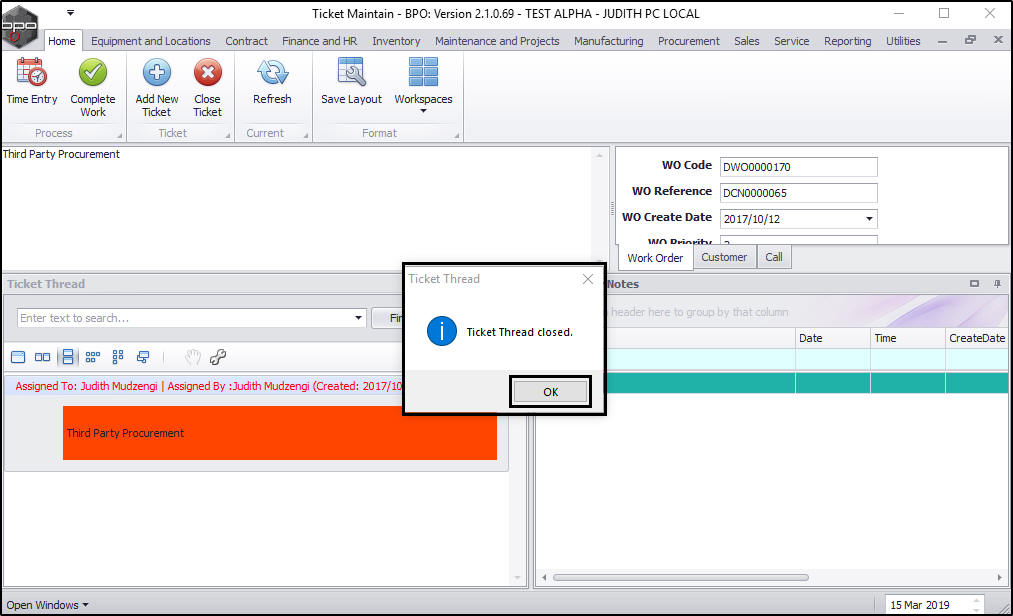
- The Ticket Thread message box will close.
- Exit the screen.

The ticket will no longer be displayed in the All Open Tickets screen.
- In this example, the filter row has been used to search for the closed ticket thread but the data grid no longer contains that ticket.

CAP.001.001