We are currently updating our site; thank you for your patience.
Equipment
Assets - View (Asset) Scan History Report
| Ribbon Access: Equipment and Locations > Assets |
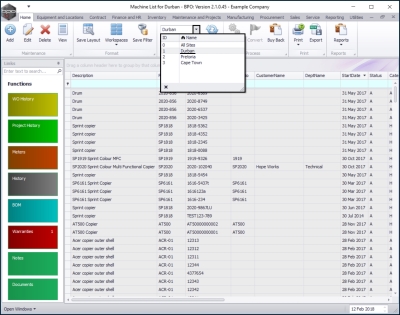
- The Machine List for [] screen will be displayed.
The Site and Type Filters
The screen will open with the default Site setting configured on the user and the Equipment Type filter set to 'All' (machines).
Note: You do not need to select the Site or Type to access this report. Refer to Site Selection for more information.
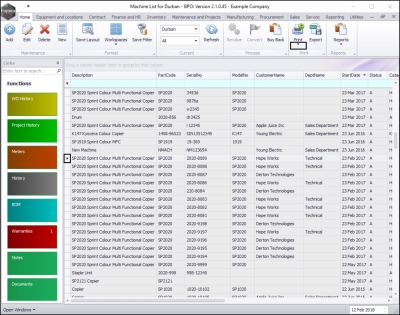
Select the Asset
- Select the row of the asset where you wish to view / print the scan history.
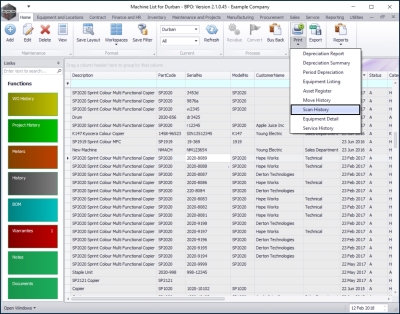
Open the Report Options
- Click on the drop-down arrow on the Print button.
Select Scan History Option
- The Print drop-down menu will be displayed.
- Select Scan History from the list.
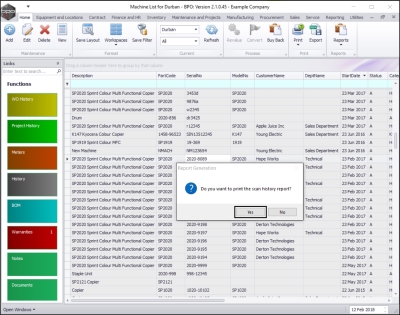
- A Report Generation message box will pop up asking:
- Do you want to print the scan history report?
- Click on Yes.
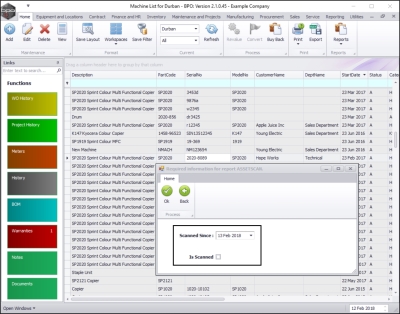
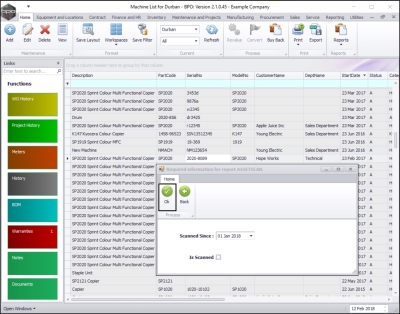
A Required information for report ASSETSSCAN. screen will pop up.
Select Required Date
- Scanned Since: Either type in or click on the drop-down arrow and use the calendar function to select the date.
- Is Scanned: Click on this check box if you wish to select scanned items only.
Is Scanned Report (N - No)
- When you have edited your selection, click on Ok.
- In this image the Is Scanned check box has been left un-ticked.
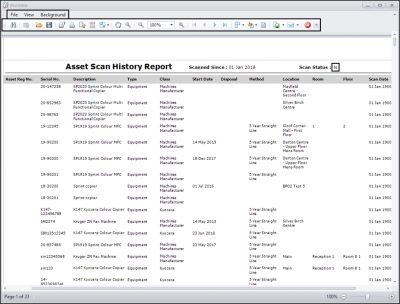
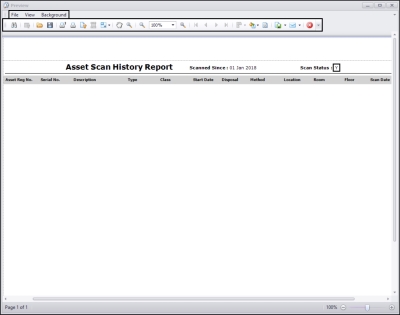
- The Report Preview screen will be displayed.
- In this image the report's scan status is N (not scanned) as the Is Scanned check box was left un-ticked in the previous step.
Select Report Options
- From here you can View, Print, Export or Email the Asset Scan History Report.
- Close the Report Preview screen when done.
Is Scanned Report (Y - Yes)
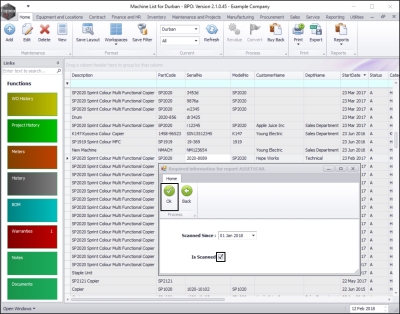
- In the Required information for report ASSETSSCAN. screen,
- Select the Scanned Since date.
- Click on the Is Scanned check box.
- Click on Ok.
- The Report Preview screen will be displayed.
- In this image the report's scan status is Y (scanned) as the Is Scanned checkbox was ticked in the previous step.
Select Report Options
- From here you can View, Print, Export or Email the Asset Scan History Report.
- Close the Report Preview screen when done.
MNU.007.029

