We are currently updating our site; thank you for your patience.
Interface and Environment
Using Nucleus Service - Quick Access Toolbar (QAT) Setup
The Quick Access Toolbar (QAT) is a customisable toolbar that allows the user to add or remove a set of buttons or commands that are independent of the tab on the ribbon that is currently displayed.
These buttons / commands are always available and may be used and generated across all environments, no matter what kind of page is opened, what navigational panel is active or which ribbon bar tab is visible.
By default, the QAT is in the upper left-hand corner of the Nucleus Service interface.
A user may relocate it to be displayed either above or below the ribbon.
| Ribbon Select: > Quick Access Toolbar Icon |
- When you first set up Nucleus Service, the Quick Access Toolbar icon is located above the Ribbon.
- Click on the icon.
Show Quick Access Toolbar Below the Ribbon
- The pop-up menu will give two options.
- The first gives you the option to Show Quick Access Toolbar Below the Ribbon.
- Click on this option.
- The Quick Access Toolbar is now displayed below the Ribbon.
Show Quick Access Toolbar Above the Ribbon
- To move it back to above the ribbon, click on the Quick Access Toolbar.
- In the drop-down menu displayed, select the Show Quick Access Toolbar Above the Ribbon option.
- The icon will return to its original place above the ribbon.
Customize the Ribbon
- Click on Quick Access Toolbar again to display the drop-down menu.
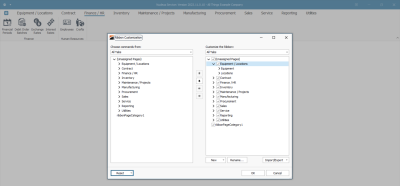
- Click on the second option: Customise the Ribbon.
- The Ribbon Customization screen will pop up.
- For further information on this topic go the Ribbon Configuration manual.
Minimize the Ribbon
- Right click on the Quick Access Toolbar to re-open the pop-up menu.
- There will now be a third option to Minimize the Ribbon.
- Click on this option.
- The ribbon toolbar will be minimized, displaying the main ribbon tabs only.
- To display the full ribbon option again, right click on the Quick Access Toolbar.
- You will see in the menu that the Minimize the Ribbon option is ticked.
- Click on this option to untick it.
- The ribbon will display the ribbon toolbar again.
Customize the Quick Access Toolbar
Add Toolbar Buttons
- Click on any one of the ribbon tabs where you wish to select a ribbon toolbar button.
- In this image, the Service ribbon tab has been selected.
- Right click on any of the ribbon toolbar buttons that you wish to add to your quick access toolbar.
- In this image the Calls button has been selected.
- From the pop-up menu, select Add to Quick Access Toolbar.
- The selected toolbar icon will now be displayed in the Quick Access Toolbar.
- Hover over the icon to display the toolbar button name.
- Continue adding selected icons in this way, until you have completed the Quick Access Toolbar customization to your satisfaction.
- In this image, Calls, Service Requests and My Work, have been added.
Remove Toolbar Buttons
- You may wish to remove an icon from the Quick Access Toolbar.
- Right click on the icon.
- From the pop-up menu, select Remove from Quick Access Toolbar.
- The icon will be removed.
MNU.000.005


