We are currently updating our site; thank you for your patience.
Service
Work Orders - Images
This function is normally done in TechConnect where the Technician will take images of work that needs to be done, e.g repairs of hardware, and then uploaded the image to the Work Order.
| Ribbon Access: Service > Work Orders |
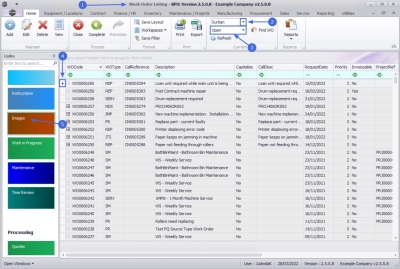
- The Work Order Listing screen will be displayed.
- Select the Site where the work order was issued.
- The example has Durban selected.
-
Select the Status for the Work Order.
- The example has Open selected.
- Click on the row of the work order you wish to view the image for.
- Click on the Images tile.
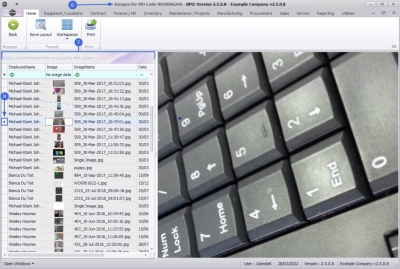
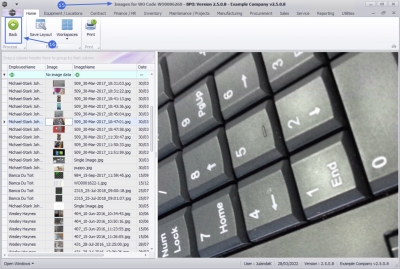
- The Images for WO Code [WO number] screen will be displayed.
- A list of Image data that have already been linked to the Work Order will display.
- Here you can view the Name of the Employee, Image stock, Image Name and the Date the image was linked to the Work Order.
- Click on the row of the image to display it in the image area.
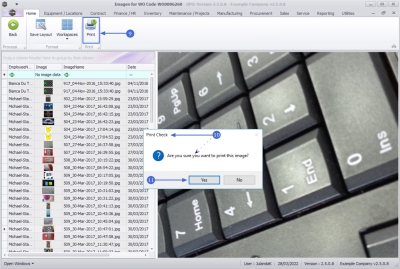
Print Image
- Click on Print.
- When you receive the Print Check message to confirm;
- Are you sure you want to print this image?
- Click on Yes.
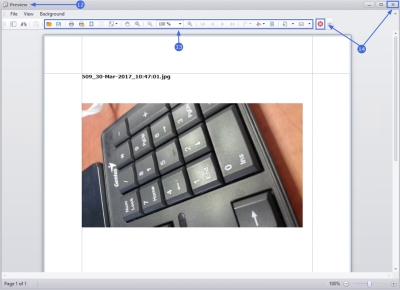
- The image will display in the Preview screen.
- From here you can make cosmetic changes to the document as well as Save, Print, Zoom and add a Watermark to the image.
- Close the screen when done.
- You will return to the Images for WO Code screen.
- Click on Back to return to the Work Order Listing screen.
MNU.072.014

